Loading ...
Loading ...
Loading ...
model name1[MVC-CD400/CD250]
[3-075-356-12(1)]
62
filename[C:\MVC-CD400Nouhinn\3075356121\307535612MVCCD400U2\08bef.fm]
masterpage:Left
How to setup and
operate your camera
The usage of the menus and SET UP screen
items that are most frequently used for
“Advanced operations” is described below.
* MVC-CD400 only
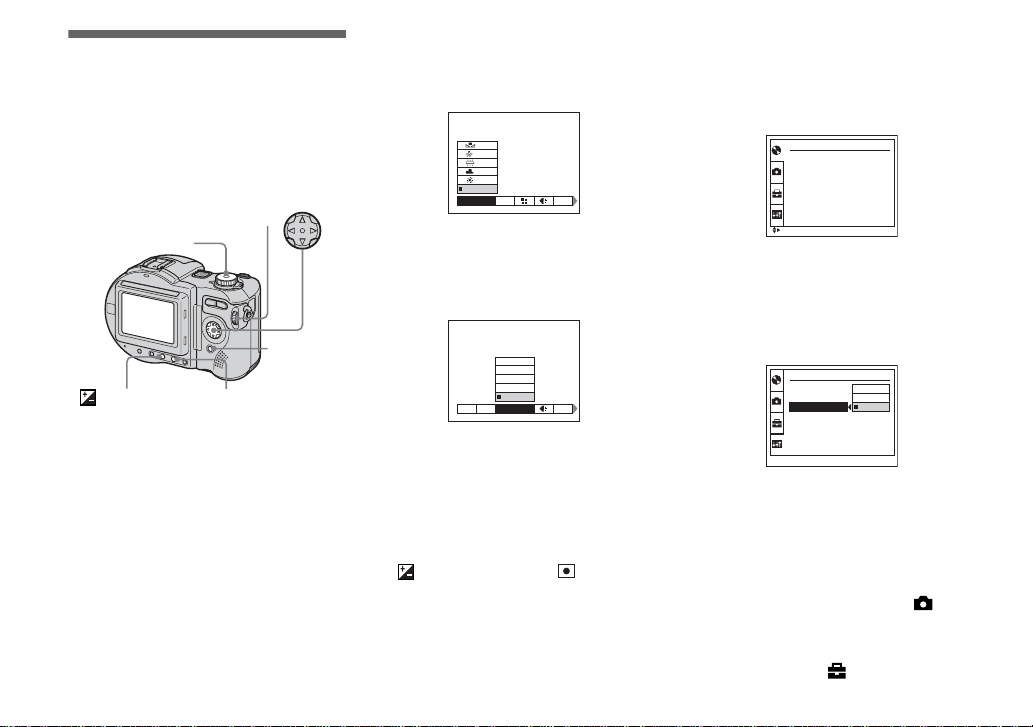
Changing the menu settings
a Press MENU.
The menu appears.
b Press b/B on the control
button to select the item you
want to set.
The selected item turns yellow.
c Press v/V on the control
button to select the desired
setting.
The frame of the selected setting turns
yellow, and the setting is entered.
• (EV), 9 (FOCUS) and (SPOT
METER) appear on the MVC-CD250 menu
(page 111).
To turn off the menu display
Press MENU.
Changing the items in the
SET UP screen
a Set the mode dial to SET UP.
The SET UP screen appears.
b Press v/V/b/B on the control
button to select the item you
want to set.
The frame of the selected item turns
yellow.
c Press z on the control button
to enter the setting.
• On MVC-CD250, the [HOLOGRAM AF]
(pages 31, 116) item is displayed as [AF
ILLUMINATOR] and the [BRACKET STEP]
(page 116) item is not displayed in
[CAMERA].
• On MVC-CD250, the [CONVERSION LENS]
(page 117) and [HOT SHOE] (page 117) items
are not displayed in [SETUP 1].
Mode dial
Control button
MENU
FOCUS*
Jog dial*
(Exposure)*
MODE
WHITE BAL
ISO
AUTO
MODE
640×480
1280×960
1600×1200
2272 (3:2)
2272×1704
WB
IMAGE SIZE
ISO
DISC TOOL
FINALIZE :
FORMAT :
INITIALIZE :
UNFINALIZE
:
SELECT
SETUP 2
OK
SHUTTER
ON
OFF
LCD BRIGHTNESS :
LCD BACKLIGHT :
BEEP :
VIDEO OUT :
z
Before advanced operations
Loading ...
Loading ...
Loading ...