Loading ...
Loading ...
Loading ...
8
PROGRAMMING YOUR
COFFEEMAKER
SETTING THE CLOCK
When the coffeemaker is plugged in, the power
icon and 12:00 will illuminate. Simply tap the
power icon to view all options.
Setting Hours and Minutes
Press and hold either HR or MIN icons for 2
seconds until clock starts to flash. Hold icon
down to scroll through the digits quickly, or touch
and release to advance one digit at a time until
the desired time is reached. Be sure the PM
indicator is on if setting a PM time.
Turning ON/OFF the Clock in Idle Mode
When the unit is idle, you have the option to
have the clock display on or off. Press and
hold the HR and MIN icons for 3 seconds –
clock display will go off. To turn back on, press
and hold the HR and MIN icons for 3 seconds.
Clock display will turn on.
SETTING THE AUTO ON TIME
1. Press and hold the Auto On icon for
2 seconds.
The digital display will flash the default
(12:00) or previously selected time.
Follow directions under SETTING THE
CLOCK (above) to program your brew-start
time. Ten seconds after programming, the
unit will automatically exit Auto On or you
can touch the Auto On icon to exit setting
mode immediately. The Auto On icon will
illuminate, letting you know Auto On
is activated.
2. To activate Auto On using previously
selected time:
Press the Auto On icon for 2 seconds.
The previously set time will appear and
icon will light up.
3. To deactivate Auto On:
Press illuminated Auto On icon; light will go
off, indicating mode is turned off.
SETTING THE AUTO OFF TIME
1. Press and hold the Brew/Auto Off icon
for 5 seconds.
The digital display will flash the programmed
Auto Off default (2:00) or previously
selected time. Follow directions under
SETTING THE CLOCK to program
coffeemaker to shut off from 0 to 4 hours
after brew cycle is finished.
2. To exit/confirm Auto Off time setting:
Do not touch any icons. Auto Off setup
mode will be exited automatically after
5 seconds.
TURNING OFF READY TONE
Your coffeemaker features a Ready Tone that
beeps 5 times when coffee is finished brewing.
To turn this alert off, press the Ready Tone icon;
an icon will appear next to the time with an “X”,
indicating the tone is off. To turn tone back on,
press Ready Tone icon again; the “X” will
disappear.
MAKING COFFEE
Follow instructions in BEFORE BREWING
YOUR FIRST POT OF COFFEE (page 7).
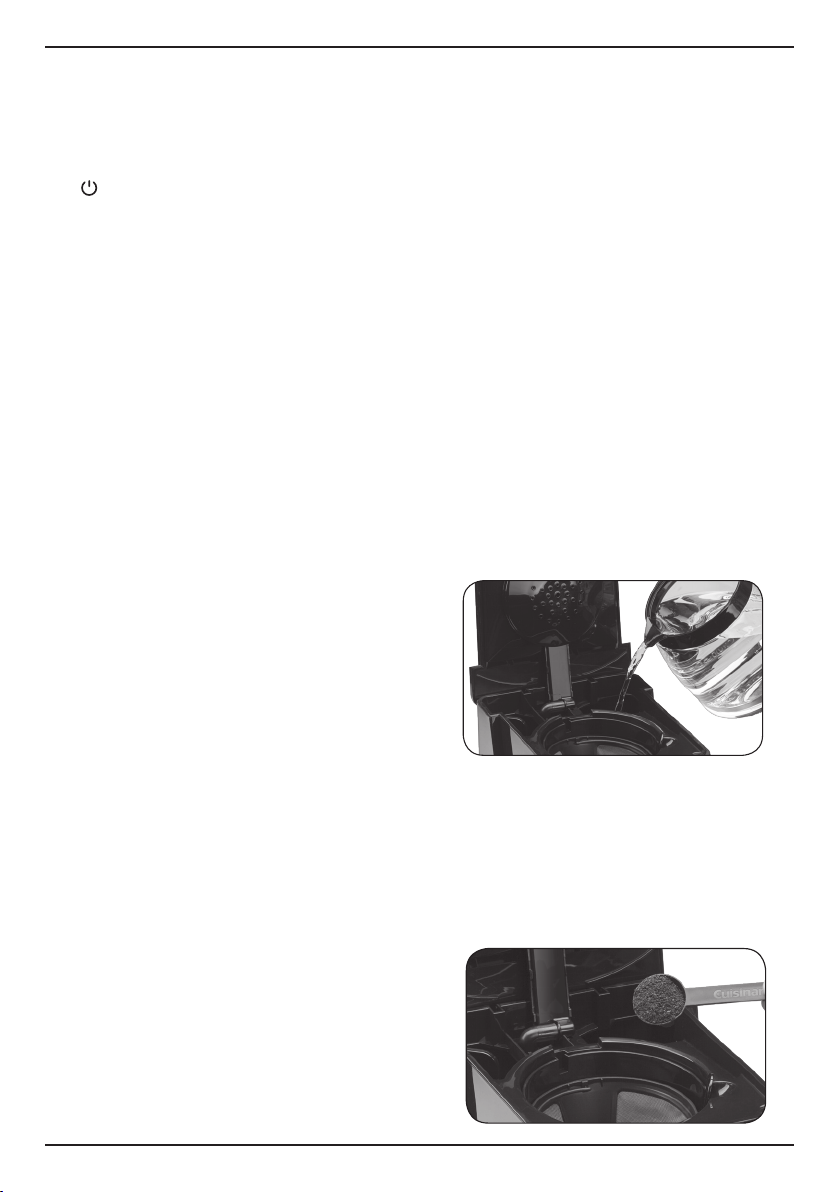
1. Fill the water reservoir
Lift the coffeemaker lid to open. Pour the
desired amount of water into the water
reservoir using the water level indicator
located at the side of the coffeemaker.
2. Add the ground coffee
Insert a #4 paper filter OR the gold-tone
filter. Be sure that the paper filter is com-
pletely open and fully inserted in the basket.
It may help to fold and flatten the seams of a
paper filter beforehand. Add 1 level scoop of
ground coffee per cup. Adjust the amount
according to taste.
Loading ...
Loading ...
Loading ...