Loading ...
Loading ...
Loading ...
8
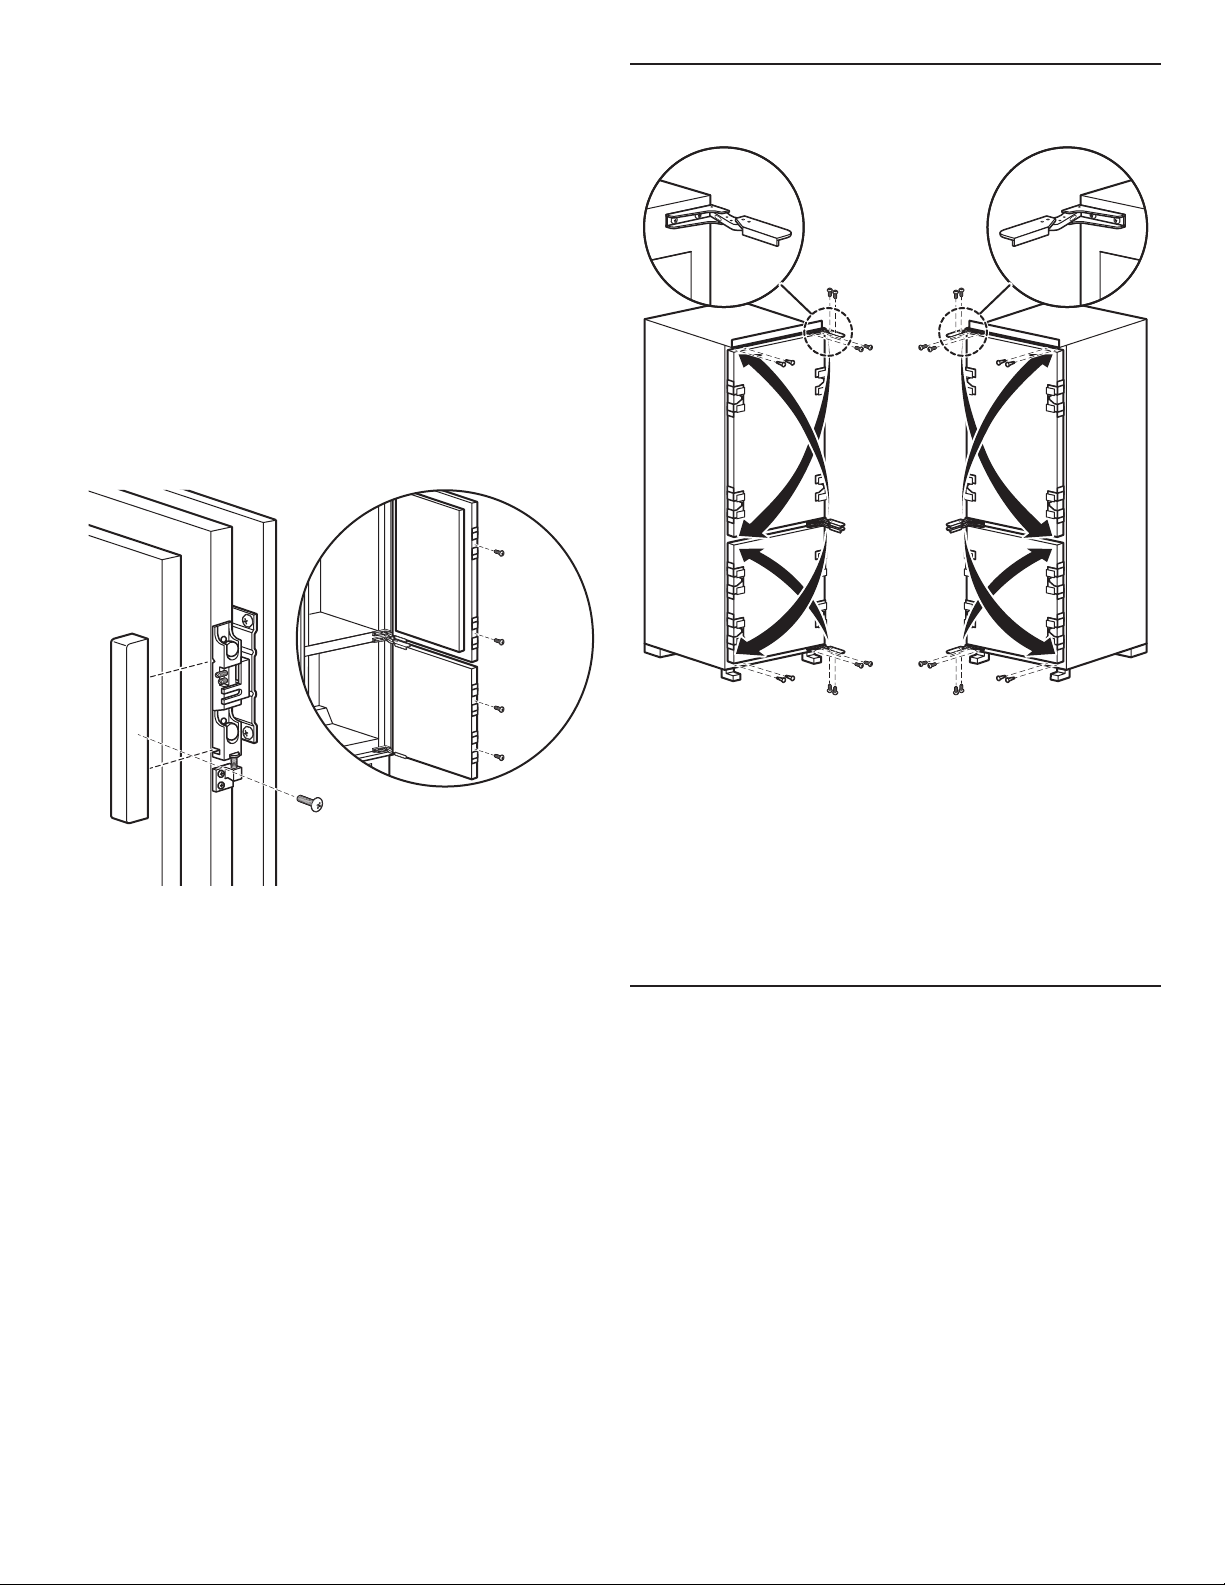
■ The bottom-slotted headless screw (B in the illustration)
adjusts the horizontal (left-to-right) alignment of the door
panel. Use a at-blade screwdriver to turn the screw
clockwise and loosen it. Slide the panel to the left or
right as desired, and then tighten the screw by turning it
counterclockwise.
NOTE: Do not slide the panel more than 2.5 mm in either
direction. If you slide the panel too far, the panel mount may
not properly fasten to the door panel.
■ The screw (C in the illustration) at the bottom of the panel
mount adjusts the vertical (top-to-bottom) alignment of the
door panel. Use a at-blade screwdriver to make adjustments.
Turn the screw clockwise to raise the door panel and
counterclockwise to lower the door panel.
NOTE: To raise or lower the door panel, you may need to rst
loosen the slotted headless screws. If you do, make sure to
re-tighten them after making the desired vertical adjustment.
9. Fix each panel mount into place, and then install the panel
mount covers and hinge end caps.
■ Use a Phillips screwdriver and a 9.5 mm screw to x each
of the panel mounts into place (four on each door).
■ Snap a panel mount cover onto each panel mount located
on the side of the door opposite the hinges, and then
snap a hinge end cap onto each hinge.
10. Install the two top screw covers and the four hinge interior
covers. Each snaps into place.
Reverse the Doors
(optional)
1. Use a Phillips screwdriver to remove the four screws on the
top hinge of the refrigerator door. Repeat for the four screws
on the bottom hinge of the refrigerator door.
2. If present, remove the hole plugs from the opposite side of the
refrigerator door.
3. Use the four screws to install the top hinge on the opposite
(bottom) side of the refrigerator door. Repeat for the bottom
hinge.
4. Insert the hole plugs where the hinge screws were located
prior to the door reversal.
5. Repeat the process to reverse the freezer door.
Complete Installation
1. Remove all boxes, parts packages, and packing materials
from the interior of the refrigerator. See the “Cleaning” section
in the Use and Care Guide for instructions on cleaning, or
unpacking.
2. Install the shelves and bins in the refrigerator and freezer
compartments.
3. The controls are preset at the factory to the midpoint setting.
Make sure the compressor is operating properly and that all
the lights are working.
To get the most efcient use from your new built-in refrigerator,
read the Use and Care Guide. Keep Installation Instructions and
the Use and Care Guide near the built-in refrigerator for easy
reference.
Loading ...
Loading ...
Loading ...