Loading ...
Loading ...
Loading ...
3
4
MODEL: NH14-SKG-IR-V2 MODEL: NH14-SKG-IR-V2
Features
SHORT CORD INSTRUCTIONS
A short power supply cord is provided to reduce the hazards resulting from
entanglement or tripping over a longer cord. Longer detachable power-supply
cords or extension cords are available and may be used if care is exercised in
their use. If a longer detachable power-supply extension cord is used:
1. The marked electrical rating of the cord set or extension cord should be at
least as great as the electrical rating of the appliance, and:
2. The cord should be arranged so that it will not drape over the counter top or
tabletop where it can be pulled on by children or tripped over unintentionally.
LINE CORD SAFETY TIPS
1. Never pull or yank on cord or the appliance.
2. To insert plug, grasp it rmly and guide it into outlet.
3. To disconnect appliance, grasp plug and remove it from outlet.
4. Before each use, inspect the line cord for cuts and/or abrasion marks. If any
are found, this indicates that the appliance should be serviced and the line
cord replaced. Please return it to an authorized service representative.
5. Never wrap the cord tightly around the appliance, as this could place undue
stress on the cord where it enters the appliance and cause it to fray and break.
DO NOT OPERATE APPLIANCE IF THE LINE CORD SHOWS ANY DAMAGE
OR IF APPLIANCE WORKS INTERMITTENTLY OR STOPS WORKING
ENTIRELY.
IMPORTANT
During the rst few minutes of initial use, you may notice smoke and/or a slight
odor. This is normal and should quickly disappear. It will not recur after appliance
has been used a few more times.
This appliance is not intended for use by persons (including children) with
reduced physical, sensory or mental capabilities, or lack of experience and
knowledge, unless they have been given supervision or instruction concerning
use of the appliance by a person responsible for their safety.
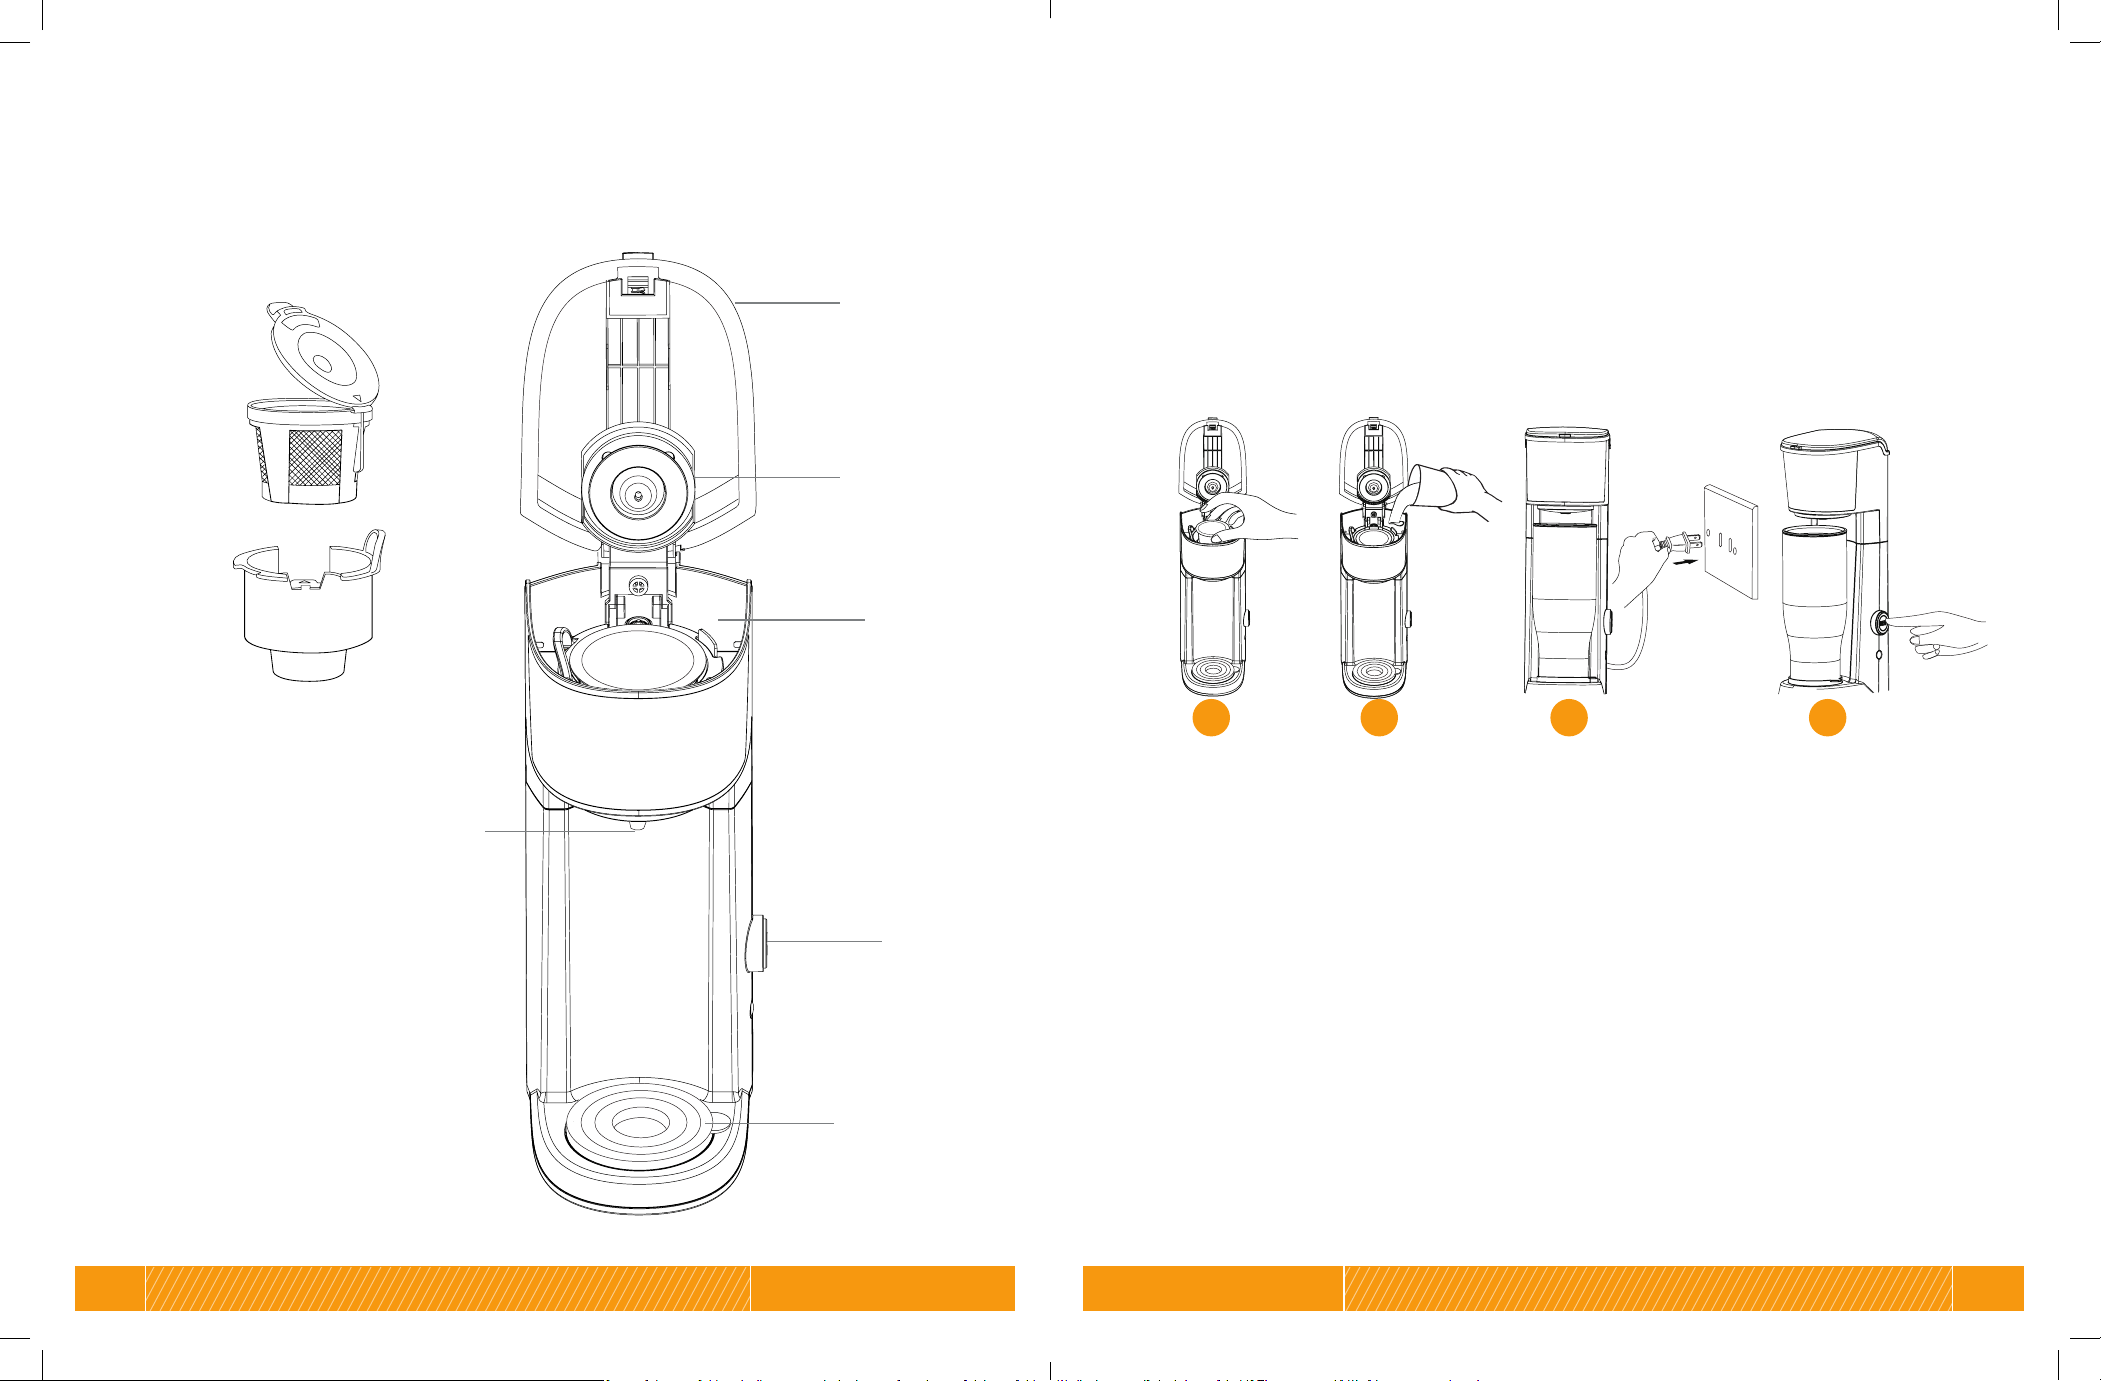
1. Coee grounds lter
2. Capsule Receptacle for both
K-Cups and Coee Ground Filter
3. Lid
4. Water shower head
5. Water tank
6. Brew button
7. Indicator light
8. Spout
9. Rubber Drip Tray
1
2
3
4
5
6
9
8
Operating Instructions
USING YOUR COFFEE MAKER
Remove packing materials and read all instructions carefully before use.
Before rst use, run the machine with water and no coee to ensure the unit is
clean. Do not immerse the unit in water.
1 2 3 4
STEP 1: Place K-Cup or provided permanent coee ground lter* into receptacle.
STEP 2: Add water to tank located behind capsule receptacle, under water shower head
and close lid until you hear a clicking sound.
STEP 3: Connect unit to power supply.
IMPORTANT: Do not plug in this unit before water is added to tank.
STEP 4: Firmly press the “BREW” button and enjoy!
*Fill provided coee ground lter with ground coee and close until it clicks. Place lter into
the receptacle by aligning the "front" of the lter and the recepacle facing the user. No
lters may be used other than the one provided. May cause injury to persons and damage
to unit.
Note: Indicator light will turn on when coee maker is plugged in. The indicator light will
blink when brewing.
CAUTION: To avoid potential scalding, do not open lid while unit is in operation. We
recommend not keeping your unit plugged in overnight or for long periods of time.
Loading ...
Loading ...
Loading ...