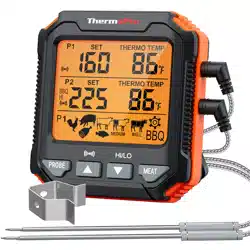
ThermoPro TP17 Dual Probe Digital Cooking Meat Thermometer
Product's Documents
Below are documents related to this product, you can read online or download:
- User Manual - (English, French) Read Online | Download pdf
- Internal Temperature Guide & Wood Flavor Guide - (English) Download
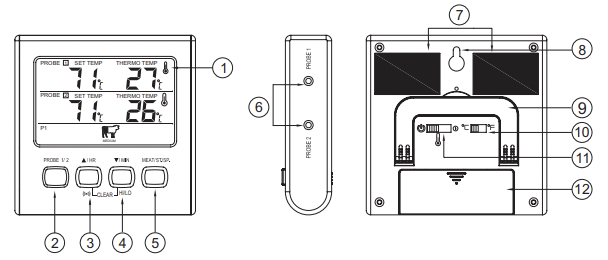
 Button
 Button: In Cook mode, Press ▲to select food types while in quick temperature setting. Press ▲to increase your desired cooking temperature while in manual tempera- ture setting. Press to turn ON/OFF the alarm in BBQ mode. Press the HR button to set hours while in timer mode. To clear time, press the HR and MIN buttons at the same time.
 ), Pork/Veal (
  ), Ham (
  ), Beef Rare/Fish (
  ), Beef Medium (
  ), Beef Well Done (
  ), BBQ and User-Defined (
  ). The pre-programmed doneness temperature setting for each meat type is recommended by USDA (U.S. Department of Agriculture). Press and hold for 3 seconds to enter the BBQ target temperature setting; In Timer mode, press the ST/SP button to begin the count- down or count-up timer. Press the ST/SP button to pause or restart the timer.
 , Timer mode
  or power off the device.
 to conserve the battery.
 ".
". or ▼/MIN/HI/LO button to select your food type.
 mode and then press ▲ or ▼to set the temperature to your desired one.
 icon shows, it means the temperature setting is user-defined.
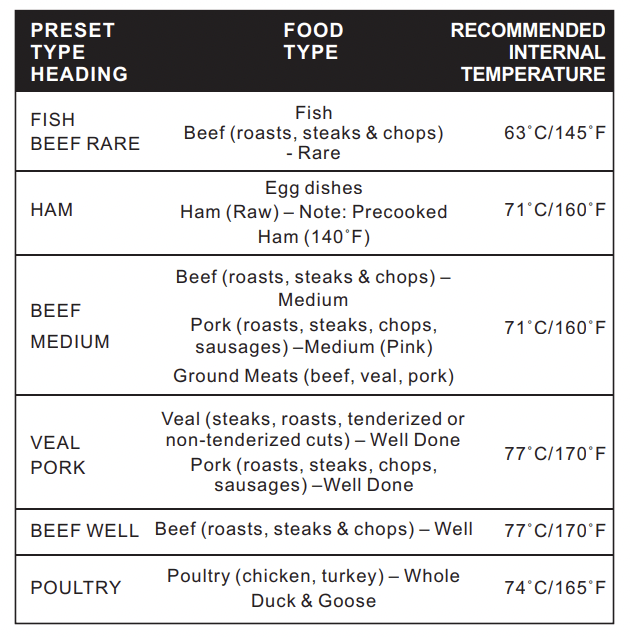
 .
. .
.