
User Manual
20DV6942/37
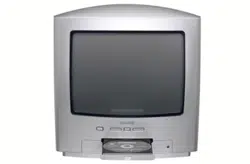
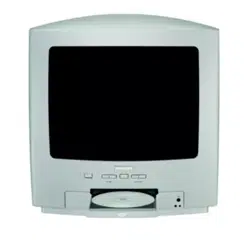
TV/DVD
TV/DVD
Thank you for choosing Philips.
Need help fast?
Read your User Manual first for quick tips
that make using your Philips product more
enjoyable. If you have read your instructions
and still need assistance you may access our
online help at www.p4c.philips.com or
call 1-800-531-0039 while with your product.
8670 000 20966
Model No.:
Serial No.:
PANEL INDEX
Panel
Sequence
and
Panel Index
COVER
SAFETY
INFO
MODEL
REGISTRATION
INFORMATION
PANEL
1
PANEL
2
PANEL
3
PANEL
4
PANEL
5
PANEL
6
PANEL
7
PANEL
8
PANEL
9
PANEL
10
PANEL
11
PANEL
12
PANEL
13
PANEL
14
PANEL
19
PANEL
20
PANEL
21
PANEL
22
PANEL
23
PANEL
24
PANEL
25
PANEL
26
PANEL
27
PANEL
28
PANEL
29
PANEL
30
PANEL
31
PANEL
32
PANEL
15
PANEL
16
PANEL
17
PANEL
18
Subject Panel No.
Basic Antenna/Cable TV Connections . . .1
Connecting Other Equipment to the
TV/DVD . . . . . . . . . . . . . . . . . . . . . . . . .2
Connecting the TV/DVD
to Other Systems . . . . . . . . . . . . . . . . . .3
Remote Control . . . . . . . . . . . . . . . . . .4-5
Basic Features . . . . . . . . . . . . . . . . . . . . .6
Programming TV Channels . . . . . . . . . . . .7
Skipping Channels, Favorite Channels . . .8
Language, Clock . . . . . . . . . . . . . . . . . . . .9
On Time, Off Time . . . . . . . . . . . . . . . . .10
Picture, SmartTimer . . . . . . . . . . . . . . . .11
Sound, MTS . . . . . . . . . . . . . . . . . . . . . .12
Closed Captions, SleepTimer . . . . . . . . .13
Picture, Sound Effects . . . . . . . . . . . . . .14
AutoLock
TM
Secret Code . . . . . . . . . . . .15
Subject Panel No.
CH Lock . . . . . . . . . . . . . . . . . . . . . . . .16
Master Enable, MPAA Ratings . . . . . . . .17
TV Parental Guidelines . . . . . . . . . . . . .18
Canadian English or French Ratings . . . .19
General Disc Information . . . . . . . . . . .20
DVD Features . . . . . . . . . . . . . . . . . .21-23
MP3/JPEG Playback . . . . . . . . . . . . . . . .24
Search Mode . . . . . . . . . . . . . . . . . . . . .25
DVD General Setup . . . . . . . . . . . . . . . .26
DVD Analog Audio Setup,
DVD Video Setup . . . . . . . . . . . . . . . . .27
Digital Setup . . . . . . . . . . . . . . . . . . . . .28
DVD Preferences . . . . . . . . . . . . . . . . . .29
DVD Parental Control . . . . . . . . . . . . . .30
Troubleshooting . . . . . . . . . . . . . . . . . . .31
Philips Limited Warranty . . . . . . . . . . . .32
Side 1
Side 2
PANEL LAYOUT
AutoLock is a trademark of Philips Consumer Electronics.
Copyright 2004 Philips Consumer Electronics.

Return your Product Registration Card today
to get the very most from your purchase.
Congratulations on your purchase, and welcome to the “family!”
Dear PHILIPS product owner:
Thank you for your confidence in PHILIPS.You’ve selected one of the best-built, best-
backed products available today.We’ll do everything in our power to keep you happy with
your purchase for many years to come.
As a member of the PHILIPS “family,” you’re entitled to protection by one of the most
comprehensive warranties and outstanding service networks in the industry.What’s more,
your purchase guarantees you’ll receive all the information and special offers for which
you qualify, plus easy access to accessories from our convenient home shopping network.
Most importantly, you can count on our uncompromising commitment to your total satis-
faction.All of this is our way of saying welcome - and thanks for investing in a PHILIPS
product.
P.S. To get the most from your PHILIPS purchase, be sure to complete and
return your Product Registration Card at once.
Registering your model with PHILIPS makes you eligible for all of the valuable benefits listed below, so
don't miss out. Complete and return your Product Registration Card at once to ensure:
Know these
safetysymbols
This “bolt of lightning” indicates uninsulated material within your unit may
cause an electrical shock. For the safety of everyone in your household, please
do not remove product covering.
The “exclamation point” calls attention to features for which you should read
the enclosed literature closely to prevent operating and maintenance problems.
WARNING: To reduce the risk of fire or electric shock, this apparatus should not
be exposed to rain or moisture, and objects fillled with liquids, such as vases, should
not be placed on this apparatus.
CAUTION: To prevent electric shock, match wide blade of plug to wide slot, fully
insert.
*Proof of
Purchase
Returning the enclosed card
guarantees that your date of
purchase will be on file, so
no additional paperwork will
be required from you to
obtain warranty service.
*Product Safety
Notification
By registering your product,
you'll receive notification -
directly from the manufac-
turer - in the rare case of a
product recall or safety
defect.
*Additional Benefits
of Product
Ownership
Registering your product
guarantees that you'll receive
all of the privileges to which
you're entitled, including spe-
cial money-saving offers.
t
s
Visit our World Wide Web Site at http://www.philips.com
IMPORTANT SAFETY INSTRUCTIONS
Read before operating equipment
Note to the CATV system installer: This
reminder is provided to call the CATV system
installer's attention to Article 820-40 of the NEC
that provides guidelines for proper grounding and, in
particular, specifies that the cable ground shall be
connected to the grounding system of the building,as
close to the point of cable entry as practical.
1. Read these instructions.
2. Keep these instructions.
3. Heed all warnings.
4. Follow all instructions.
5. Do not use this apparatus near water.
6. Clean only with a dry cloth.
7. Do not block any of the ventilation openings. Install
in accordance with the manufacturer’s instructions.
8. Do not install near any heat sources such as radia-
tors, heat registers, stoves, or other apparatus
(including amplifiers) that produce heat.
9. Do not defeat the safety purpose of the polarized
or grounding-type plug.A polarized plug has two
blades with one wider than the other.A grounding
type plug has two blades and a third grounding
prong.The wide blade or third prong are provided
for your safety.When the provided plug does not fit
into your outlet, consult an electrician for replace-
ment of the obsolete outlet.
10. Protect the power cord from being walked on or
pinched particularly at plugs, convenience recepta-
cles, and the point where they exit from the appara-
tus.
11. Only use attachments/accessories specified by the
manufacturer.
12. Use only with a cart, stand, tripod, bracket, or table
specified by the manufacturer, or sold with
the apparatus. When a cart is used, use
caution when moving the cart/apparatus
combination to avoid injury from tip-over.
13. Unplug this apparatus during lightning storms or
when unused for long periods of time.
14. Refer all servicing to qualified service personnel.
Servicing is required when the apparatus has been
damaged in any way, such as power-supply cord or
plug is damaged, liquid has been spilled or objects
have fallen into apparatus, the apparatus has been
exposed to rain or moisture, does not operate nor-
mally, or has been dropped.
15. This product may contain lead and mercury.
Disposal of these materials may be regulated due to
environmental considerations. For disposal or recy-
cling information, please contact your local authori-
ties or the Electronic Industries Alliance:
www.eiae.org
16. Damage Requiring Service - The appliance
should be serviced by qualified service personnel
when:
A. The power supply cord or the plug has been dam-
aged; or
B. Objects have fallen, or liquid has been spilled into
the appliance; or
C. The appliance has been exposed to rain; or
D. The appliance does not appear to operate normally
or exhibits a marked change in performance; or
E. The appliance has been dropped, or the enclosure
damaged.
17. Tilt/Stability - All televisions must comply with
recommended international global safety standards
for tilt and stability properties of its cabinet design.
• Do not compromise these design standards by
applying excessive pull force to the front, or top, of
the cabinet which could ultimately overturn the
product.
• Also, do not endanger yourself, or children, by plac-
ing electronic equipment/toys on the top of the cab-
inet. Such items could unsuspectingly fall from the
top of the set and cause product damage and/or
personal injury.
18. Wall or Ceiling Mounting - The appliance should
be mounted to a wall or ceiling only as recommend-
ed by the manufacturer.
19. Power Lines - An outdoor antenna should be
located away from power lines.
20. Outdoor Antenna Grounding - If an outside
antenna is connected to the receiver, be sure the
antenna system is grounded so as to provide some
protection against voltage surges and built up static
charges.
Section 810 of the National Electric Code,
ANSI/NFPA No. 70-1984, provides information with
respect to proper grounding of the mast and sup-
porting structure, grounding of the lead-in wire to
an antenna discharge unit, size of grounding connec-
tors, location of antenna-discharge unit, connection
to grounding electrodes, and requirements for the
grounding electrode. See Figure below.
21. Object and Liquid Entry - Care should be taken
so that objects do not fall and liquids are not spilled
into the enclosure through openings.
22. Battery Usage CAUTION - To prevent battery
leakage that may result in bodily injury, property
damage, or damage to the unit:
• Install all batteries correctly, with + and - aligned as
marked on the unit.
• Do not mix batteries (old and new or carbon and
alkaline, etc.).
• Remove batteries when the unit is not used for a
long time.
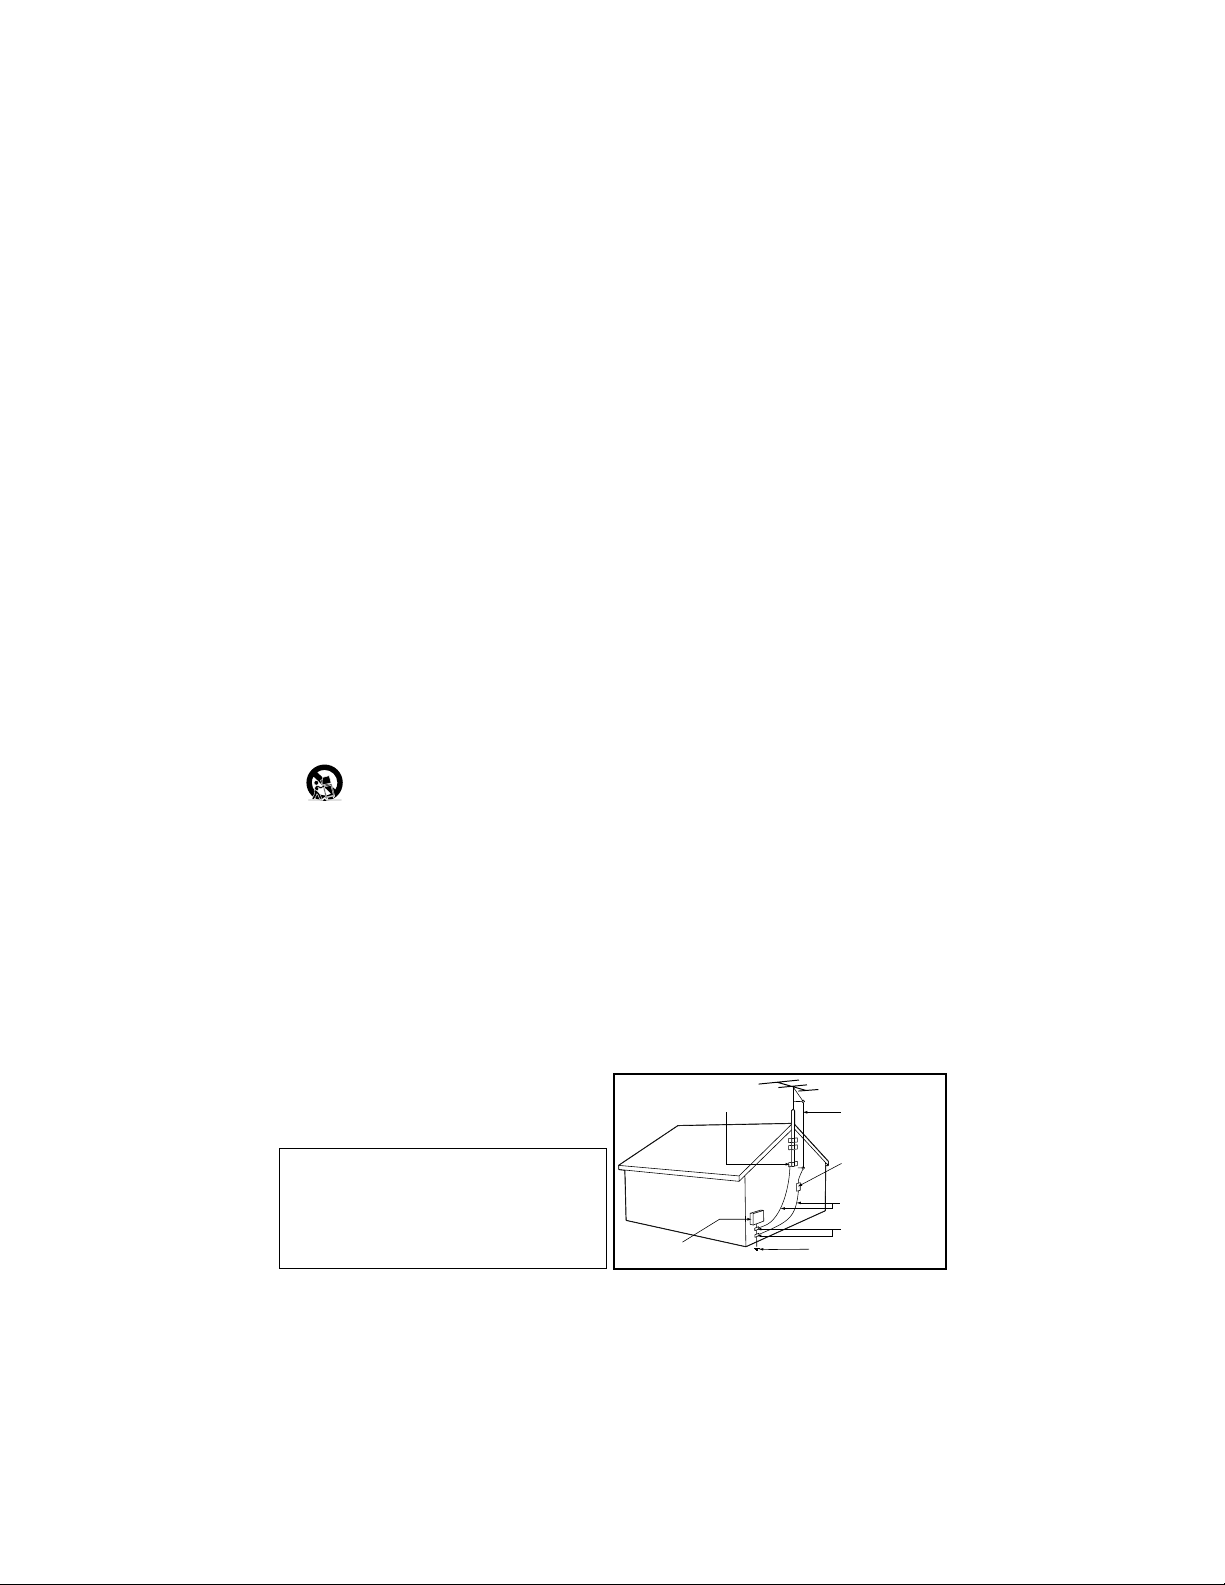
ANTENNA LEAD IN WIRE
ANTENNA DISCHARGE UNIT
(NEC SECTION 810-20)
GROUNDING CONDUCTORS
(NEC SECTION 810-21)
GROUND CLAMPS
POWER SERVICE GROUNDING ELECTRODE SYSTEM
(NEC ART 250, PART H)
GROUND CLAMP
ELECTRIC SERVICE EQUIPMENT
BASIC A
NTENNA/CABLE TV CONNECTIONS
Your Cable Box/Satellite Receiver may
have Audio/Video Out jacks instead of a
single Antenna Out jack (RF coaxial or
75 ohm) as shown here. Use audio/video
cables to connect those jacks to the
TV/DVD’s AV INPUTS.
Press TV/AV/DVD on the remote to select
VIDEO mode. Select TV channels at the
Cable Box/Satellite Receiver as usual,
leaving the TV/DVD on VIDEO.
HELPFUL HINT
75 OHM
ANTENNA
INPUT
CABLE TV
OR SATELLITE
SIGNAL
75 OHM
ANTENNA
INPUT
VIDEO
AUDIO-R
AV INPUT
L
(MONO)
AV OUTPUT
COAXIAL
DVD DIGITAL
OUTPUT
L
1
T
o receive television programming, con-
nect your TV/DVD using one of the
connections shown.The TV channels will
be available after you use Auto Search to
select channels.
1
Using Cable TV service or an
Indoor or Outdoor Antenna
Connect a Cable TV signal or an
antenna to the 75 OHM
ANTENNA INPUT on the rear
of the TV/DVD.
Using a Cable Box or
Satellite Receiver
1. Connect the Cable TV or
Satellite signal to the IN Jack on
the Cable Box/Satellite Receiver.
2. Connect an RF coaxial cable
(not supplied) to the OUT Jack
on the Cable Box/ Satellite
Receiver and to the 75 OHM
ANTENNA INPUT on the
TV/DVD.
3. To view any channel, set the
TV/DVD to the output channel
(3 or 4) of the Cable
Box/Satellite Receiver.Then,
select channels at the Cable
Box/Satellite Receiver.
2
When all other connections
are complete, plug in the
TV/DVD’s power cord.
IN
OUT
75 OHM
ANTENNA
INPUT
CABLE TV
OR SATELLITE SIGNAL
RF COAXIAL
CABLE
75 OHM
ANTENNA
INPUT
VIDEO
AUDIO-R
AV INPUT
L
(MONO)
AV OUTPUT
COAXIAL
DVD DIGITAL
OUTPUT
L
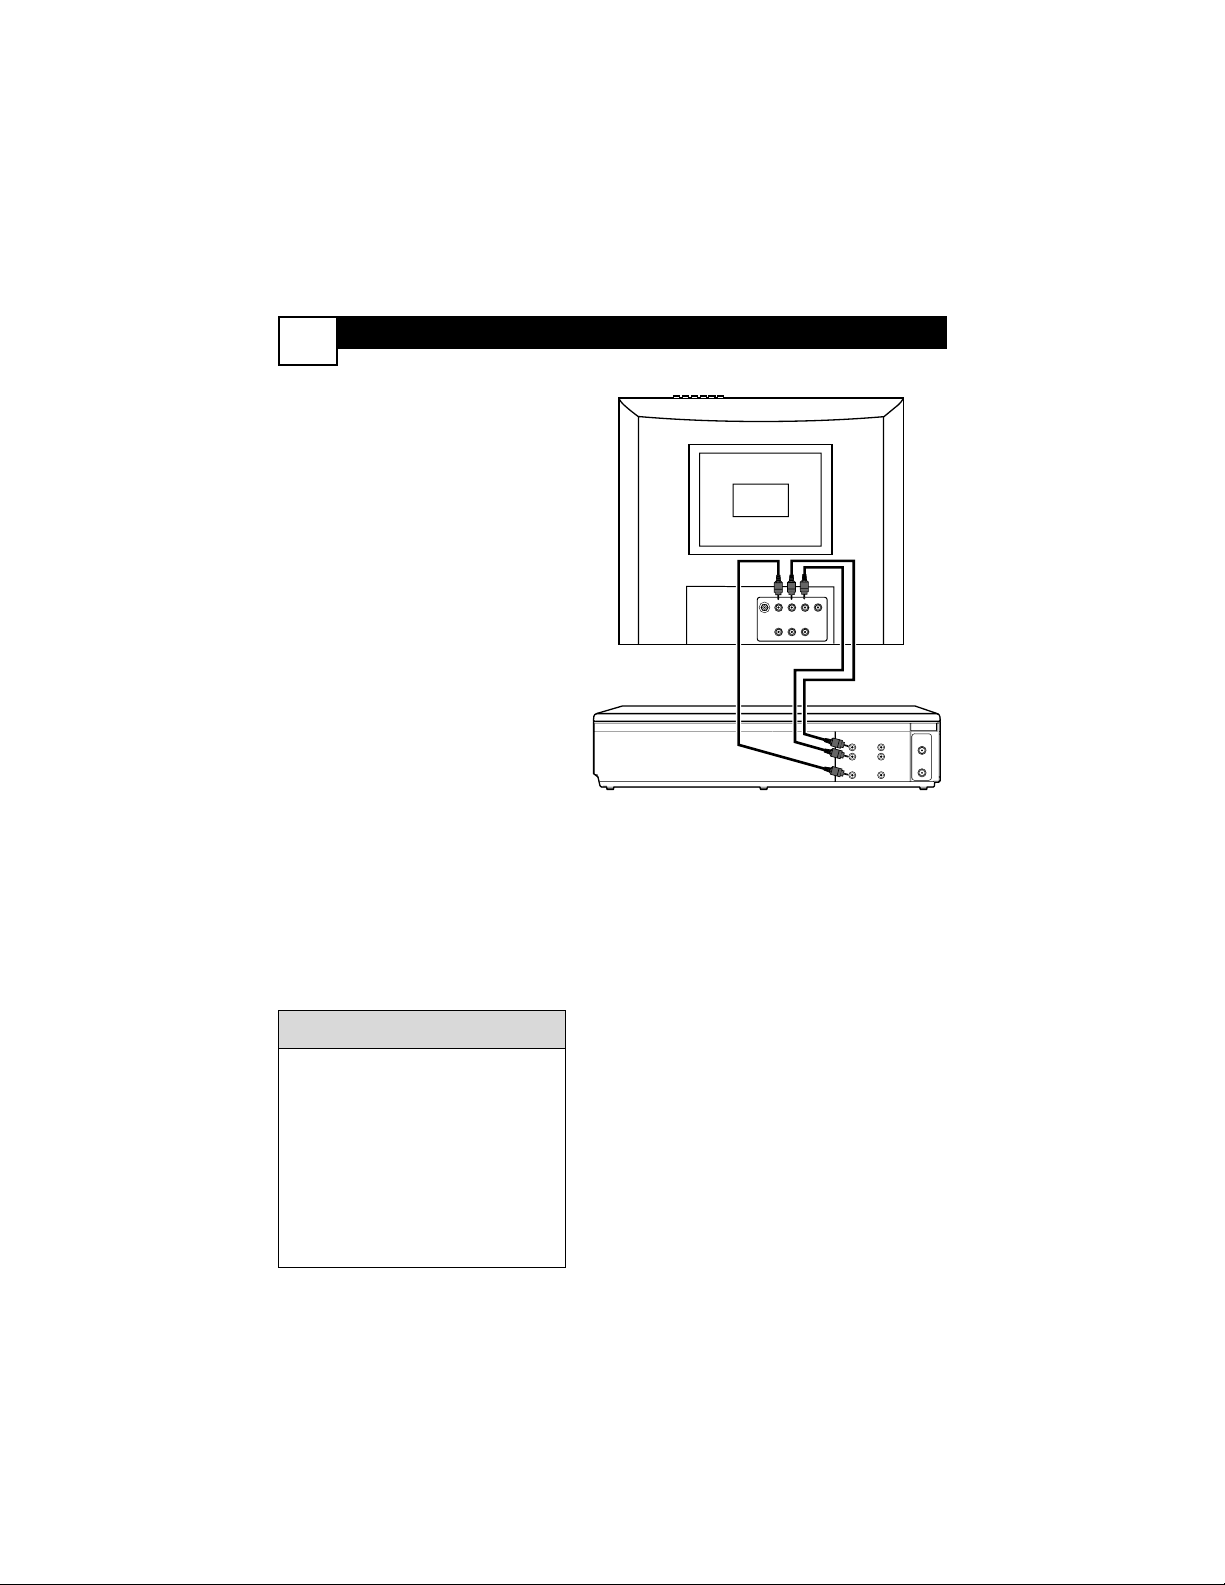
CONNECTING OTHER
EQUIPMENT TO THE TV/DVD
2
Y
ou may want to connect a VCR,
Camcorder, or Video Game to this
TV/DVD.After making this connection,
press TV/AV/DVD to select VIDEO mode.
The materials playing on the other equip-
ment will show on the TV/DVD’s VIDEO
channel. Audio and video cables are not
supplied.
1
Connect a video cable to the
VIDEO OUT jack of the other
equipment and to the yellow
VIDEO AV INPUT jack on the
back of the TV/DVD.
2
Connect audio cables to the
AUDIO OUT jacks of the other
equipment and to the red and
white AUDIO L/R AV INPUT
jacks on the back of the TV/DVD.
3
Turn on the TV/DVD and the
other equipment.
4
Press TV/AV/DVD on the
remote to set the TV/DVD to the
VIDEO channel.VIDEO will
appear in the top left corner of
the TV screen.
5
Play the tape, game, etc. as usual
on the other equipment.You will
watch and hear it at the TV/DVD.
If the other equipment has only a
single AUDIO OUT jack (usually
white), connect it to only the white
(left) AUDIO AV INPUT jack on the
TV/DVD.The sound will come from
a single channel (the left) and will
not be in Stereo.
Remember to match the cable col-
ors to the jack colors. Connect
OUT jacks on the other equipment
to AV INPUTs on the TV/DVD.
HELPFUL HINT
ANTENNA
IN
L
R
L
R
AUDIO
OUT
AUDIO
IN
ANTENNA
OUT
VIDEO
IN
VIDEO
OUT
75 OHM
ANTENNA
INPUT
VIDEO
AUDIO-R
AV INPUT
L
(MONO)
AV OUTPUT
COAXIAL
DVD DIGITAL
OUTPUT
L
From VCR’s AUDIO and VIDEO OUT jacks
to VIDEO and AUDIO A/V INPUT jacks on TV/DVD
VCR
TV/DVD
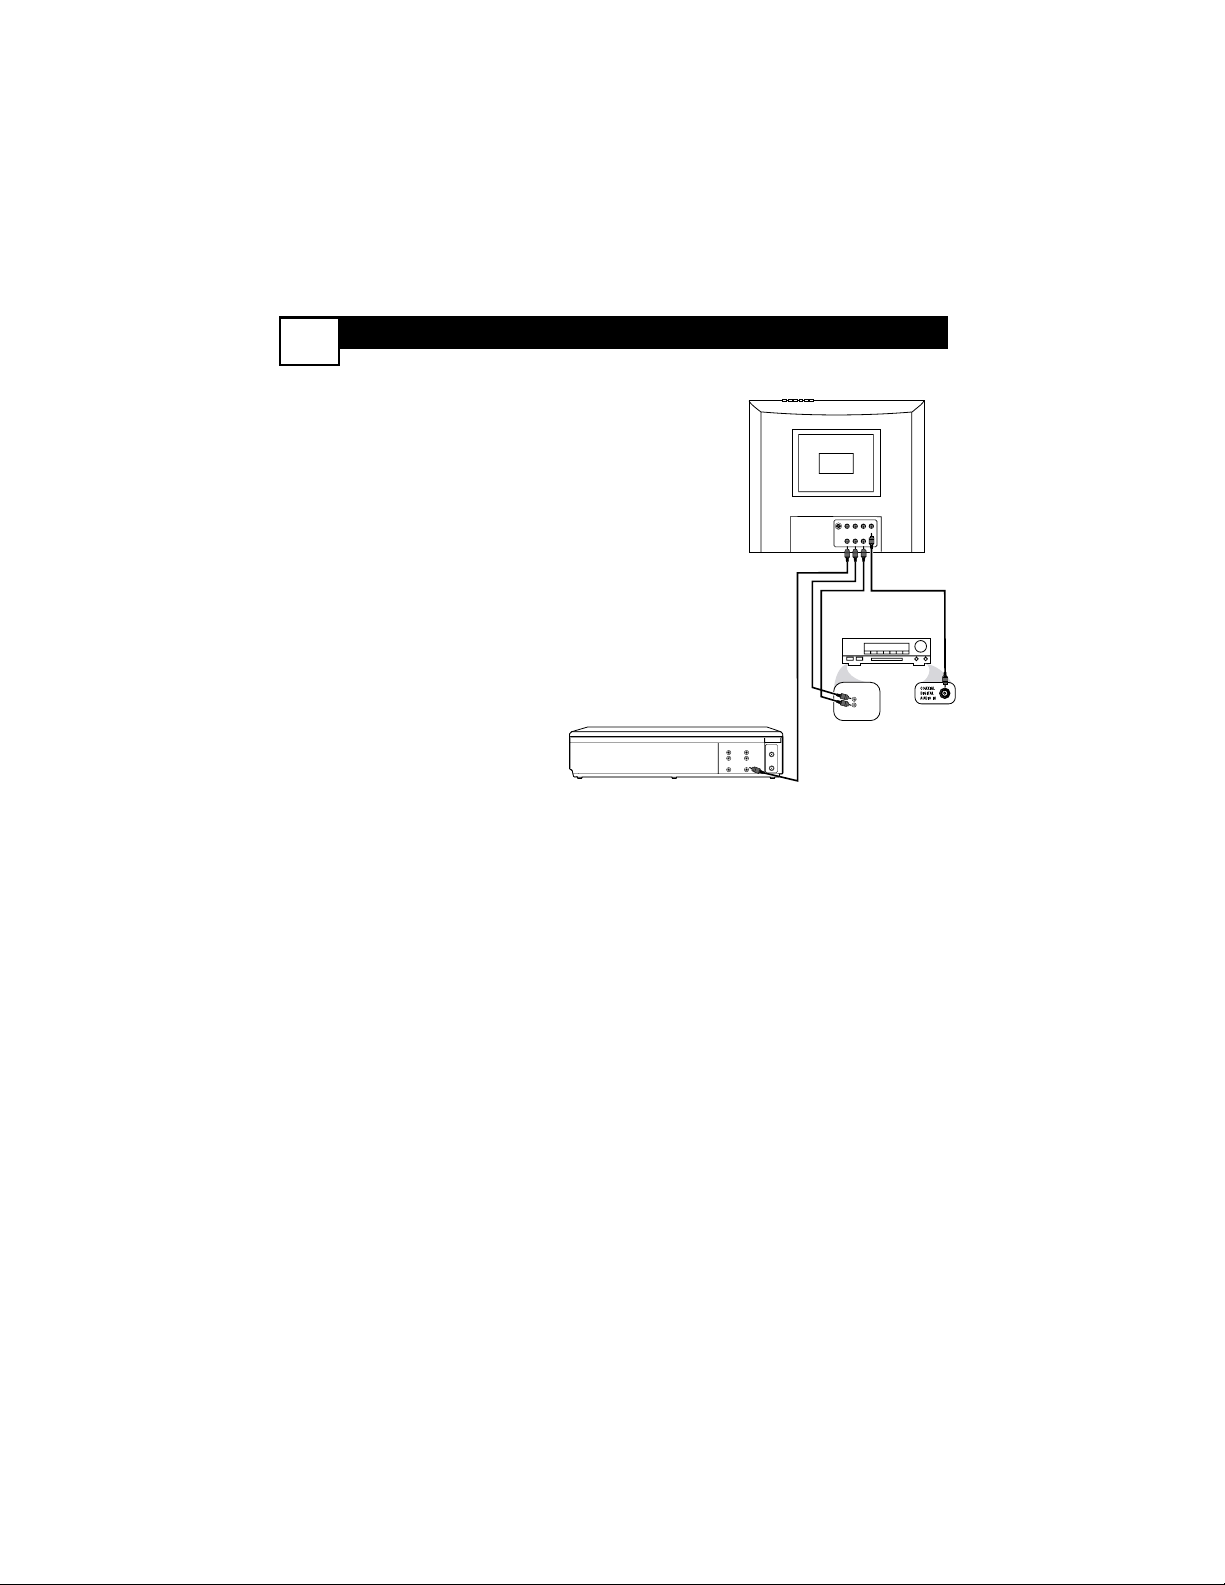
CONNECTING THE
TV/DVD TO OTHER SYSTEMS
3
Y
ou may want to connect the TV/DVD
to other devices such as a VCR or a
Stereo. For example, you can record a TV
program from the TV/DVD to a VCR, or
hear the sound from the TV/DVD on a
Stereo. You will use the AV OUTPUTs on
the back of the TV/DVD to send the pic-
ture and/or sound to another device.
1
Two different audio connec-
tions are possible - analog or
digital.
If the VCR, Stereo, etc., has red
and white Audio In jacks, this is
an analog connection. Connect
audio cables to the red and
white AUDIO AV OUTPUT
jacks on the TV/DVD and to
the AUDIO IN jacks on the
Stereo,VCR, etc.
These cables are not supplied
with the TV/DVD, but may come
with the other equipment. Use
RCA-style cables, matching cable
colors to jack colors.
Or, if your Stereo has a Coaxial
Digital Audio In jack, you can
make a digital connection. Use a
coaxial digital audio cable
(not supplied) to connect the
TV/DVD’s DVD DIGITAL
OUTPUT COAXIAL jack to
the Stereo’s Coaxial Digital
Audio In jack.
2
If you are connecting to a
VCR or other video device,
also connect a video cable
from the TV/DVD’s VIDEO
AV OUTPUT jack (yellow)
to the VCR’s VIDEO IN jack.
There is no video connection to
a stereo.
3
Set the Stereo,VCR, etc., to
its Auxiliary In, Audio/Video
In, or Source mode. See its
owner’s manual for details.
ANTENNA
IN
L
R
AUDIO
OUT
L
R
AUDIO
IN
ANTENNA
OUT
VIDEO
IN
VIDEO
OUT
L
R
AUDIO
IN
OR
75 OHM
ANTENNA
INPUT
VIDEO
AUDIO-R
AV INPUT
L
(MONO)
AV OUTPUT
COAXIAL
DVD DIGITAL
OUTPUT
L
From VIDEO and AUDIO A/V OUTPUT jacks on
TV/DVD to AUDIO IN jacks on Stereo or VCR
and VIDEO IN jacks on VCR
VCR
STEREO
TV/DVD
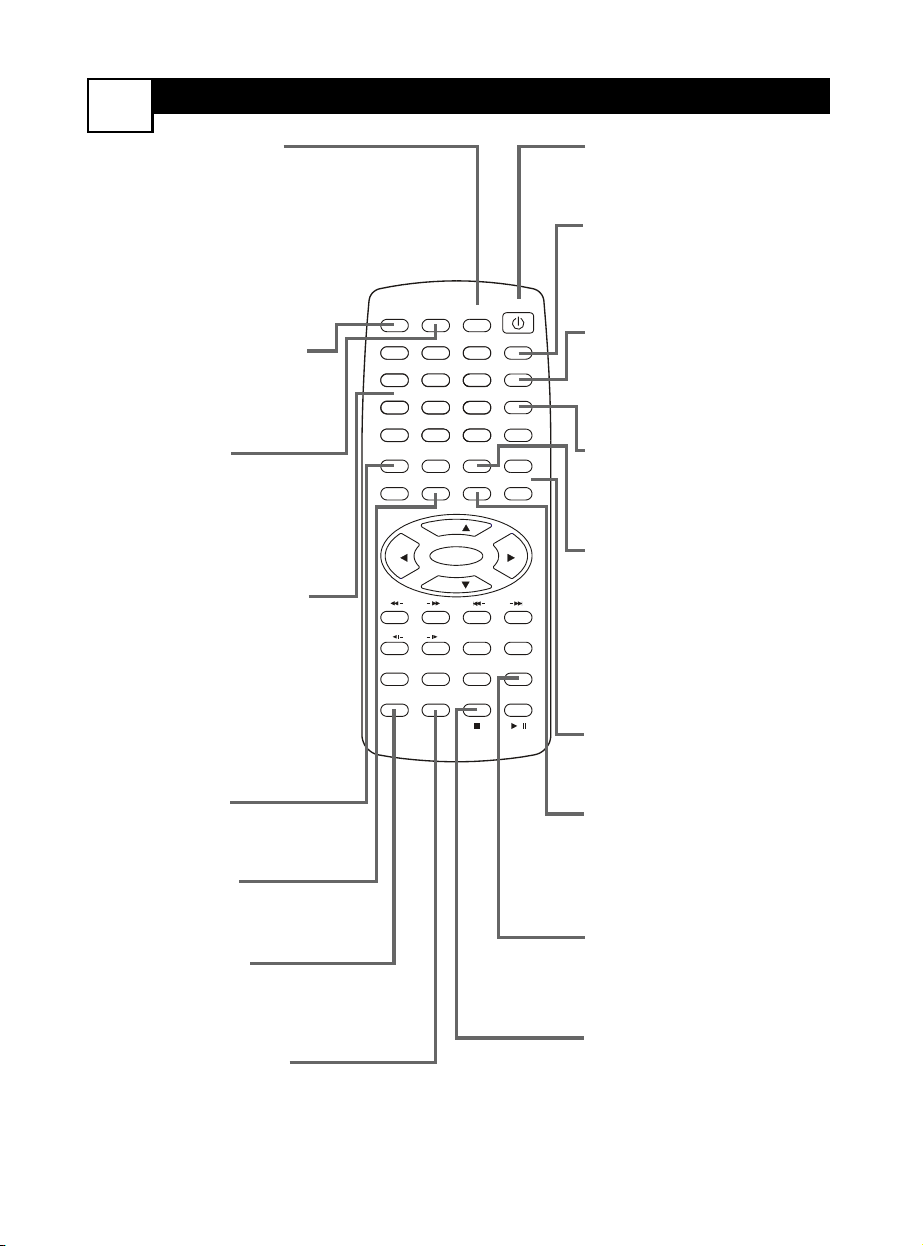
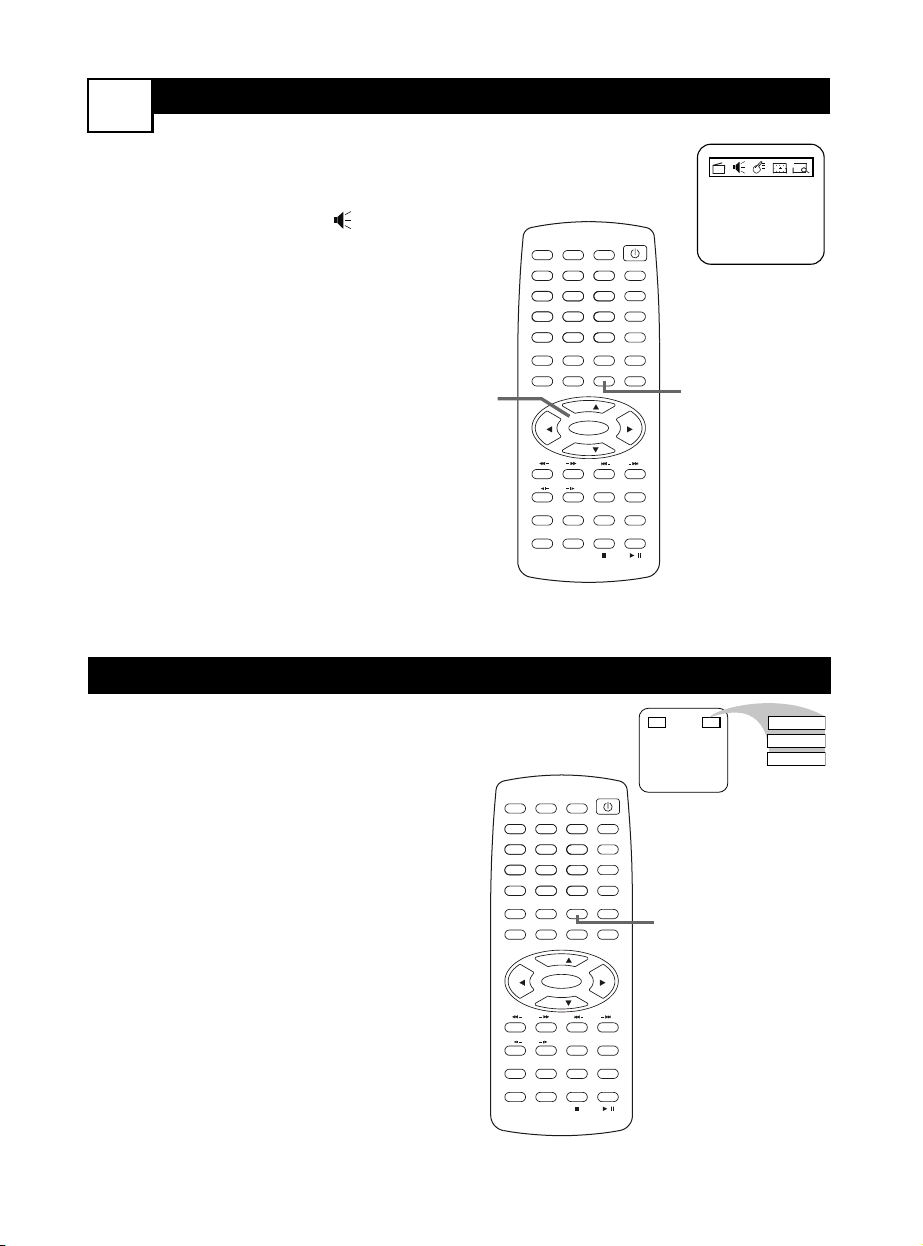
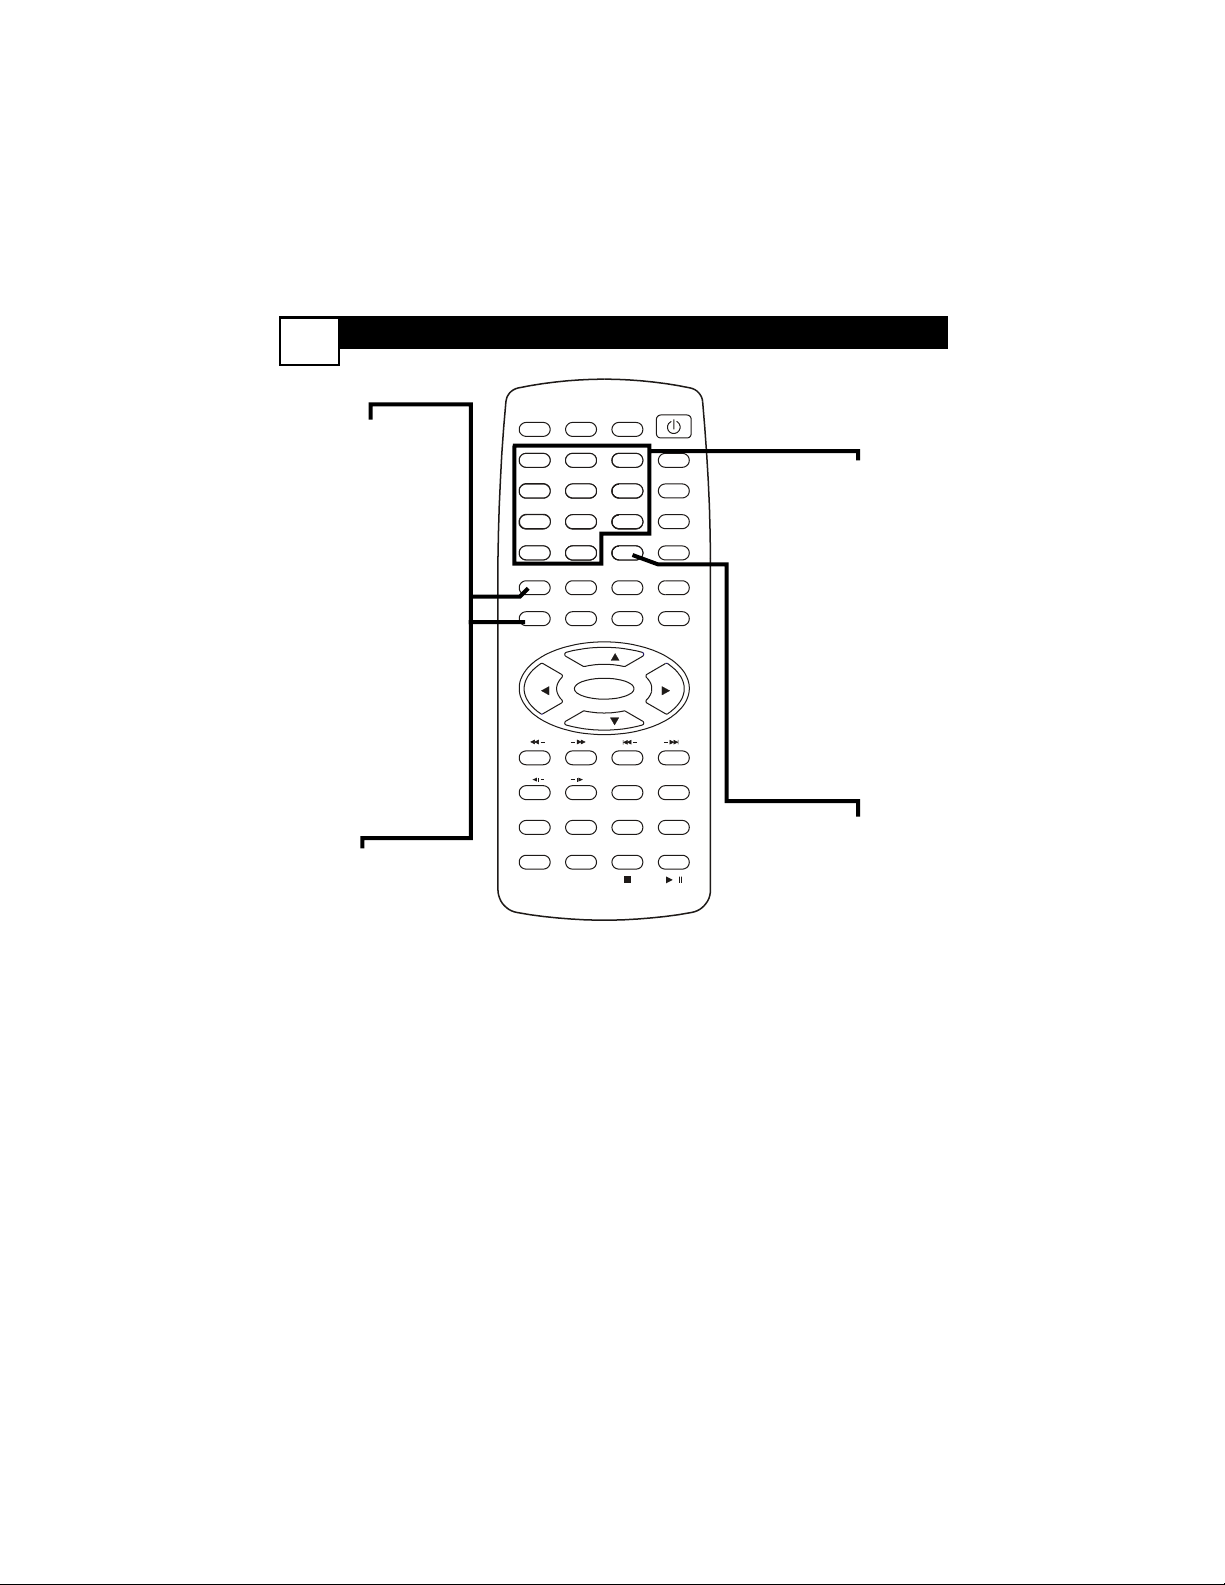
REMOTE
CONTROL
4
TV/AV/DVD Button
Press to select a Video In
mode. Choose TV for regu-
lar TV programming, DVD
for Disc play, or VIDEO to
watch materials playing on
other equipment connected
to the TV/DVD (VCR, video
games, etc.).
OPEN/CLOSE Button
Press to open or close the
disc tray.This automatically
puts the unit in DVD mode.
MUTE Button
Press to silence the sound.
The H will appear on the
screen. Press MUTE again to
restore the volume to its
previous level.
Number (0-9) Buttons
Use to select TV channels,
to select Disc chapters or
tracks, or to enter informa-
tion in menus.
When choosing one- or
two-digit TV channels (i.e. 6
or 12), there will be a pause
before the channel changes.
TITLE Button
Press to access a DVD’s title
menu.
SETUP Button
Press to access the SETUP
menu of the DVD Player.
REPEAT Button
Press to repeatedly play a
Disc portion (Track,
Chapter, etc.).
REPEAT A-B Button
Press to play a specific Disc
segment repeatedly.
POWER
yy
Button
Press to turn the unit on or
off.
SLEEP Button
Press to have the TV/DVD
turn itself off after a set
amount of time.
CLOCK Button
In TV mode, press to go
directly to the Timer menu
to set up clock or timer fea-
tures.
S. EFFECT Button
Press to choose a sound
effect (Personal,Voice, Music,
or Theatre).
MTS Button
Press to choose an audio
option (MONO, STEREO,
SAP-second audio program,
or MONO+SAP), depending
on the TV channel. MTS will
not function if the volume is
muted.
VOL. +,VOL. - Buttons
Use to increase or decrease
the volume.
MENU Button
Press to access or remove
the TV menu. It will disap-
pear after 15-20 seconds of
inactivity.
ZOOM Button
Press to enlarge or reduce a
DVD or Video CD image
during play.
STOP C Button
Press to stop Disc play.
POWER
SLEEP
CLOCK
VOL+
PICTURE/DEL.
S.EFFECT
VOL-
MTS
MENU
TV/AV/DVD
DISPLAY
R/L
SKIP
SEARCH
MODE
SUBTITLE ZOOM
STOP
PLAY/PAUSE
/
9
6
3
MUTE
RECALL
OPEN/CLOSE
TITLE
MENU/PBC SETUP
SCAN
REPEAT
LANGUAGE
ANGLE
REPEAT
A-B
ENTER
21
FAV.
8
7
5
4
0
SLOW
DVD10+
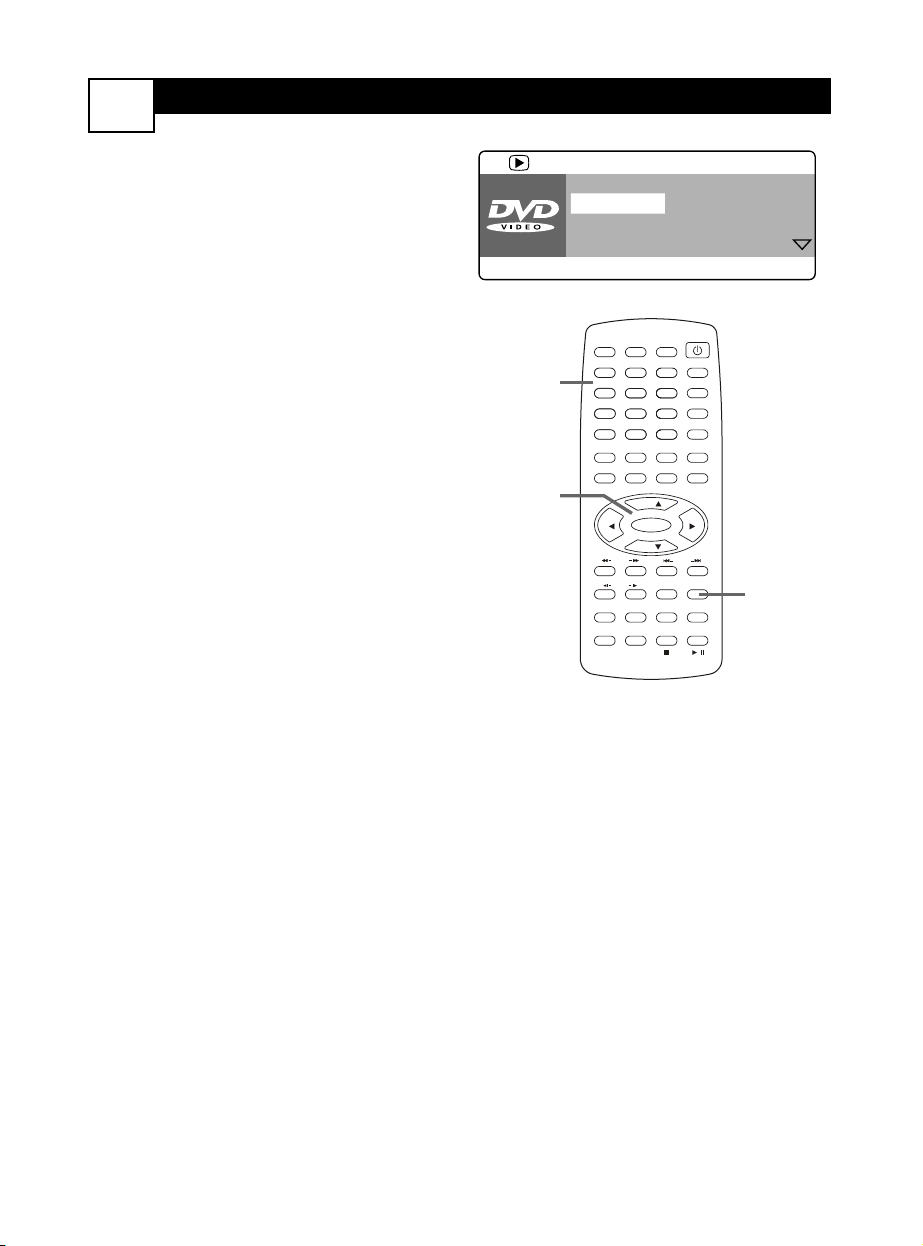
CH+
CH-
REMOTE CONTROL
5
POWER
SLEEP
CLOCK
VOL+
PICTURE/DEL.
S.EFFECT
VOL-
MTS
MENU
TV/AV/DVD
DISPLAY
R/L
SKIP
SEARCH
MODE
SUBTITLE ZOOM
STOP
PLAY/PAUSE
/
9
6
3
MUTE
RECALL
OPEN/CLOSE
TITLE
MENU/PBC SETUP
SCAN
REPEAT
LANGUAGE
ANGLE
REPEAT
A-B
ENTER
21
FAV.
8
7
5
4
0
SLOW
DVD10+
CH+
CH-
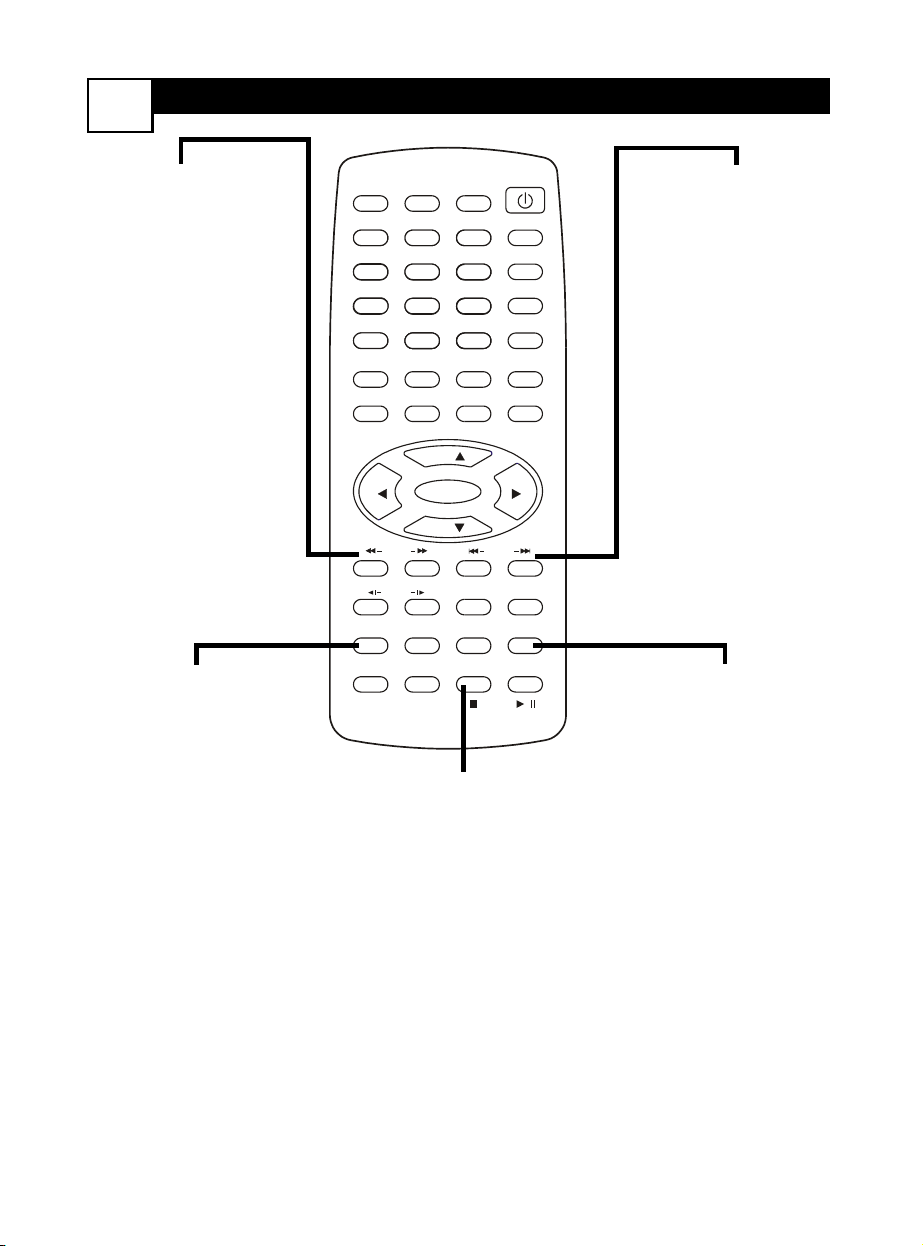
RECALL
Press to switch between the
last channel and the current
channel.
FAV./DVD10+ Button
Press to move through your
five favorite TV channels. In
DVD mode, use to select a
Track or Chapter.
MENU/PBC Button
Press to access a DVD’s
menu or to enable Playback
Control (PBC) on a Video
CD.
ENTER Button
Press to confirm a menu
selection.
CH+o, CH-p, 2, 3
Buttons
Use to select items in the
on-screen menu. Use
CH+o and CH-p to
change TV channels.
SCAN 1h, g6 Buttons
Press to fast forward or fast
reverse a Disc during play.
SLOW Buttons
Press to play a Disc forward
or backward in slow
motion.
LANGUAGE Button
Press to select a language
for the audio of a DVD.
ANGLE Button
Press to select a different
camera angle or perspective
during DVD play.
DISPLAY Button
Press to see the current TV
channel number or time or
to see Disc information.
PICTURE/DEL Button
Press to choose a prede-
fined picture setting
(Multimedia, Personal,
Movies, Sports,Weak Signal).
SKIP j, G Buttons
Press to skip to the next or
previous Disc Chapter or
Track.
SEARCH MODE Button
Press to access or remove
the search menu for a DVD
or Video CD.
R/L Button
Press to hear sound from
the right or left channel of a
Video CD or Audio CD.
SUBTITLE Button
Press to select a language
for subtitles during DVD
play.
PLAY/PAUSE M
Button
Press to play a Disc. Press to
pause or freeze the picture
during play; press again to
resume play.
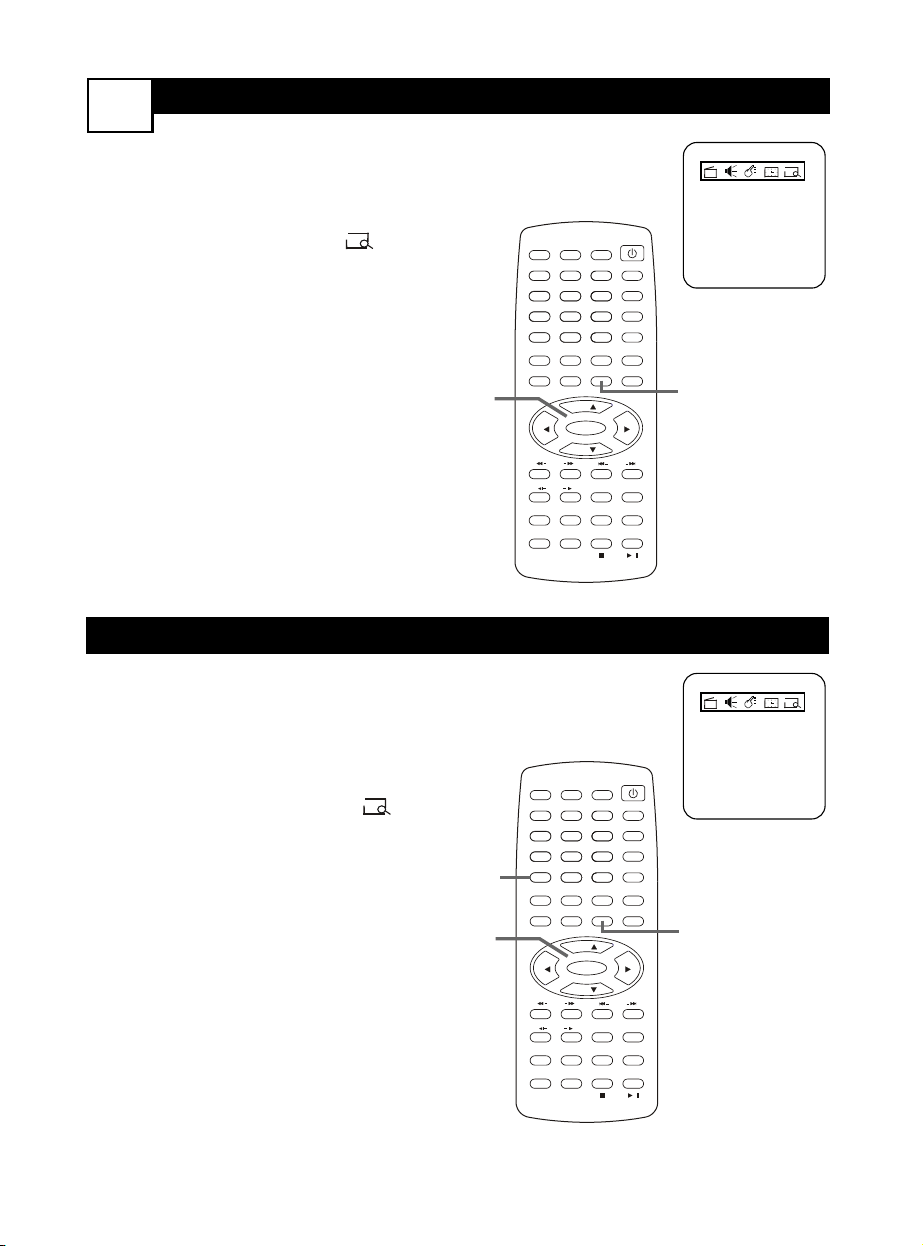
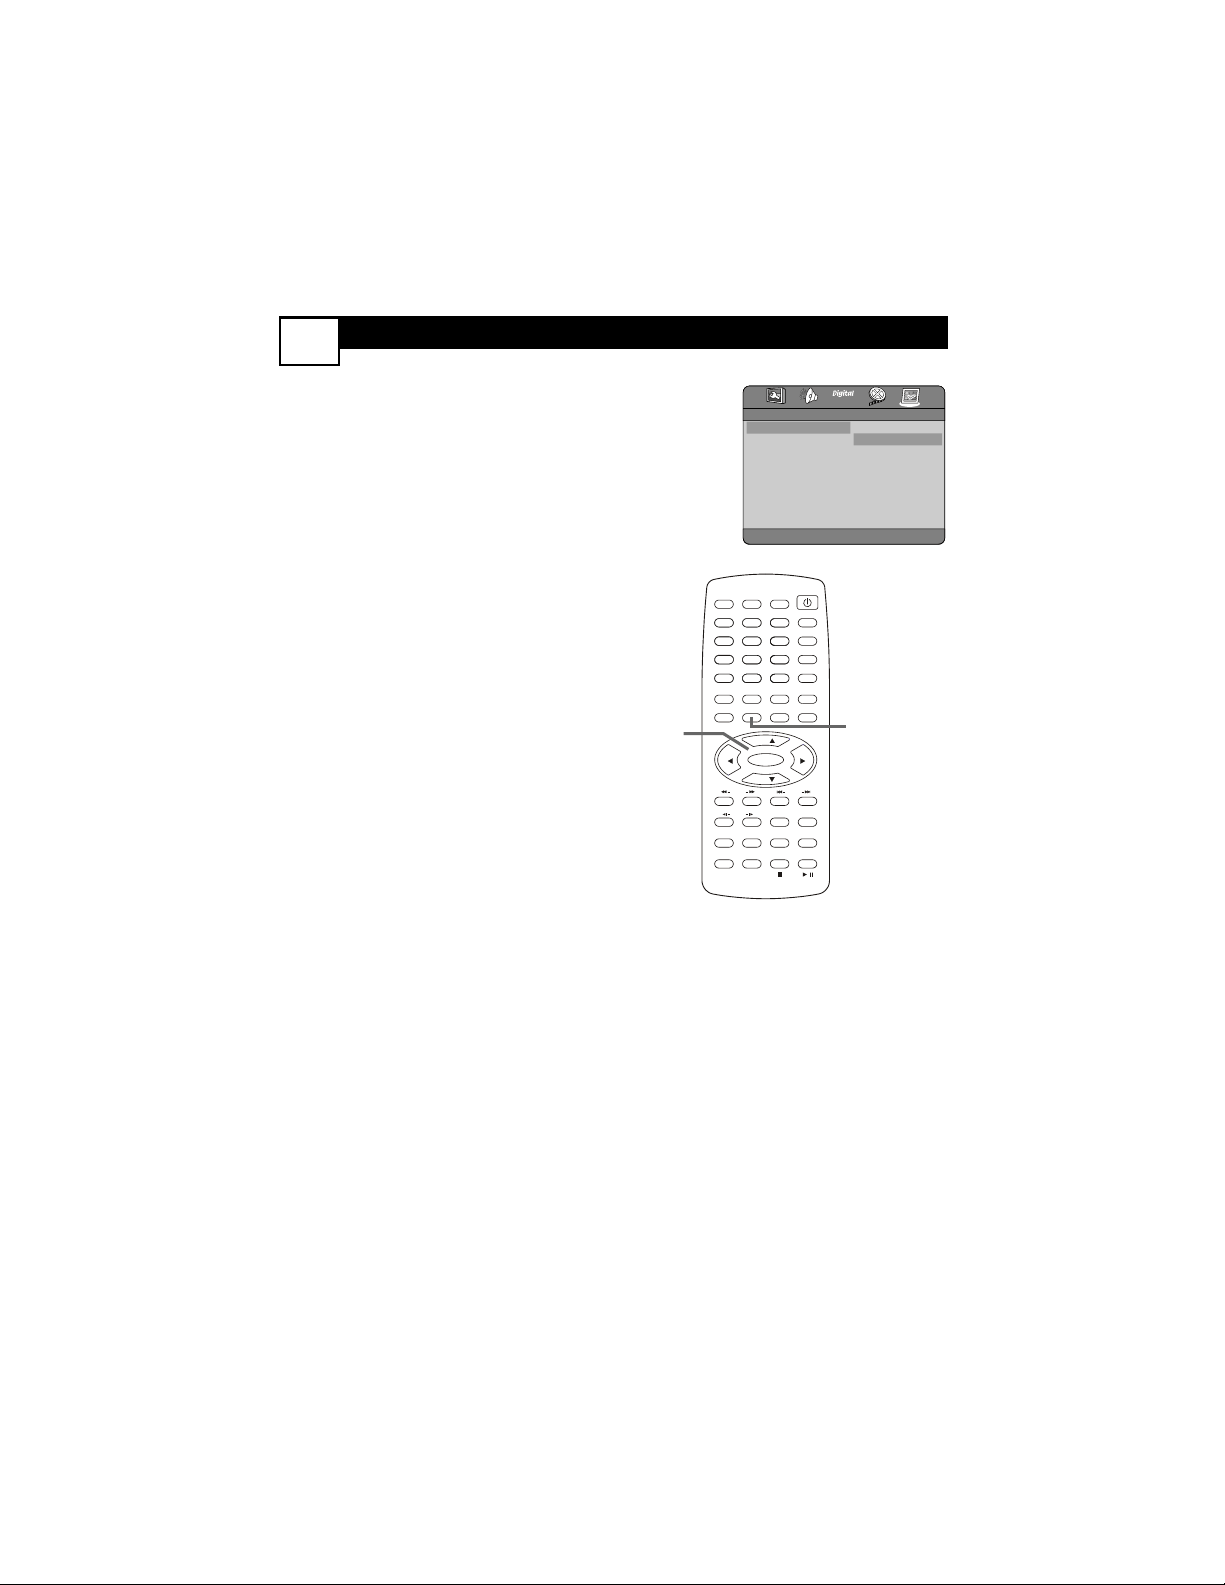
BASIC FEATURES
6
Watching TV
1
Press POWER
yy
to turn on the
TV/DVD.
2
Press TV/AV/DVD to select TV
mode. The current channel num-
ber will appear in the top left cor-
ner.
3
Use CH+o and CH-p to select
TV channels.
Playing a Disc
4
Press TV/AV/DVD to select DVD
mode. The large DVD Video logo
will appear on the screen.
5
Press OPEN/CLOSE to open
the disc tray. Insert a Disc with
the label facing up.
If a DVD has movies on both sides
of the Disc, make sure the label of
the side you want to play is facing
up. In this case, the labelling is prob-
ably on the inner ring of the Disc.
6
Press OPEN/CLOSE again to
close the tray.
Play may begin automatically. If not,
press PLAY/PAUSE M.
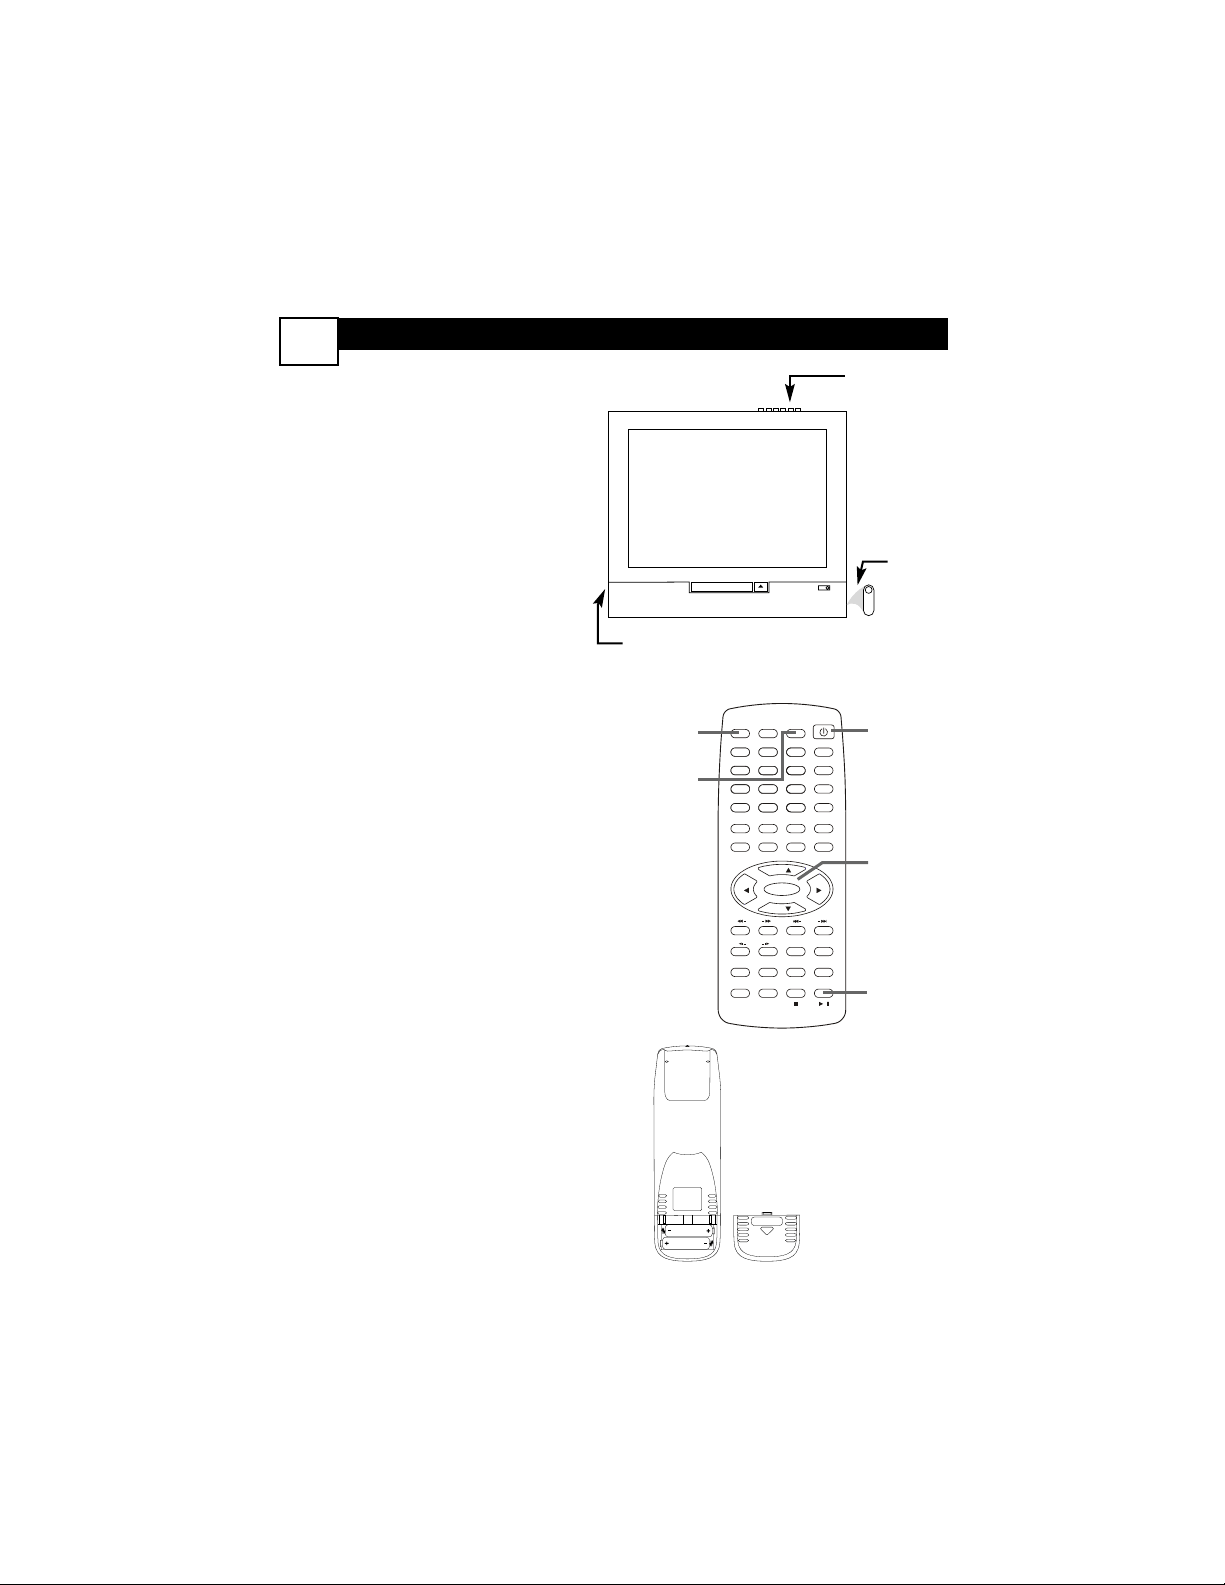
Remote Control Batteries
1
Remove the battery compart-
ment lid on the back of the
remote by sliding the lid down and
off.
2
Insert two AAA batteries. Install
them as marked inside the com-
partment.
3
Replace the compartment lid.
POWER
button
HEADPHONE jack
Connect headphones (not supplied)
here for personal listening.
TV/AV/DVD,
MENU,
VOL(ume),
CH(annel),
(ENTER,
PLAY/PAUSE)
buttons
POWER
SLEEP
CLOCK
VOL+
PICTURE/DEL.
S.EFFECT
VOL-
MTS
MENU
TV/AV/DVD
DISPLAY
R/L
SKIP
SEARCH
MODE
SUBTITLE ZOOM
STOP
PLAY/PAUSE
/
9
6
3
MUTE
RECALL
OPEN/CLOSE
TITLE
MENU/PBC SETUP
SCAN
REPEAT
LANGUAGE
ANGLE
REPEAT
A-B
ENTER
21
FAV.
8
7
5
4
0
SLOW
DVD10+
CH+
CH-
1
2,4
3
5,6
6
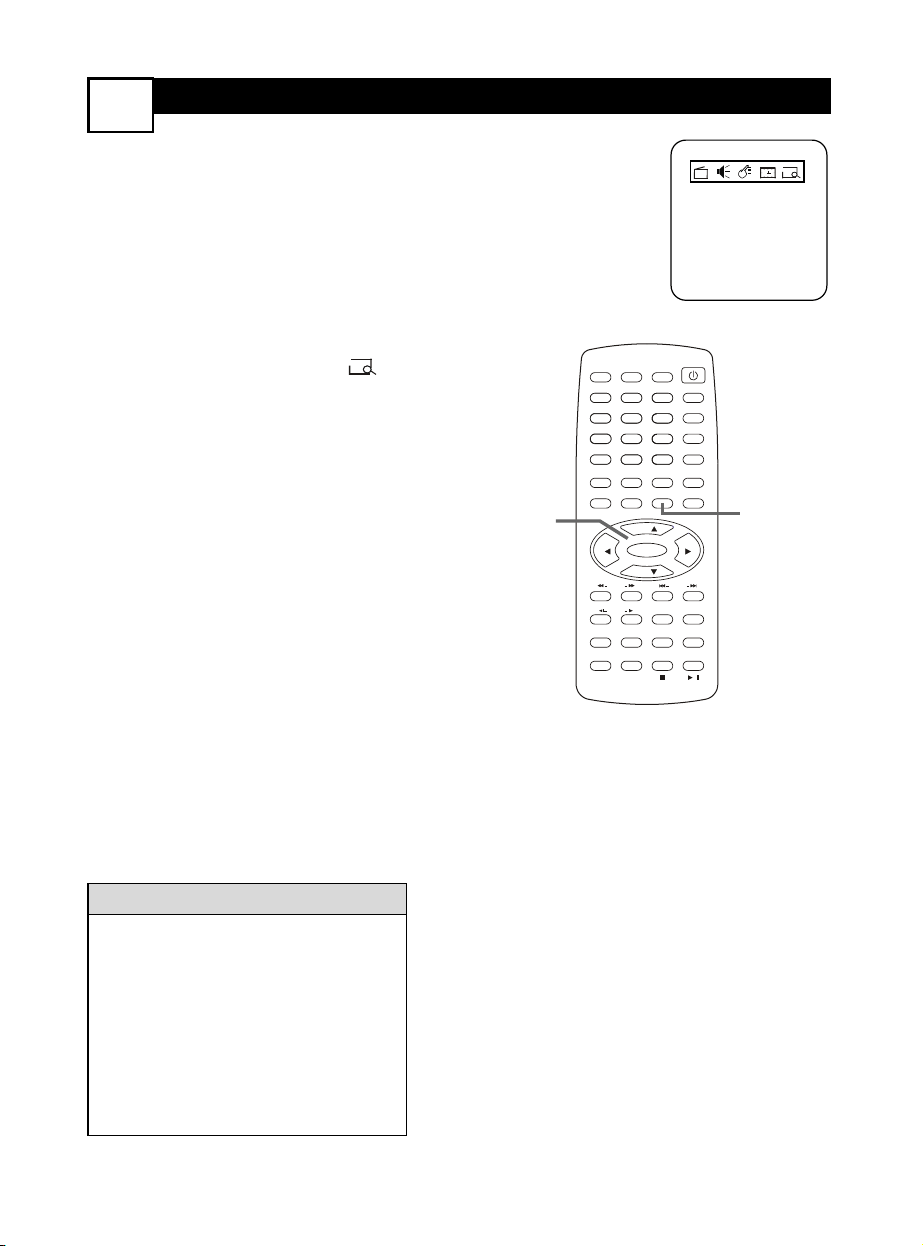
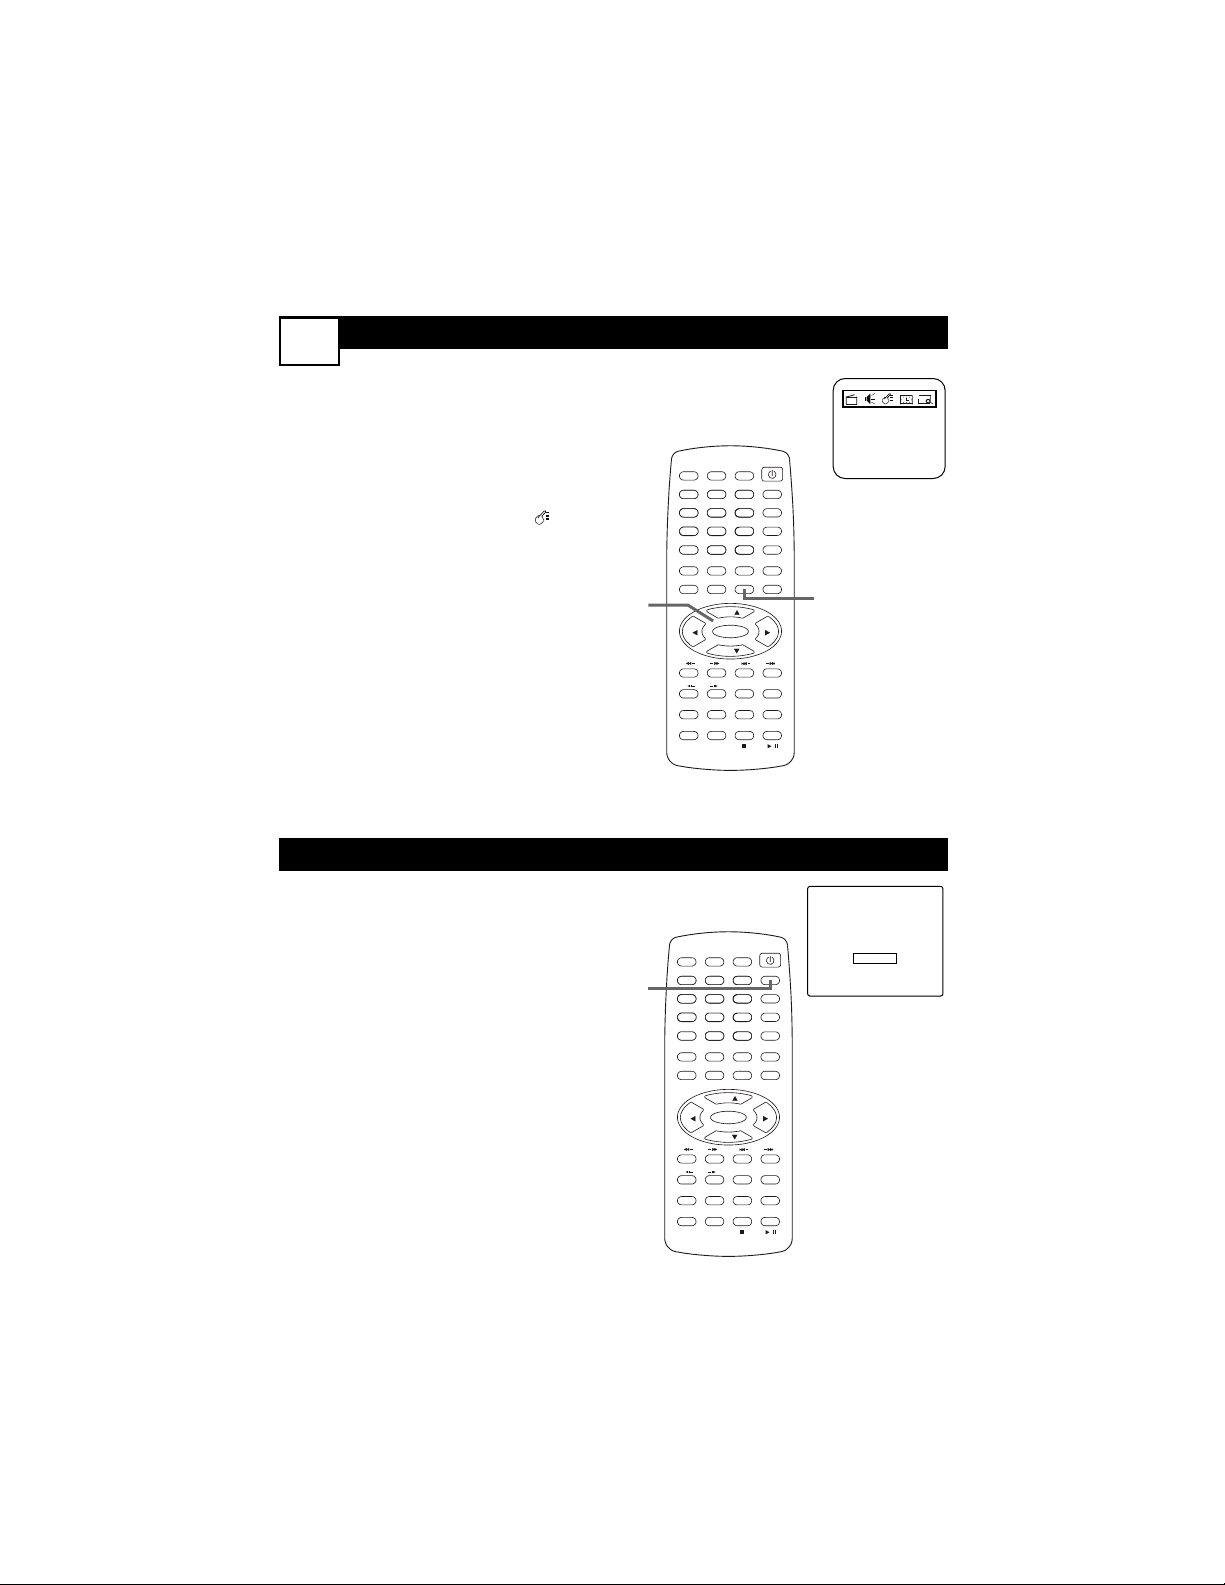
PROGRAMMING
TV CHANNELS
7
POWER
SLEEP
CLOCK
VOL+
PICTURE/DEL.
S.EFFECT
VOL-
MTS
MENU
TV/AV/DVD
DISPLAY
R/L
SKIP
SEARCH
MODE
SUBTITLE ZOOM
STOP
PLAY/PAUSE
/
9
6
3
MUTE
RECALL
OPEN/CLOSE
TITLE
MENU/PBC SETUP
SCAN
REPEAT
LANGUAGE
ANGLE
REPEAT
A-B
ENTER
21
FAV.
8
7
5
4
0
SLOW
DVD10+
CH+
CH-
T
he TV can receive channels via an
Antenna or Cable TV signal, then
memorize the available channels.This
makes it easy for you to select only avail-
able TV stations when you use CH+o
and CH-p.
Make sure the Antenna or Cable TV sig-
nal is connected securely to the 75 OHM
ANTENNA INPUT before you begin.
1
Press MENU. Press 2 or 3 to
choose the Preset menu.
2
Press CH+o or CH-p to select
Tuner Mode.
3
Press 2 or 3 to choose
Antenna or Cable. Choose
Cable if you have Cable TV serv-
ice. Channels 1-125 will be possi-
ble. Choose Antenna if you con-
nected an indoor or outdoor
antenna to the TV/DVD. Channels
2-69 will be possible.
4
Press CH+o or CH-p to select
Auto Search.
5
Press 3 to start scanning chan-
nels.The channels will count up
on the screen during the search.
When finished, the TV will go to
the lowest available channel.
“Completed” will appear briefly.
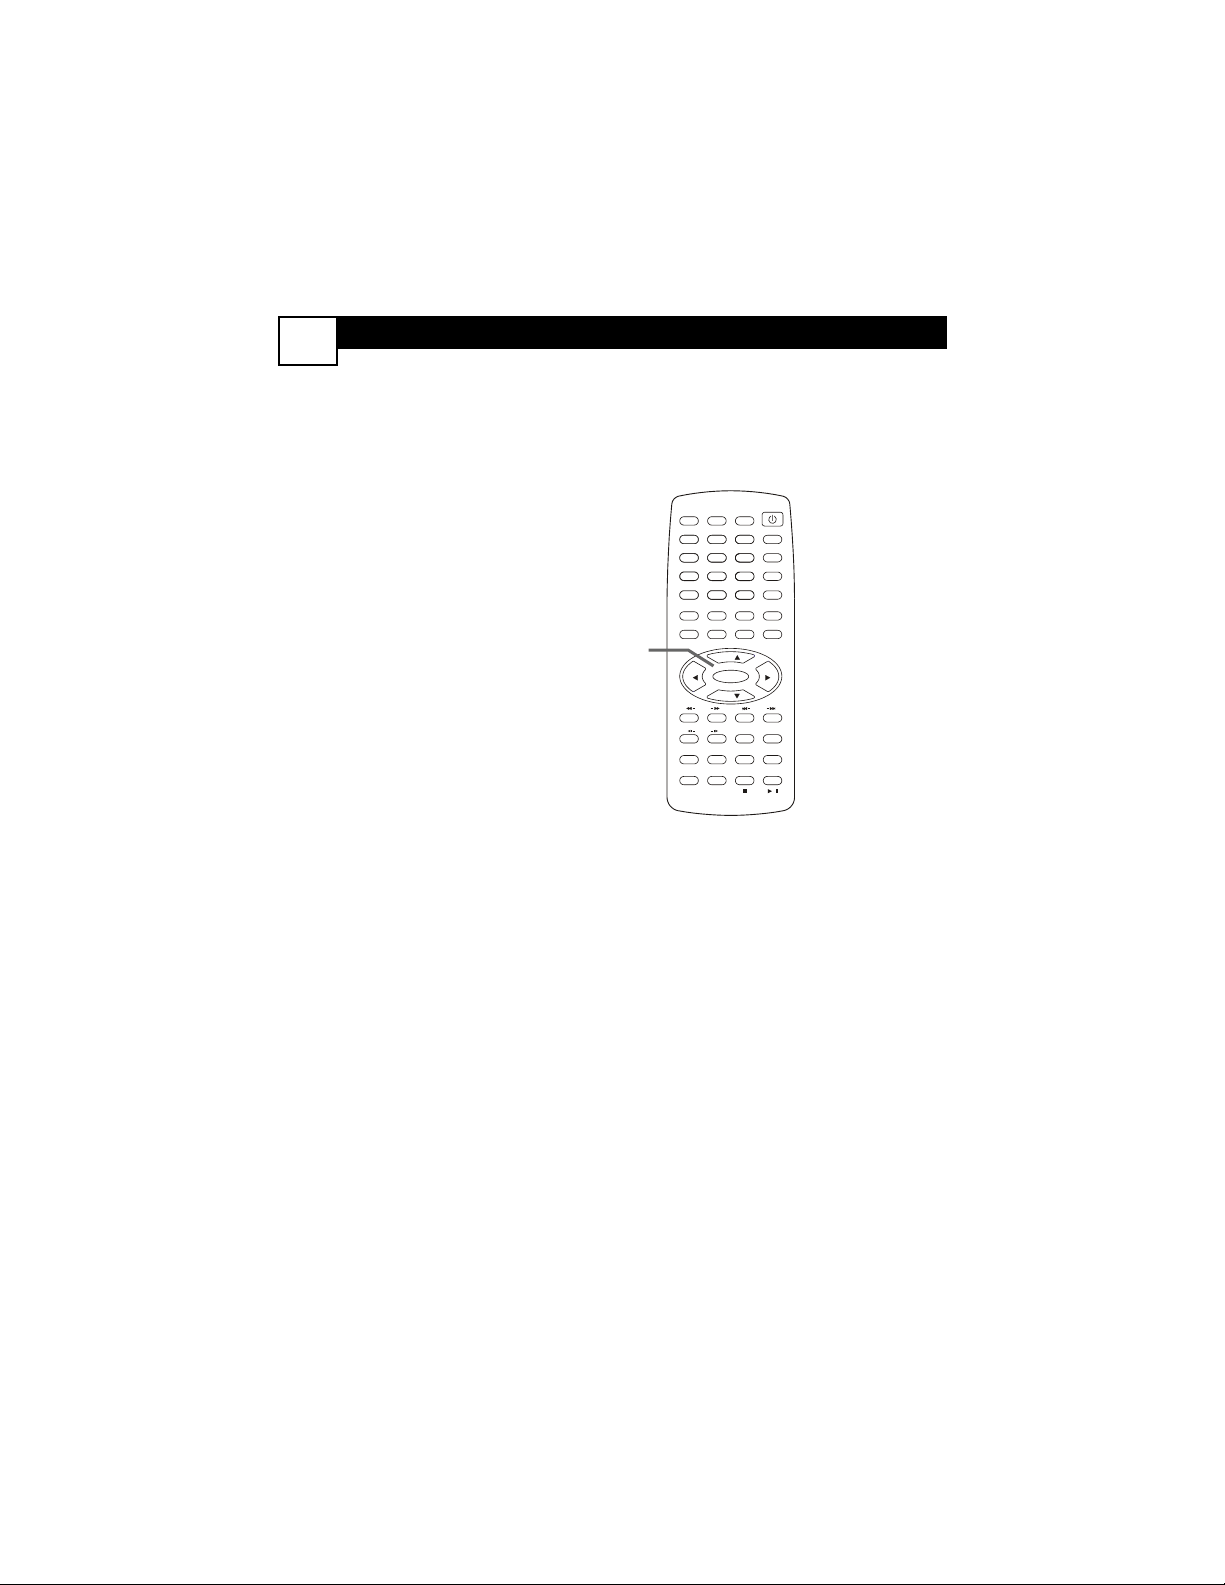
Tuner Mode
• Cable
• Channel 3
• Skipped Off
• Manual Up
• Auto Search ·
• Favorite list
In this same Preset menu, choose
Manual and use 2 or 3 to change
TV channels Up or Down.
You cannot select the Preset menu
if CH lock is On or when the unit is
in AV or DVD mode.
You can start Auto Search directly
by pressing and holding the MENU
button on the top of the TV/DVD.
HELPFUL HINTS
1
1-5
SKIPPING C
HANNELS
8
Y
ou can skip memorized channels or
add channels that the TV did not
memorize.
1
Press MENU. Press 2 or 3 to
choose the Preset menu.
2
Press CH+o or CH-p to select
Channel. Use 2 or 3 to
choose the channel you want to
add or skip.
3
Press CH-p to select Skipped,
then press 2 or 3 to choose
On or Off. Choose ON to skip
the channel when using
CH+o/CH-p. Choose OFF to
access the channel with
CH+o/CH-p.You can still select
skipped channels using the
Number buttons on the remote.
Y
ou can put five TV channels in a quick-
selection or “surf ” ring.Then, using
FAV./DVD10+ on the remote, you can
quickly flip through only your five favorite
channels.
1
Press MENU, then press 2 or 3
to choose the Preset menu.
2
Press p to select Favorite list,
then press ENTER.
3
Five channel slots will appear. Use
CH+o or CH-p to choose a
slot (1-5), then use 2 or 3 to
choose the channel you want in
that slot. (Antenna or Cable will
indicate whether you are using an
antenna or Cable TV service to
receive your TV channels.)
4
While watching TV, press
FAV./DVD+10 repeatedly to scan
through your five favorite channels
continuously.
FAVORITE CHANNELS
Tuner Mode
• Cable
• Channel 3
• Skipped Off
• Manual Up
• Auto Search ·
• Favorite list
Tuner Mode
• Cable
• Channel 3
• Skipped Off
• Manual Up
• Auto Search ·
• Favorite list
POWER
SLEEP
CLOCK
VOL+
PICTURE/DEL.
S.EFFECT
VOL-
MTS
MENU
TV/AV/DVD
DISPLAY
R/L
SKIP
SEARCH
MODE
SUBTITLE ZOOM
STOP
PLAY/PAUSE
/
9
6
3
MUTE
RECALL
OPEN/CLOSE
TITLE
MENU/PBC SETUP
SCAN
REPEAT
LANGUAGE
ANGLE
REPEAT
A-B
ENTER
21
FAV.
8
7
5
4
0
SLOW
DVD10+
CH+
CH-
1
1-3
POWER
SLEEP
CLOCK
VOL+
PICTURE/DEL.
S.EFFECT
VOL-
MTS
MENU
TV/AV/DVD
DISPLAY
R/L
SKIP
SEARCH
MODE
SUBTITLE ZOOM
STOP
PLAY/PAUSE
/
9
6
3
MUTE
RECALL
OPEN/CLOSE
TITLE
MENU/PBC SETUP
SCAN
REPEAT
LANGUAGE
ANGLE
REPEAT
A-B
ENTER
21
FAV.
8
7
5
4
0
SLOW
DVD10+
CH+
CH-
1
1-3
4
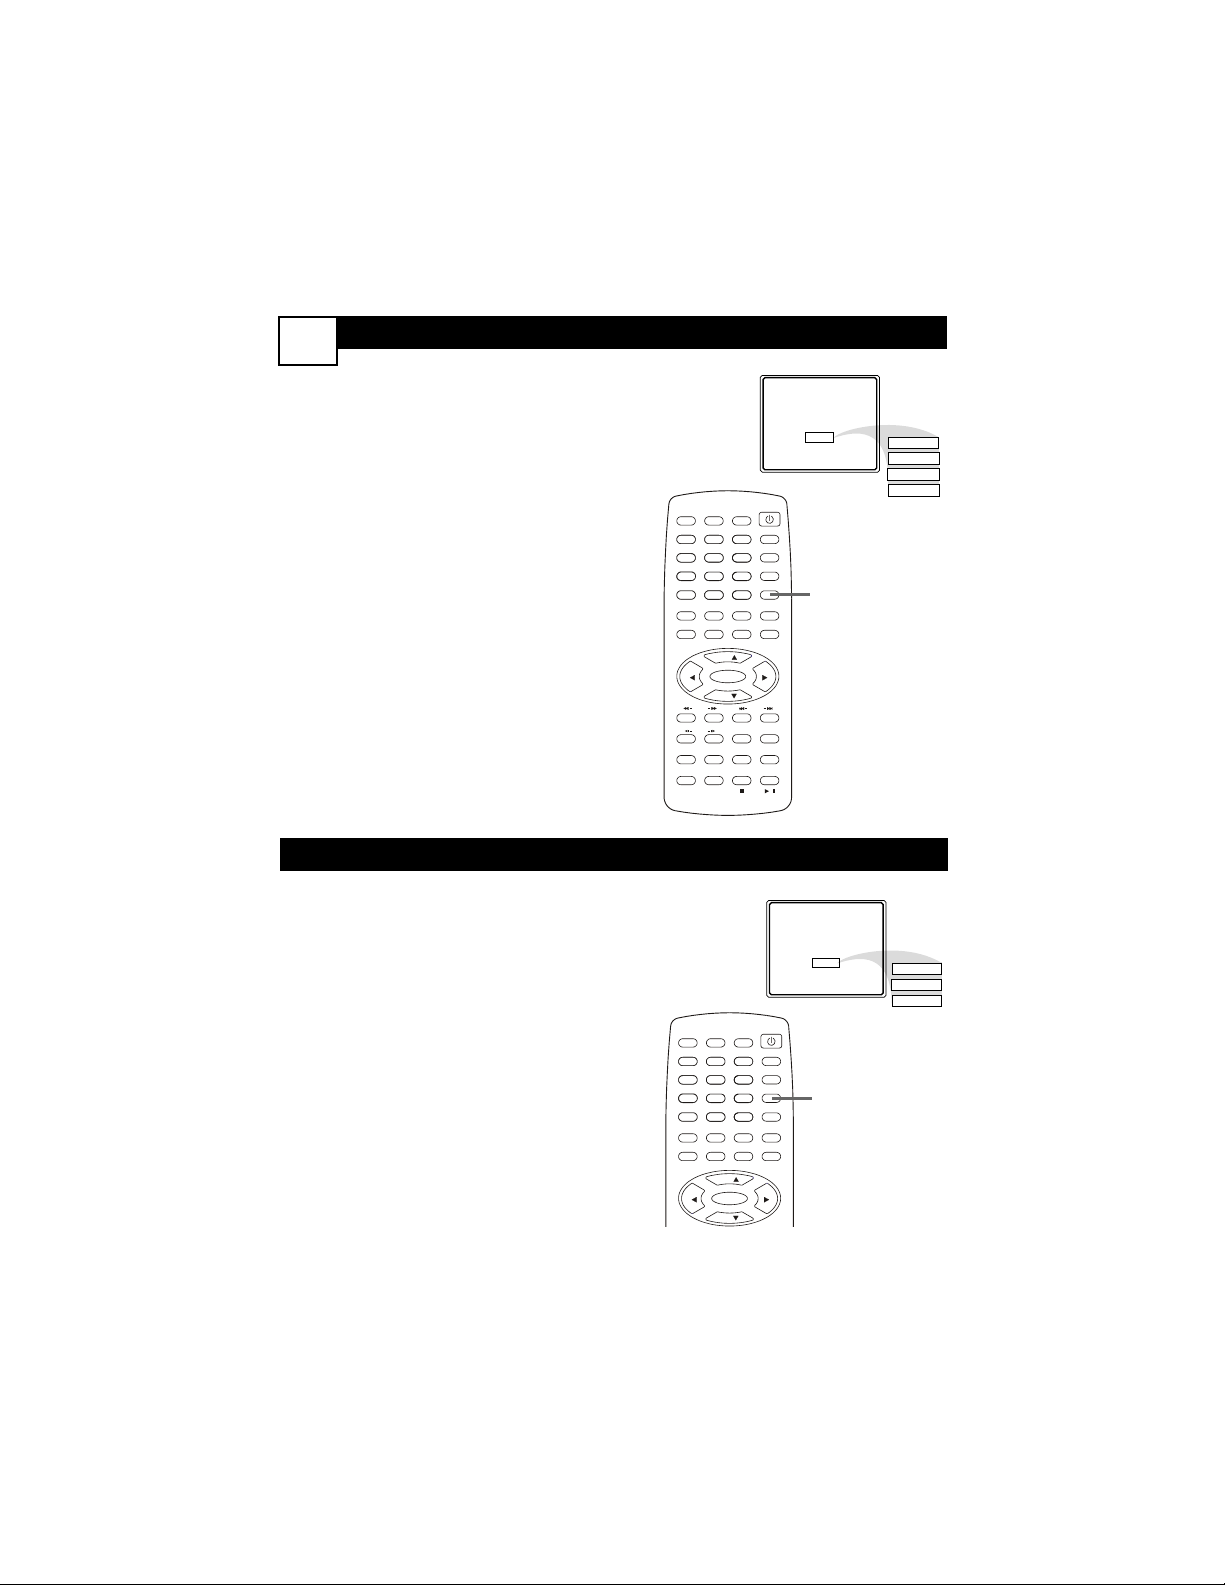
LANGUAGE
9
CLOCK
Language
• English
• C-Capt Off
• AutoLock
• SmartTimer Off
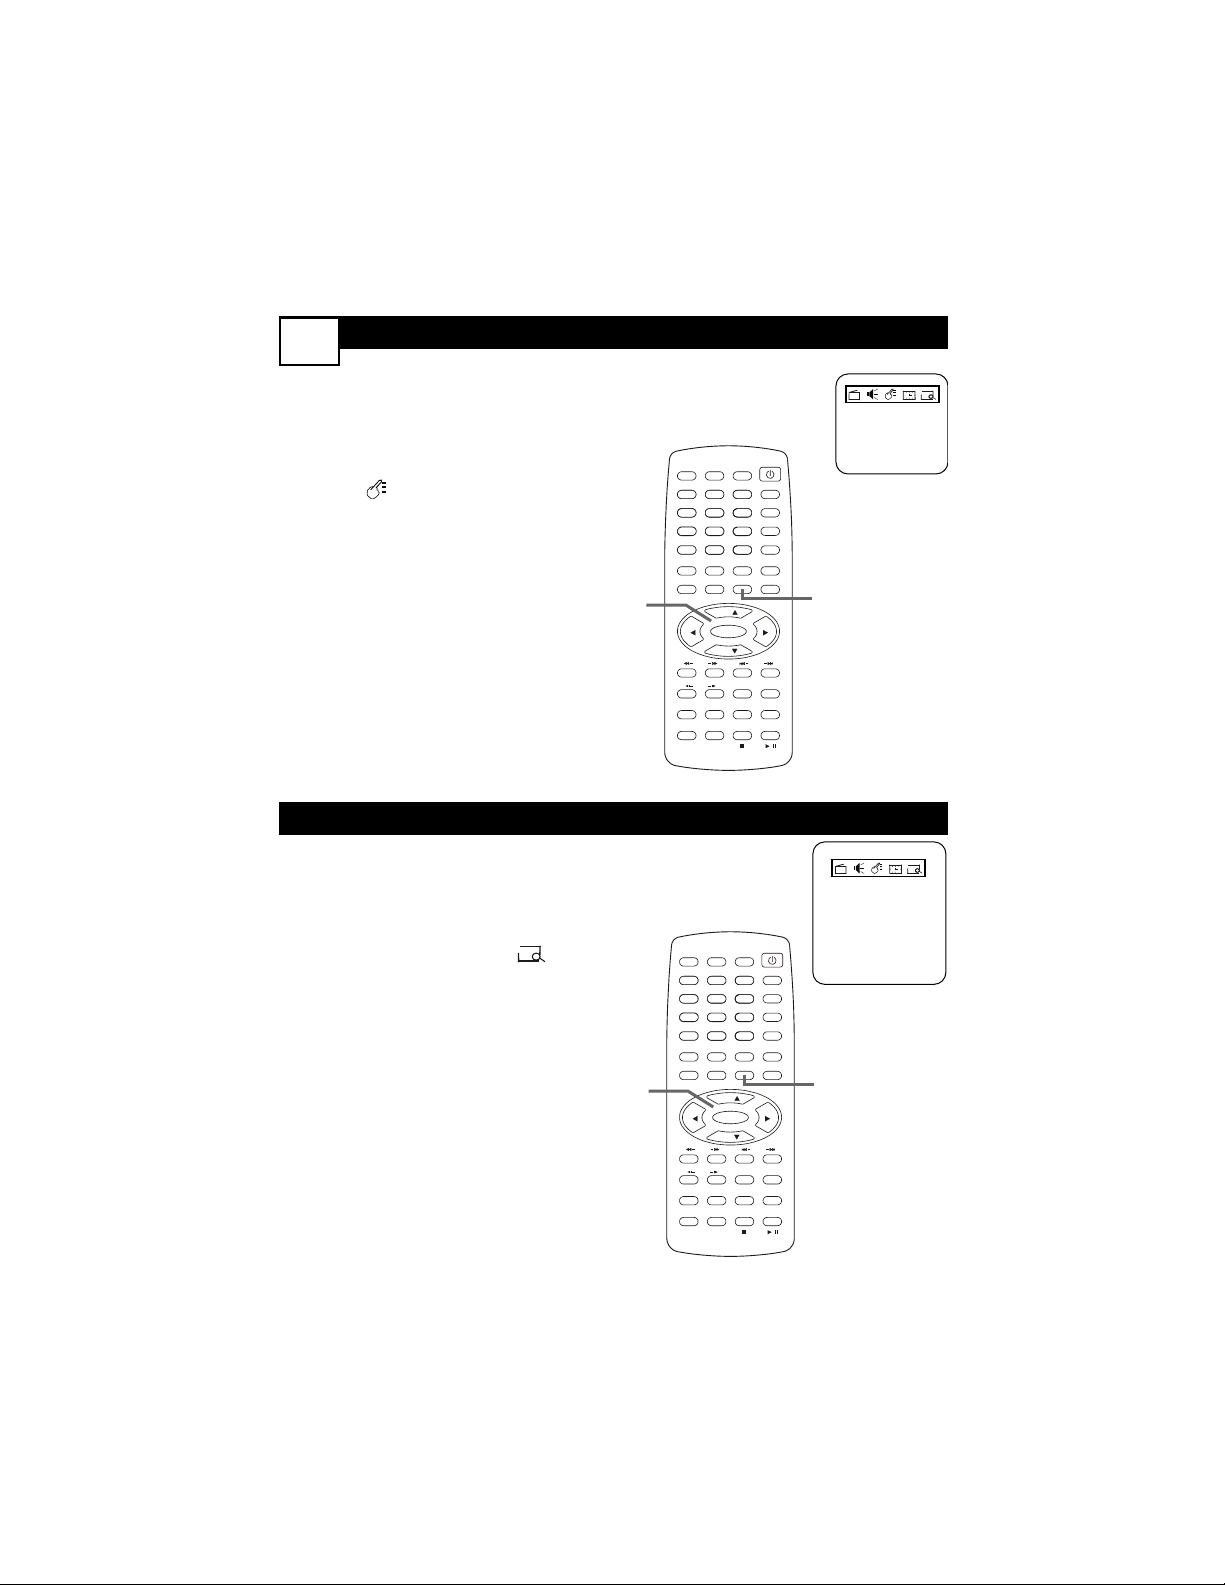
Y
ou can set the TV’s on-screen menu to
appear in English, French, or Spanish.
1
Press MENU.
2
Press 3 to select the Features
menu.
3
Press CH-p to select
Language.
4
Press 2 or 3 to select English,
Francais (French), or Espanol
(Spanish).
This changes the language for the
TV menus. It does not affect the
language of other text features,
such as Closed Captions.
F
ollow these steps to set the clock on
the TV/DVD. Once the clock is set,
press DISPLAY until you see the current
time on the screen during TV viewing.
1
Press MENU. Press 2 or 3 to
choose the Timer menu.
2
Press CH+o or CH-p to select
Clock.
3
Press 2 or 3 to change the
time minute by minute. Press
and hold 2 or 3 to change the
time quickly in 10-minute incre-
ments.The clock is only available
in “military” time (no AM or PM),
also known as 24-hour time.
• Off Time Off
• 11:30
• On Time Off
0:00
• Channel 6
Tuner Mode
• Antenna
• Clock 13:05
POWER
SLEEP
CLOCK
VOL+
PICTURE/DEL.
S.EFFECT
VOL-
MTS
MENU
TV/AV/DVD
DISPLAY
R/L
SKIP
SEARCH
MODE
SUBTITLE ZOOM
STOP
PLAY/PAUSE
/
9
6
3
MUTE
RECALL
OPEN/CLOSE
TITLE
MENU/PBC SETUP
SCAN
REPEAT
LANGUAGE
ANGLE
REPEAT
A-B
ENTER
21
FAV.
8
7
5
4
0
SLOW
DVD10+
CH+
CH-
1
2-4
POWER
SLEEP
CLOCK
VOL+
PICTURE/DEL.
S.EFFECT
VOL-
MTS
MENU
TV/AV/DVD
DISPLAY
R/L
SKIP
SEARCH
MODE
SUBTITLE ZOOM
STOP
PLAY/PAUSE
/
9
6
3
MUTE
RECALL
OPEN/CLOSE
TITLE
MENU/PBC SETUP
SCAN
REPEAT
LANGUAGE
ANGLE
REPEAT
A-B
ENTER
21
FAV.
8
7
5
4
0
SLOW
DVD10+
CH+
CH-
1
1-3
ON T
IME
10
OFF TIME
W
ith the clock set, you can set the
unit to turn off at a certain time.
1
While in the Timer menu, press
CH+o or CH-p to select Off
Time.
2
Press 2 or 3 to set Off Time to
Once, Daily, or Off.
3
Press CH-p to select the
time beneath Off Time. Press 2
or 3 to change the time.
Press and hold 2 or 3 to
change the time quickly in 10-
minute increments.
4
Press MENU to remove the
menu.The TV/DVD will turn itself
off at the time you specified.
Before it turns off, the timer
symbol will flash on the screen.
O
nce the clock is set, you can set the
unit to turn on at a certain time.
1
In the Timer menu, press CH+o
or CH-p to select On Time.
2
Press 2 or 3 to set On Time
to Once, Daily, or Off.
3
Press CH-p to select the time
beneath On Time. Press 2 or
3 to change the time. Press and
hold 2 or 3 to change the time
quickly in 10-minute increments.
4
Press CH+o or CH-p to select
Channel. Press 2 or 3 to select
the channel you want when the
power comes on.
Make sure Tuner Mode is correct,
whether you have an Antenna or
Cable TV service.
5
Turn off the TV/DVD. It will turn
on at the time you set.
• Off Time Off
• 11:30
• On Time Off
0:00
• Channel 6
Tuner Mode
• Antenna
• Clock 13:05
• Off Time Off
• 11:30
• On Time Off
0:00
• Channel 6
Tuner Mode
• Antenna
• Clock 13:05
POWER
SLEEP
CLOCK
VOL+
PICTURE/DEL.
S.EFFECT
VOL-
MTS
MENU
TV/AV/DVD
DISPLAY
R/L
SKIP
SEARCH
MODE
SUBTITLE ZOOM
STOP
PLAY/PAUSE
/
9
6
3
MUTE
RECALL
OPEN/CLOSE
TITLE
MENU/PBC SETUP
SCAN
REPEAT
LANGUAGE
ANGLE
REPEAT
A-B
ENTER
21
FAV.
8
7
5
4
0
SLOW
DVD10+
CH+
CH-
1-4
POWER
SLEEP
CLOCK
VOL+
PICTURE/DEL.
S.EFFECT
VOL-
MTS
MENU
TV/AV/DVD
DISPLAY
R/L
SKIP
SEARCH
MODE
SUBTITLE ZOOM
STOP
PLAY/PAUSE
/
9
6
3
MUTE
RECALL
OPEN/CLOSE
TITLE
MENU/PBC SETUP
SCAN
REPEAT
LANGUAGE
ANGLE
REPEAT
A-B
ENTER
21
FAV.
8
7
5
4
0
SLOW
DVD10+
CH+
CH-
4
1-3
PICTURE
SMARTTIMER
11
• Color 30
• Brightness 47
• Picture 70
• Sharpness 25
• Tint +05
• DNR Off
• C-Temp Normal
Language
• English
• C-Capt Off
• AutoLock
• SmartTimer Off
T
o adjust your TV picture, select a
channel and use the controls described
below.
1
Press MENU. The Picture menu
will be selected.
2
Press o or p to select a picture
control, then use 2 or 3 to
adjust the setting.
Color Add or eliminate color.
Brightness Brighten dark areas
of the picture.
Picture Add detail to the light
areas of the picture.
Sharpness Improve detail in the
picture.
Tint Obtain natural skin tones.
DNR (Dynamic Noise
Reduction) Choose On to
improve the picture when recep-
tion is poor by sharpening the
picture quality. Black areas of the
picture become richer in darkness
and white areas become brighter.
C.Temp (Color Temperature)
Select Normal, Cool, or Warm.
Normal whitens the whites; Cool
adds blue to the whites;Warm
adds red to the whites.
A
ctivate SmartTimer to have the unit
turn off after four hours of non-use.
1
Press MENU. Press 2 or 3 to
choose the Features menu.
2
Press CH+o or CH-p to select
SmartTimer.
3
Press 2 or 3 to select On or
Off.
POWER
SLEEP
CLOCK
VOL+
PICTURE/DEL.
S.EFFECT
VOL-
MTS
MENU
TV/AV/DVD
DISPLAY
R/L
SKIP
SEARCH
MODE
SUBTITLE ZOOM
STOP
PLAY/PAUSE
/
9
6
3
MUTE
RECALL
OPEN/CLOSE
TITLE
MENU/PBC SETUP
SCAN
REPEAT
LANGUAGE
ANGLE
REPEAT
A-B
ENTER
21
FAV.
8
7
5
4
0
SLOW
DVD10+
CH+
CH-
1
2
POWER
SLEEP
CLOCK
VOL+
PICTURE/DEL.
S.EFFECT
VOL-
MTS
MENU
TV/AV/DVD
DISPLAY
/
9
6
3
MUTE
RECALL
OPEN/CLOSE
TITLE
MENU/PBC SETUP
ENTER
21
FAV.
8
7
5
4
0
DVD10+
CH+
CH-
1
1-3
SOUND
12
T
o adjust your TV sound, use the Sound
menu as described.
1
Press MENU, then press 3 to
select the Sound menu.
2
Press CH+o or CH-p to select
a sound control, then use 2 or 3
to adjust the setting.
Bass Adjust the low frequency
sounds.
Treble Adjust high frequency
sounds.
Balance Evenly distribute the
sound to the left and right speak-
ers.
Surround Select On or Off.
AVL (Auto Volume Leveler)
Select On or Off.Turning On AVL
regulates sudden volume changes
(commercials, channel changes,
etc.).
• Bass 90
• Treble 90
• Balance +01
• Surround On
• AVL On
MTS
M
ulti-channel Television Sound (MTS)
accesses different audio options
broadcast by a TV station. For example, a
show may broadcast a different language,
or a Second Audio Program (SAP).
1
Press MTS repeatedly to choose
MONO, STEREO, SAP, or
MONO+SAP.
MONO distributes the sound via
one audio channel. STEREO pro-
duces sound through left and
right audio channels. SAP means
the program has a second audio
or language available. Choose
MONO+SAP to hear both the
original audio and the second
audio at the same time.
To use MTS, the volume cannot
be muted, and the TV station
must have different audio options
available.
15 SAP
STEREO
MONO
MONO+SAP
POWER
SLEEP
CLOCK
VOL+
PICTURE/DEL.
S.EFFECT
VOL-
MTS
MENU
TV/AV/DVD
DISPLAY
R/L
SKIP
SEARCH
MODE
SUBTITLE ZOOM
STOP
PLAY/PAUSE
/
9
6
3
MUTE
RECALL
OPEN/CLOSE
TITLE
MENU/PBC SETUP
SCAN
REPEAT
LANGUAGE
ANGLE
REPEAT
A-B
ENTER
21
FAV.
8
7
5
4
0
SLOW
DVD10+
CH+
CH-
1
1,2
POWER
SLEEP
CLOCK
VOL+
PICTURE/DEL.
S.EFFECT
VOL-
MTS
MENU
TV/AV/DVD
DISPLAY
R/L
SKIP
SEARCH
MODE
SUBTITLE ZOOM
STOP
PLAY/PAUSE
/
9
6
3
MUTE
RECALL
OPEN/CLOSE
TITLE
MENU/PBC SETUP
SCAN
REPEAT
LANGUAGE
ANGLE
REPEAT
A-B
ENTER
21
FAV.
8
7
5
4
0
SLOW
DVD10+
CH+
CH-
1
CLOSED C
APTIONS
13
C
losed Captioning (CC) displays the
voice content of TV programs on the
TV screen. Designed to help the hearing
impaired, this feature uses on-screen “text
boxes” to show dialog and conversations
while the TV program is in progress.
1
Press MENU. Press 2 or 3 to
choose the Features menu.
2
Press CH+o or CH-p to select
C. Capt.
3
Press 2 or 3 to select Off, CC1
(most commonly available), CC2
or CC3(black text box), or C.
Mute (captions will only show
when the volume is muted).
Language
• English
• C-Capt Off
• AutoLock
• SmartTimer Off
Y
ou can set the TV to turn itself off
within a certain amount of time.
1
Press SLEEP on the remote so
the SLEEP display appears.
2
Press SLEEP repeatedly to pick
the amount of time (10-120 min-
utes in 10-minute increments)
before the TV will turn off.
An on-screen count down will
appear during the last minute
before the TV shuts itself off.
Pressing SLEEP during this time
cancels the Sleep Timer.
Sleep 60 Min.
SLEEPTIMER
POWER
SLEEP
CLOCK
VOL+
PICTURE/DEL.
S.EFFECT
VOL-
MTS
MENU
TV/AV/DVD
DISPLAY
R/L
SKIP
SEARCH
MODE
SUBTITLE ZOOM
STOP
PLAY/PAUSE
/
9
6
3
MUTE
RECALL
OPEN/CLOSE
TITLE
MENU/PBC SETUP
SCAN
REPEAT
LANGUAGE
ANGLE
REPEAT
A-B
ENTER
21
FAV.
8
7
5
4
0
SLOW
DVD10+
CH+
CH-
1
1-3
POWER
SLEEP
CLOCK
VOL+
PICTURE/DEL.
S.EFFECT
VOL-
MTS
MENU
TV/AV/DVD
DISPLAY
R/L
SKIP
SEARCH
MODE
SUBTITLE ZOOM
STOP
PLAY/PAUSE
/
9
6
3
MUTE
RECALL
OPEN/CLOSE
TITLE
MENU/PBC SETUP
SCAN
REPEAT
LANGUAGE
ANGLE
REPEAT
A-B
ENTER
21
FAV.
8
7
5
4
0
SLOW
DVD10+
CH+
CH-
1,2
PICTURE
14
SOUND EFFECTS
W
hether you’re watching a movie or
sports, your TV has a video setting
to enhance your current program content.
1
Press PICTURE/DEL repeatedly
to select Multimedia, Personal,
Movies, Sports, or Weak Signal.
Multimedia Use when playing
video games connected to the TV.
Personal Uses the specific settings
for Color, Brightness, Picture,
Sharpness, and Tint as you define in
the TV’s Picture menu.
Movies Enhances the picture
when watching videotapes or
DVDs.
Sports Use when watching sport-
ing events.
Weak Signal Use when watching
programs that have poor recep-
tion.
Personal
Movies
Sports
Weak Signal
Multimedia
T
he Auto Sound feature allows the listen-
er to select between four different facto-
ry set sound options.
1
Press S. EFFECT repeatedly to
choose Personal,Voice, Music, or
Theatre.
Personal Uses the specific settings
for Bass, Treble, and Balance as you
define in the Sound menu.
Voice Use if a program is mostly
dialog.
Music Use for musical program-
ming with little dialog.
Theatre Enhances the sound when
watching movies.
Personal
Theatre
Music
Voice
POWER
SLEEP
CLOCK
VOL+
PICTURE/DEL.
S.EFFECT
VOL-
MTS
MENU
TV/AV/DVD
DISPLAY
R/L
SKIP
SEARCH
MODE
SUBTITLE ZOOM
STOP
PLAY/PAUSE
/
9
6
3
MUTE
RECALL
OPEN/CLOSE
TITLE
MENU/PBC SETUP
SCAN
REPEAT
LANGUAGE
ANGLE
REPEAT
A-B
ENTER
21
FAV.
8
7
5
4
0
SLOW
DVD10+
CH+
CH-
1
POWER
SLEEP
CLOCK
VOL+
PICTURE/DEL.
S.EFFECT
VOL-
MTS
MENU
TV/AV/DVD
DISPLAY
/
9
6
3
MUTE
RECALL
OPEN/CLOSE
TITLE
MENU/PBC SETUP
ENTER
21
FAV.
8
7
5
4
0
DVD10+
CH+
CH-
1
AUTO
LOCK
TM
SECRET C
ODE
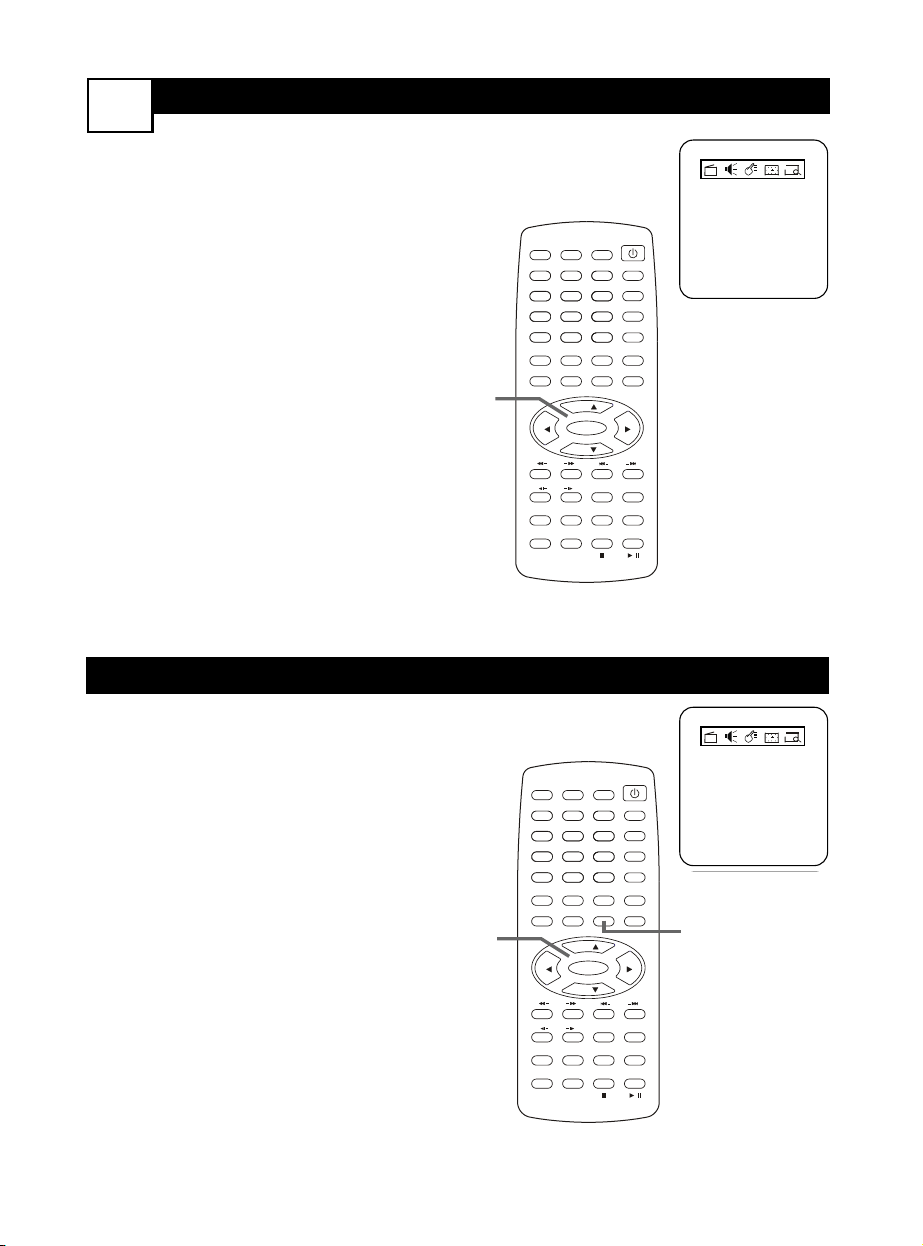
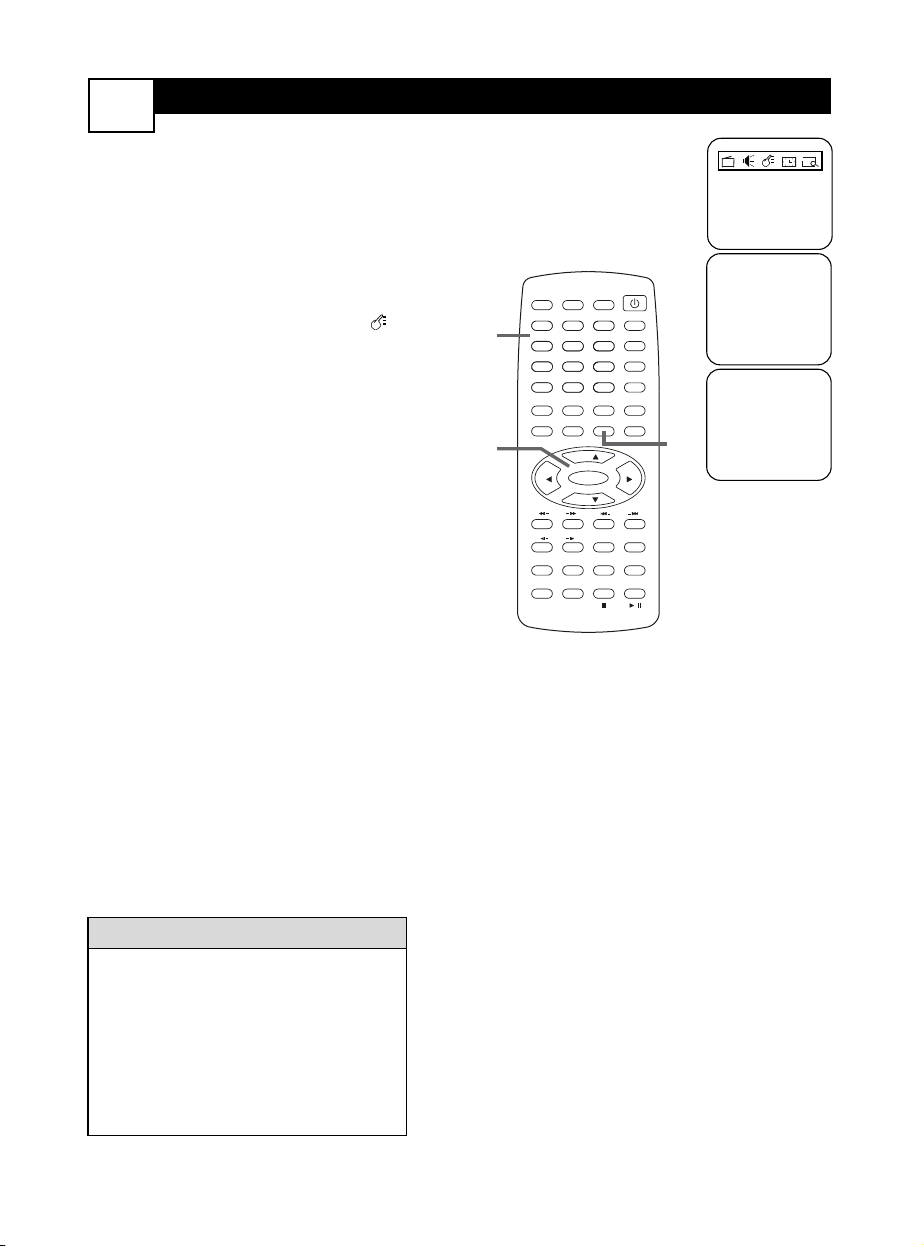
15
A
utoLock
TM
enables you to block or cen-
sor TV programming, preventing chil-
dren from watching programming you
consider inappropriate for them.
You will need an access code to set up
AutoLock
TM
or to watch blocked program-
ming.To set a code, follow these steps.
1
Press MENU, then press 2 or 3
to go to the Features menu.
2
Press CH+o or CH-p to high-
light AutoLock, then press
ENTER.
3
The screen will read, “Enter
Secret Code - - - - .” Use the
Number buttons to enter 0, 0,
0, 0. “XXXX” appears on the
screen as you enter the numbers.
If you enter an incorrect code,
“Incorrect Secret Code” will
appear. Press MENU to return to
the Features menu.
POWER
SLEEP
CLOCK
VOL+
PICTURE/DEL.
S.EFFECT
VOL-
MTS
MENU
TV/AV/DVD
DISPLAY
R/L
SKIP
SEARCH
MODE
SUBTITLE ZOOM
STOP
PLAY/PAUSE
/
9
6
3
MUTE
RECALL
OPEN/CLOSE
TITLE
MENU/PBC SETUP
SCAN
REPEAT
LANGUAGE
ANGLE
REPEAT
A-B
ENTER
21
FAV.
8
7
5
4
0
SLOW
DVD10+
CH+
CH-
1
1,2
3
Language
• English
• C-Capt Off
• AutoLock
• SmartTimer Off
Enter Secret Code
_ _ _ _
Incorrect
Secret code
To change the code later, highlight
AutoLock
TM
as detailed in steps 1-2.
While it is highlighted, press CHAN-
NEL o on the TV/DVD and VOL. +
on the remote at the same time.
Next use the Number buttons to
enter a new four-digit code. Press
ENTER to save the new code.
HELPFUL HINTS

CH LOCK
16
F
ollow these steps to select the channels
you want to block out or censor.
Once you’ve entered your access code
and the AutoLock
TM
menu is on the
screen:
1
Press CH+o or CH-p to select
CH lock, then press ENTER.
2
Press CH+o or CH-p to select
Tuner Mode, then press 2 or 3
to choose whether you receive
programming from an Antenna or
Cable TV service.
3
Press CH+o or CH-p to select
Channel, then press 2 or 3 to
choose the channel number you
want to block.
4
Press CH+o or CH-p to select
Lock, then press 2 or 3 to
choose On (block the channel
from viewing) or Off (enable
viewing).
5
Repeat steps 3-4 as necessary to
block other channels.
6
Press CH+o or CH-p to select
CH lock, then press 2 or 3 to
turn it On or Off. Choose On to
actually block all the channels you
selected. Choose Off to allow
viewing for now.
When CH lock is On, you
cannot access the Preset
menu.
• CH lock On
Tuner Mode
• Cable
• Channel 3
• Lock On
POWER
SLEEP
CLOCK
VOL+
PICTURE/DEL.
S.EFFECT
VOL-
MTS
MENU
TV/AV/DVD
DISPLAY
R/L
SKIP
SEARCH
MODE
SUBTITLE ZOOM
STOP
PLAY/PAUSE
/
9
6
3
MUTE
RECALL
OPEN/CLOSE
TITLE
MENU/PBC SETUP
SCAN
REPEAT
LANGUAGE
ANGLE
REPEAT
A-B
ENTER
21
FAV.
8
7
5
4
0
SLOW
DVD10+
CH+
CH-
1-6
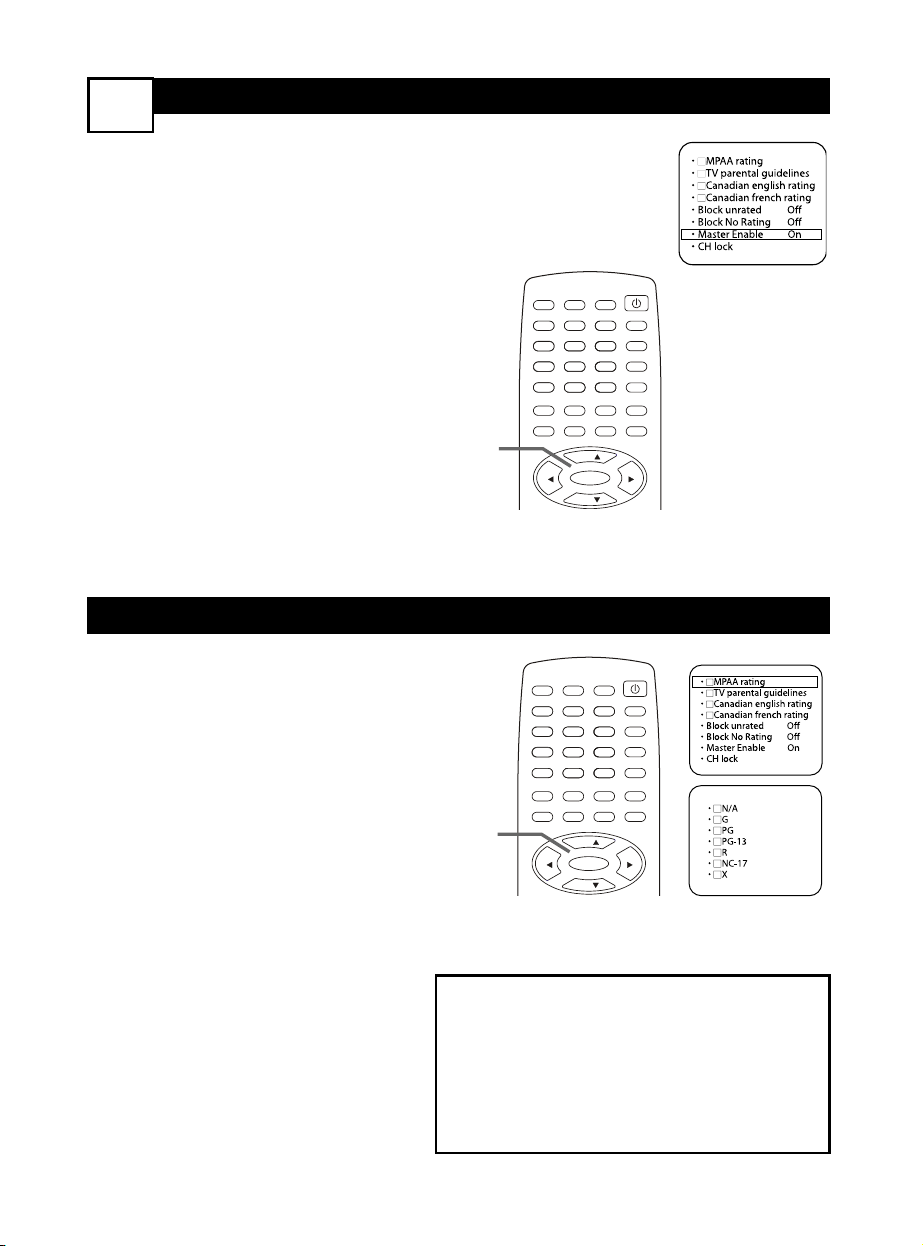
MASTER ENABLE
17
MPAA RATINGS
M
aster Enable is like a “master
switch” for AutoLock
TM
.When On,TV
programming will be blocked as you have
specified for MPAA rating,TV parental
guidelines, Canadian english rating, and
Canadian french rating.
Once you’ve entered your access code
and the AutoLock
TM
menu appears:
1
Press CH+o or CH-p to select
Master Enable.
2
Press 2 or 3 to choose On if
you want to activate your
AutoLock
TM
settings.To disable
your AutoLock
TM
settings, choose
Off.
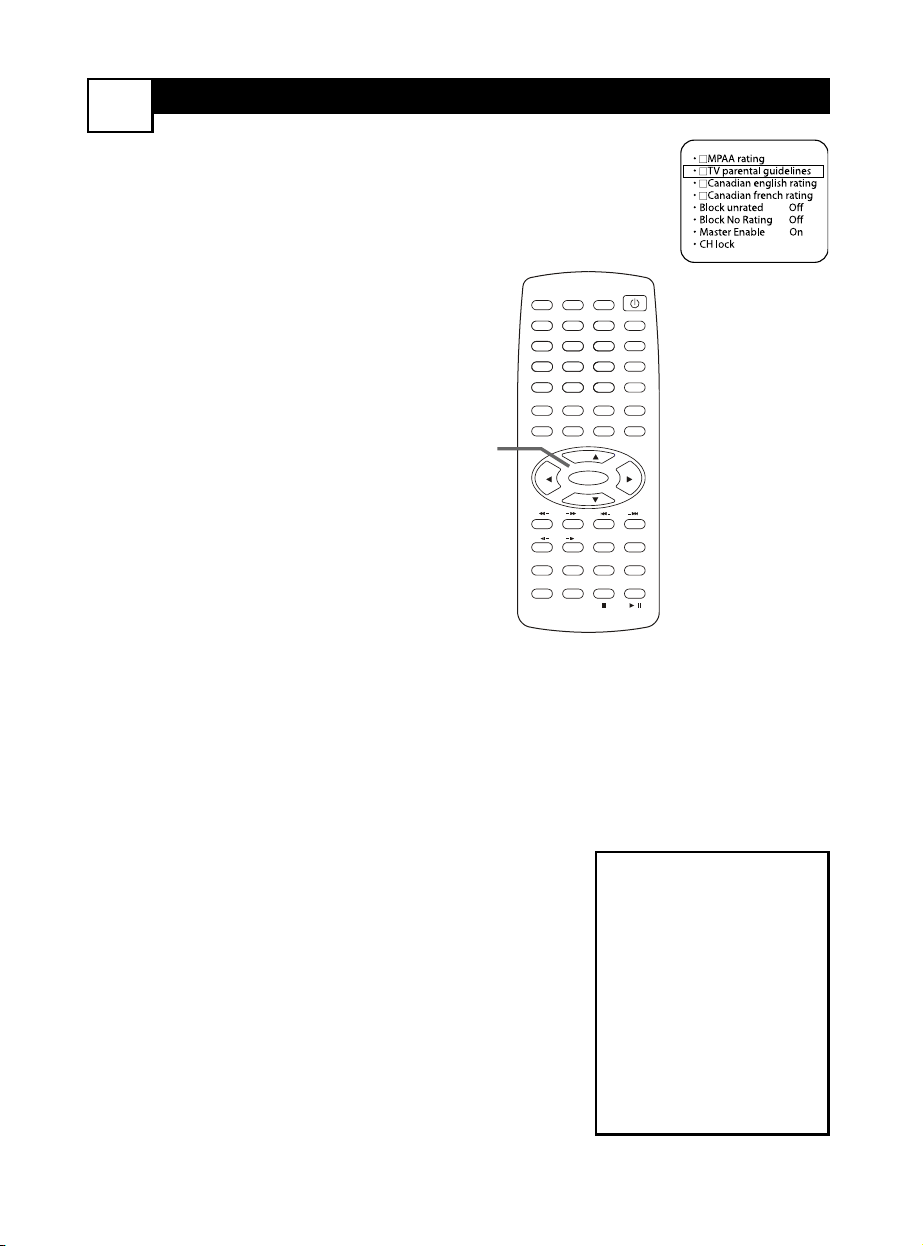
Y
ou can block programming based on
MPAA (Motion Pictures Association of
America) Ratings. Once you’ve entered
your access code and the AutoLock
TM
fea-
tures are displayed on the screen:
1
Press CH+o or CH-p to select
MPAA rating.
2
Press ENTER to see the options
(N/A, G, PG, PG-13, R, NC-17,
or X).
3
Press CH+o or CH-p to
choose a rating. Each rating can
be turned ON or checked
(which will block viewing) or OFF
(which will allow viewing).
4
Use ENTER to turn the rating
ON (checked) or OFF.
When a rating is blocked, any
higher level will also be blocked
from viewing. (For example, if R is
blocked, NC-17 and X will be
blocked automatically.)
• N/A - Not active; all ratings are viewable.
• G - General Audience
• PG - Parental Guidance suggested.
• PG-13 - Unsuitable for children under 13
• R - Restricted; under 17 requires accompa-
nying parent or adult guardian
• NC-17 - No one under 17 admitted
• X - Mature audience only
POWER
SLEEP
CLOCK
VOL+
PICTURE/DEL.
S.EFFECT
VOL-
MTS
MENU
TV/AV/DVD
DISPLAY
/
9
6
3
MUTE
RECALL
OPEN/CLOSE
TITLE
MENU/PBC SETUP
ENTER
21
FAV.
8
7
5
4
0
DVD10+
CH+
CH-
1,2
POWER
SLEEP
CLOCK
VOL+
PICTURE/DEL.
S.EFFECT
VOL-
MTS
MENU
TV/AV/DVD
DISPLAY
/
9
6
3
MUTE
RECALL
OPEN/CLOSE
TITLE
MENU/PBC SETUP
ENTER
21
FAV.
8
7
5
4
0
DVD10+
CH+
CH-
1-4
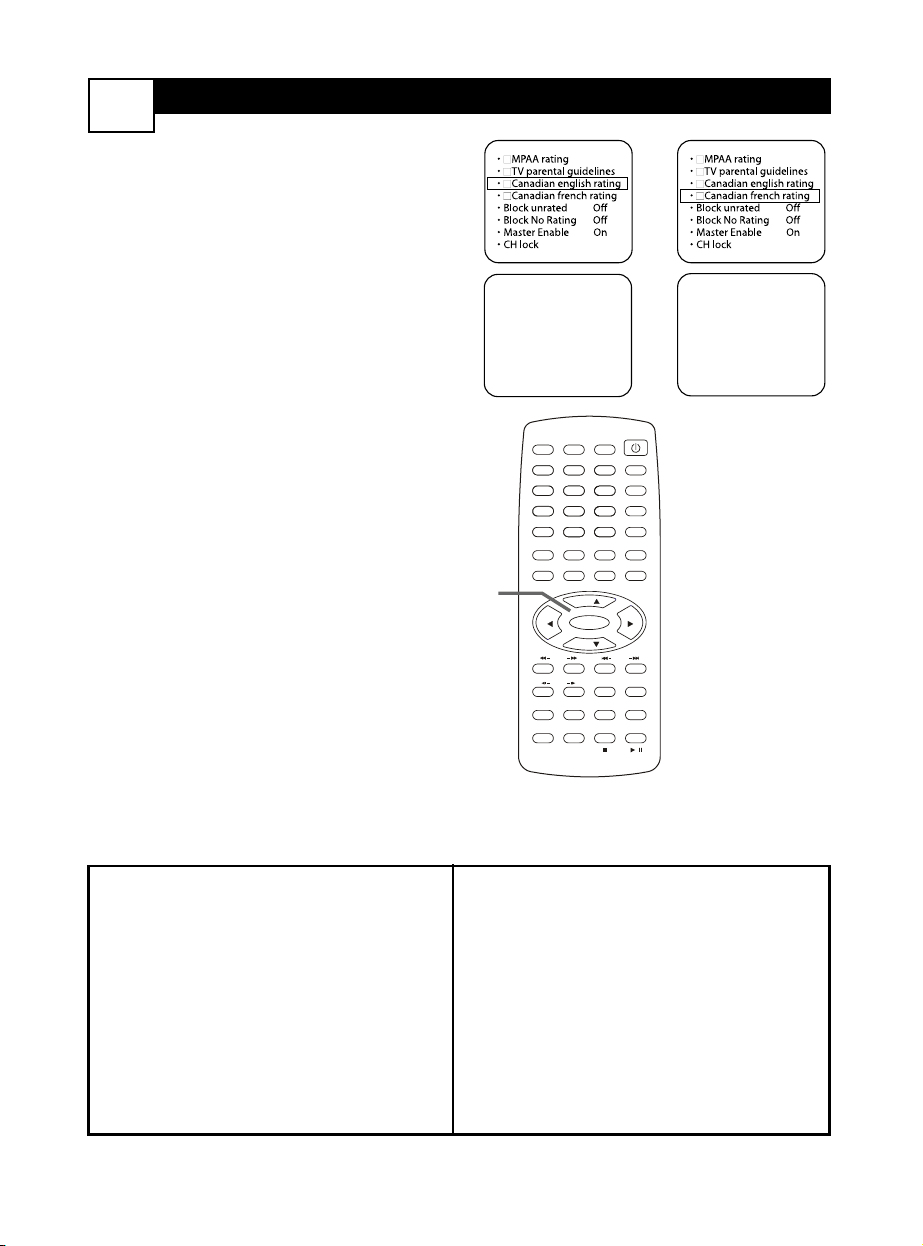
TV PARENTAL GUIDELINES
18
A
utoLock
TM
can block programming
based on Parental Guideline ratings set
by the TV industry.
Once you’ve entered your access code
and the AutoLock
TM
features are on the
screen:
1
Press CH+o or CH-p to select
TV parental guidelines, then
press ENTER.
2
Press CH+o or CH-p to
choose the rating level at which
you want to block viewing, then
press ENTER. Programs rated at
this level or higher will be
blocked.
Choose None to disable blocking
and view all rating levels.
3
Sub-ratings are available for TV-
Y7,TV-PG,TV-14 or TV-MA:
F (fantasy or make-believe);
V (violence); S (sex); L (coarse
language); or D (suggestive dia-
log).
Press CH+o or CH-p to
choose CONTENT, then press
ENTER.
4
Press CH+o or CH-p to
choose a rating (TV-PG, etc.),
then press 3.
5
Press CH+o or CH-p to
choose a sub-rating (Violence,
etc.). Press ENTER repeatedly to
Block or View it.
Press 2 to go back and choose
another rating for which you
want to specifically adjust the
sub-ratings. Repeat steps 4-5 as
necessary to block or view all the
ratings and sub-ratings.
• None - View all ratings
• TV-Y - Appropriate for
all children
• TV-Y7 - Appropriate for
children seven and older
• TV-G - General
Audience
• TV-PG - Parental
Guidance suggested.
• TV-14 - Unsuitable for
children under 14
• TV-MA - Mature audi-
ence only
POWER
SLEEP
CLOCK
VOL+
PICTURE/DEL.
S.EFFECT
VOL-
MTS
MENU
TV/AV/DVD
DISPLAY
R/L
SKIP
SEARCH
MODE
SUBTITLE ZOOM
STOP
PLAY/PAUSE
/
9
6
3
MUTE
RECALL
OPEN/CLOSE
TITLE
MENU/PBC SETUP
SCAN
REPEAT
LANGUAGE
ANGLE
REPEAT
A-B
ENTER
21
FAV.
8
7
5
4
0
SLOW
DVD10+
CH+
CH-
1-5
CANADIAN ENGLISH OR
FRENCH RATINGS
19
C
anadian movie ratings differ from
those used in the United States. Follow
these steps to block TV viewing according
to Canadian standards. Once you’ve
entered your access code and the
AutoLock
TM
features are on the screen:
1
Press CH+o or CH-p to select
Canadian English rating or
Canadian French rating, then
press ENTER.
2
Press CH+o or CH-p to
choose the level at which you
want to block viewing, then press
ENTER. Programs rated at this
level or higher will be blocked.TV
shows with a lower rating may be
viewed.
Canadian English Ratings
• E - Exempt - Unblocks all ratings and
enables viewing.
• C - Child-appropriate programming
• C8+ - Appropriate for children 8 or
older
• G - General programming; suitable for
all audiences
• PG - Parental Guidance suggested
• 14+ - Viewers should be 14 or older.
• 18+ - Viewers should be 18 or older.
Canadian French Ratings
• E - Exémptees
• G - Général
• 8 ans + - Général - Déconseillé aux
jeunes enfants
• 13 ans + - Gette émission peut convenir
aux enfants de moins de 13 ans
• 16 ans + - Gette émission ne convenient
pas aux moins de 16 ans
• 18 ans + - Gette émission est réservée
aux adult
POWER
SLEEP
CLOCK
VOL+
PICTURE/DEL.
S.EFFECT
VOL-
MTS
MENU
TV/AV/DVD
DISPLAY
R/L
SKIP
SEARCH
MODE
SUBTITLE ZOOM
STOP
PLAY/PAUSE
/
9
6
3
MUTE
RECALL
OPEN/CLOSE
TITLE
MENU/PBC SETUP
SCAN
REPEAT
LANGUAGE
ANGLE
REPEAT
A-B
ENTER
21
FAV.
8
7
5
4
0
SLOW
DVD10+
CH+
CH-
1,2
• PE
• PC
• PC8+
• PG
• PPG
• P14+
• P18+
• PE
• PG
• P8 ans+
• P13 ans+
• P16 ans+
• P18 ans+
OR
GENERAL D
ISC INFORMATION
20
Playable Discs
In DVD mode, this TV/DVD will play
the Disc types shown at right. Finalize
CD-Rs, CD-RWs, DVD+Rs, and
DVD+RWs before playing them. A
DVD also must meet the require-
ments for Region Codes and Color
Systems as described below.
Available Disc Features...
Features described in this manual are
not available on every Disc. An “”
will appear in the top left corner of
the screen if you try a feature that is
not available. Some features are avail-
able only during play, while others are
available only if play is stopped. If you
cannot access a feature, try stopping
or starting play, or changing Discs,
then try the feature again.
Region Codes
This TV/DVD has a Region One (1)
DVD Player. DVDs must be labeled
for ALL regions or for Region 1 in
order to play. Look for the symbols at
right on your DVDs.
Color Systems
DVDs are recorded in different color
systems. The most common are
NTSC (for the United States and
North America), PAL, and SECAM.
This TV/DVD will play NTSC and PAL
Discs. Set TV TYPE according to the
DVDs you play most often.
Cleaning a Disc
• Use a soft, dry cloth to wipe Discs.
• Wipe Discs in a straight line from
the center to the edge. Never wipe
Discs in a circular motion.
• Do not use detergent or abrasive
cleaning agents.
• Handle Discs by the edges so finger-
prints and dust do not adhere to
the surfaces of the Discs.
• Always store a Disc in its protective
case when it is not in use.
MP3/JPEG: Digital audio files (MP3) or pictures
(JPEGs) recorded on a CD-R (Compact Disc
Recordable), CD-RW (Compact Disc
Rewritable), or Picture CD
Video CDs
Region Codes
Recordable
ReWritable
DVD: Prerecorded
Digital Video Discs
DVD+R (Recordable once)
or DVD+RW (Rewritable)
Audio CDs
DVD FEATURES
21
Disc Menus
Press TITLE or
MENU/PBC to see
the main Disc menu.
These vary among
Discs, depending on the
features available on
the Disc.
Use CH+o, CH-p, 2,
3, or the Number but-
tons to select items in
the menu, then press
ENTER. Continue until
you set up all the fea-
tures you want or until
play begins.
Follow the information
supplied on the individ-
ual Disc, as each will be
different.
Playback Control
(VCDs 2.0 or above)
Press MENU/PBC to
turn Playback Control
(PBC) on or off.
Choosing On will acti-
vate the VCD’s on-
screen menu if avail-
able.
Use the Number but-
tons to play a Track
from the menu.
Follow the information
on the VCD, as each
will be different.
Selecting Tracks,
Chapters,Titles
Press a Number but-
ton during play to
select a Track or
Chapter. Use the
Number buttons when
play is stopped to
select a new Title.
To select a double-digit
item, use FAV/DVD10+.
For example, to select
chapter 12, press
FAV/DVD10+, then 2.
For Track 28, press
FAV/DVD10+ twice,
then 8.
Displays
Press DISPLAY
repeatedly to see the
elapsed or remaining
playing time of a DVD
Title or Chapter or a
Video CD Track.
Press DISPLAY to turn
off the displays or to
activate Pro Logic on a
Video CD.
POWER
SLEEP
CLOCK
VOL+
PICTURE/DEL.
S.EFFECT
VOL-
MTS
MENU
TV/AV/DVD
DISPLAY
R/L
SKIP
SEARCH
MODE
SUBTITLE ZOOM
STOP
PLAY/PAUSE
/
9
6
3
MUTE
RECALL
OPEN/CLOSE
TITLE
MENU/PBC SETUP
SCAN
REPEAT
LANGUAGE
ANGLE
REPEAT
A-B
ENTER
21
FAV.
8
7
5
4
0
SLOW
DVD10+
CH+
CH-
DVD FEATURES
22
Scanning
Press SCAN 1h or
SCAN g6 repeatedly
to search or scan a
Disc during play.
Use SCAN 1h to
search backward at 2,
4, 8, 16, or 32 times the
normal speed.
Use SCAN g6 to
fast forward play at 2,
4, 8, 16, or 32 times the
normal playing speed.
Sound will be mute
during scanning.
To resume normal play,
press PLAY/PAUSE
M.
Audio Language
Some DVDs have dif-
ferent audio languages
available.This varies by
Disc, but could include
foreign languages, direc-
tor’s commentary, or
soundtracks. Press
LANGUAGE repeat-
edly during play to
select one of the lan-
guages available on the
Disc.
Skipping Chapters
or Tracks
Press SKIP j or
SKIP G during play
to move to the previ-
ous or next Chapter or
Track.
Press SKIP j once
to go to the beginning
of the current Track or
Chapter. Quickly press
it repeatedly to go to
previous Tracks or
Chapters.
Zoom/Reduce
Press ZOOM repeat-
edly during DVD or
Video CD play to
enlarge or reduce the
picture.
The blue box that
appears inside a gray
box during zoomed
play indicates the loca-
tion of the zoomed
area within the overall
picture. Press CH+o
or CH-p to move
around in the zoomed
picture.
POWER
SLEEP
CLOCK
VOL+
PICTURE/DEL.
S.EFFECT
VOL-
MTS
MENU
TV/AV/DVD
DISPLAY
R/L
SKIP
SEARCH
MODE
SUBTITLE ZOOM
STOP
PLAY/PAUSE
/
9
6
3
MUTE
RECALL
OPEN/CLOSE
TITLE
MENU/PBC SETUP
SCAN
REPEAT
LANGUAGE
ANGLE
REPEAT
A-B
ENTER
21
FAV.
8
7
5
4
0
SLOW
DVD10+
CH+
CH-
Stop/Resume Play
For a DVD or VCD,
press STOP C once;
when you resume play,
it will start at the same
point. If you press
STOP C twice, play
will start at the begin-
ning of the Disc when
you resume play.
You cannot select the
PREFERENCE PAGE in
the Setup menu if play
has not been stopped
completely (by pressing
STOP C twice).
DVD FEATURES
23
Slow Motion
Press SLOW during
play to begin slow
motion playback.
You can play a Disc for-
ward or backward at
1/2, 1/4, 1/8, or 1/16 the
normal speed. (Reverse
slow motion is available
only on DVDs.)
Sound will be mute
during slow motion
play.
To resume play at the
normal speed, press
PLAY/PAUSE M.
R/L (right/left)
Some Audio CDs and
Video CDs are record-
ed on multiple audio
channels. For example,
music may be on the
left channel while
vocals are on the right
channel. Press R/L
repeatedly during play
to choose which chan-
nels you want to hear
(MONO LEFT, MONO
RIGHT, MIX-MONO,
or STEREO). Check
your Disc case for
details.
Angles
Press ANGLE repeat-
edly during play to see
the movie from a differ-
ent angle or perspec-
tive.A DVD must have
different angles record-
ed. If it does not, will
show in the screen’s
top left corner.
Repeat Play
Press REPEAT contin-
uously to play a Track,
Chapter,Title, or Disc
repeatedly. Choose Off
to cancel Repeat play.
Your Repeat setting will
appear in the screen’s
top left corner.
Repeat a Segment
To play a portion of a
Disc over and over,
press REPEAT A-B
during play at the
beginning of the seg-
ment. At the end of
the segment, press
REPEAT A-B again.
The segment will play
repeatedly. To cancel
Repeat play, press
REPEAT A-B again.
Subtitles
Some DVDs have subti-
tles in multiple lan-
guages. Options vary by
Disc. Press SUBTI-
TLE during play to
select a language for
Subtitles, or to turn off
Subtitles.
POWER
SLEEP
CLOCK
VOL+
PICTURE/DEL.
S.EFFECT
VOL-
MTS
MENU
TV/AV/DVD
DISPLAY
R/L
SKIP
SEARCH
MODE
SUBTITLE ZOOM
STOP
PLAY/PAUSE
/
9
6
3
MUTE
RECALL
OPEN/CLOSE
TITLE
MENU/PBC SETUP
SCAN
REPEAT
LANGUAGE
ANGLE
REPEAT
A-B
ENTER
21
FAV.
8
7
5
4
0
SLOW
DVD10+
CH+
CH-
MP3/JPEG PLAYBACK
24
T
he TV/DVD will play CD-Rs that contain
MP3 (music) or JPEG (picture) files.
1
After you insert a CD-R, a menu
will appear, showing the Folders
(groups of Files) or Files (music or
pictures) available.
2
While play is stopped, press
CH+o or CH-p to select a
Folder or File. Press ENTER to
open the Folder or play the File.
To go to a previous Folder level
while play is stopped, select the
top item in the column and press
ENTER.
JPEG Zoom/Reduce
Press ZOOM to enlarge an image
125%, 150%, or 200% or to reduce the
image 50% or 75%. Press 2, 3, CH+o,
or CH-p to move the image around.
Search Mode
Press SEARCH MODE during play to
choose a new Track or select a specific
elapsed playing time (MP3 Tracks only).
With either the Track or Time space
highlighted, use the Number buttons to
enter the Track or Time you want.
Rotate a JPEG image
During play, press 2 or 3 to rotate an
image. Use CH+o or CH-p to flip an
image vertically or horizontally.
Repeat Play
Press REPEAT to choose: SINGLE
(play will stop after the current File or
Track plays); FOLDER (plays all files in
the Folder once); REPEAT ONE (plays a
single Track or image repeatedly);
REPEAT FOLDER (plays all files in the
Folder repeatedly); SHUFFLE (plays all
files in the Folder in random order);
REPEAT ALL (plays all JPEG files repeat-
edly); RANDOM (plays Tracks in the
Folder); and REPEAT OFF.
Kodak Picture CD
This unit will play Kodak Picture CDs,
but the menus and features may differ.
POWER
SLEEP
CLOCK
VOL+
PICTURE/DEL.
S.EFFECT
VOL-
MTS
MENU
TV/AV/DVD
DISPLAY
R/L
SKIP
SEARCH
MODE
SUBTITLE ZOOM
STOP
PLAY/PAUSE
/
9
6
3
MUTE
RECALL
OPEN/CLOSE
TITLE
MENU/PBC SETUP
SCAN
REPEAT
LANGUAGE
ANGLE
REPEAT
A-B
ENTER
21
FAV.
8
7
5
4
0
SLOW
DVD10+
CH+
CH-
2
SEARCH M
ODE
25
D
ifferent Search features are available
for DVDs and Video CDs.
1
Press SEARCH MODE during
play.
2
Press CH+o or CH-p to select a
feature, then press 3.
3
TITLE, CHAPTER,TRACK: Use
the Number buttons to choose a
different Title, Chapter, or Track.The
number of available Titles, Chapters,
or Tracks shows in the display. (The
FAV/DVD10+ button has no opera-
tion.)
AUDIO or SUBTITLE: Press
CH+o or CH-p to select a lan-
guage for the Audio or Subtitles,
then press ENTER.
ANGLE: Use the Number buttons
to select an available angle.The num-
ber of available angles appears in the
display. Multiple angles must be
recorded on the DVD. See the DVD
for availability.
TT TIME, CH TIME, DISC TIME,
or TRACK TIME: Use the Number
buttons to enter the desired elapsed
playing time (in hours, minutes, and
seconds) of a DVD Title (TT or Title
Total); DVD Chapter (CH); Video
CD Track, or Video CD Disc. Play
will skip to that point on the Disc.
REPEAT: Press CH+o or CH-p
to play a Chapter,Title,Track, or
Disc (ALL) repeatedly. Select OFF to
disable Repeat play.
Then press ENTER.
(For VCDs, PBC must be OFF.)
TIME DISP: Press CH+o or CH-
p to choose whether you want to
see the elapsed or remaining playing
time of a Title, Chapter, or Track at
the bottom of the Search Mode dis-
play.Then press ENTER.
4
Press SEARCH MODE again to
remove the display.
TITLE 01/01
CHAPTER 0_/66
AUDIO 5.1 CH ENGLISH
SUBTITLE ENGLISH
MENU
BITRATE 48
llllllll TITLE ELAPSED 0:21:40
POWER
SLEEP
CLOCK
VOL+
PICTURE/DEL.
S.EFFECT
VOL-
MTS
MENU
TV/AV/DVD
DISPLAY
R/L
SKIP
SEARCH
MODE
SUBTITLE ZOOM
STOP
PLAY/PAUSE
/
9
6
3
MUTE
RECALL
OPEN/CLOSE
TITLE
MENU/PBC SETUP
SCAN
REPEAT
LANGUAGE
ANGLE
REPEAT
A-B
ENTER
21
FAV.
8
7
5
4
0
SLOW
DVD10+
CH+
CH-
2,3
3
1,4
DVD GENERAL
SETUP
26
1
Press SETUP. Press 2 or 3 to go
to the GENERAL SETUP PAGE.
2
Press CH+o or CH-p to select a
feature, then press 3.
3
Press CH+o or CH-p to choose
a setting, then press ENTER.
TV DISPLAY
NORMAL/PS (panscan):Trims the pic-
ture to fit the TV screen.
NORMAL/LB (letterbox):Widens the
picture, displays black bars at the top
and bottom of the screen.
WIDE: If your DVD/VCD is recorded
in widescreen format, the image will
be squeezed to fit the TV screen. If the
image is distorted, choose
NORMAL/PS or NORMAL/LB
instead.
The format must be available on the
Disc.
ANGLE MARK Select ON to see
the angle symbol on the screen
when different camera angles are
available on a DVD. (Press ANGLE
on the remote to choose a different
perspective or angle.)
OSD LANG The Setup menus
(on-screen displays) can be in
English, French, or Spanish.
CAPTIONS Choose ON to see
captions for Discs.
Different than
subtitles, captions show sound effects
in addition to spoken text. Captions
must be available on the Disc. Closed
Captions must be on in TV mode.
LAST MEMORY Choose ON if
you want a DVD to resume play at
the same point when you switch
from TV mode back to DVD mode.
4
Press SETUP to remove the menu.
POWER
SLEEP
CLOCK
VOL+
PICTURE/DEL.
S.EFFECT
VOL-
MTS
MENU
TV/AV/DVD
DISPLAY
R/L
SKIP
SEARCH
MODE
SUBTITLE ZOOM
STOP
PLAY/PAUSE
/
9
6
3
MUTE
RECALL
OPEN/CLOSE
TITLE
MENU/PBC SETUP
SCAN
REPEAT
LANGUAGE
ANGLE
REPEAT
A-B
ENTER
21
FAV.
8
7
5
4
0
SLOW
DVD10+
CH+
CH-
1-3
1,4
TV DISPLAY
ANGLE MARK
OSD LANG
CAPTIONS
LAST MEMORY
- - GENERAL SETUP PAGE - -
GO TO GENERAL SETUP PAGE
DVD A
NALOG AUDIO SETUP
27
1
Press SETUP. Press 2 or 3 to go to
the ANALOG AUDIO SETUP
PAGE .
2
Press CH+o or CH-p to select a
feature, then press 3.
3
Press CH+o or CH-p to select the
setting you want (as described below),
then press ENTER.
DOWNMIX: Choose LT/RT if you
connected the TV/DVD to a Stereo
that has Dolby Pro Logic.
Select STEREO if you connected the
TV/DVD to an audio system that does
not have Dolby Pro Logic.
POST DRC (Dynamic Range
Control): Choose ON to level the vol-
ume during Disc play, reducing the
range between loud and soft sounds.
To hear the highs and lows of the vol-
ume, choose OFF. AUTO distributes
the sound as it is received.
4
Press SETUP to remove the menu.
DOWNMIX LTIRT
POST DRC STEREO
- - ANALOG AUDIO SETUP PAGE - -
SET STEREO DOWNMIX
POWER
SLEEP
CLOCK
VOL+
PICTURE/DEL.
S.EFFECT
VOL-
MTS
MENU
TV/AV/DVD
DISPLAY
/
9
6
3
MUTE
RECALL
OPEN/CLOSE
TITLE
MENU/PBC SETUP
ENTER
21
FAV.
8
7
5
4
0
DVD10+
CH+
CH-
1-3
1,4
TV TYPE PAL
MULTI
NTSC
- - VIDEO SETUP PAGE - -
SET TV STANDARD
1
Press SETUP, then press 2 or 3 to
go to the VIDEO SETUP PAGE.
2
Press CH-p to select TV TYPE,
then press 3.
3
Press CH+o or CH-p to choose
PAL, MULTI, or NTSC.
DVDs are recorded in a color sys-
tem, usually NTSC in the United
States.The color system will be iden-
tified on the DVD or its case.
Set TV TYPE to the type of DVDs
you will play (PAL or NTSC). If you
plan to play both, choose MULTI.The
unit will recognize and play both
types of Discs.
4
Press SETUP to remove the menu.
POWER
SLEEP
CLOCK
VOL+
PICTURE/DEL.
S.EFFECT
VOL-
MTS
MENU
TV/AV/DVD
DISPLAY
/
9
6
3
MUTE
RECALL
OPEN/CLOSE
TITLE
MENU/PBC SETUP
ENTER
21
FAV.
8
7
5
4
0
DVD10+
CH+
CH-
1-3
1,4
DVD VIDEO SETUP
DIGITAL
SETUP
28
1
Press SETUP. Press 2 or 3 to
choose DIGITAL SETUP.
2
Press CH+o or CH-p to select
a feature, then press 3.
3
Press CH+o or CH-p to
select a setting. Press ENTER.
DUAL MONO: Adjust when
Disc sound is in Stereo (from
left/right channels).
Choose STEREO to separate the
left/right sounds into the
left/right speakers. Choose L-
MONO or R-MONO to hear
either the left or right channel at
both speakers. Choose MIX-
MONO to hear a mixture of the
left and right channels at each
speaker.
DYNAMIC: If your Disc has
Dolby Digital sound, use DYNAM-
IC to minimize volume extremes.
Adjust the gap between soft and
loud sounds by choosing a ratio
between 1/8 and FULL, or choose
OFF.
SPDIF OUTPUT (Sony-Philips
Digital Interface): Choose SPDIF
OFF if the TV/DVD is connected
to a Stereo using the red/white
AUDIO OUTPUT jacks.
Choose SPDIF RAW if it’s con-
nected to an audio system using
the DVD DIGITAL OUTPUT
COAXIAL jack.
Discs are recorded in a certain
sampling rate.The higher the rate,
the better the sound quality.
Choose PCM/96K if you play
Discs recorded at the high rate of
96 kHz. Otherwise, choose
PCM/48K.
4
Press SETUP to remove the
menu.
POWER
SLEEP
CLOCK
VOL+
PICTURE/DEL.
S.EFFECT
VOL-
MTS
MENU
TV/AV/DVD
DISPLAY
R/L
SKIP
SEARCH
MODE
SUBTITLE ZOOM
STOP
PLAY/PAUSE
/
9
6
3
MUTE
RECALL
OPEN/CLOSE
TITLE
MENU/PBC SETUP
SCAN
REPEAT
LANGUAGE
ANGLE
REPEAT
A-B
ENTER
21
FAV.
8
7
5
4
0
SLOW
DVD10+
CH+
CH-
1-3
1,4
DUAL MONO STEREO
DYNAMIC L-MONO
SPDIF OUTPUT R-MONO
MIX-MONO
- - DIGITAL SETUP - -
SET LEFT MONO MODE
DVD PREFERENCES
29
1
Press SETUP. Press 2 or 3 to
go to the PREFERENCE
PAGE .
You can select this only if you
stopped Disc play by pressing
STOP C twice.
2
Press CH+o or CH-p to select
a feature, then press 3.
3
Press CH+o or CH-p to select
the setting you want, then press
ENTER.
AUDIO, SUBTITLE, DISC
MENU
Choose the language you want for
a DVD’s Audio, Subtitles, or Disc
Menu. The language must be
recorded on the DVD. If there is a
language on the DVD that is not
shown in this list, choose OTH-
ERS.
DEFAULT: With RESET select-
ed, press ENTER.This restores
all the DVD Player’s settings to
their factory defaults.The settings
you have made will be erased.
4
Press SETUP to remove the
menu.
AUDIO FRENCH
SUBTITLE SPANISH
DISC MENU CHINESE
PARENTAL JAPANESE
PASSWORD KOREAN
DEFAULT RUSSIAN
THAI
OTHERS
- - PREFERENCE PAGE - -
PREFERRED AUDIO LANGUAGE
POWER
SLEEP
CLOCK
VOL+
PICTURE/DEL.
S.EFFECT
VOL-
MTS
MENU
TV/AV/DVD
DISPLAY
R/L
SKIP
SEARCH
MODE
SUBTITLE ZOOM
STOP
PLAY/PAUSE
/
9
6
3
MUTE
RECALL
OPEN/CLOSE
TITLE
MENU/PBC SETUP
SCAN
REPEAT
LANGUAGE
ANGLE
REPEAT
A-B
ENTER
21
FAV.
8
7
5
4
0
SLOW
DVD10+
CH+
CH-
1-3
1,4
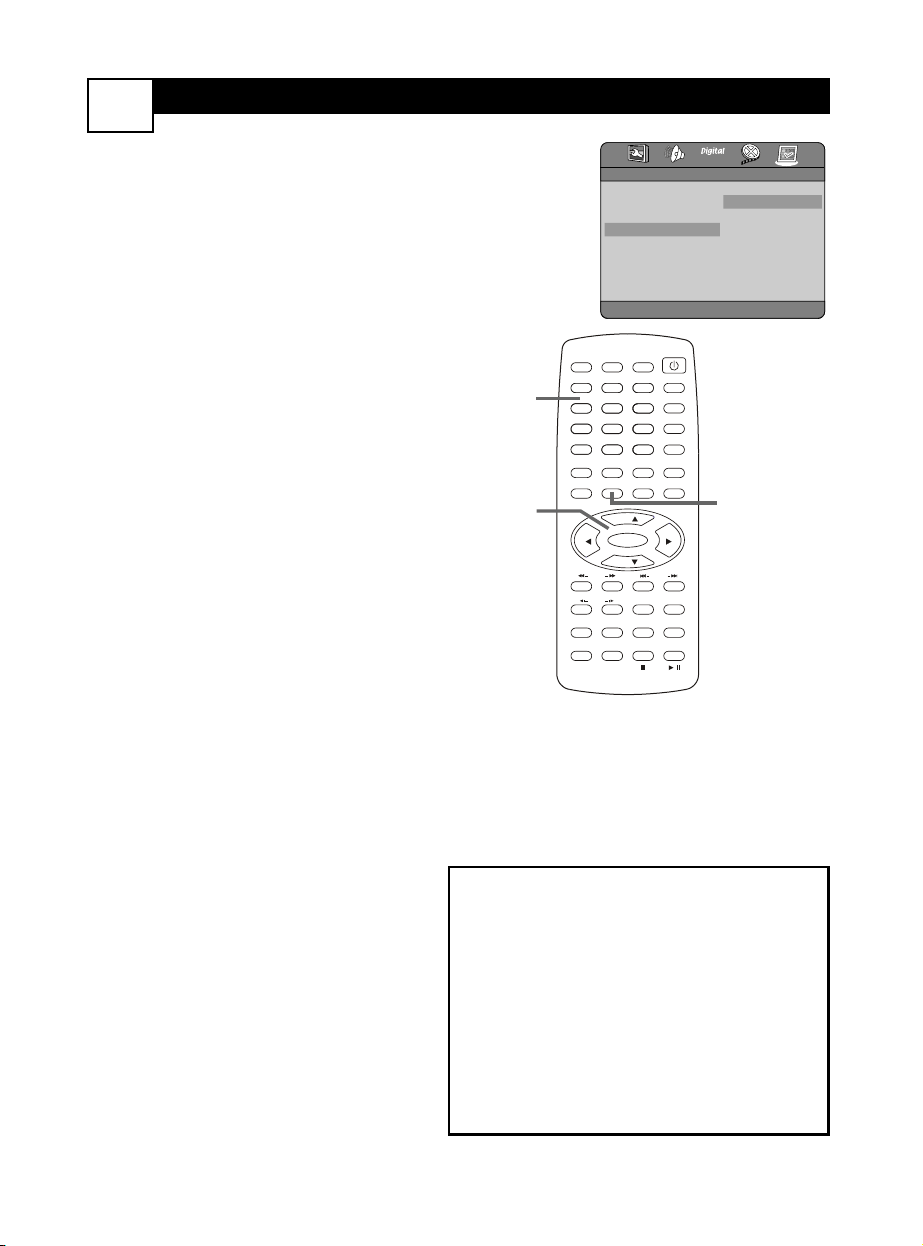
DVD PARENTAL CONTROL
30
P
ARENTAL blocks DVD viewing if its rating
exceeds the level you allow.This feature
only affects DVDs; it does not affect TV view-
ing.
You will need a four-digit password to
change the PARENTAL level, disable the fea-
ture, or view blocked DVDs.
1
Stop play by pressing STOP C
twice.
Press SETUP. Press 2 or 3 to go
to the PREFERENCE PAGE.
2
Press CH+o or CH-p to select
a feature, then press 3.
3
PASSWORD
With CHANGE selected, press
ENTER.
Use the Number buttons to
enter your old four-digit pass-
word. If this is your first time set-
ting a password, use the 1009
default code.
Next, enter a NEW PASS-
WORD. It must have exactly four
digits. Four Xs will appear, protect-
ing the code’s identity.
Enter the same new password
again for CONFIRM PWD.
Finally, press ENTER.
PARENTAL
Press CH+o or CH-p to choose
a movie rating level at which you
want to ban play. Press ENTER.
You must enter your four-digit
password, then press ENTER
again to confirm your setting.
If a DVD is rated higher than the
level you select, play will be prohib-
ited.You must either change the
Disc or enter your password.
Choose OFF to disable this feature
and watch all DVDs, regardless of
their rating.
4
Press SETUP to remove the
menu.
PARENTAL RATINGS
• 1 KID SAF - Safe viewing for children
• 2 G - General Audience
• 3 PG - Parental Guidance suggested
• 4 PG-13 - Unsuitable for children under 13
• 5 PGR - Movie elements range from PG to R.
• 6 R - Restricted; those under 17 should be
accompanied by a parent or adult guardian
• 7 NC-17 - Not suitable for those under 17
• 8 ADULT - Mature audience only
• OFF - PARENTAL is disabled; all DVDs can
be watched.
POWER
SLEEP
CLOCK
VOL+
PICTURE/DEL.
S.EFFECT
VOL-
MTS
MENU
TV/AV/DVD
DISPLAY
R/L
SKIP
SEARCH
MODE
SUBTITLE ZOOM
STOP
PLAY/PAUSE
/
9
6
3
MUTE
RECALL
OPEN/CLOSE
TITLE
MENU/PBC SETUP
SCAN
REPEAT
LANGUAGE
ANGLE
REPEAT
A-B
ENTER
21
FAV.
8
7
5
4
0
SLOW
DVD10+
CH+
CH-
1-3
1,4
3
AUDIO 1 KID SAF
SUBTITLE 2 G
DISC MENU 3 PG
PARENTAL 4 PG 13
PASSWORD 5 PGR
DEFAULT 6 R
7 NC17
8 ADULT
- - PREFERENCE PAGE - -
SET PARENTAL CONTROL

TROUBLESHOOTING
31
No Power
• Check the power cord. Disconnect the power cord from power, wait 10 seconds, then
reinsert the plug into the outlet. Press POWER
yy
again.
• Make sure the power outlet is not controlled by a wall switch.
• Be sure a fuse has not blown on the AC power strip, if one is in use.
No TV Channels
• Make sure the Cable TV signal or Antenna is connected securely to the 75 OHM
ANTENNA INPUT on the rear of the TV/DVD.
• Activate Auto Search to find all available channels.
• Press TV/AV/DVD repeatedly to put the unit in TV mode.The current channel number
will appear briefly in the top left corner of the screen.
• Check the AutoLock
TM
settings. Make sure CH Lock is OFF or enter your secret code
to access TV channels.
No Sound
• Check the MUTE button on the remote control.
• If you are connecting the TV/DVD to other equipment, check the cable connections
between the equipment. Connect RIGHT OUT jacks to RIGHT IN jacks, LEFT OUT
to LEFT IN, etc.
Remote Does Not Work
• Check the batteries. If necessary, replace them with AAA Heavy Duty (Zinc Chloride)
or Alkaline batteries.
• Press TV/AV/DVD to put the unit in TV, DVD, or Video mode. TV features only work
with the unit in TV mode, DVD menus are only available in DVD mode, etc.
• Point the remote control toward the front of the TV/DVD, not at other equipment.
Disc will not play.
• Insert a playable Disc. You may play DVDs; Audio CDs; MP3/JPEG files on a finalized
CD-R, CD-RW or Picture CD; finalized DVD+Rs or DVD+RWs; or Video CDs.
• Place the Disc correctly in the recesses in the Disc tray. If the Disc is one-sided, place
the Disc in the tray with the label facing up and the shiny side facing down. If the Disc
is two-sided, make sure the label of the side you want to play is facing up.
• Clean the Disc.
• Check Parental controls and adjust as necessary.
• Press TV/AV/DVD repeatedly to put the unit in DVD mode.The large DVD logo will
appear on the screen. Disc features are only available in DVD mode.
Disc feature is not available.
• An “” will appear on the screen if you try a feature that is not available. Some fea-
tures are available only during play, while others are available only if play is stopped. If
you cannot access a feature, try stopping or starting play, or changing Discs, then try
the feature again.

PHILIPS L
IMITED WARRANTY
32
90 Days Labor & One (1) Year Parts & Two (2) Years Display
PHILIPS CONSUMER ELECTRONICS war-
rants this product against defect in material or
workmanship, subject to any conditions set forth
as follows:
PROOF OF PURCHASE: You must have proof
of the date of purchase to receive warranted
repair on the product.A sales receipt or other
document showing the product and the date that
you purchased the product as well as the author-
ized retailer included, is considered such proof.
COVERAGE:
(If the product is determined to be defective)
LABOR: For a period of ninety (90) days from the
date of purchase, Philips will repair or replace the
product, at its option, at no charge, or pay the
labor charges to any Philips authorized repair facil-
ity.After the period of ninety (90) days, Philips will
no longer be responsible for charges incurred.
PARTS: For a period of one (1) year from the date
of purchase, Philips will supply at no charge, new
or rebuilt replacement parts in exchange for
defective parts. Philips authorized service centers
will provide removal and installation of the part
under the specified labor warranty.
DISPLAY: For a period of two (2) years from the
date of purchase, Philips will supply, at no charge, a
new or rebuilt active display device in exchange
for the defective display. Philips authorized service
centers will provide removal and installation of the
parts under the specified labor warranty.
EXCLUDED FROM WARRANTY
COVERAGE
Your warranty does not cover:
• Labor charges for installation or setup of the
product, adjustment of customer controls on
the product, and installation or repair of
antenna systems outside of the product.
• Product repair and/or part replacement
because of improper installation, connections
to improper voltage supply, abuse, neglect, mis-
use, accident, unauthorized repair or other
cause not within the control of Philips.
• A product that requires modification or adap-
tation to enable it to operate in any country
other than the country for which it was
designed, manufactured, approved and/or
authorized, or repair of products damaged by
these modifications.
• Damage occurring to product during shipping
when improperly packaged or cost associated
with packaging.
• Product lost in shipment and no signature ver-
ification of receipt can be provided.
• A product used for commercial or institutional
purposes (including but not limited to rental
purposes).
• Products sold AS IS or RENEWED.
TO OBTAIN WARRANTY SERVICE IN
THE U.S.A., PUERTO RICO, OR U.S.
VIRGIN ISLANDS…
Contact Philips Customer Care Center at:
1-800-531-0039.
TO OBTAIN WARRANTY SERVICE IN
CANADA…
1-800-661-6162 (French Speaking)
1-800-531-0039 (English/Spanish Speaking)
REPAIR OR REPLACEMENT AS PROVIDED
UNDER THIS WARRANTY IS THE EXCLUSIVE
REMEDY FOR THE CONSUMER. PHILIPS SHALL
NOT BE LIABLE FOR ANY INCIDENTAL OR
CONSEQUENTIAL DAMAGES FOR BREACH
OF ANY EXPRESS OR IMPLIED WARRANTY
ON THIS PRODUCT. EXCEPT TO THE EXTENT
PROHIBITED BY APPLICABLE LAW,ANY
IMPLIED WARRANTY OF MERCHANTABILITY
OR FITNESS FOR A PARTICULAR PURPOSE
ON THIS PRODUCT IS LIMITED IN DURATION
TO THE DURATION OF THIS WARRANTY.
Some states do not allow the exclusions or limita-
tion of incidental or consequential damages, or
allow limitations on how long an implied warranty
lasts, so the above limitations or exclusions may
not apply to you. In addition, if you enter into a
service contract agreement with the PHILIPS part-
nership within ninety (90) days of the date of sale,
the limitation on how long an implied warranty
lasts does not apply.
This warranty gives you specific legal rights. You may
have other rights which vary from state/province to
state/province.
Philips, P.O. Box 520890, Miami, FL 33152 (402) 536-4171
EL6588E001 / 01-04