Loading ...
Loading ...
Loading ...
13
Auger Paddle
Inspection
The paddles are thick, rubber parts bolted to the edges of the auger.
The paddles are subject to wear, and should be inspected and
replaced if worn beyond the service limit.
1. Park the snow thrower on a
flat, level surface. Disconnect
the spark plug cap and turn the
fuel valve OFF so the engine
cannot be accidentally started.
Tilt the snow thrower back
enough to raise the auger
housing.
2. Inspect the paddles on the
auger and make sure they are in good condition and securely
attached.
3. Measure the distance
between the edge of the
rubber paddle to the edge of
the metal auger support.
AUGER PADDLE SERVICE
LIMIT:
5/8 inch (15 mm)
Auger paddle replacement
should only be done by a
servicing Honda snow thrower
dealer. If the paddles are worn
out, the scraper blade may also
need replacement.
Scraper Blade
Inspection
1. Turn the engine switch and fuel valve to the OFF position and
disconnect the spark plug cap so the engine cannot be accidentally
started.
2. Examine the scraper blade and verify it contacts the ground
evenly. If it does not, adjust the scraper blade. See "Adjustment"
below.
3. Measure the distance
between the ground and
lowest point on the rubber
paddle on the auger. The
paddle ground clearance
should be:
1/16 ~ 1/8 inches
(1 ~ 3 mm).
If the ground clearance is
not within the
specification, adjust the
scraper blade. See
Adjustment on this page.
4. Tilt the snow thrower back
and measure the
thickness of the scraper
blade. Replace the
scraper blade if it is less
than 1/16 inch (2 mm)
thick. See Replacement
on this page.
Adjustment
1.
Turn the engine switch and
fuel valve to the OFF
position and disconnect the
spark plug cap so the
engine cannot be
accidentally started.
2. Tilt the snow thrower
forward to provide access
to the underside of the
scraper blade.
3. Loosen (don’t remove) the
three flange nuts on the
scraper blade.
4. Move the scraper blade
down slightly. Tighten the self-locking nuts and recheck the
clearance.
Repeat the procedure as needed to get the necessary clearance. If
you cannot set the ground clearance within 1/8 ~ 1/16 inch,
replace the scraper blade.
Replacement
The scraper blade wears with normal use and must be replaced when
it reaches the service limit. The scraper blade thickness and
adjustment determine the clearance between the rubber paddles and
the ground.
A new scraper blade can be purchased from a servicing Honda
dealer. See page 20 for scraper blade and hardware part numbers.
1. Turn the engine switch and fuel valve to the OFF position (page 7)
and disconnect the spark plug cap so the engine cannot be
accidentally started.
2. Tilt the snow thrower forward to provide access to the underside of
the scraper blade.
3. Remove the three flange nuts, flat washers, and the scraper blade.
4. Install the new scraper blade, reusing the bolts, washers, and nuts.
5. Adjust the scraper blade. See Adjustment above.
5/8 inch (15 mm)
1/16 ~ 1/8 in
(1 ~ 3 mm)
1/16 in
(2 mm)
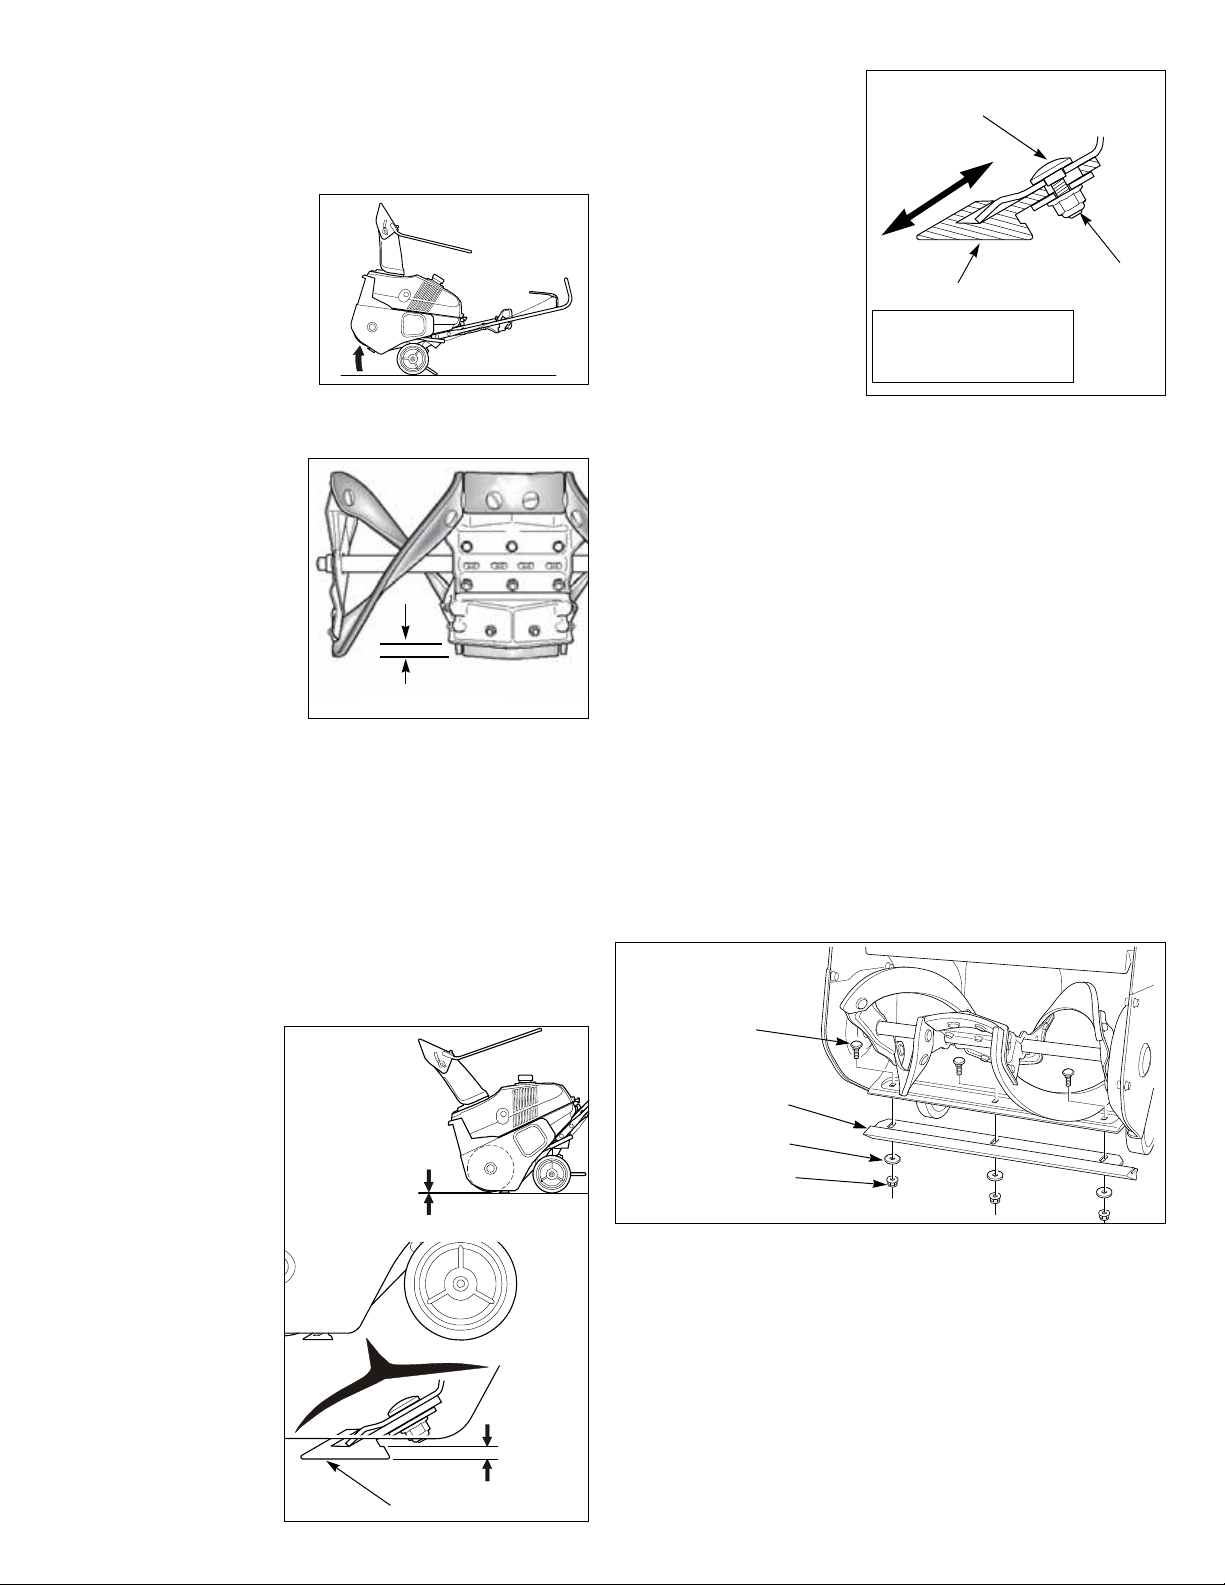
SCRAPER BLADE
SCRAPER BLADE
FLANGE
NUT (3)
CARRIAGE BOLT (3)
Adjust position to set
1/16 ~ 1/8 in (1 ~ 3 mm)
ground clearance.
CARRIAGE
BOLT (3)
FLANGE NUT (3)
FLAT WASHER (3)
SCRAPER BLADE
Loading ...
Loading ...
Loading ...