Loading ...
Loading ...
Loading ...

BEFORE FIRST USE
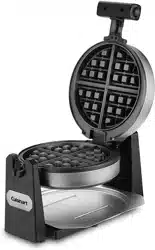
Before using your Cuisinart
®
Belgian Wafe
Maker for the rst time, remove any dust from
shipping by wiping the plates with a damp cloth.
Remove all packaging and any promotional labels
or stickers from your wafe maker. Be sure that
all parts (listed in Parts and Features) of your
new wafe maker have been included before
discarding any packing materials. You may want
to keep the box and packing materials for use at
a later date.
NOTE: The wafe plates have been treated with
a special nonstick coating. The rst time you use
your wafe maker, it may have a slight odor and
may smoke a bit. This is normal and common to
appliances with a nonstick surface.
OPERATING
INSTRUCTIONS
1. Place the Cuisinart
®
Belgian Wafe Maker on a
clean, at surface.
2. Plug the power cord into a standard electrical
outlet.
3. To preheat your Cuisinart
®
Belgian Wafe
Maker, turn the control knob dial to your
preferred setting. The ready indicator light
located on the top of the wafe maker will light
up when fully heated. (Heat-up time should
take approximately four minutes for the rst
wafe of each baking session.)
4. After wafe maker is preheated, season wafe
plates with cooking spray or brush with a
avorless oil to thoroughly coat all surfaces.
It’s important that you preheat the wafe
maker before seasoning with cooking spray or
oil. Your wafe maker is now ready to bake.
5. After the wafe maker is preheated and ready
for baking, open the wafe maker lid.
6. Fill the provided batter cup with batter. If using
a standard measuring cup, ll to ¾ cup. Pour
the batter evenly across the wafe plates. Use
a heatproof spatula to spread the batter evenly
over the grids.
7. Close the lid and rotate the handle 180° to
the right. The Ready indicator light will turn
off. NOTE: Baking time is determined by the
browning setting chosen. It may take up to 3
minutes longer to bake your wafes on a higher
setting.
8. When the wafe is baked, the Ready light
indicator will turn on. Rotate the handle 180° to
the left and open the lid. To remove the wafe,
gently loosen the edges with a heatproof
spatula. Never use stainless steel utensils, as
they may damage the nonstick coating.
9. Repeat the above process if making additional
wafes. It is not necessary to spray the wafe
grids before each new waf e.
When you are finished baking, always unplug
the power cord from the wall outlet. Allow the
waffle maker to cool down completely before
handling.
The wafe plates have been treated with a
special nonstick PTFE coating. Before the rst
use, we suggest you season the grids with
cooking spray or avorless vegetable oil. If using
oil, apply oil with a paper towel or pastry brush.
CLEANING AND
MAINTENANCE
Once you have nished baking, remove plug from
electrical outlet. Leave the top lid open and allow
grids to cool before cleaning.
Never take your Belgian wafe maker apart for
cleaning. Simply brush crumbs from grooves,
and absorb any excess cooking oil by wiping
with a dry cloth or paper towel. You may clean
the grids by wiping with a damp cloth to prevent
staining and sticking from batter or oil buildup.
Be certain grids have cooled completely
before cleaning. If batter adheres to plates,
simply pour a little cooking oil onto the baked-on
batter and let stand approximately 5 minutes.
This will soften the batter for easy removal.
To clean exterior, wipe with a soft, dry cloth.
Never use an abrasive cleanser or harsh pad.
NEVER IMMERSE CORD, PLUG OR UNIT IN
WATER OR OTHER LIQUIDS.
Hand-wash drip tray.
Maintenance: Any other servicing should
be performed by an authorized service
representative.
5
Loading ...
Loading ...
Loading ...