Loading ...
Loading ...
Loading ...
16 49-5000444 Rev. 0
Installation Instructions
INSTALLATION INSTRUCTIONS
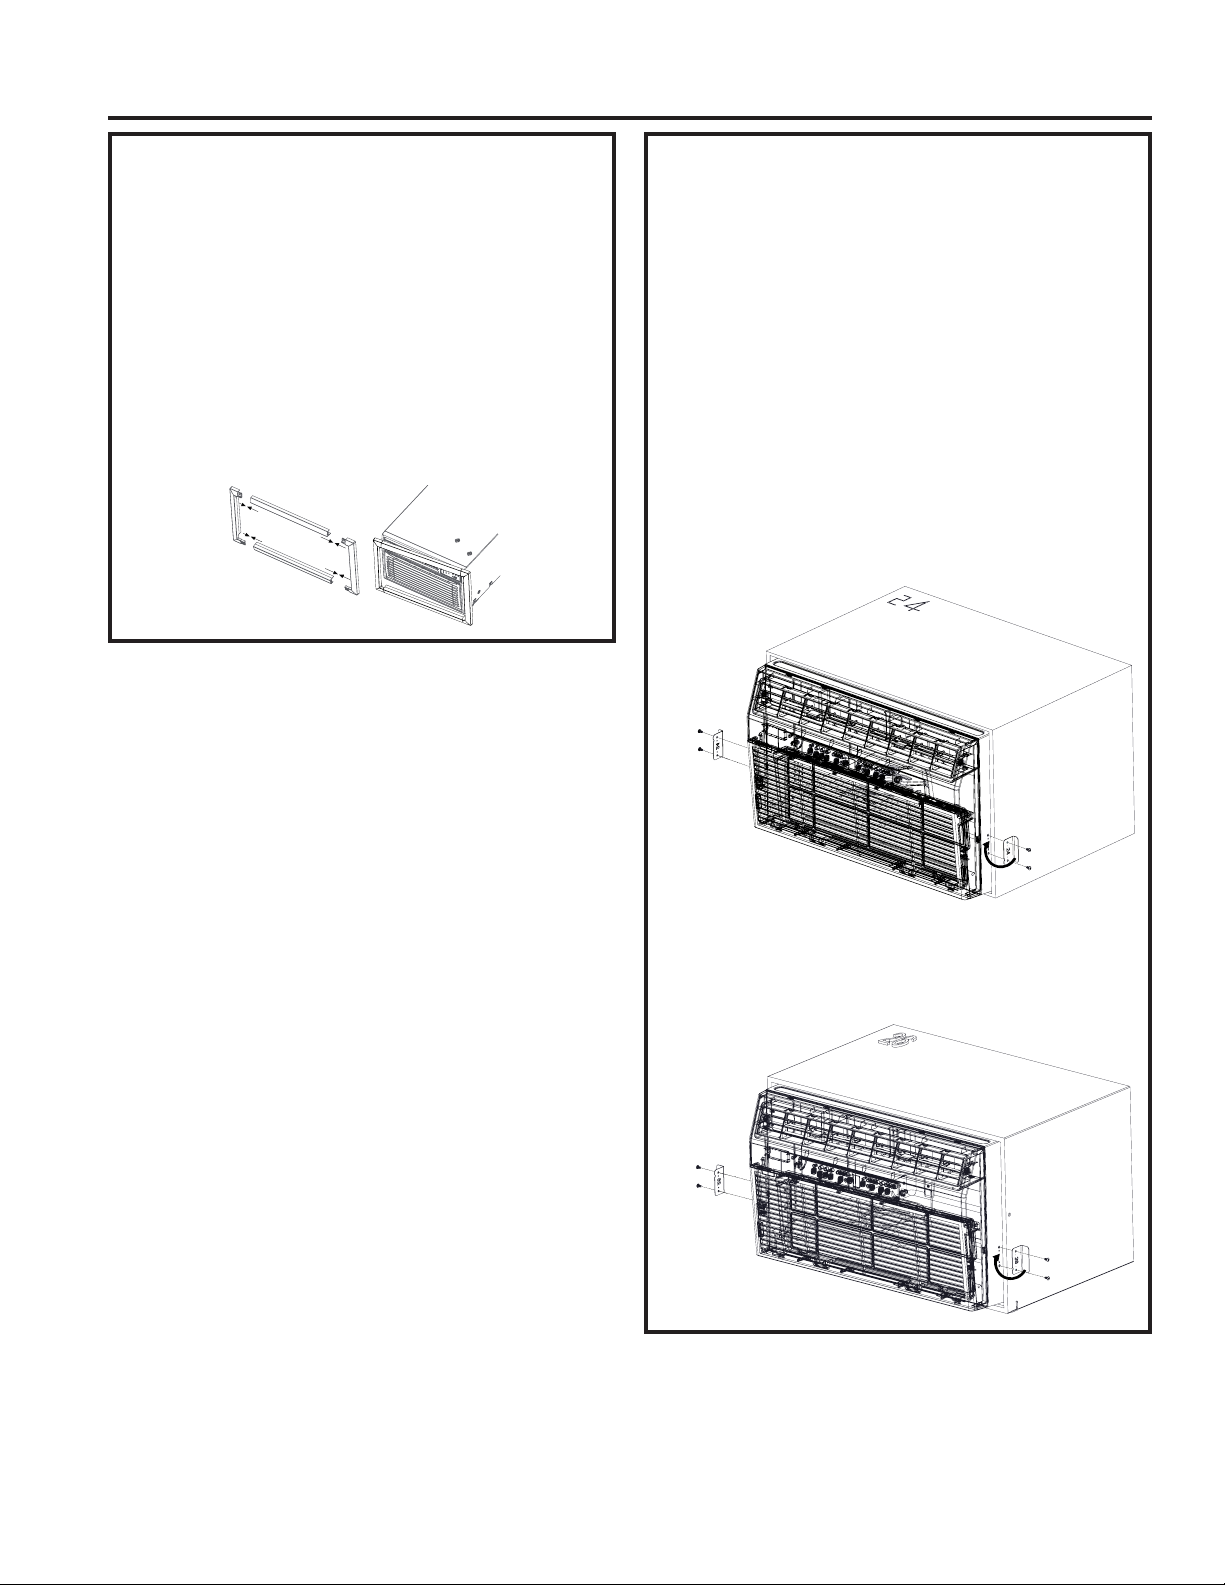
Trim Kit Installation Instructions
■
Install the 1” x 1-1/2” x 84” long stuffer seal
between the wall sleeve and the unit. A flat-bladed
screwdriver or putty knife is recommended.
■ Measure the height and width of the installed wall
sleeve and choose the appropriate trim kit that
matches those dimensions.
■
Assemble the trim frame by inserting the top and
bottom pieces into side pieces and snapping into
place.
■
Pull the cord through the trim frame and slide the
trim over the unit until flush with the wall or wall
sleeve.
Assemble Trim
Ensamblar moldura
Assembler la garniture
Security Brackets Installation
(It is important to install these brackets
to prevent the chassis from being
pushed into the room from the outside.)
■ Measure the width of the installed wall sleeve and
choose the appropriate security bracket (24” or 26”)
designed for that sleeve.
■
The brackets must be installed so the flanges are
hooked behind the inside flanges of the wall sleeve.
Using the screws provided, attach the brackets on
the sides of the chassis.
For 24” sleeves, pull the unit out slightly, hook the
short flange of the 24” bracket behind the sleeve
inside edge and secure to the unit with the two
screws provided. Repeat on the opposite side.
Push the unit all the way back into the case.
For 26” sleeves, hook the short flange of the 26”
bracket behind the sleeve inside edge and secure
to the unit with the the two screws provided.
Repeat on the opposite side.
Hook inside
sleeve edge
and secure
to unit
Hook inside
sleeve edge
and secure
to unit
Hook inside
sleeve edge
and secure
to unit
Hook inside
sleeve edge
and secure
to unit
Loading ...
Loading ...
Loading ...