Loading ...
Loading ...
Loading ...
14
English
AUDIO IN
WIRELESS
TRANSMITTER
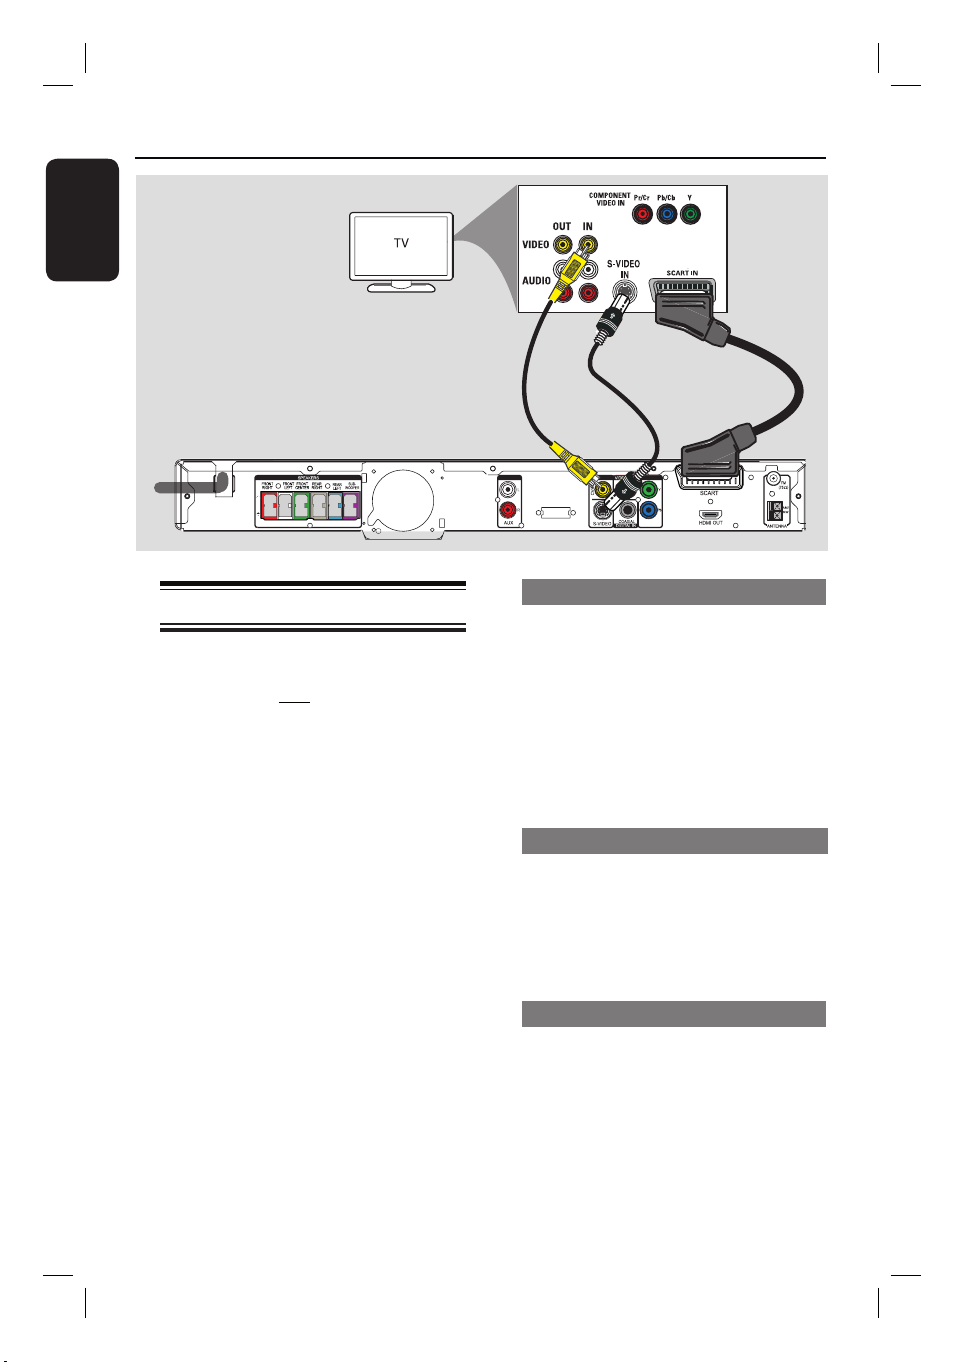
Step 2: Connecting to TV
This connection enables you to view the
video playback from this unit. You only
need to choose one of the options
below to make the video connection.
– For a standard TV, follow option 1 or
2 or 3.
– For a progressive scan TV, follow
option 4.
– For a HDMI TV, follow option 5.
Helpful Hint:
– It is important to connect this unit directly
to the TV in order to enjoy optimum video
quality.
Option 1: Using the Scart socket
Connect the scart cable (supplied) from
the SCART socket on the main unit to
the corresponding SCART input socket
on the TV.
Helpful Hint:
– With this connection, you can press TV on
the remote control to route the TV’s audio to
the speakers.
Option 2: Using the S-Video jack
Connect an S-video cable (not supplied)
from the S-VIDEO socket on the main
unit to the S-Video input socket (or
labelled as Y/C or S-VHS) on the TV.
It provides excellent picture quality.
Option 3: Using the Video jack
Connect a composite video cable (not
supplied) from the CVBS socket on the
main unit to the video input socket (or
labelled as A/V In, Video In, Composite
or Baseband) on the TV.
It provides good picture quality.
Basic Connections (continued)
Option 1
Main Unit (rear)
Option 2
Option 3
Loading ...
Loading ...
Loading ...