Loading ...
Loading ...
Loading ...
13GB
Depending on the type of car, be sure to insulate the
unused leads with electrical tape for safety.
Do not connect this cable when the steering wheel
remote control is not used.
Consulting the dealer or an experienced technician
for help is recommended.
When using the wired remote control
1 To enable the wired remote control, set [STR
CONTROL] in [STEERING] to [PRESET].
Installation
For Japanese cars, see “Mounting the unit in a
Japanese car” (page 13).
Mounting the unit with an installation kit
(not supplied)
You can use a commercially available double DIN
installation kit. Choose an installation kit with the
following panel frame size.
Larger than 172 mm × 97 mm (6
7
/8 in × 3
7
/8 in) (w/
h), with an inner corner radius of less than 0.5 mm
(
1
/32 in).
Note
Be sure to use the mounting screws .
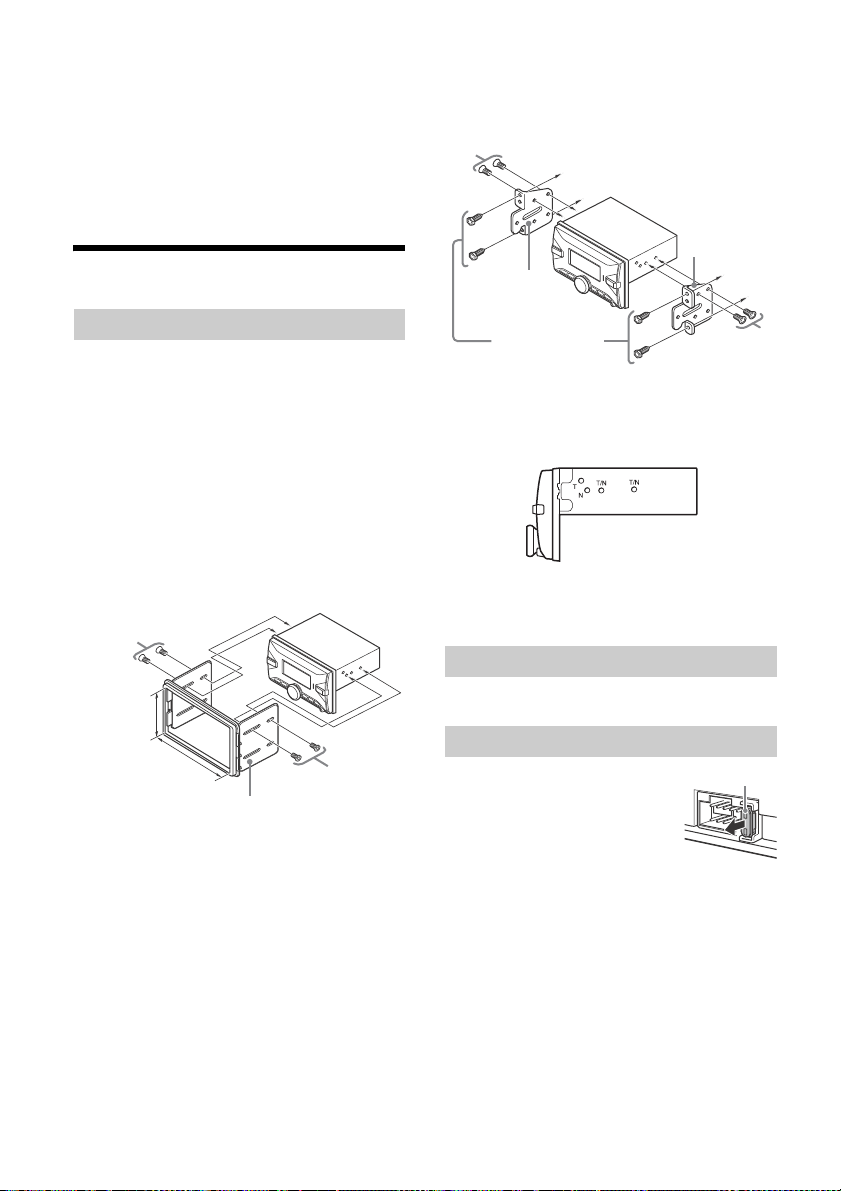
Mounting the unit in a Japanese car
You may not be able to install this unit in some
makes of Japanese cars. In such a case, consult your
Sony dealer.
When mounting this unit to the preinstalled
brackets of your car, use the mounting screws in
the appropriate screw holes based on your car:
T for TOYOTA and N for NISSAN.
Note
To prevent malfunction, install only with the mounting
screws .
For details, see “Resetting the Unit” (page 6).
When replacing the fuse, be sure
to use one matching the
amperage rating stated on the
original fuse. If the fuse blows,
check the power connection and
replace the fuse. If the fuse blows
again after replacement, there
may be an internal malfunction. In such a case,
consult your nearest Sony dealer.
Mounting the unit in the dashboard
Larger than
97 mm (3
7
/8 in)
Larger than
172 mm (6
7
/8 in)
Installation kit (not supplied)
To dashboard/center console
Resetting the unit
Fuse replacement
To dashboard/center console
Parts supplied with
your car
Bracket
Bracket
Fuse (10 A)
Loading ...
Loading ...
Loading ...