Usage & Installation Instructions
Please read this manual before you start installing and using the machine. In order
to improve our product continuously, we will update the product when necessary
without notice.If the instruction does not match the product, the actual product shall
prevail.

Catalog
Safety Precautions and Warnings…………………………………….....2
Product Introductions…..…………………………………………......3
Installation Instructions……………………………………………......5
Monitor Instructions……………………………………………..........9

Customer Service
If you have any questions or concerns, please feel free to contact us.
Email address: [email protected]
Contact Us
1

2
1. Safety Precautions and Warnings
Please keep this manual properly for future reference.
a. Before starting to exercise,consult your doctor for potential harm. Do not use this device if you are on
medication for heart rate, blood pressure or cholesterol levels.
b. Make sure that you have read this manual before assembling and using . Only the correct installation,
maintenance and proper use of the machine, can achieve a safe and effective use of the effect. Please
ensure that all users of this device are informed of the warnings and precautions.
c. Be aware of the various discomforts from your body. Warning: Improper or excessive exercise can harm
your health. If you feel pain, a tight heart muscle, an irregular heartbeat, shortness of breath,
disinformation, dizziness, or any discomfort, stop practicing immediately and consult your doctor
before continuing your exercise .
d. Place the machine on the floor with solid,flat protective layer or carpet. To ensure your safety, do not
put anything within 0.5 meters around the machine.
e. Before exercise,check that all screws, nuts and other hardware components are fully installed.
f. Warning: You have to check the wearable parts regularly to keep the safe use.
g. Warning:Assemble the equipment on a smooth,flat floor. If you find some defective parts or hear some
abnormal noises stop using the device until the problem has been resolved.
h. This equipment has passed the test of ASTM standard. Applicable to household standards. Maximum
weight capacity: 220lbs.
i. Lift and move this machine carefully to avoid back injury. Remember to ask for help if necessary.
j. All removable parts should be maintained weekly and regularly
(
such as:crank,foot tube
screws,etc). Check whether they are broken or loosened before, and repair or replace them at
once.
k. Pay more attention to the most wearable parts.
L. Turn the governor to 8th section when do not use.
3
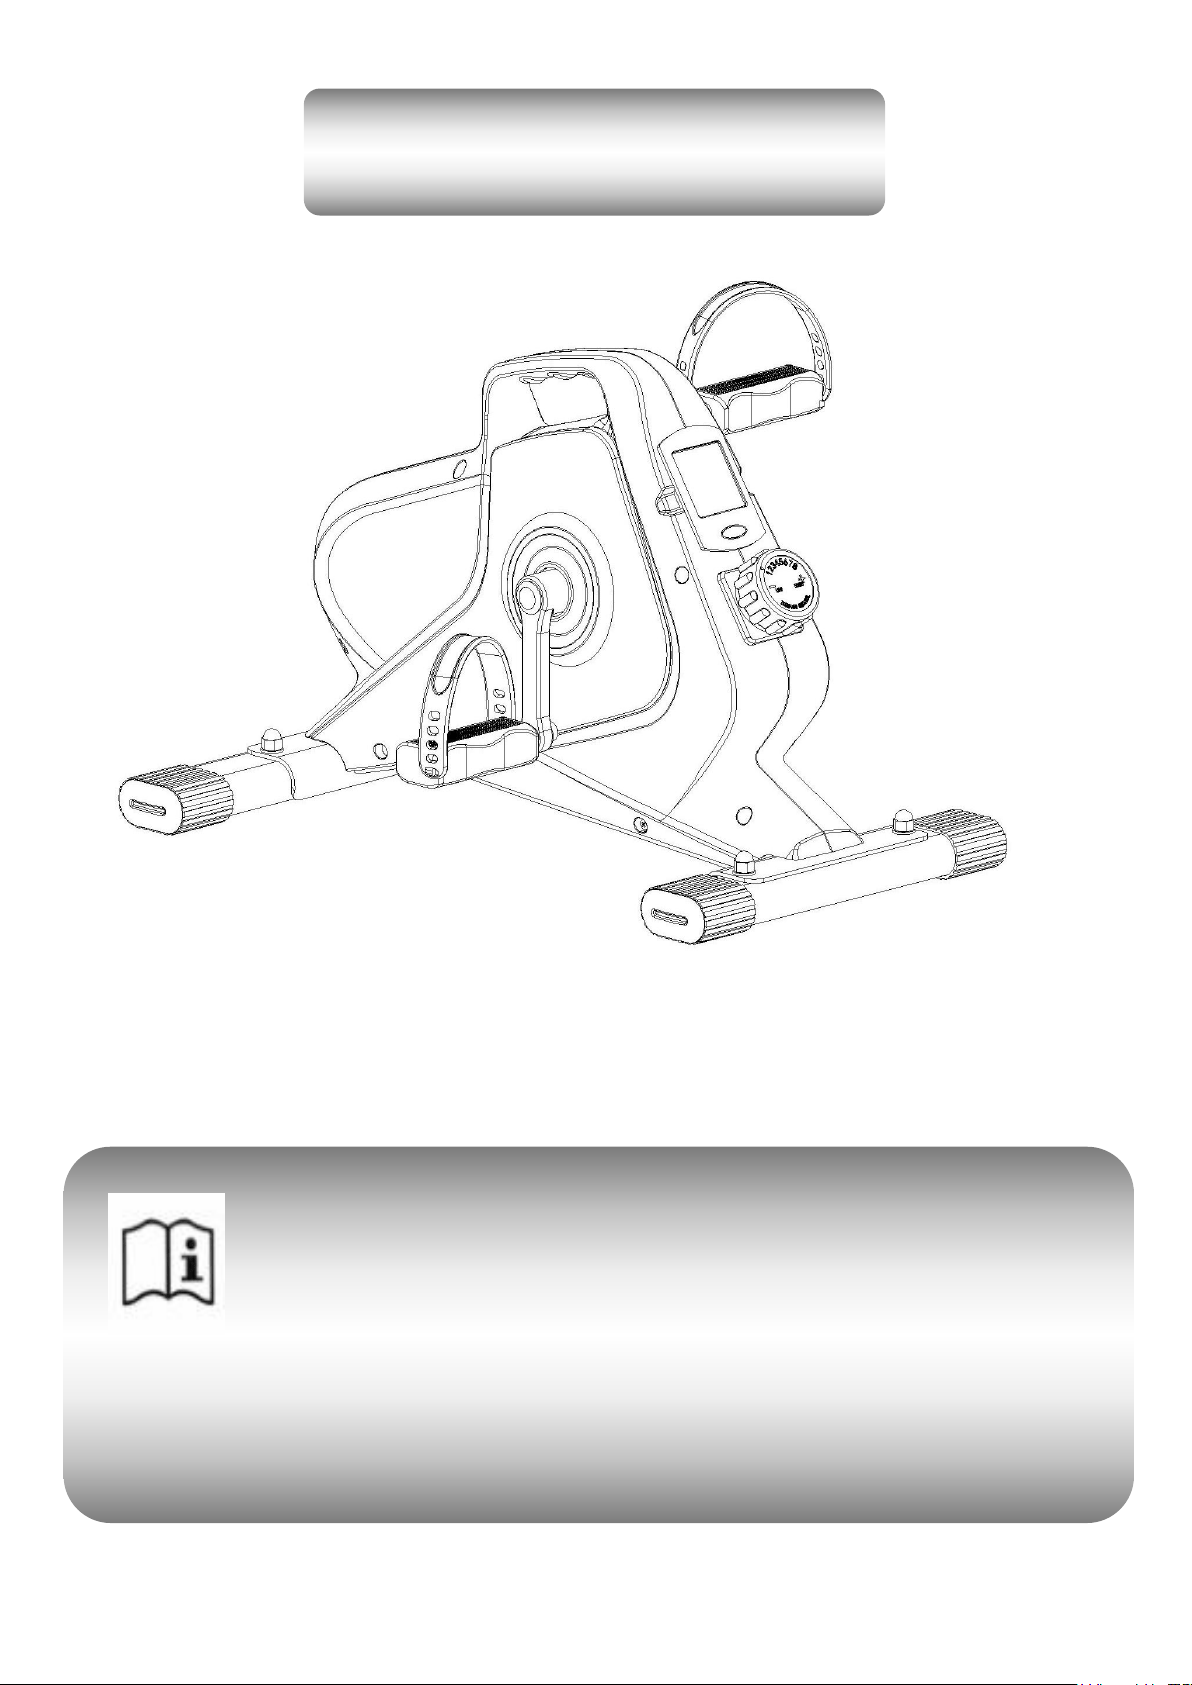
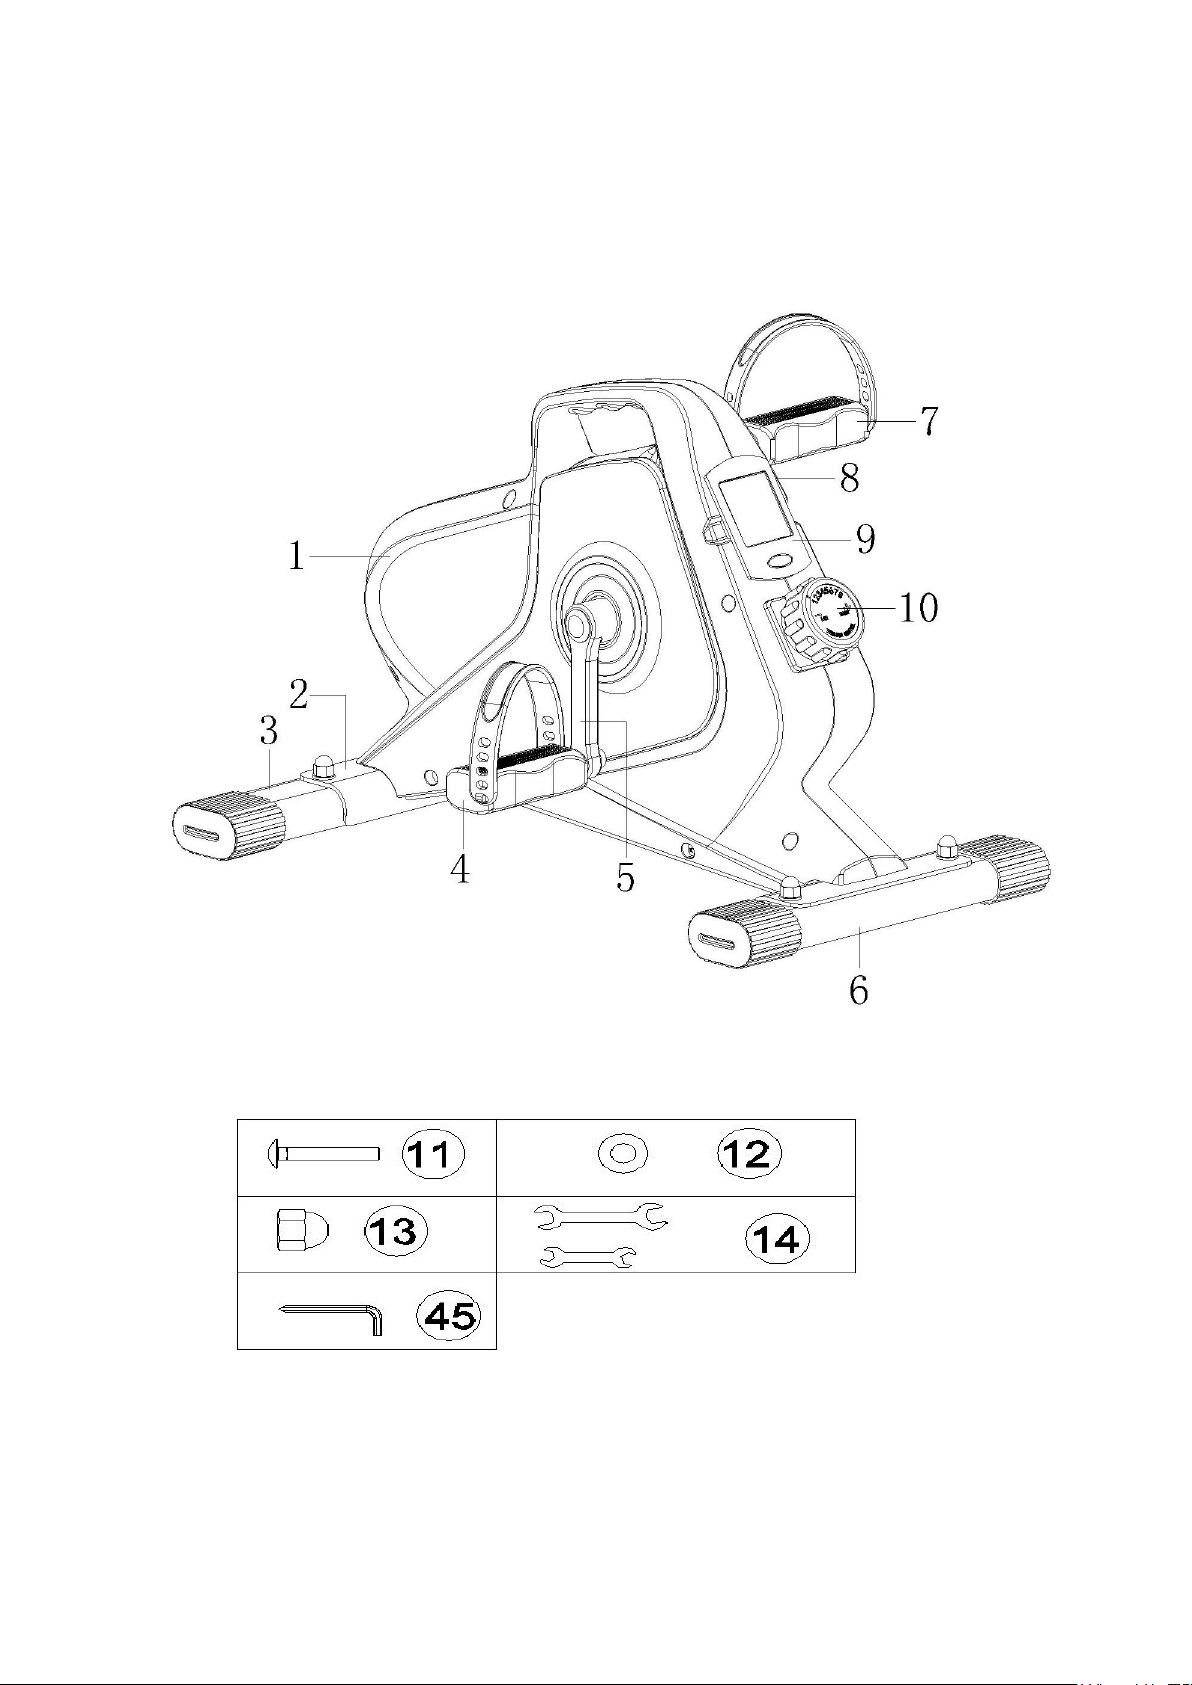
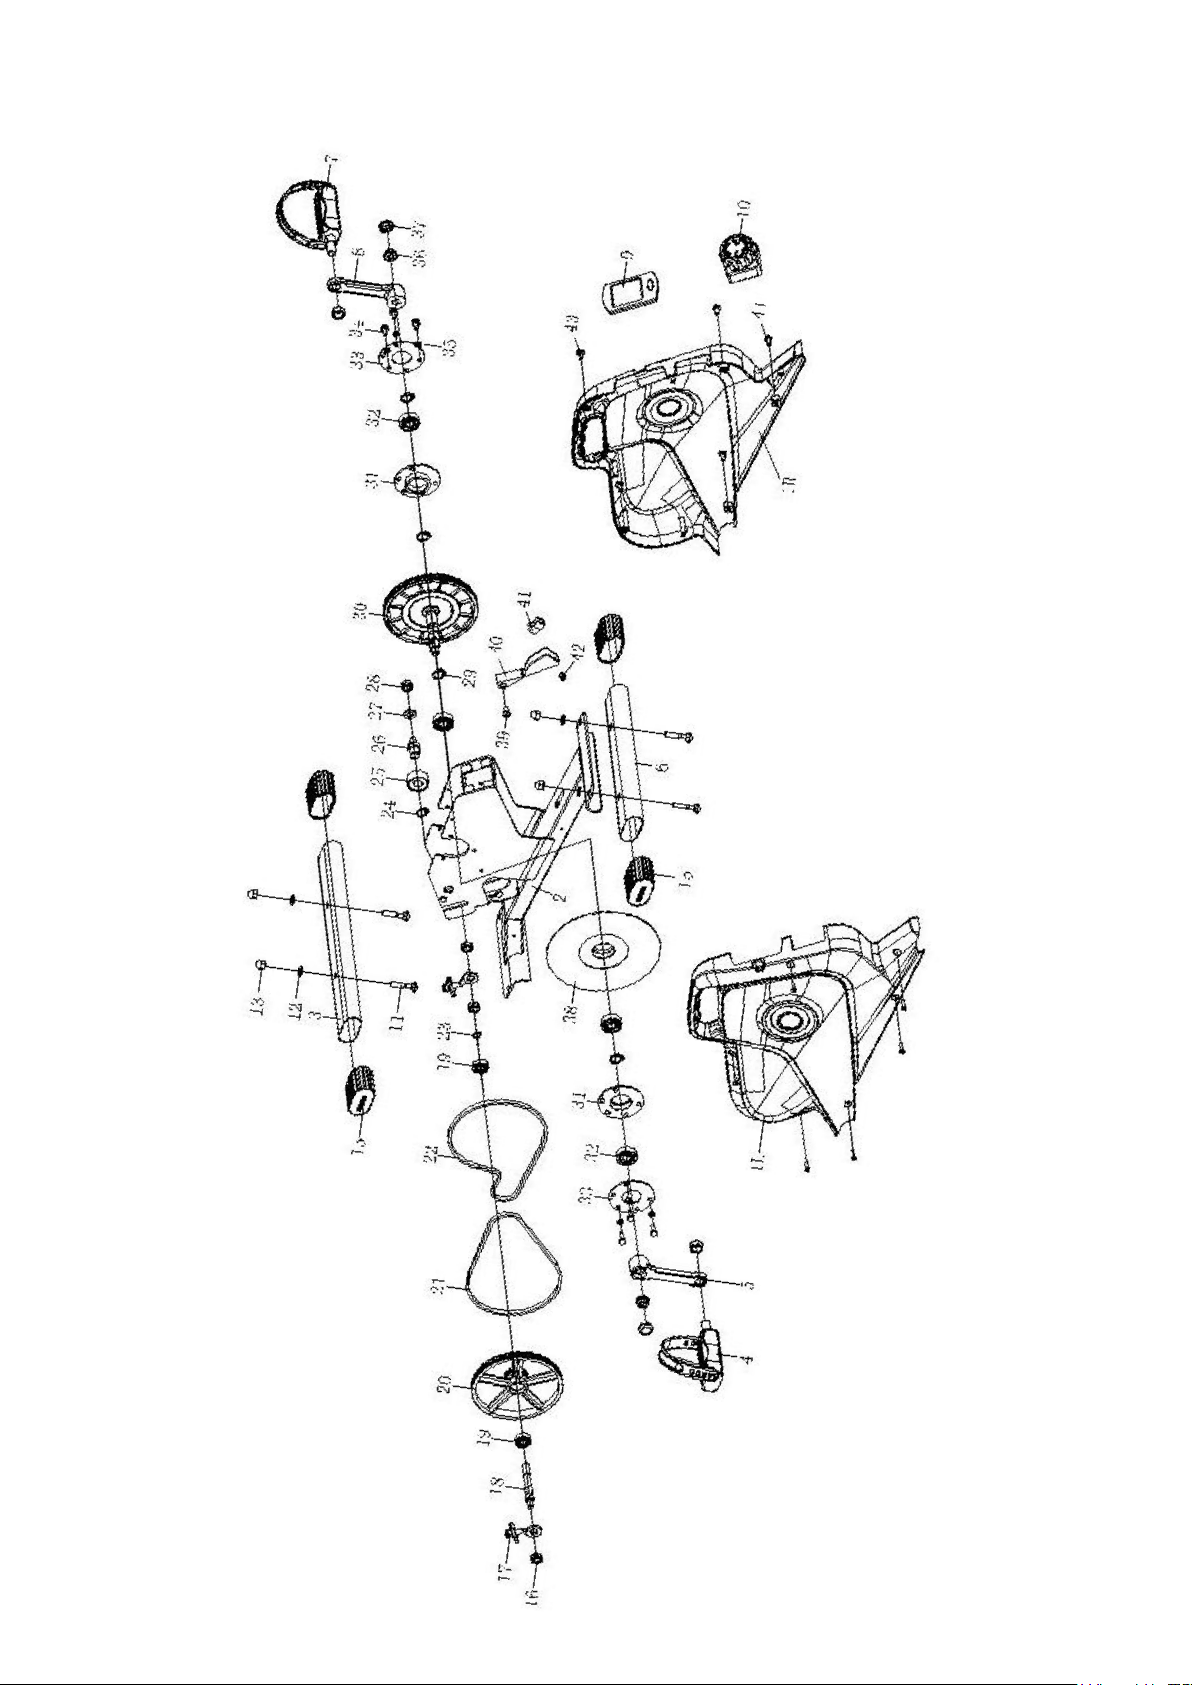
2. Product introduction
Components explanation:
4
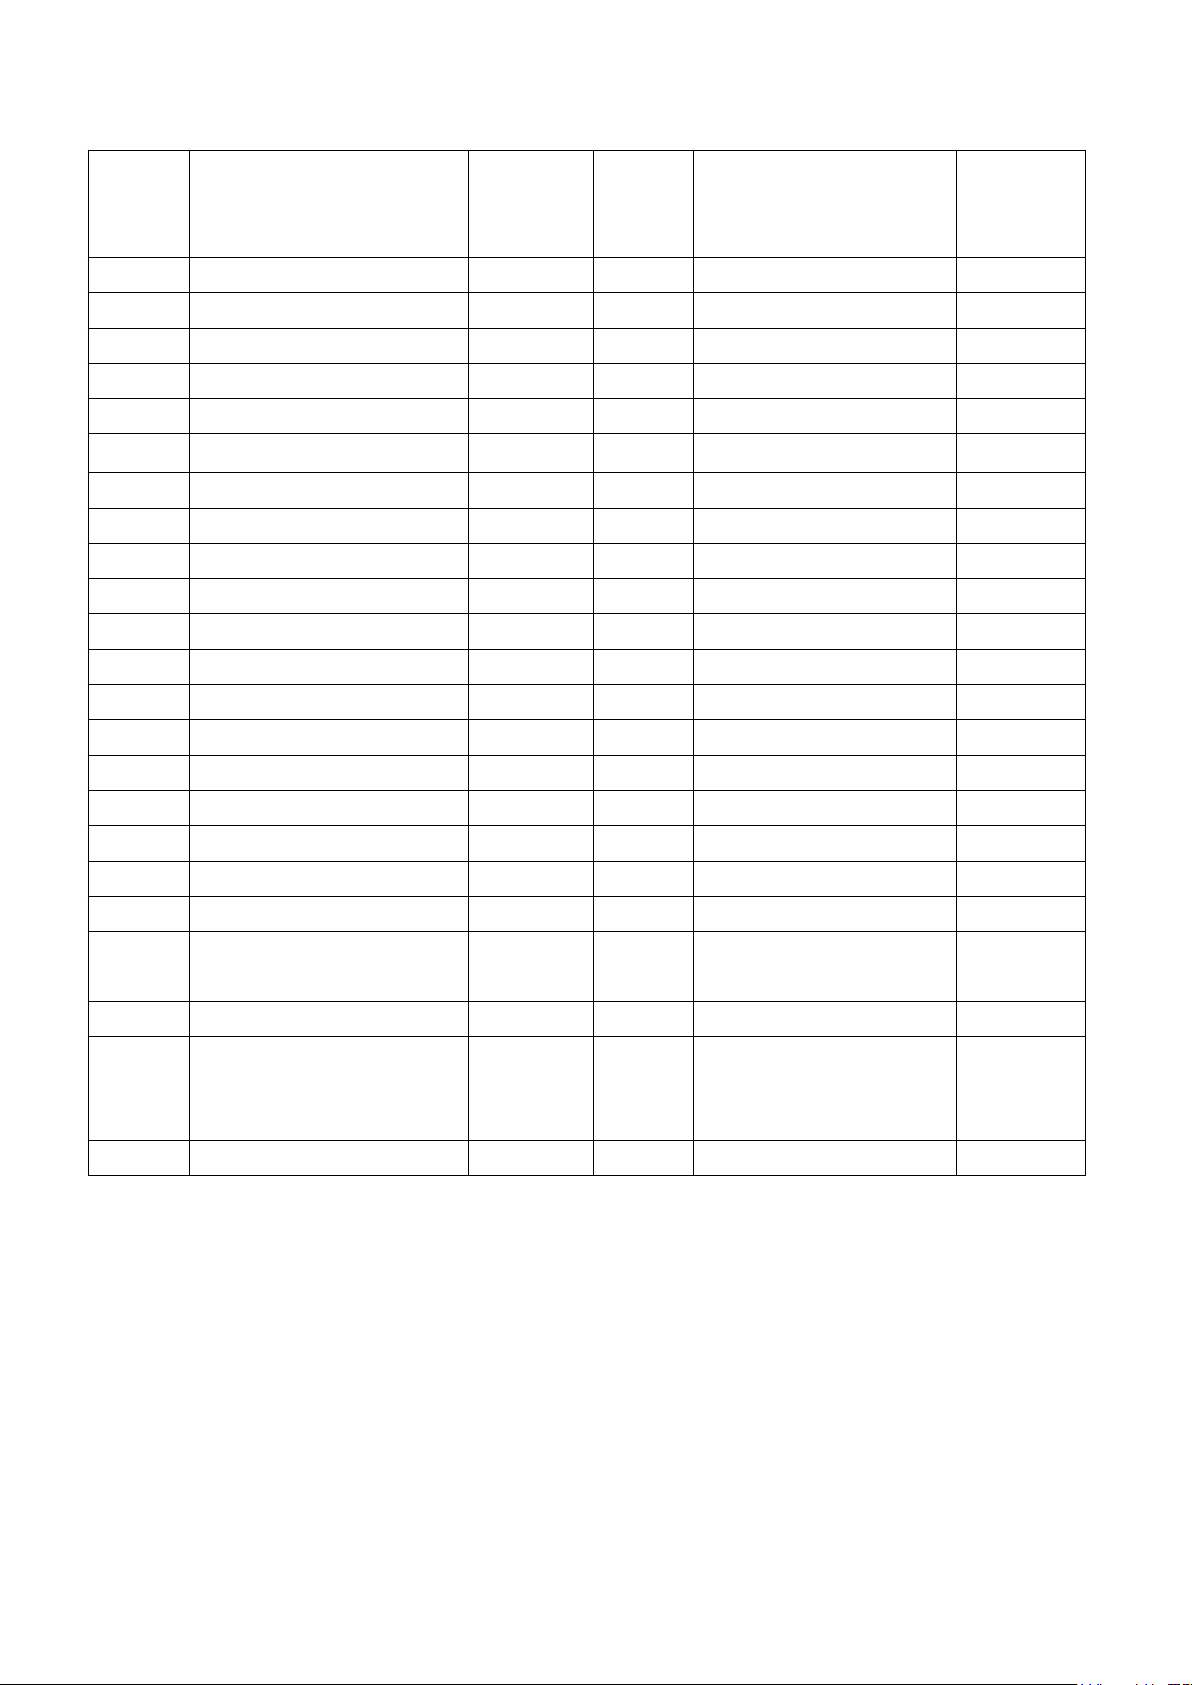
Configuration List
No.
Name
Quantity
No.
Name
Quantity
1
Housing
1
2
Frame
1
3
Front Stabilizer
1
4
Left pedal
1
5
Left crank
1
6
Rear Stabilizer
1
7
Right pedal
1
8
Right crank
1
9
Digital monitor
1
10
Tension knob
1
11
Carriage bolts 8*40
4
12
Flat washer 8*15*2
4
13
Cap nuts M8
4
14
Spanner
2
45
Hexagon wrench
1
5
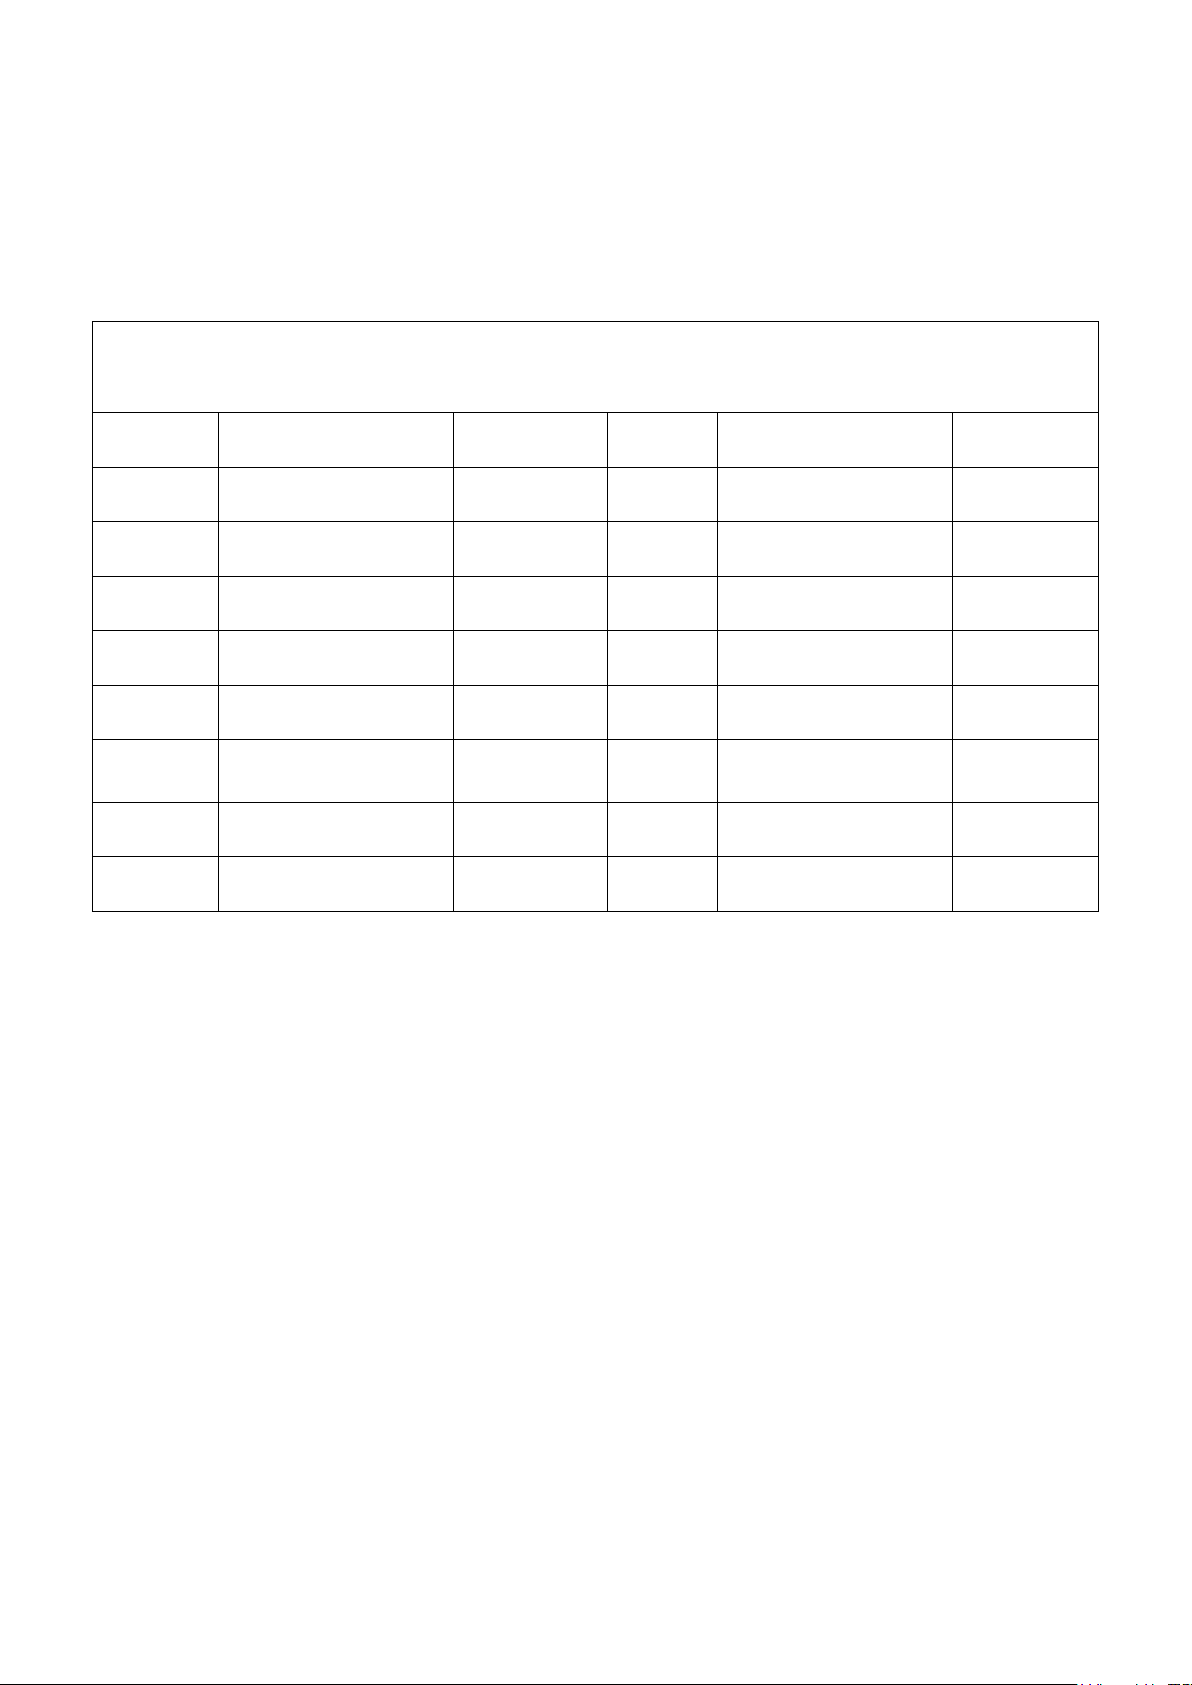
3. Installation Instruction
Step 1. Foot tubes installation
Accessories required: A short rear foot tube(6), a long front foot tube(3), four flat washers(12), four carriage bolts(11),
four cap nuts(13), a spanner(14)(Please refer to the illustration)
Pass the carriage bolts(reverse) through the holes in foot tube, then place the flat washer and tighten the cap nut with a
spanner. The other foot tube is installed in the same way
.
Step 2.Pedals installation
Accessories required: A left pedal(4), a right pedal(7), a spanner(14)(Please refer to the illustration)
Attach the right pedal to the right crank with the supplied spanner. Turn the right pedal right. Tighten it to the end and fix it.
Attach the left pedal by turning it to the left in the same way. Finally, install the pedal straps.
(Caution: All pedals and cranks have the“L”or“R”mark. The direction in which the pedal is tightened is also marked on
the crank. Do not mistake the direction when installing, or it will damage the crank)
6
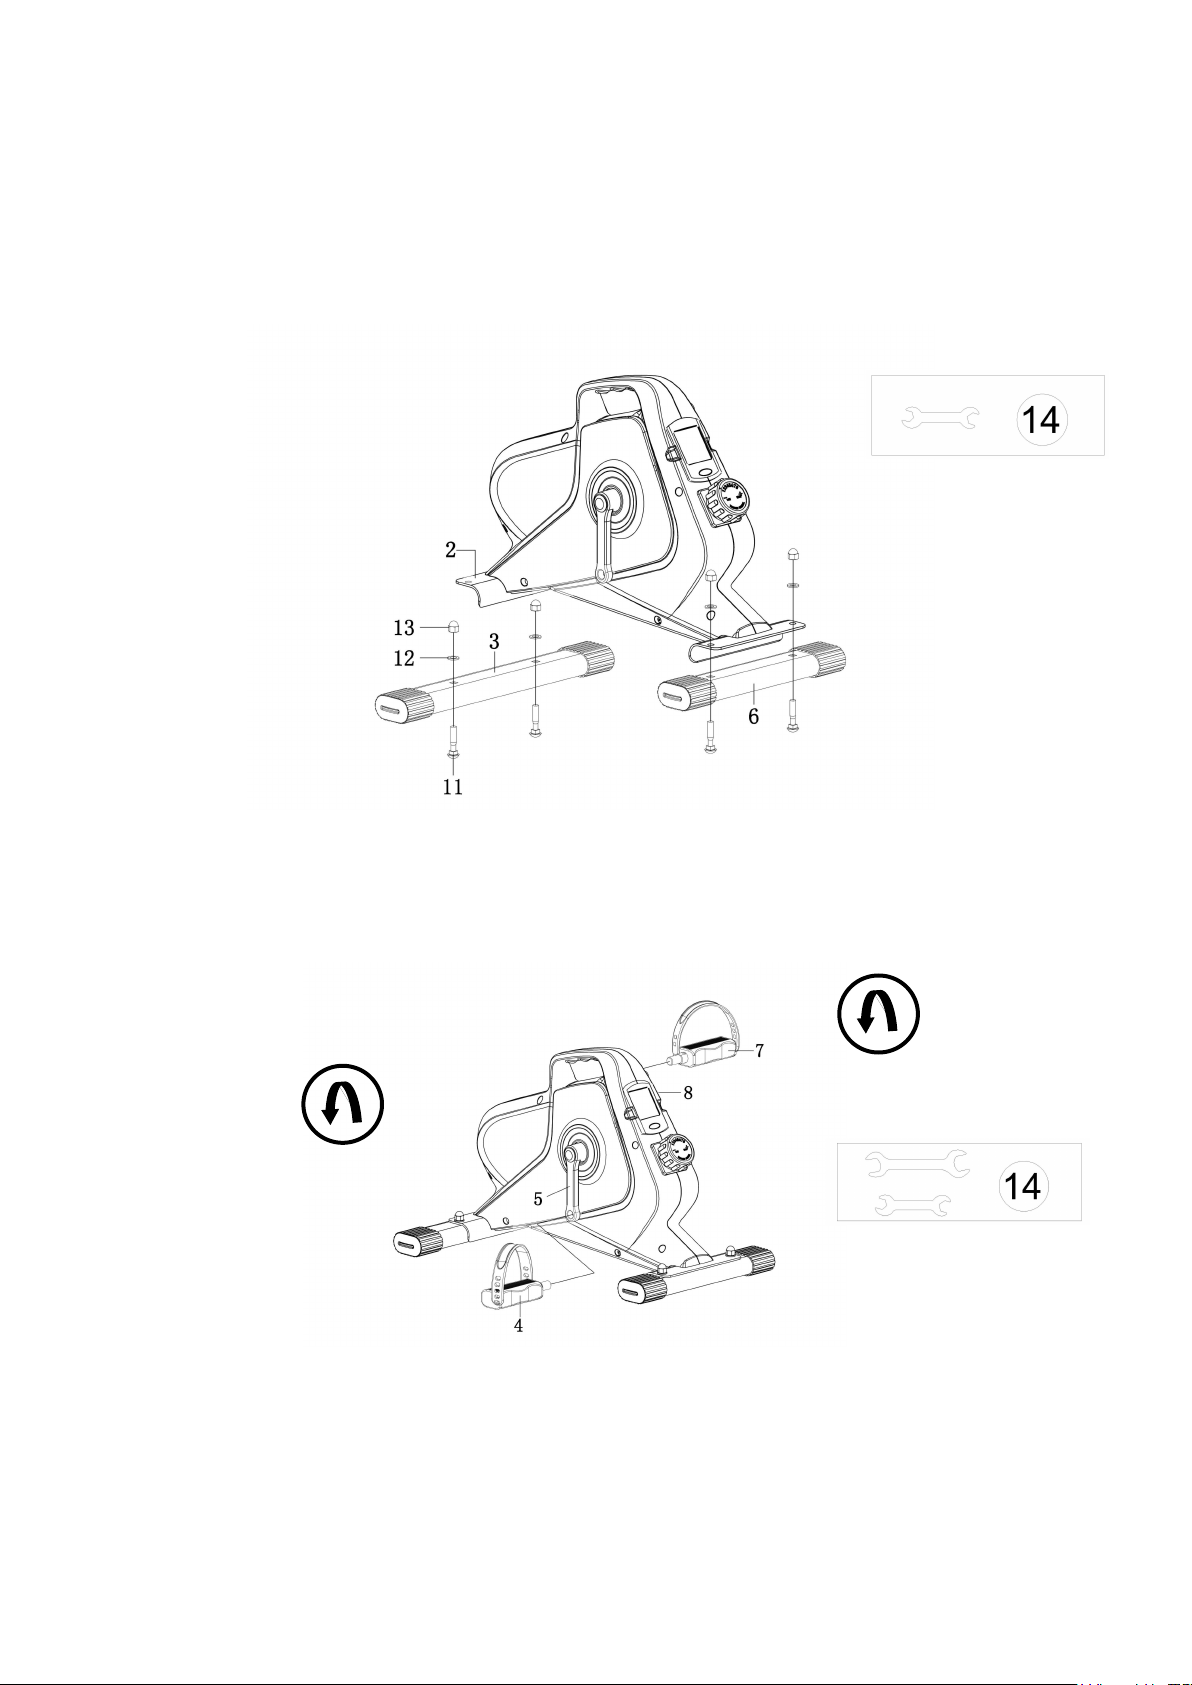
Step 3. Digital monitor installation
Accessories required: Digital monitor, battery (Please refer to the illustration)
Take out the electronic meter installed on the machine, and put the battery into the electronic meter. Then check whether the
induction line is connected with the electronic meter, and install the electronic meter into the machine after checking
nothing is wrong.
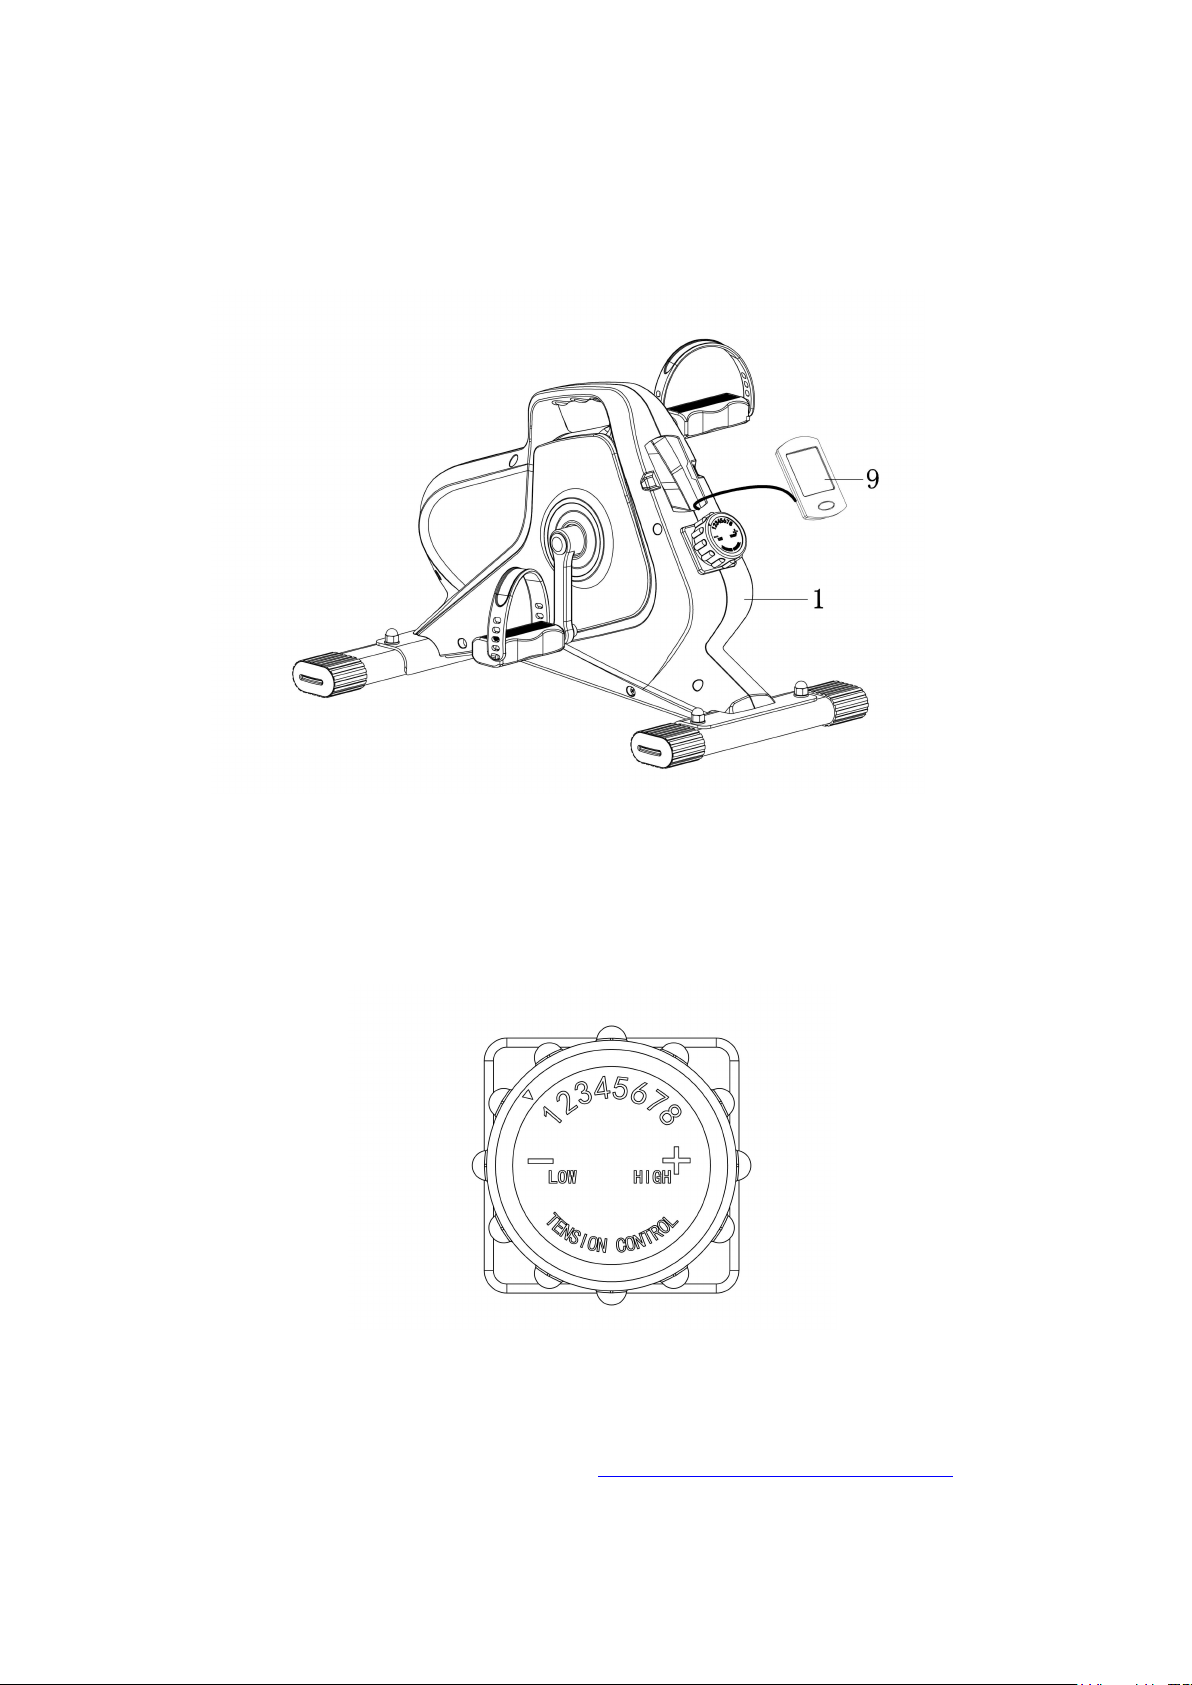
Resistance adjustment
The resistance of the product can be adjusted to 8 different tension. The "1" is the minimum resistance , and the "8" is the
maximum one. Please manually rotate the governor according to the direction.
Note:Tighten all bolts after the mentioned requirements are fulfilled. And check it carefully to avoid errors before using.
Any question please feel free to contact us
:yosudasports@gmail.com
7
8
NO.
Name
Quantit
y
NO.
Name
Quantity
1
Housing
1
2
Frame
1
3
Front foot tube
1
4
Left pedal
1
5
Left crank
1
6
Rear foot tube
1
7
Right pedal
1
8
Right crank
1
9
Digital monitor
1
10
Tension control
1
11
Carriage bolts 8*40
4
12
Flat washer 8*15*2
4
13
Cap nuts M8
4
14
Spanner
2
15
Foot cover
4
16
Hex nut M10
3
17
Chain adjuster 6*45
2
18
Axis
1
19
Bearing6000
2
20
Aluminum pulley
1
21
PJ230
1
22
PJ240
1
23
Circlip10
1
24
Circlip15
1
25
Bearing6202
1
26
Press belt axle
1
27
Flat washer 10*24*2
1
28
Lock nuts M10
1
29
Circlip17
6
30
Belt pulley
1
31
Flange Bearing Seat
2
32
Bearing 6003
2
33
Ring flange
2
34
Outer hexagon nut 6*12
6
35
Spring washer 6
6
36
Flange nut 10*1.25
2
37
Crank end cap
2
38
Flywheel
1
39
Cross recessed truss head
screw 6*12
2
40
Magnetic rod frame
1
41
Magnet
4
42
Plug
1
43
Cross recessed truss
head tapping screw 4*16
7
44
Cross recessed truss
head self drilling screw
4.2*16
4
45
Hexagon wrench
1

9
4.How to Use The Monitor
Red Button : Choose the mode to display the data or reset the data
Reset : Press the button for 5s or change the battery
Mode Type
SCAN Mode:Press the button many times until the monitor shows ""SCAN"" .Then the monitor will automatically displays
the data in order(Time,Speed,Calories,Odometer,Distance), switching every 6 seconds.
Lock Mode: If you choose Lock Mode, it will stay on that data state until you cycle all the way around to the "scan" option.
Press the button many times until the monitor shows what you want.
Functions
1.TIME: The time(in hours and minutes) from the beginning to the end of the exercise
2.RPM: The speed you pedal the exerciser within one minute
3.CAL: The calories from the beginning to the end of the exercise this time
4.ODO: The odometer from the beginning to the end of the exercise this time
5.DIST: The numbers will accumulate day after day unless you reset or change the battery
Notes:
1. If it does not show or the display is blurred, please replace the battery.
2. After stopping using for 4 minutes, the monitor will shut down automatically.
3. The monitor will start automatically calculate data after you restart the movement or press the button.
4. After you stop the movement for 4 seconds, the monitor will stop calculating the data.
5.Battery Type:2 AAA / UM–4