Loading ...
Loading ...
Loading ...
EN - 4
DESCRIPTION OF THE
APPLIANCE (Fig.A)
1 Accessory slots
2 Handle
3 Accessory release trigger
4 Speed and timer display
5 Start/Stop button
6 Speed adjustment buttons
7 Optimus beaters
8 Dough hooks
9 Wire beaters
10 Accessory bag
11 Feet
12 Identication plate
13 Cable winding clamp
IDENTIFICATION PLATE (12)
The identication plate states the technical
data, the serial number and marking. The
identication plate must never be removed.
BEFORE COMMISSIONING
• Unpack the appliance carefully and remove
all packaging materials and any labels and
stickers.
• Clean the motor base using a damp cloth.
Wash all components and dry thoroughly
(see paragraph “Cleaning and Mainte-
nance”).
Before use, check that all compo-
nents are integral.
ASSEMBLY OF COMPONENTS
(Fig. B)
• Beaters and dough hooks must be inserted
into the correct side, and are not inter-
changeable.
• Insert beater/dough hook with a round
ring (A) into the round slot (A).
• Insert beater/dough hook with octagonal
ring (B) into the octagonal slot (B).
Do not use two accessories of
different type together.
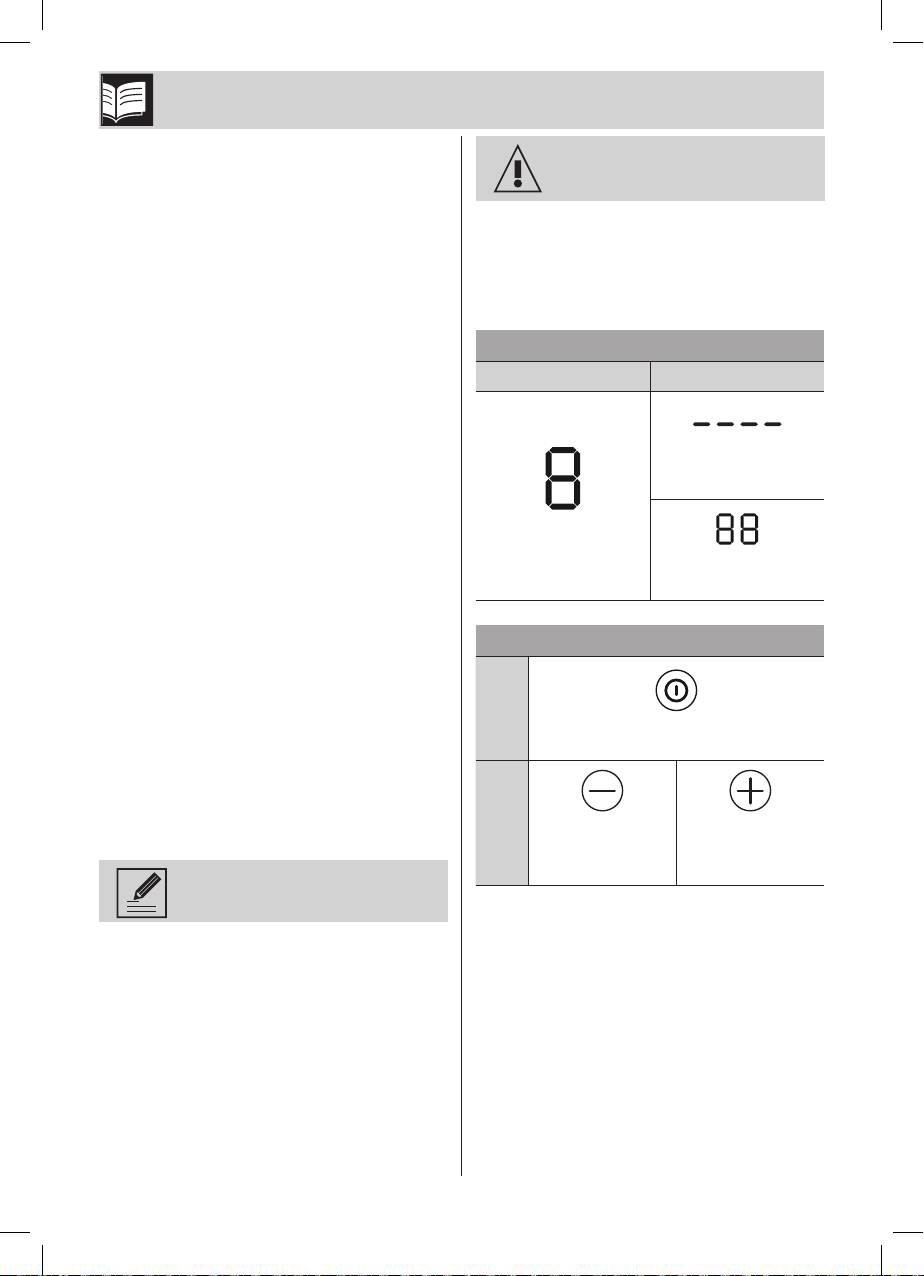
DESCRIPTION OF CONTROLS
AND ACCESSORIES
The appliance is equipped with 3 buttons and
a time and speed display.
Display (4)
(4a) (4b)
Selected speed
Running timer in
minutes
Running timer in
seconds
Buttons
(5)
ON - OFF Key
(6)
Decrease speed
Increase speed/
Turbo function
(keep pressed)
Optimus beaters (7)
• Use this accessory for semi-hard doughs,
medium-consistency creams, chocolate
based doughs, pastry doughs, cakes and
biscuits doughs,etc.
• Always use both beaters.
Description / Assembly / Commands
Loading ...
Loading ...
Loading ...