Loading ...
Loading ...
Loading ...
Page 4
Parts Supplied
1 - Hardware bag
• 4 - 4x8 mm installation screws
1 - Charcoal Filter
1 - Air deector
Installation Instructions
If it is not possible to vent cooking fumes and vapors to
the outside, the hood can be used in the non-vented
(recirculating) version, using the recirculating kit .
Fumes and vapors are recycled through grid.
1. Assemble the air deector with the duct cover bracket
using (4) 4.2 x 8 mm screws.
C
B
A
A. Mounting screws
B. Air deector
C. Duct cover bracket
2. Measure from the bottom of the air deector to the
bottom of the hood outlet.
X
A
C
B
D
E
A. Air deector
B. Vent clamp
C. X = length to cut vent duct
D. Vent duct
E. Exhaust outlet
3. Cut the duct to the measured size “X.”
4. Remove the air deector.
5. Slide the duct onto the bottom of the air deector.
6. Place the assembled air deector and duct over the
exhaust outlet from the hood.
7. Reassemble the air deector to the duct cover bracket
with the four assembly screws.
8. Use duct tape or vent clamps to seal the deector and
the exhaust outlet from the hood.
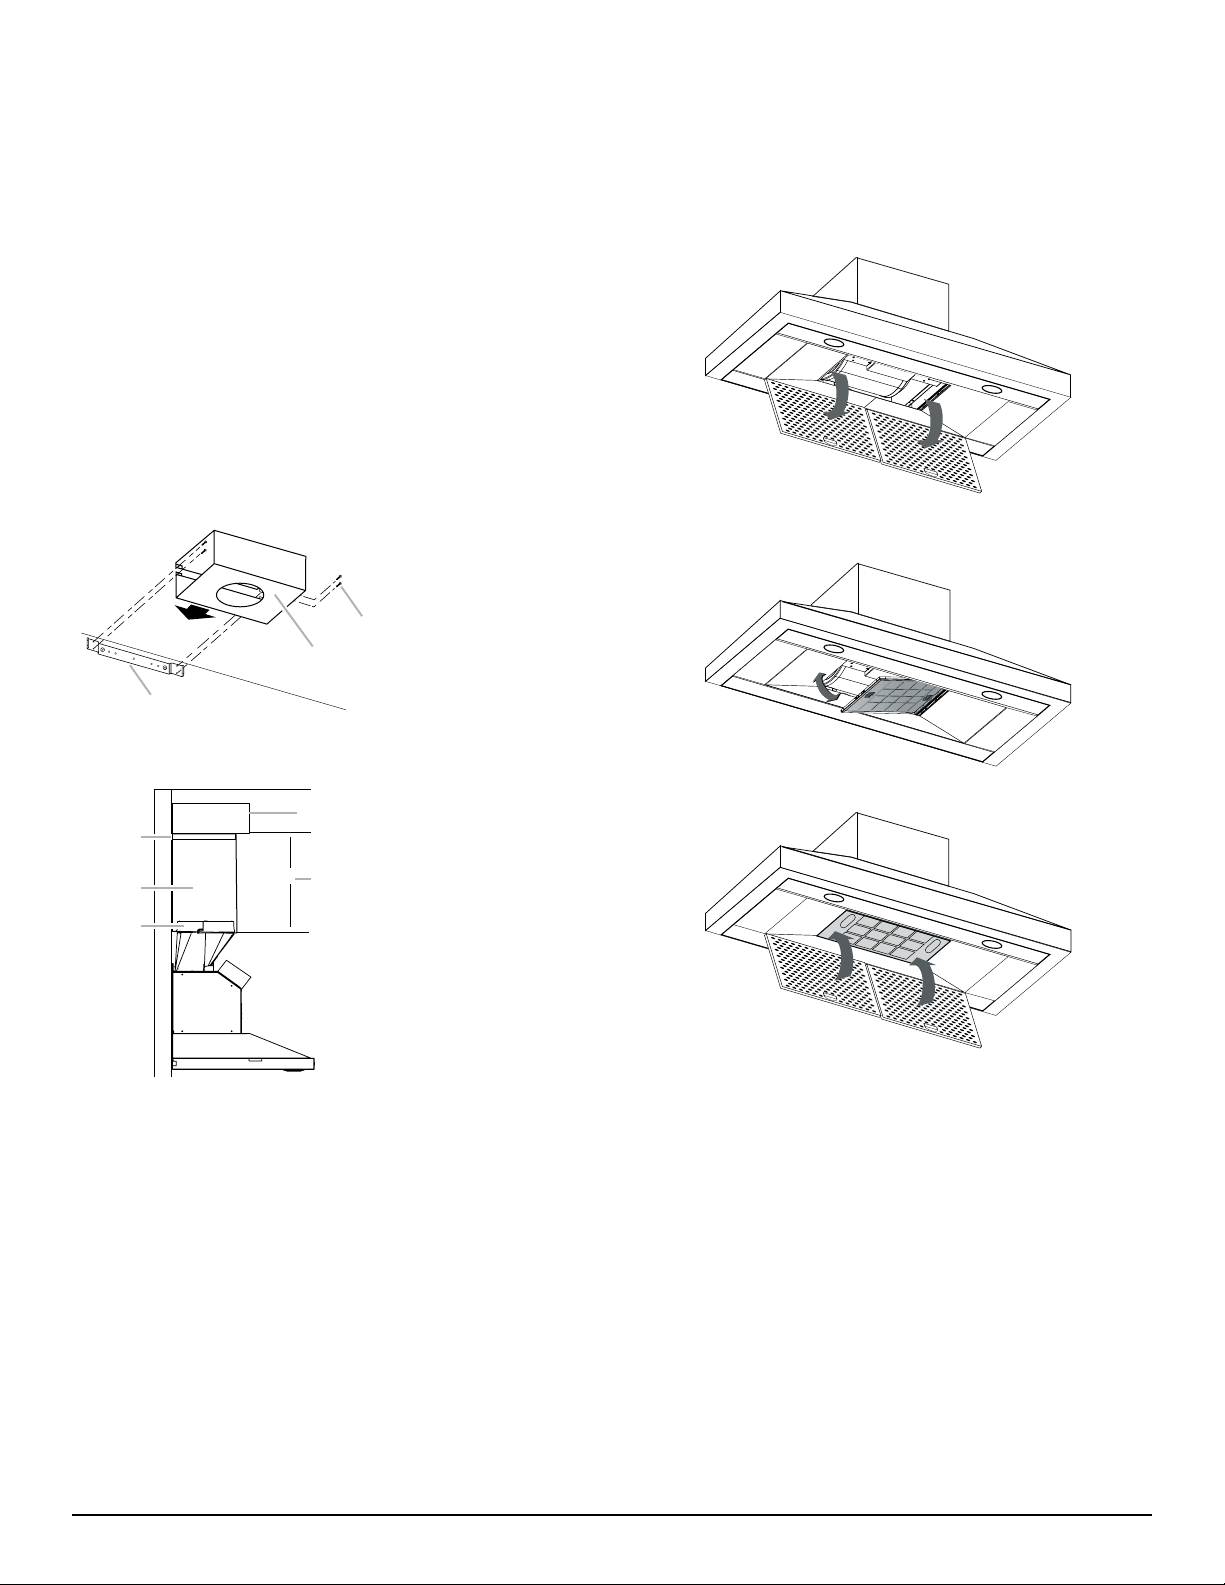
Charcoal Filter Replacement
In the recirculating mode, the air will be recirculated
through disposable charcoal lters that help remove smoke
and odors.
• Remove the grease lter of the hood.
• Position the charcoal lter inside the structure of the
motor as shown in picture.
• Reinstall the grease lter onto the bottom of the hood.
NOTE: The charcoal lters cannot be cleaned. It should be
replaced every 4-6 months (depending on hood usage).
Loading ...
Loading ...
Loading ...