Loading ...
Loading ...
Loading ...
9
8
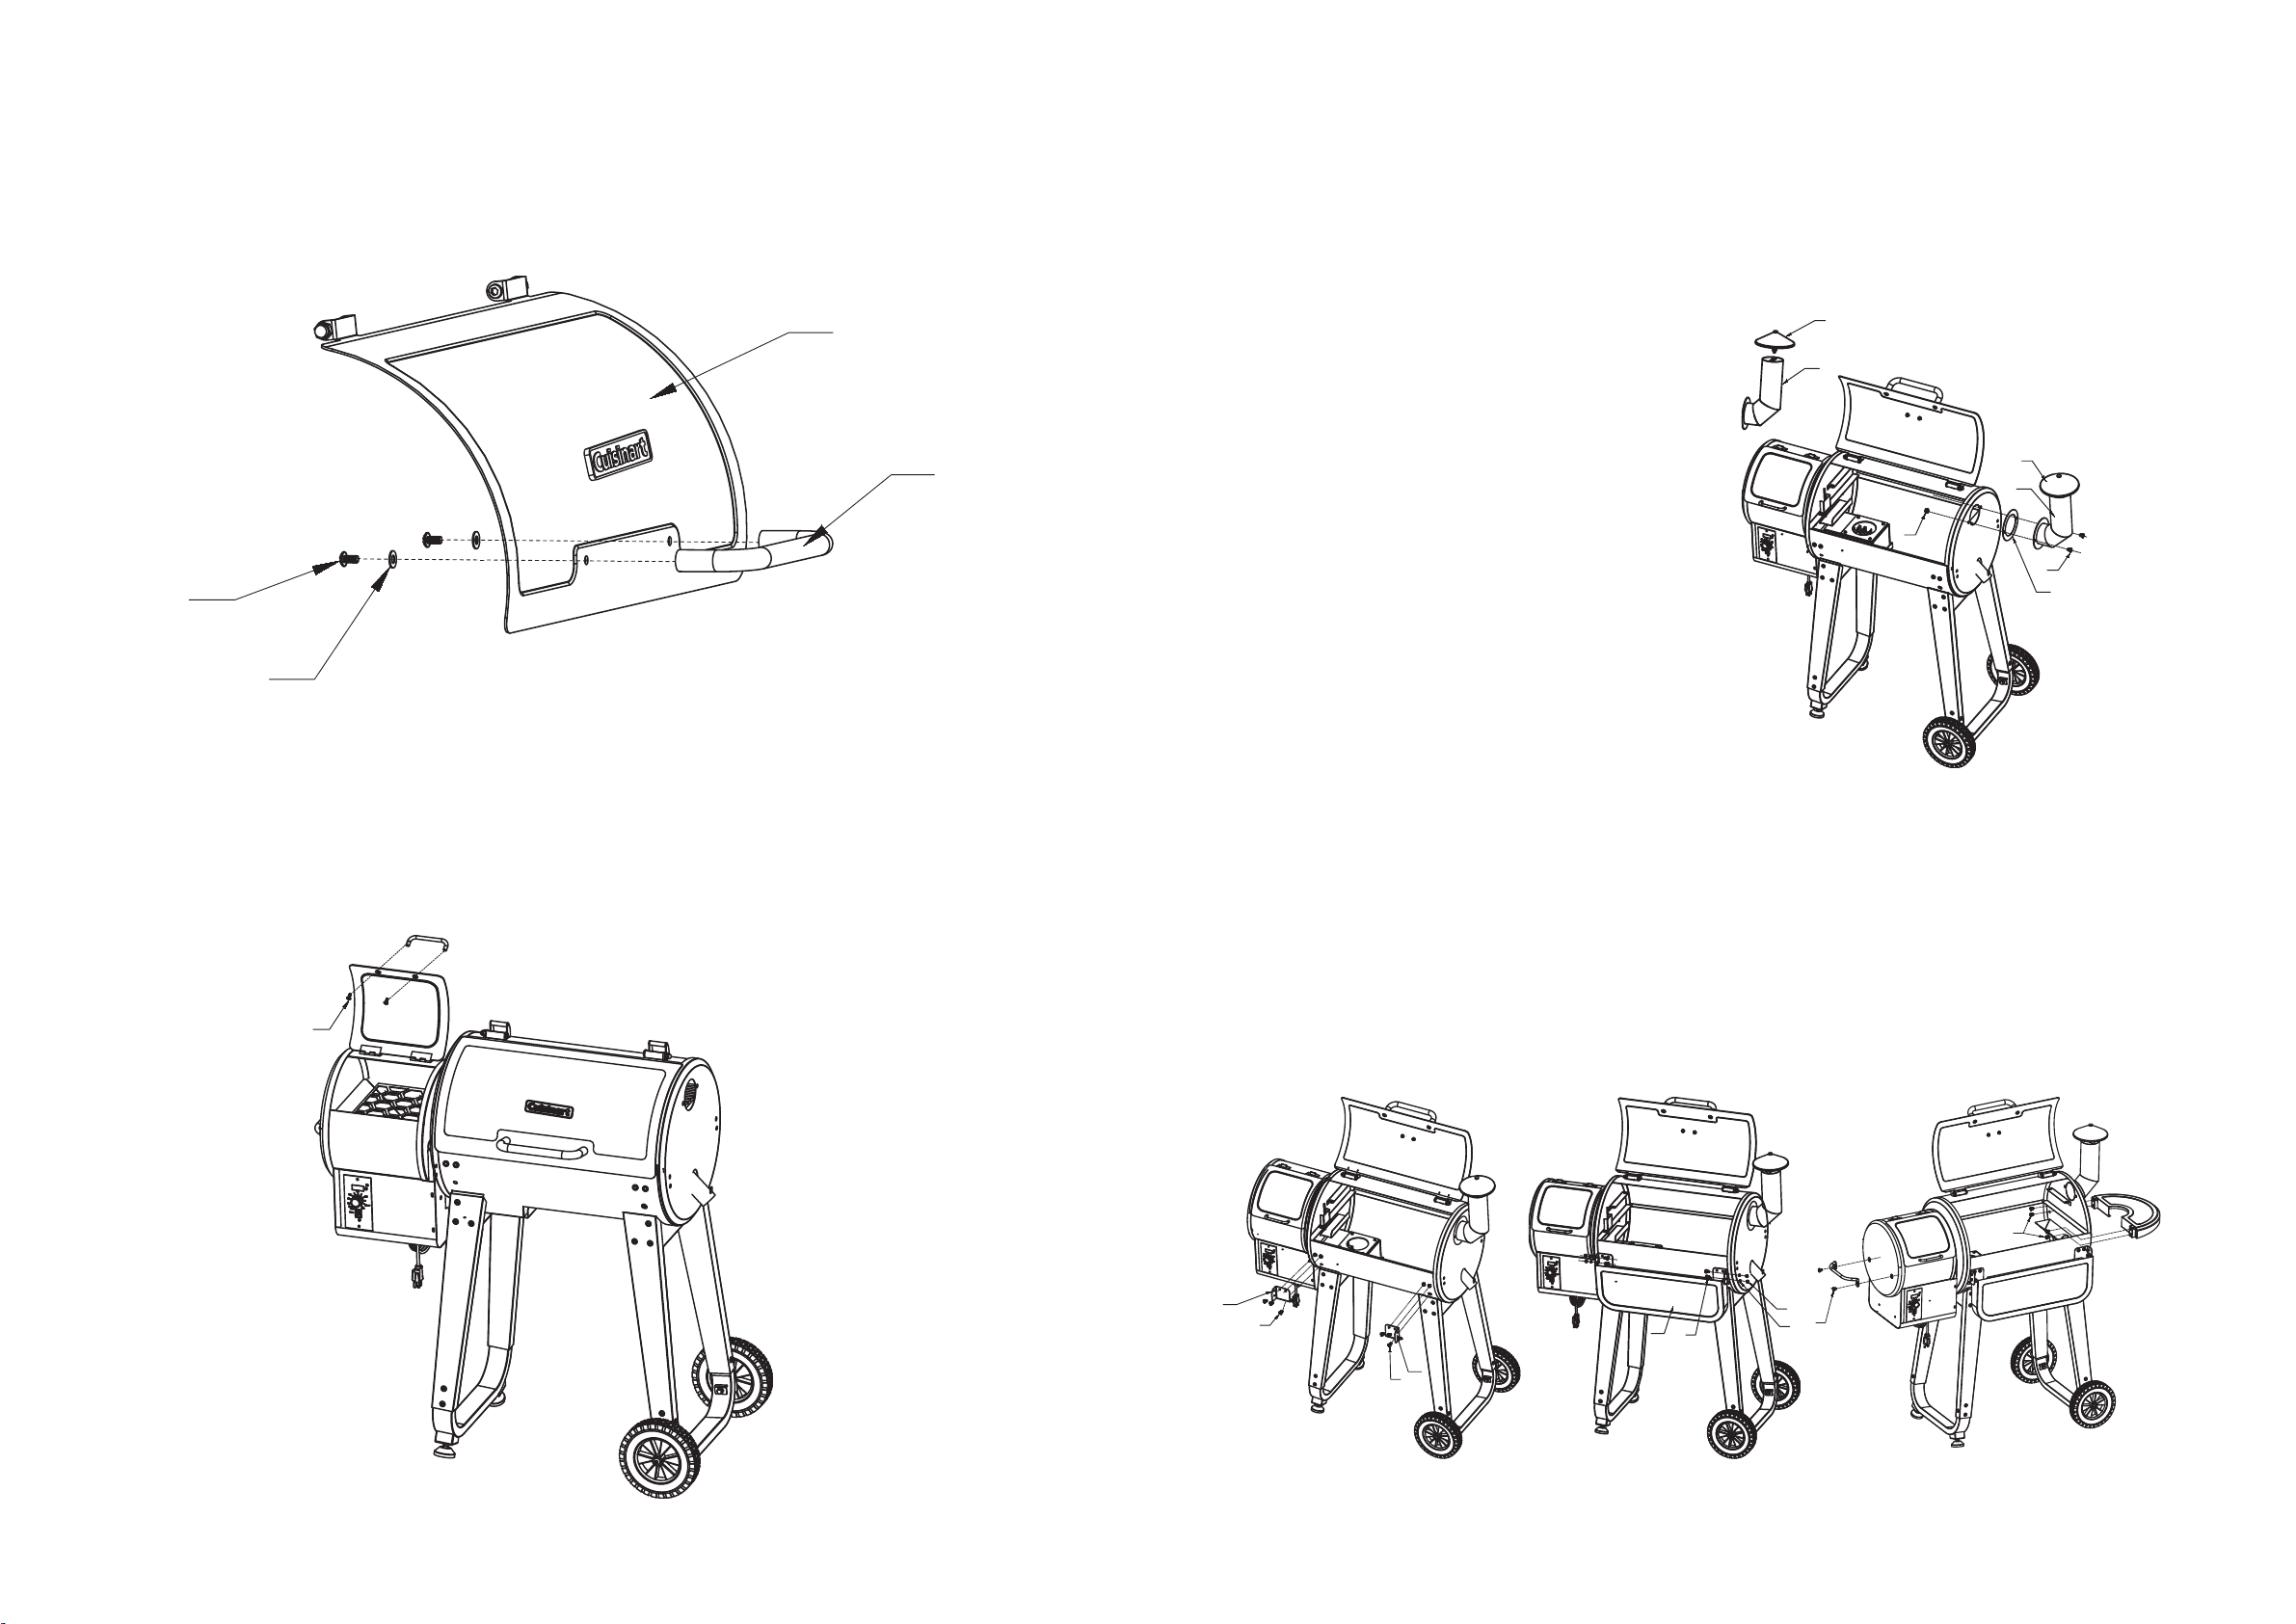
ATTACHING HANDLE TO LID
1) Place one Hexagon Bolt (A) through one Flat Washers (G), then place both through the
back side of the Lid (4) and meet with the Lid Handle (6). Tighten loosely with a wrench.
Repeat on other side. Fully tighten both sides. (Do not over tighten these Bolts)
1) Keeping the Hopper Burner Lid open, insert one Bolt (B) through the back side of the
Hopper Burner Lid and align with the Hopper Lid Handle (24). Tighten loosely with a
wrench. Repeat on the other side. Fully tighten both sides.
2) Align the Side Handle (3) with the corresponding holes on side of the Hopper Burner.
Insert one Bolt (B) and tighten slightly. Repeat on the other side. Fully tighten both sides.
ATTACHING HOPPER HANDLE TO HOPPER LID
ATTACHING SMOKESTACK TO GRILL CHAMBER
1) Place the Chimney Gasket (11) between the Chimney (10) and the Grill Chamber.
Align the holes between the Chimney (10), Chimney Gasket (11) and Grill Chamber.
Secure by placing a Hexagon Bolt (A) through the corresponding holes. Place a Flat
Washers (G) on each Bolt inside the Grill Chamber and secure with a Nut (H) using a wrench.
2) Screw the Chimney Cap (9) into the bracket in the top of the Chimney (10).
Hand tighten the cap to the desired height.
ATTACHING SHELVES
1) Mount the Front Shelf Left Bracket (14) and Front Shelf Right Bracket (17) on each side
by aligning the two holes on the top and one on the bottom (the flange should be on the
outside of the bracket). Secure with 3 Screw (B) for each bracket. Placing the FRONT TABLE
in between the two brackets and aligning bottom holes and securing using a Shoulder
Screw (C) and Nut (D). Attached a Shoulder Screw (C) and Nut (D) to the top hole of each
bracket flange. To use the Front Shelf (18), lift and secure over the Should Screw.
2) Align the holes in the Side Shelf (22) with the corresponding holes on the right side of
the Grill Chamber. With Grill Chamber Lid open, insert two Bolts (B) and thread into the
Side Shelf. Repeat the process on other side. Tighten the Bolts.
6
4
A
G
F
A
9
10
9
10
11
H
B
14
17
B
C
D
E
18
B
B
Loading ...
Loading ...
Loading ...