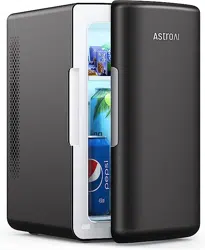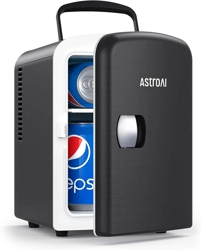

4 L MINI FRIDGE
USER MANUAL
LY0204A

Thank you for purchasing the AstroAI 4 L Mini Fridge.
This portable fridge can be plugged into a 12 V car cigarette lighter
and a standard wall outlet. Its powerful cooling lets you keep
everything at the perfect temperature.
We hope you enjoy your new mini fridge! If you have any questions
or concerns, please email us via suppor[email protected]m.
INTRODUCTION
Please fully read and understand this manual before using this
product; keep this manual for future reference.
!
- 02 -

The fridge connects to wall outlets with an AC power cord. Before
using, check that the outlet’s voltage corresponds to the rating
shown on the appliance nameplate.
(US/CA/MX:120 V, EU/UK: 220-240 V).
For your safety, please do not disassemble the fridge.
To reduce the risk of fire or electrical shock, always connect the
fridge to a grounded outlet.
Avoid using this fridge in dusty or air-contaminated environ-
ments. Use in these environments may draw debris into the
fridge.
Always use the fridge in a well-ventilated area. Ensure that the
back and sides of the fridge have at least 2 inches of space to
allow for proper airflow.
Store the fridge in a dry and well-ventilated place. Keep this unit
away from direct sunlight.
DO NOT allow children to use this portable fridge without adult
supervision.
Unplug the fridge’s power cord from the 12 V cigarette lighter
socket when the car’s engine is turned o. Failure to do so may
drain the car battery.
DO NOT directly connect the fridge to a 24 V power supply.
SAFETY INFORMATION
- 03 -

To prevent possible damage to the fridge, unplug it during
lightning storms or if not in use for extended periods of time.
Keep this product away from rain, corrosive gases, and liquids.
To safely disconnect the fridge from a power source, turn o the
switch on the back of the fridge, then unplug the cord from the
power supply.
DO NOT bend, stretch, or pull apart the power cable, doing so may
cause an electric shock.
Ensure the power socket is easy to access during installation and
handle it with care.
DO NOT squeeze or crush the product.
DO NOT place the product upside down.
DO NOT leave heavy objects on top of the product.
- 04 -
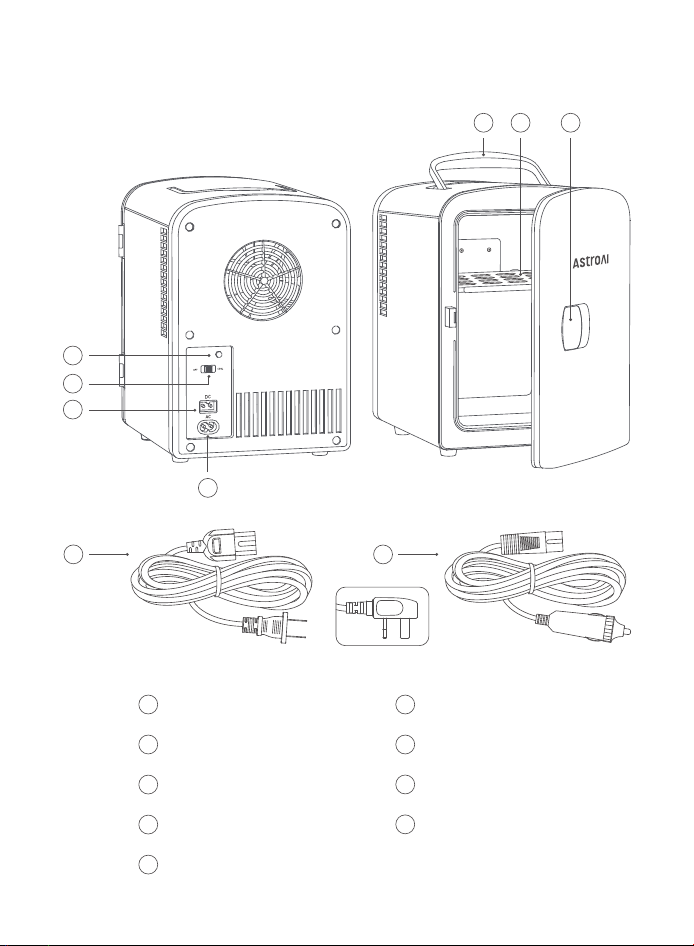
DIAGRAM
or
1
2
3
765
8
4
9
Cool Indicator Light
1
DC Port
3
OFF/Cool Switch
2
AC Port
4
Carrying Handle
5
Removable Shelf
6
Door Handle
7
AC Power Cord
8
DC Power Cord
9
- 05 -
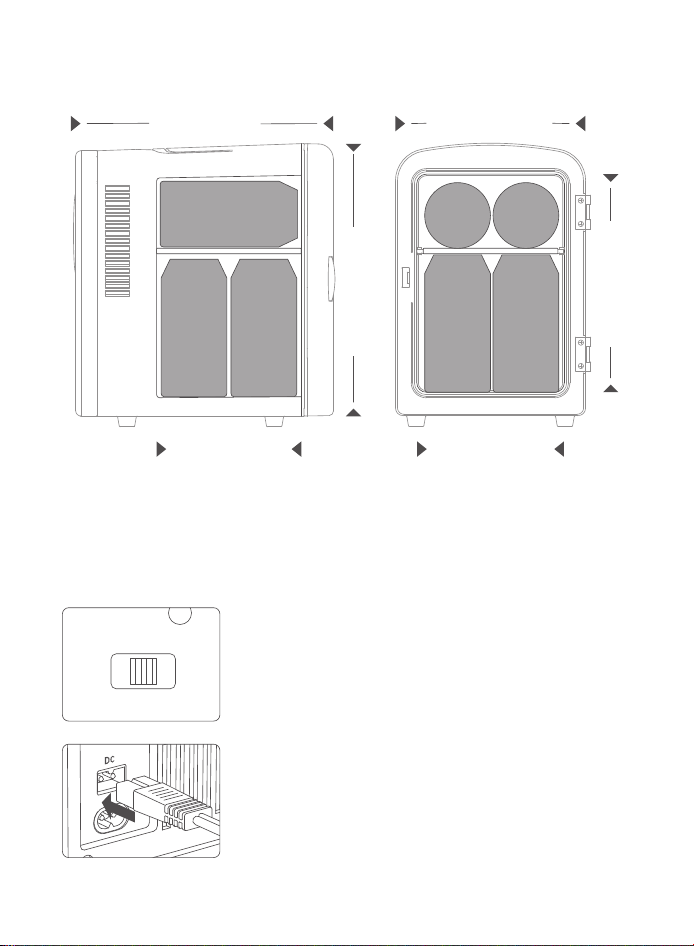
INSTRUCTIONS
9.4 in(24 cm)
6.9 in(17.5 cm)
5.3 in(13.5 cm) 5.5 in(14 cm)
9.8 in(25.5 cm)
8.1 in(20.5 cm)
DIMENSIONS
355 ml
355 ml
Connecting the 12 V Power Supply
1. Turn the switch to the OFF position before connect-
ing the DC port to a power supply. Otherwise, the
green indicator will not illuminate.
2. Insert the DC power cord into the DC power port on
the back side of the fridge.
OFF COOL
- 06 -
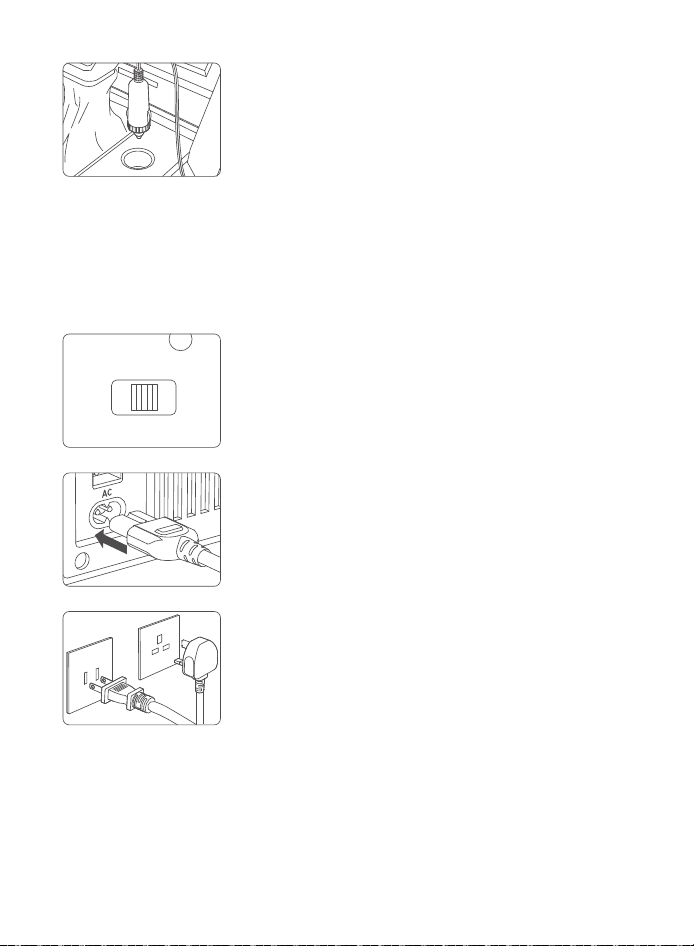
OFF COOL
1. Turn the switch to the OFF position before connect-
ing the AC port to a power supply. Otherwise, the
green indicator will not illuminate.
3. Place the fridge on a stable surface, and insert the
DC power cord plug into a vehicle’s cigarette lighter
socket.
4. Switch the OFF/Cool Switch to the Cool side. The green indicator light will
illuminate.
Connecting to A Wall Outlet
2. Insert the AC power cord into the AC power port on
the back side of the fridge.
3. Place the fridge on a stable surface, and insert the
AC power cord plug into the wall outlet. Before
using, check that the supply voltage corresponds
to the one shown on the appliance nameplate.
or
4. Switch the OFF/Cool Switch to the Cool side, so the green indicator light
will illuminate.
- 07 -

Cool Mode Tips
For ecient cooling, fill the fridge with beverages that have already been
refrigerated.
The fridge can cool beverages, cosmetic products, and fruits.
The lowest possible temperature the fridge can achieve depends on the
surrounding ambient temperature. The lower the ambient temperature,
the better the fridge's cooling performance will be.
TROUBLESHOOTING
Fridge is Not Working
Check the indicator light; if the light is o or flashing, please check the
power connection.
Check the back of the fridge. Ensure you turn on the switch correctly.
Turn on the car power first (for car use).
Ensure the fridge’s voltage matches the supply voltage (for home use).
The fridge is only compatible with 12 V cigarette lighters (for car use).
Poor Heat Dissipation
Make sure that the back and sides of the fridge have at least 2 inches of
space from the wall.
DO NOT use the fridge in a high-temperature environment.
DO NOT block the heat dissipation area.
The Cooler is Not Working
Ensure the switch is on the Cool side.
Check if the fan is functioning properly. Contact AstroAI Customer Support
if the fridge is making any loud noises.
- 08 -

SPECIFICATIONS
Model Capacity
Input Voltage
DC 12 V
AC 220-240 V, 50/60 Hz
(DE/UK/FR/ES/IT)
Operating
Temperature
32 °F-40 °F ( 18-22 °C )
Below the Ambient Temperature
Cool Mode: 40 W; 3.3 A
AC 120 V, 60 Hz
(US/CA/MX)
Cool Mode : 0.7 A
Cool Mode : 50 W
LY0204A 4 L
MAINTENANCE
Make sure to empty out and disconnect the fridge before cleaning it.
Use a wet cloth and mild soap to clean the fridge.
If the fridge will not be used for a long period of time, please dry the
interior before storing it.
Excessive Condensation Droplets
DO NOT frequently open the door, or keep it open for a long time.
DO NOT place hot objects in the fridge.
The lowest possible temperature the fridge can cool to depends on the
ambient environment, however, it cannot cool lower than 32 °F (0 °C).
The cooler the ambient temperature is, the cooler the fridge will be.
Abnormal Noises
Check for any foreign objects on the fan.
Look for any parts that have fallen o the fridge.
- 09 -

RECYCLING
You may dispose of the product when its service life has ended.
Please recycle the recyclable parts according to local guidelines.
Each AstroAI 4 L Mini Fridge will be free from defects in material and
workmanship.
This warranty does not cover damage from neglect, misuse, contamina-
tion, alteration, accidents, or other abnormal conditions of operation or
handling. This warranty covers the original purchaser only and is not
transferable.
AstroAI always wants to provide our customers with excellent products
and customer service.
Questions or concerns? We’re happy to help!
Please contact us at [email protected] or visit astroai.com.
WARRANTY PERIOD
1-Year Limited Warranty from AstroAI.
- 10 -

Web: www.astroai.com
E-mail: support@astroai.com
V2.2