Loading ...
Loading ...
Loading ...
7
PROGRAMMING YOUR
COFFEEMAKER
SETTING THE CLOCK
When the coffeemaker is plugged in,
12:00 will appear until you set the time.
Turn the Function knob to CLOCK
Hold down the Hour or Minute button until
the clock begins flashing. Press either
button to select the desired time. Hold
buttons down to scroll through the digits, or
press and release to advance one digit at a
time. When scrolling, the numbers will
advance slowly and then speed up. When
the number displayed approaches the
desired time, press and release to advance
one digit at a time. Be sure the PM
indicator is on if a PM time is desired.
SETTING THE AUTO ON TIME
When you turn the Function knob to PROG,
it displays a previously selected Auto On
time, or the default time (12:00pm).
1. Turn the Function knob to PROG
Follow directions under SETTING THE
CLOCK (above) to program your start-
brew time.
2. Turn the Function knob to AUTO ON
LCD will display the current time.
3.
Press and release On/Off button
A green light indicates that coffeemaker is
in AUTO ON mode. A red light will come
on when brew cycle begins. Both lights
will go off when Keep Warm cycle ends.
NOTE: To start brew time at the same
time the next day, simply make sure the
Function knob is on AUTO ON and press
and release On/Off button once more.
Green Auto On light will go on.
MAKING COFFEE
Follow instructions in “Before Brewing
Your First Pot of Coffee” in previous
section and get ready to start enjoying
your coffee up to 25% faster.
1.
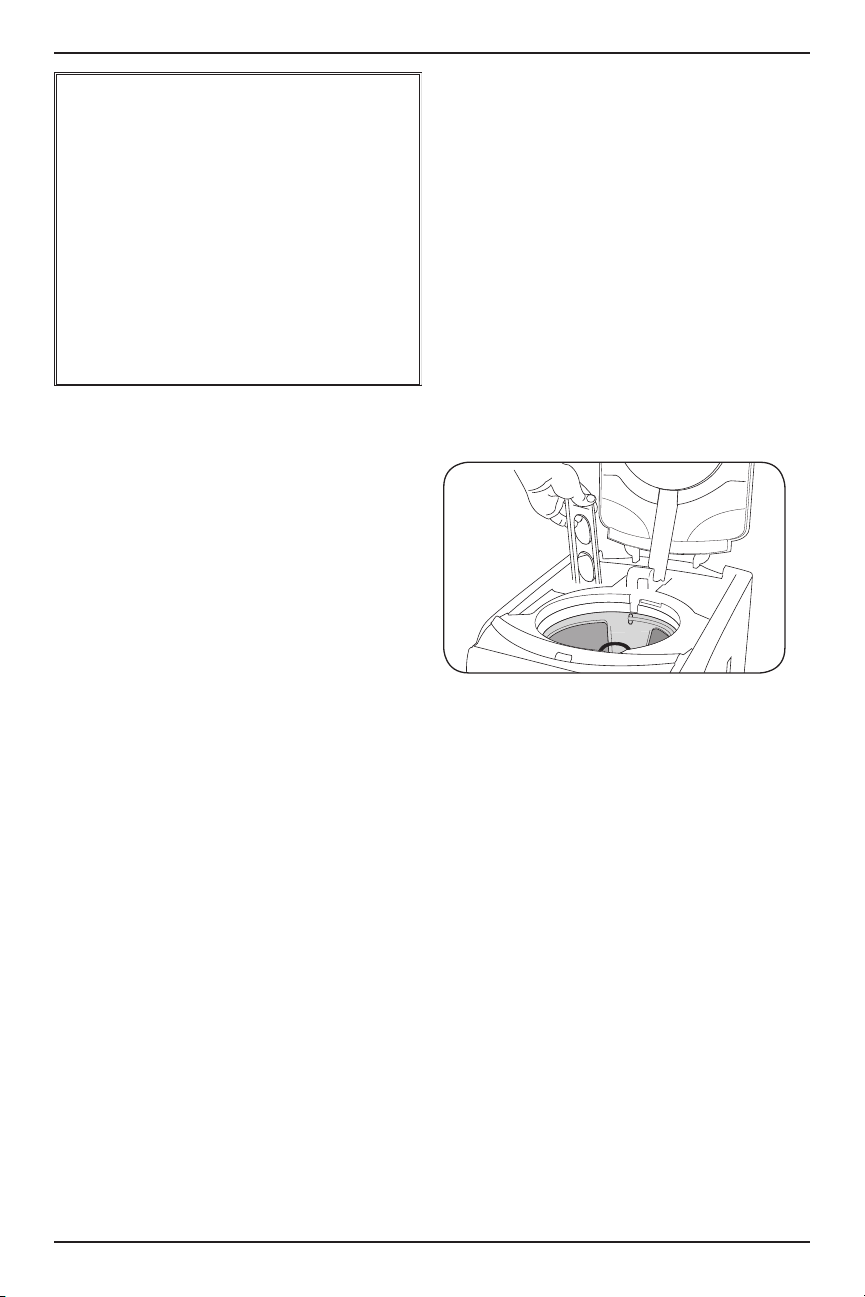
Insert charcoal water filter
Follow directions for the preparation and
insertion of the filter on page 8.
2.
Fill the water reservoir
Open the reservoir cover by lifting it up.
Pour in the desired amount of water
using the water level window located at
the side of the coffeemaker.
Helpful Hint: Using cold water in the
carafe can affect brewed coffee tempera-
ture. “Preheat” your carafe by rinsing it
out with hot water before brewing.
3.
Set preferences
a.
Push the 1–4 cup button if you are
brewing fewer than 5 cups.
b.
Press Regular or Bold button to select
brew strength.
Flavor will remain at
selected strength until you change it.
c.
Turn Ready Tone on to signal when brew
cycle is complete. (5 tones will sound)
4.
Add the ground coffee
Remove the filter basket by grasping the
handle and lifting straight up, and then
place it on the countertop. Insert a #4
paper filter or permanent filter. Be sure
that the paper filter is completely open
BEFORE BREWING YOUR
FIRST POT OF COFFEE
During the manufacturing process, dust
can get trapped in your coffeemaker. We
recommend flushing out the system
before brewing your first pot of coffee.
Simply fill the reservoir and power on the
unit. (See steps #2 and #6 in MAKING
COFFEE instructions, below). DO NOT
ADD COFFEE!
Once you’ve done that, brew a pot of real
coffee and get ready to enjoy Cuisinart at
its best!
Loading ...
Loading ...
Loading ...