Loading ...
Loading ...
Loading ...
o
Connecting the speaker cables
Carefully check the left (L) and right (R) channels and + (red) and –
(black) polarities on the speakers being connected to this unit, and be
sure to connect the channels and polarities correctly.
1
Peel off about 10 mm of sheathing from the tip of the
speaker cable, then either twist the core wire tightly or
terminate it.
.
2
Turn the speaker terminal counterclockwise to loosen it.
.
3
Insert the speaker cable’s core wire to the hilt into the
speaker terminal.
.
4
Turn the speaker terminal clockwise to tighten it.
.
o
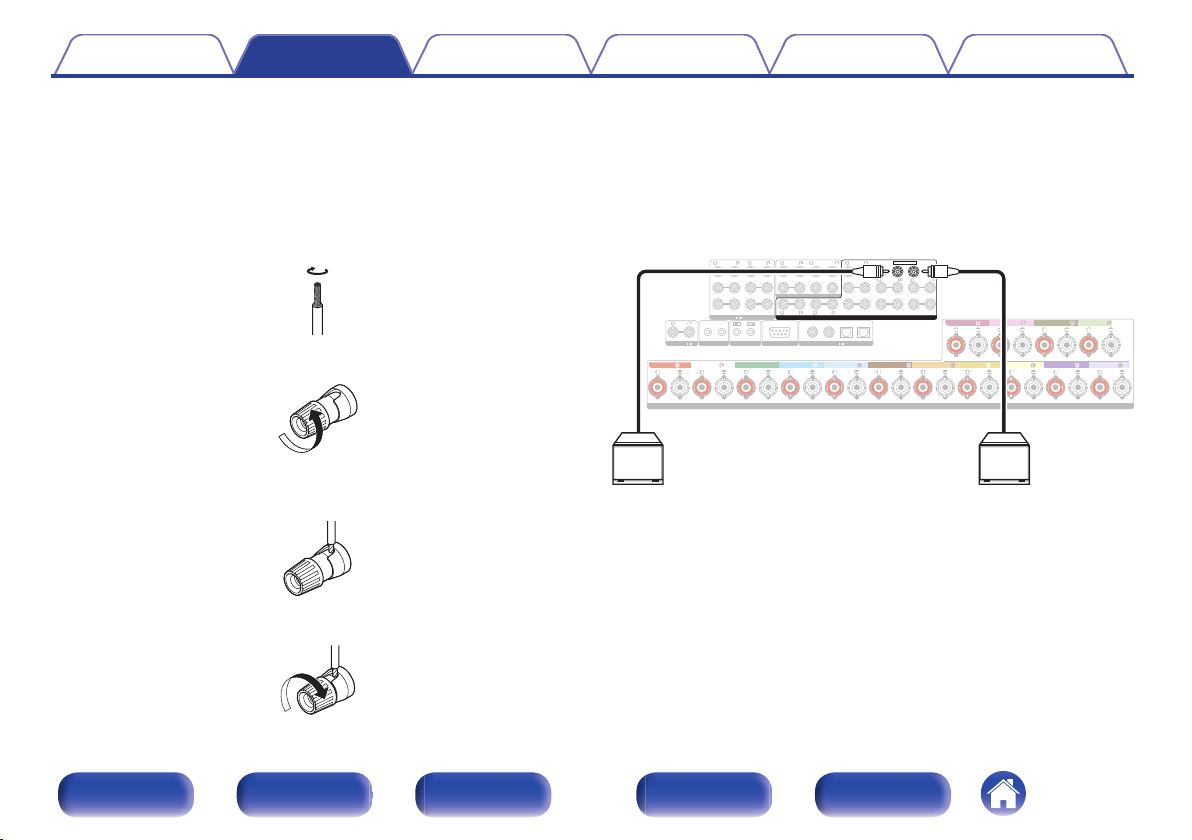
Connecting the subwoofer
Use a subwoofer cable to connect the subwoofer. Two subwoofers can
be connected to this unit.
To use two subwoofers, set “Subwoofer” to “2 spkrs” in the “Speaker
Config.” setting. (v p. 232)
The level and distance can be set separately for Subwoofer 1 and
Subwoofer 2.
.
1 CBL/SAT
PHONO
2
DVD
1
CBL/SAT
2
CD
1
TV
AUDIO
6 CD
2 DVD
12
3 Blu-ray
5 MEDIA PLAYER
4 GAME
RS-232C
7.1CH IN
REMOTE CONTROL
TRIGGER OUT
PRE OUT
COAXIAL OPTICAL
STRAIGHT CABLE
I
R
DC12V 150mA MAX.
ZONE2 ZONE3
FRONT
FRONT
SURROUND
CENTER
SUBWOOFER
SURROUND BACK
CENTER
SURROUND BACK
SURROUND
HEIGHT2
HEIGHT4/FRONT WIDE
1
AUDIO
(ASSIGNABLE)
AUDIO
DIGITAL AUDIO
(ASSIGNABLE)
2
ASSIGNABLE ASSIGNABLE
ASSIGNABLE ASSIGNABLE
ASSIGNABLE
SPEAKERS
SUBWOOFER
HEIGHT1
HEIGHT3
FRONT
HEIGHT4/FRONT WIDE
HEIGHT3 HEIGHT3
FRONT
CENTER
SURROUND SURROUND
SURROUND BACK SURROUND BACK
HEIGHT1 HEIGHT1 HEIGHT2 HEIGHT2
HEIGHT4/FRONT WIDE
SW1 SW2
Contents
Connections Playback Settings Tips Appendix
43
Front panel Display Rear panel Remote Index
Loading ...
Loading ...
Loading ...