Loading ...
Loading ...
Loading ...
17
16
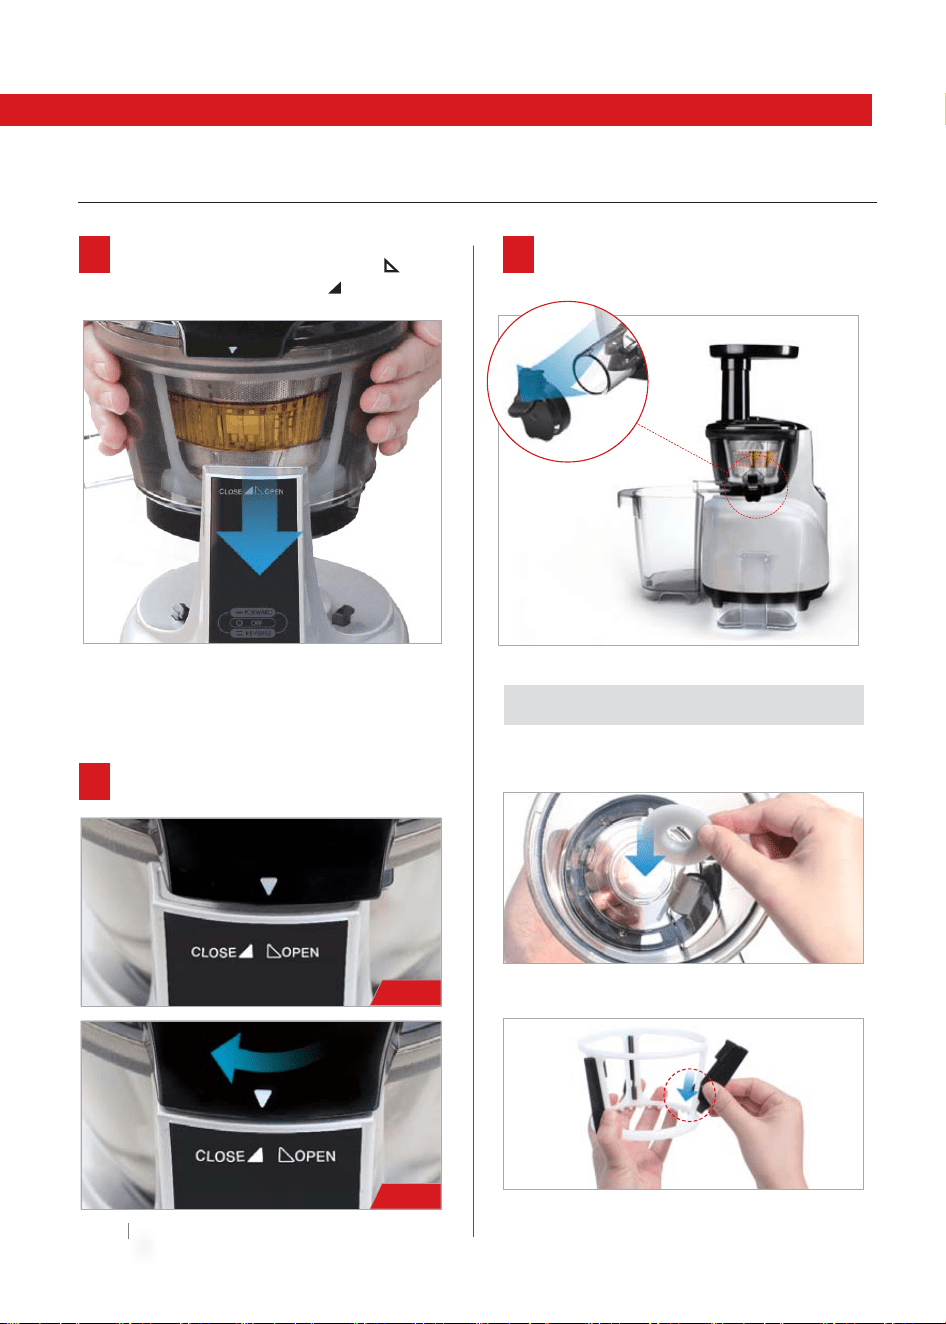
How to Disassemble and Clean
Note
Place the juicing bowl underneath the running
water and unplug the compression silicone to
clean the pulp spout.
Soak the juicing bowl in a solution of warm water with baking
soda or little bit of bleach to clean the excess build up.
Tip
It is not necessary to completely clean the juicer in
between making multiple juices. When fi nished with
juicing, disassemble and clean thoroughly.
Tip
Clean the base with soft damp towel and dry.
Remove the juicing screw, stainer and rotation
wiper unit from the juicing bowl. Clean with
provided brush.
Note
Tip
Note
Underneath the running water, clean the out
side of the juicing screw with a dish scrub. Use
the end tip of the cleaning brush to push out
any residue within the crevices on bottom of the
juicing screw.
With the smart cap closed, fi ll the juicing bowl
with water and turn on the juicer.
After a moment, open the Smart Cap and let
the water run out of the juicing bowl.
* The products illustrated/photographed in this booklet may vary slightly from the actual product.
Note
If the towel is very wet, make sure to squeeze out the
access liquid before using it on the juicer.
After juicing ingredients with seeds, make sure to
thoroughly clean the bottom crevice of the juicing
screw. If this area isn’t properly cleaned, this can aff ect
the balance between the juicing screw and the strainer
and damage the parts.
ㆍ
Extract all the remaing pulp in the juicing bowl
before stopping the juicer.
ㆍ
For easier clean up, operate the juicer for additional
30 seconds after juice has been extracted.
When the drum lid is stuck, press the REVERSE - OFF
- FORWARD button in the order, switching back and
forth 2~3 times to dislodge. Then place your hands
on top of the drum lid and fi rmly press down as you
simultaneously turn the drum lid counter clockwise
to open.
Please thoroughly clean the juicing screw under
running water with the cleaning brush.
Completely dry before using ensuring that the juicing
screw is clean without any residue.
ㆍ
Immediately clean the juicer after each use. If remaining
residue in the juicer dries up, it can make disassembling
diffi cult as well as clean-up. The excess build up can
cause poor performance in future uses.
ㆍ
For easier disassembling, place the top-set in the sink
and run the water down from the top of the top-set.
ㆍ
Thoroughly dry the bottom of the juicing screw where it
connects to the metal cylinder shaft on the base.
Switch OFF and unplug the power cord from the
wall outlet.
Rinsing
1
1 4 6
7
5
1
2
Turn the drum lid counter clockwise to open.
2
Note
ㆍ
When moving the appliance, do not lift by grabbing
the feeding tube. Always lift the appliance by
grabbing the base or handle.
Turn the top-set counter clockwise and lift off
the base.
3
Loading ...
Loading ...
Loading ...