Loading ...
Loading ...
Loading ...

12
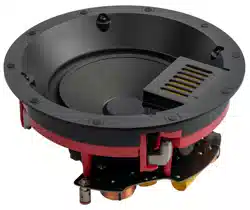
NOTE: Retrofit Back Boxes are available for all in-ceiling Motion series speakers. These back
boxes reduce sound from “leaking” into the area above where the speaker is installed. For
example, if building a home theater downstairs and there are living spaces directly above where
the speakers are installed it may be desirable to use these back boxes to help contain the sound
so it does not cause any disturbance to those above the speakers.
1. If the template has a removable center, remove it at this time.
2. Using a stud finder, position the template completely between wall studs or ceiling joists.
XTC8, and XTC8-HT: Install in-ceiling only.
3. Hold or tape the template in place and mark cutout with a pencil. For rectangular
speakers, level the template before marking (Figs. 5a, 6a.1, & 6a.2).
4. Remove the template and cut out the opening with a drywall knife (Figs. 5b & 6b).
5. In-wall: If desired, place fiberglass insulation above and below the cut-out hole. Place
a half thick piece of fiberglass insulation behind the speaker. In-ceiling: If desired, place
fiberglass insulation 12" (30cm) or thicker between the joists directly above the speaker.
6. Connect speaker cables. Be consistent when connecting the speaker leads to the terminals.
Take great care to assign the same color to the (+) terminal on both the speaker and the
amplifier.
7. Set your power drill to the high speed but low torque setting.
8. Ensure the clamps on the lip of the speaker are positioned exactly as shown in the Warning
Diagrams.
9. Gently push the assembly into the ceiling or wall hole (Figs. 5c & 6c).
10. Supporting the assembly with one hand, tighten each screw using the electric drill and
Torx T20 bit. Stop tightening when you sense resistance (Figs. 5d & 6d). MC6-HT: Before
tightening screws orient speaker so the drivers are positioned towards the desired position.
11. Gently press the grille into place (Figs. 5e & 6e).
Loading ...
Loading ...
Loading ...
