
Loading ...
Loading ...
Loading ...
19
BATTERY & CHARGER MAINTENANCE
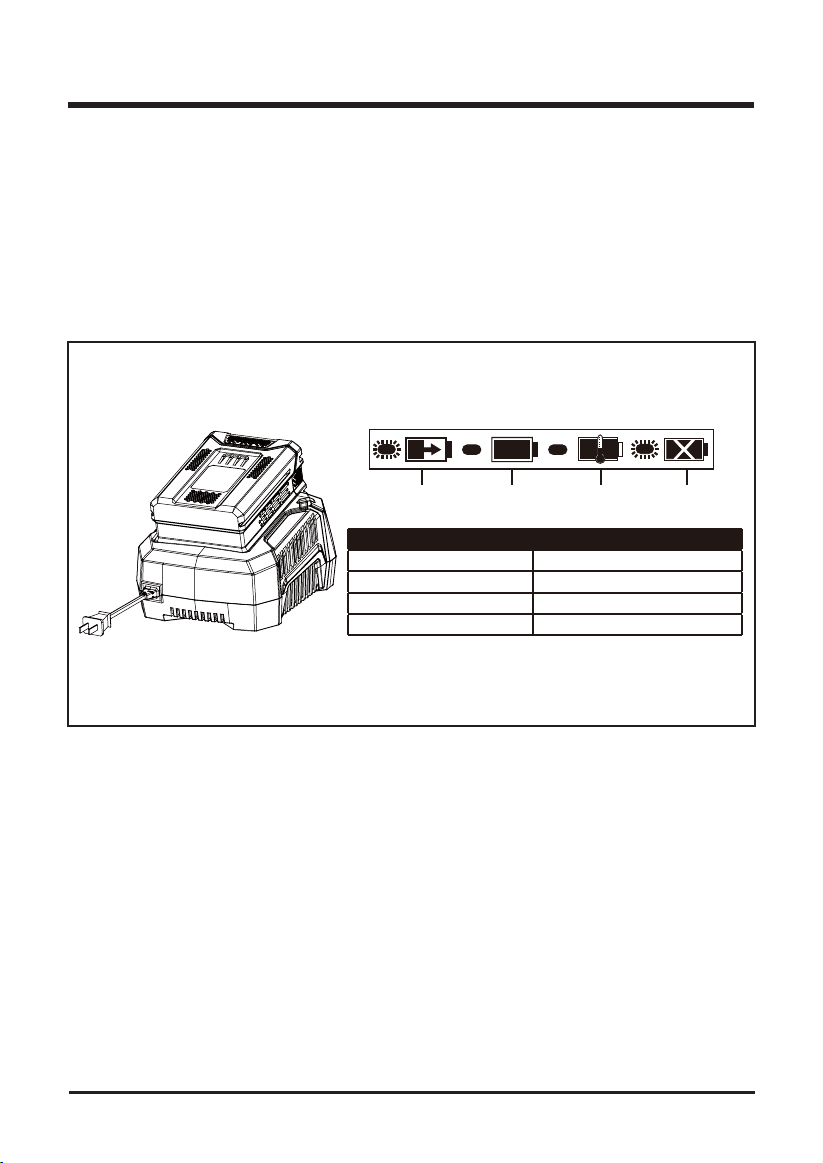
CHARGING PROCEDURE (See Figure 9)
NOTE :
The battery is not shipped fully charged. It is recommended to fully charge
before rst use to ensure that maximum run time can be achieved. This lithium-ion
battery will not develop a memory and may be charged at any time. A fully discharged
battery pack will require approximately 90 minutes to fully charge from a discharged
state.
1. Plug the charger into an AC power outlet.
2. Insert the battery pack (3) into the charger.
This is a diagnostic charger. The Charger LED Lights will illuminate in specic order to
communicate the current battery status. They are as follows:
CHECKING THE CHARGE
If the battery pack does not charge properly:
• Check the current at the power outlet with another tool. Make sure that the outlet is not
turned off.
• Check that the charger contacts have not been shorted by debris or foreign material.
• If the surrounding air temperature is not normal room temperature, move the charger and battery
pack to a location where the temperature is between 50˚F and 100˚F .
Fig. 9
Charging Fully
Charged
Over
Temperature
Charging
Fault
LED STATUS DESCRIPTION
Blinking Green Charging
Solid Green Fully Charged
Solid Red Over Temperature
FALSE DEFECT NOTE:
When the battery is inserted into the charger and the status LED blinks RED, remove the battery
from the charger for 1 minute, then reinsert. If the status LED blinks GREEN, then the battery is
properly charging. If the status LED is still blinking RED, remove the battery and unplug the charger
for 1 minute.
After 1 minute, plug in the charger and reinsert the battery. If the status LED blinks GREEN, then
the battery is properly charging. If the status LED is still blinking RED, the battery is defective and
needs to be replaced.
Blinking Red
Charging Fault
Loading ...
Loading ...
Loading ...