1
Camscura Pro Hidden Camera
User’s Guide

Camscura Pro
The Camscura Pro is a fully functional and customizable video
recording system in a compact case. Use the preset recording
mode, or program custom settings to record based on motion,
vibration, body heat, voice, or time of day. The Camscura Pro
allows you to change video quality, video orientation and more.
Record for up to 36 hours on a single charge, or use the AC
adapter and eliminate power concerns.
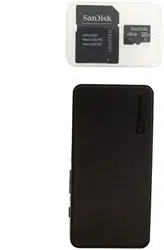
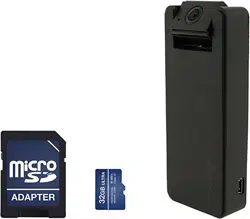
All video is recorded to a micro SD card. Use the BHS Cam Setup Tool
to customize your settings from your Mac or Windows PC, and view
your videos using your computer’s media player (MPC Star, VLC, etc.).

2
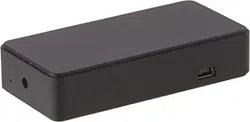
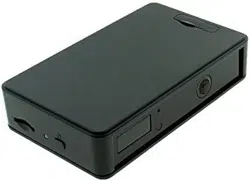
In the box you will find the Camscura
Pro Hidden Camera, a USB cord, AC
power adapter, and this user’s guide.

8
To change settings on your device, you first need to download and install
the BHS Cam Setup Tool. This can be downloaded from http://help.
brickhousesecurity.com. Type “Camscura Pro” into the search box to find links
to software, firmware, video tutorials, and FAQs. The BHS Cam Setup Tool is
available for Mac and PC.
To install the BHS Cam Setup Tool for PC, download BHS_Cam_Setup_Tool.
exe. After download is complete, double click on the .exe file to begin
installation. Follow the prompts to complete installation.
To install the BHS Cam Setup Tool for Mac, download BHS_Cam_Setup_Tool.
dmg. After download is complete, double-click on the .dmg file to begin
installation. Drag the BHS Cam Setup Tool icon into the Applications folder to
complete installation. Once installation is complete, click on Finder and select
Applications. Double click BHS Cam Setup Tool to launch.
Note that the time/date stamp on your videos will not be accurate until you
have adjusted settings with the BHS Cam Setup Tool.

9
Videos can be played using MPC Star (http://www.mpcstar.com/download.
php) or VLC Player (http://www.videolan.org/vlc/index.html). To edit and rotate
recorded videos, you can download VideoPad Editor here: http://download.
cnet.com/VideoPad-Video-Editor/3000-13631_4-10906278.html
Add the video clip to sequence and then select it. Choose the ‘Rotate’ effect.
Click on the right or left arrow to rotate.
BHS Camera Tool
The BHS Cam Setup Tool is broken up into 3 sections. When the device
is plugged into your PC via USB, the icon along the top will say “DVR
Connected”. If it says “DVR Disconnected,” you may need to power your
computer off and on and plug the device back in.
Date/Time: in the Date Time section, you can adjust the time stamp on your
videos. Choose PC Date Time to program the device using the time and date
saved to your computer.

13
Frame Rate: High is 18 FPS (frames per second). Low is 6 FPS. Higher frame
rates will produce a smoother video. Lower frame rates may produce choppy
video.
Split File Time: Choose 10, 15, or 30. This is how long the device will record
before creating a new file. For example; if you choose 10, the device will save
each recording and start a new file every 10 minutes.
Day/Night Mode: Choose Day, Night, or Auto switching. When in Night mode,
the device needs less light to capture video, but its picture can be “blown
out” if there is bright light. Enabling Auto switching will allow the device to
automatically switch between Day and Night modes, depending on current
lighting conditions.
Orientation: Choose Normal or Vertical Flip. In Normal setting, the side of the
device with the BrickHouse Security Logo will be considered the top.
In Vertical Flip, the side with the USB Port will be considered the top. This allows
you to adjust orientation depending on where you will be placing the device.

14
Passive Infrared Sensor (PIR): Enable or Disable the PIR Sensor. PIR is a
sensor that detects heat energy. If humans, animals or objects that emit heat
pass the sensor, it will trigger the device to begin recording. Using the PIR
feature will prolong battery life.
Voice-Trigger Sensitivity: High, Medium, Low, or Disable. When the
Camscura Pro detects sounds higher than xx decibels, it will begin recording.
For Sensitivity:
High: 62dB
Medium: 67dB
Low: 70dB
Reference:
Normal conversation at 3ft: 60dB
Mobile Phone Ringtone: 70dB
Vibration Trigger Sensitivity: High, Medium, Low, or Disable the vibration sensor.

15
Motion Detection Sensitivity: High, Medium, Low, or Disable motion
activation. By default, motion detection is enabled with medium sensitivity
using Circular mode.
Schedule Recording: allows you to enable Audio, Motion, or Vibration trigger
recording at a certain time of the day.
Once you have chosen your settings, click on the Sync Settings to DVR icon.
You will receive a Settings Saved notification when they have been loaded.
Option: The Option section allows you to change the language the BHS Cam
Setup Tool Tool will display. Choose from English, French, German, Chinese
traditional, and Chinese simplified.
Click on the Save Option button to save any changes you have made. When
disconnecting the Camscura Pro from your computer, be sure to always
choose the Safely Remove Hardware option in the Windows control panel.

17
LED Status Guide
Without AC Adapter Connected
-Green LED on: Camscura Pro powering up
-Green LED flashing: Begin recording, after 60 seconds the LED light will turn
off and the Camscura Pro will continue recording.
-Green / Red LED intermittent flashing: Camscura Pro still is recording and
battery running low.
-Red LED on: Camscura Pro does not detect a micro SD card, faulty micro SD
card inserted, micro SD card full (Circular Recording disabled), or battery low.

18
With AC Adapter Connected
-Orange LED on: Charging
-Green LED on: Charge complete
-Green LED flashing: Charge complete and begin recording, after 60 seconds
the LED light will turn off and the Camscura Pro will continue recording.
-Green /Orange LED intermittent flashing: Charging and Recording at the
same time.
-Red LED on: Camscura Pro does not detect a micro SD card, faulty micro SD
card inserted, micro SD card full (Circular Recording disabled), or battery low.
Connected to Computer
-Orange LED on: Charging
-Green LED on: Charge Complete

19
Recording Video
To record video, choose Circular or Custom using the Mode switch, then hold
down the Power button for 2-3 seconds. When powered on, the Green LED
will turn on and flash for 60 seconds before going dark. Once it stops blinking,
the device is recording using the settings loaded for whatever mode you have
chosen.
Viewing Your Files
To view your files on a computer, simply connect the device via the supplied
USB cord with the Micro SD card inserted to the device, making sure the
device is powered Off. It will connect as a removable drive, and depending
on the settings on your PC, it may automatically notify you that new hardware
was detected. If so, select Open Folder to View Files.
If it is not automatically detected, click Start on your desktop. Select My
Computer if you are using Windows XP, or Computer if using Windows Vista
or Windows 7. The device should be listed as a Removable Disk under the

20
Devices With Removable Storage section. Open that drive, which will contain
a folder called BHS. This folder will contain all your recorded files.
Upgrading Firmware
Occasionally, upgrades may be available for your device’s firmware that
add functionality or fix issues. To upgrade your device, download the new
firmware to your PC and open the file. Once open, press the upgrade button
on the device using a paperclip, pin, or similar and connect the device to your
computer via USB. The upgrade should occur automatically, and a notification
will appear on your screen once it has been completed.

21
Troubleshooting
Problem: The device is “stuck” with the LED light on and is not responding to
any buttons.
Solution: This issue occurs most commonly when the device is given too
many commands too quickly (rapidly pressing the power button repeatedly).
This can cause it to freeze up. If this occurs, use a paperclip or other small
object to gently push the Reset button. Hold the buttons down for 10
seconds to force the device to power down and reset.
Problem: The time is incorrect.
Solution: Charge the device and use the BHS Cam Setup Tool to set the time.
If the battery remains drained for 5 days, time settings will be lost.

24
Micro SD Card: Micro SD cards, also known as TransFlash, are smaller
versions of SD memory cards. As electronic devices are becoming smaller,
Micro SD cards are becoming more and more common in the marketplace.
USB Port: A USB port is a standard cable connection interface on personal
computers and consumer electronics. USB ports allow stand-alone electronic
devices to be connected via cables to a computer. USB can connect
computer peripherals such as mice, keyboards, PDAs, gamepads and
joysticks, scanners, digital cameras, printers, personal media players, flash
drives, and external hard drives.
For help and information on your device, visit the BrickHouse Security
knowledge base at http://www.help.brickhousesecurity.com