seandtire Guide
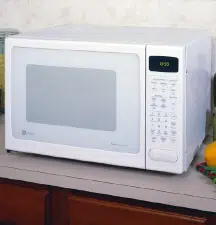
Microwave/ConvectionOven
n
!
Safe~ instructions....................3-5
Precautionsto Avoid PossibleExposure
to ExcessiveMicrowave Energy.............2
w
OperatingInstructions,~ps
Aluminum Foil..........................................4. 28
Clock..................................................................8
ClockDisplayOn/Off .................................9
Combination Cooking..........10. 11,26-28
Combination Roast...........................27. 28
CookingbyTemperature ........................27
CookingbyTime ..................................-....26
ControlPanel...............................................8. 9
ConvectionCooking.................10, 11,24,25
CookingbyTemperature ........................25
CookingbyTime .......................................24
CookingReference Guide..........................29
Cookware and Accessories.......................11
DelayStart .....................................................14
Features............................................................7
Microwave Cooking........................9. 12-22
Add 30 Seconds.......................................l 4
Auto Defrost.......................................l 7, 18
Beverage....................................................19
ChildLock-Out......................................8. 12
Cook.............................................................2l
CookingbyTemperature ........................16
CookingbyTime ...............................13, 14
CookingComplete Reminder ..................7
DefrostingbyTime...................................15
DelayStart/Reminder .............................14
ExpressCook........................................8. 14
Ktchen Timer ............................................12
Microwaving Tips .......................................6
Popcorn......................................................l g
Power Levels............................6. 8, 12–16
Reheat.........................................................2O
SoundFeature......................................8. 14
OvenShelf.....4. 5,7, 11, 19-21,23,27,30
Probe..................................4. 7–9, 16, 25r Z7
What Your Oven Can Do............................10
GEAppliances
Problem Solver...............................3z
More questions?...call
GEAnswerCenter@800.626.2000
CareandCleaning............................30
Control Panel ................................................3O
Oven Shelf .....................................................3O
Temperature Probe.....................................30
installation..........................................3l
Adapter Plugs...............................................31
ExtensionCords...........................................31
Groundinginstructions...............................3l
Consumer Services...................35
Appliance Registration..................................2
Important Phone Numbers........................35
Model and Serial Number Location...........2
Warranty ........................................BackCover
1
I
~LP US~LP YOU...
Beforeusingyouroven,
readthisguidecareftily.
It is intended to help you operate
and maintain your new microwave
oven properly.
Keep it handy for answers to your
questions.
If you don’t understand something
or need more help, call:
GE Answer Center@
800.626.2000
24 hours a day, 7 days a week
Writedownthemodeland
serialnumbers.
You’llfind them on a label on the
left side of the control panel (seen
when the door is open).
These numbers are also on the
Consumer Product Ownership
Registration Card that came with
your microwave oven. Before
sending in this card, please write
these numbers here:
Model Number
Setial Number
Use these numbers in any
correspondence or service calls
concerning your microwave oven.
Besureyourmicrowave
ovenis registered.
It is important that we know the
location of your microwave oven
should a need occur for
adjustments.
Yoursupplier is responsible for
registering you as the owner.
Please check with your supplier to
be sure he has done so; also send
in your Consumer Product
Ownership Registration Card. If
you move, or if you are not the
original purchaser, please write to
us, stating model and serial
numbers.
Thisapptiancemust be re~stered.
Please be certain that it is.
Write to:
GE Appliances
Range Product Service
Appliance Park
Louisville, KY 40225
Myoureceiveda
damagedoven...
Immediately contact the deder (or
builder) that sold you the oven.
Savetimeandmoney.
Beforeyourequestservice...
Check the Problem Solver in the
back of this guide. It lists causes of
minor operating problems that you
can correct yourself.
AUthesethingsarenormal
withyourmicrowaveoven.
● Dimming oven light and change
in blower sound may occur while
operating at power levels other
than high.
● Dull, thumping sound while oven
is operating.
● Some TV-Radio interference
might be noticed while using
your microwave oven. It’s
similarto the interference caused
by other small appliances and
does not indicate a problem with
your oven.
● Steam or vapor escaping from
around the door.
● Light reflection around door or
outer case.
● During cooking you will hear
“cracking” and “popping” noises
which are nothing more than
normal expansion of the oven.
● At the end of microwave cycles
you will hear a slightthump. This
is normal.
PRECAUTIONSTO AVOIDPOSSIBLEEXPOSUm
TO EXCESSIVEMICROWAVEENERGY
(a)DoNotAttemptto operatethis oven with
the door open sinceopen-dooroperationcan
result in harmfulexposureto microwave
energy.It is importantnot to defeator tamper
with the safetyinterlocks.
(b)DoNotPlaceanyobjectbetweentheoven
front face and the dooror allow soilor cleaner
residueto accumulateon sealingsurfaces.
(c)DoNotOperatetheovenif itis damaged.It is
particularlyimportantthatthe ovendoorclose
properlyand thatthereis no damageto the:
(1) door (bent)
(2) hingesand latches(broken or loosened)
(3) door seals and sealingsurfaces.
(d)me OvenShodd Notbe adjustedor repaired
by anyoneexceptproperlyqualifiedservice
personnel.
2
~ORTANT SA~~ ~STRUCmONS
Readd ktrudom beforewhg yourapptiance.
When using electricalappliances,basic safety
precautionsshouldbe followed,includingthe
following:
A WA~lNG-Toreducethetiskof
burns, electric shock,fire, injuryto persons
or exposureto excessivemicrowaveenergy:
● Readand followthe specific “Precautionsto
AvoidPossibleExposureto ExcessiveMicrowave
Energy” on thepreviouspage.
● Ttis app~ancemustbegrounded.Connectonly
to properly groundedoutlet.See Grounding
Instructionssectioninthe back of thisguide.
● Usethisapplianceody for its intendeduseas
describedintiis guide.
Do not use corrosive
chemicalsor vaporsin this appliance.This
microwave/convectionovenis specifically
designedto heat or cookfood, and is not
intendedfor laboratoryor industrialuse.
● For bestoperation,plugthisapplianceinto
itsownelectricaloutlet,topreventflickering
oflights,blowingoffuseor trippingofcircuit
breaker.
*Donot mountthisappfianceovera sink.Install
or locatethisapplianceody in accordancewith
the providedInsta~ationInstructions.
● Becertain to placethefront surfaceofthedoor
threeinchesor morebackfromthe countertop
edgeto avoidaccidentaltippingofthe
appliancein normalusage.
● Donotcoveror blockanyopeningsonthe
appliance.
● Donot storethisapplianceoutdoors.Do not
use this productnear water—forexample,in a wet
basement,near a swimmingpool or neara sink.
● This microwaveovenisnot approvedor tes~d
for marine use.
● Donot operateanyheatingor cooking
appliancebeneaththismicrowaveoven.
● Donotmountthe microwaveovenoveror near
anyportionofa heatingor cookingappfiance.
● Donot storeanythingdirectlyontopofthe
microwaveovensurface
whenthemicrowave
ovenisinoperation.
● Donot immersepowercord or plugin water.
. Keeppowercordawayfrom heatedsurfaces.
● Donot letpowercordhang overedgeoftable
or counter.
● Donot operatethisapplianceifit has a
damagedpowercordor plug,ifitis not
workingproperly,orifit has beendamaged
or dropped.
sSeedoor surfacecleaninginstructionsin the
Careand Cleaningsection(s)ofthisguide.
● Donot operatetheovenwithoutthe turntable
and the turntable support seatedand in place.
● Donot allowthe turntable to berestrictedso
theturntible cannotrotate.
● Thisapplianceshouldbe servicedonlyby
qualifiedservicepersonnel.Contict nearest
authorizedservicefacilityfor examination,
repair or adjustment
● Aswithanyappliance,closesupervisionis
necessarywhenusedbychildren.
● Toreducethe riskoffirein the ovencavity:
—Donotovercookfood.
Carefullyattendappliance
ifpaper,plasticorothercombustiblematerialsare
placedinsidethe ovento facilitatecooking.
—Removewiretwist-tiesand metalhandlesfrom
paper or plasticcontainersbefore placingthem in
theoven.
—Donot useyourmicrowavdconvectionovento
dry newspapers.
—Donot userecycledpaper produck.
Recycled
papertowels,napkinsand waxed paper can
containmetal fleckswhich may cause arcing
or ignite.Paperproductscontainingnylon or
nylonfilamentsshouldbe avoided,as theymay
also ignite.
—Donotpoppopcorninyour microwaveoven
unlessin a specialmicrowavepopcorn accessory
or unless you use popcornlabeled for use in
microwaveovens.
—Donotovercookpotatoes.They coulddehydrate
andcatch fire,causingdamageto youroven.
(continued next page)
3
U
!
WORTANT SAm~ ~STRUC~ONS
(continued)
—Donotoperatethe ovenin microwaveor
combinationmodeswhileemptyto avoid
damageto theovenand thedangeroffire.
If by accidentthe oven shouldrun emptya
minuteor two,no harmisdone.However,try to
avoid operatingthe oven emptyat dl times-it
savesenergyand prolongsthe life of the oven.
—Donotusetheovenforstoragepurposes.
Donotleavepaper producti, cookingutensils
or foodin the ovenwhennot in use.
—Hmaterialsinsideovenshouldignite,
keep
oven door closed,turn ovenoff, and disconnect
power cord, or shutoff power at the fuse or
circuitbreakerpanel. Hthe dooris opened,the
fire may spread,
● Someproductssuchas wholeeggsand sealed
conkiners-for example,closedglassjars—
willexplodeandshouldnotbeheated
in this
microwaveoven.Such use of the microwave/
convectionoven could resultin injury.
● Avoidheatingbabyfoodinglassjars,evenwith
thelidoff.Makesureallinfantfoodisthoroughly
cooked.Stirfoodtodistributetheheatevenly.Be
carefultopreventscaldingwhenwarming
formulaorbreastmik. Thecontainermayfeel
coolerthanthetik reallyis.Alwaystestthernik
beforefeedingthebaby.
● Whenusingthe convectionorcombination
cookingfunctions,boththeoutsideandinsideof
theovenwillbecomehot.Alwaysusehotpadsto
removecontainersoffoodandaccessoriessuchas
ovenshelfandtemperatureprobe,
● Oversizedfoodor oversizedmetalcookware
shouldnotbeusedin a microwave/convection
ovenbecausetheyincreasetherisk ofelectric
shockand cotid causeafire.
● Donot cleanwithmetalscouringpads.Heces
canburn offthepad and touchelectricalparts
involvingrisk ofelectricshock.
● Donot usepaper productswhenthe
microwave/convectionovenisoperatedin the
convectionor combinationmode.
● Donot storeanymaterhds,other than our
recommendedaccessories,in thisovenwhen
notin use.
● Donot defrostfrozenbeveragesinnarrow
neckedbottles(especiallycarbonatedbeverages).
Evenifthecontainerisopened,pressurecanbuild
up. This can causethecontainerto burst,possibly
resultingin injury.
● Usefoilonlyas directedin thisguide.
W dinnersmaybemicrowavedinfoiltraysless
than3/4”high;removethetopfoilcoverand
returnthetraytothebox.Whenusingfoilinthe
microwave/convectionoven,keepit at least1
inchawayfromthesidesofthe oven.
● Donot covertheshelfor anyotherpart ofthe
ovenwithmetalfoil.Thiswi~cause
overheatingofthemicrowave/convectionoven.
*
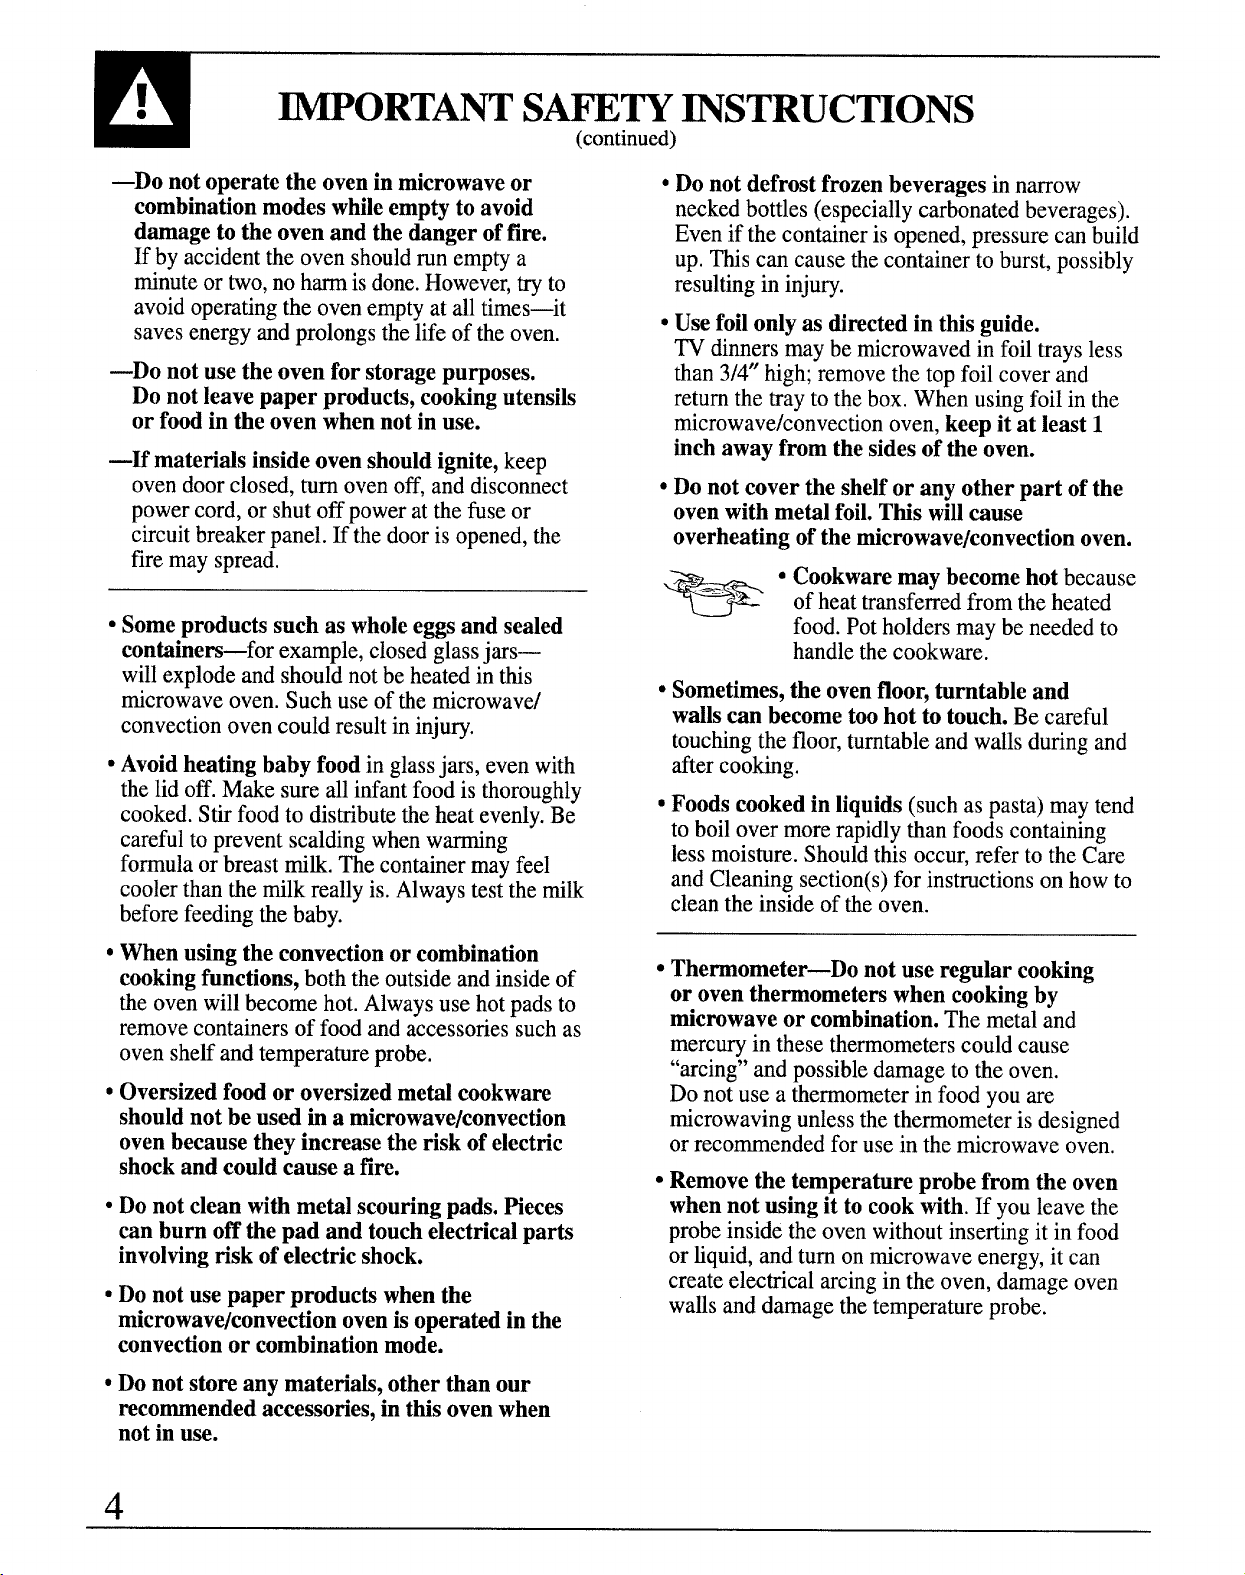
● Cookwaremaybecomehotbecause
ofheattransferredfromtheheated
food.Potholdersmaybeneededto
handlethecookware.
● Sometimes,the ovenfloor,turntable and
wallscan becometoohot to touch.Becareful
touchingthefloor,turntableandwallsduringand
aftercooking.
● Foodscookedin liquids(suchaspasta)maytend
toboilovermorerapidlythanfoodscontaining
lessmoisture.Shouldthisoccur,refertotheCare
andCleaningsection(s)forinstructionsonhowto
cleantheinsideoftheoven.
cThermometer-Do notuseregularcooking
or oventhermometerswhencookingby
microwaveor combination.
The metal and
mercuryin these thermometerscould cause
“arcing”and possibledamageto the oven.
Do not use a thermometerin food you are
microwavingunlessthe thermometeris designed
or recommendedfor use in the microwaveoven.
● Removethe temperatureprobefromthe oven
whennotusingit tocookwith.Ifyouleavethe
probeinsidetheovenwithoutinsertingit infood
orfiquid,andturnonmicrowaveenergy,itcan
createelectricalarcingintheoven,damageoven
wa~sanddamagethetemperatureprobe.
● Plasticcookwar~Plastic cookwaredesignedfor
●
microwavecookingis very useful,but shouldbe
used carefully.Evenmicrowave-safeplasticmay
not be as tolerantof overcookingconditionsas are
glass or ceramicmaterialsand may softenor char
if subjectedto shortperiodsof overcooking.
In longerexposuresto overcoobg, the food
and cookwarecouldignite.For these reasons:
1)Use microwave-safeplastics only and usethem
in strictcompliancewiththe cookware
manufacturer’srecommendations.2) Do not
subjectemptycookwareto microwaving.
3) Do not permit childrento use plasticcookware
withoutcompletesupervision.
WhencookingPork,followthedirections
exactlyand al;;ys cookthe meat to an internal
temperatureof at least 170°F.This assuresthat,in
the remote possibilitythattrichinamaybe present
in themeat, it willbe killed and meat willbe safe
to eat.
● Do notboile~s inamicrowaveoven.Pressure
will build up insideegg yok and will causeit to
burst, possiblyresultingin injury.
+
● Foodswithunbrokenouter “skin”
such
as potatoes, sausages,tomatoes,
apples,chickenlivers and other
giblets,and egg yoks (see previous
caution)shouldbe piercedto allow
steamto escapeduringcooking.
● Spon@neousbofling-Under certainspecial
circumstances,liquidsmaystarttoboilduringor
shortlyafterremovalfromthemicrowaveoven.
Topreventburnsfromsplashingliquid,we
recommendthefollowing:beforeremovingthe
containerfromtheoven,allowittostandinthe
ovenfor30to40secondsaftertheovenhasshut
off.Donot boilliquidsin narrow-necked
containerssuchassoftdrink bottles,wine
flmksand especiallynarrow-neckedcoffee
cups.Evenifthecontainerisopened,excessive
steamcanbuildupandcauseittoburstor
ovefiow.
● Notallplasticwrapissuitible for usein
microwaveovens.Checkthepackagefor
properuse.
● “Botiable”cookingpouchesand tightlyclosed
plasticbagsshouldbeslit,piercedorventedas
directedbypackage.Iftheyarenot,plasticcould
burstduringorimmediatelyaftercooking,
possiblyresultingininjury.Also,plasticstorage
containersshouldbeatleastpartiallyuncovered
becausetheyformatightseal.Whencooking
withcontainerstightlycoveredwithplasticwrap,
removecoveringcarefullyanddirectsteamaway
fromhandsandface.
,’/tfi,y
e
● Hotfoodsandst- @ncause
-....
..-
burns.Becarefulwhenopeningany
~
containersofhotfood,including
popcornbags,cookingpouchesand
boxes.Topreventpossibleinjury,
directsteamawayfromhandsandface.
sUseoftheshetiaccessory:
—Removethe sheti from oven when not in use.
—Use pot holders when handlingthe she~ and
cookware.They may be hot.
—Be sure that the shelfis positionedproperly
insidethe ovento preventproductdamage.
Optional Accessories
Availableat extra costfrom your GE supplier.
JX1327MBV and JX1330MBV (for model
~1390GV) or JX1327MWV andJX1330MWV
(formodel~1390WV) Installation~t converts
this oven to a built-in wall oven.
SA~ T~SE
~STRUCTIONS
● Make sure all cookware used in your microwave
oven is suitable for microwaving. Most glass
casseroles, cooking dishes, measuring cups, custard
cups, pottery or china dinnerwme which does not
have metallic trim or glaze with a metallic sheen
can be used. Some cookware is labeled “suitable for
microwaving.”
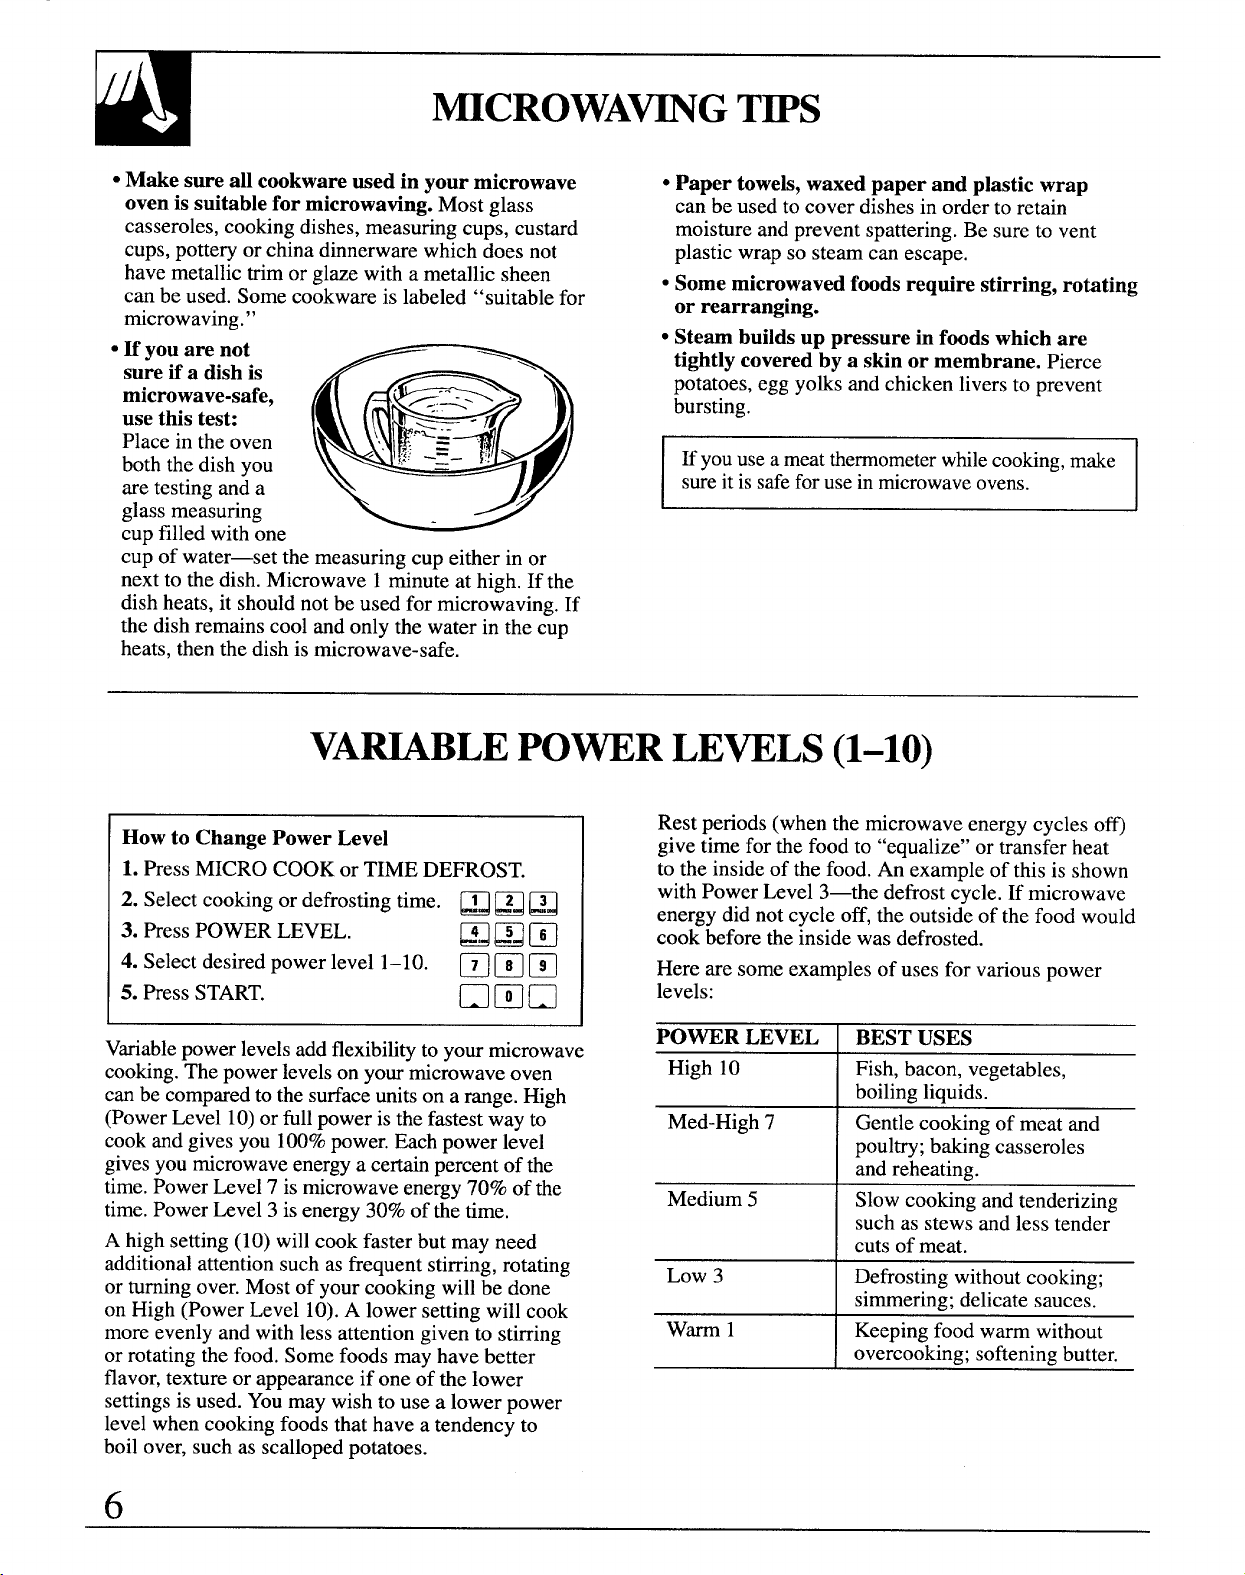
● H you are not
sure if a dish is
microwave-safe,
use this test:
Place in the oven
both the dish you
are testing and a
glass measuring
cup filled with one
cup of water—set the measuring cup either in or
next to the dish. Microwave 1 minute at high. If the
dish heats, it should not be used for microwaving. If
the dish remains cool and only the water in the cup
heats, then the dish is microwave-safe.
● Paper towels, waxed paper and plastic wrap
can be used to cover dishes in order to retain
moisture and prevent spattering. Be sure to vent
plastic wrap so steam can escape.
● Some microwaved foods require stirring, rotiting
or rearranging.
● Steam builds up pressure in foods which are
tightly covered by a skin or membrane. Pierce
potatoes, egg yoks and chicken livers to prevent
bursting.
E you usea meatthermometerwhilecooking,make
sureit issafeforusein microwaveovens.
VA~BLE POWER LEVELS(1-10)
How to Change Power Level
1. PressMICRO COOK or TIME DE~OST.
2. Select cooking or defrosting time. ~~ PJ FJ
3. Press POWER LEVEL.
EBm
4. Select desired power level 1–10.
❑mm
5. Press START.
❑ mn
Variablepower levelsadd flexibilityto your microwave
cooking.The power levelson your microwave oven
can be compared to the surface unitson a range. High
(Power Level 10)or full power is the fastest way to
cook and gives you 100%power. Each power level
givesyou microwaveenergya certain percent of the
time. Power Level 7 is microwave energy 70% of the
time. Power Level 3 is energy 30% of the time.
A high setting (10) will cook faster but may need
additional attention such as frequent stirring, rotating
or turning over. Most of your cooking will be done
on High (Power Level 10).A lower setting will cook
more evenly and with less attention given to stirring
or rotating the food. Some foods may have better
flavor, texture or appearance if one of the lower
settingsis used. Youmay wish to use a lower power
level when cooking foods that have a tendency to
boil over, such as scalloped potatoes.
Rest periods (when the microwave energy cycles o~
give time for the food to “equalize” or transfer heat
to the inside of the food. An example of this is shown
with Power Level 3—the defrost cycle. If microwave
energy did not cycle off, the outside of the food would
cook before the inside was defrosted.
Here are some examples of uses for various power
levels:
I poul~; bakin~ casseroles
and reheating.-
Medium 5 Slow cooking and tenderizing
I such as stew~and less tende~
cuts of meat.
Low 3
Defrosting without cooking;
simmering; delicate sauces.
warm1
Keeping food warm without
ove;co~king; softening butter.
6
Cooking Complete Reminder
(For all defrost and cook cycles except Temp
Coo~old)
To remind you that you have food in the oven, the
oven will display “En&’and beep once a minute
until you either open the oven door or touch the
CLEAWOFF pad.
I
I
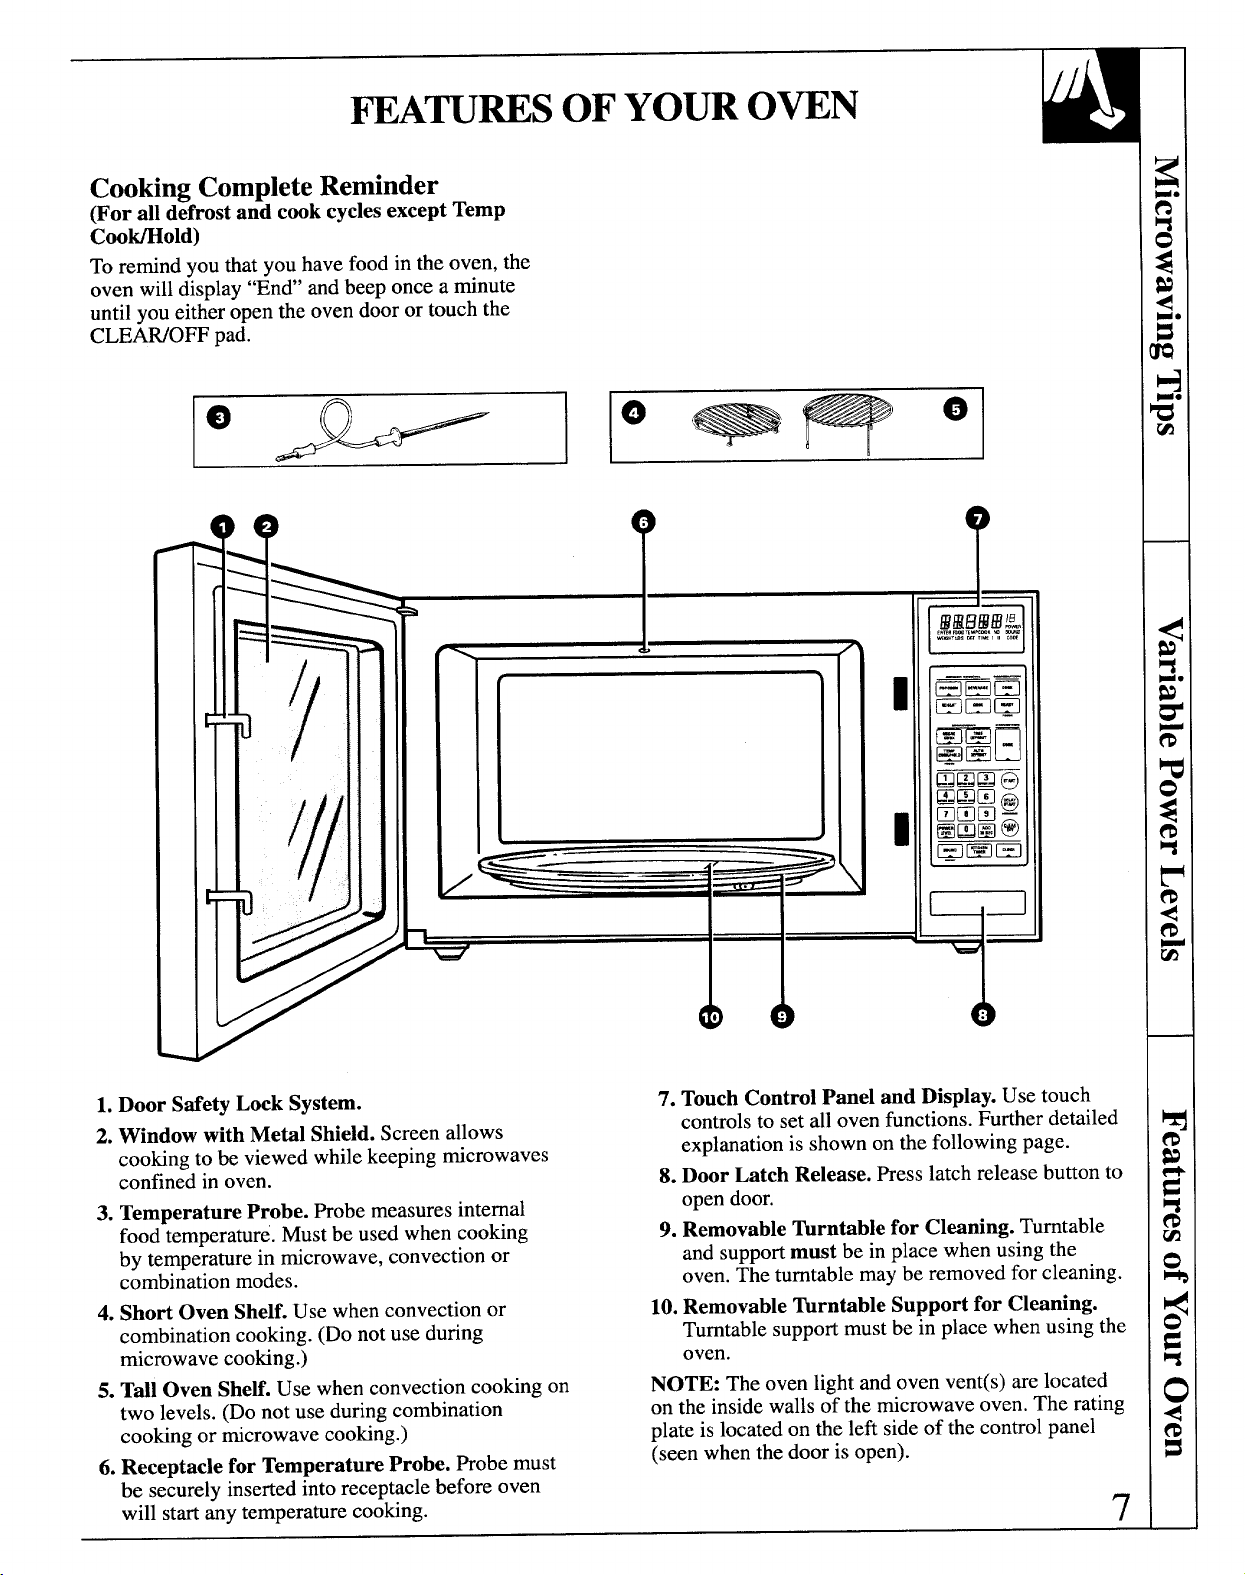
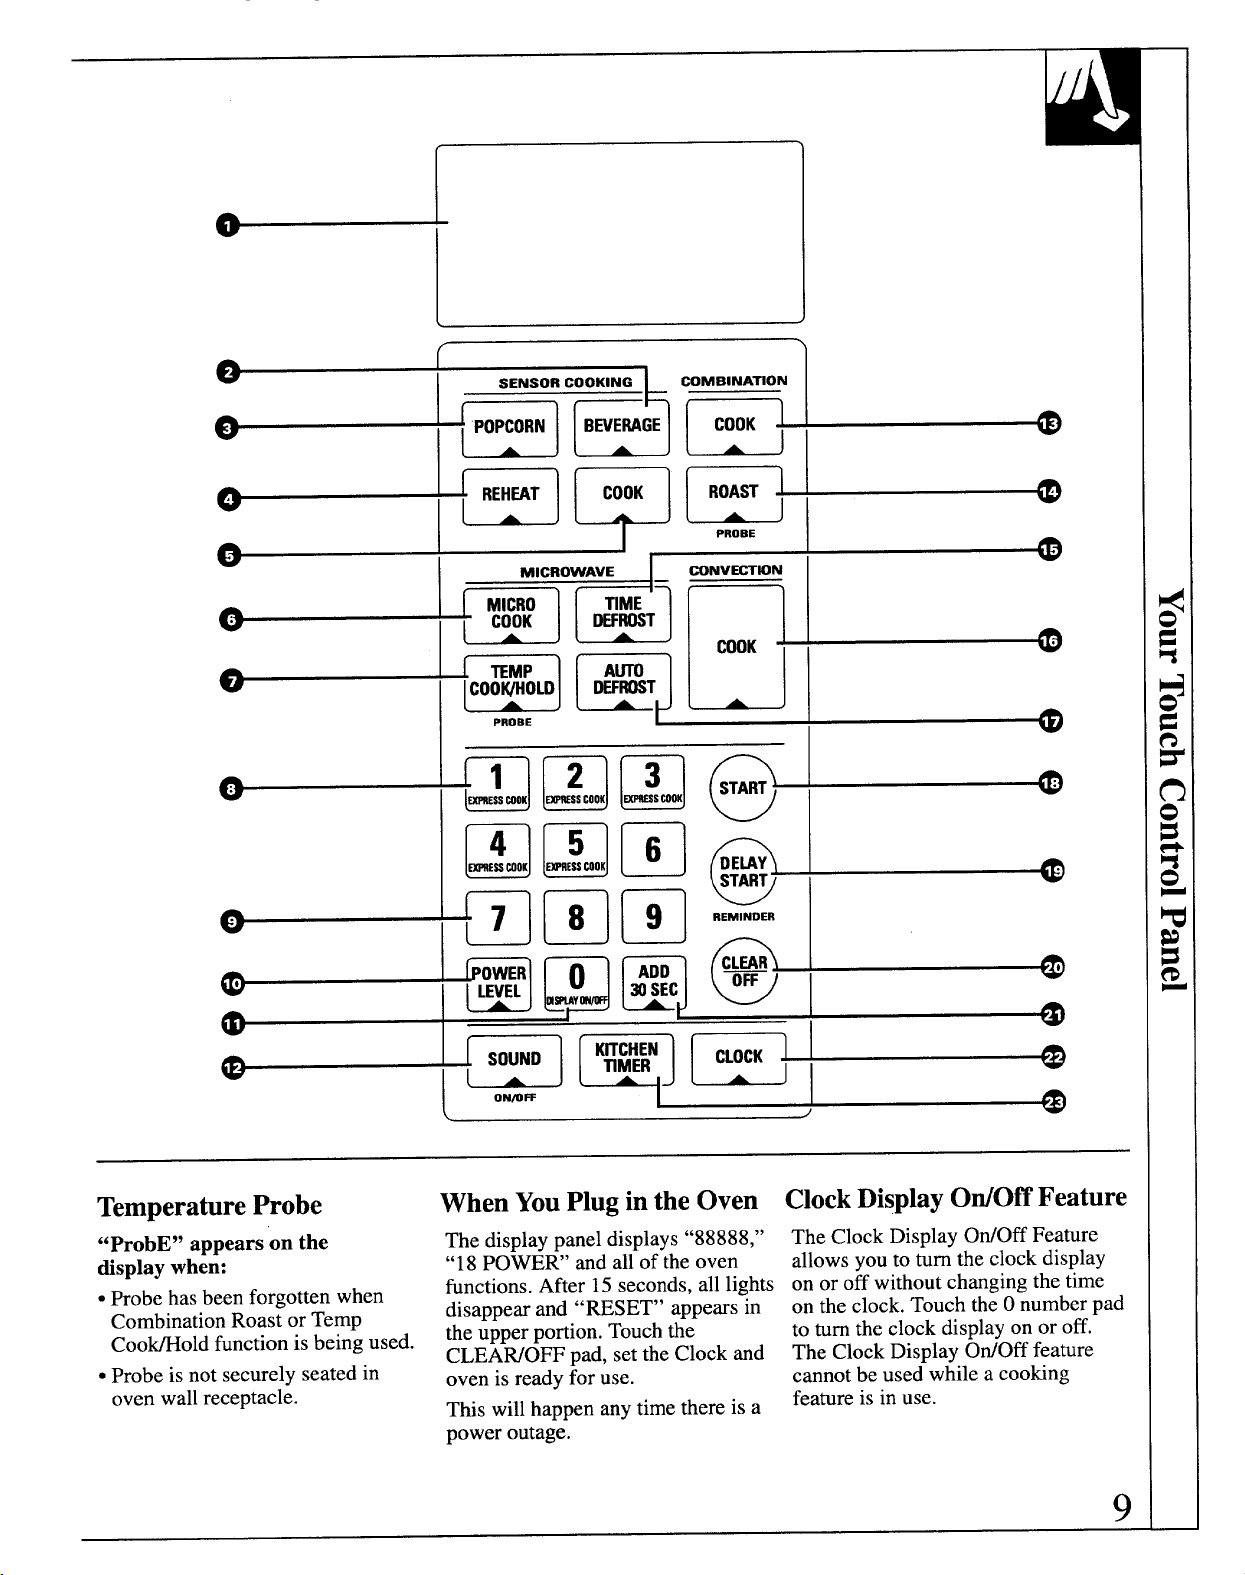
1. Door SafetyLocksystem.
7. Touch Control Panel and Display. Use touch
2. Window with Metil Shield. Screen allows
cooking to be viewed while keeping microwaves
confined in oven.
3. Temperature Probe. Robe measures internal
food temperature. Must be used when cooking
by temperature in microwave, convection or
combination modes.
4. Short Oven Shelf. Use when convection or
combination cooking. (Do not use during
microwave cooking.)
5. Tall Oven SheE. Use when convection cooking on
two levels. (Do not use during combination
cooking or microwave cooking.)
6. Receptacle for Temperature Probe. Probe must
be securely inserted into receptacle before oven
will start any temperature cooking.
controls to set all oven functio~s. Further detailed
explanation is shown on the following page.
8. Door Latch Release. Presslatch release button to
open door.
9. Removable Turntable for Clwning. Turntable
and support must be in place when using the
oven. The turntable may be removed for cleaning.
10. Removable ~rntable Support for Cleaning.
Turntable support must be in place when using the
oven.
NOTE: The oven light and oven vent(s) are located
on the inside walls of the microwave oven. The rating
plate is located on the left side of the control panel
(seen when the
doorisopen).
7
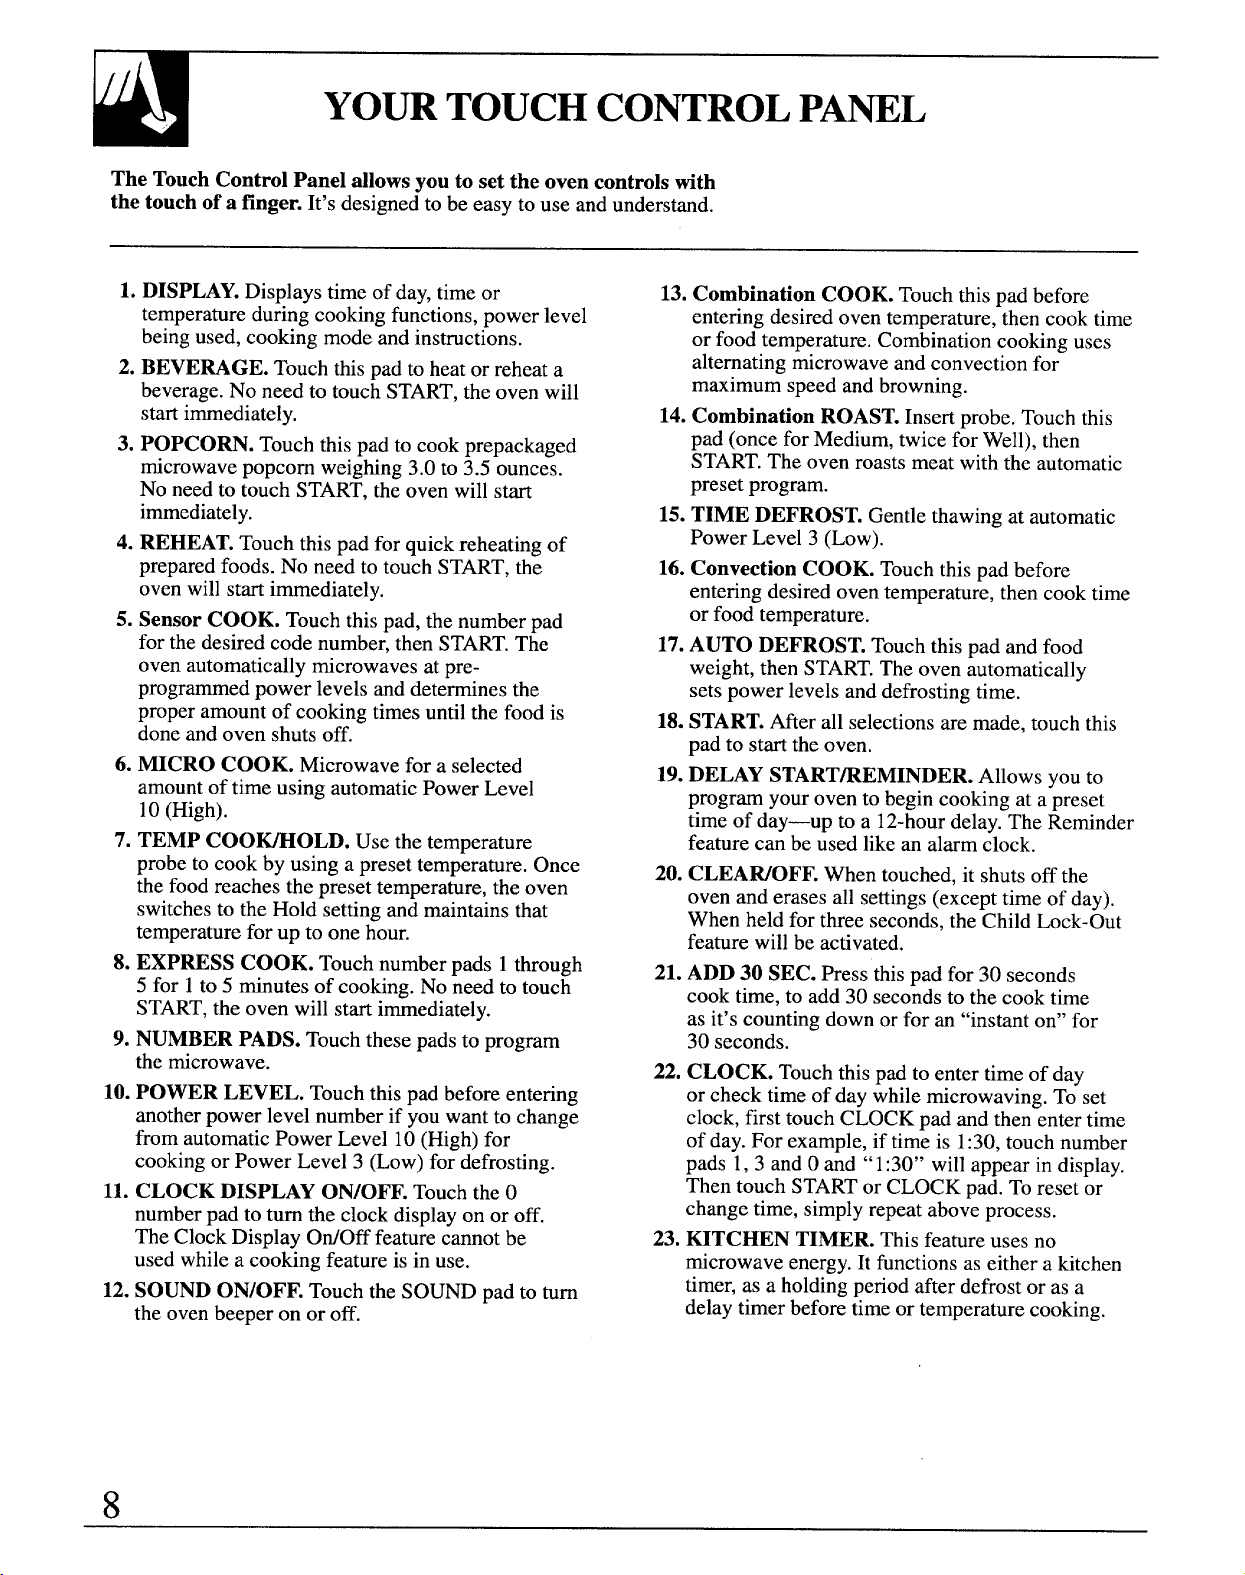
YOURTOUCHCONTROLP~L
The Touch Control Panel allows you to set the oven controls tith
the touch of a finger. It’sdesigned to be easy to use and understand.
1. DISPLAY.Displays time of day, time or
temperature during cooking functions, power level
being used, cooking mode and instructions.
2. BEVERAGE. Touch this pad to heat or reheat a
beverage. No need to touch START,the oven will
start immediately.
3. POPCORN. Touch this pad to cook prepackaged
microwave popcorn weighing 3.0 to 3.5 ounces.
No need to touch START, the oven will start
immediately.
4. REHEAT.Touch this pad for quick reheating of
prepared foods. No need to touch START, the
oven will start immediately.
5. Sensor COOK. Touch this pad, the number pad
for the desired code number, then START.The
oven automatically microwaves at pre-
programmed power levels and determines the
proper amount of cooking times until the food is
done and oven shuts off.
6. MICRO COOK. Microwave for a selected
amount of time using automatic Power Level
10 (High).
7. TEMP COO-OLD. Use the temperature
probe to cook by using a preset temperature. Once
the food reaches the preset temperature, the oven
switches to the Hold setting and maintains that
temperature for up to one hour.
8. EXPRESS COOK. Touch number pads 1 through
5 for 1to 5 minutes of cooking. No need to touch
START,the oven will start immediately.
9. NUMBER PADS. Touch these pads to program
the microwave.
10. POWER LEVEL. Touch this Dadbefore entering
11.
12.
.
another power level number if you want to change
from automatic Power Level 10 (High) for
cooking or Power Level 3 (Low) for defrosting.
CLOCK DISPLAY ON/OFF. Touch the O
number pad to turn the clock display on or off.
The Clock Display OtiOff feature cannot be
used while a cooking feature is in use.
SOUND ON/OFF. Touch the SOUND pad to turn
the oven beeper on or off.
8
13. Combination COOK. Touch this pad before
entering desired oven temperature, then cook time
or food temperature. Combination cooking uses
alternating microwave and convection for
maximum speed and browning.
14. Combination ROAST.Insert probe. Touch this
pad (once for Medium, twice for Well), then
START.The oven roasts meat with the automatic
preset program.
15. TIME DEFROST. Gentle thawing at automatic
Power Level 3 (Low).
16. Convection COOK. Touch this pad before
entering desired oven temperature, then cook time
or food temperature.
17.AUTO DEFROST. Touch this pad and food
weight, then START.The oven automatically
sets power levels and defrosting time.
18.START.After all selections are made, touch this
pad to start the oven.
19.DELAY START~EMINDER. Allows yOUto
program your oven to begin cooking at a preset
time of day—up to a 12-hourdelay. The Reminder
feature can be used like an alarm clock.
20. CLEAWOFF. When touched, it shuts off the
oven and erases all settings (except time of day).
When held for three seconds, the Child Lock-Out
feature will be activated.
21. ADD 30 SEC. Press this pad for 30 seconds
cook time, to add 30 seconds to the cook time
as it’s counting down or for an “instant on” for
30 seconds.
22. CLOCK. Touch this pad to enter time of day
or check time of day while microwaving. To set
clock, first touch CLOCK pad and then enter time
of day. For example, if time is 1:30,touch number
pads 1, 3 and Oand “1:30” will appear in display.
Then touch STARTor CLOCK pad. To reset or
change time, simply repeat above process.
23. KITCHEN TIMER. This feature uses no
microwave energy. It functions as either a kitchen
timer, as a holding period after defrost or as a
delay timer before time or temperature cooking.
,
L
.
,.,
i,
@~@
@L@
G
;
SOUND
(
A
J
ON~W
L
/
TemperatureProbe
WhenYouPlug inthe Oven
ClockDisplayOtiOff Feature
“ProbE” appears on the
The display panel displays “88888,”
&splay when:
“18 POWER’ and all of the oven
● Probe has been forgotten when
functions. After 15 seconds, all lights
Combination Roast or Temp
disappear and “RESET” appears in
Coo~old function is being used.
the upper portion. Touch the
CLEAWOFF pad, set the Clock and
● Probe is not securely seated in
oven is ready for use.
oven wall receptacle.
This will happen any time there is a
power outage.
The Clock Display OtiOff Feature
allows you to turn the clock display
on or off without changing the time
on the clock. Touch the Onumber pad
to turn the clock display on or off.
The Clock Display OtiOff feature
cannot be used while a cooking
feature is in use.
9
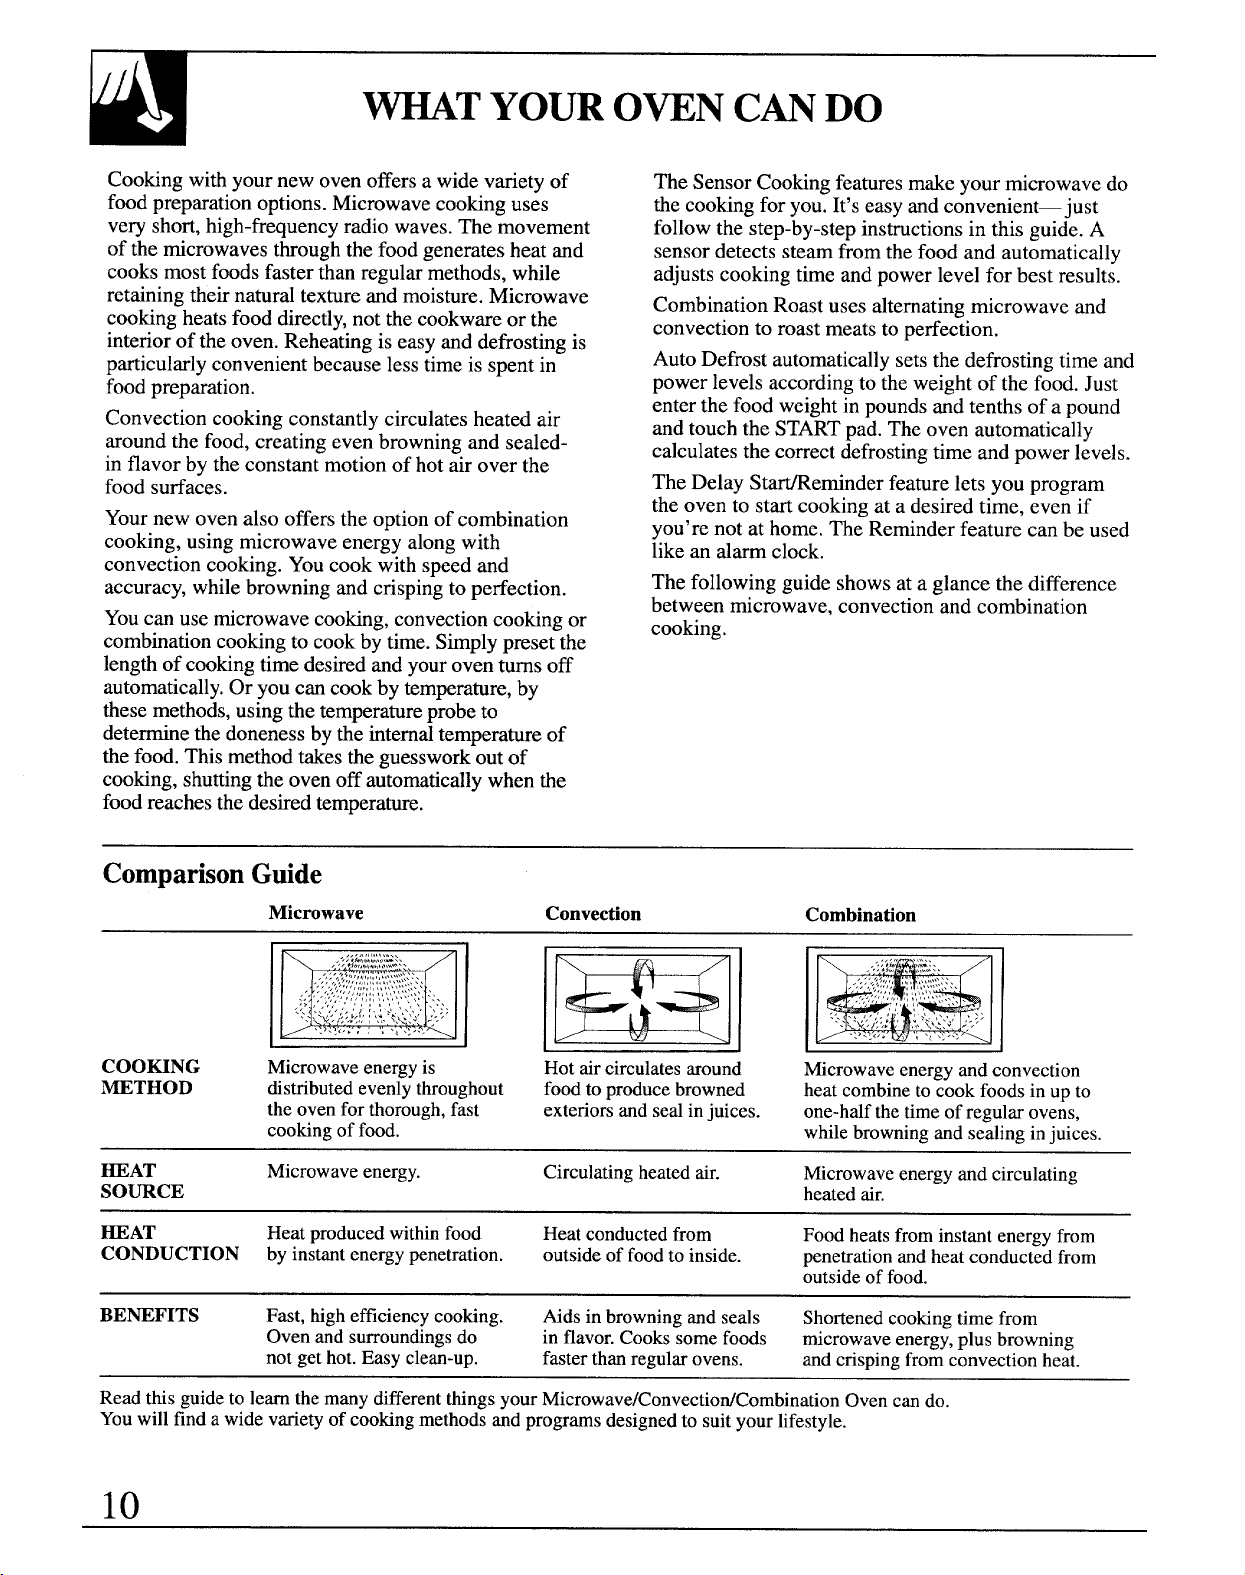
Cooking with your new oven offers a wide variety of
food preparation options. Microwave cooking uses
very short, high-frequency radio waves. The movement
of the microwaves through the food generates heat and
cooks most foods faster than regular metiods, while
retaining their natural texture and moisture.Microwave
cooking heatsfood directly,not the cookware or the
interior of the oven. Reheating is easy and defrosting is
particularly convenient because less time is spent in
food preparation.
Convection cooking constantly circulates heated air
around the food, creating even browning and sealed-
in flavor by the constant motion of hot air over the
food surfaces.
Yournew oven also offers the option of combination
cooking, using microwave energy along with
convection cooking. You cook with speed and
accuracy, while browning and crisping to perfection.
Youcan use microwave cooking, convectioncooking or
combinationcooking to cook by time. Simply preset the
length of cooking time desired and youroven turns off
automatically.Or you can cook by temperature,by
these methods,using the temperatureprobe to
determinethe donenessby the intemd temperature of
the food. This method takes the guessworkout of
cooking, shuttingthe oven off automaticallywhen the
food reaches the desired temperature.
The Sensor Cookingfeaturesmake your microwave do
the cooking for you.It’seasy and convenient—just
follow the step-by-step instructions in this guide. A
sensor detects steam from the food and automatically
adjusts cooking time and power level for best results.
Combination Roast uses alternating microwave and
convection to roast meats to perfection.
Auto Defrost automatically sets the defrosting time and
power levels according to the weight of the food. Just
enter the food weight in pounds and tenths of a pound
and touch the STARTpad. The oven automatically
calculates the correct defrosting time and power levels.
The Delay Stafieminder feature lets you program
the oven to start cooking at a desired time, even if
you’re not athome. The Reminderfeaturecanbe used
likeanalarmclock.
The following guide showsataglance thedifference
betweenmicrowave, convection andcombination
cooking.
ComparisonGuide
Microwave
Convection Combination
COOMNG Microwaveenergyis
Hotaircirculatesaround
Microwaveenergyandconvection
METHOD
distributedevenlythroughout
foodtoproducebrowned heatcombinetocookfoodsinupto
theovenforthorough,fast
exteriorsandsealinjuices. one-halfthetimeof regularovens,
cookingof food.
whilebrowningandsealinginjuices.
HEAT Microwaveenergy.
Circulatingheatedair.
Microwaveenergyandcirculating
SOURCE
heatedair.
HEAT Heatproducedwithinfood
Heatconductedfrom Foodheatsfrominstantenergyfrom
CONDUCTION byinstantenergypenetration.
outsideof foodtoinside.
penetrationandheatconductedfrom
outsideof food.
BENEFITS Fast,highefficiencycooking.
Aidsinbrowningandseals
Shortenedcookingtimefrom
Ovenandsurroundingsdo
inflavor.Cookssomefoods microwaveenergy,plusbrowning
notgethot.Easyclean-up.
fasterthanregularovens. andcrispingfromconvectionheat.
ReadthisguidetolearnthemanydifferentthingsyourMicrowave/ConvectiodCombinationOvencando.
Youwillfindawidevarietyof cookingmethodsandprogramsdesignedtosuityourlifestyle.
10
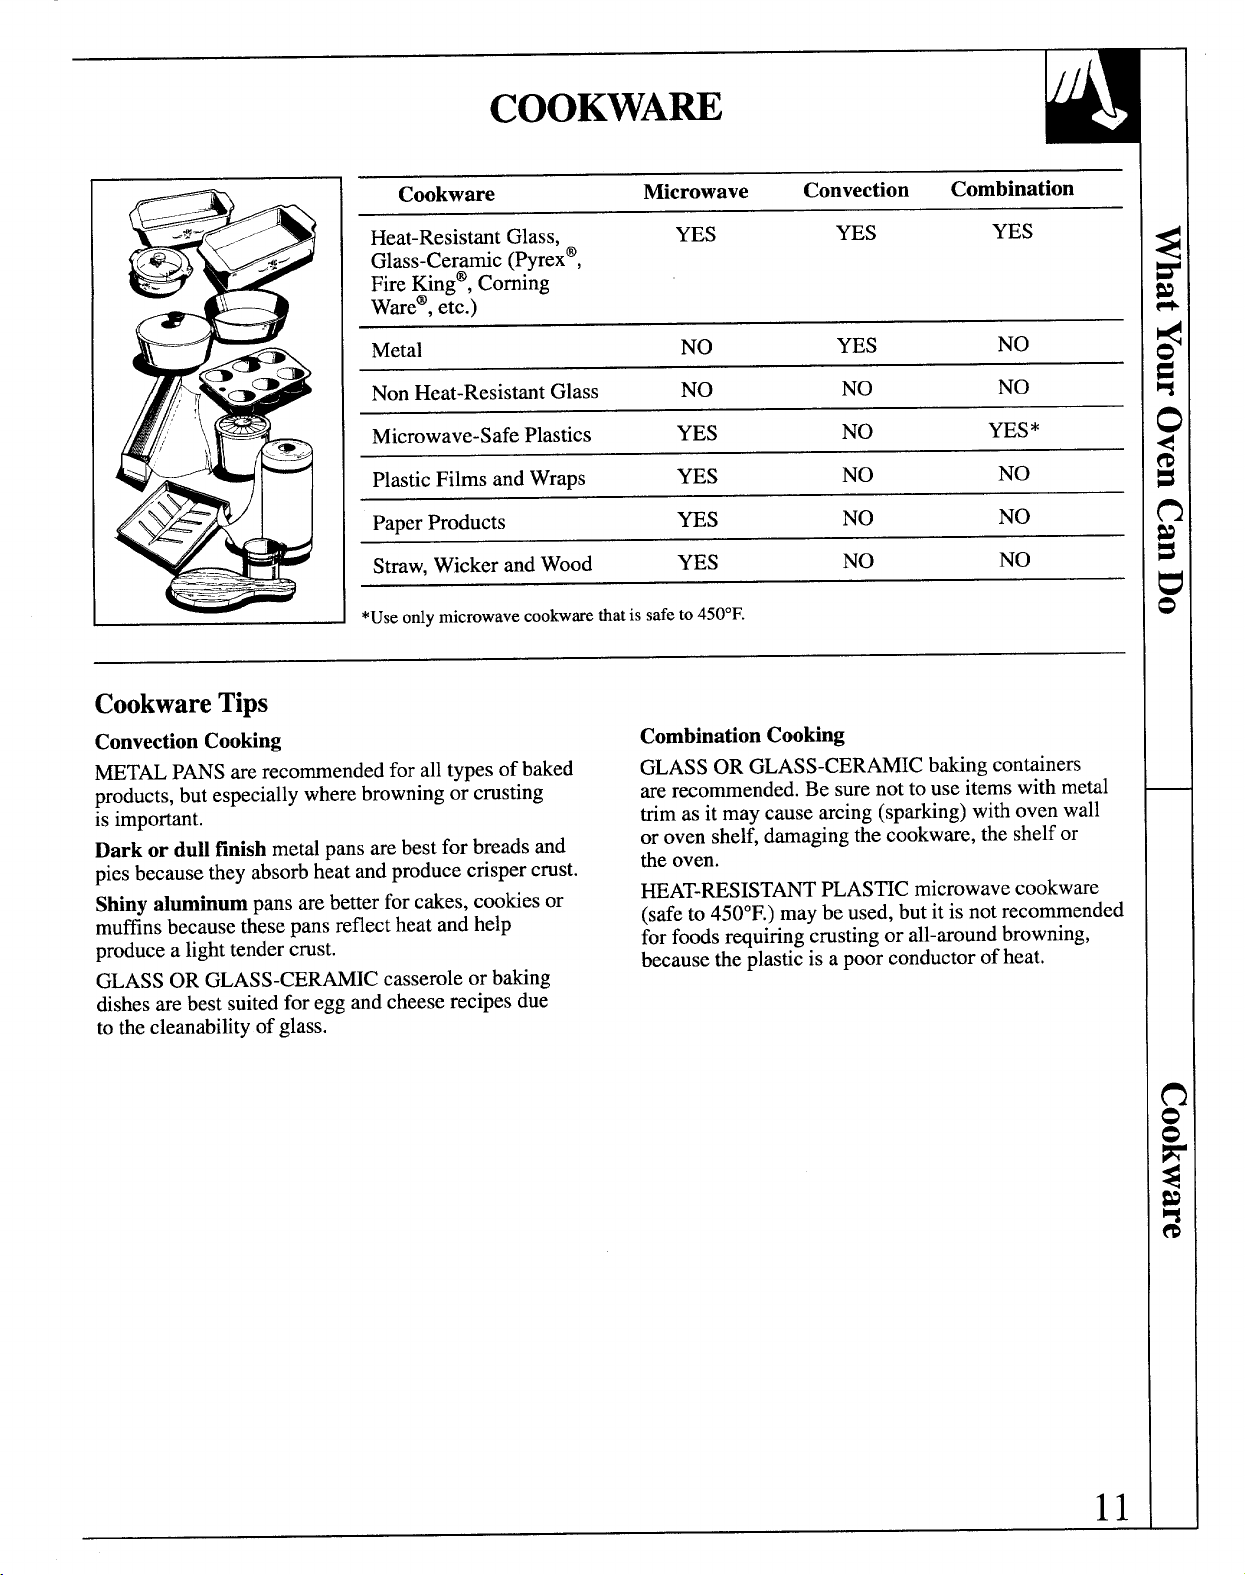
COOKWA~
Cookware
Microwave Convection
Combination
Heat-Resistant Glass, YES YES YES
Glass-Ceramic (Pyrex@,
Fire fing”, Corning
Ware@,etc.)
Metal
NO YES NO
Non Heat-Resistant Glass NO NO NO
Microwave-Safe Plastics YES NO YES*
Plastic Films and Wraps
YES
NO NO
Paper Products ms NO NO
Straw, Wicker and Wood YES NO
NO
*Useonlymicrowavecookwaretiatissafeto450°F.
CookwareTips
Convection Cooking
METALPANSare recommended for all types of baked
products,but especially where browning or crusting
is important.
Dark or dullfinish metal pans are bestfor breads and
pies because they absorbheat and produce crisper crust.
Shiny aluminum pans are better for cakes, cookies or
muffinsbecause these pans reflectheat and help
produce a lighttender crust.
GLASS OR GLASS-CERAMIC casserole or baking
dishesare best suitedfor egg and cheese recipes due
to the cleanability of glass.
Combination Cooking
GLASS OR GLASS-CERAMIC baking containers
are recommended. Be sure not to use items with metal
trim as it may cause arcing (sparking)with oven wall
or oven shelf, damagingthe cookware, the shelfor
the oven.
~AT-RESISTANT PLAS~C microwave cookware
(safeto 450°F.)may be used, but it is not recommended
for foods rquinng crusting or all-around browning,
because the plasticis a poor conductor of heat.
11
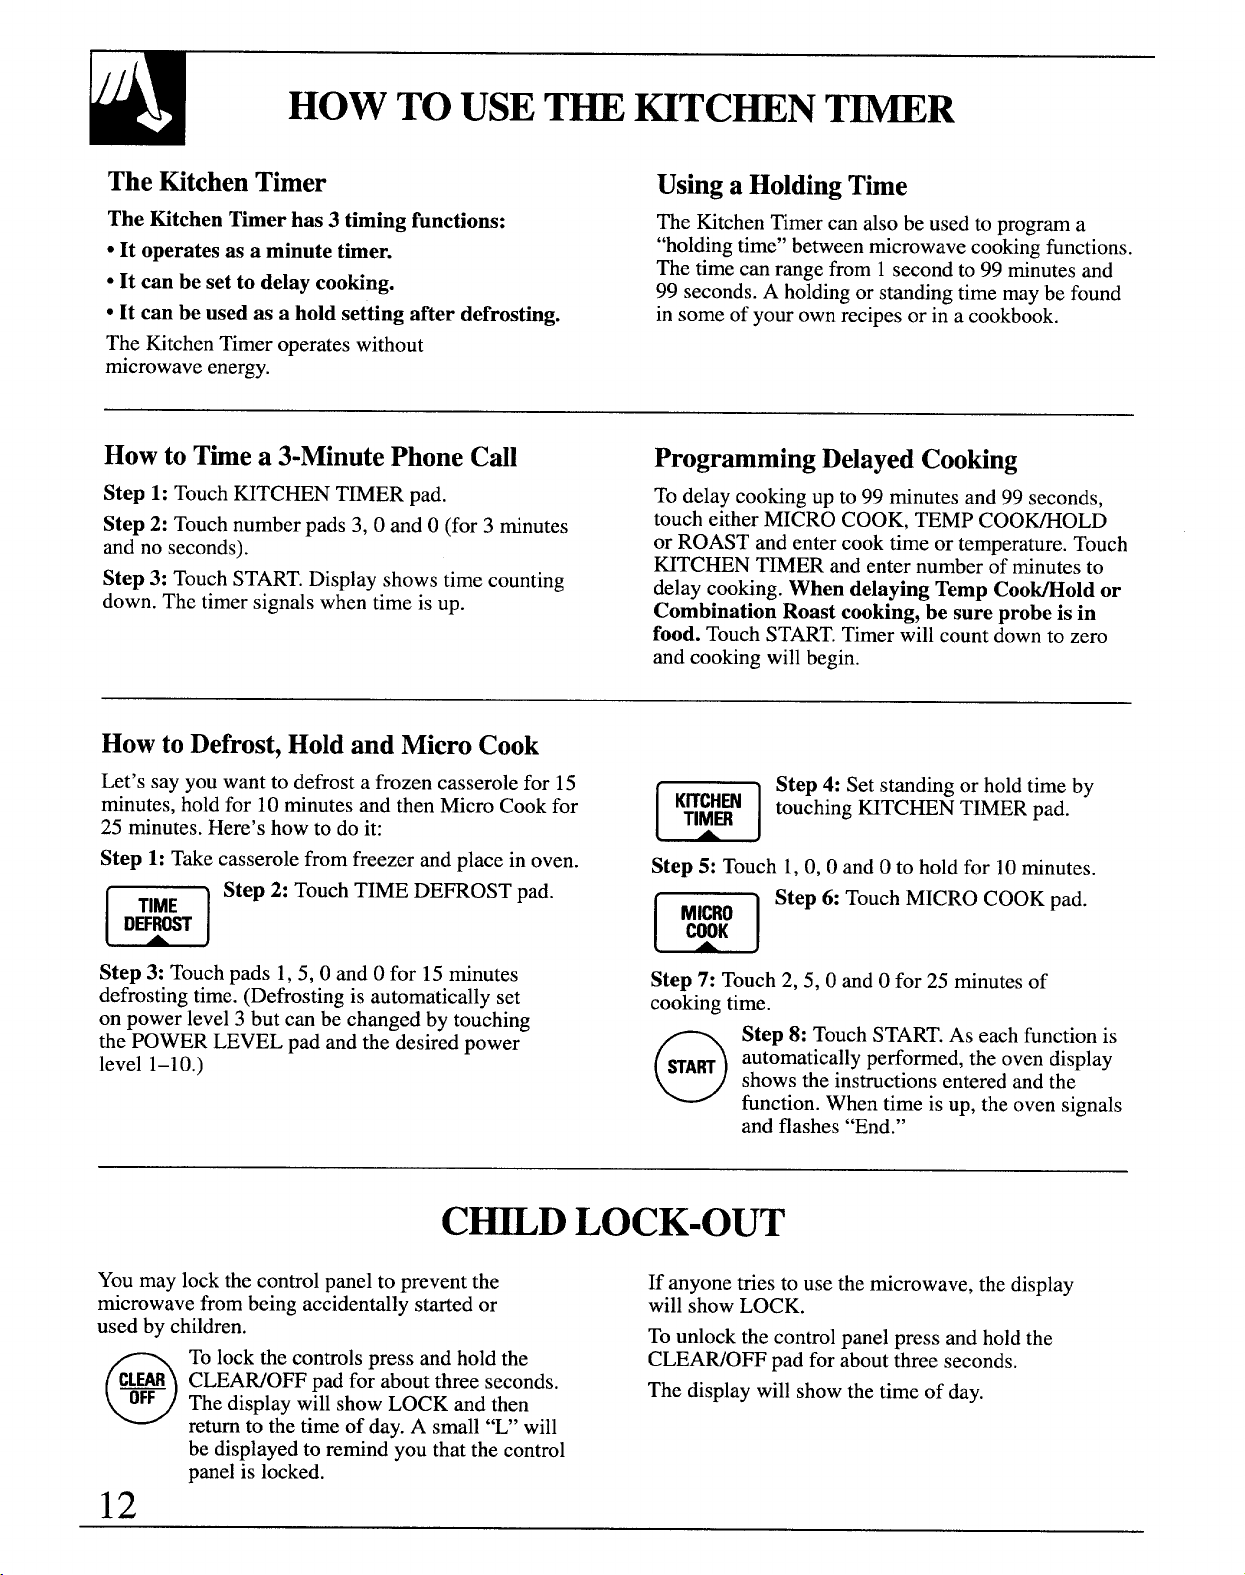
HOW TO USET~ ~TCHEN T~R
TheMtchenTimer Usinga HoldingTime
The Kitchen Timer has 3 timing functions:
● It operates as a minute timer.
“It can be set to delay cooking.
The Kitchen Timer can also be used to program a
“holdingtime” between microwave cooking functions.
The time can range from 1 second to 99 minutes and
99 seconds. A holding or standing time maybe found
GIt can be used as a hold setting after defrosting.
in some of your own ~ecipesor ii a cookbdok.
The Kitchen Timer operates without
microwave energy.
Howto Timea 3-MinutePhone Cdl
Step 1: Touch HTCHEN TMER pad.
Step 2: Touch number pads 3, 0 and O(for 3 minutes
and no seconds).
Step 3: Touch START.Display shows time counting
down. The timer signals when time is up.
ProgrammingDelayedCooking
To delay cooking up to 99 minutes and 99 seconds,
touch either MICRO COOK, TEMP COO~OLD
or ROAST and enter cook time or temperature. Touch
HTCHEN T~ER and enter number of minutes to
delay cooking. When delaying Temp Coo~old or
Combination Roast cooking, be sure probe is in
food. Touch START.Timer ~ill count down to zero
and cooking will begin.
HowtoDefrost,HoldandMicroCook
Let’s say you want to defrost a frozen casserole for 15
minutes, hold for 10 minutes and then Micro Cook for
m
K::HmN
25
minutes. Here’s how to do it:
Step 4: Set standing or hold time by
touching ~TCHEN TIMER pad.
Step 1: Take casserole from freezer and place in oven.
n
Step 2: Touch TIME DEFROST pad.
TIME
DEFROST
Step 3: Touch pads 1, 5, 0 and Ofor 15 minutes
defrosting time. (Defrosting is automatically set
on power level 3 but can be changed by touching
the POWER LEVEL pad and the desired power
level 1-10.)
Step 5:
Touch 1, 0, 0 andOto hold for 10minutes.
m
Step 6: Touch MICRO COOK pad.
M&\}O
Step 7: Touch 2, 5, 0 and Ofor 25 minutes of
cooking time.
o
Step 8: Touch START.As each function is
SA~
automatically performed, the oven display
shows the instructions entered and the
function. When time is up, the oven signals
and flashes “End.”
C=D LOCK-OUT
You may lock the control panel to prevent the
If anyone tries to use the microwave, the display
microwave from being accidentally started or
will show LOCK.
used by children.
To unlock the control panel press and hold the
o
To lock the controls press and hold the
CLEAWOFF pad for about three seconds.
Cm CLEAWO~ pad for about three seconds.
OFF
The display will show LOCK and then
The display will show the time of day.
return to the time of day. A small “U’ will
be displayed to remind you that the control
panel is locked.
12
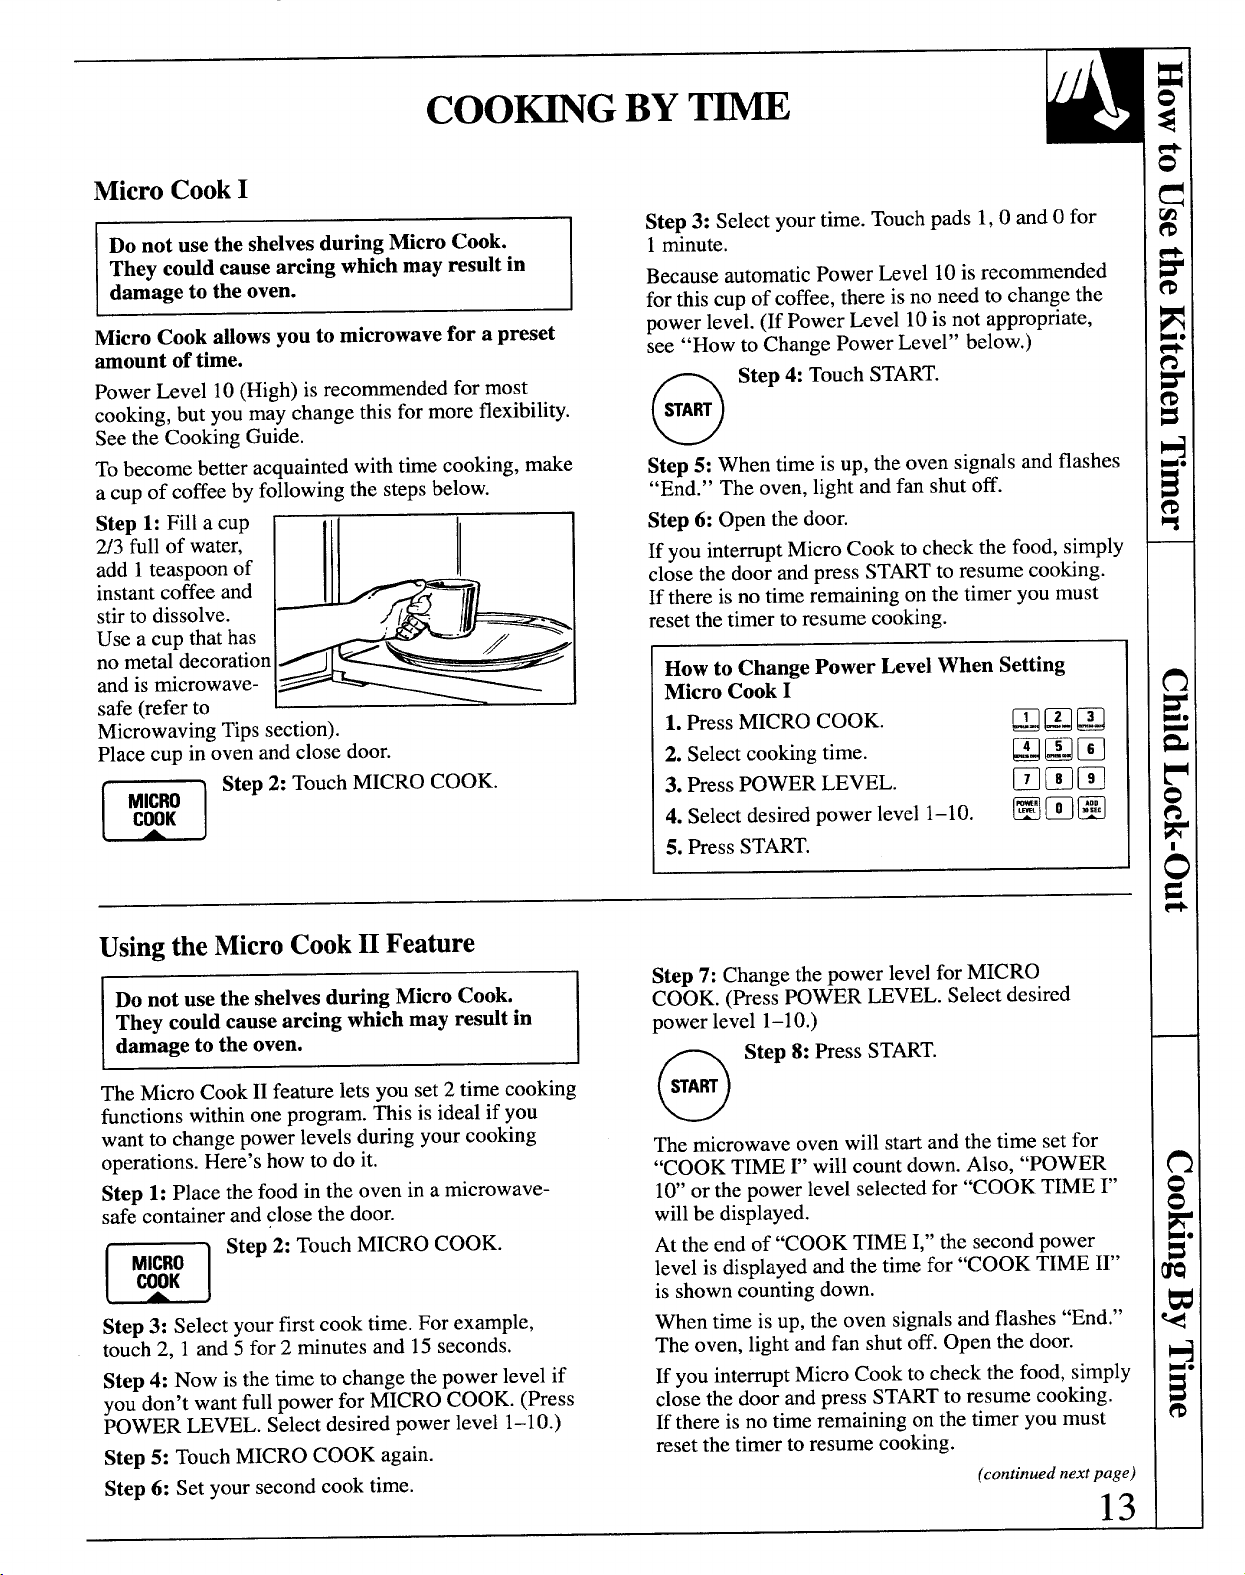
MicroCookI
~
Do not use the shelves during Micro Cook.
They codd cause arcing which may result in
Micro Cook allows you to microwave for a preset
amount of time.
Power Level 10 (High) is recommended for most
cooking, but you may change this for more flexibility.
See the Cooking Guide.
To become better acquainted with time cooking, make
.
a cup of coffee by following the steps below.
Step 1: Fill a cup
2/3 full of water,
add 1teas~oon of
~
I
L
instantcoffee and
z<
1.
stirto dissolve.
[’q~
Use a cup that has
no metal decoration
>
and is rnicrowave-
safe (refer to
1
~
Microwaving Tips section).
Place cup in oven and close door.
m
Step 2: Touch MICRO COOK.
::::
Step 3: Select your time. Touch pads 1,0 and Ofor
1minute.
Because automatic Power Level 10 is recommended
for this cup of coffee, there is no need to change the
power level. (If Power Level 10 is not appropriate,
see “How to Change Power Level” below.)
o
Step4: Touch START.
SA~
Step 5: When time is up, the oven signals and flashes
“End.” The oven, light and fan shut off.
Step 6: Open the door.
If you interrupt Micro Cook to check the food, simply
.
close the door and press STARTto resume cooking.
If there is no time remaining on the timer you must
reset the timer to resume cooking.
How to Change Power Level When Setting
Micro Cook I
1. PressMICRO COOK.
❑BQ
2. Select cooking time.
BQE
3. Press POWER LEVEL.
❑mm
4. Select desired power level 1–10.
Hm@
5. Press START.
Usingthe MicroCookII Feature
Do not use the shelves during Micro Cook.
They could cause arcing which may result in
damage to the oven.
The Micro Cook II feature lets you set 2 time cooking
functions within one program. This is ideal if you
want to change power levels during your cooking
operations. Here’s how to do it.
Step 1: Place the food in the oven in a microwave-
safe container and close the door.
m
Step 2: Touch MICRO COOK.
L
A
J
Step 3: Select your first cook time. For example,
touch 2, 1 and 5 for 2 minutes and 15 seconds.
Step 4: Now is the time to change the power level if
you don’t want full power for MICRO COOK. (Press
POWER LEVEL. Select desired power level 1–10.)
Step 5: Touch MICRO COOK again.
Step 6: Set your second cook time.
Step 7: Change the power level for MICRO
COOK. (Press POWER LEVEL. Select desired
power level 1-10.)
o
Step 8: PressSTART.
WA~
The microwave oven will start and the time set for
“COOK TIME ~’will count down. Also, “POWER
10’ or the power level selected for “COOK TIME ~’
will be displayed.
At the end of “COOK TIME I,” the second power
level is displayed and the time for “COOK TIME II”
is shown counting down.
When time is up, the oven signalsand flashes “End.”
The oven, light and fan shut off. Open the door.
If you interrupt Micro Cook to check the food, simply
close the door and press STARTto resume cooking.
If there is no time remaining on the timer you must
reset the timer to resume cooking.
(continued next page)
13
COO~G BYT-
(con~ued)
TheExpressCookFeature
The Express Cook feature is a short-cut method to To ExpressCook your food or beverage:
set time for 1-5 minutes at Power Level 10.
Touch a number pad (from 1to 5) for 1to 5 minutes
of cooking at Power Level 10.For example, touch the
2 pad for 2 minutes of cooking time. No-need to touch
START,the oven will start immediately.
The oven will signal and turn off automatically
when finished.
Howto UseDelayStart
The Delay Start feature allows you to program
your oven to begin cooking at a preset time of
day—up to a 12-hour delay.
o
Step 1: Touch DELAY STARTpad.
DEUY
START
REMINmR
Step2: Enter the time you want the oven to start.
(Be sure your microwave oven clock shows the
correct time of day.)
Step 3: Enter your desired cooking program.
o
Step 4: Touch START pad. The display
START
will show the time you entered. The time of
day may be displayed by touching the
CLOCK pad. The oven will automatically
start at the desired time.
Howto UseReminder
The Reminder feature can be used like an alarm
clwk, without starting the oven.
Example: It is 7 a.m. and you must remember
to leave for a dentist appointment at 10 a.m.
o
Step 1: Touch DELAY STARTpad.
DE~Y
START
REMINMR
Step 2: Enter the time you want the oven to remind
you. (Be sure your microwave oven clock shows the
correct time of day. The reminder time can be set up
to 12hours later.)
Step 3: Touch START
pad. The reminder is now
set at the time you
E
I=t 1= j~f
programmed, and will
j~~j~f
signal you at that time
with a beeping sound until
you open the door or touch the CLEAWOFF pad.
The display will show “REM” until the oven door is
opened or CLEAWOFF is touched. The REMinder
time may be displayed by touching the DELAY
STARTpad. The time-of-day may be displayed by
touching the CLOCK pad.
TheSoundFeature
Add30 Seconds
The Sound feature allows you to turn the oven beeper
The Add 30 Seconds feature provides a convenientway
on or off. to extendcookingtime by 30 seconds while the oven
Touch the SOUND pad once to turn off the sound.
timeris countingdown. It will add 30 secondsto the
Touch the pad again to turn the sound back on. If the
time shown each time the pad is touched.
sound has been turned off, a small “MUTE’ will be
This pad may also be used as an express cook for 30
displayed.
seconds of cooking. No need to touch START,the
oven will start immediately.
14
DEFROST~G BYT~
The Defrost(PowerLevel3)
Time Defrost is designed for speedy thawing of
frozen food and is one of the great advantages of a
microwave oven.
Use the Time Defrost setting to quickly thaw foods
such as bread, rolls, vegetables, fruits and frozen
dinners. The Auto Defrost setting is preferred for
meat and poultry because the oven sets the defrosting
time and power levels for you.
● Power Level 3 is automatically set when you press
TIME DEFROST pad, but you may change this for
more flexibility.
● See the Defrosting Guide for defrosting help.
How to Change Power Level
QQQ
1. Press TIME DEFROST.
~~m
2. Select defrosting time.
mmm
3. Press POWER LEVEL.
mmm
4. Select desired power level 1–10.
5. Press START.
To become better acquainted with the defrost
function, defrost a 10 oz. package of frozen
strawberries by following the steps below.
Step 1: Place a package of frozen strawberries in
the oven and close door. Be sure package contains
no metal.
m
Step 2: Touch TIME DEFROST.
\
A
)
Step 3: Select one half of the total defrosting time
recommended. For example, touch pads 4, 0 and O
for 4 minutes.
o
Step 4: Touch START.When the cycle is
WART
completed, the oven signals and flashes
“En&’,then automatically shuts off.
Step 5: Turn the package over, close the door and
repeat Steps 2 and 3 to set remaining half of
defrosting time. Touch START.
Step 6: When the oven signals and flashes “En&’,
open the door, remove the package and separate
strawberries to finish defrosting.
DefrostingTips
● Foods frozen in paper or
-,:z,,ti:::,,2ER
6-. .4::=>> L plastic can be defrosted in
the package Tightly closed
~oodhas partially defrosted,
as directed by package.
Plastic storage containers
should be at least partially
uncovered.
● Family-size, pre-packaged frozen dinners can be
defrosted and microwaved. If the food is in a foil
container, transfer it to a microwave-safe dish.
● For even defrosting, some
foods need to be broken up
or separated part of the way
through the defrosting time.
● Foods that spoil easily, such as milk, eggs, fish,
stuffings,poultry and pork should not be allowed to
sit out for more than one hour after defrosting.Room
temperature promotes the growth of harmful bacteria.
● Check the Defrosting Guide for other defrosting tips.
QuestionsandAnswers
Q. When I press START,I hear a dull thumping
Q. Can I defrost small items in a hurry?
noise. What is it?
A. Yes, but they will need more frequent attention
A. This sound is normal. It is letting you know the
than usual. Raise the power level after entering
magnetron is in operation.
the time by touching the desired power level pad.
Power Level 7 cuts the total defrosting time in
about 1/2;Power Level 10 cuts the total defrosting
time to approximately 1/3. During either, rotate or
stir food frequently.
15
~
TempCoo~old takes the guesswork out of cooking,
Do not use the shelves during microwave
because the oven automatically switches to “Hold”
cooking They codd cause arcing wkch may
setting after reaching the preset food temperature
and maintains that temperature for up to 1 hour.
Internal temperature is the best test of doneness
NOTE: Oven automatically switches to “Hold”
for many foods.
when preset food temperature is reached.
Use Temp Coo~old to cook a variety of foods to
the desired finished food temperature. The Micro
Cook setting is recommended for batters, doughs,
frozen foods and foods which are d~lcdt to cook
precisely with the probe.
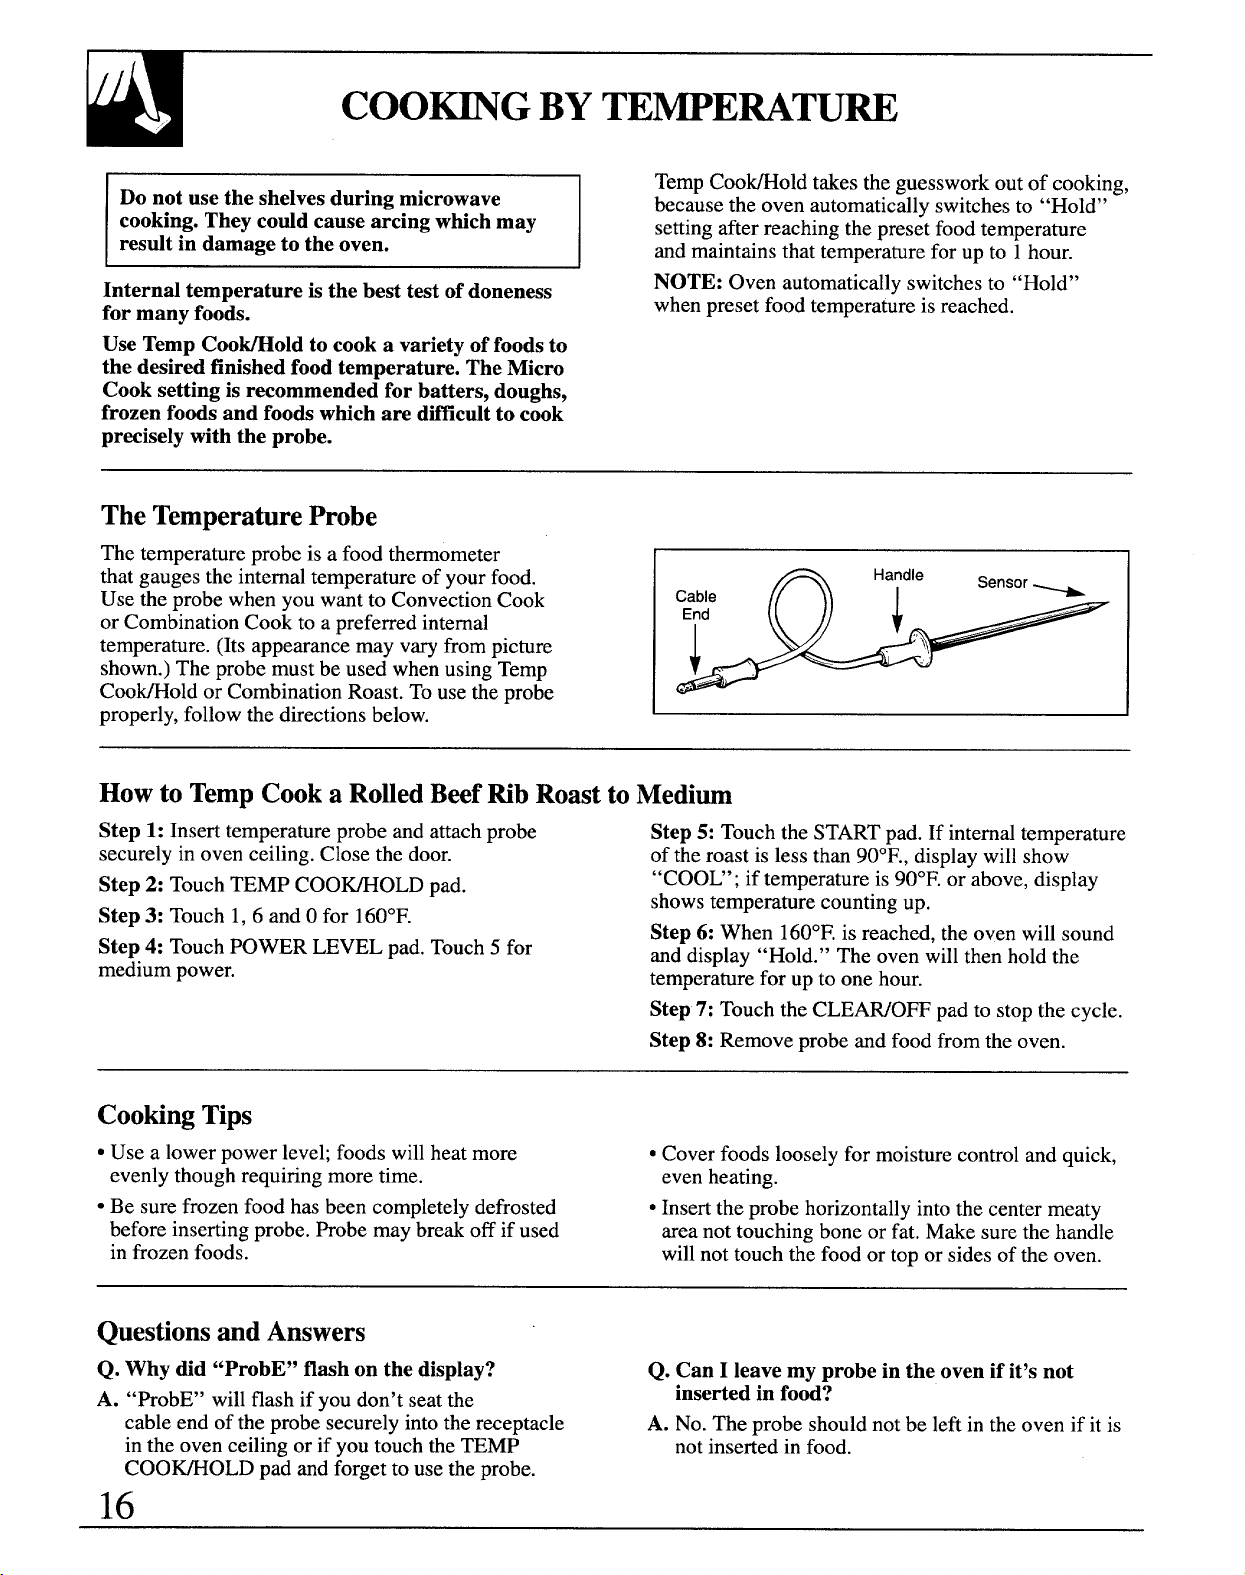
TheTemperatureProbe
The temperature probe is a food thermometer
that gauges the internal temperature of your food.
Use the probe when you want to Convection Cook
Cable
or Combination Cook to a preferred internal
End
I
temperature. (Its appearance may vary from picture
shown.) The probe must be used when using Temp
Coo~old or Combination Roast. To use the probe
properly, follow the directions below.
Howto TempCooka RolledBeefRib RoasttoMedium
Step 1: Insert temperature probe and attach probe
Step 5: Touch the START pad. If internal temperature
securely in oven ceiling. Close the door.
of the roast is less than 90°F., display will show
Step 2: Touch TEMP COO~OLD pad.
“COOU’; if temperature is 90°F. or above, display
Step 3: Touch 1,6 and Ofor 160°F.
shows temperature counting up.
Step 4: Touch POWER LEVEL pad. Touch 5 for
Step 6: When 160°F.is reached, the oven will sound
medium power.
and display “Hold.” The oven will then hold the
temperature for up to one hour.
Step 7: Touch the CLEAWOFF pad to stop the cycle.
Step 8: Remove probe and food from the oven.
CookingTips
● Use a lower power level; foods will heat more
● Cover foods loosely for moisture control and quick,
evenly though requiring more time.
even heating.
● Be sure frozen food has been completely defrosted
● Insert the probe horizontally into the center meaty
before inserting probe. Probe may break off if used
area not touching bone or fat. Make sure the handle
in frozen foods.
will not touch the food or top or sides of the oven.
QuestionsandAnswers
Q. Why did “ProbE” flash on the display?
Q. Can I leave my probe in the oven if it’s not
A. “ProbE” will flash if you don’t seat the
inserted in food?
cable end of the probe securely into the receptacle
A. No. The probe should not be left in the oven if it is
in the oven ceiling or if you touch the TEMP
not inserted in food.
COO~OLD pad and forget to use the probe.
16
AUTODEFROST
AutoDefrost
With the Auto Defrost feature, the oven
Use the Auto Defrost Guide. Enter the food weight in
automatically sets the defrosting times and power pounds and tenths of a pound (see Conversion Guide
levels for you. below). Then touch STARTpad.
The oven calculatesdefrostingtime ad changes power
levelsduringdefrostingto give even defrosting results.
Howto SetAutoDefrost
Before you begin, check the Auto Defrost Guide
located in this section. It shows minimum and
maximum food weights for a variety of foods.
Youwill need to know your food weight before
setting Auto Defrost.
Step1: Removefoodfrompackage,placein ovenon
microwave-safedishandclosedoor.
n
Step 2: Touch AUTO DEFROST pad.
AUTO
DEF~ST
Step 3: Enterweight.For example,touchnumber
pads 1 and2 for weightof 1,2 pounds(1 pound,
3
ounces). See Conversion Guide below. After
approximately 5 seconds “START’ flashes.
o
Step 4: Touch STARTpad. Display shows
HART defrost time counting down.
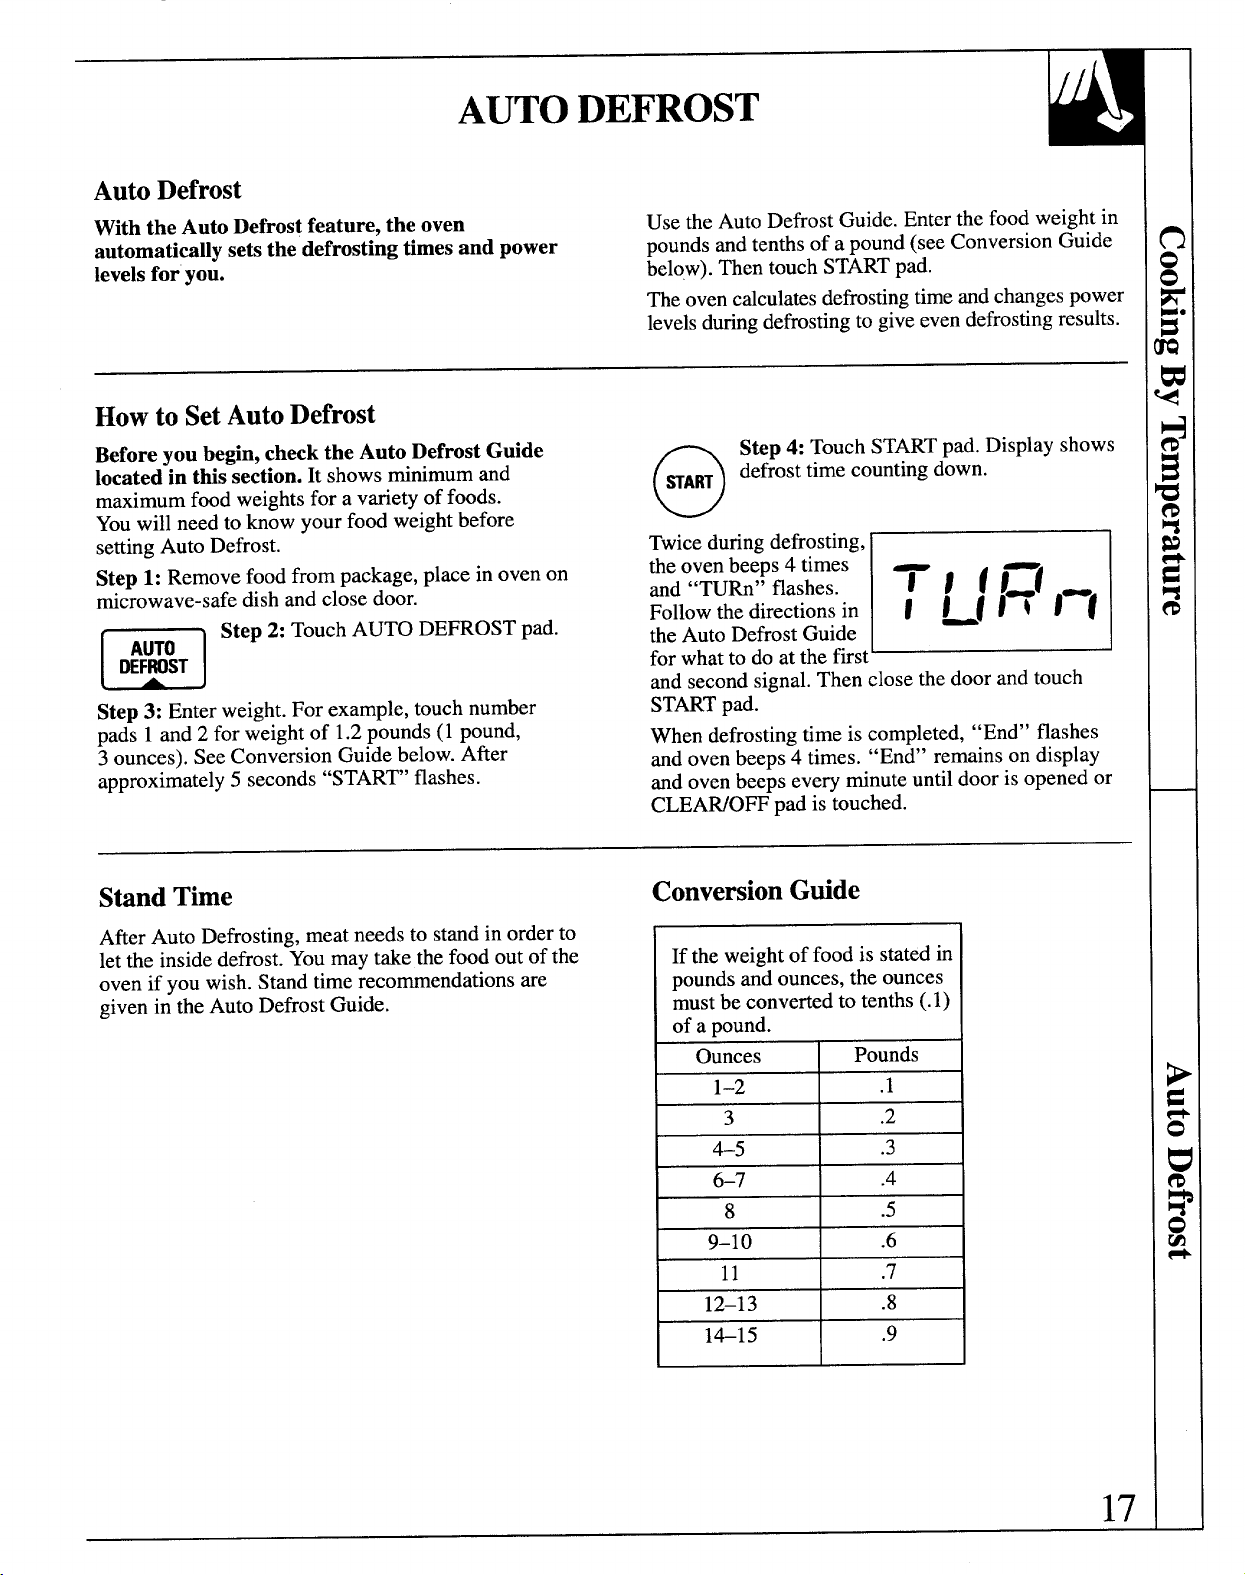
Twice during defrosting,
tie oven beeps 4 times
and “TURn” flashes.
E
71
fl=(
Follow the directions in
I ~fltl-(
the Auto Defrost Guide
for what to do at the first
and second signal. Then close the door and touch
STARTpad.
When defrosting time is completed,
“End” flashes
and oven beeps 4 times.
“End” remains on display
and oven beeps every minute until door is opened or
CLEAWOFF pad is touched.
StandTime
ConversionGuide
After Auto Defrosting, meat needs to stand in order to
let the inside defrost. You may take the food out of the
oven if you wish. Stand time recommendations are
given in the Auto Defrost Guide.
If the weight of food is stated in
pounds and ounces, the ounces
must be converted to tenths (.1)
of a pound.
Ounces
Pounds
1-2 .1
3
.2
4-5
.3
6-7 .4
8 .5
9-1o .6
11 .7
12–13 .8
1415 .9
17
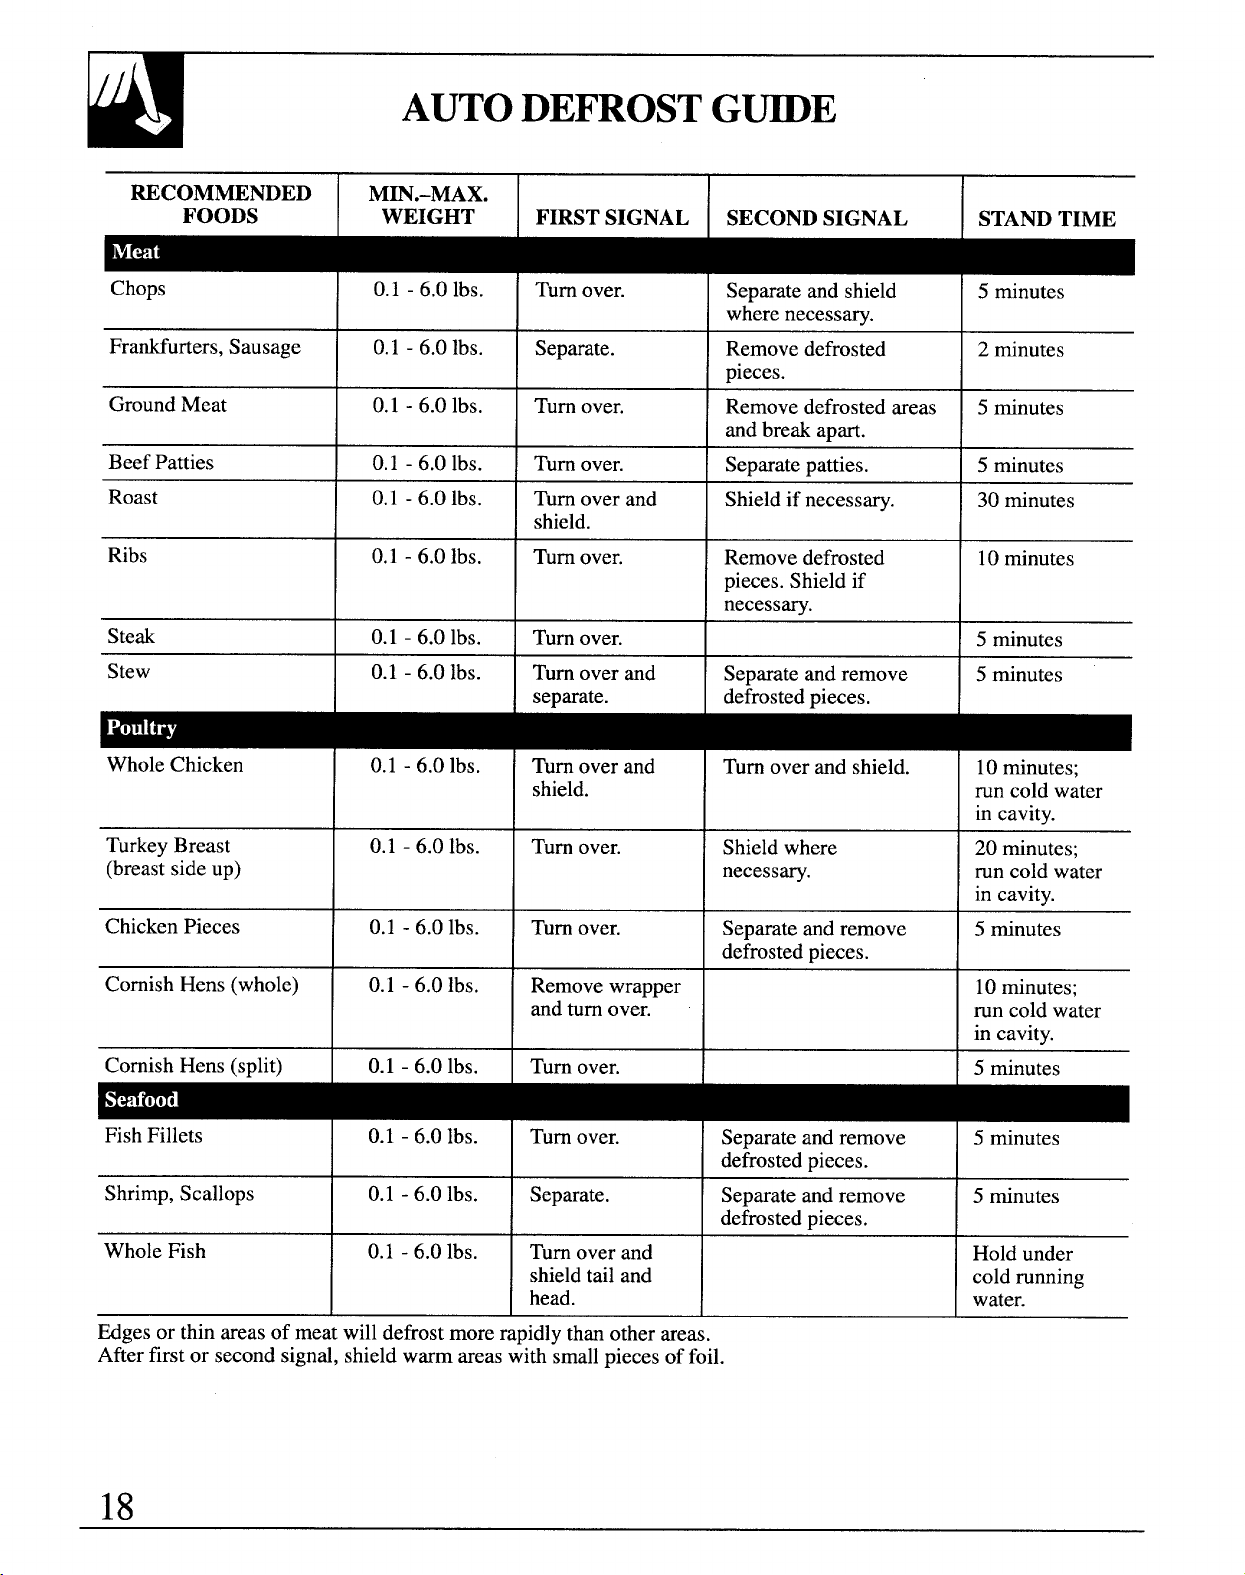
AUTODE~OST G~E
RECOMMENDED
Min.-MAX.
FOODS
WEIGHT FIRST SIGNAL
SECOND SIGNAL
STAND TIME
Chops I 0.1- 6.0 lbs. I Turn O“er.
I Separate and shield I 5 minutes
where necessary.
Frankfurters, Sausage 0.1 -6.0 Ibs.
Separate. Remove defrosted
2 minutes
Dieces.
I
I I
.
I
Ground Meat 0.1 -6.0 lbs. Turn over. Remove defrosted areas 5 minutes
and break apart.
Beef Patties 0.1 -6.0 lbs. Turn over.
Separate patties. 5 minutes
Roast 0.1 -6.0 lbs. Turn over and
Shield if necessary.
30 minutes
shield.
Ribs 0.1 -6.0 lbs. Turn over. Remove defrosted 10minutes
pieces. Shield if
necessary.
Steak
0.1 -6.0 lbs.
Turn over. 5 minutes
Stew
0.1 -6.0 lbs.
Turn over and Separate and remove 5 minutes
separate. defrosted pieces.
Whole Chicken
TurkeyBreast
(breastsideup)
Chicken Pieces
Cornish Hens (whole)
Comish Hens (split)
0.1 -6.0 lbs.
0.1 -6.0 Ibs.
0.1 -6.0 lbs.
0.1 -6.0 Ibs.
0.1 -6.0 lbs.
Turnover and
shield.
Turn over.
Turn over.
Remove wrapper
and turn over.
Turn over,
Turn over and shield.
10 minutes;
run cold water
in cavitv.
Shieldwhere
20 minutes;
necessary. runcold water
in cavitv.
Separate and remove
I
5 minutes
defrosted Dieces.
10
minutes;
runcold water
in cavitv.
I 5 minutes
Fish Fillets
0.1 -6.0 lbs. Turn over.
Separate and remove 5 minutes
defrosted pieces.
Shrimp, Scallops
0.1 -6.0 lbs. Separate.
Separate and remove
5 minutes
defrosted pieces.
Whole Fish
0.1 -6.0 lbs. Turn over and Hold under
shield tail and
cold running
head.
water.
, # 1
~ges or thin areas of meat will defrost more rapidly than other areas.
After first or second signal, shield warm areas with small pieces of foil.
18
SENSORCOOKING
PoPcom
NOTE: Do NOT use the metal shelves with
the Popcorn program.
The Popcorn feature is designed to be used only
with prepackaged microwave popcorn weighing
3.0 to 3.5 ounces.
Step 1: Remove the outer wrapper from the
microwave popcorn.
m
Step 3: Touch POPCORN pad.
POPCORN
No
need to touch START,the oven
will start immediately.
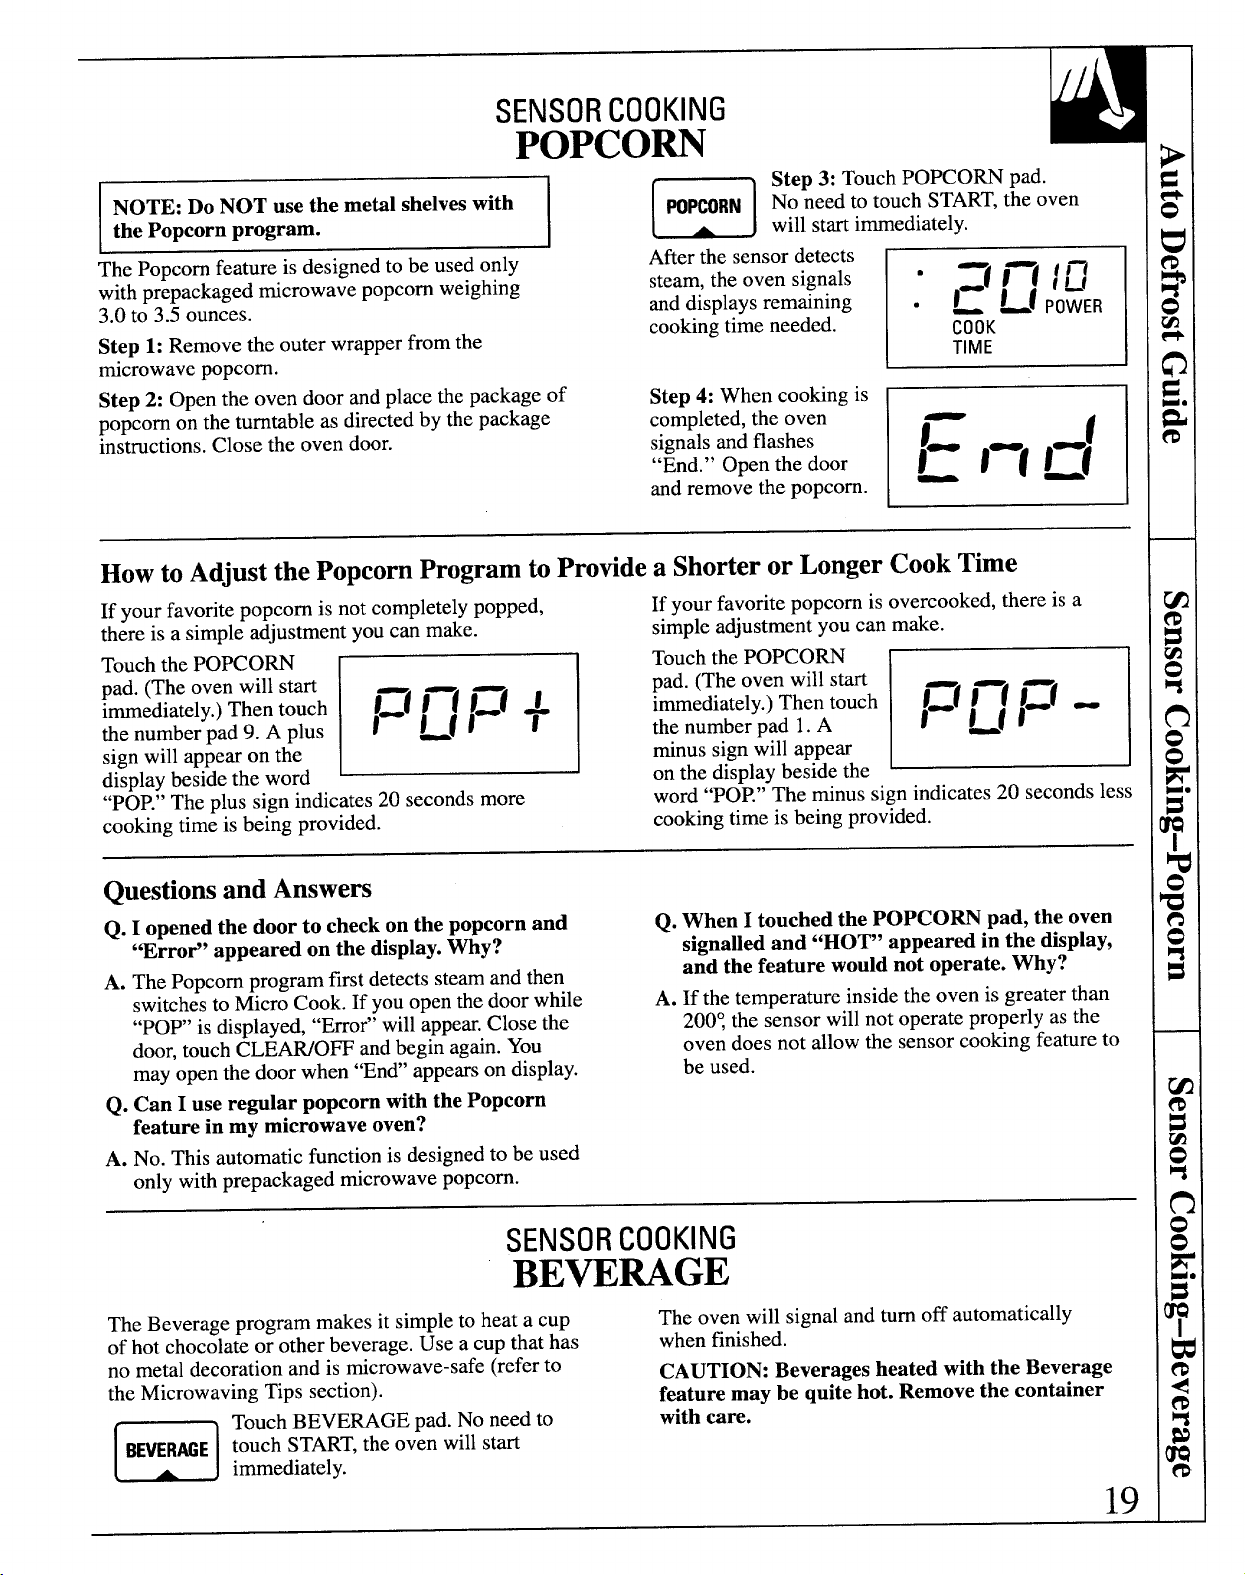
After the sensor detects
E
steam, the oven signals
●
=1 1—( / ~
and displays remaining .
~ ~f POWER
cooking time needed.
COOK
TIME
Step 2: Open the oven door and place the package of
Step 4: When cooking is
popcorn on the turntable as directed by the package
completed, the oven
instructions. Close the oven door.
signals and flashes
“End.” Open the door
and remove the popcorn.
Howto Adjustthe PopcornProgramtoProtide a ShorterorLongerCookTime
If your favorite popcorn is not completely popped,
If your favorite popcorn is overcooked, there is a
there is a simple adjustment you can make.
simple adjustment you can make.
Touch the POPCORN
r
Touch the POPCORN
pad. (The oven will start
1=( l—l 1=/ +
pad. (The oven will start
immediately.)Then touch
immediately.)Then touch
E
I=( 1—1 1=1 -
the number pad 9. A plus
1 ~11
the number pad 1.A
I ~fl
sign will appear on the
minus sign will appear
display beside the word
on the display beside the
“POP.”The plus sign indicates 20 seconds more
word “POP.” The minus sign indicates 20 seconds less
cooking time is being provided.
cooking time is being provided.
QuestionsandAnswers
Q. I opened the door to check on the popcorn and
Q. When I touched the POPCORN pad, the oven
“Error” appeared on the display.Why?
signalled and “HOT” appeared in the display,
A. The Popcorn program first detects steam and then
and the feature would not operate. Why?
switchesto Micro Cook. If you open the door while
A. If the temperature inside the oven is greater than
“pop’ is
displayed,“Error” will appear.Close the
200Ythesensorwill not operateproperlyasthe
door, touchCLEWO~ andbegin again.You
oven does not allow the sensorcooking featureto
mayopenthedoor when“End’ appearson display.
be used.
Q.
Can I use regular popcorn with the Popcorn
feature in my microwave oven?
A. No. This automatic function is designed to be used
only with prepackaged microwave popcorn.
SENSORCOOKING
BEWUGE
The Beverage program makes it simple to heat a cup
The oven will signal and turn off automatically
of hot chocolate or other beverage. Use a cup that has
when finished.
no metal decoration and is microwave-safe (refer to
CAUTION: Beverages heated with the Beverage
the Microwaving Tips section).
feature may be quite hot. Remove the container
m
Touch BEVERAGE pad. No need to
with care.
BEVERME touch START,the oven will start
immediately.
19

SENSORCOOKING
WmAT
By actually sensing the steam that escapes as food
Do not use the shelves during Reheat. They
heats, this feature automatically adjusts the oven’s
could cause arcing which may result in damage
heating time to varioustypes and amounts of pre-
to the oven.
cooked food.
I
I
Reheat is designed for reheating single serving sizes
Because all cooking containers must be covered
of previously prepared foods. With many leftovers,
during automatic reheating, this feature is best with
there is no need to lookup reheating times in a
foods you want to retain moisture.
cookbook or to rely on guesswork.
FoodsRecommended
FoodsNot Recommended
A wide variety
Bread products,
of previously
foods that must
prepared foods
be reheated
including
uncovered,
a+ fs
,.
leftovers can be
foods that
reheated using
require constant
this feature.
attention, foods
v~ ~%
Reheat is
calling for a dry
recommended for
look or crisp
single-servingsof
surface after reheating should not be reheated using
food or plates of leftovers.
this feature. It is best to use Micro Cook.
EasytoUse
Simplytouch theREHEATpad.
No needto touch START,theoven will start
immediately.
KeepDoor Closed
Do not open the oven door while the word “RHEAT”
is displayed—steam escaping from the oven can
affect reheating performance. If the door is opened,
close the door and touch START immediately.
Example:
Place covered food in oven. Touch
When steam is sensed the oven will signal and turn
off automatically. The oven displays “End” and beeps
START,the oven will start immediately.
every minute until the door is opened or CLEAWOFF
‘Fn:=:d+ ‘Stouched
are displayed.
Questions&Answers
Q. If my food is not completely reheated after
Q. What if I don’t cover the dish in Reheat?
using Reheat, what should I do?
A. Oven senses steam too
quickly, which shortens
A. Use Micro Cook to reheat for additional time
the reheating time and leaves food too cool.
until desired temperature is reached.
Cover with lid or vented plastic wrap and
reset Reheat.
20
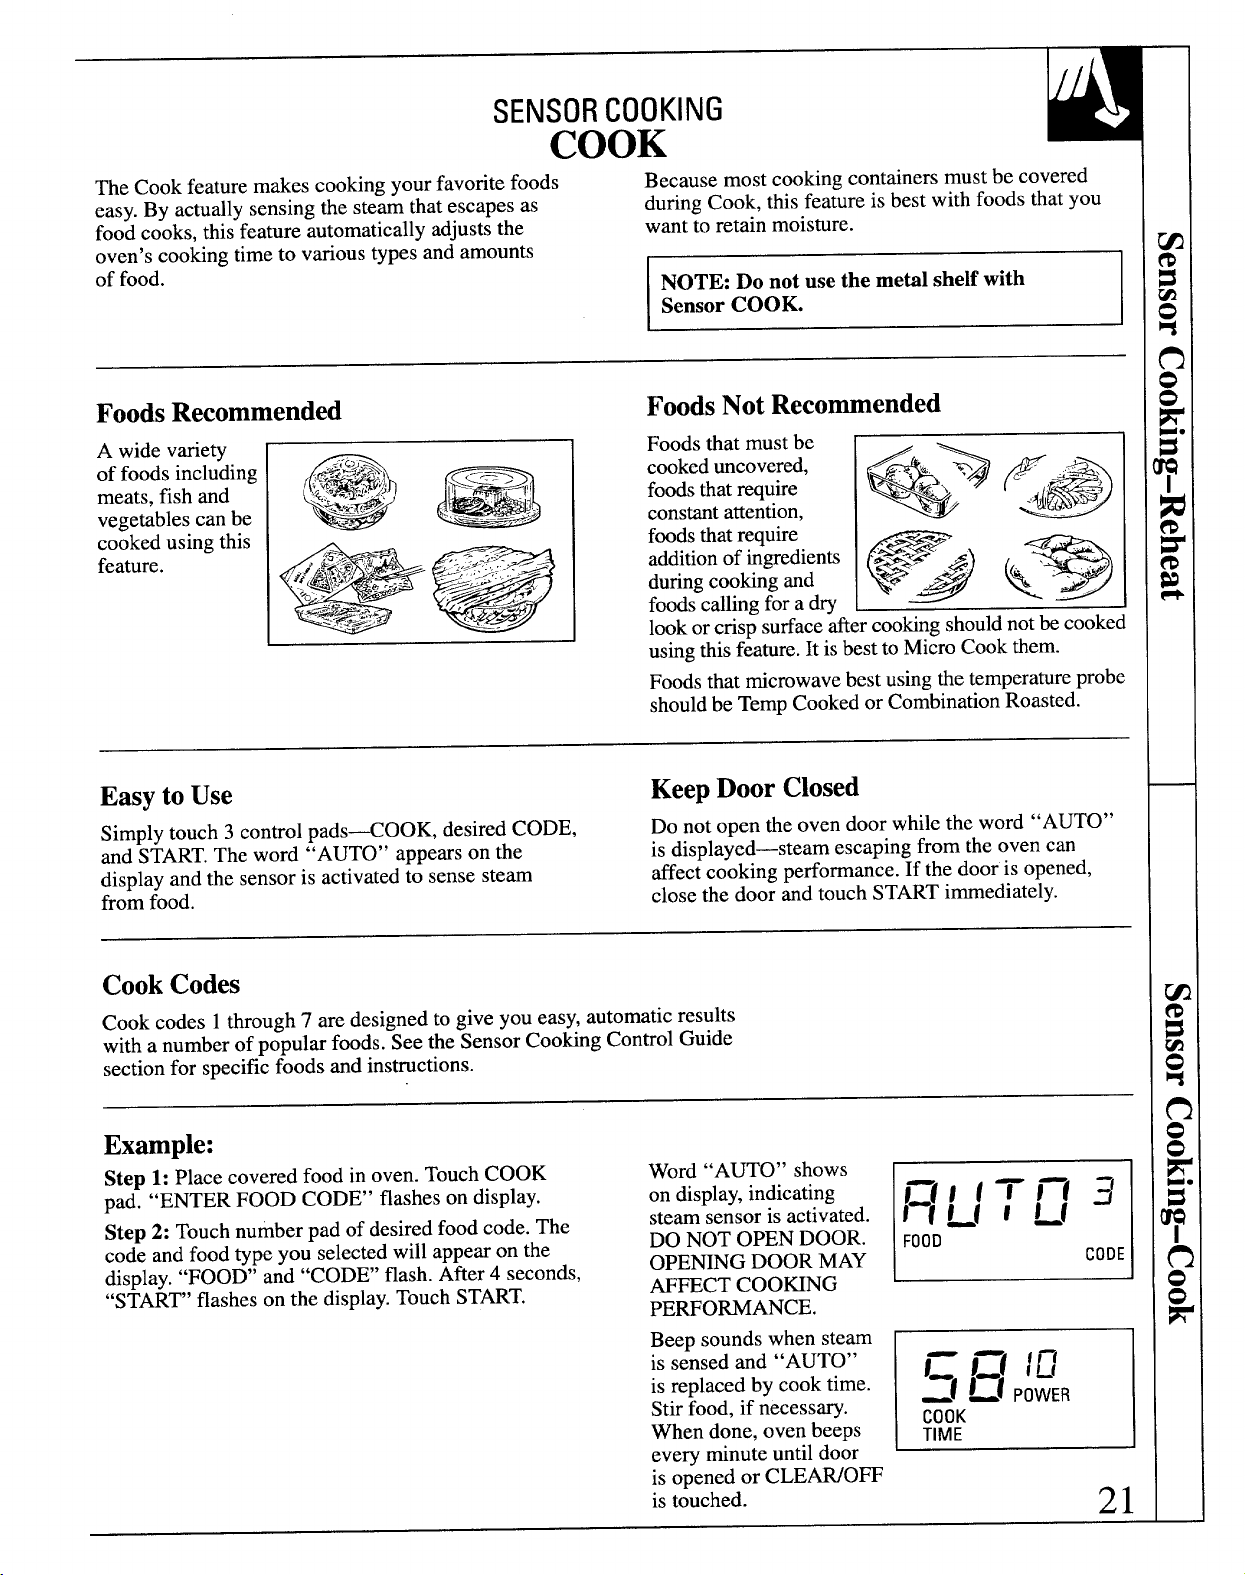
SENSORCOOKING
COOK
The Cook feature makes cooking your favorite foods
Because most cooking containers must be covered
easy. By actually sensing the steam that escapes as
during Cook, this feature is best with foods that you
food cooks, this feature automatically adjusts the
want to retain moisture.
oven’s cooking time to various types and amounts
of food.
NOTE: Do not use the metil shelf with
Sensor COOK.
FoodsRecommended
A wide variety
of foods including
meats, fish and
vegetables can be
cooked using this
feature.
I
FoodsNot Recommended
Foods that must be
cookeduncovered,
foodsthat require
constantattention,
foodsthat require
additionof ingredients
duringcooking and
foods calling for a dry
lookor cris~ surfaceaftercookingshouldnotbe cooked
A
usingthisfeature.It isbestto Micro Cook them.
Foodsthat microwavebest using the temperatureprobe
shouldbe Temp Cooked or CombinationRoasted.
Easyto Use
KeepDoor Closed
Simply touch 3 control pads<OOK, desired CODE,
Do not open the oven door while the word
“AUTO”
and
START.The word “AUTO” appears on the
is displayed—steam escaping from the oven can
display and the sensor is activated to sense steam
affect cooking performance. If the door is opened,
from food.
close the door and touch START immediately.
CookCodes
Cook codes 1through 7 are designed to give you easy, automatic results
with a number of popular foods. See the Sensor Cooking Control Guide
section for specific foods and instructions.
Example:
Step 1: Place covered food in oven. Touch COOK
Word “A~O” shows
pad. “ENTER FOOD CODE” flasheson display.
on display,indicating
Step 2: Touch number pad of desired food code. The
steam sensor is activated.
code and food type you selected will appear on the
DO NOT OPEN DOOR.
display. “FOOD’ and “CODE’ flash. After 4 seconds,
OPEMNG DOOR MAY
“START’ flashes on the display.Touch START.
AFFECT COO~NG
PERFORMANCE.
FOOO
CODE
Beep sounds when steam
is sensed and “AUTO”
E
= 1=( /L’
is replaced by cook time.
:1 ~1 p~~~~
Stir food, if necessary.
When done, oven beeps
COOK
TIME
every
minute until door
is opened or CLEWO~
is touched.
21
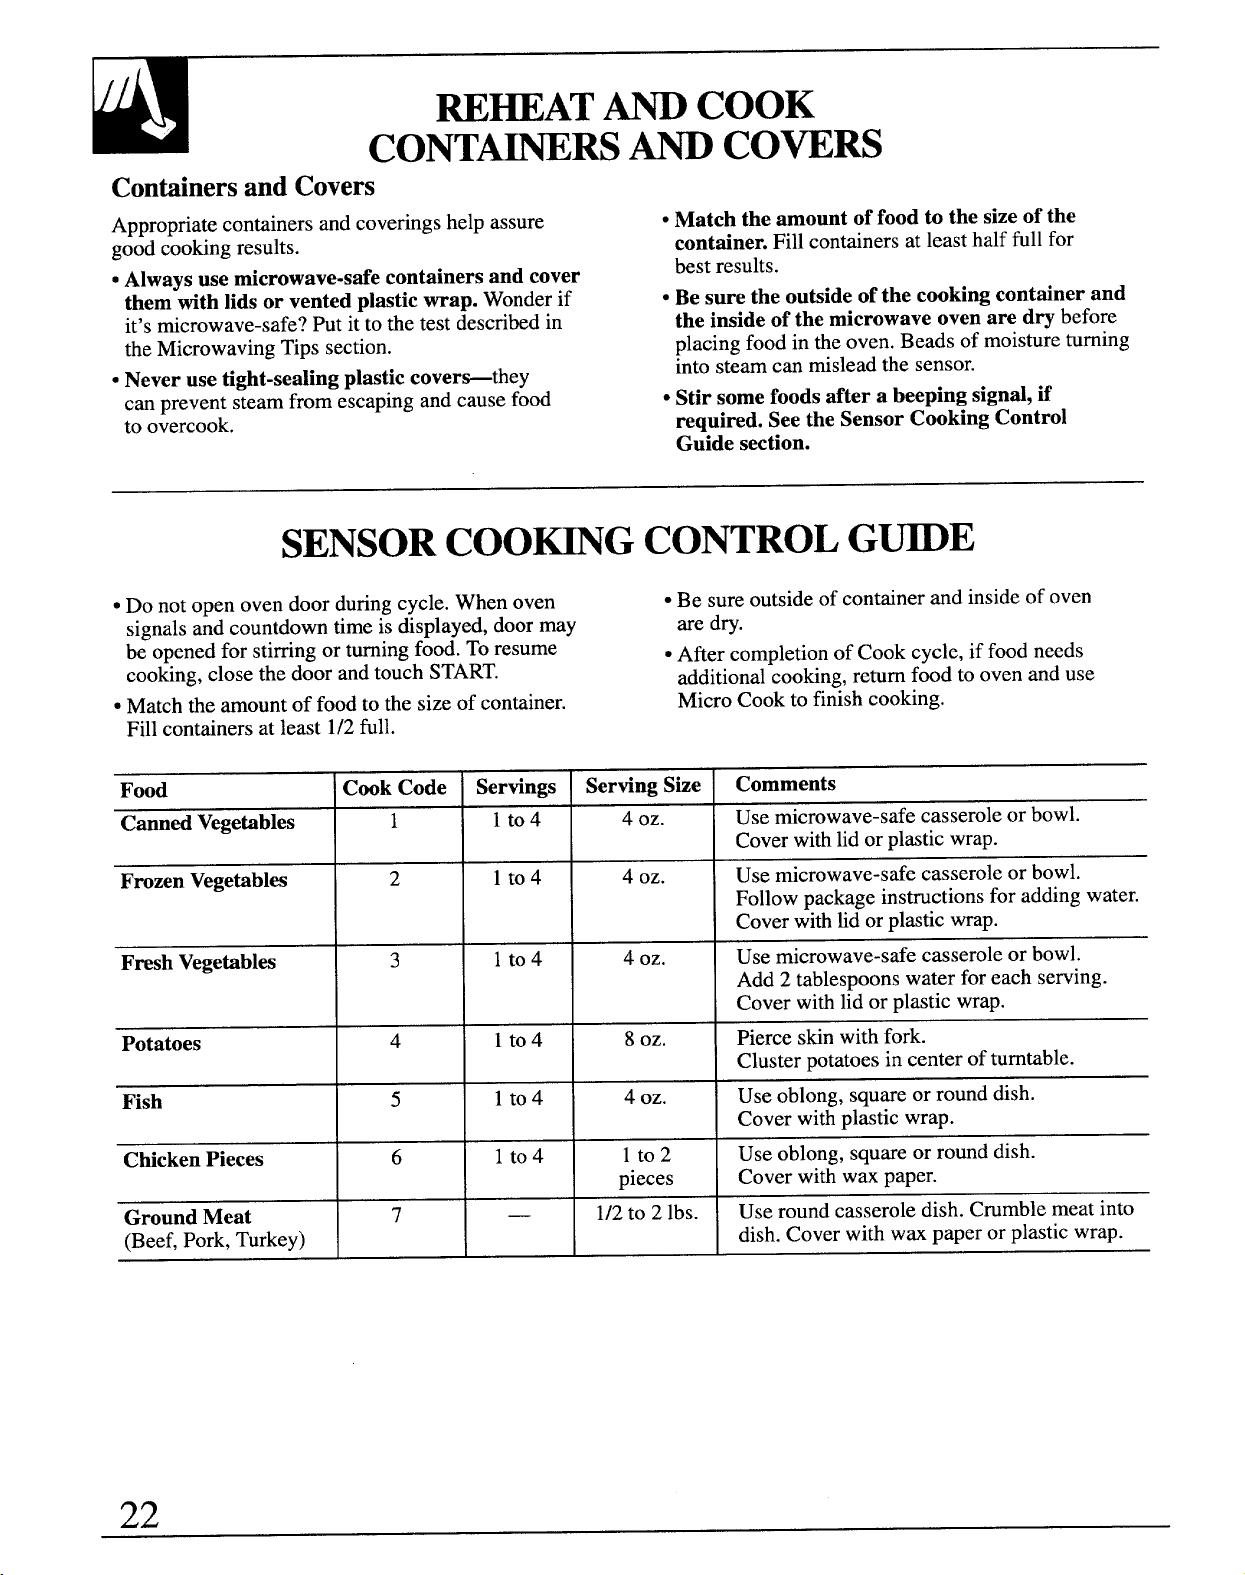
Containersand Covers
Appropriate containers and coverings help assure
good cooking results.
QAlways use microwave-safe containers and cover
them tith lids or vented plastic map. Wonder if
it’smicrowave-safe? Put it to the test described in
the Microwaving Tips section,
QNever use tight-sea~ng plastic cover=they
can prevent steam from escaping and cause food
to overcook.
● Match the amount of food to the size of the
container. Fill containers at least half full for
best results.
● Be sure the outside of the cooking container and
the inside of the microwave oven are dry before
placing food in the oven. Beads of moisture turning
into steam can mislead the sensor.
● Stir some foods after a beeping signal, if
required. See the Sensor Cooking Control
Guide section.
SENSORCOO~G CONTROLG~E
● Do not open oven door during cycle. When oven
● Be sure outside of container and inside of oven
signals and countdown time is displayed, door may
are dry.
be opened for stirring or turning food. To resume
● After completion of Cook cycle, if food needs
cooking, close the door and touch START.
additional cooking, return food to oven and use
● Match the amount of food to the size of container.
Micro Cook to finish cooking.
Fill containers at least 1/2full.
Food
Cook Code
Servings
Serving
Size
Comments
Canned Vegetables
1 lto4
4 oz.
Use microwave-safe casserole or bowl.
Cover with lid or plastic wrap.
Frozen Vegetables
2 lto4
4 oz.
Use microwave-safe casserole or bowl.
Follow package instructions for adding water.
Cover with tid or plastic wrap.
Fresh Vegetables
3 lto4
4 oz.
Use microwave-safe casserole or bowl.
Add 2 tablespoons water for each serving.
Cover with lid or plastic wrap.
Potatoes
4 lto4 8
OZ.
Pierce skin with fork.
Cluster potatoes in center of turntable.
Fish
5
lto4
4 oz.
Use oblong, square or round dish.
Cover with plastic wrap.
Chicken Pieces
6
lto4
lto2
Use oblong, square or round dish.
pieces
Cover with wax paper.
Ground Meat
7
—
1/2to 2 lbs.
Use round casserole dish. Crumble meat into
(Beef, Pork, Turkey)
dish. Cover with wax paper or plastic wrap.
22
HOW TOUSET~ SHELF SYSTEM
Microwave
Convection
Combination
Shorter Shelf
- ‘o
YES,
YES,
always use the
always use the
shorter shelf.
shorter shelf.
Taller Shelf with Shorter
NO
YES, NO
Shelf for two-level b&ing.
the two-level shelf system
should be used when b&ing
on two levels, for example,
when b&ing a two-layer eke.
23
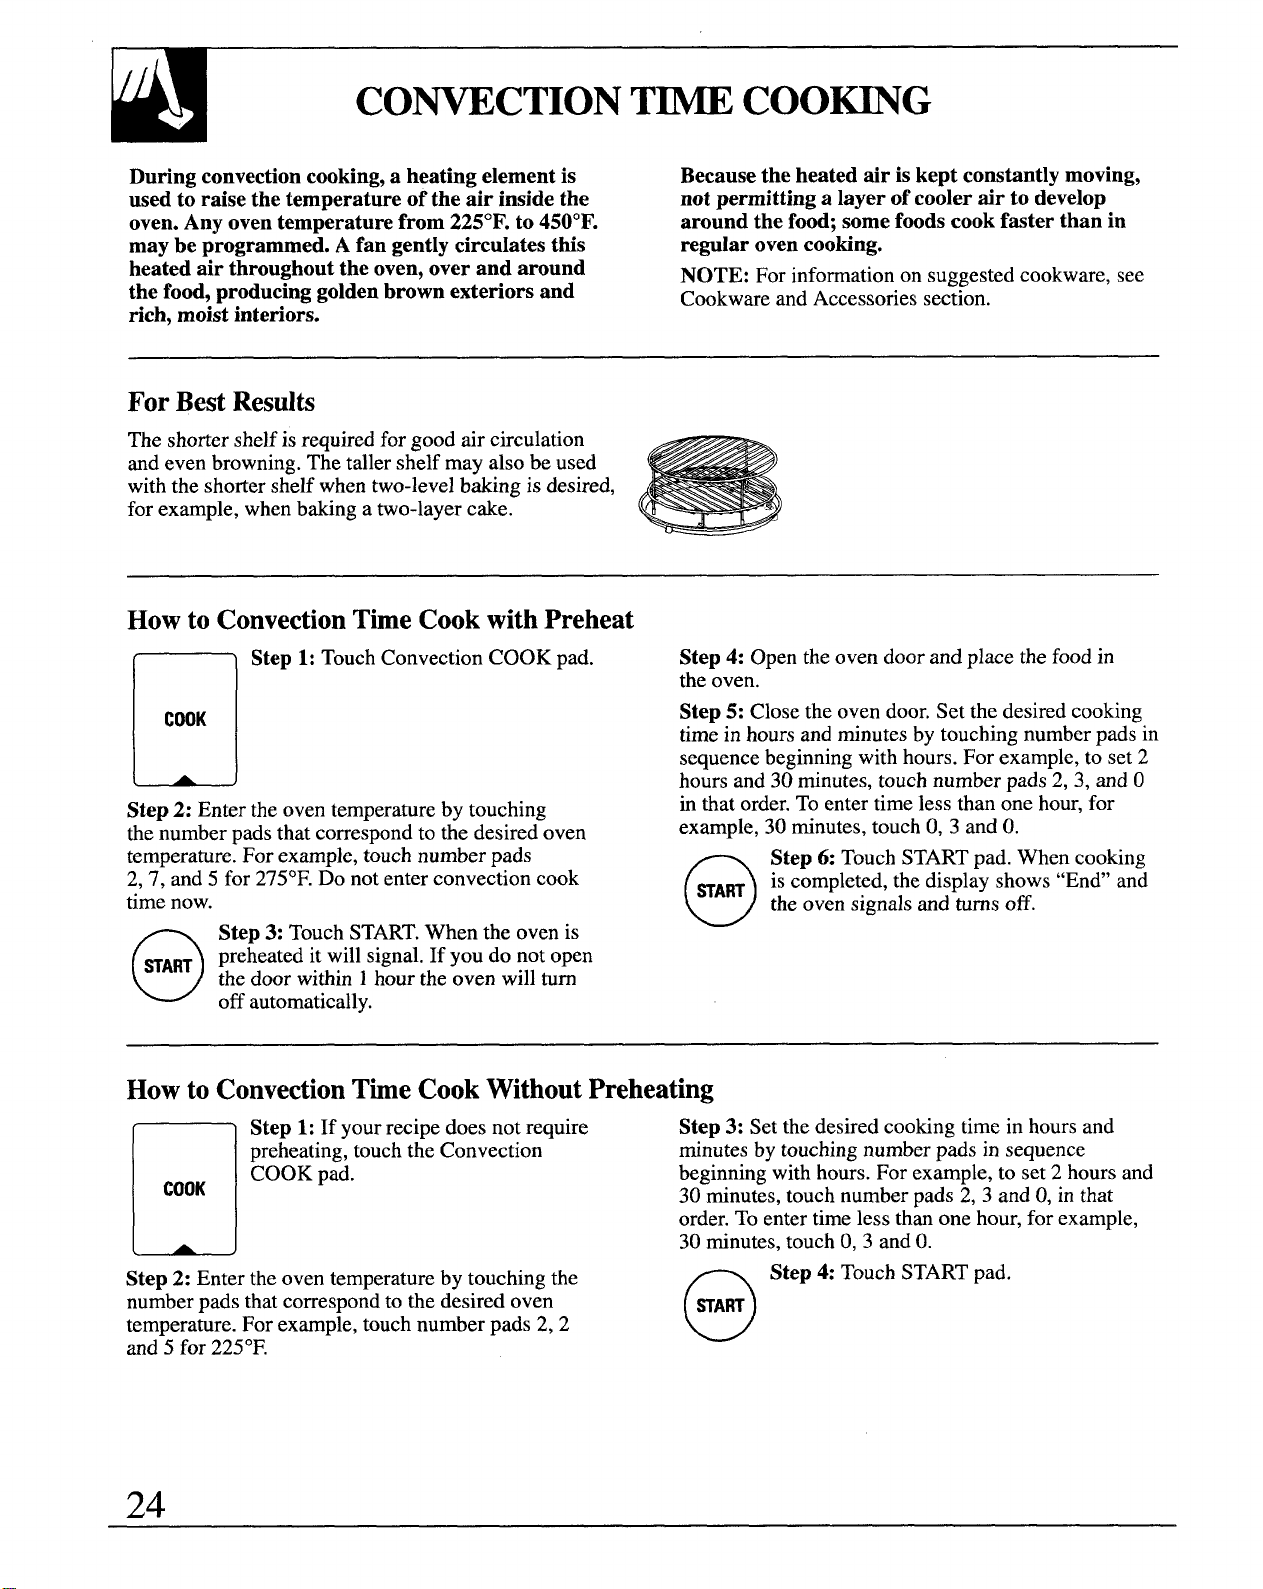
CO~CTION T~ COO~G
During convection cooking, a heating element is
Because the heated air is kept constantly moving,
used to raise the temperature of the air inside the
not permitting a layer of cooler air to develop
oven. Any oven temperature from 225°F. to 450°F.
around the food; some foods cook faster than in
may be programmed. A fan gently circulates this
regular oven cooking.
heated air throughout the oven, over and around
the food, producing golden brown exteriors and
NOTE: For information on suggested cookware, see
Cookware and Accessories section.
rich, moist interiors.
ForBest Results
The shorter shelf is required for good air circulation
and even browning. The taller shelf may also be used
with the shorter shelf when two-level baking is desired,
for example, when baking a two-layer cake.
Howto ConvectionTbe Cookwith Preheat
n
Step 1: Touch Convection COOK pad.
COOK
(
A
J
Step 2: Enter the oven temperature by touching
the number pads that correspond to the desired oven
temperature. For example, touch number pads
2,7, and 5 for 275°F.Do not enter convection cook
time now.
o
Step 3: Touch START.When the oven is
~ART preheated it will signal. If you do not open
the door within 1hour the oven will turn
off automatically.
Step 4: Open the oven door and place the food in
the oven.
Step
5: Close the oven door. Set the desired cooking
time in hours and minutes by touching number pads in
sequence beginning with hours. For example, to set 2
hours and 30 minutes, touch number pads 2,3, and O
in that order. To enter time less than one hour, for
example, 30 minutes, touch O,3 and O.
0
Step 6: Touch START pad. When cooking
HART
is
completed, the display shows “En&’and
the oven signals and turns off.
Howto ConvectionTfie CookWithoutPreheating
n
Step 1: If yourrecipe doesnotrequire
preheating, touch the Convection
COOK
COOK pad.
Step 2: Enter the oven temperature by touching the
number pads that correspond to the desired oven
temperature. For example, touch number pads 2, 2
and 5 for 225°F.
Step
3: Set the desired cooking time in hours and
minutes by touching number pads in sequence
beginning with hours. For example, to set 2 hours and
30 minutes, touch number pads 2, 3 and O,in that
order. To enter time less than one hour, for example,
30 minutes, touch O,3 and O.
n Step 4: Touch START pad
[ START)
24

Youcan also convection cook with the temperature probe, to assure
that foods are cooked precisely to the degree of doneness desired, while
the constantly circulating hot air assures even cooking and delicious
browning. The temperature probe monitors the internal temperature
of the food and turns the oven off automatically when the desired
temperature is reached.
ForBest Results
The shorter shelf is required for good air circulation
and even browning. Use only the shorter shelf when
using the probe. Do not use the taller shelf.
-
Howto ConvectionTemperatureCook
Steu 1: Insert probe in food as
m
Step 3: Enter oven temperature by touching the
receptacle.
n
COOK
dir~cted in the-Cookbook or in
—
4
&
number pads that correspond to the desired-oven
this guide. Plug other end of ‘-
temperature. For example, touch 2, 2, 5 for 225°F.
probe securely into ceiling
—
Step 4: Touch the appropriate number pads in
sequence to enter the desired food temperature.
Step 2: Touch
Any food temperature from 90°F. to 199°F.maybe
\/\
Convection COOK ‘ ‘“
programmed. For example, touch 1, 8 and O,in-that
pad.
\
order, for 180°F.The temperature selected is shown
on the display.
o
Step 5: Touch START pad. When food
SA~
reaches preselected temperature, display
shows “End,” oven signals and turns off.
QuestionsandAnswers
Q. After I preheated my oven, I tried to set
Q. Can I store the probe in the oven when it is not
cooking time, but nothing happened. What is
in use?
the problem?
A. Leaving the probe in the oven is not recommended.
A. Until you open the oven door or touch the
If you forget and leave it in during cooking,
CLE~OFF pad, the oven remains in the preheat
without having inserted it in food, damage to the
mode and no further instructions can be entered.
probe or to the oven may result.
After 1 hour oven automatically turns off.
Q. Can I check during the cooking cycle to be sure
that I have set the correct oven temperature?
A. Yes. If you touch the Convection COOK pad at
any time during cooking, the selected oven
temperature is displayed on the display.
25

CO~~ATION = COO~G
Combination cooking offers the best features of microwave energy
and convection cooking. Microwaves cook food fast and convection
circulation of h-ted air browns foods bwutifully.
ForBest Results
The shorter shelf is required for good air circulation
and even browning. Use only the shorter shelf when
combination cooking. Do not use the taller shelf.
Howto CombinationTimeCookWithPreheat
m
Step 1: Touch Combination
COOK
COOK pad.
Step 2: Enter the oven temperature by touching
the number pads that correspond to the desired oven
temperature. For example, touch number pads
2,7, and 5 for 275°F.Do not enter convection cook
time now.
o
Step 3: Touch START.When the oven is
~ART preheated it will signal ready. If you do not
open the door within 1 hour the oven will
turn off automatically.
Step 4: Open the oven door and place the food in
the oven.
Step 5: Close the oven door. Set the desired cooking
time in hours and minutes by touching number pads in
sequence beginning with hours. For example, to set 2
hours and 30 minutes, touch number pads 2,3, and O
in that order. To enter time less than one hour, for
example, 30 minutes, touch O,3 and O.
0
Step 6: Touch START pad. When cooking
WART
is completed, the display shows “En&’and
the oven signals and turns off.
Howto CombinationTimeCookWithoutPreheating
D
Step1:If your recipe does not require
Step 3: Set the desired cooking time in hours and
COOK
preheating, touch the Combination
minutes by touching number pads in sequence
COOK pd.
beginning with hours. For example, to set 2 hours and
Step 2: Enter the oven temperature by touching the
30 minutes, touch number pads 2, 3 and O,in that
number pads that correspond to the desired oven
order.To enter time less than one hour, for example,
temperature. For example, touch number pads 2, 2
30 minutes, touch O,3 and O.
and 5 for 225°F.
n Step 4: Touch START pad.
u
HART
QuestionsandAnswers
Remember:
Q. MayI use my metal roasting pan to
● Check the Cookware and Accessories section
Combination Cook a roast?
for correct cookware when Combination cooking.
A. No. Do not use metal cookware when Combination
● For best roasting and browning results, whole roasts
cooking. Place the roast on a trivet in a glass dish.
shouldbe cooked in a dish placed directly on the
Q. b it necessary to place a glass dish on the oven
shorter oven shelf.
floor when Combination cooking?
● Place meat on a trivet in a glass dish to collectjuices
A. No. For best roasting results, place the glass dish on
and prevent spattering.
the shorter oven shelf which rests on the turntable
QSome recipes call for preheating.
during Combination cooking.
● For foods that are too tall to flt in the oven, you can
leave out the trivet. If necessary, you may take out the
26
shelfand place the dish directly on the turntable.
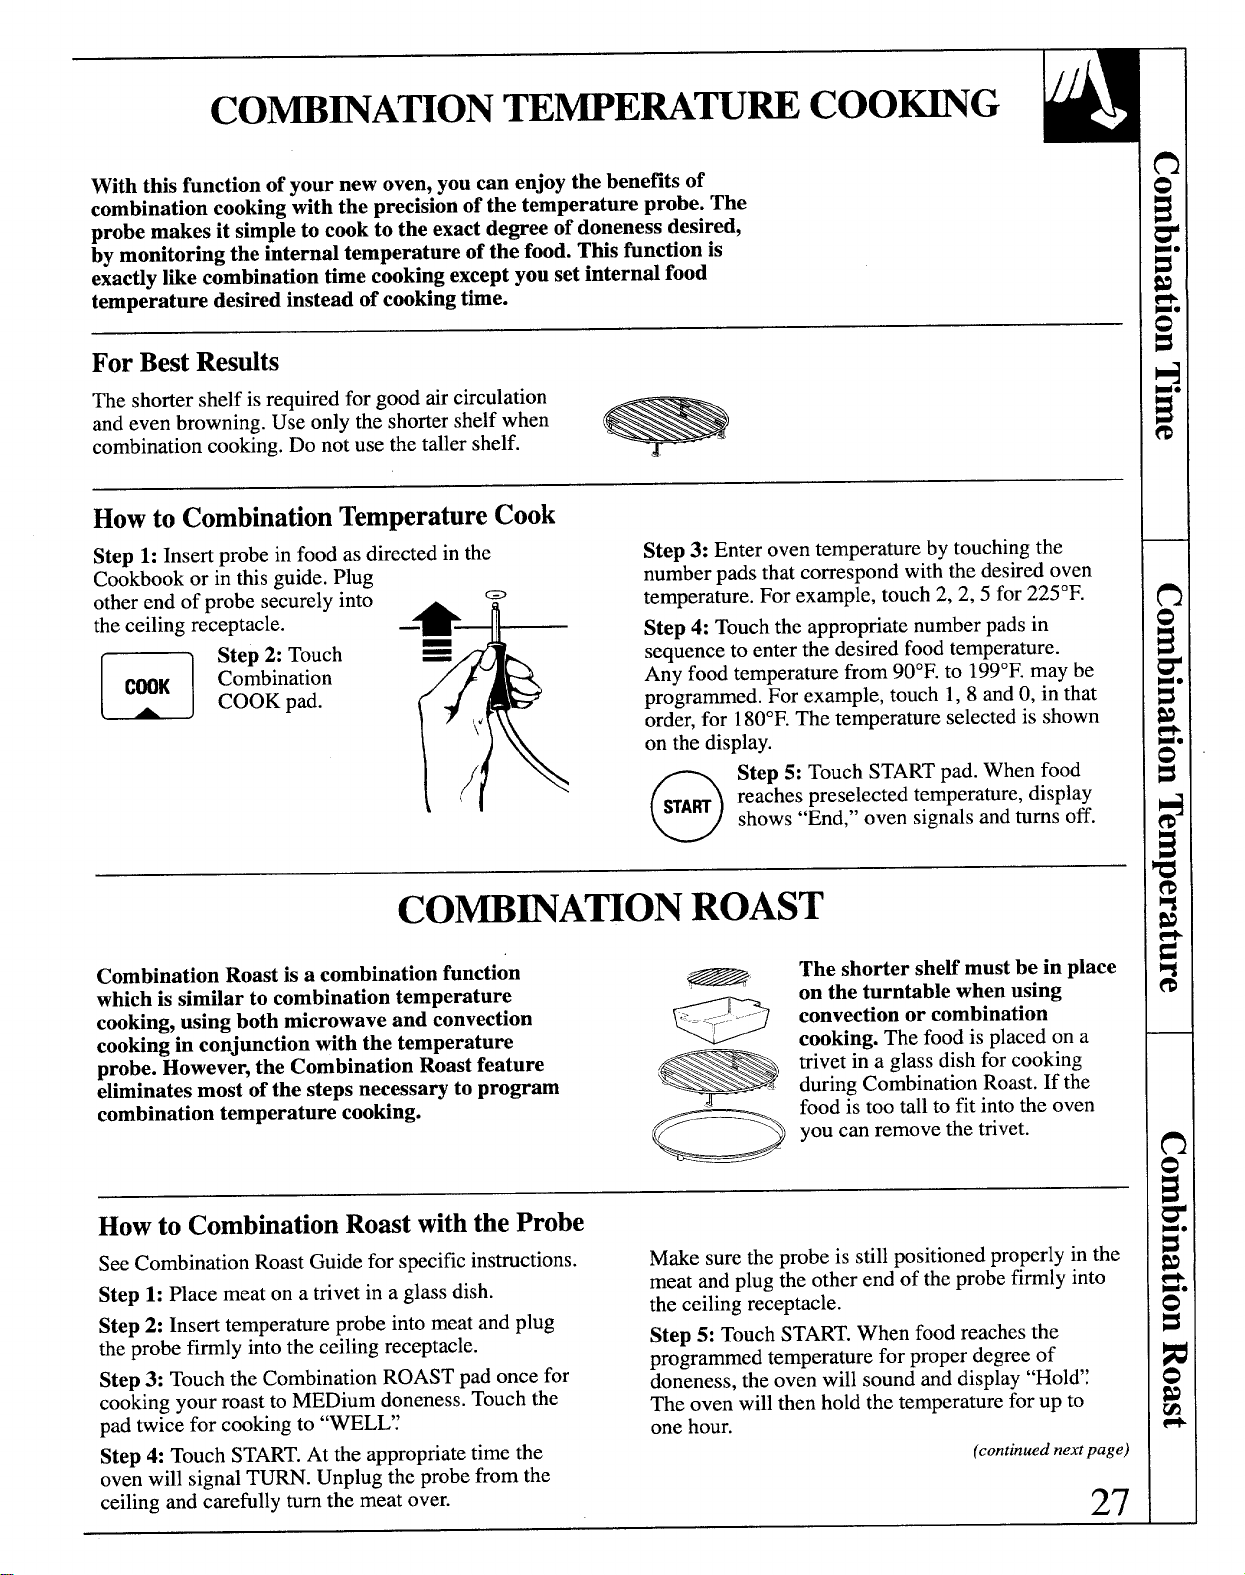
W]ththis function of your new oven, you can enjoy the benefits of
combination cooking with the precision of the temperature probe. The
probe makes it simple to cook to the exact degree of doneness desired,
by monitoring the internal temperature of the food.
Thisfunctionis
exactlylikecombinationtimecookingexceptyousetinternalfood
temperaturedesiredinsteadofcookingtime.
ForBest Results
The shorter shelf is required for good air circulation
and even browning. Use only the shorter shelf when
combination cooking. Do not use the taller shelf.
Howto CombinationTemperatureCook
Step 1: Insert probe in food as directed in the
Step 3: Enter oven temperature by touching the
Cookbook or in this guide. Plug
number pads that correspond with the desired oven
other end of probe s~curelyint~
a
*
T
tempera~ure.For example, touch 2, 2,5 for 225°F.
the ceiling receptacle.
—
Step 4: Touch the appropriate number pads in
~ Step 2: Touch =
B
sequence to enter the desired food temperature.
Any food temperature from 90°F. to 199°F.maybe
programmed. For example, touch 1, 8 and O,in that
1(
order, for 180°F.The temperature selected is shown
u
C~K
Co&bination
COOK pad.
;/\ Og
Step 5: Touch START pad. When food
I
reaches preselected temperature, display
shows “End,” oven signals and turns off.
CO~~A~ON ROAST
Combination Roast is a combination function
which is similar to combination temperature
cooking, using both microwave and convection
s
J ---
=-<~--.””
cooking in conjunction with the temperature
probe. However, the Combination Roast feature
eliminates most of the steps necessary to program
-
combination temperature cooking.
o
The shorter she~ must be in place
on the turntible when using
convection or combination
cooking. The food is placed on a
trivet in a glass dish for cooking
during Combination Roast. If the
food is too tall to fit into the oven
you can remove the trivet.
Howto CombinationRoastwiththe Probe
See Combination Roast Guide for specific instructions.
Make sure the probe is still positioned properly in the
Step 1: Place meat on a trivet in a glass dish.
meat and plug the other end of the probe firmly into
Step 2: Insert temperature probe into meat and plug
the ceiling receptacle.
the probe firmly into the ceiling receptacle.
Step 5: Touch START.When food reaches the
Step 3: Touch the Combination ROAST pad once for
programmed temperature for proper degree of
doneness, the oven will sound and display “Hol&~
cooking your roast to MEDium doneness. Touch the
The oven will then hold the temperature for up to
pad twice for cooking to “WELE~
one hour.
Step 4: Touch START.At the appropriate time the
(continued next page)
oven will signal TM. Unplug the probe from the
ceiling and carefully turn the meat over.
27
CO~~A~ON ROAST
(continued)
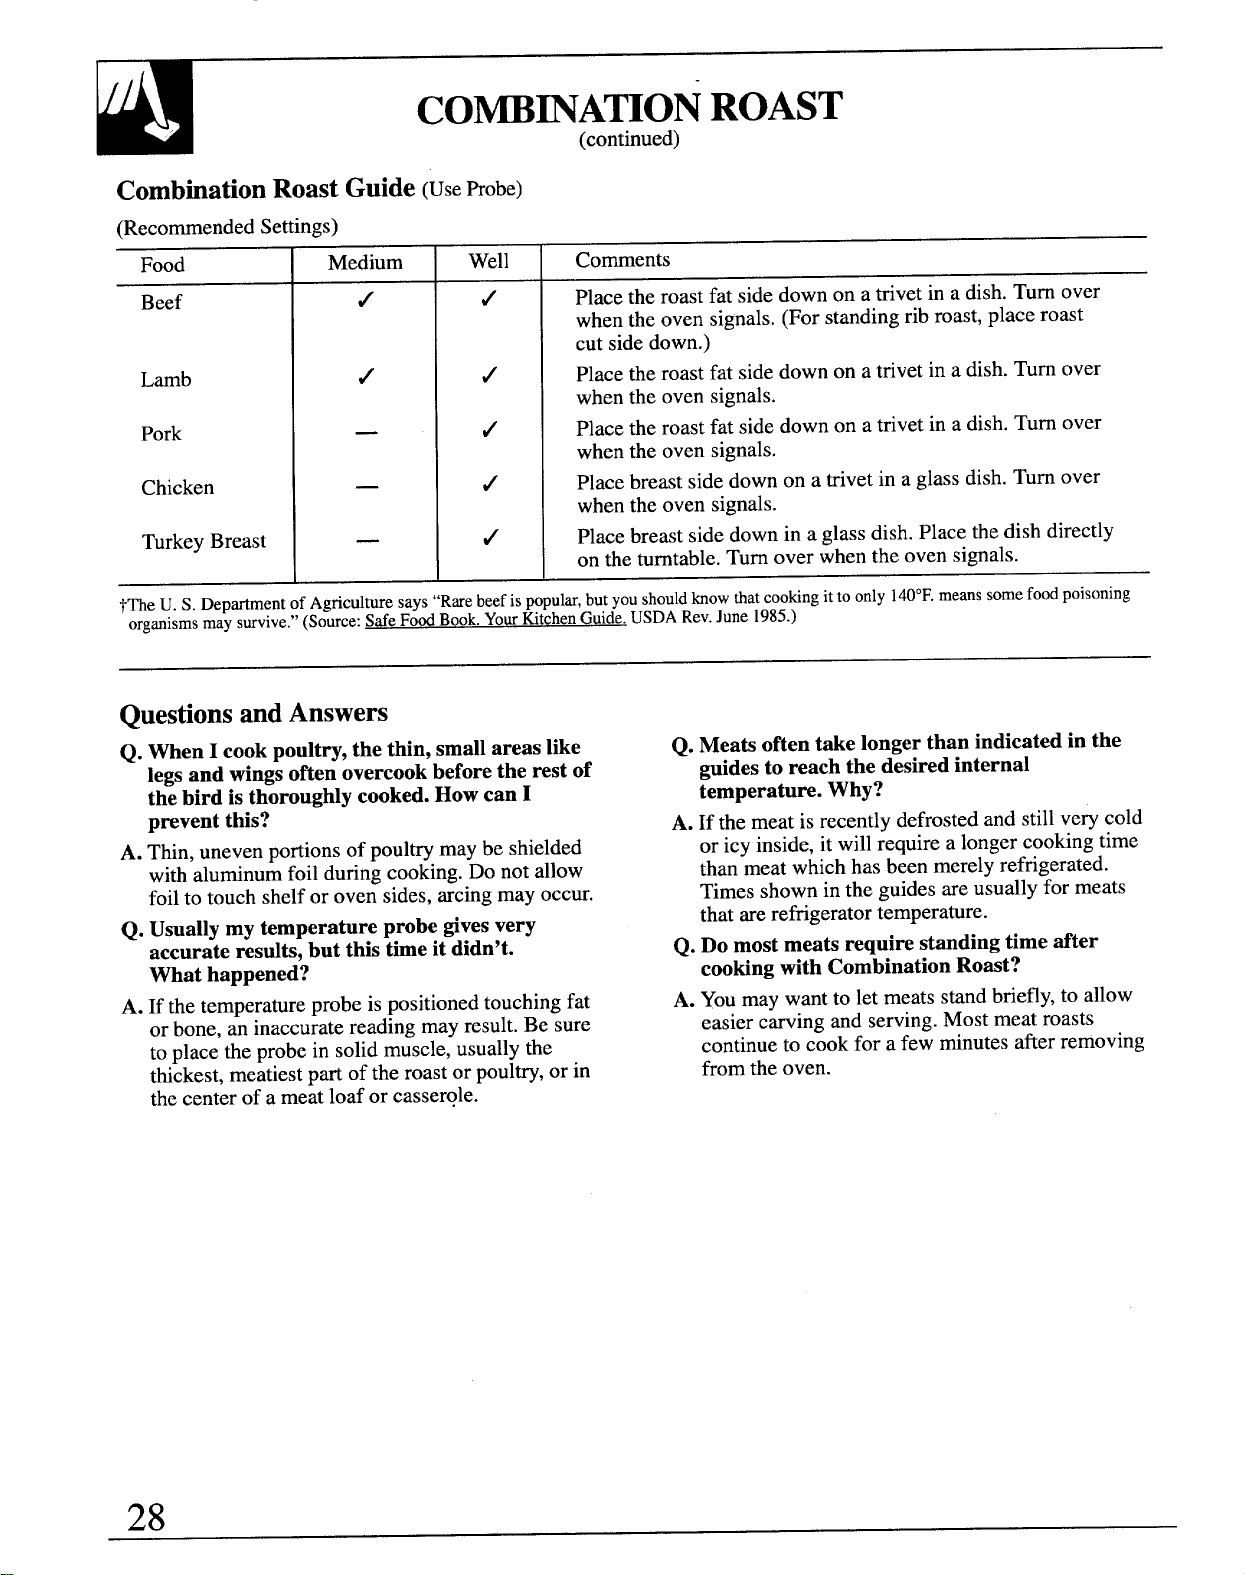
CombinationRoastGuide(UseProbe)
(Recommended Settings)
Food
Beef
Lamb
Pork
Chicken
Turkey Breast
Medium
Well Comments
Place the roast fat side down on a trivet in a dish. Turn over
when the oven signals. (For standing rib roast, place roast
cut side down.)
Place the roast fat side down on a trivet in a dish. Turn over
when the oven signals.
Place the roast fat side down on a trivet in a dish. Turn over
when the oven signals.
Place breast side down on a trivet in a glass dish. Turn over
when the oven signals.
Place breast side down in a glass dish. Place the dish directly
on the turntable. Turn over when the oven signals.
~~e U. S. DepartmentofAgriculturesays “Rwe beefis ppuh, but youshouldknowtiat cookingit to only 140°F.meanssomefoodpoisoning
organismsmay survive.”(Source:Safe FoodBook.YourKtchen Guide.USDARev.June 1985.)
QuestionsandAnswers
Q. When I cook poultry, the thin, small areas like
legs and wings often overcook before the rest of
the bird is thoroughly cooked. How can I
prevent this?
A. Thin, uneven portions of poultry maybe shielded
with aluminum foil during cooking. Do not allow
foil to touch shelf or oven sides, arcing may occur.
Q. Usually my temperature probe gives very
accurate resdb, but this time it didn’t.
What happened?
A. If the temperature probe is positioned touching fat
or bone, an inaccurate reading may result. Be sure
to place the probe in solid muscle, usually the
thickest, meatiest part of the roast or poultry,or in
the center of a meat loaf or casserole.
Q. Meats often take longer than indicated in the
guides to reach the desired internal
temperature. Why?
A. If the meat is recently defrosted and still very cold
or icy inside, it will require a longer cooking time
than meat which has been merely refrigerated.
Times shown in the guides are usually for meats
that are refrigerator temperature.
Q. Do most meats require standing time after
cooking with Combination Roast?
A. You may want to let meats stand briefly, to allow
easier carving and serving. Most meat roasts
continue to cook for a few minutes after removing
from the oven.
28
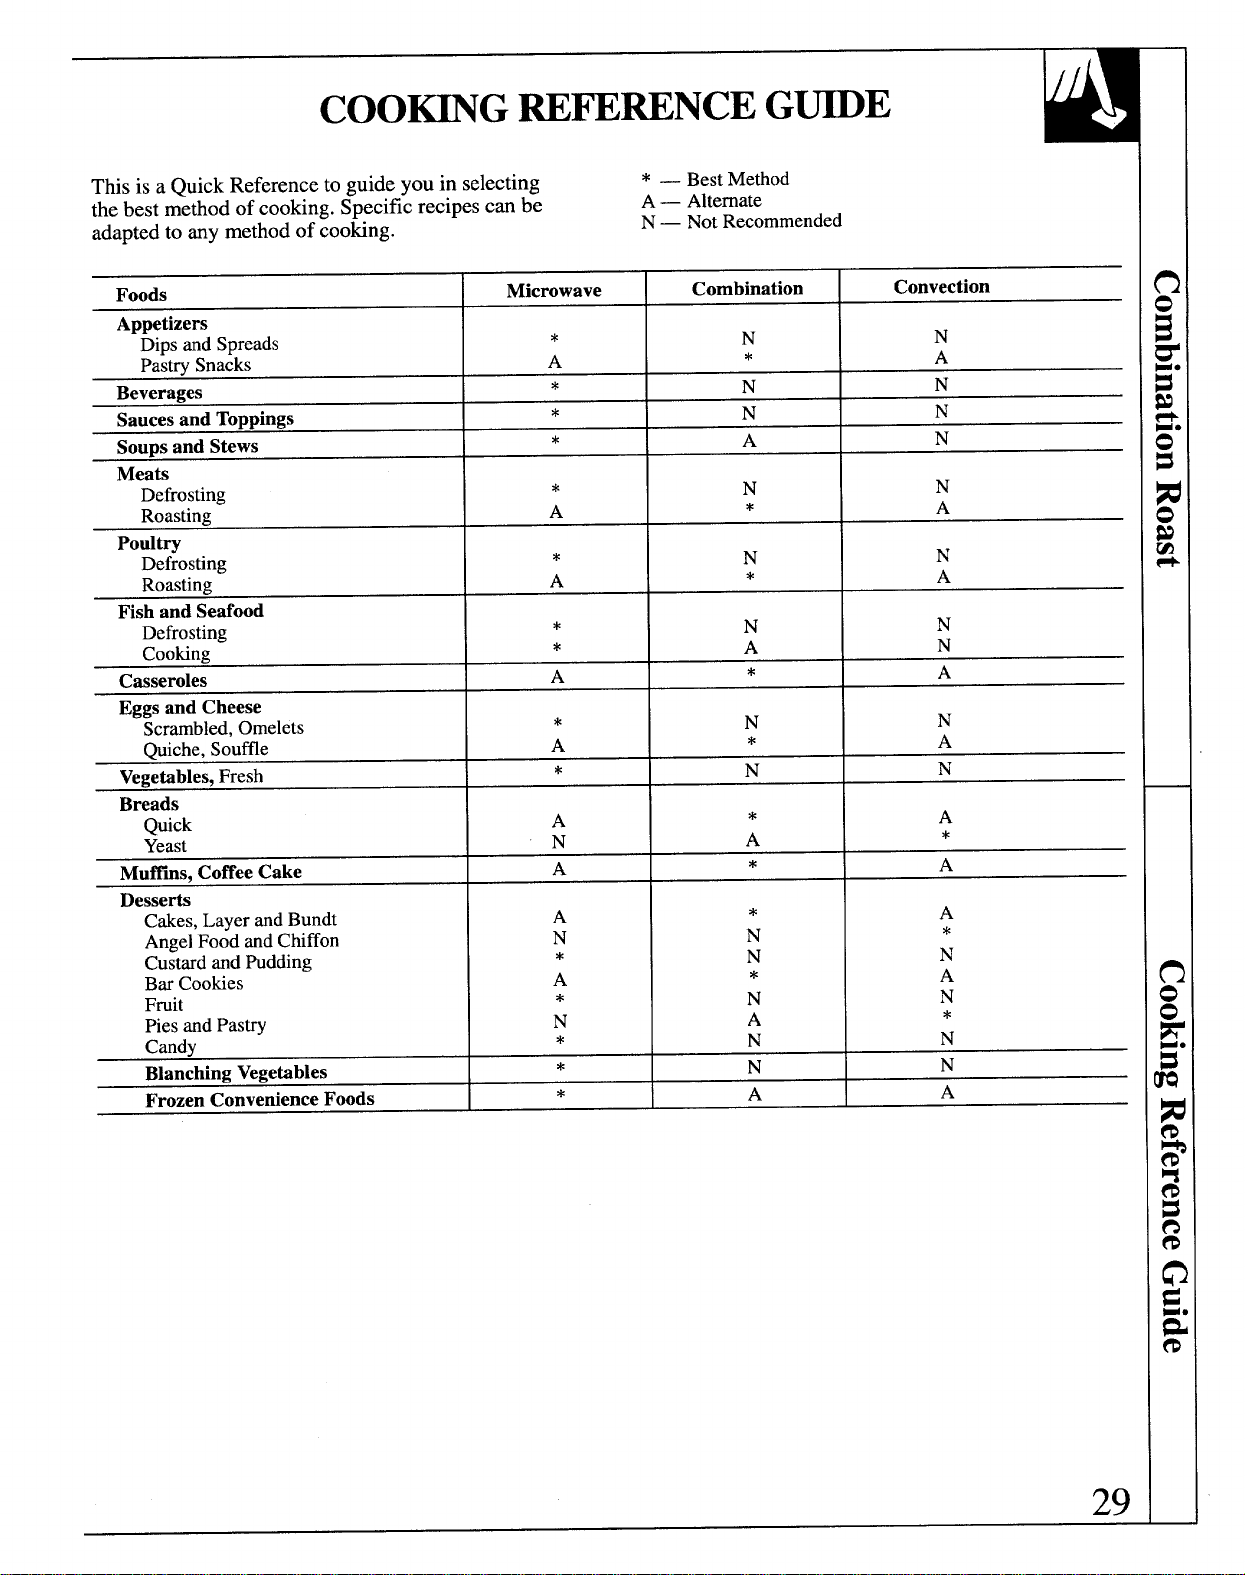
This is a Quick Reference to guide you in selecting
* — BestMethod
the best method of cooking. Specific recipes can be
A— Alternate
adapted to any method of cooking.
N— NotRecommended
Foods
M]crowave
Combination
Convection
Appetizers
Dips andSpreads
*
N
N
PastrySnacks
A
*
A
Beverages
*
N
N
Saucesand Toppings
*
N
N
Soupsand Stews
*
A
N
Meats
Defrosting
*
N
N
Roasting
A
*
A
Poult~
Defrosting
*
N
N
Roasting
A
*
A
Fish and Seafood
Defrosting
*
N
N
Cooking
*
A
N
Casseroles
A
*
A
Eggsand Cheese
Scrambled,Omelets
*
N
N
Quiche,Souffle
A
*
A
Vegetables,Fresh
*
N
N
Breads
Quick
A
*
A
Yeast
N
A
*
Muffins,CoffeeCake
A
*
A
Desserts
Cakes,
LayerandBundt
A
*
A
AngelFoodandChiffon
N
N
*
CustardandPudding
*
N
N
BarCookies
A
*
A
Fruit
*
N
N
PiesandPastry
N
A
*
Candy
*
N
N
BlanchingVegetables
*
N
N
FrozenConvenienceFoods
*
A
A
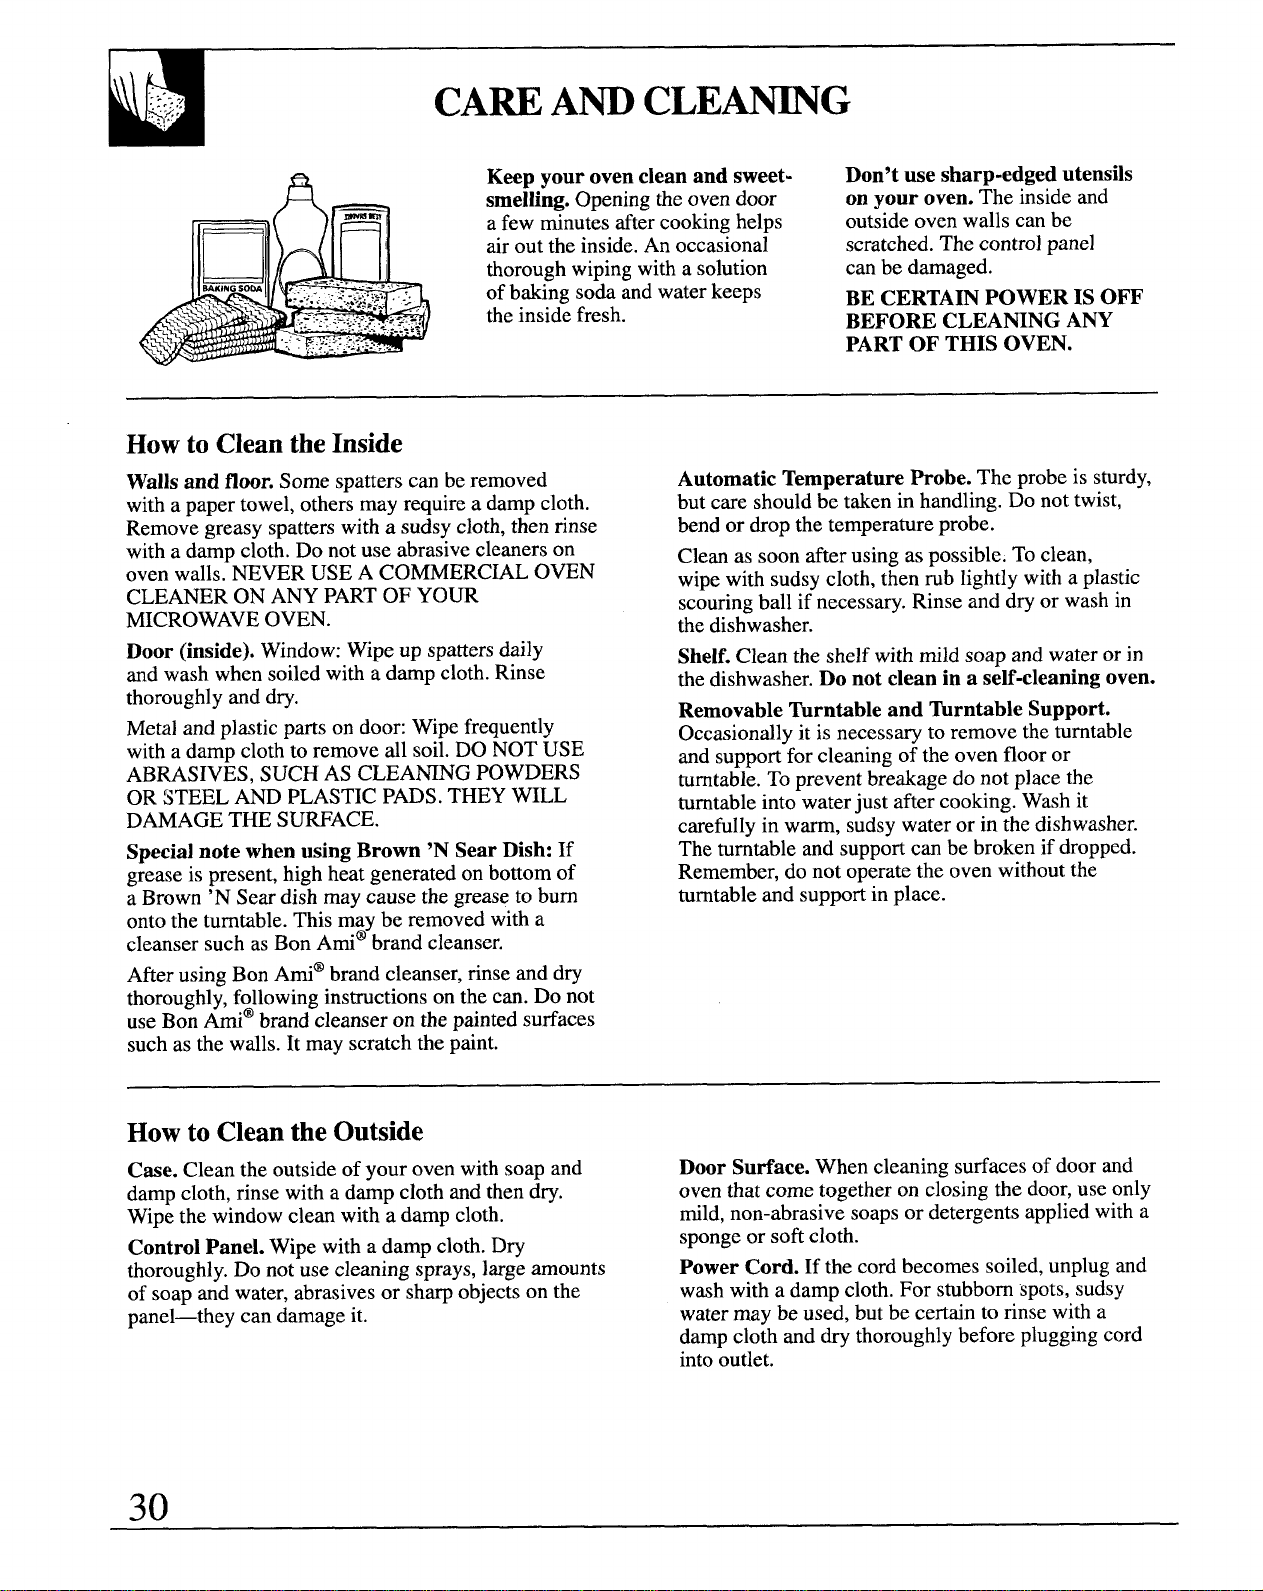
CAM Am CLEMG
Keep your oven clean and sweet-
Don’t use sharp-edged utensils
smelling. Opening the oven door
on your oven. The inside and
a few minutes after cooking helps
outside oven walls can be
air out the inside. An occasional
scratched. The control panel
thorough wiping with a solution
can be damaged.
of baking soda and water keeps
BE CERTAIN POWER IS OFF
the inside fresh.
BEFORE CLEANNG ANY
PART OF THIS OVEN.
Howto CleantheInside
Walls and floor. Some spatters can be removed
with a paper towel, others may require a damp cloth.
Remove greasy spatters with a sudsy cloth, then rinse
with a damp cloth. Do not use abrasive cleaners on
oven walls. NEVER USE A COMMERC~L OVEN
CLEANER ON ANY PART OF YOUR
MICROWAVE OVEN.
Door (inside). Window: Wipe up spatters daily
and wash when soiled with a damp cloth. Rinse
thoroughly and dry.
Metal and plastic parts on door: Wipe frequently
with a damp cloth to remove dl soil. DO NOT USE
ABRASIVES, SUCH AS CLEANNG POWDERS
OR STEEL AND PLASTIC PADS. THEY WILL
DAMAGE THE SURFACE.
Special note when using Brown ‘N Sear Dish: If
grease is present, high heat generated on bottom of
a Brown ‘N Sear dish may cause the grease to bum
onto the turntable. This may be removed with a
cleanser such as Bon Ami@brand cleanser.
After using Bon Arni@brand cleanser, rinse and dry
thoroughly, following instructions on the can. Do not
use Bon Ami@brand cleanser on the painted surfaces
such as the walls. It may scratch the paint.
Automatic Temperature Probe. The probe is sturdy,
but care should be taken in handling. Do not twist,
bend or drop the temperature probe.
Clean as soon after using as possible. To clean,
wipe with sudsy cloth, then mb lightly with a plastic
scouring ball if necessary. Rinse and dry or wash in
the dishwasher.
Shelf. Clean the shelf with mild soap and water or in
the dishwasher. Do not clean in a se~-cleaning oven.
Removable Turntible and Turntable Support.
Occasionally it is necessary to remove the turntable
and support for cleaning of the oven floor or
turntable. To prevent breakage do not place the
turntable into water just after cooking. Wash it
carefully in warm, sudsy water or in the dishwasher.
The turntable and support can be broken if dropped.
Remember, do not operate the oven without the
turntable and support in place.
Howto Cleanthe Outside
Case. Clean the outside of your oven with soap and
damp cloth, rinse witi a damp cloth and then dry.
Wipe the window clean with a damp cloth.
Control Panel. Wipe with a damp cloth. Dry
thoroughly. Do not use cleaning sprays, large amounts
of soap and water, abrasives or sharp objects on the
panel—they can damage it.
Door Surface. When cleaning surfaces of door and
oven that come together on closing the door, use only
mild, non-abrasive soaps or detergents applied with a
sponge or soft cloth.
Power Cord. If the cord becomes soiled, unplug and
wash with a damp cloth. For stubborn spots, sudsy
water may be used, but be certain to rinse with a
damp cloth and dry thoroughly before plugging cord
into outlet.
30
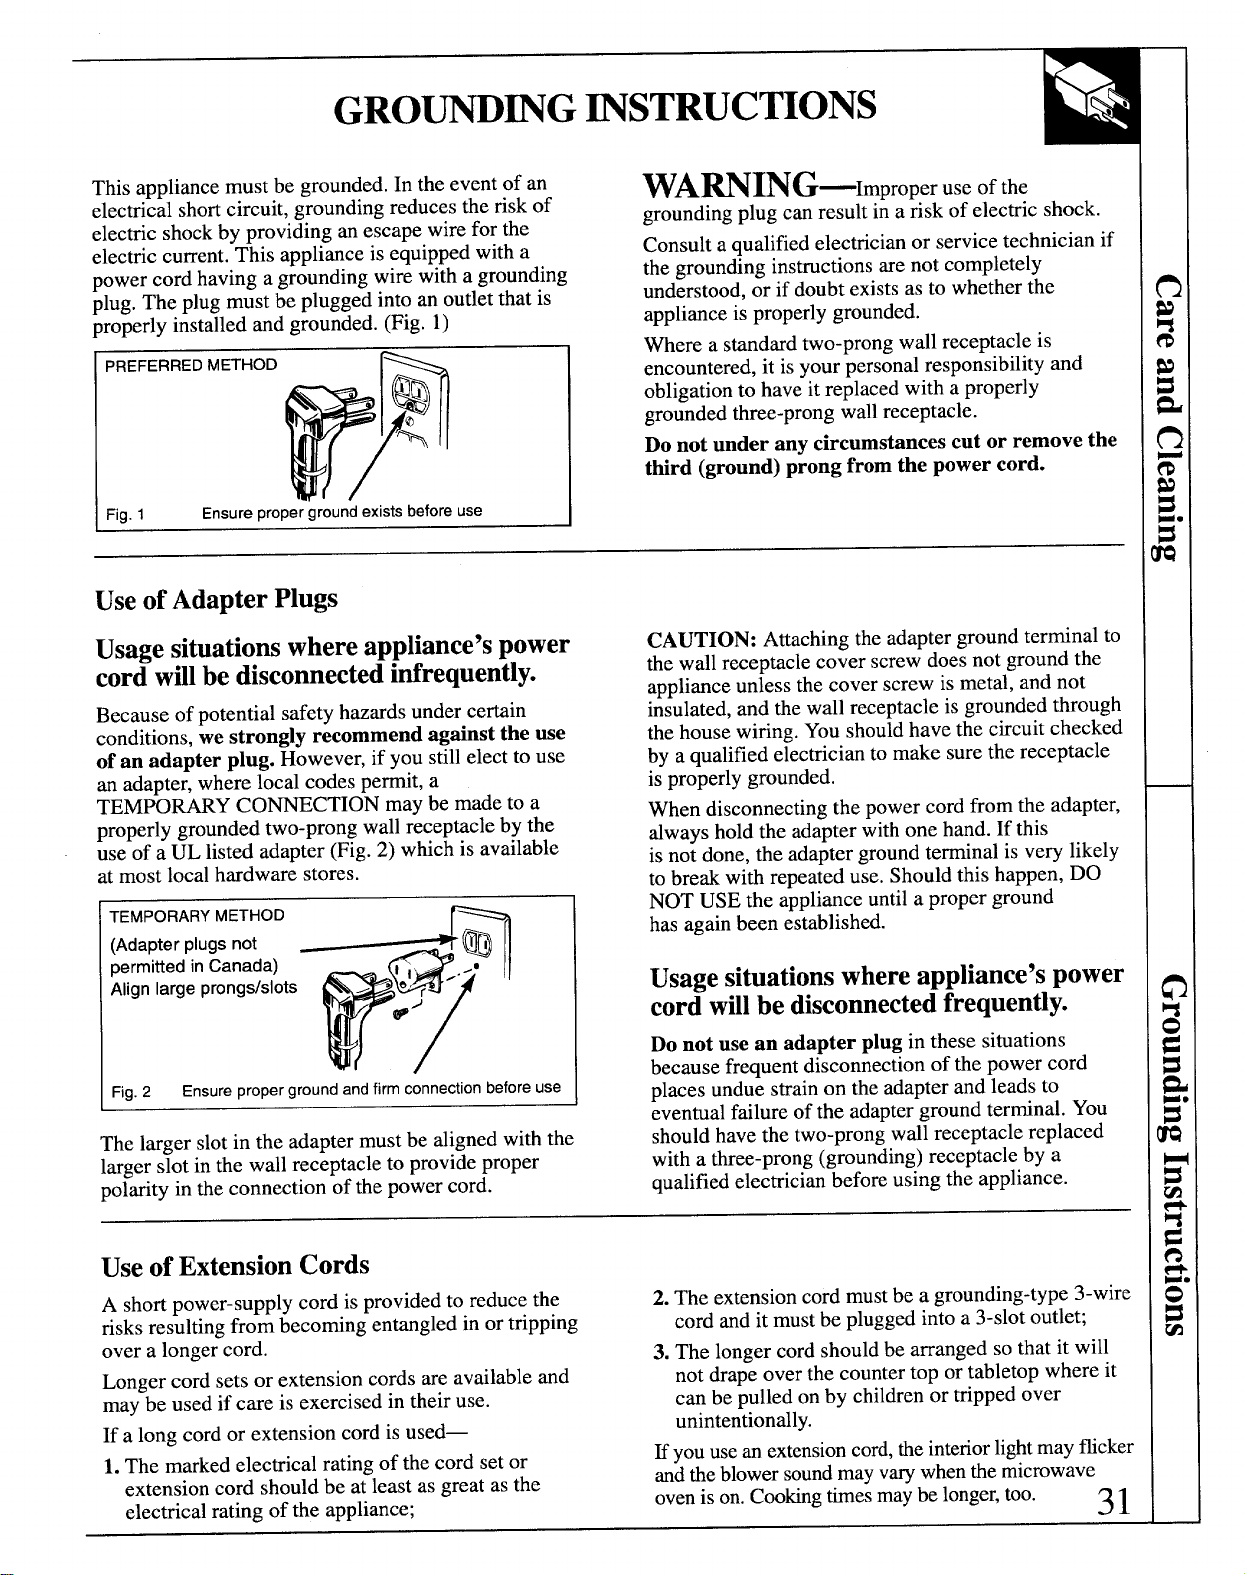
GRO~~G ~STRUCTIONS
This appliance must be grounded. In the event of an
electrical shortcircuit, grounding reduces the risk of
electric shock by providing an escape wire for the
electric current. This appliance is equipped with a
power cord having a grounding wire with a grounding
plug. The plug must be plugged into an outlet that is
properly installed and grounded. (Fig. 1)
PREFERRED METHOD
Fig. 1 Ensure proper ground exists before use
WA~lNG—ImProPer use of the
grounding plug can result in a risk of electric shock.
Consult a qualified electrician or service technician if
the grounding instructions are not completely
understood, or if doubt exists as to whether the
appliance is properly grounded.
Where a standard two-prong wall receptacle is
encountered, it is your personal responsibility and
obligation to have it replaced with a properly
grounded three-prong wall receptacle.
Do not under any circumstances cut or remove the
third (ground) prong from the power cord.
Useof AdapterPlugs
Usagesituationswhereappliance’spower
cordwfilbe disconnectedinfrequently.
Because of potential safety huards under certain
conditions, we strongly recommend against the use
of an adapter plug. However, if you st~llelect to use
an adapter, where local codes permit, a
TEMPORARY CO~CTION maybe made to a
properly grounded two-prong wall receptacle by the
use of a UL listed adapter (Fig. 2) which is available
at most local hardware stores.
TEMPORARY METHOD
(Adapterplugsnot
permittedinCanada)
Alignlargeprongs/slots
Fig. 2
Ensure proper ground and firm connection before use
rhelager slotintheadaptermustbe alignedwiththe
larger slot in the wall receptacle to provide proper
polarity in the connection of the power cord.
CAUTION: Attaching the adapter ground terminal to
the wall receptacle cover screw does not ground the
appliance unless the cover screw is metal, and not
insulated, and the wall receptacle is grounded through
the house wiring. You should have the circuit checked
by a qualified electrician to make sure the receptacle
is properly grounded.
When disconnecting the power cord from the adapter,
always hold the adapter with one hand. If this
is not done, the adapter ground terminal is very likely
to break with repeated use. Should this happen, DO
NOT USE the appliance until a proper ground
has again been established.
Usagesituationswhereappliance’spower
cordwillbe disconnectedfrequently.
Do not use an adapter plug in these situations
because frequent disconnection of the power cord
places undue strain on the adapter and leads to
eventual failure of the adapter ground terminal. You
should have the two-prong wall receptacle replaced
with a three-prong (grounding) receptacle by a
qualified electrician before using the appliance.
Useof ExtensionCords
A short power-supply cord is provided to reduce the
risks resulting from becoming entangled in or tripping
over a longer cord.
Longer cord sets or extension cords are available and
may be used if care is exercised in their use.
If a long cord or extension cord is used—
1. The marked electrical rating of the cord set or
extension cord should be at least as great as the
electrical rating of the appliance;
2. The extension cord must be a grounding-type 3-wire
cord and it mustbe plugged into a 3-slotoutlet;
3. The longer cord should be arranged so that it will
not drape over the counter top or tabletop where it
can be pulled on by children or tripped over
unintentionally.
Hyou usean extensioncord,theinteriorlightmay ficker
andtheblowersoundmay varywhenthemicrowave
ovenis on.Cookingtimesmaybe longer,too.
31
●
QUES~ONS?
USE THIS PROBLEM SOLVER
PROBLEM
I POSSIBLE CAUSE
OVEN WILL NOT
● A fuse in your home may be blown or the circuit breaker tripped. Replace fuse or
COME ON
reset circuit breaker.
● Unplug your microwave/convection oven, then plug it back in.
QMake sure 3-prong plug on oven is fully inserted into wall receptacle.
CONTROL PANEL
● Door not securely closed.
LIG~D, YET OVEN
QSTARTpad must be touched after entering cooking selection.
WWL NOT START
● Another selection entered aheady in oven and CLEAWOW pad not touched
I to cancel it.
● Make sure you have entered cooking time or temperature after touching one of the
cooking pads.
● CLE~O~ pad was touched accidentally. Reset cooking program and touch
STARTpad.
● Make sure you have entered a desired finished food temperature or oven temperature
after setting temperature cooking programs.
● Make sure you have entered a code number after touching Sensor COOK.
“PRObP’ APPEARS
● Temperature probe is missing or not plugged in securely when using cooking
ON DISPLAY functions that measure food temperature.
“Error” APPEARS
● During Cook, Reheat, Beverage or Popcorn program, the door was opened before
ON DISPLAY steam could be detected, or steam was not detected in maimum time.
“HOT’ APPEARS
● This is normal when the temperature inside the oven is greater than 200 degrees and
ON DISPLAY
the door is opened.
● One of the sensor cooking pads was touched when the temperature inside the oven
was greater than 200 degrees. These features will not operate
when the oven is hot.
All these things are normal with your microwave oven:
cSteam or vapor escaping from around the door.
● Dull thumping sound while oven is operating.
● Light reflection around door or outer case.
“Some TV-Radio interference might be noticed while
“Dimming oven light and change in blower sound
using your microwave oven. It’s similar to the
may occur while operating at power levels other
interference caused by other small appliances and
than high.
does not indicate a problem with your oven.
If you need more help...call, toll free: GE Answer Center”/ 800.626.2000/ consumer information service
32

NO~S
33
IF YOU NEED SERVICE...
To obtain service, see the Consumer Services page in
NEXT, if you are still not pleased, write all the
the back of this guide.
details—including your phone number—to:
We’re proud of our service and want you to be
Manager, Consumer Relations
pleased. If for some reason you are not happy with the
GE Appliances
service you receive, here are three steps to follow for
Appliance Park
further help.
Louisville, KY 40225
~RST, contact the people who serviced your
HN_LY, if your problem is still not resolved, write:
appliance. Explain why you are not pleased.
In most cases, this will solve the problem.
Major Appliance Consumer Action Panel
20 North Wacker Drive
Chicago, IL 60606
34
WdllBeThere
Withthepurchaseofyour newGEappliance,receivetheassurancefiat ifyou everneed
informationor assistancehorn GE,we’llbe there.Allyouhavetodo iscall—toll-free!
GEAnswerCentep
80~62&2000
WhateveryourquestionaboutanyGEmajor appliance,GEAnswerCenter”
informationserviceisavailabletohelp.Yourcdl—andyourquestion-will be
answeredprompdy andcourteously.And youcancallanytime.GEAnswer
Center@setice isopen 24hoursaday,7daysaweek.
lwHomeRepairSemite
80MEXARES(80M32-273q
AGE consumerserviceprofessionalwillprovideexpertrepairservice,
scheduledatatimethat’sconvenientforyou. ManyGEConsumerService
companymperatedlocationsofferyou servicetodayor tomorrow,or atyour
convenience (7:00a.m.to7:00p.m. weekdays,9:00a.m.to2:00p.m. Saturdays).
Ourfactory-trainedtechniciansknowyourapplianceinsideandout–so most
repairscanbehandledinjustone visit.
L
ForCustomemW@SpecialNeeds...
80~6262000
Upon request,GEwillprovide
Consumerswithimpairedhearingor speechwhohave
Braillecontrolsfor avarietyof GE
accesstoaTDD or aconventionalteletypewritermay
appliances,andabrochure to
call800-TDD-GEAC(800-833-4322)torequest
assistinplanningabarrier-free informationor service.
kitchenfor personswithlimited
mobility.To obtain theseitems,
freeof charge,call800.626.2000.
SemiteContiacti
80M2&2224
You canhavethesecurefeelingthatGEConsumerSemitewillstillbe there
afteryourwarrantyexpires.PurchaseaGEcontractwhileyourwarrantyisstill
ineffectandyou’ll receiveasubstantialdiscount.Withamultiple-yearcontract,
you’re assuredof futureserviceattoday’sprices.
Pah andAccessories
80M2&2002
kdivid& qu~fied toservicetheirownappbces
User maintenanceinstictions containedin&is boo~et
canhavepar~ or accessoriessentdirectlytotheirhome.
coverproceduresintendedtobeperformedbyanyuser.
The GEpartssystemprovidesaccesstoover47,000
Otherservicinggenerdy shotid bereferredtoqu~ied
par~..and allGEGenuineRenewalPartsarefully
service
personnel.Cautionmustbe exercised,since
warranted.VISA,MasterCardandDiscovercards
improperservicingmaycauseunsafeoperation.
areaccepted.
)
I
I
YOUR GE MICROWAVH
Staple sales slip or cancelled check
CONVECTION OVEN
here. Proof of original purchase date
II
WARRANW
is needed to obtain service
under warranty.
I
I
WHAT IS COVERED
FULL ONE-YEAR WARRANTY
Forone year from date of original
***** **********************
purchase,we will provide,free of
This warranty is extended to the
charge, pafis and sewice labor in
originalpurchaser and any
your hometo repairor replaceany
succeedingownerfor products
~ti of tk microwavdconvmtion
purchasedfor ordina~ homeuse in
oventhat fails becauseof a
the 48 mainlandstates, Hawaiiand
manufacturingdefect.
Washington,D.C. InAlaskathe
warran~ isthe same exceptthat it is
LIMITEDADDITIONAL
LIMITED becauseyou must payto
NINE-YEARWARRANTY
shipthe productto the serviceshop
Forthe secondthroughtenth year
or for the sewice technician’stravel
from date of originalpurchase,we
coststo your home.
will provide,free ofcharge,a Allwarrantyservicewillbeprovided
replacementmagnetron tub if the
byourFactorySewiceCentersorby
magnetrontubefails becauseof a ourauthorizedCustomerCare@
manufacturingdefect,Youpayfor
servicersduringnormalwoting hours.
the servicetripto yourhome and
Shouldyourapplianceneedsewice,
servicelaborcharges.
duringwarrantyperiodorbeyond,
call80@GECARES (800-432-2737).
I
WHAT IS NOT COVERED
● Servicetrips to yourhometo teach
Ifyou havean installationproblem,
you how to usethe product.
contactyour dealer or installer.
Readyour Useand Care
Youare responsiblefor providing
material.
adequateelectrical,gas,
Ifyouthen haveanyquestions
exhaustingand other connecting
facilities.
aboutoperatingthe product,
pleasecontactyourdealeror our
● Replacementof housefusesor
ConsumerAffairsofficeat the
resettingof circuitbreakers.
addressbelow,orcall, toll free:
● Failureof the productif it is usedfor
GE Answer Cente~
otherthan its intendedpurposeor
800.626.2000
usedcommercially.
consumer informationservice
● Damageto productcausedby
● Improperinstallation.
accident,fire,floods or actsof God.
WARRANTORIS NOT
RESPONSIBLE FOR
CONSEQUENTIAL DAMAGES.
Some states do not allow the exclusion or limitation of incidental or consequential damages, so the above limitation or exclusion
may not apply to you. This warranty gives you specific legal rights, and you may also have other rights which vary from state to state.
To know what your legal rights are in your state, consult your local or state consumer affairs office or your state’s Attorney General.
Warrantor: General El=tric Company
If further help is needed concerning this warranty, write:
Manager—Consumer Affairs, GE Appliances, Louisville, KY 40225
JEI .
Ptinted in Korea
6-95 CG
