
1
Manual de uso y cuidado e
instrucciones de instalación
Anote aquí los números de modelo
y serie
Modelo
Serie
Puede localizarlos en una etiqueta,
por detrás del cajón de
almacenamiento, en el marco del
horno.
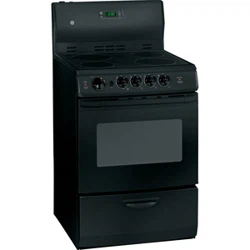
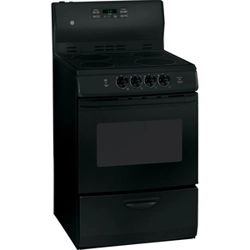
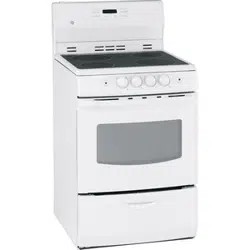
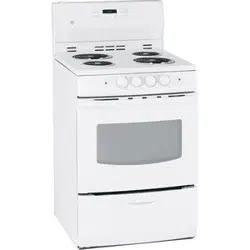
Modelos de quemadores eléctricos
superiores de espiral y radiantes
Modelos equipados
con limpieza
estándar
JCAS745
JCAS445
JCAS735
183D9541P012
Modelos equipados
con autolimpieza
JCAP750
JCAP760
JCAP765
For the English version,
go to page 47.
Información de seguridad ......................... 2-6
Instrucciones de operación
Quemadores superiores ...................................... 7, 8
Utensilios .......................................................................... 9
Controles ....................................................................... 10
Horno ....................................................................... 11, 12
Reloj, timer y contacto eléctrico ................ 13, 14
Horneado y rostizado por tiempo .................... 15
Funciones especiales ...................................... 16-18
Funciones Sabat ................................................ 19, 20
Conversión de temperaturas ............................. 20
Termostato .................................................................... 21
Autolimpieza ........................................................ 22, 23
Cuidado y limpieza ................................. 24-30
Instrucciones de instalación ................ 31-39
Solución de problemas .......................... 40-44
Accesorios ...................................................... 45
Servicios al consumidor
Serviplus ......................................................................... 95
Garantía .......................................................................... 96
2
INSTRUCCIONES IMPORTANTES DE SEGURIDAD.
LEA TODAS LAS INSTRUCCIONES ANTES DE USAR.
ADVERTENCIA:
LEA TODAS LAS INSTRUCCIONES DE SEGURIDAD ANTES DE UTILIZAR ESTE PRODUCTO.
NO SEGUIR ESTAS INSTRUCCIONES PUEDE GENERAR UN INCENDIO, UNA DESCARGA
ELÉCTRICA, LESIONES CORPORALES O LA MUERTE.
DISPOSITIVO ANTIVOLCADURAS
Instrucciones de
seguridad
Instrucciones de
operación
Cuidado y limpieza
Solución
de problemas
Servicio
al consumidor
Instrucciones de
instalación
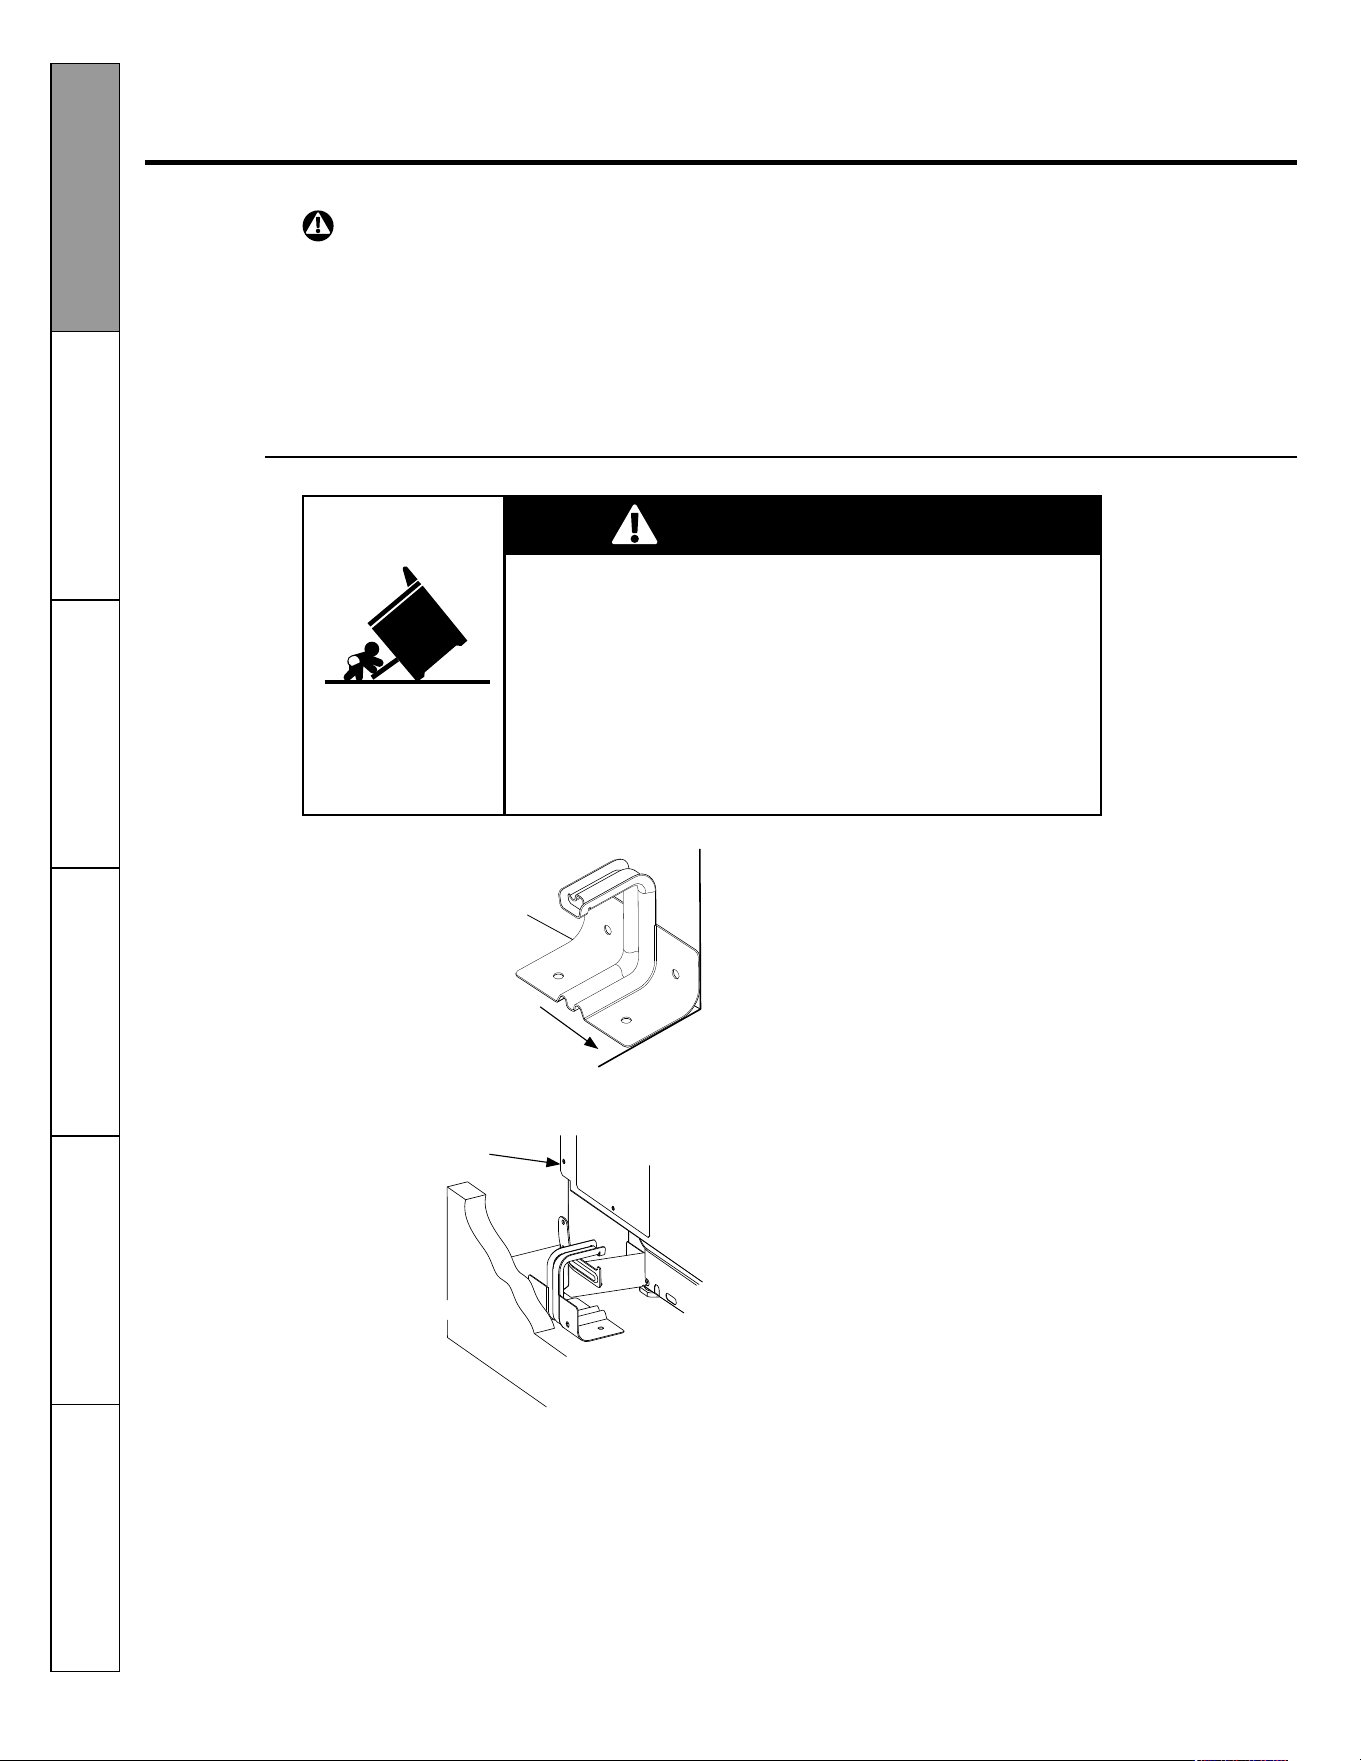
Riesgo de Volcaduras
Un niño o un adulto pueden hacer volcar la estufa y morir.
Verifique que el soporte antivolcaduras se haya instalado y
ajustado correctamente.
Asegúrese de que el dispositivo antivolcaduras sea reinstalado
cuando se mueva la estufa. No utilice la estufa sin que el
dispositivo antivolcaduras esté instalado y ajustado.
Si estas instrucciones no se siguen, como resultado se podrá
producir la muerte o quemaduras graves de niños y adultos.
ADVERTENCIA
Para reducir el riesgo de volcar la estufa, ésta debe suje-
tarse mediante un dispositivo antivolcaduras apropiada-
mente instalado. Ver las instrucciones de instalación en-
viadas con el dispositivo para obtener detalles completos
antes de iniciar la instalación.
Para estufas independientes:
Para revisar si el dispositivo esta instalado y ajustado de
forma apropiada, mire debajo de la estufa para ver que el
brazo antivolcaduras unido al panel lateral se encuentra
enganchado con el soporte antivolcaduras. En algunos
modelos, el cajón de almacenamiento o el panel de pro-
tección se puede retirar para una inspección mas fácil. Si
no es posible realizar una inspección visual, deslice la es-
tufa hacia adelante, confirme que el soporte antivolcadu-
ras esté unido de forma segura al piso o la pared, y desli-
ce la estufa hacia atrás de modo que el brazo antivolca-
duras se deslice justo por debajo del soporte antivolca-
duras.
Si por cualquier razón usted jala la estufa separándola de
la pared, siempre repita este procedimiento a fin de veri-
ficar que la estufa se encuentre apropiadamente asegu-
rada por el soporte antivolcaduras.
Pared trasera
Gabinete adyacente
o ubicación final del
panel lateral derecho
de la estufa
Panel lateral
derecho
Pared trasera
3
• Cuando opere el aparato, nunca use ropa suelta ni col-
gante. Tenga cuidado cuando trate de alcanzar artícu-
los almacenados sobre la estufa. El material inflamable
podría incendiarse si entra en contacto con los quema-
dores superiores calientes causando quemaduras seve-
ras.
• Use guantes para cocina que estén secos. Los guantes
para cocina húmedos o mojados sobre superficies ca-
lientes, pueden resultar en quemaduras debido al vapor.
No deje que los guantes para cocina toquen los quema-
dores calientes. No use toallas ni trapos voluminosos.
• Por su seguridad, nunca use su aparato para calentar la
habitación.
• No permita que la grasa con la que se cocina ni otros
materiales flamables se acumulen dentro o cerca de la
estufa.
• No use agua contra incendios causados por grasa.
Nunca levante una sartén que flamea. Apague los con-
troles. Ahogue una sartén que flamea sobre un quema-
dor cubriendo completamente la sartén con una tapa
bien ajustada, con una charola para hornear galletas o
con una charola plana. Use un extintor de fuego multi-
propósitos tipo químicos secos o espuma.
La grasa que flamea afuera de una sartén puede extin-
guirse cubriéndola con bicarbonato de sodio o, si lo tie-
ne disponible, con un extintor de fuego multipropósitos
tipo químicos secos o espuma.
Las flamas en el horno se pueden sofocar por completo
cerrando la puerta y apagando el horno o usando un
extintor de fuego multipropósitos tipo químicos secos o
espuma.
COCINE COMPLETAMENTE LA CARNE ROJA Y LAS AVES...
Cocine completamente la carne roja y las aves: la carne roja hasta una temperatura INTERNA de 160 ºF (72 ºC) por lo
menos y las aves hasta una temperatura INTERNA de 180 ºF (83 ºC) por lo menos. El cocinar hasta estas temperaturas
usualmente protege de enfermedades causadas por los alimentos.
ADVERTENCIA
PRECAUCIONES DE SEGURIDAD
• No presione los quemadores superiores, las resistencias
generadoras de calor ni la superficie interior del horno.
Estas superficies pueden estar lo suficientemente ca-
lientes para quemar, a pesar de que luzcan de color
obscuro. Durante y después de su uso, no presione ni
permita que la ropa u otros materiales inflamables en-
tren en contacto con los quemadores, con las áreas cer-
canas a los quemadores o con el área interior del horno;
deje primero que transcurra el tiempo suficiente para
que se enfríen.
Las superficies potencialmente calientes incluyen la cu-
bierta, las áreas frente a la cubierta, la abertura de ven-
tilación del horno, las superficies cercanas a la misma,
los rincones alrededor de la puerta del horno y las mol-
duras metálicas por encima de la puerta.
RECUERDE: La superficie interior del horno podría estar
caliente al abrir la puerta.
• No almacene ni use materiales combustibles, gasolina
u otros vapores y líquidos flamables en las cercanías de
éste o cualquier otro aparato electrodoméstico.
• Para mantener una buena ventilación y evitar incen-
dios causados por grasa, mantenga limpios la campa-
na y los filtros para grasa.
• Nunca bloquee las ventilas (aberturas para aire) de la
estufa. Estas proporcionan la entrada y salida de aire
necesarias para que la estufa opere apropiadamente
con la combustión correcta. Las aberturas para aire se
localizan en la parte trasera de la cubierta, en la parte
superior e inferior de la puerta del horno, así como en la
parte inferior de la estufa, por debajo del cajón de al-
macenamiento.
Instrucciones de
seguridad
Instrucciones de
operación
Cuidado y limpieza
Solución
de problemas
Servicio
al consumidor
Instrucciones de
instalación

4
INFORMACIÓN IMPORTANTE DE SEGURIDAD
LEA TODAS LAS INSTRUCCIONES ANTES DE USAR SU ESTUFA
HORNO
• Aléjese de la estufa cuando abra la puerta del
horno. El aire caliente o vapor que escapa,
puede causar quemaduras en manos, cara y/
u ojos.
• No caliente recipientes de alimentos que no
están abiertos. La presión puede acumularse
y el contenedor podría estallar, causando le-
siones.
• Mantenga la ventilación del horno sin obs-
trucciones.
• Mantenga el horno libre de acumulaciones de
grasa.
• Coloque la parrilla del horno en la posición
deseada mientras el horno esté frío. Si debe
mover las parrillas cuando ya están calientes,
no deje que sus guantes para cocina toquen
las resistencias generadoras de calor.
• No limpie el empaque de la puerta. El empa-
que de la puerta es esencial para obtener un
buen sello. Debe tenerse cuidado de no frotar,
dañar o mover el empaque.
• Limpie solamente las partes enlistadas en
este manual de uso.
• No use limpiadores para hornos en los mode-
los equipados con autolimpieza. No debe
usarse dentro ni alrededor de ninguna parte
del horno ningún limpiador comercial para
hornos ni ningún recubrimiento protector
para horno de ningún tipo. Los residuos de los
limpiadores para horno dañarán el interior del
horno cuando se usa el ciclo de autolimpieza.
HORNO CON AUTOLIMPIEZA (algunos modelos)
• El jalar las parrillas hasta el tope de bloqueo
es muy cómodo cuando necesita levantar ali-
mentos pesados. También es una precaución
contra quemaduras causadas por tocar su-
perficies calientes de la puerta o paredes del
horno.
• Cuando use bolsas para cocinar o rostizar en
el horno, siga las instrucciones del fabricante.
• No use el horno para secar periódico. Si se
sobrecalienta, podría incendiarse.
• No use el horno como área para almacenar.
Los artículos que se guardan dentro de un
horno pueden incendiarse.
• No deje productos de papel, utensilios para
cocinar o alimentos dentro del horno mien-
tras no se encuentra en uso.
• Antes de iniciar un ciclo de autolimpieza del
horno, retire la charola para asar, la rejilla y
otros utensilios.
• Asegúrese de limpiar los derrames grandes,
antes de iniciar la operación de autolimpieza.
• Si el modo de autolimpieza falla, apague el
horno y desconecte la estufa del suministro
de energía eléctrica. Haga que un técnico ca-
lificado dé servicio al horno.
• Retire las parrillas del horno antes de iniciar
el ciclo de autolimpieza, de lo contrario po-
drían decolorarse.
Instrucciones de
seguridad
Instrucciones de
operación
Cuidado y limpieza
Solución
de problemas
Servicio
al consumidor
Instrucciones de
instalación
5
QUEMADORES DE CUBIERTA, TODOS LOS MODELOS
• Nunca deje sin atención los quemadores
eléctricos en posiciones altas de calor. Los
hervores que se derraman causan humo y
derrames grasosos que podrían incendiarse.
• Solamente ciertos tipos de vidrio, vitrocerá-
mica, barro u otros contenedores vidriados
son adecuados para usar sobre la cubierta;
otros podrían romperse debido a los cambios
súbitos de temperatura.
• Para minimizar la posibilidad de sufrir que-
maduras, incendio de materiales inflamables
y derrames, los mangos de los contenedores
deben voltearse hacia el centro de la estufa,
sin extenderse por encima de los quemado-
res cercanos.
• Antes de retirar los utensilios de la cubierta,
apague siempre los quemadores.
• No prepare alimentos "a la flama" sobre la
cubierta. Si usted prepara alimentos a la fla-
ma bajo una campana extractora, encienda
el ventilador.
Use el tamaño apropiado de cacerolas que tengan fondos planos lo suficientemente grandes
para cubrir el quemador eléctrico. El uso de utensilios más pequeños expondrá una porción del
quemador eléctrico a contacto directo lo que podría resultar en el incendio de prendas. La rela-
ción apropiada de tamaño de utensilio con tamaño de quemador mejorará además la eficiencia.
• Esté pendiente de los alimentos que se fríen
a calor alto o medio.
• Los alimentos a freír deben estar tan secos
como sea posible. La escarcha en alimentos
congelados o la humedad en alimentos fres-
cos, puede causar que la grasa hierva y sal-
pique por encima de las paredes de la sartén.
• Use poca grasa para freír efectivamente. El
llenar demasiado la sartén con grasa puede
causar derrames cuando se introducen los
alimentos.
• Si va a usar una combinación de grasas y
aceites para freír, entonces mézclelos juntos
antes de calentar o a medida que la grasa se
derrite lentamente.
• Siempre caliente lentamente la grasa y ob-
serve mientras se calienta.
• Siempre que sea posible, use un termómetro
para grasa para evitar sobrecalentar la grasa
más allá del punto en que genera humo.
Instrucciones de
seguridad
Instrucciones de
operación
Cuidado y limpieza
Solución
de problemas
Servicio
al consumidor
Instrucciones de
instalación

6
• Evite rayar la cubierta de cristal. La cubierta puede ra-
yarse con artículos como instrumentos filosos, anillos u
otras joyas, así como con los remaches de las prendas
de vestir.
• Los rayones grandes o impactos a puertas o cubiertas
de cristal pueden resultar en la rotura o astillamiento
del cristal.
• No opere los quemadores eléctricos radiantes si el cris-
tal está roto. Los derrames o las soluciones limpiadoras
pueden penetrar una cubierta rota generando el riesgo
de sufrir un choque eléctrico. Contacte inmediatamente
a un técnico calificado si la cubierta de cristal se rompe.
• Nunca use la superficie de la cubierta de cristal como
tabla para cortar.
• No coloque ni guarde artículos que se puedan derretir o
incendiar sobre la cubierta de cristal, incluso cuando no
se está usando.
• Tenga cuidado al colocar cucharas u otros utensilios
para mezclar sobre la superficie de la cubierta de cristal
cuando está en uso. Podrían calentarse y causar que-
maduras.
INFORMACIÓN IMPORTANTE DE SEGURIDAD
LEA TODAS LAS INSTRUCCIONES ANTES DE USAR SU ESTUFA
ADVERTENCIA
QUEMADORES ELÉCTRICOS RADIANTES (en algunos modelos)
Tenga cuidado al tocar la cubierta. La superficie de vidrio de la cubierta retendrá calor después de que los
controles han sido apagados.
• Limpie con cuidado la cubierta. Si se usa una esponja o
trapo húmedo para limpiar un derrame sobre un que-
mador caliente de la superficie de la cubierta, tenga
cuidado para evitar quemaduras causadas por el vapor.
Algunos limpiadores pueden producir vapores nocivos
si se aplican sobre una superficie caliente.
NOTA: Recomendamos evitar limpiar el área de los que-
madores antes de que se hayan enfriado y las luces in-
dicadoras se hayan apagado. Los derrames de azúcar
son la excepción a esto. Por favor consulte la sección
Limpiando la cubierta de cristal.
• Cuando la cubierta está fría, use solamente la crema
limpiadora recomendada para limpiarla.
• Para evitar un posible daño a la superficie de cocción,
no aplique crema limpiadora a la superficie de cristal
mientras está caliente.
• Después de la limpieza, use un trapo seco o una toalla
de papel para remover los residuos de la crema limpia-
dora.
• Lea y siga todas las instrucciones y advertencias en las
etiquetas de la crema limpiadora.
• No levante la cubierta. El levantarla puede conducir a
daños así como a una operación inapropiada de la es-
tufa.
• Limpie la cubierta con precaución. Si se usa una espon-
ja mojada para limpiar derrames sobre una cubierta ca-
liente, tenga cuidado de evitar quemaduras causadas
por el vapor.
• Para evitar la posibilidad de sufrir una quemadura o
choque eléctrico, siempre asegúrese de que los contro-
les de todos los quemadores se encuentren en la posi-
ción APAGADO (OFF) y que todos los quemadores de es-
piral estén fríos antes de tratar levantar o remover uno
de ellos.
¡PRECAUCIÓN!
QUEMADORES ELÉCTRICOS DE ESPIRAL (en algunos modelos)
LEA Y SIGA CUIDADOSAMENTE ESTA INFORMACIÓN DE SEGURIDAD.
GUARDE ESTAS INSTRUCCIONES
• No sumerja en líquidos ni remoje los quemadores eléc-
tricos removibles. No los meta a la máquina lavavajillas.
• Asegúrese de que las charolas recolectoras y el ducto
de ventilación no estén cubiertos y que se encuentren
en su sitio. Su ausencia durante la cocción podría dañar
partes de la estufa así como el cableado.
• No use papel aluminio para forrar las charolas recolec-
toras ni ninguna parte dentro del horno excepto como
se describe en este manual. El mal uso puede resultar
en un choque eléctrico, riesgo de incendio o daños a la
estufa.
Instrucciones de
seguridad
Instrucciones de
operación
Cuidado y limpieza
Solución
de problemas
Servicio
al consumidor
Instrucciones de
instalación

7
Usando los quemadores de la cubierta
A lo largo de este manual, las características y apariencia pueden variar con respecto a las de su modelo.
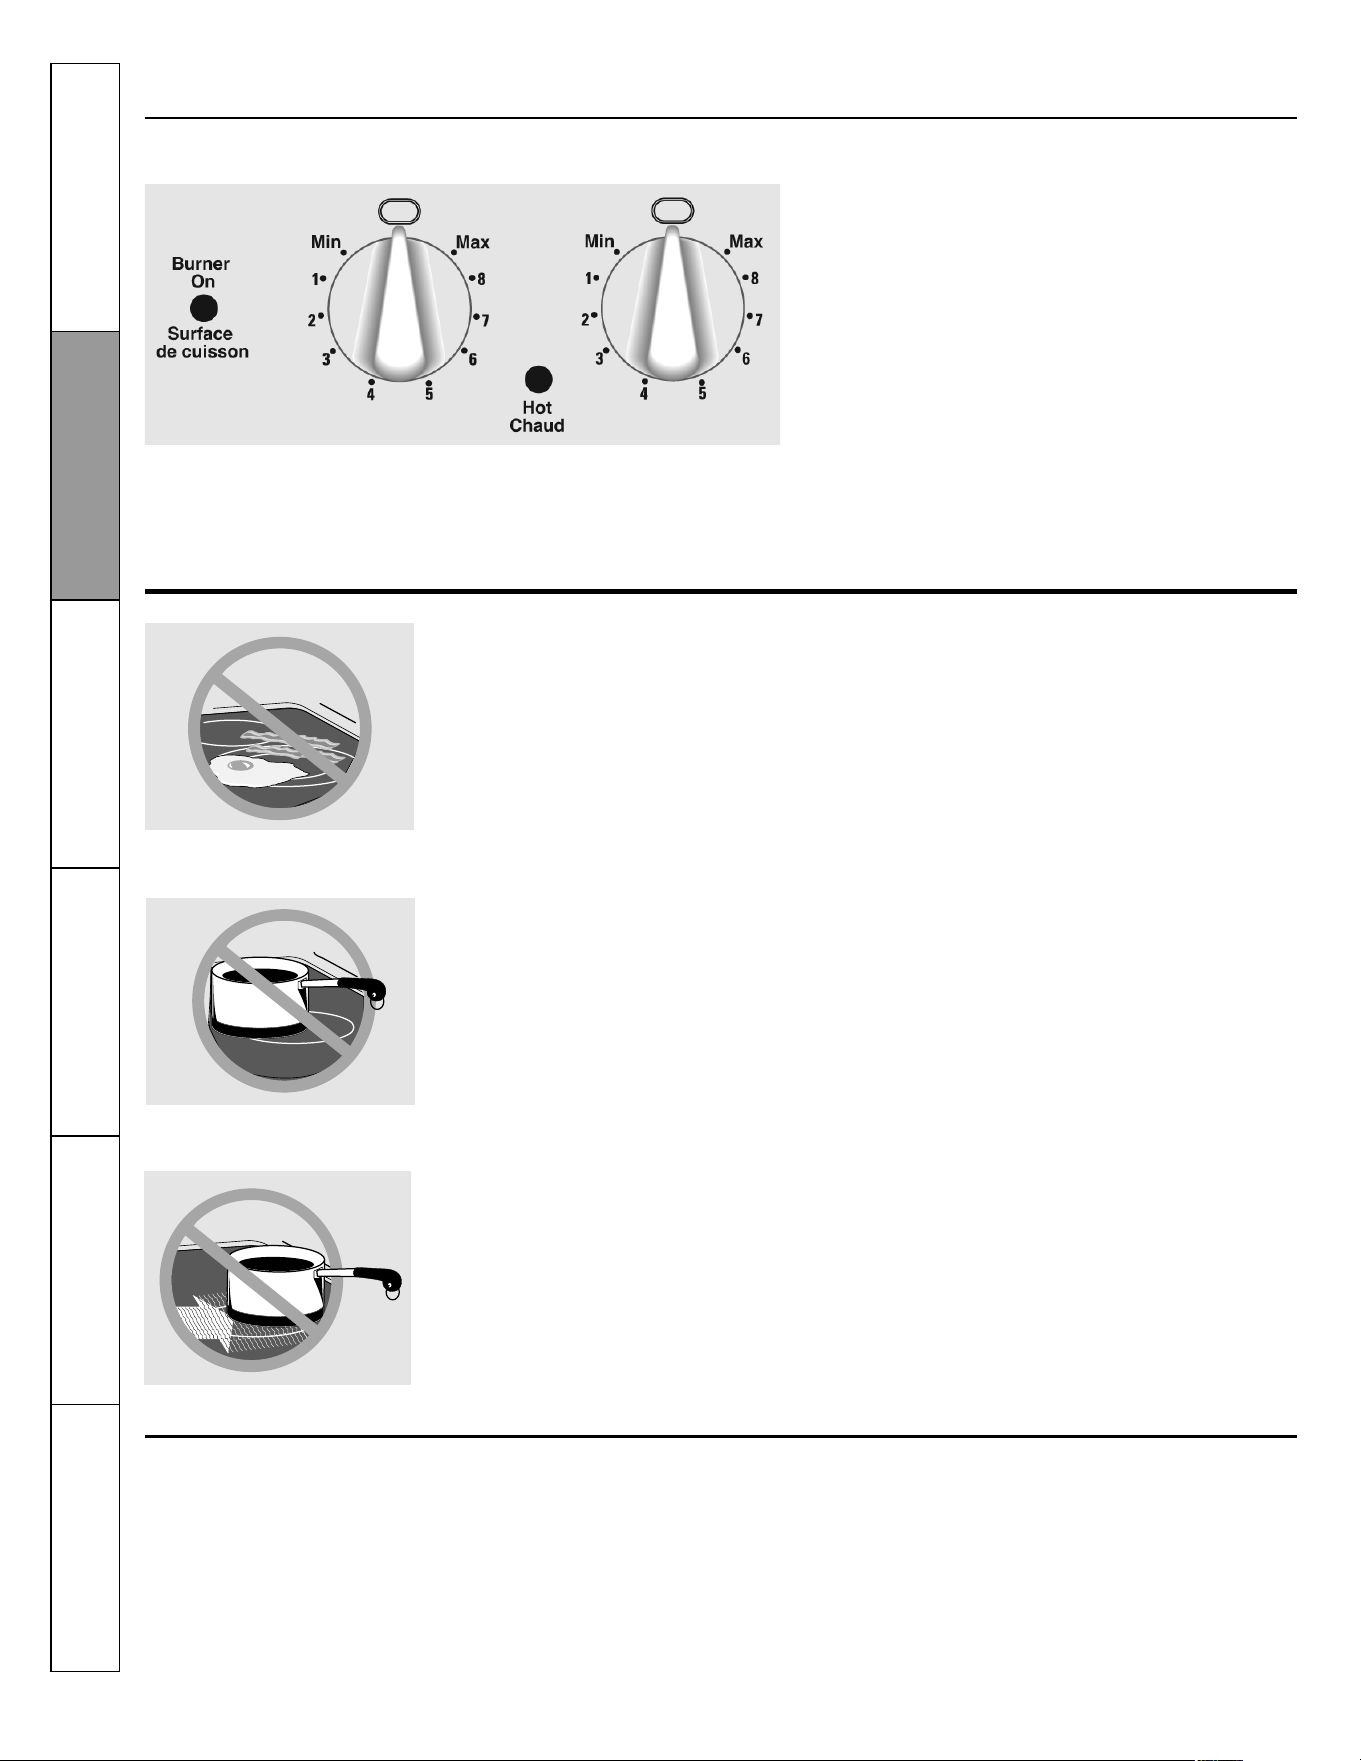
Cómo seleccionar las posiciones para los controles
Controles de los quemadores de la cubierta
Los quemadores de la cubierta y sus controles
están diseñados para proporcionarle una varie-
dad de posiciones de calor para cocinar.
En ambas posiciones LO (BAJA) y HI (ALTA), hay
un ligero nicho en donde los controles producen
clics; HI (ALTA) marca la posición más alta; LO
(BAJA) marca la posición más baja.
En una cocina silenciosa, usted podría escuchar
unos ligeros clics durante la cocción, que indican
que las posiciones de calor seleccionadas están
siendo mantenidas.
El cambiar el nivel de calor a una posición más
alta siempre muestra una respuesta más rápida
en la temperatura que cambiar hacia una posi-
ción más baja.
1. Empuje la perilla hacia adentro.
2. Gírela en dirección de las agujas del reloj o en
dirección contraria hasta la posición que de-
see.
El control debe empujarse hacia adentro para
moverlo de la posición de APAGADO (OFF).
Cuando el control se encuentra en cualquier po-
sición diferente a OFF (APAGADO), se puede girar
sin empujarlo.
Cuando termine de cocinar, asegúrese de colocar
el control en la posición OFF (APAGADO). Hay un
indicador que se ilumina cuando CUALQUIER
quemador está encendido.
La luz indicadora Quemador Encendido, se en-
ciende cuando CUALQUIER quemador de la cu-
bierta está encendido.
Guía de posiciones de calor
MAX (MÁXIMA) --- Inicio rápido para cocinar; lle-
va el agua a hervir.
MEDIUM HIGH (MEDIA ALTA) --- Para freír rápi-
damente, para asar en una sartén, para mante-
ner un hervor rápido en grandes cantidades de
alimentos.
MED (MEDIA) --- Para salsa y dorar; para mante-
ner un hervor lento en grandes cantidades de ali-
mentos.
MEDIUM LOW (MEDIA BAJA) --- Cereales; para
mantener una temperatura de servir para la ma-
yoría de los alimentos.
MIN (MÍNIMA) --- Para cocinar después de co-
menzar con la posición HI (ALTA); para cocinar
con poca agua en una sartén cubierta. Úsela
para cocinar arroz al vapor.
NOTAS:
• En las posiciones MAXIMA o MEDIA ALTA, nun-
ca deje los alimentos sin atención. Los hervo-
res que se derraman causan humo; los derra-
mes grasosos pueden incendiarse.
• Puede derretir chocolate o mantequilla en un
quemador pequeño, usando la posición MÍNI-
MA.
Consejos para cocinar
Use utensilios medianamente pesados o pesa-
dos. Los utensilios hechos de aluminio conducen
más rápidamente el calor que otros metales. Los
utensilios hechos de hierro vaciado y de hierro
vaciado recubiertos son lentos para absorber el
calor, pero generalmente cocinan uniformemen-
te en posiciones bajas o medias de calor. Las sar-
tenes de acero cocinan de manera no uniforme
si no se les combina con otros metales.
No llene de más los utensilios con grasa que po-
dría derramarse al agregar otros alimentos. Los
alimentos que aún tiene escarcha, burbujean vi-
gorosamente. Vigile los alimentos que se fríen a
altas temperaturas. Mantenga la estufa y cam-
pana limpias y libres de acumulaciones de grasa.
Para conservar la mayor energía de cocción, las
sartenes deben tener plano el fondo, deben tener
laterales rectos y tapas que les ajusten bien.
Haga coincidir el tamaño de la sartén con el del
quemador de cubierta. Una sartén que se extien-
de más allá de 2,5 cm de la charola recolectora
atrapa calor, lo que causa resquebrajamiento
(grietas muy delgadas) sobre porcelana, y deco-
loración que va de azul a gris obscuro en las cha-
rolas recolectoras cromadas.
Instrucciones de
seguridad
Instrucciones de
operación
Cuidado y limpieza
Solución
de problemas
Servicio
al consumidor
Instrucciones de
instalación
8
Usando los quemadores eléctricos radiantes
(algunos modelos)
La cubierta radiante cuenta con unidades de ca-
lentamiento que se encuentran por debajo de
una superficie tersa de cristal.
NOTA: Es normal percibir un ligero olor cuando se
usa una cubierta de cristal por primera vez. Este
olor es causado por el calentamiento de las partes
nuevas y de los materiales de aislamiento y des-
aparecerá en un tiempo corto.
El quemador alterna ciclos de encendido y apa-
gado para mantener la posición de calor estable-
cida por el control.
Es seguro colocar utensilios calientes del horno
sobre la superficie de cristal cuando está fría.
Aun después de apagar los quemadores de la
cubierta, la cubierta de cristal retiene suficiente
calor para seguir cocinando. Para evitar cocer de
más los alimentos, retire las cacerolas de los
quemadores de la cubierta cuando los alimentos
ya estén cocinados. Evite colocar cualquier obje-
to sobre la superficie de la cubierta a menos que
ya se haya enfriado por completo.
No deslice sus utensilios por encima de la cubierta
ya que puede rayar el vidrio. El vidrio es resistente
a rayones, no a prueba de rayones.
Acerca de los quemadores eléctricos radiantes...
Cada quemador eléctrico radiante tiene un limi-
tador de temperatura.
El limitador de temperatura protege a la cubierta
de cristal al evitar que se caliente demasiado.
Siempre coloque la cacerola al cen-
tro del quemador que va a usar.
Nunca cocine sobre el cristal direc-
tamente. Siempre use utensilios.
El limitador de temperatura puede apagar los
quemadores por un tiempo si:
• La cacerola hierve hasta secarse.
• El fondo de la cacerola no es completamente
plano.
• La cacerola está descentrada.
• No hay una cacerola sobre el quemador.
Limitador de Temperatura
• Las manchas causadas por agua (depósitos mi-
nerales) son removibles usando la crema lim-
piadora o vinagre blanco sin diluir.
• El uso de limpiadores para ventanas podría de-
jar una película iridiscente sobre la cubierta. La
crema limpiadora removerá esta decoloración.
• No almacene artículos pesados encima de la
cubierta. Si caen sobre la cubierta, podrían cau-
sar daños.
• No use la superficie de la cubierta como tabla
para cortar.
Descentrado
Sobre la
cubierta
Arrastrar
Luces indicadoras (solamente en modelos de
quemadores radiantes con cubierta de cristal)
La luz indicadora HOT (CALIENTE) se ilumina al encender
cualquier quemador eléctrico radiante, y permanece en-
cendido hasta que la superficie se enfría lo suficiente
como para tocarla.
La luz indicadora BURNER ON (QUEMADOR ENCENDIDO)
se ilumina siempre que se enciende cualquier quemador.
NOTA: La luz indicadora HOT (CALIENTE) puede encender
cuando un control se encuentra entre las posiciones MIN
y OFF (APAGADO), pero no hay energía alimentando a los
quemadores.
Usando los quemadores de la cubierta
A lo largo de este manual, las características y apariencia pueden variar con respecto a las de su modelo.
Instrucciones de
seguridad
Instrucciones de
operación
Cuidado y limpieza
Solución
de problemas
Servicio
al consumidor
Instrucciones de
instalación
9
Acero Inoxidable:
Recomendado.
Seleccionando el tipo de utensilios para cocinar
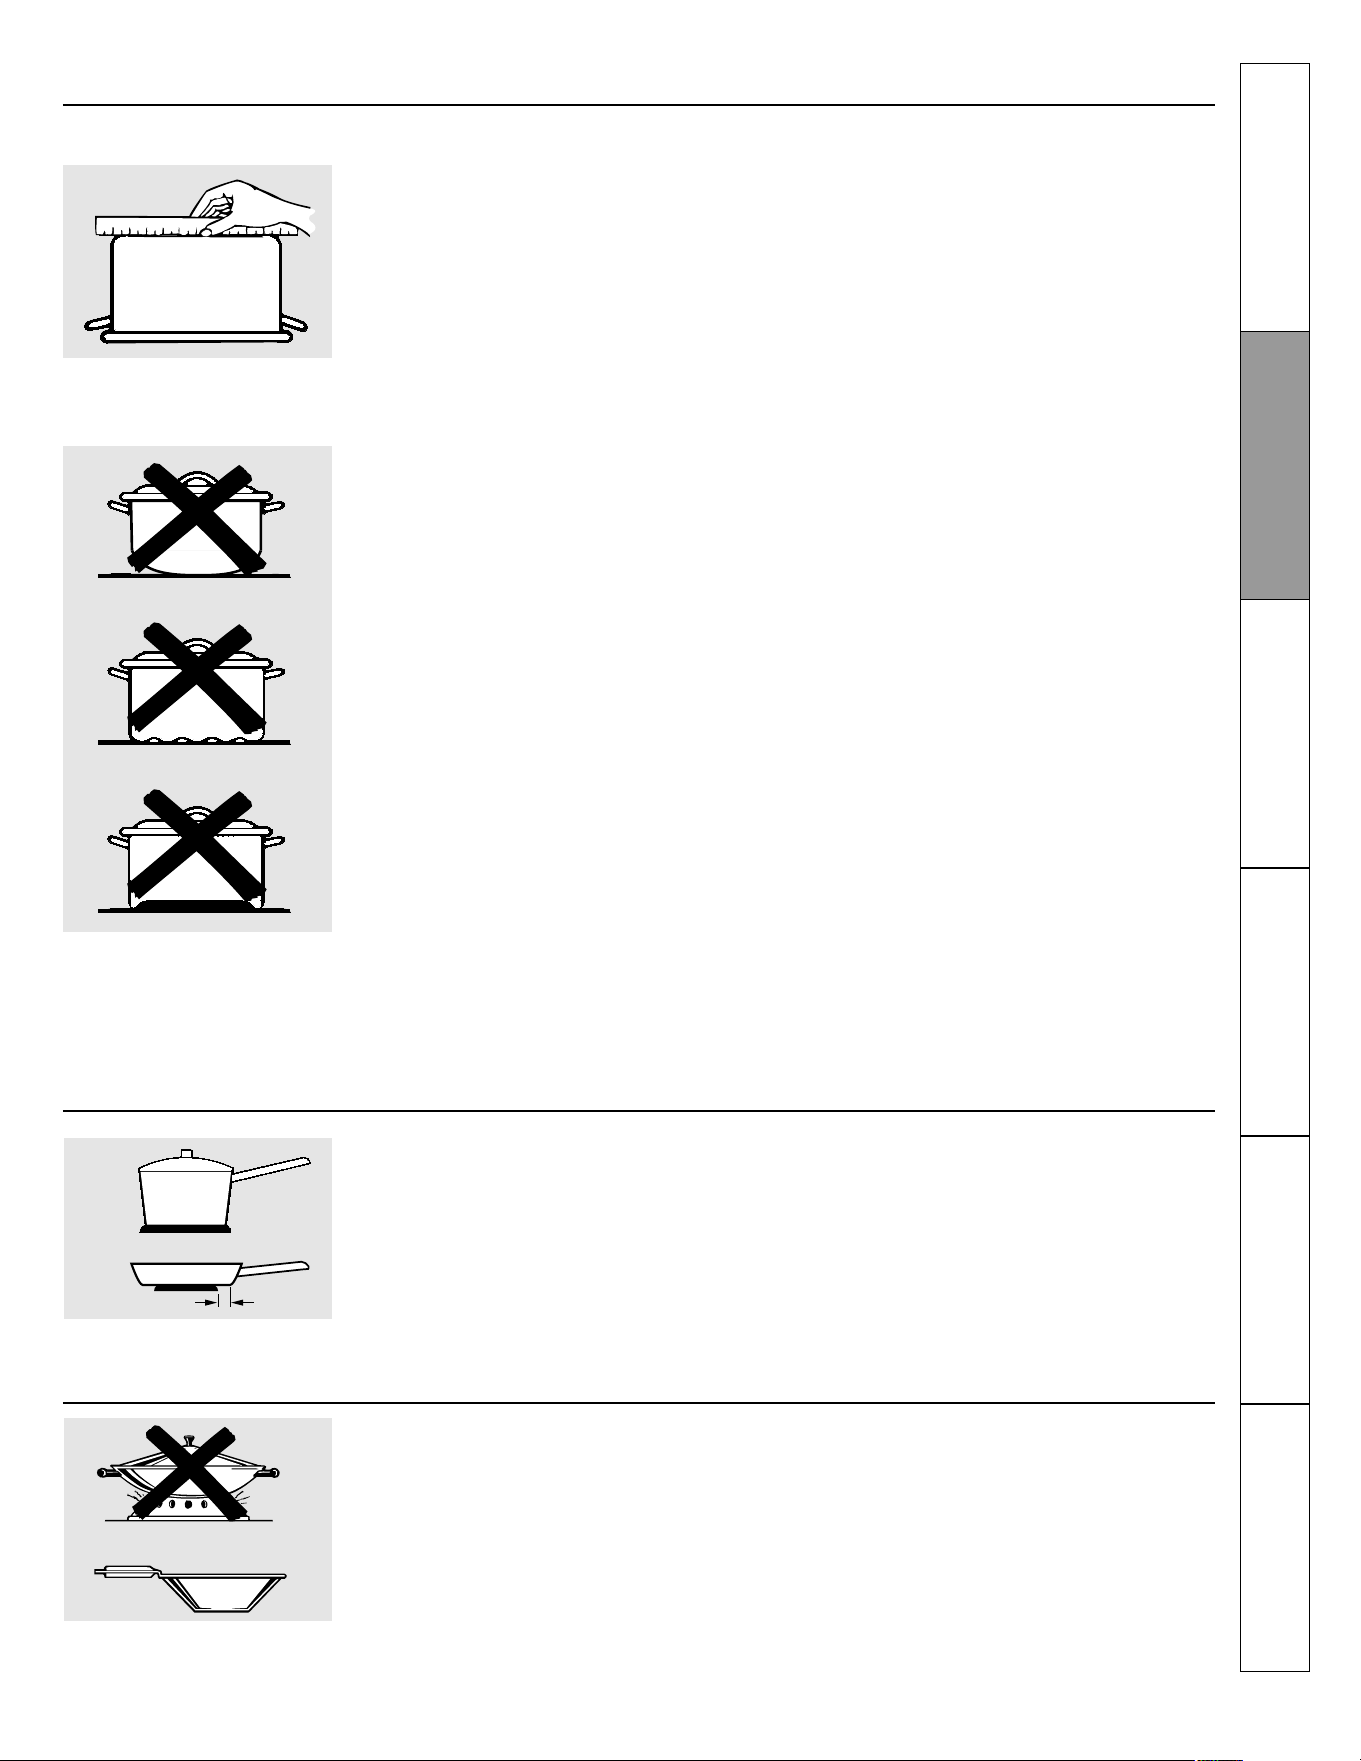
Esta información le ayudará a seleccionar utensilios para cocinar que proporcionan un buen desempeño sobre cubiertas de cristal.
Revise que las cacerolas tengan
fondo plano usando una regla.
No se recomiendan las cacero-
las con fondos redondeados,
curvos, ondulados o deformes.
Cocinando en una sartén Wok
Recomendamos usar woks de fondo plano so-
lamente. Están disponibles en su tienda de
venta al menudeo local.
No utilice sartenes wok que tienen anillos de so-
porte. El uso de este tipo de woks, con o sin el
anillo en su sitio, puede ser peligroso.
El colocar el anillo sobe el quemador generará
una acumulación de calor que dañará la cubierta
de porcelana. No trate de usar dichos sartenes
wok sin el anillo. Usted puede quemarse seria-
mente si el wok se voltea.
Use utensilios pesados o de peso medio. Los
utensilios de aluminio conducen el calor más rá-
pidamente que otros metales. Los de hierro fun-
dido y de hierro fundido recubierto, son lentos
para absorber el calor, pero por lo general coci-
nan uniformemente en posiciones de calor entre
bajo y medio. Las cacerolas de acero pueden co-
cinar desigualmente si no están combinadas con
otros metales.
Consejos para seleccionar utensilios para cocinar sobre la cubierta
Para obtener los mejores resultados de cocción,
las cacerolas deben tener el fondo plano. Use
utensilios de tamaños que correspondan al de
los quemadores. La cacerola no debe extenderse
más de 2,5 cm de la orilla del quemador.
No más de 2,5 cm
Use sartenes wok de fondo pla-
no solamente.
La siguiente información le ayudará a seleccionar utensilios que proporcionan un buen desempeño para cocinar sobre quemadores
eléctricos de espiral.
Consejos para el envasado casero de conser-
vas:
Asegúrese de que el envasador de conservas
esté centrado sobre el quemador.
Asegúrese de que el fondo del envasador sea
plano.
Utilice recetas y procedimientos de fuentes con-
fiables. Estas están disponibles con fabricantes
como Ball® y Kerr®, así como en el Servicio de
Extensión del Departamento de Agricultura.
Para prevenir quemaduras causadas por el vapor
o calor, tenga cuidado al envasar las conservas.
Barro:
Se puede usar, aunque no es recomendable
Bajo desempeño. Puede rayar la superficie.
Vitrocerámica:
Se puede usar, aunque no es recomendable
Bajo desempeño. Puede rayar la superficie.
Hierro fundido recubierto de esmalte porcela-
nizado
Recomendado
Se recomienda siempre que el utensilio esté re-
cubierto completamente con esmalte porcelani-
zado. Se recomienda tener cuidado con utensi-
lios de hierro fundido que no están recubiertos
totalmente con esmalte porcelanizado terso, ya
que podría rayar la cubierta de vitrocerámica.
Fondo de cobre:
Recomendado
El cobre puede dejar residuos que lucen como ra-
yones. Los residuos pueden removerse siempre
que limpie inmediatamente la cubierta. Sin em-
bargo, no permita que estas cacerolas hiervan
hasta secarse. El metal sobrecalentado podría
pegarse a las cubiertas de cristal. El fondo de co-
bre sobrecalentado de una cacerola dejará resi-
duos que mancharán permanentemente la cu-
bierta si no se remueven inmediatamente.
Aluminio:
Se recomienda el pesado
Buena conductividad. Los residuos de aluminio
lucen algunas veces como rayones sobre la cu-
bierta, pero se pueden remover si se limpian in-
mediatamente. Debido a su bajo punto de fusión,
no debe usarse aluminio ligero y delgado.
Instrucciones de
seguridad
Instrucciones de
operación
Cuidado y limpieza
Solución
de problemas
Servicio
al consumidor
Instrucciones de
instalación
10
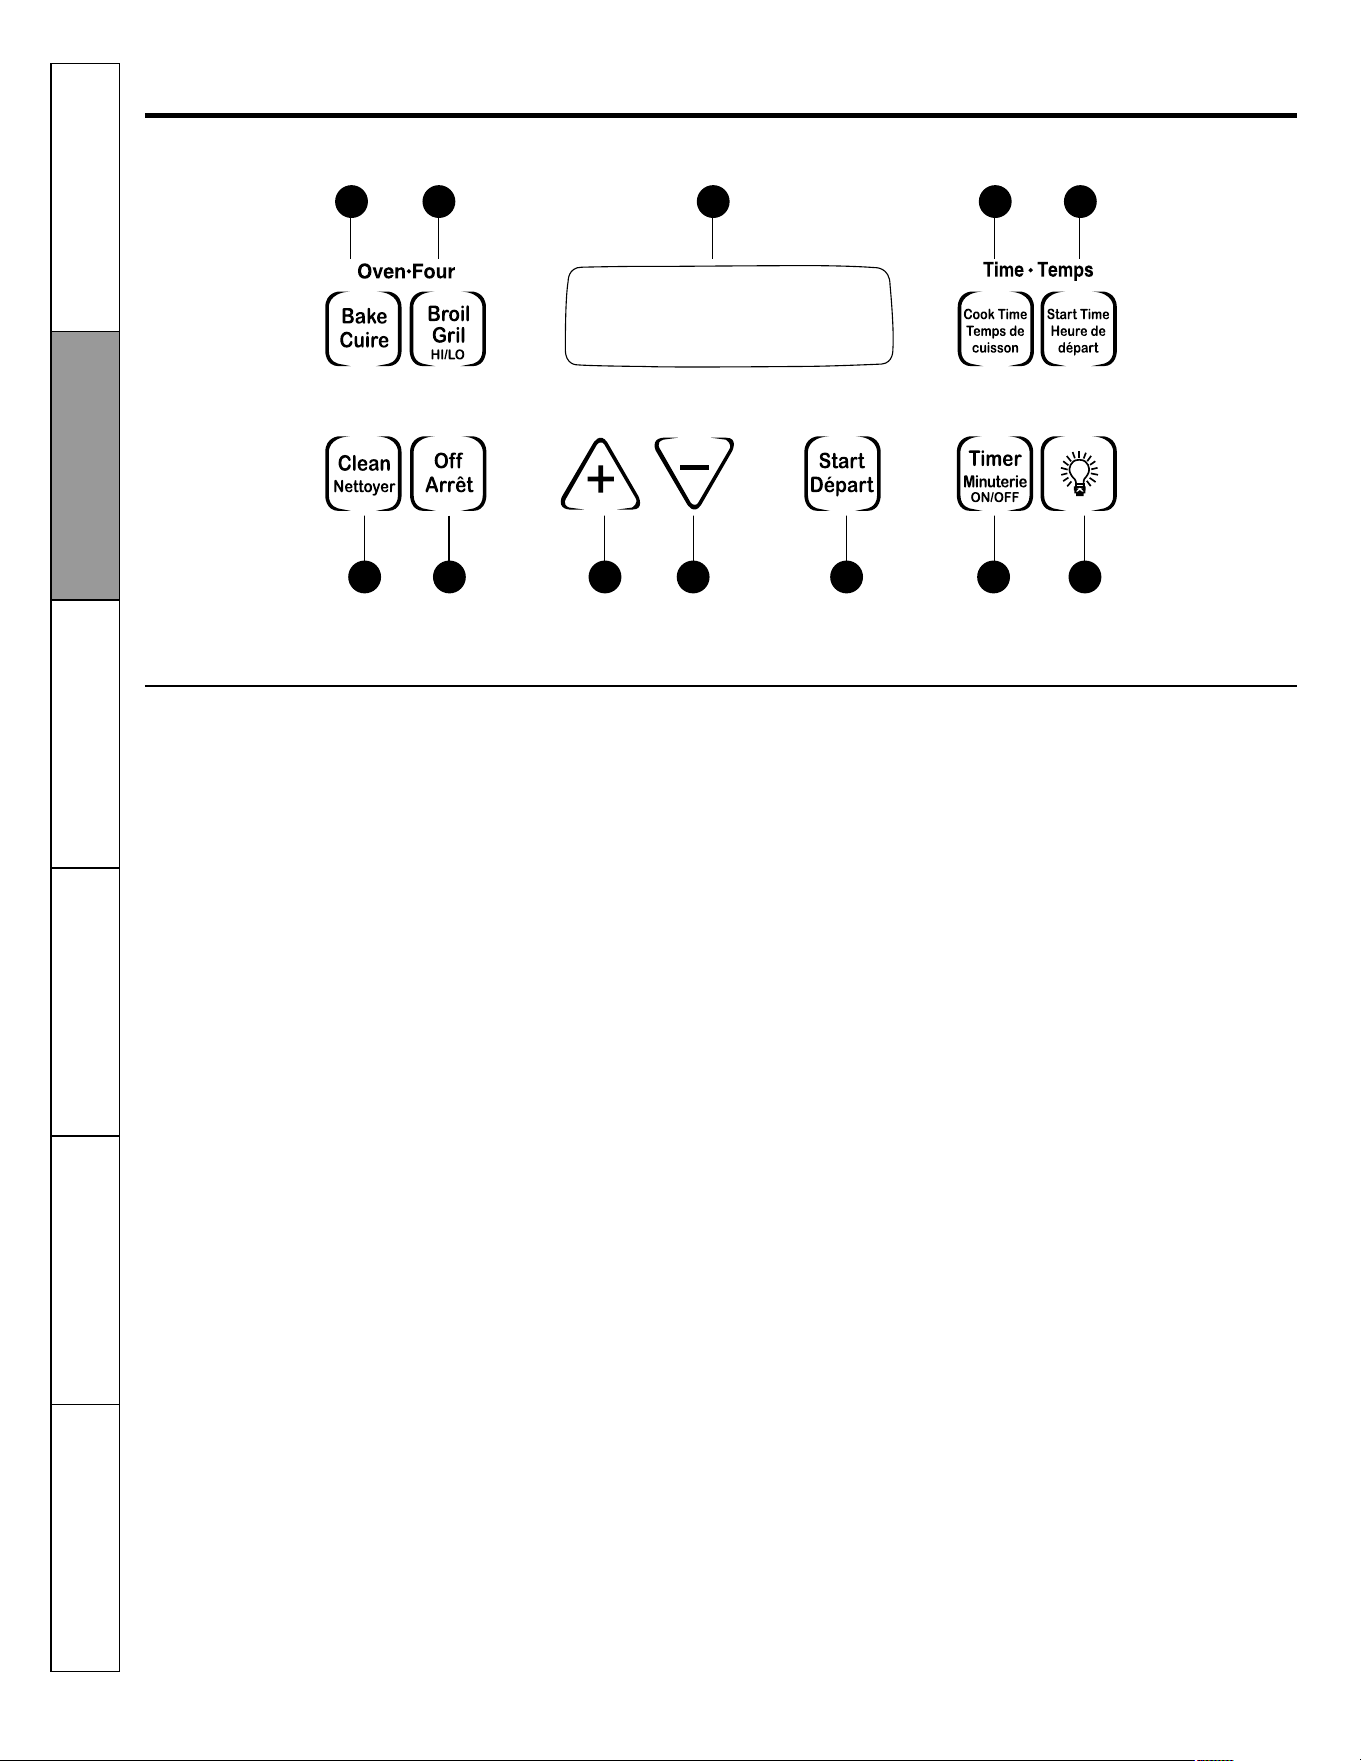
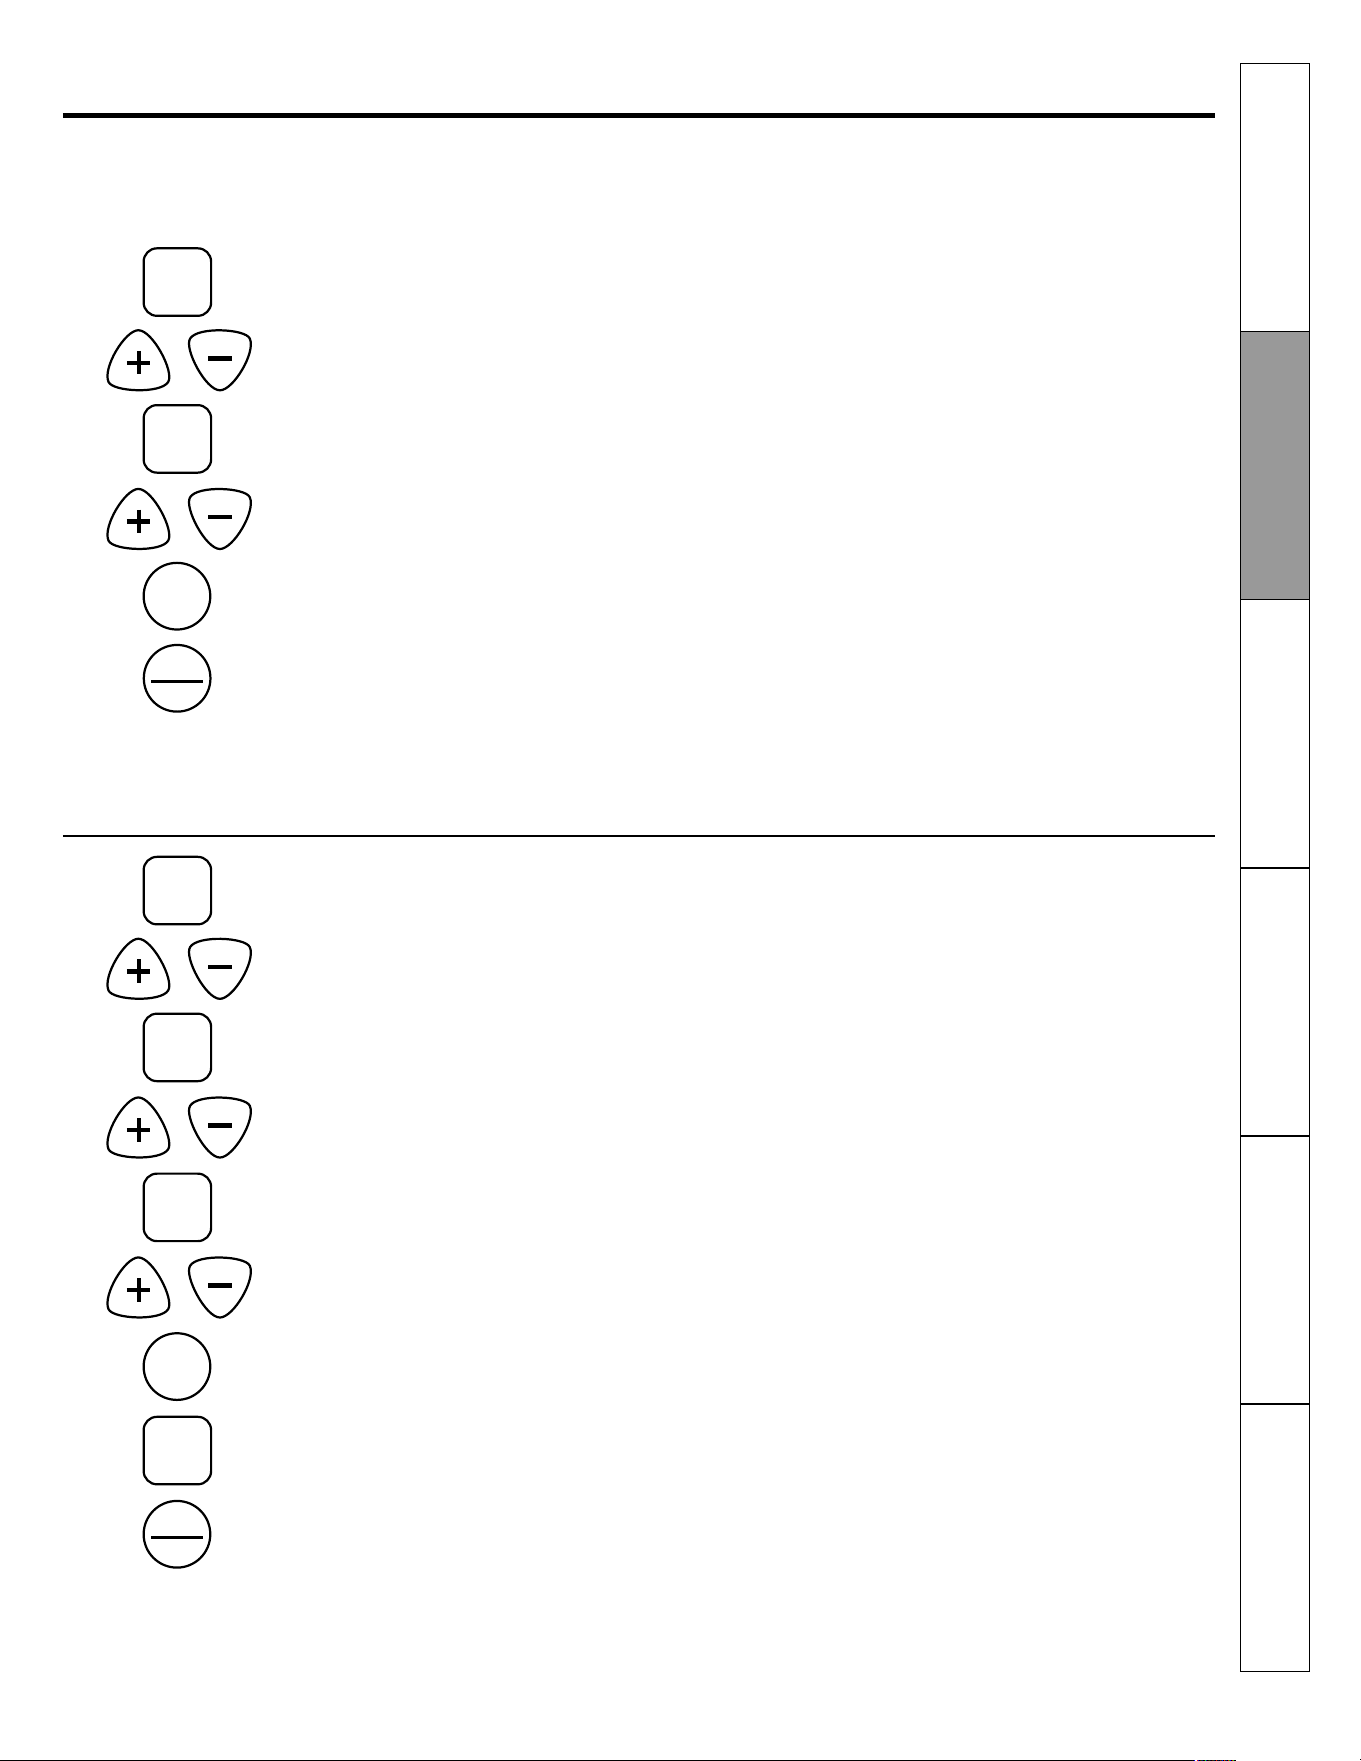
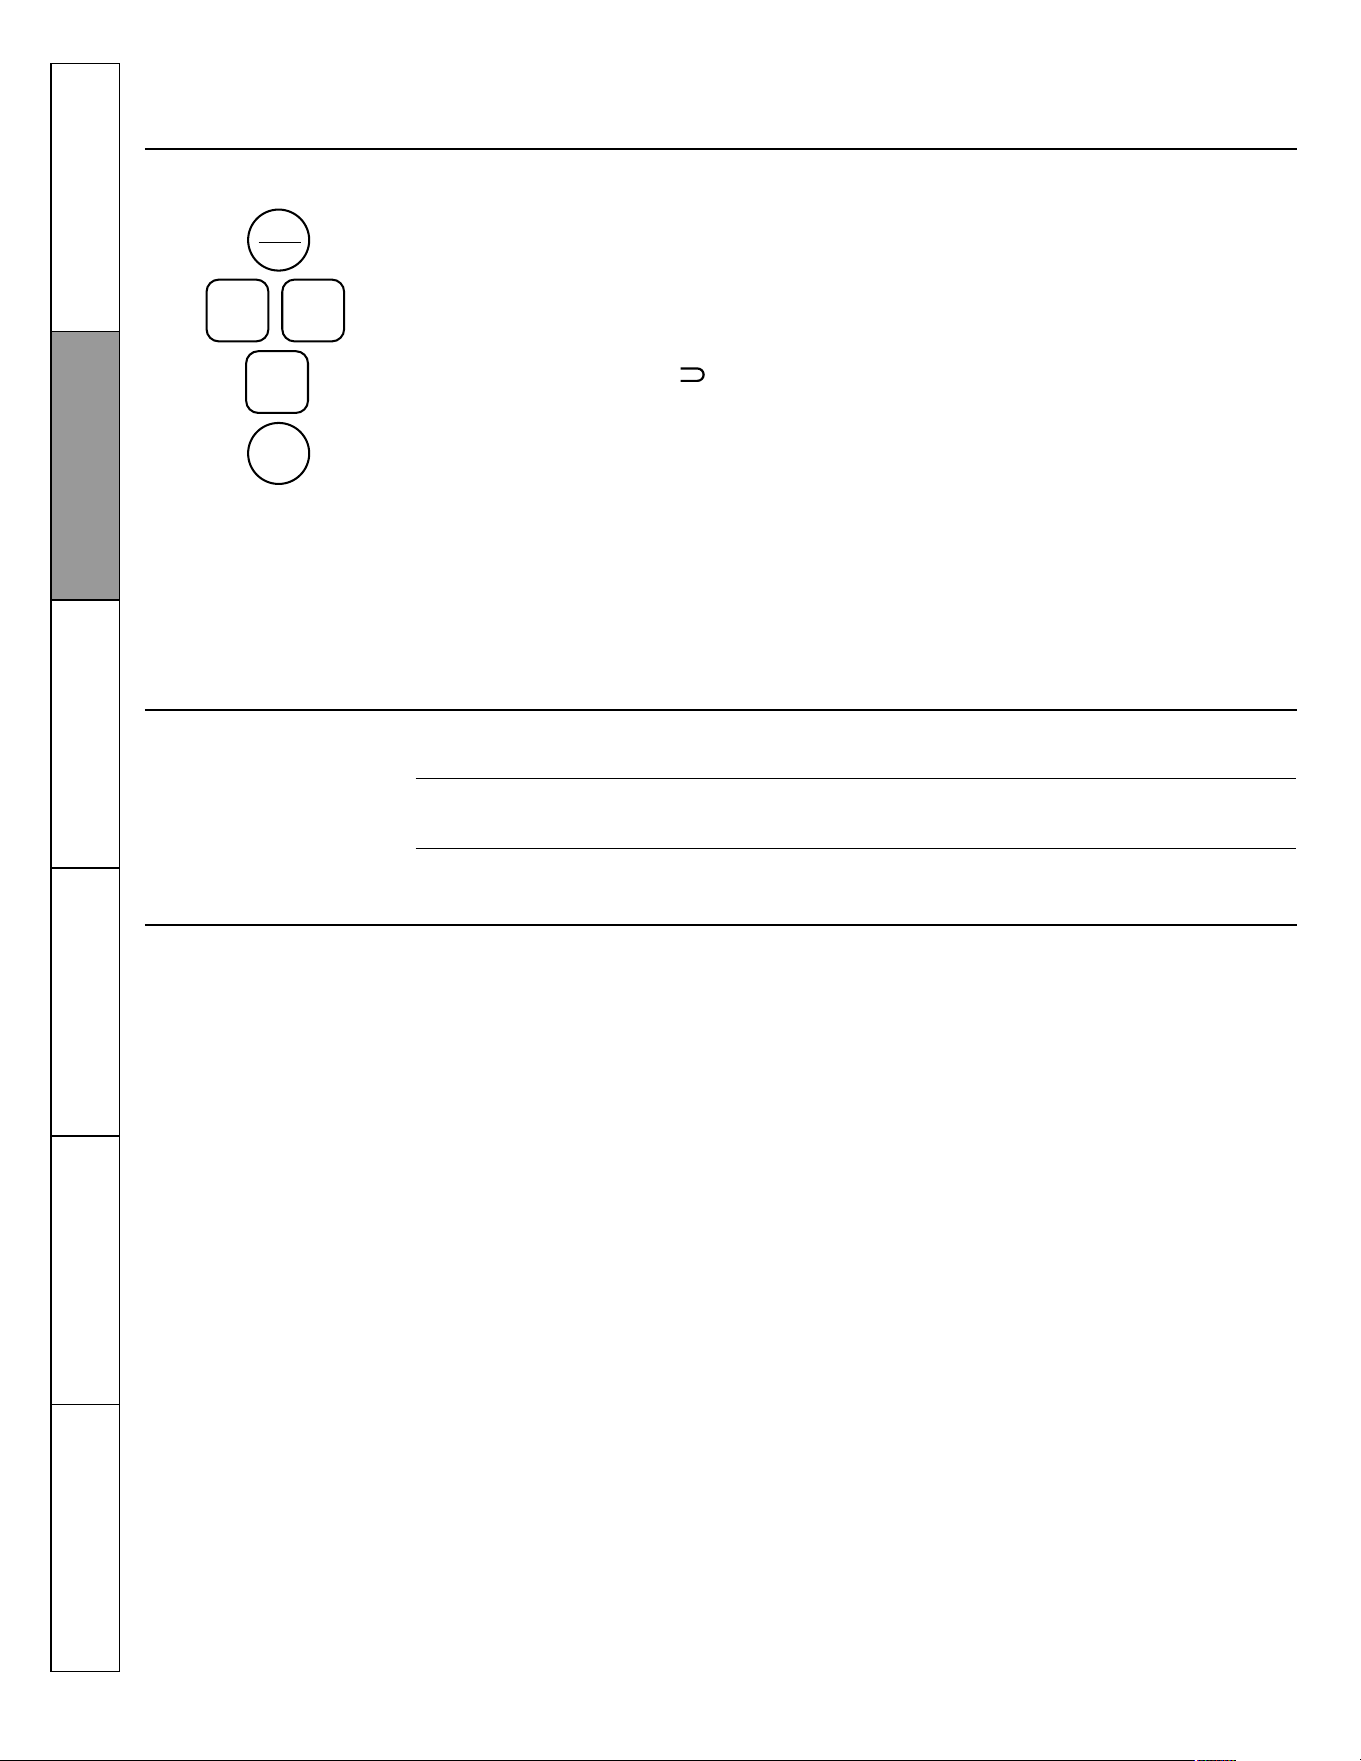
1. Botón BAKE (HORNEAR)
Presione este botón para seleccionar la función de
horneado.
Indicador HORNEAR (BAKE)
Parpadea durante el modo de edición. Usted puede
cambiar la temperatura del horno en ese momento.
2. Botón BROIL (ASAR)
Presione este botón para seleccionar la función ASAR.
Luz ASAR (BROIL)
Parpadea durante el modo de edición, en ese momen-
to usted puede cambiar de HI (ASAR ALTO) a LO BROIL
(ASAR BAJO).
3. Pantalla
Muestra las operaciones que ha seleccionado. La hora
del día y el estatus de la cocción.
4. Botón COOK TIME (TIEMPO DE COCCIÓN)
Presione este botón y después el botón + ó – para pro-
gramar la cantidad de tiempo que desea cocinar sus
alimentos. El horno se apaga cuando el tiempo de coc-
ción finaliza.
5. Botón START TIME (HORA DE INICIO)
Úselo junto con los botones COOK TIME (TIEMPO DE
COCCIÓN) o SELF CLEAN (AUTOLIMPIEZA) para progra-
mar el horno para que arranque y se detenga auto-
máticamente a la hora que usted programó.
6. Botón OVEN LIGHT ON/OFF (LUZ DE HORNO ENCENDI-
DO/APAGADO)
Presione este botón para encender o apagar la luz de
horno.
7. Botón TIMER/CLOCK (TIMER/RELOJ).
Presione este botón para seleccionar la función timer.
Después presione los botones + y - para ingresar el
tiempo.
Para programar el reloj, mantenga presionado este
botón por 3 segundos y luego presione los botones + y
-. La hora del día parpadea en la pantalla la primera
vez que enciende el horno.
Usando los controles del horno (algunos modelos)
A lo largo de este manual, las funciones y la apariencia pueden variar con respecto a las de su modelo.
Funciones y posiciones para el control del horno, reloj y timer
8. Botón START (INICIO)
Debe presionarse para iniciar cualquier función de
cocción.
9. Botón -
Toques cortos sobre este botón disminuyen el tiempo
o temperatura en cantidades pequeñas. Presione sin
soltar el botón para disminuir en pantalla el tiempo o
la temperatura en cantidades grandes.
10. Botón +
Toques cortos sobre este botón incrementan el tiempo
o temperatura en cantidades pequeñas. Presione sin
soltar el botón para aumentar en pantalla el tiempo o
la temperatura en cantidades grandes.
11. Botón CLEAR/OFF (BORRAR/APAGAR)
Presione este botón para cancelar TODAS las opera-
ciones del horno excepto el reloj y el timer.
12. Botón SELF CLEAN (AUTOLIMPIEZA)
Presione este botón para seleccionar la función de au-
tolimpieza. Consulte la sección "Usando el horno de
autolimpieza".
Luz CLEAN (LIMPIAR)
Parpadea durante el modo de edición, en ese momen-
to usted puede cambiar la cantidad de tiempo para el
ciclo de autolimpieza. Permanece encendido cuando
el horno se encuentra en el ciclo de autolimpieza. Des-
pués del ciclo de autolimpieza, la luz indicadora se
apaga. Desbloquee la puerta.
Si "F y un número o letra" parpadean en la pantalla y el
control del horno emite señales, esto indica un código de
error de función.
Presione el botón CLEAR/OFF (BORRAR/APAGAR). Permita
que el horno se enfríe durante una hora. Ponga el horno
de nuevo en operación.
Si el código de error de función se repite, desconecte la
estufa del suministro de energía y llame para solicitar
servicio.
12 11 10
12 3 45
9876
(Hornear)
(Inicio)(Apagar)
(Asar Alto/Bajo)
(Limpieza) (Timer)
(Tiempo)
(Tiempo de
cocción)
(Hora de
inicio)
(Horno)
Instrucciones de
seguridad
Instrucciones de
operación
Cuidado y limpieza
Solución
de problemas
Servicio
al consumidor
Instrucciones de
instalación

11
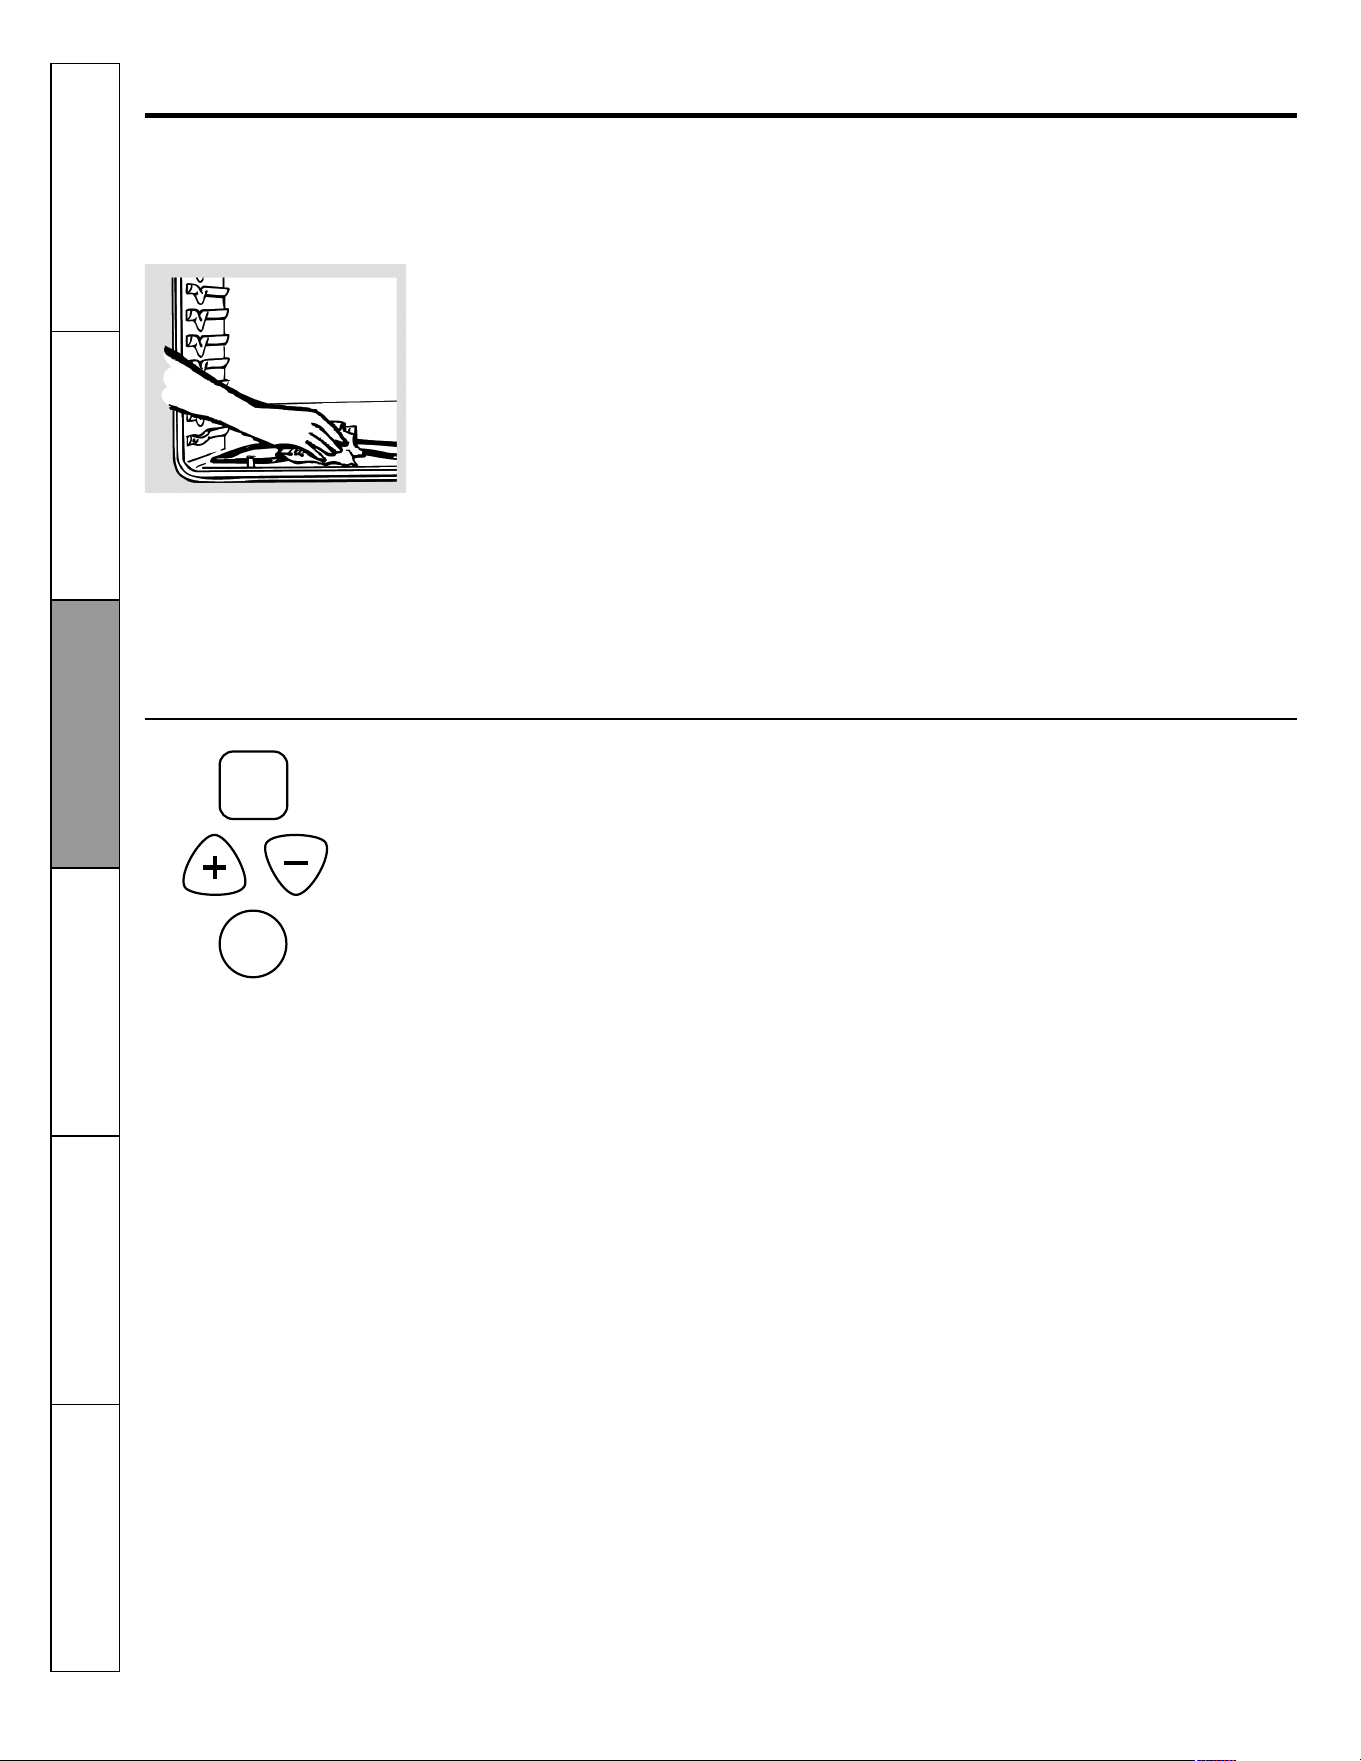
Usando el horno.
Antes de que usted inicie...
Para evitar posibles quemaduras, coloque las pa-
rrillas en la posición deseada antes de encender
el horno.
Las parrillas tienen topes de bloqueo, de manera
que cuando se colocan correctamente sobre los
soportes para parrillas (A hasta E), se detienen
antes de salir por completo, y no se ladean.
Para colocar y retirar utensilios, jale hacia afuera
la parrilla hasta el tope del soporte de la parrilla.
Para remover una parrilla, jálela hacia usted, in-
cline el extremo frontal hacia arriba y jálela hacia
afuera.
Para reinstalarla, coloque el extremo de la parri-
lla (topes de bloqueo) sobre el soporte, incline ha-
cia arriba el frente y empuje la parrilla hacia
adentro.
NOTA: La parrilla no está diseñada para deslizar-
se hacia afuera cuando se encuentra en la posi-
ción especial inferior (R).
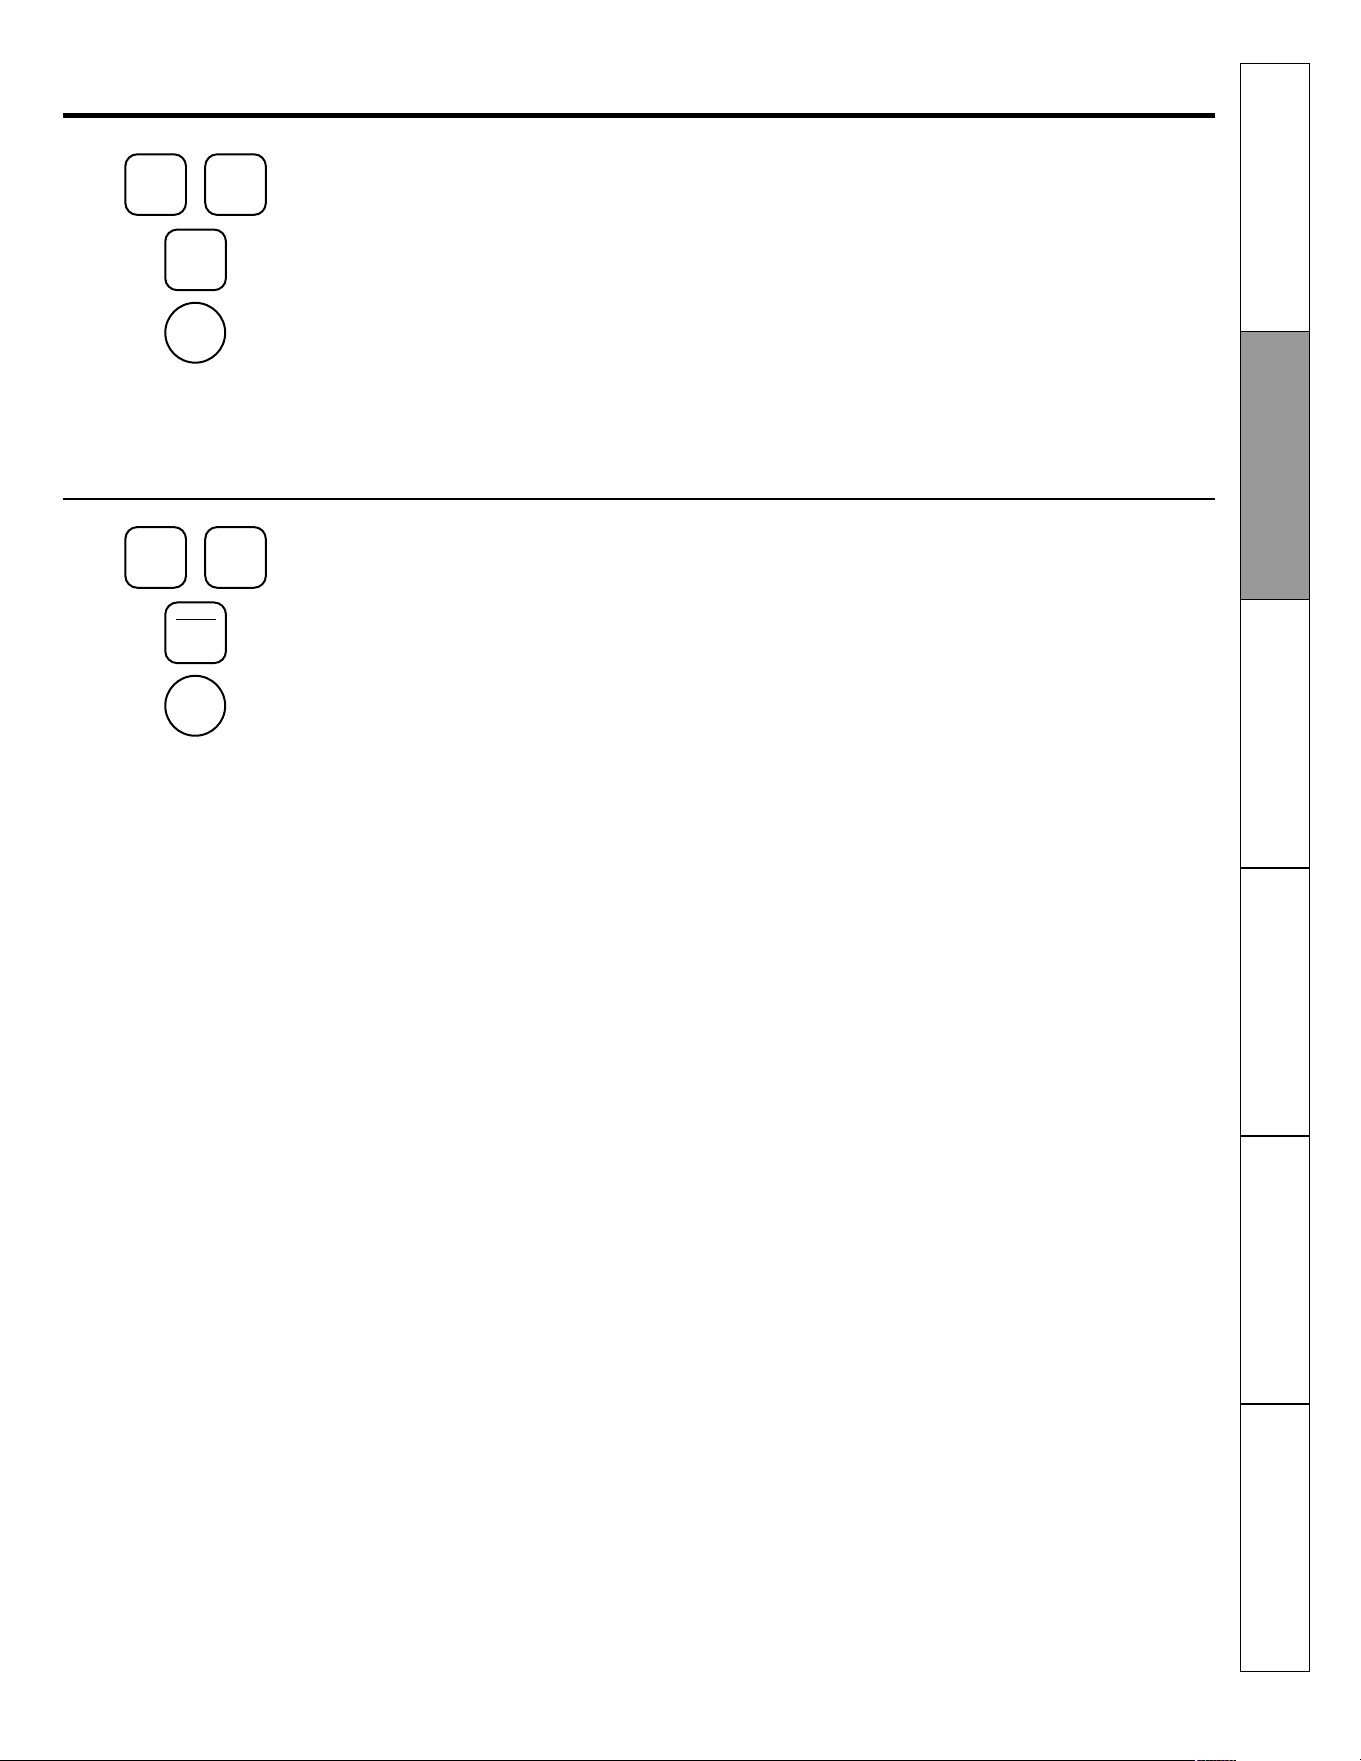
Reloj y Timer de cocina (algunos modelos)
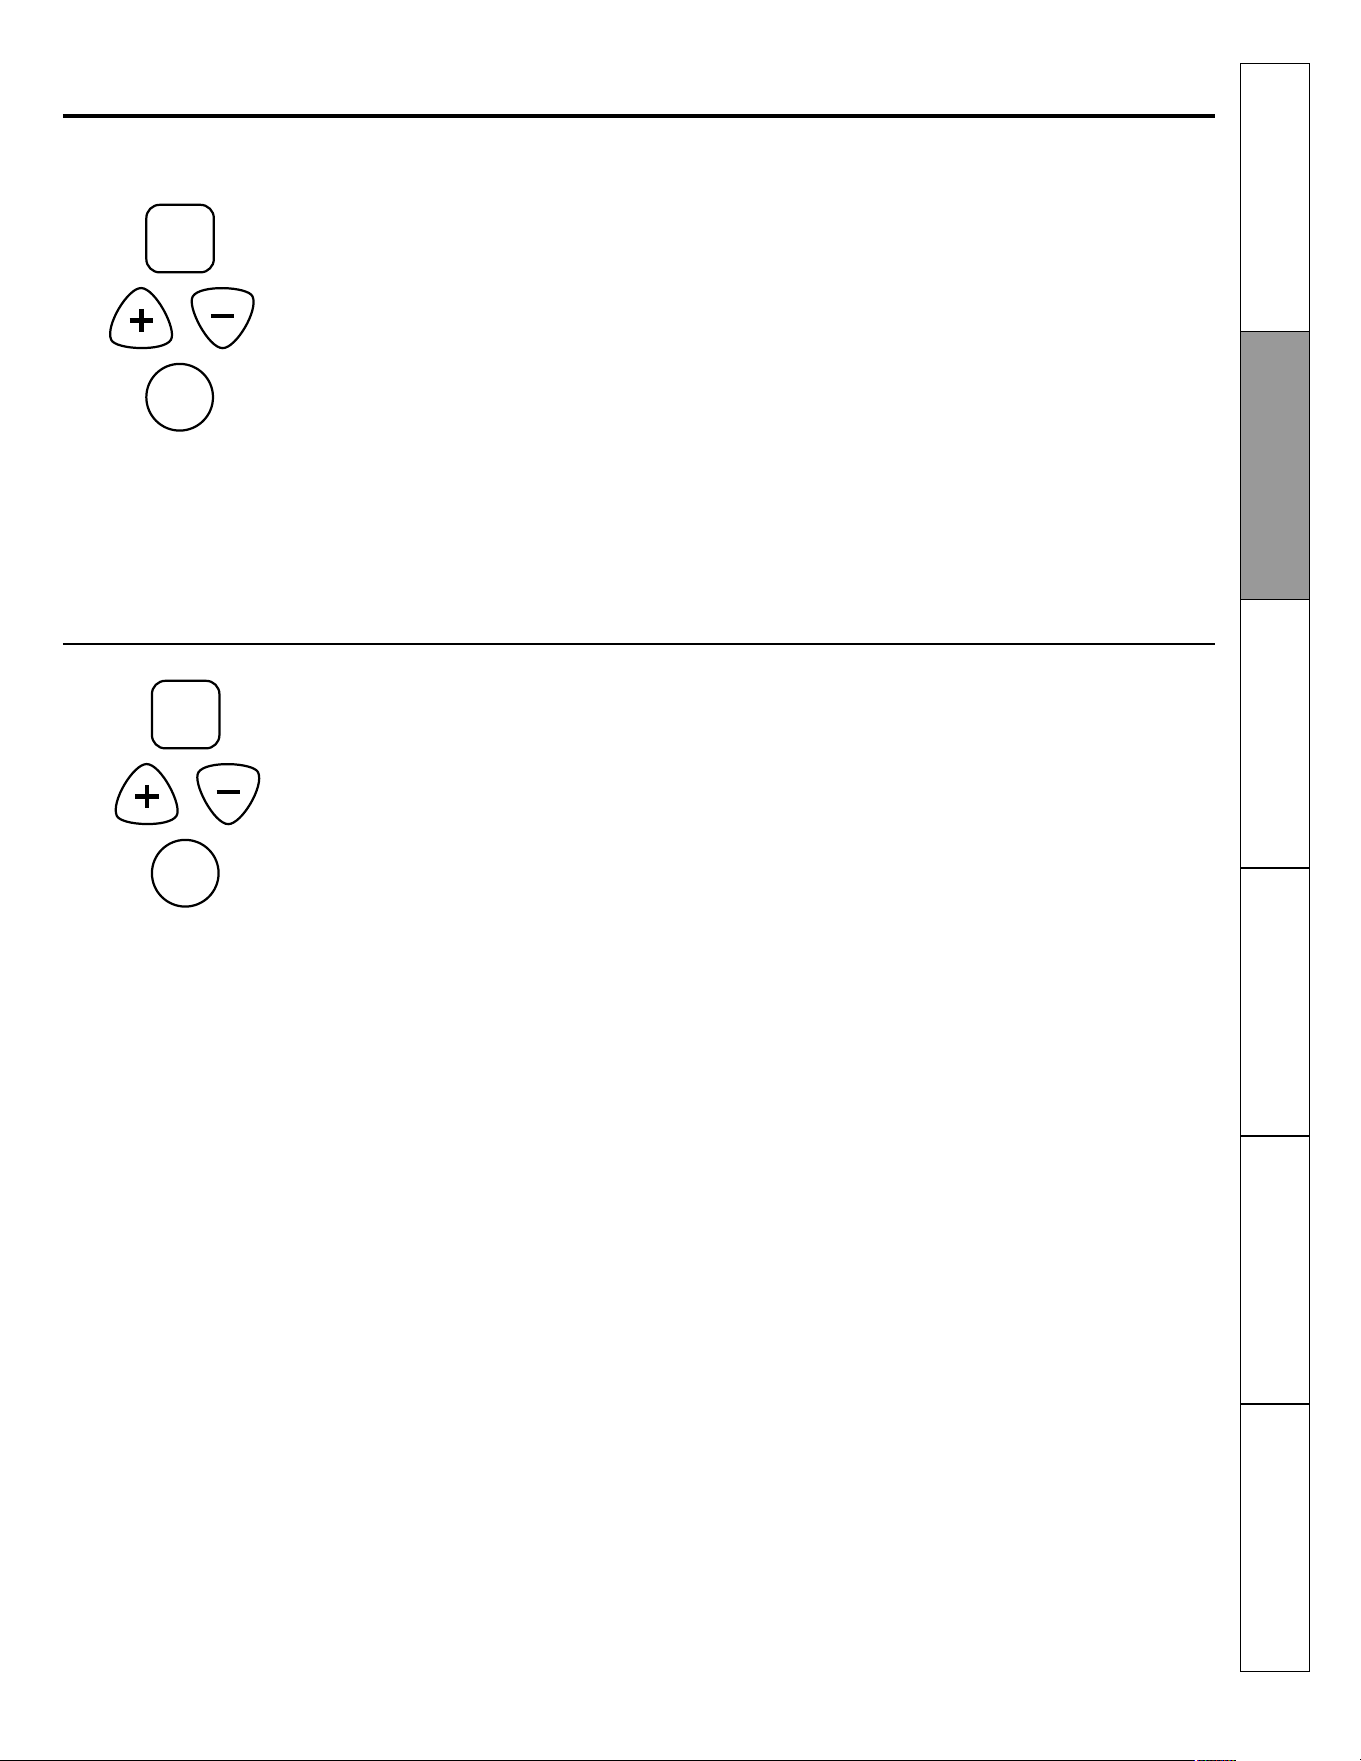
1. Botón TIMER
Presione este botón para seleccionar la función de timer.
2. Botón RELOJ (CLOCK)
Presione este botón antes de ajustar el reloj.
3. Pantalla
Muestra la hora del día y el tiempo programado para el timer, el tiempo de cocción o la hora para
el inicio de la cocción.
4. Botones +/-
Estos botones le permiten ajustar el reloj y el timer.
Perilla de temperatura del horno (algunos modelos)
Gire esta perilla hasta la posición que desee.
El indicador luminoso del horno se enciende has-
ta que el horno alcanza la temperatura que us-
ted seleccionó, después se apaga y enciende
con la o las resistencias del horno durante la
cocción.
La apariencia puede variar
Posiciones para la parrilla del horno
El horno tiene cuatro soportes para parrilla: "A" la
inferior, B, C y D (la superior).
El horno tiene cuatro posiciones
para parrilla.
Instrucciones de
seguridad
Instrucciones de
operación
Cuidado y limpieza
Solución
de problemas
Servicio
al consumidor
Instrucciones de
instalación

12
1. Presione el botón BAKE (HORNEAR).
2. Presione el botón + ó - para ingresar la tempe-
ratura deseada.
3. Presione el botón START (INICIO).
4. Revise los alimentos en el tiempo más corto
que indica la receta. Hornee por más tiempo si
fuera necesario.
5. Presione el botón CLEAR/OFF (BORRAR/APA-
GAR) cuando la cocción haya sido completa-
da.
Cómo programar el horno para hornear o rostizar
NOTA: Puede ser que el ventilador de enfriamien-
to se encienda y apague automáticamente para
enfriar las partes internas. Esto es normal y el
ventilador podría continuar operando aún des-
pués de apagar el horno.
Usando el horno.
Precalentando y colocación de charolas
Precaliente el horno si la receta lo requiere. Para
precalentar programe el horno a la temperatura
correcta. El precalentado es necesario para obte-
ner buenos resultados al hornear pasteles, galle-
tas, postres y pan.
Para modelos de horno que no incluyen una luz
indicadora o tono de precalentado, precaliente
por 10 minutos.
Los resultados de horneo serán mejores si las
charolas para hornear están centradas en el hor-
no lo más posible. Las charolas no deben tocarse
unas con otras, ni las paredes interiores del hor-
no. Si usted necesita acomodar charolas sobre
dos parrillas, "escalone" las charolas de manera
que una no quede directamente sobre la otra, y
deje unos 38 mm entre charolas y hacia el frente,
fondo y lados de la cavidad del horno.
Papel aluminio
No use papel aluminio sobre el piso del horno.
Nunca cubra por completo una parrilla con papel
aluminio. Esto afecta la circulación de calor y re-
sultará en un horneado pobre.
Una hoja más pequeña de papel aluminio puede
usarse para recibir un derrame, colocándola so-
bre una parrilla más abajo, varios centímetros
por debajo de los alimentos.
NOTA: Cierre la puerta antes de iniciar cualquier función de asado.
Modelos sin una perilla de temperatura para el horno
1. Coloque la carne o pescado sobre una rejilla para asar y ésta a
su vez sobre una charola diseñada para asar.
2. Presione una sola vez el botón BROIL HI/LO (ASAR ALTO/BAJO)
para asar en ALTO.
Para cambiar a ASAR BAJO, presione de nuevo el botón BROIL
HI/LO (ASAR ALTO/BAJO).
3. Presione el botón START (INICIO).
4. Al concluir el asado, presione el botón CLEAR/OFF (BORRAR/APA-
GAR).
Si su horno está conectado a 208 Volts, puede asar filetes a tér-
mino rojo precalentando el asador y colocando la parrilla del
horno una posición más alta.
Cómo programar el horno para asar
Modelos con una perilla de temperatura para el horno
1. Coloque la carne o pescado sobre una rejilla para asar y ésta a
su vez sobre una charola diseñada para asar.
2. Siga las posiciones sugeridas para la parrilla de la "Guía para
asar".
3. Cierre la puerta del horno.
4. Gire la perilla del control de temperatura del horno hasta la posi-
ción BROIL (ASAR).
5. Al concluir el asado, gire la perilla del control de temperatura del
horno hasta la posición OFF (APAGAR).
Instrucciones de
seguridad
Instrucciones de
operación
Cuidado y limpieza
Solución
de problemas
Servicio
al consumidor
Instrucciones de
instalación
13
Asegúrese de que el reloj se en-
cuentre ajustado con la hora
correcta del día.
Usando el reloj, el timer y el contacto de conveniencia
No todas las funciones se incluyen en todos los modelos.
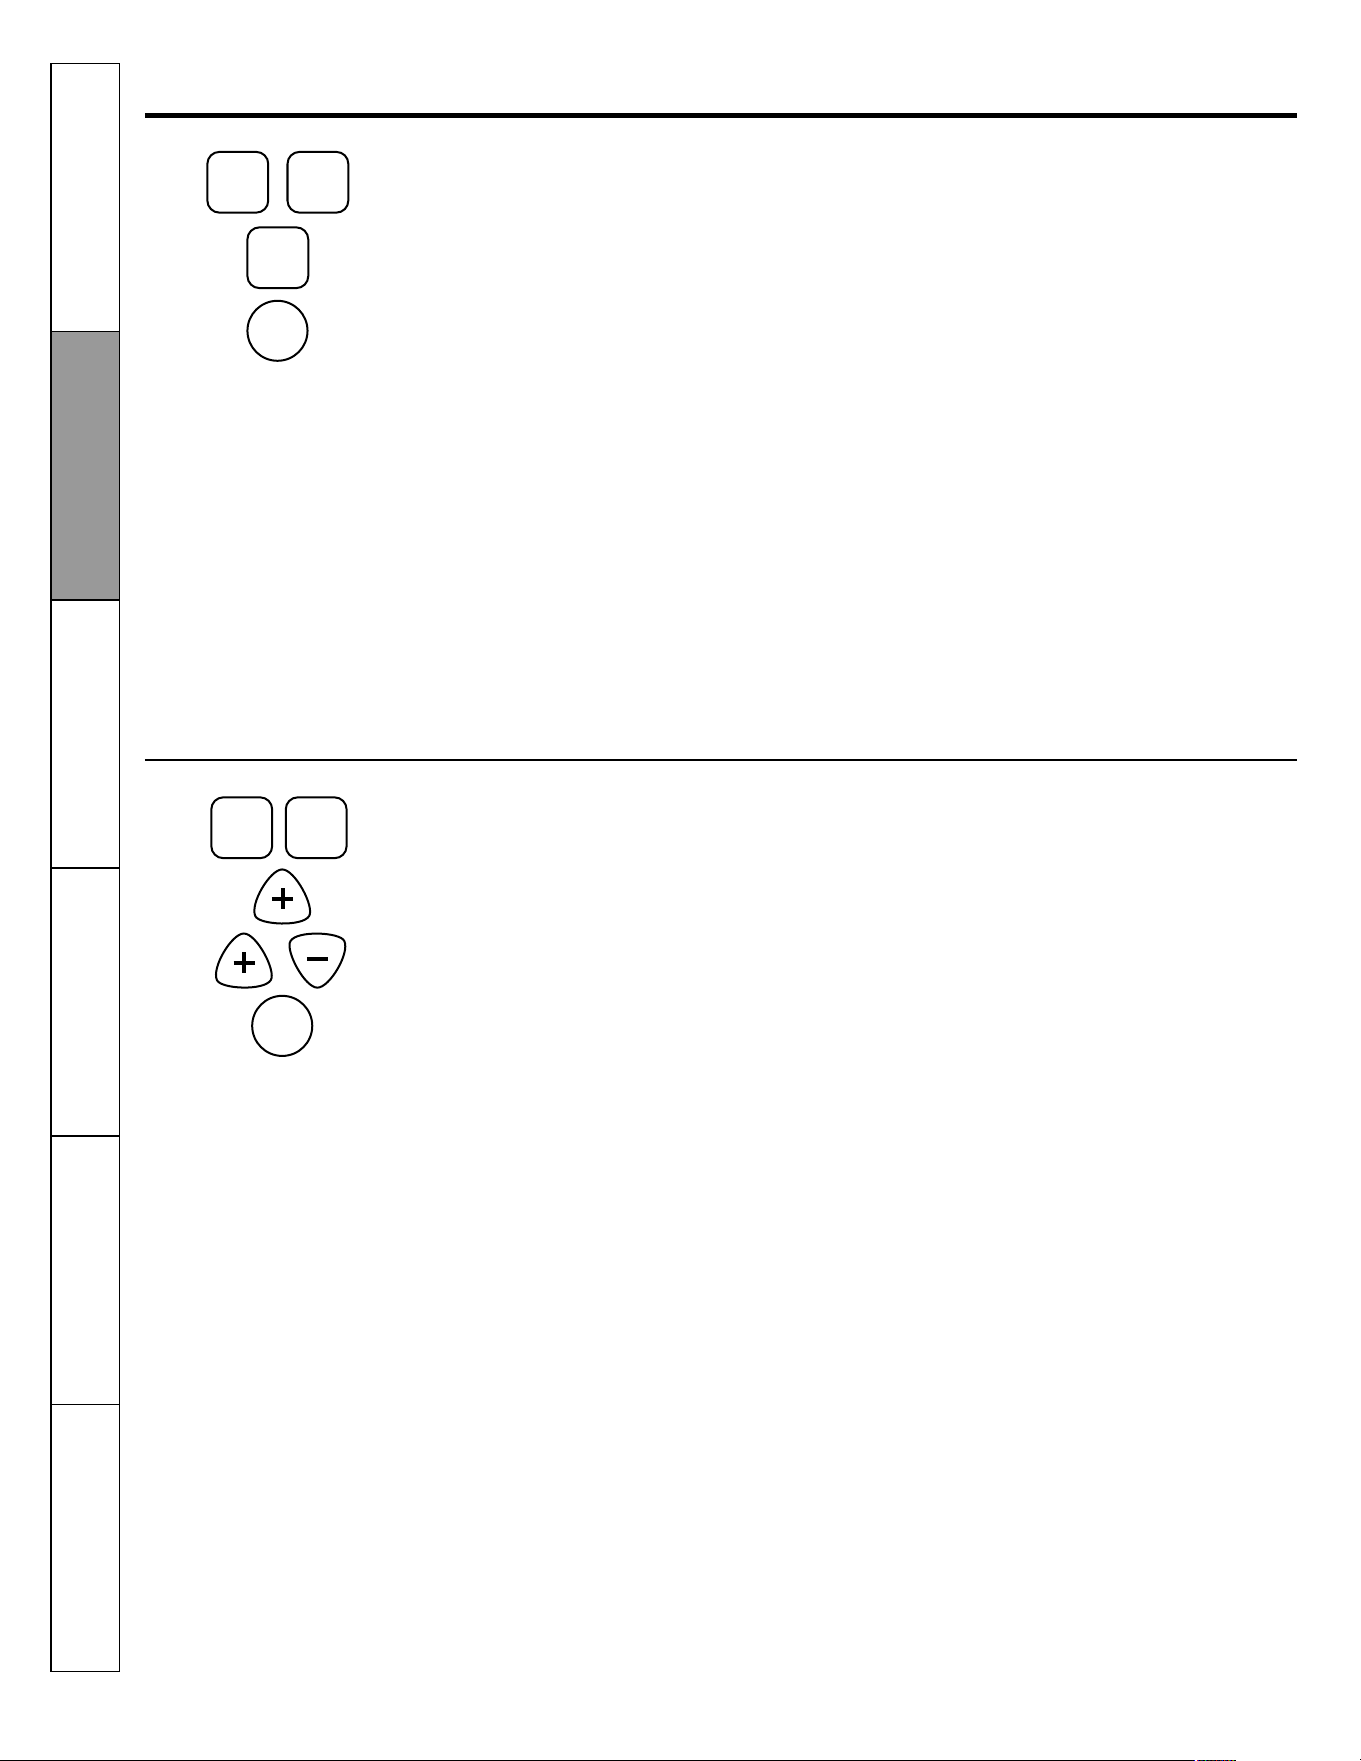
Para ajustar el reloj
Para programar el timer
El timer funciona como timer de
minutos solamente.
El botón APAGAR (OFF) no afec-
ta al timer.
(algunos modelos)
El reloj debe ajustarse a la hora correcta del día
para que las funciones automáticas por tiempo
del horno funcionen apropiadamente. La hora
del día no puede cambiarse durante un horneo
por tiempo ni durante un ciclo de autolimpieza.
1. Mantenga presionado por 3 segundos el bo-
tón TIMER.
2. Presione los botones + o -.
Si no se presiona el botón + ni el botón - dentro
de un periodo de un minuto después de haber
presionado el botón TIMER, entonces la pantalla
regresa al ajuste original. Si esto sucede, presio-
ne el botón TIMER y reingrese la hora del día.
3. Presione el botón START/ON (INICIO/ENCEN-
DER) hasta que la hora del día sea mostrada
en la pantalla. Esto ingresa la hora y arranca
al reloj.
Para consultar la hora del día cuando la pantalla
está mostrando otra información, simplemente
presione el botón TIMER. La pantalla muestra la
hora del día hasta que se presiona otro botón.
El timer no controla operaciones del horno. El
tiempo máximo que acepta el timer es de 9 ho-
ras con 59 minutos.
1. Presione el botón TIMER.
2. Presione los botones + o - hasta que la canti-
dad de tiempo que usted desea aparezca en
la pantalla. La cantidad máxima de tiempo
que puede ingresarse en minutos es de 59.
Los tiempos mayores que 59 minutos deben
ingresarse como horas con minutos.
Si usted se equivoca, presione el botón TIMER y
comience de nuevo.
3. Presione el botón START/ON (INICIO/ENCEN-
DER). Se inicia la cuenta regresiva, aunque la
pantalla no cambia sino hasta que ha trans-
currido un minuto.
4. Cuando el timer alcanza :00, el control elec-
trónico emite 3 bips seguidos de un solo bip
cada 6 segundos hasta que se presione el bo-
tón TIMER.
(INICIO)
TIMER
START
MINUTERIE
(TIMER)
(INICIO)
TIMER
START
MINUTERIE
(TIMER)
Instrucciones de
seguridad
Instrucciones de
operación
Cuidado y limpieza
Solución
de problemas
Servicio
al consumidor
Instrucciones de
instalación

14
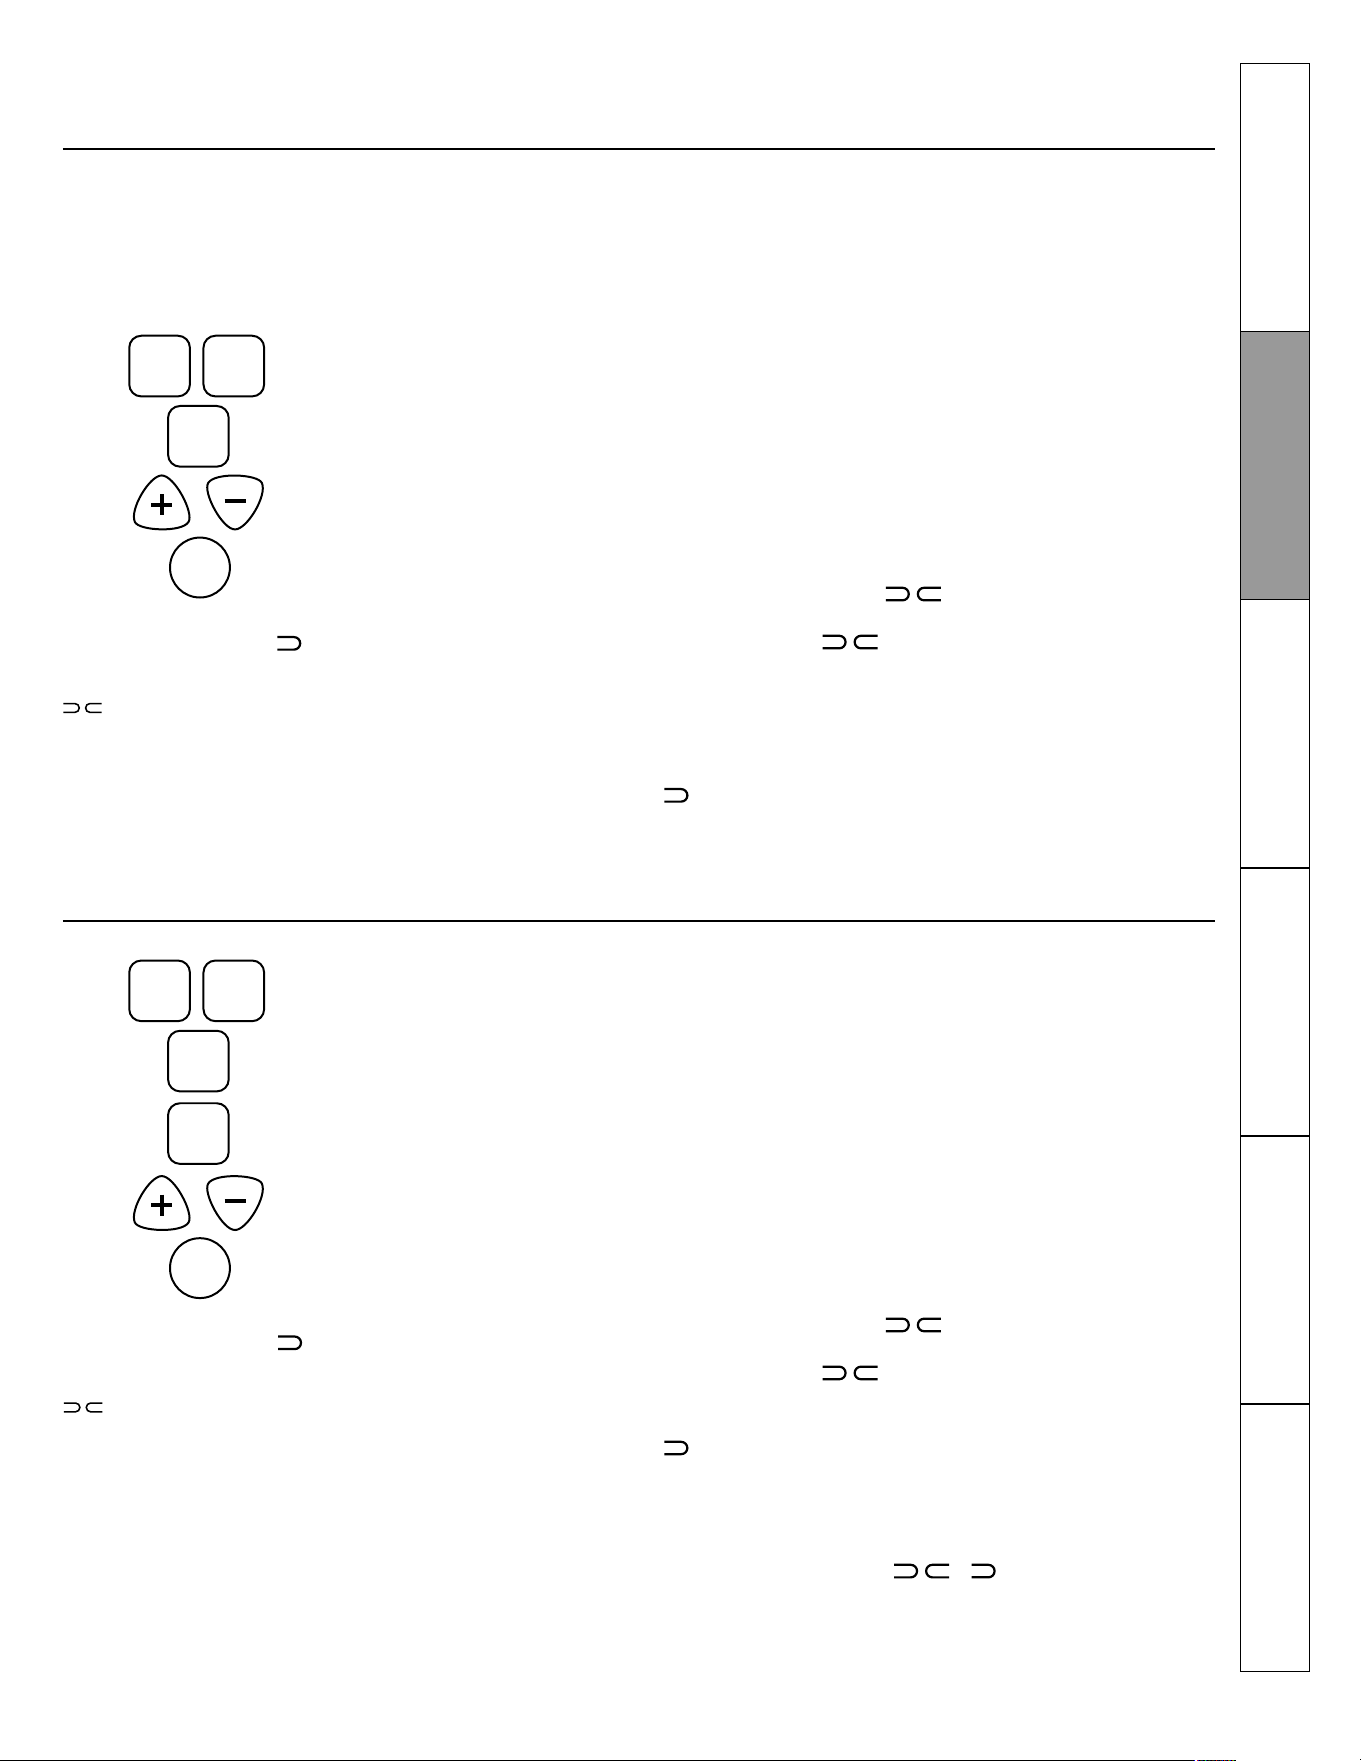
Para reiniciar el timer
Para cancelar el timer
Presione dos veces el botón TIMER.
Apagón
Tonos de fin de ciclo (algunos modelos)
Usando el reloj, el timer y el contacto de conveniencia
No todas las funciones se incluyen en todos los modelos.
(algunos modelos)
Si la pantalla aún muestra el tiempo restante, us-
ted puede editar el timer presionando el botón
TIMER, después los botones + o - hasta que el
tiempo que usted desea aparezca en la pantalla.
Si el tiempo restante no aparece en pantalla (la
pantalla muestra el reloj, inicio retrasado o tiem-
po de cocción), llame el tiempo restante a panta-
lla presionando el botón TIMER y después los bo-
tones + o - para ingresar el tiempo nuevo que us-
ted desea.
Borre los tonos presionando el botón de la fun-
ción que está usted usando.
Si la pantalla muestra una hora del día parpa-
deando, entonces usted ha experimentado un
apagón. Reajuste el reloj.
Para reprogramar el reloj, presione dos veces el
botón TIMER. Ingrese la hora correcta del día pre-
sionando los botones + o -. Presione el botón
START/ON (INICIO/ENCENDER).
Contacto eléctrico de conveniencia (en algunos modelos)
El contacto eléctrico de conveniencia de 120 V
ubicado en la parte superior del copete puede
usarse para conectar aparatos eléctricos peque-
ños.
Cuando use este contacto eléctrico, asegúrese
de que el cordón eléctrico no descanse sobre o
cerca de un quemador. Si el quemador estuviera
encendido, el cordón eléctrico se dañará.
Para reiniciar el disyuntor de circuitos, presione
el interruptor que se encuentra cerca del contac-
to eléctrico, en la parte superior del copete.
TIMER
MINUTERIE
COOK TIME
TEMPS DE
CUISSON
(TIMER)
(TIEMPO DE
COCCIÓN)
o bien
Instrucciones de
seguridad
Instrucciones de
operación
Cuidado y limpieza
Solución
de problemas
Servicio
al consumidor
Instrucciones de
instalación
15
Usando las funciones de horneo y rostizado por tiempo
NOTA: Los alimentos que se estropean fácilmente, como la leche, huevos, pescado, rellenos, las aves y el puerco no deben dejarse repo-
sar más de 1 hora antes o después de cocinarlos. La temperatura ambiente promueve el crecimiento de bacterias nocivas. Asegúrese de
que la luz del horno esté apagada ya que el calor del foco acelera el crecimiento de las bacterias nocivas.
Cómo programar un inicio inmediato y apagado automático
El horno enciende inmediatamente y cocina du-
rante un periodo de tiempo seleccionado. Al fina-
lizar el tiempo de cocción, el horno se apaga au-
tomáticamente.
1. Presione el botón BAKE (HORNEAR).
2. Use los botones + o - para programar la tem-
peratura deseada para el horno.
3. Presione el botón COOK TIME (TIEMPO DE
COCCIÓN).
NOTA: Si su receta requiere precalentamiento,
entonces podría ser necesario agregar un tiempo
adicional.
4. Presione los botones + o - para ingresar el
tiempo para hornear.
La pantalla muestra la temperatura para el hor-
no y el tiempo de cocción que usted ingresó.
5. Presione el botón START/ON (INICIO/ENCEN-
DER).
La pantalla muestra la temperatura que ingresó
para el horno así como la cuenta regresiva del
tiempo de cocción. La pantalla comienza a cam-
biar una vez que el horno alcanza una tempera-
tura de 100 ºF (37,8 ºC).
El horno continúa cocinando durante el periodo
de tiempo programado, después se apaga auto-
máticamente.
6. Presione el botón CLEAR/OFF (BORRAR/APA-
GAR) para borrar la pantalla.
Cómo establecer un inicio retrasado y apagado automático
Usted puede programar el control del horno para
retrasar el inicio de la cocción, cocina durante un
periodo de tiempo seleccionado y después se
apaga automáticamente.
Asegúrese de que el reloj muestra la hora correc-
ta del día.
1. Presione el botón BAKE (HORNEAR).
2. Use los botones + o - para ingresar la tempe-
ratura deseada para el horno.
3. Presione el botón COOK TIME (TIEMPO DE
COCCIÓN).
NOTA: Si su receta requiere de un precalenta-
miento, podría ser necesario agregar un tiempo
adicional de cocción.
4. Presione los botones + o - para ingresar la
cantidad deseada para el tiempo de cocción.
5. Presione el botón START TIME (HORA DE INI-
CIO).
6. Usando los botones + o - ingrese la hora del
día en la que desea que el horno encienda y
comience a cocinar.
7. Presione el botón START/ON (INICIO/ENCENDI-
DO).
NOTA: Se escucha un tono de atención si usted
está usando hornear por tiempo y no presiona el
botón START/ON (INICIO/ENCENDER) después de
usar la temperatura para hornear.
Si usted desea revisar los tiempos que ha progra-
mado, presione el botón START TIME (HORA DE
INICIO) para revisar la hora de inicio, o presione
COOK TIME (TIEMPO DE COCCIÓN) para revisar la
cantidad de tiempo de cocción que ha progra-
mado.
Cuando el horno se enciende a la hora del día
que usted programó, la pantalla muestra la tem-
peratura del horno que cambia (comenzando
desde 100 ºF) así como la cuenta regresiva del
tiempo programado.
Al finalizar el tiempo de cocción, el horno se apa-
ga y se escucha el tono de fin de ciclo.
Presione el botón CLEAR/OFF (BORRAR/APAGAR)
para borrar la pantalla.
(algunos modelos)
BAKE
COOK
TIME
START
CLEAR
OFF
HORNEAR
(TIEMPO
DE COCCIÓN)
INICIO
(BORRAR
APAGAR)
(HORNEAR)
(TIEMPO
DE COCCIÓN)
(HORA
DE INICIO)
(HORA
DE INICIO)
(INICIO)
(BORRAR
APAGAR)
CLEAR
OFF
START
TIME
START
START
TIME
COOK
TIME
BAKE
Instrucciones de
seguridad
Instrucciones de
operación
Cuidado y limpieza
Solución
de problemas
Servicio
al consumidor
Instrucciones de
instalación

16
Funciones especiales del control del horno
El nuevo control Touch Pad cuenta con funciones adicionales que usted puede usar. Las siguientes son las funciones y cómo las puede
activar.
El modo de funciones especiales puede activarse solamente cuando la pantalla muestra la hora del día. Estas funciones especiales per-
manecen en la memoria del control hasta que se repiten los pasos.
Cuando la pantalla muestra su selección, presione el botón START (INICIO). Las funciones especiales permanecen en memoria después de
un apagón, exceptuando la función Sabat, que tendrá que ser reingresada.
Apagar después de 12 horas
Con esta función, si usted olvida el horno encen-
dido, el control electrónico apaga automática-
mente el horno después de 12 horas para las
funciones de hornear o después de 3 horas para
las de asar.
Si usted desea APAGAR esta función, siga estos
pasos.
1. Presione los botones BAKE (HORNEAR) y
BROIL HI/LO (ASAR ALTO/BAJO) al mismo
tiempo por 3 segundos hasta que la pantalla
muestre SF.
2. Presione el botón START TIME (HORA DE INI-
CIO). La pantalla muestra "12 shdn" (apagar
después de 12 horas). Presione de nuevo el
botón START TIME (HORA DE INICIO) y la pan-
talla mostrará "no shdn" (no apagar después
de 12 horas).
3. Presione el botón START (INICIO) para activar
la elección "no apagar después de 12 horas"
y dejar el control programado en este modo
de función especial.
(HORA
DE INICIO)
(INICIO)
START
START
TIME
BAKE
BROIL
HI/LO
(HORNEAR)
(ASAR
ALTO/BAJO)
Selección de temperatura en grados Fahrenheit o Celsius
El control electrónico de su horno viene progra-
mado para seleccionar temperaturas en grados
Fahrenheit, pero usted puede cambiar esto para
usar grados Celsius.
1. Presione los botones BAKE (HORNEAR) y
BROIL HI/LO (ASAR ALTO/BAJO) al mismo
tiempo por 3 segundos hasta que la pantalla
muestre SF.
2. Presione los botones BROIL HI/LO (ASAR
ALTO/BAJO) y COOK TIME (TIEMPO DE COC-
CIÓN) al mismo tiempo por 2 segundos. La
pantalla muestra "F" (Fahrenheit).
3. Presione de nuevo los botones BROIL HI/LO
(ASAR ALTO/BAJO) y COOK TIME (TIEMPO DE
COCCIÓN) al mismo tiempo por 2 segundos.
La pantalla mostrará "C" (Fahrenheit).
4. Presione el botón START (INICIO).
Bloqueo del control del horno
El control electrónico le permite bloquear el te-
clado de manera que no pueden activarse los
botones cuando se les presiona.
Si usted desea APAGAR esta función, siga estos
pasos.
1. Presione los botones BAKE (HORNEAR) y
BROIL HI/LO (ASAR ALTO/BAJO) al mismo
tiempo por 3 segundos hasta que la pantalla
muestre SF.
2. Presione el botón SELF CLEAN (AUTOLIMPIE-
ZA). La pantalla muestra "LOC OFF" (BLO-
QUEO APAGADO).
Presione de nuevo el botón SELF CLEAN (AU-
TOLIMPIEZA). La pantalla mostrará "LOC ON"
(BLOQUEO ENCENDIDO).
3. Presione el botón START (INICIO) para activar
la función de bloqueo del control y dejar el
control programado en este modo de función
especial.
Cuando esta función está activada y se presio-
nan los botones, el control electrónico emite un
bip y la pantalla muestra "LOC" (BLOQUEADO).
NOTA: El modo de bloqueo de control no afectará
a los botones TIMER/CLOCK (TIMER/RELOJ) ni
OVEN LIGHT ON/OFF (LUZ DEL HORNO ENCEN-
DER/APAGAR).
(HORNEAR)
(TIEMPO
DE COCCIÓN)
COOK
TIME
BAKE
(ASAR
ALTO/BAJO)
BROIL
HI/LO
START
BROIL
HI/LO
(ASAR
ALTO/BAJO)
(TIEMPO
DE COCCIÓN)
COOK
TIME
(ASAR
ALTO/BAJO)
BROIL
HI/LO
(HORNEAR)
BAKE
(AUTOLIMPIEZA)
SELF
CLEAN
START
BROIL
HI/LO
(ASAR
ALTO/BAJO)
Instrucciones de
seguridad
Instrucciones de
operación
Cuidado y limpieza
Solución
de problemas
Servicio
al consumidor
Instrucciones de
instalación
17
Funciones especiales del control del horno
Tonos al final de un ciclo de cocción controlado por tiempo
Al final de un ciclo controlado por tiempo, se es-
cuchan 3 bips cortos, seguidos de un solo bip
cada 6 segundos hasta que se presiona el botón
CLEAR/OFF (BORRAR/APAGAR). Este tono conti-
nuo cada 6 segundos puede cancelarse.
Para cancelar el bip continuo cada 6 segundos:
1. Presione los botones BAKE (HORNEAR) y
BROIL HI/LO (ASAR ALTO/BAJO) al mismo
tiempo por 3 segundos hasta que la pantalla
muestre SF.
2. Presione el botón BROIL HI/LO (ASAR ALTO/
BAJO). La pantalla muestra "CON BEEP" (BIP
CONTINUO). Presione de nuevo el botón
BROIL HI/LO (ASAR ALTO/BAJO). La pantalla
mostrará "BEEP" (esto cancela el bip cada 6
segundos).
3. Presione el botón START (INICIO).
(INICIO)
START
BAKE
BROIL
HI/LO
(HORNEAR)
(ASAR
ALTO/BAJO)
BROIL
HI/LO
(ASAR
ALTO/BAJO)
Reloj de 12 horas, 24 horas o apagado
El control electrónico viene programado para
usar el reloj de 12 horas. Si usted prefiere tener el
formato militar de 24 horas o apagar el reloj
para que no aparezca en pantalla, siga estos pa-
sos:
1. Presione los botones BAKE (HORNEAR) y
BROIL HI/LO (ASAR ALTO/BAJO) al mismo
tiempo por 3 segundos hasta que la pantalla
muestre SF.
2. Presione una sola vez el botón TIMER/CLOCK
(TIMER/RELOJ). La pantalla muestra "12 hr". Si
esta la opción que usted desea, entonces
presione el botón START (INICIO).
Presione de nuevo el botón TIMER/CLOCK (TI-
MER/RELOJ) para cambiar al formato militar
de 24 horas. Si esta la opción que usted de-
sea, entonces presione el botón START (INI-
CIO).
Presione de nuevo el botón TIMER/CLOCK (TI-
MER/RELOJ) para apagar la pantalla del reloj.
La pantalla muestra la palabra "OFF" (APAGA-
DO). Si esta la opción que usted desea, en-
tonces presione el botón START (INICIO).
NOTA: Si el reloj se encuentra en el modo "apa-
gado", entonces usted no podrá usar la función
DELAY START (RETRASAR INICIO).
(INICIO)
START
BAKE
BROIL
HI/LO
(HORNEAR)
(ASAR
ALTO/BAJO)
TIMER
CLOCK
HOLD 3 SEC.TO
SET CLOCK
(TIMER
RELOJ)
Instrucciones de
seguridad
Instrucciones de
operación
Cuidado y limpieza
Solución
de problemas
Servicio
al consumidor
Instrucciones de
instalación
18
Funciones especiales del control del horno
Cocinar y esperar
El control de su horno nueve viene con la función
"cocinar y esperar" que mantiene calientes sus
alimentos cocinados hasta por 3 horas una vez
que ha finalizado HORNEAR POR TIEMPO o ROS-
TIZAR POR TIEMPO.
NOTA: Esta función solamente se puede progra-
mar para trabajar con HORNEAR POR TIEMPO o
ROSTIZAR POR TIEMPO (consulte la sección
"Usando las funciones de hornear por tiempo o
rostizar por tiempo"). Después de que HORNEAR
POR TIEMPO o ROSTIZAR POR TIEMPO se ha de-
tenido automáticamente, la función COOK AND
HOLD (COCINAR Y ESPERAR) inicia automática-
mente.
Para activar esta función para usarla después de
HORNEAR POR TIEMPO o ROSTIZAR POR TIEMPO,
siga estos pasos:
1. Presione los botones BAKE (HORNEAR) y
BROIL HI/LO (ASAR ALTO/BAJO) al mismo
tiempo por 3 segundos hasta que la pantalla
muestre SF.
2. Presione el botón COOK TIME (TIEMPO DE
COCCIÓN). La pantalla muestra "Hid OFF" (CO-
CINAR Y ESPERAR APAGADO).
Presione de nuevo el botón COOK TIME (TIEM-
PO DE COCCIÓN) para activar la función. La
pantalla mostrará "Hid ON" (COCINAR Y ESPE-
RAR ENCENDIDO).
3. Presione el botón START (INICIO) para activar
la función COOK AND HOLD (COCINAR Y ESPE-
RAR) y dejar el control programado en este
modo de función especial.
Cambiando la velocidad de los botones + y -
Mientras usted usa los botones + y - para ingre-
sar un tiempo o una temperatura, podría notar
que la pantalla cambia lentamente. Esta función
especial le permite a usted cambiar la velocidad.
Para establecer la velocidad que usted prefiera,
siga estos pasos:
1. Presione los botones BAKE (HORNEAR) y
BROIL HI/LO (ASAR ALTO/BAJO) al mismo
tiempo por 3 segundos hasta que la pantalla
muestre SF.
2. Presione el botón "+". La pantalla le muestra
la velocidad establecida con un número que
puede ser desde 1 hasta 5.
3. Presione de nuevo el botón "+" para aumen-
tar la velocidad. Puede hacerlo hasta llegar a
la posición "5".
Presione el botón "-" para disminuir la veloci-
dad. Puede hacerlo hasta llegar a la posición
"1".
4. Presione el botón START (INICIO) para activar
la función y dejar el control establecido en
este modo especial.
(INICIO)
START
BAKE
BROIL
HI/LO
(HORNEAR)
(ASAR
ALTO/BAJO)
COOK
TIME
(TIEMPO DE
COCCIÓN)
(HORNEAR)
BAKE
START
BROIL
HI/LO
(ASAR
ALTO/BAJO)
(INICIO)
Instrucciones de
seguridad
Instrucciones de
operación
Cuidado y limpieza
Solución
de problemas
Servicio
al consumidor
Instrucciones de
instalación
19
Usando la función Sabat
(Diseñada para usarse en las festividades y Sabat judíos) (algunos modelos)
Cómo programar un horneado rostizado normal bajo el modo Sabat
NOTA: Para comprender cómo trabaja el control
del horno, practique usando horneado normal
(no Sabat) antes de ingresar al modo Sabat.
Asegúrese de que el reloj muestre la hora correc-
ta del día.
1. Presione sin soltar los botones BAKE (HOR-
NEAR) y BROIL HI/LO (ASAR ALTO/BAJO) al mis-
mo tiempo, hasta que la pantalla muestre SF.
NOTA: Si la pantalla muestra la información
para hornear o rostizar, esto significa que los
botones BAKE (HORNEAR) y BROIL HI/LO (ASAR
ALTO/BAJO) no fueron presionados al mismo
tiempo. Presione el botón CLEAR/OFF (BO-
RRAR/APAGAR) y comience de nuevo.
2. Presione el botón START TIME (HORA DE INICIO)
hasta que la "Sabbath" aparezca en la panta-
lla.
3. Presione el botón START (INICIO) y
aparece
en la pantalla.
4. Presione el botón BAKE (HORNEAR). No se es-
cuchará ninguna señal.
5. La temperatura inicial está preestablecida en
350 ºF presione los botones + o - para incre-
mentar o disminuir la temperatura en seg-
mentos de 5 ºF La temperatura puede estable-
cerse entre 170 ºF (77 ºC) y 550 ºF (287 ºC) No
se dará ninguna señal ni temperatura
6. Presione el botón START (INICIO).
7. Después de un retraso de tiempo aleatorio de
entre 30 segundos y 1 minuto aproximada-
mente,
aparece en pantalla indicando
que el horno está horneando o rostizando. Si
no aparece en la pantalla, comience de
nuevo desde el paso 4.
Para ajustar la temperatura del horno, presione
BAKE (HORNEAR) y después los botones + o -
para incrementar o disminuir la temperatura en
segmentos de 5 ºF Presione el botón START (INI-
CIO).
NOTA: Los botones CLEAR/OFF (BORRAR/APA-
GAR) y COOK TIME (TIEMPO DE COCCIÓN) perma-
necen activos durante la función Sabat.
La función Sabat puede usarse para hornear o rostizar solamente. No puede usarse para asar, autolimpieza ni retrasar el inicio de una
cocción.
NOTA: La luz del horno se enciende automáticamente (en algunos modelos) al abrir la puerta, y se apaga al cerrarla. El foco puede remo-
verse. Consulte la sección "Reemplazo de la luz del horno". En modelos con un interruptor de iluminación en el panel de controles, la luz
del horno puede encenderse y dejarse así.
Cuando la pantalla muestra el
horno está programado para Sa-
bat. Cuando la pantalla muestra
entonces el horno está hor-
neando o rostizando.
Cuando la pantalla muestra el
horno está programado para Sa-
bat. Cuando la pantalla muestra
entonces el horno está hor-
neando o rostizando.
Cómo programar hornear o rostizar por tiempo - Inicio inmediato y apagado
automático bajo el modo Sabat
NOTA: Para comprender cómo trabaja el control
del horno, practique usando inicio automático y
apagado automático normal (no Sabat) antes de
ingresar al modo Sabat.
Asegúrese de que el reloj muestre la hora correc-
ta del día.
1. Presione sin soltar los botones BAKE (HOR-
NEAR) y BROIL HI/LO (ASAR ALTO/BAJO) al mis-
mo tiempo, hasta que la pantalla muestre SF.
NOTA: Si la pantalla muestra la información
para hornear o rostizar, esto significa que los
botones BAKE (HORNEAR) y BROIL HI/LO (ASAR
ALTO/BAJO) no fueron presionados al mismo
tiempo. Presione el botón CLEAR/OFF (BO-
RRAR/APAGAR) y comience de nuevo.
2. Presione el botón START TIME (HORA DE INICIO)
hasta que Sabbath aparezca en pantalla.
3. Presione el botón START (INICIO) y
aparece
en pantalla.
4. Presione el botón COOK TIME (TIEMPO DE COC-
CIÓN).
5. Presione los botones + o - para establecer el
tiempo de cocción deseado entre 1 minuto y 9
horas con 59 minutos. La pantalla muestra el
tiempo de cocción ingresado.
6. Presione el botón START (INICIO).
7. Presione el botón BAKE (HORNEAR). No se es-
cucha ninguna señal.
8. La temperatura inicial se establece automáti-
camente en 350 ºF. Presione los botones + o -
para incrementar o disminuir la temperatura
en segmentos de 5 ºF. La temperatura puede
programarse entre 170 ºF y 550 ºF No se dará
ninguna señal ni temperatura.
9. Presione el botón START (INICIO).
10. Después de un retraso aleatorio de tiempo de
entre 30 segundos y 1 minuto aproximada-
mente,
aparece en pantalla indicando
que el horno está horneando o rostizando. Si
no aparece en la pantalla, comience de
nuevo desde el paso 7.
Para ajustar la temperatura del horno, presione
el botón BAKE (HORNEAR) y después los botones
+ o - para incrementar o disminuir la temperatu-
ra en segmentos de 5 ºF Presione el botón START
(INICIO).
Cuando el horno termina de cocinar, la pantalla
cambia de a y aparece "0:00", indi-
cando que el horno se ha apagado pero aún se
encuentra en el modo Sabat. Retire sus alimen-
tos cocinados.
(HORNEAR)
BAKE
START
BROIL
HI/LO
(ASAR
ALTO/BAJO)
(INICIO)
START
TIME
(HORA DE
INICIO)
(HORNEAR)
BAKE
START
BROIL
HI/LO
(ASAR
ALTO/BAJO)
(INICIO)
START
TIME
(HORA DE
INICIO)
COOK
TIME
(TIEMPO DE
COCCIÓN)
Instrucciones de
seguridad
Instrucciones de
operación
Cuidado y limpieza
Solución
de problemas
Servicio
al consumidor
Instrucciones de
instalación
20
Cómo salir de la función Sabat
1. Presione el botón CLEAR/OFF (BORRAR/APA-
GAR).
2. Si el horno está cocinando, espere un periodo
de tiempo aleatorio de entre 30 segundos y 1
minuto aproximadamente, hasta que la pan-
talla muestre solamente .
3. Presione sin soltar los botones BAKE (HOR-
NEAR) y BROIL HI/LO (ASAR ALTO/BAJO) al
mismo tiempo, hasta que la pantalla muestre
SF.
4. Presione varias veces el botón START TIME
(HORA DE INICIO) hasta que la pantalla mues-
tre "12 shdn" o no shdn. "12 shdn" indica que
el horno se apagará automáticamente des-
pués de 12 horas. "no shdn" indica que el hor-
no no se apagará automáticamente.
5. Presione el botón START (INICIO).
NOTA: Si ocurre un apagón mientras el horno es-
taba en la función Sabat, entonces el horno se
apaga automáticamente y debe reinicializarse.
Usando la función Sabat
(Diseñada para usarse en las festividades y Sabat judíos) (algunos modelos)
(HORNEAR)
BAKE
START
BROIL
HI/LO
(ASAR
ALTO/BAJO)
(INICIO)
START
TIME
(HORA DE
INICIO)
CLEAR
OFF
(BORRAR
APAGAR)
Conversión de temperaturas
140 150 170 200 250 275 300 325 350 375 400 425 450 475 500 525 550
60 65 75 95 120 135 150 160 175 190 205 220 230 245 260 275 290
º Fahrenheit
º Celsius
Apagón
Si encuentra el reloj parpadeando en la pantalla,
esto indica que usted ha experimentado un apa-
gón. Reprograme el reloj.
Para reprogramar el reloj, presione el botón TI-
MER. Ingrese la hora correcta del día presionando
los botones + ó -. Presione el botón START/ON
(INICIO/ENCENDER).
Instrucciones de
seguridad
Instrucciones de
operación
Cuidado y limpieza
Solución
de problemas
Servicio
al consumidor
Instrucciones de
instalación

21
El tipo de margarina afecta el desempeño de horneado
Indicador
Ajuste usted mismo el termostato del horno
Quizá su horno nuevo cocine diferente que el que reemplazó. Use su horno nuevo durante unas pocas semanas para familiarizarse con
él. Si usted piensa que su horno nuevo trabaja demasiado caliente o demasiado frío, entonces usted mismo puede ajustar el termostato.
No use termómetros como los que venden en las tiendas de víveres para revisar la temperatura de su horno. Esos termómetros pueden
variar de 20 ºF a 40 ºF.
NOTA: Este ajuste no afectará las temperaturas de asado ni de autolimpieza (en algunos modelos). El ajuste será retenido en memoria
después de un apagón.
Para ajustar el termostato que trae este tipo de perilla
1. Jale la perilla de control de temperatura del
horno para retirarla del vástago. Mire la parte
trasera de la perilla y fíjese en la posición ac-
tual antes de hacer cualquier ajuste.
2. Afloje los dos tornillos que se encuentran en
la parte trasera de la perilla.
3. Para incrementar la temperatura del horno,
mueva el indicador hacia las palabras MAKE
HOTTER (HACER MÁS CALIENTE).
Para disminuir la temperatura del horno, gire el
indicador hacia las palabras MAKE COOLER
(HACER MÁS FRÍO).
Cada muesca cambia la temperatura del horno
unos 10 ºF.
1. Presione los botones BAKE (HORNEAR) y
BROIL HI/LO (ASAR ALTO/BAJO) al mismo
tiempo, por 2 segundos hasta que la pantalla
muestre SF.
2. Presione el botón BAKE (HORNEAR). La panta-
lla muestra un número de dos dígitos.
3. La temperatura del horno puede ajustarse
hasta 35 ºF más caliente o más fría. Presione
el botón + para incrementar la temperaturas
en segmentos de 1 grado.
Presione el botón - para hacer disminuir la
temperatura en segmentos de 1 grado.
4. Apriete los tornillos.
5. Reinstale la perilla, haciendo coincidir el área
plana de la perilla con el vástago.
Para ajustar el termostato en otros modelos
Frente de la perilla TEMPERATURA
DE HORNO (la apariencia de la peri-
lla puede variar).
Parte trasera de la perilla TEMPE-
RATURA DE HORNO.
4. Cuando usted ha hecho el ajuste, presione el
botón START/ON INICIO/ENCENDER para re-
gresar a la pantalla que muestra la hora del
día. Use su horno como lo haría normalmen-
te.
NOTA: Este ajuste no afectará las temperaturas
para asar ni para autolimpieza. Será retenido en
memoria aún después de un apagón.
Nota: Excepto modelo JCAS445
(HORNEAR)
BAKE
CUIRE
START/
ON
DÉPART
(ASAR
ALTO/BAJO)
(INICIO)
BROIL
GRILL
(HORNEAR)
BAKE
CUIRE
La mayoría de las recetas para hornear se han
desarrollado usando productos altos en grasa
como mantequilla o margarina (80% de grasa). Si
usted disminuye la grasa, la receta puede no
proporcionar los mismos resultados que con un
producto más alto en grasa.
Si prepara los pasteles, pays, pastas, galletas o
dulces con productos untables bajos en grasa,
entonces las recetas pueden fallar. Mientras más
bajo sea el contenido de grasa de un producto
untable, más evidentes se vuelven estas diferen-
cias.
Los estándares federales de los Estados Unidos
de América requieren que los productos etique-
tados "margarina" contengan un 80% por lo me-
nos de grasa por peso. Los untables de bajo con-
tenido en grasa por otro lado, contienen menos
grasa y más agua. El alto contenido de humedad
de estos productos untables afecta la textura y
sabor de los alimentos que se hornean. Para ob-
tener los mejores resultados con sus recetas fa-
voritas viejas, use margarina, mantequilla o unta-
bles que contengan por lo menos 70% de aceite
vegetal.
Instrucciones de
seguridad
Instrucciones de
operación
Cuidado y limpieza
Solución
de problemas
Servicio
al consumidor
Instrucciones de
instalación
22
Usando el horno con autolimpieza
La puerta del horno debe estar cerrada y todos los controles deben estar en las posiciones correctas para que el
ciclo trabaje apropiadamente.
Antes de un ciclo de limpieza
Cómo programar el horno para la limpieza
Limpie la suciedad pesada del piso
del horno (la apariencia puede va-
riar).
(algunos modelos)
El horno debe estar frío para poder programar el
ciclo de autolimpieza.
Durante el primer ciclo de autolimpieza, reco-
mendamos ventilar su cocina con una ventana
abierta o usar un ventilador o campana de venti-
lación.
Retire del horno la charola del asador, la rejilla del
asador, todos los utensilios para cocinar y papel
aluminio (si lo hay).
Las parrillas del horno brillantes, de color plata
(en algunos modelos) pueden someterse a una
autolimpieza, pero se obscurecerán, perderán su
lustre y se harán difíciles de deslizar.
No use productos abrasivos ni limpiadores para
hornos. Limpie la parte superior, lados y el exte-
rior de la puerta del horno con agua y jabón.
Asegúrese de que la cubierta del foco del horno
(en algunos modelos) se encuentre en su sitio y
que la luz esté apagada.
IMPORTANTE: La salud de algunas aves es extre-
madamente sensible a los vapores que se despi-
den durante el ciclo de autolimpieza de cualquier
horno. Mueva las aves a otra habitación bien
ventilada.
1. Presione el botón SELF CLEAN (AUTOLIMPIE-
ZA).
2. Usando los botones + o - ingrese el tiempo de
limpieza deseado, si es que usted desea un
tiempo diferente a 4 horas.
El tiempo normal de limpieza es de 4 horas. Us-
ted lo puede cambiar a cualquier periodo de
tiempo entre 3 horas y 5 horas, dependiendo de
qué tan sucio esté su horno.
3. Presione el botón START (INICIO).
La puerta del horno se bloquea automáticamen-
te. La pantalla muestra el tiempo de limpieza res-
tante. No es posible abrir la puerta del horno sino
hasta que la temperatura llegue por debajo de la
temperatura de bloqueo y el indicador luminoso
LOCKED DOOR (PUERTA BLOQUEADA) se apague.
Cuando el indicador LOCKED DOOR (PUERTA
BLOQUEADA) se apague, abra la puerta del hor-
no.
• Las palabras LOCK DOOR (PUERTA BLOQUEA-
DA) parpadean y el control electrónico del
horno emite señales en el caso de que usted
programe un ciclo de limpieza y olvida cerrar
la puerta del horno.
• Para detener un ciclo de limpieza, presione el
botón CLEAR/OFF (BORRAR/APAGAR). Cuando
el indicador LOCKED DOOR (PUERTA BLO-
QUEADA) se apaga indicando que el horno se
ha enfriado por debajo de la temperatura de
bloqueo, entonces podrá abrir la puerta.
(AUTOLIMPIEZA)
(INICIO)
SELF
CLEAN
START
Instrucciones de
seguridad
Instrucciones de
operación
Cuidado y limpieza
Solución
de problemas
Servicio
al consumidor
Instrucciones de
instalación

23
Cómo retrasar el inicio de una limpieza
Después de un ciclo de limpieza
1. Presione el botón SELF CLEAN (AUTOLIMPIEZA).
2. Usando los botones + o - ingrese el tiempo de-
seado para la limpieza.
3. Presione el botón START TIME (HORA DE INICIO).
4. Usando los botones + o - ingrese la hora del
día para que el ciclo de limpieza inicie.
5. Presione el botón START (INICIO).
Usted podría notar un poco de ceniza blanca en
el horno. Límpiela con un trapo húmedo después
de que el horno se enfríe.
Si quedan manchas blancas, remuévalas usando
con una fibra empapada en jabón y enjuague
completamente usando una mezcla de vinagre y
agua.
Estos depósitos son generalmente residuos de
sal que no pueden ser removidos por el ciclo de
limpieza.
Si el horno no está limpio después de un ciclo de
limpieza, entonces repita el ciclo.
• No se puede programar el horno para cocinar
sino hasta que el horno está lo suficiente-
mente frío para que la puerta se desbloquee.
• Si las parrillas se tornan difíciles de deslizar,
limpie los soportes para parrillas con aceite
para cocinar.
(AUTOLIMPIEZA)
SELF
CLEAN
START
(INICIO)
START
TIME
(HORA DE
INICIO)
La puerta del horno se bloquea automáticamen-
te. La pantalla muestra la hora del día en la que
dará inicio el ciclo de limpieza. No es posible abrir
la puerta del horno sino hasta que la temperatu-
ra llega por debajo de la temperatura de bloqueo
y el indicador luminoso LOCKED DOOR (PUERTA
BLOQUEADA) se apaga.
Cuando el indicador LOCKED DOOR (PUERTA BLO-
QUEADA) se apaga, usted podrá abrir la puerta
del horno.
Usando el horno con autolimpieza
La puerta del horno debe estar cerrada y todos los controles deben estar en las posiciones correctas para que el
ciclo trabaje apropiadamente.
(algunos modelos)
Instrucciones de
seguridad
Instrucciones de
operación
Cuidado y limpieza
Solución
de problemas
Servicio
al consumidor
Instrucciones de
instalación

24
Cuidado y limpieza de la estufa
Asegúrese de que el horno no esté conectado y de que las superficies se encuentren a temperatura ambiente antes de limpiar cualquier
parte de la estufa.
Interior de la puerta
• No permita que agua en exceso corra
dentro de agujeros o ranuras de la puerta.
• El agua y jabón normalmente harán el
trabajo. Las salpicaduras o derrames muy
pesados podrían necesitar limpieza con
un limpiador abrasivo suave. Pueden
usarse también fibras para tallar enjabo-
nadas y de alambre.
No permita que derrames de alimentos con
un alto contenido de azúcar o ácidos (como
leche, jitomate, chucrut, jugo de fruta o re-
lleno para pays) permanezcan sobre la su-
perficie. Causarán una mancha opaca aún
después de limpiarlos.
Exterior de la puerta
• Use agua y jabón para limpiar la parte su-
perior, laterales y frente de la puerta del
horno. Enjuague bien. Puede usar un lim-
piador para vidrios para limpiar el vidrio
del exterior de la puerta. No permita que
el agua gotee dentro de las ranuras de
ventilación.
• El derrame de marinadas, jugo de fruta,
salsa de tomate y caldos para bañar ali-
mentos que contienen ácidos pueden
causar decoloración y deben limpiarse in-
mediatamente. Cuando la superficie esté
fría, límpiela y enjuague.
• No use limpiadores para hornos, polvos
limpiadores ni abrasivos sobre el exterior
de la puerta.
El exterior del empaque
El empaque está diseñado con un claro en la
parte inferior para permitir una apropiada circu-
lación de aire.
Ya que el área por dentro del empaque se limpia
durante el ciclo de autolimpieza, usted no nece-
sita limpiar esta zona a mano en los modelos
con autolimpieza.
El área por fuera del empaque y del marco fron-
tal puede limpiarse con una fibra para tallar de
alambre enjabonada, agua caliente y detergen-
te. Enjuague bien usando una solución de vina-
gre y agua.
No frote ni limpie el empaque de la puerta, tiene
una resistencia a la abrasión extremadamente
baja.
Si usted nota que el empaque se está gastando,
deshilachado o dañado de cualquier manera o
si se ha movido de su lugar en la puerta, enton-
ces debe hacerlo reemplazar.
Instrucciones de
seguridad
Instrucciones de
operación
Cuidado y limpieza
Solución
de problemas
Servicio
al consumidor
Instrucciones de
instalación
Con los cuidados apropiados, el acabado de es-
malte porcelanizado en el interior, piso, costados
y parte superior del horno, permanecerá como
nuevo por muchos años.
Permita al aparato alcanzar temperatura am-
biente antes de limpiarlo. Le recomendamos usar
guantes de hule para limpiar el aparato.
Generalmente, una mezcla de jabón y agua es
suficiente para limpiar el aparato. La suciedad
acumulada puede requerir de un limpiador abra-
sivo suave. Las esponjas o fibras con jabón tam-
bién pueden resultar útiles.
IMPORTANTE: No permita que los derrames de
alimentos con alto contenido de azúcar o ácido
(como leche, jitomates, sauerkraut, jugo de fruta
o relleno de tartas), permanezcan sobre la super-
ficie, ya que pueden causar manchas que per-
manecerán aún después de limpiar el aparato.
El amoníaco de uso doméstico puede facilitar la
labor de aseo. Coloque 1/2 taza en un vaso o
Interior del horno (para modelos sin la función de autolimpieza)
traste poco profundo en el horno frío por una no-
che. Los gases emitidos por el amoníaco ayuda-
rán a aflojar la grasa o alimentos pegados.
Si es necesario, puede utilizar un limpiador para
hornos. Siga las instrucciones del paquete.
No rocíe limpiador para hornos sobre los cables
eléctricos e interruptores ya que podría causar un
corto circuito y resultar en chispas o incendio.
No permita que se acumule una película de lim-
piador sobre el sensor de temperatura, ya que
podría causar que el horno trabaje inapropiada-
mente. (El sensor se localiza en la parte superior
del horno). Limpie el sensor cuidadosamente con
un trapo después de cada limpieza, procurando
no moverlo, pues un cambio en su posición podría
afectar el desempeño del horno.
No rocíe con limpiador la puerta del horno, asas, o
cualquier superficie externa del horno, gabinetes
o superficies pintadas. Los limpiadores pueden
dañar estas superficies.
Riesgo de Volcaduras
Un niño o un adulto pueden hacer volcar la estufa y morir.
Verifique que el soporte antivolcaduras se haya instalado y
ajustado correctamente.
Asegúrese de que el dispositivo antivolcaduras sea reinstalado
cuando se mueva la estufa. No utilice la estufa sin que el
dispositivo antivolcaduras esté instalado y ajustado.
Si estas instrucciones no se siguen, como resultado se podrá
producir la muerte o quemaduras graves de niños y adultos.
ADVERTENCIA
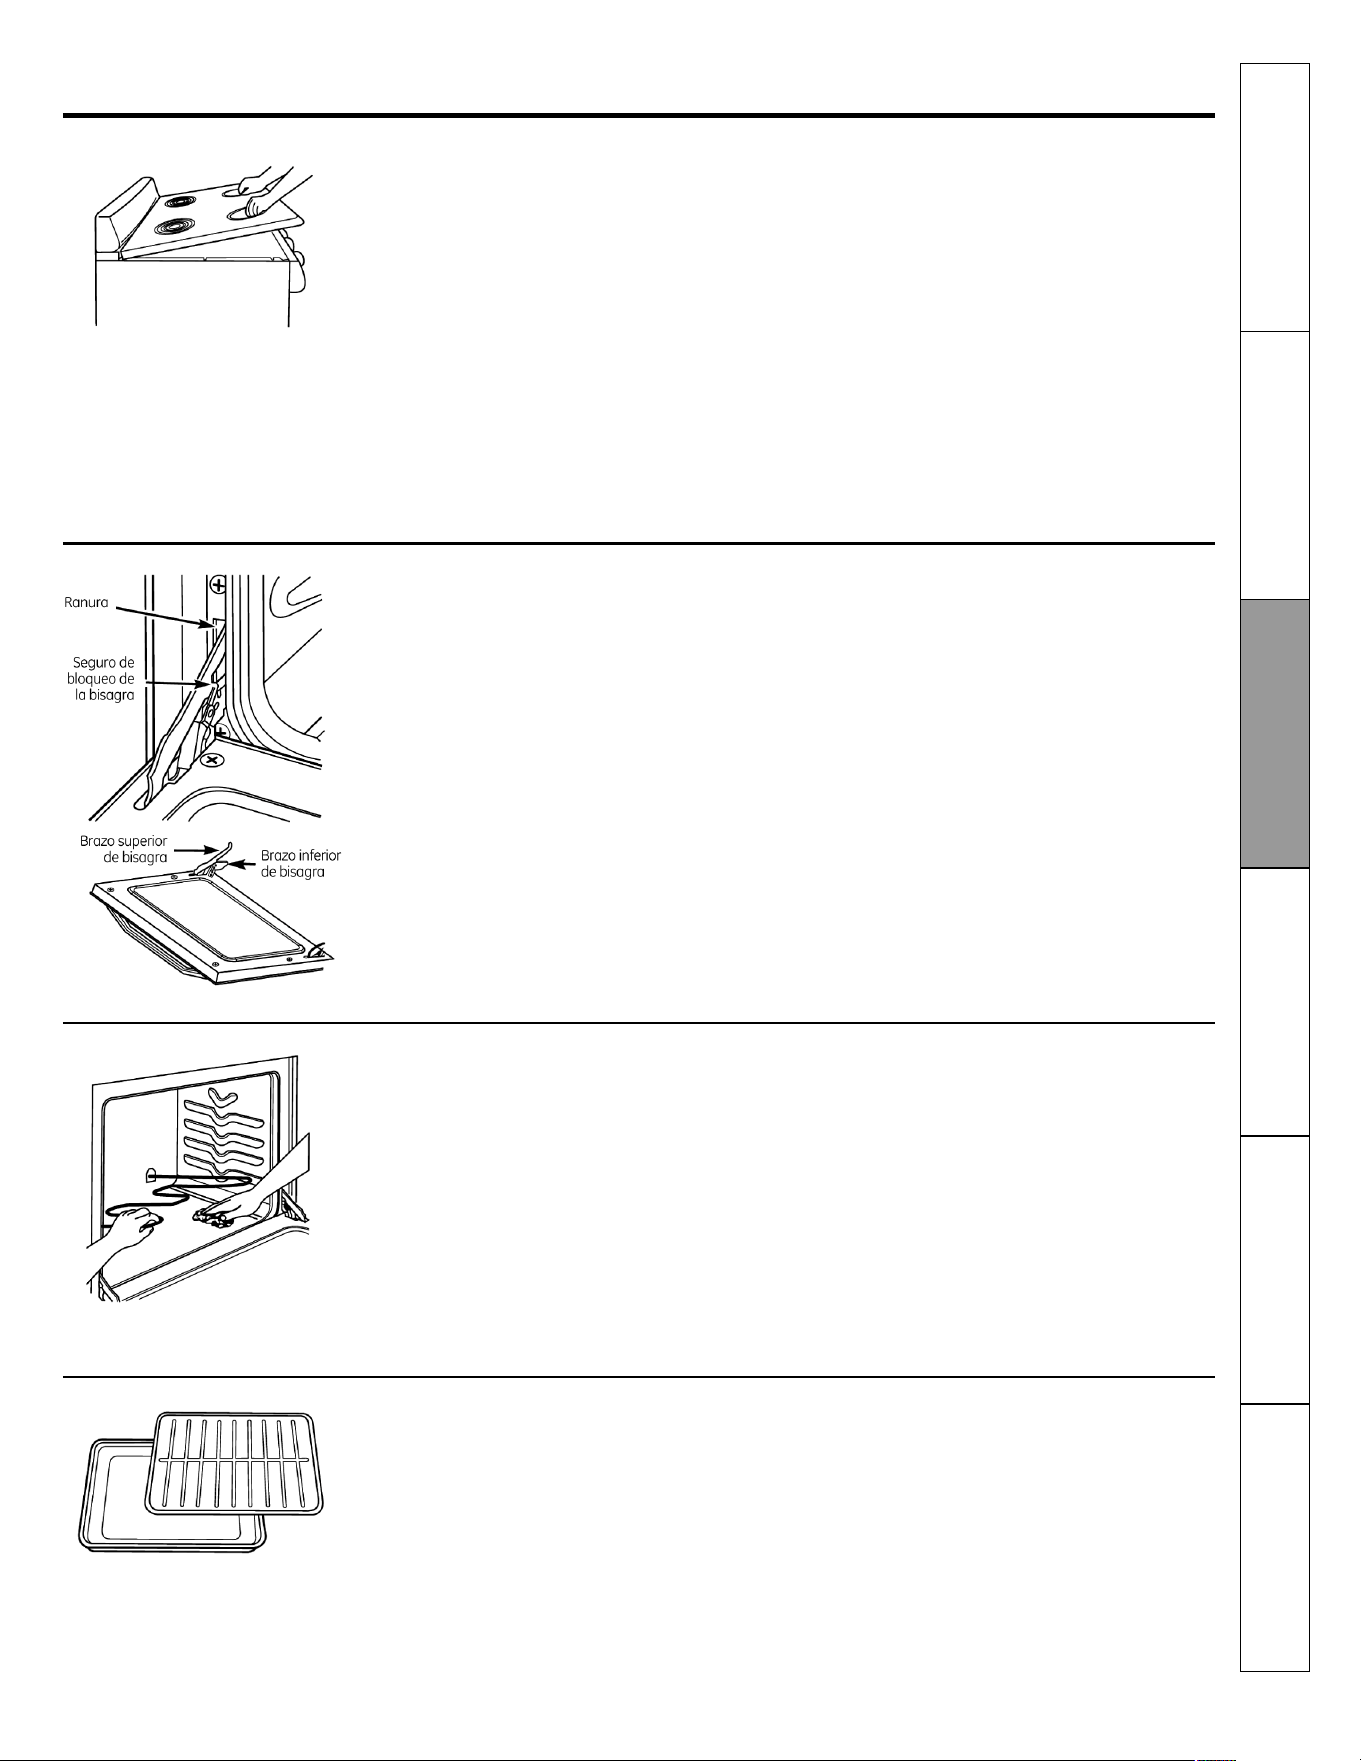
25
Cubierta abatible
Limpie con frecuencia el área bajo la cubierta. La
acumulación de suciedad, especialmente grasa
puede incendiarse.
Para facilitar la limpieza, la cubierta puede aba-
tirse y quedar soportada en la posición superior.
Asegúrese de que todos los quemadores de la
cubierta estén apagados antes de levantar la cu-
bierta.
Retire los quemadores y las charolas recolecto-
ras. Consulte la sección "Quemadores de cubier-
ta y charolas recolectoras". Tome la cubierta por
los dos pozos de los quemadores frontales, le-
vante la cubierta y reténgala abierta usando la
varilla incluida.
Después de limpiar bajo la cubierta usando agua
caliente, jabonosa y un trapo limpio, levante un
poco más la cubierta para regresar la varilla de
soporte a su posición de almacenamiento y baje
la cubierta hasta que entre en su posición. Tenga
cuidado de no pinchar sus dedos.
Reinstale las dos charolas recolectoras frontales
y sus quemadores. Consulte la sección "Quema-
dores de cubierta y charolas recolectoras".
Cuidado y limpieza de la estufa
Puerta removible
La puerta del horno es removible, pero pesada.
Quizá necesite ayuda para retirarla y para reins-
talarla.
Para remover la puerta
1. Abra la puerta hasta su posición completa-
mente abierta.
2. Jale hacia arriba los seguros de las bisagras
por encima de los ganchos de las bisagras en
ambos lados.
3. Sujete firmemente la puerta por ambos lados,
levante un poco y jálela en línea recta hacia
afuera del horno.
Para reinstalar la puerta
1. Sujete firmemente ambos lados de la puerta,
por la parte superior.
2. Introduzca y asiente los brazos superior e infe-
rior de las bisagras dentro de las ranuras del
horno.
3. Empuje los seguros de la puerta hacia abajo
para engarzar los ganchos de las bisagras.
4. Cierre la puerta del horno y asegúrese de que
trabaje apropiadamente. Si no es así, retírela y
reinstálela siguiendo los pasos anteriores. NO
TRATE DE CERRAR LA PUERTA HASTA COMPLE-
TAR ESTE PASO, LA BISAGRA O LA PUERTA PO-
DRÍAN DAÑARSE.
Resistencias del horno
No limpie la resistencia para hornear, ni la resis-
tencia para asar. Toda la suciedad se quemará
cuando se calientan estas resistencias.
Las resistencias para hornear pueden levantarse
cuidadosamente para limpiar el piso del horno.
No trate de limpiar ninguna superficie del horno
cuando está encendida cualquier resistencia de
los quemadores. Siempre use protección para
sus manos cuando limpie superficies interiores
del horno que se encuentren cerca de las resis-
tencias. Si se acumulan derrames, residuos o ce-
nizas alrededor de la resistencia para hornear,
limpie cuidadosamente alrededor de la resisten-
cia con agua tibia.
Charola y rejilla del asador
Después de asar, retire la charola para asar del
horno. Retire la rejilla de la charola. Cuidadosa-
mente vacíe la grasa de la charola en un conte-
nedor apropiado. Lave y enjuague la charola y
rejilla del asador en agua caliente usando una fi-
bra para tallar que trae un jabón en el interior o
una fibra para tallar de plástico.
Si los alimentos se han quemado sobre la rejilla,
rocíela con detergente mientras está caliente y
cubra con toallas de papel mojadas o un trapo
de cocina mojado. El remojar la charola del asa-
dor, removerá los residuos quemados de alimen-
tos.
No guarde una charola y rejilla sucias en ningún
lugar de la estufa.
Tanto la charola como la rejilla del
asador pueden lavarse también en
máquina lavavajillas.
Instrucciones de
seguridad
Instrucciones de
operación
Cuidado y limpieza
Solución
de problemas
Servicio
al consumidor
Instrucciones de
instalación
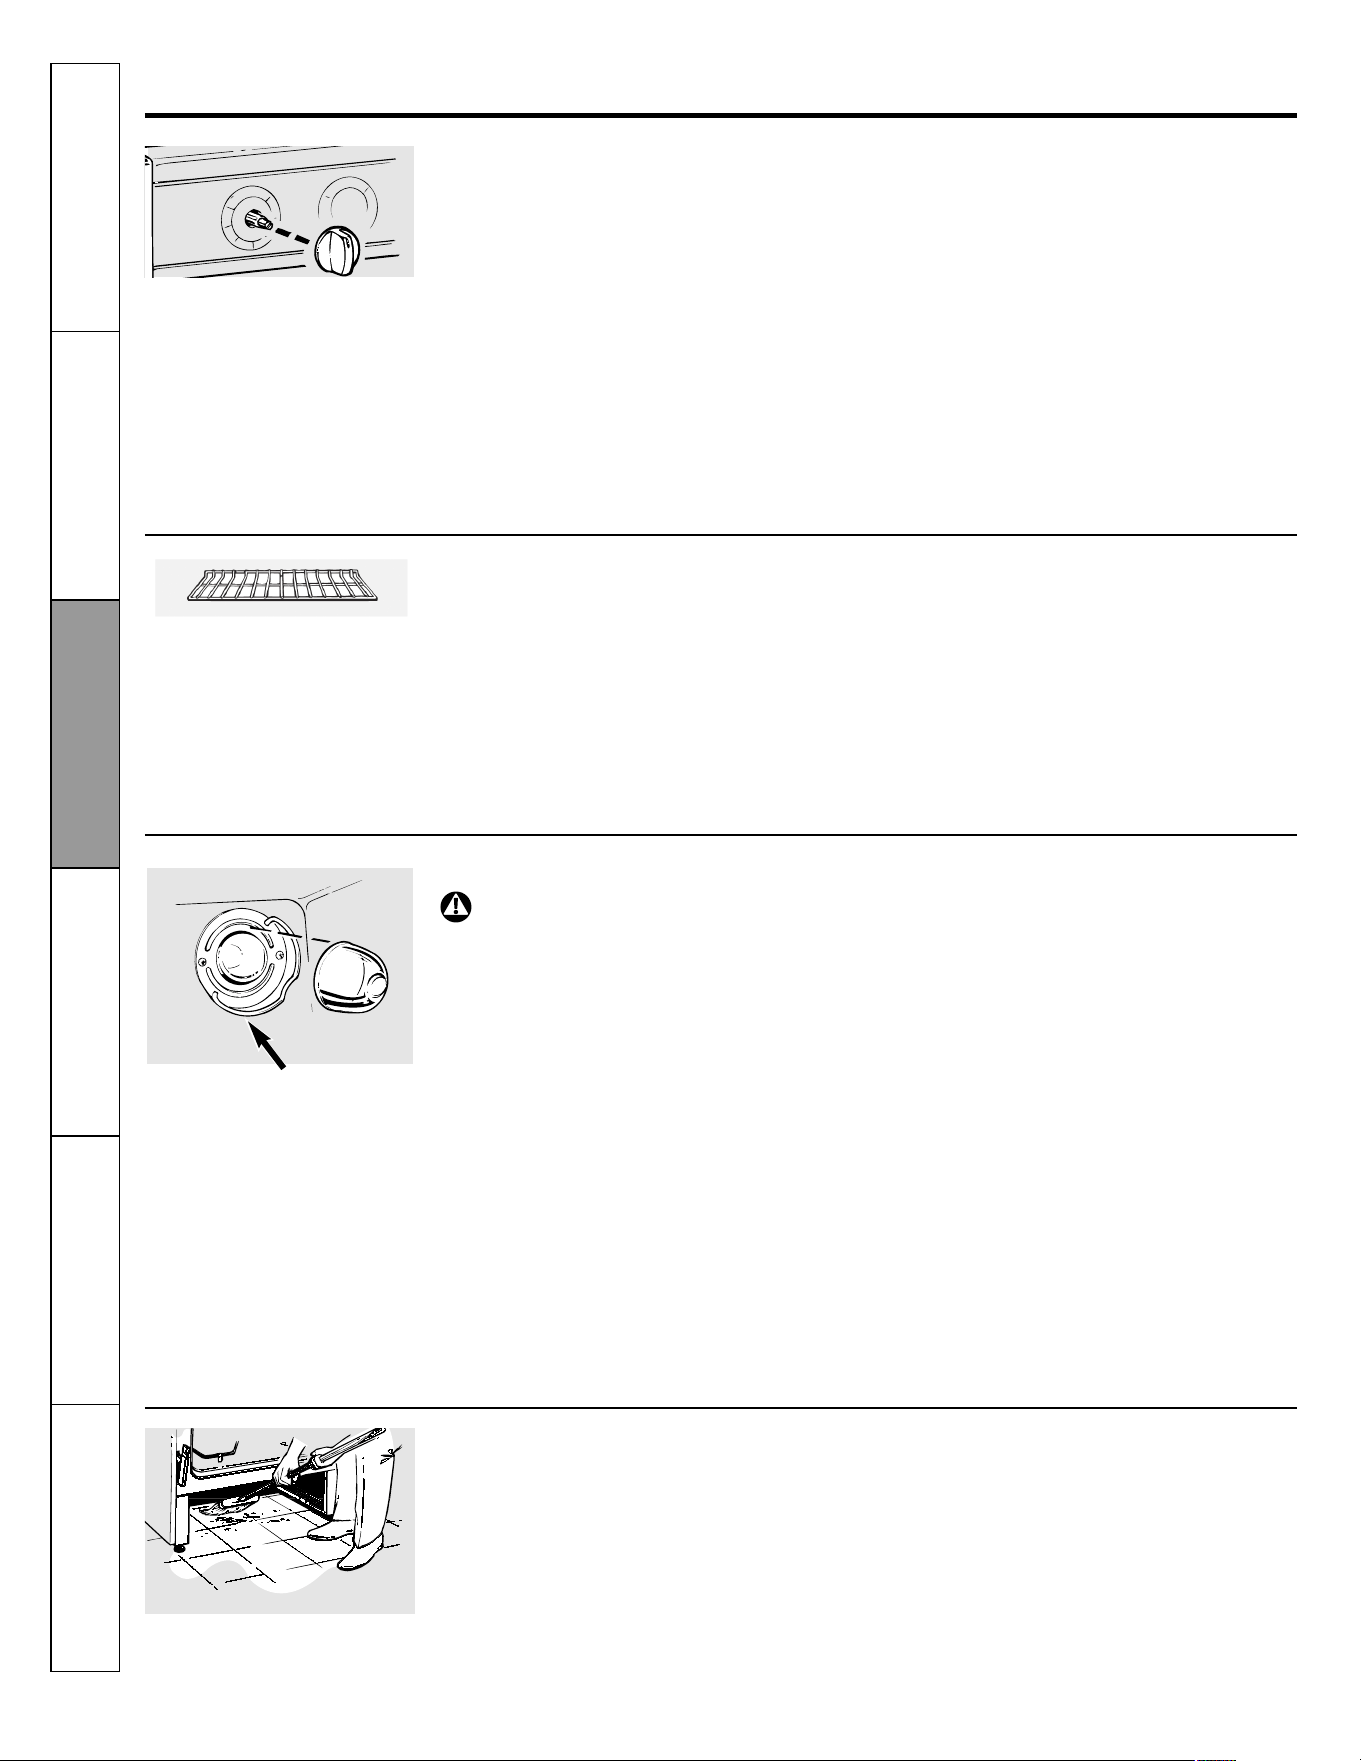
26
Cuidado y limpieza de la estufa
Removiendo el cajón de almacenamiento (en algunos modelos)
Panel de controles y perillas
Jale las perillas en línea recta
fuera del vástago.
Para remover el cajón de almacenamiento:
1. Jale el cajón hacia afuera hasta donde llegue.
2. Incline el frente del cajón hacia arriba y sá-
quelo.
Para reinstalar el cajón de almacenamiento:
1. Introduzca las correderas que se encuentran
en la parte trasera del cajón más allá del
tope de las correderas de la estufa.
2. Si fuera necesario levante el cajón para intro-
ducirlo fácilmente.
3. Deje que el frente del cajón baje, después em-
pújelo hacia adentro para cerrarlo.
Es una buena idea limpiar el panel de controles
después de usar el horno. Use un trapo húmedo
para limpiar o enjuagar. Para limpiar use un ja-
bón suave y agua o una solución 50/50 de vina-
gre y agua. Para enjuagar, use agua limpia. Pula
y seque con un trapo suave.
No use limpiadores abrasivos, limpiadores líqui-
dos fuertes, fibras de plástico para tallar ni lim-
piadores para horno sobre el panel de controles,
dañarán el acabado.
Las perillas de control pueden removerse para
facilitar su limpieza.
Asegúrese de que las perillas estén en la posición
OFF (APAGADO) y jálelas en línea recta fuera de
los vástagos para poder limpiarlas.
Las perillas pueden limpiarse en una lavavajillas
o pueden lavarse también con agua y jabón. Ase-
gúrese de que el interior de las perillas se en-
cuentre completamente seco antes de reinstalar-
las.
Reinstale las perillas en la posición OFF (APAGA-
DO) para asegurar que queden en la posición co-
rrecta.
Parrillas del horno
Limpie las parrillas del horno con un limpiador a-
brasivo o con una fibra para tallar. Después de
limpiar, enjuague las parrillas con agua limpia y
seque con un trapo limpio.
NOTA: Retire las parrillas del horno antes de ini-
ciar el ciclo de autolimpieza, de lo contrario pue-
den decolorarse.
Para facilitar el deslizamiento de las parrillas,
aplique una pequeña cantidad de aceite vegetal
o aceite para cocinar a una toalla de papel y lim-
pie las orillas de las parrillas con la toalla de pa-
pel.
Sujetador de alambre de la cu-
bierta.
Reemplazando el foco del horno (en algunos modelos)
Permita que la cubierta del foco y el foco se en-
fríen completamente.
Para remover la cubierta:
1. Coloque una mano bajo la cubierta de manera
que no caiga al liberarla. Con los dedos de la
misma mano, empuje firmemente hacia atrás
el sujetador de alambre de la cubierta. Levante
y retire la cubierta.
No retire ningún tornillo para remover la cu-
bierta.
2. Reemplace el foco con un foco para aparatos
electrodomésticos de 40 Watts
ADVERTENCIA: ANTES DE REEMPLAZAR EL FOCO DEL HORNO, APAGUE LA
LUZ DEL HORNO. DESCONECTE LA ESTUFA DE LA ENERGÍA ELÉCTRICA
DESDE EL PANEL PRINCIPAL DE FUSIBLES O DE DISYUNTORES DE CIRCUI-
TO.
Para reinstalar la cubierta:
1. Colóquela dentro de la ranura del receptáculo
para el foco. Jale el alambre hacia el frente y
el centro de la cubierta hasta que entre en su
sitio produciendo un chasquido.
2. Conecte la energía eléctrica que alimenta a la
estufa.
Limpie bajo la estufa.
Instrucciones de
seguridad
Instrucciones de
operación
Cuidado y limpieza
Solución
de problemas
Servicio
al consumidor
Instrucciones de
instalación
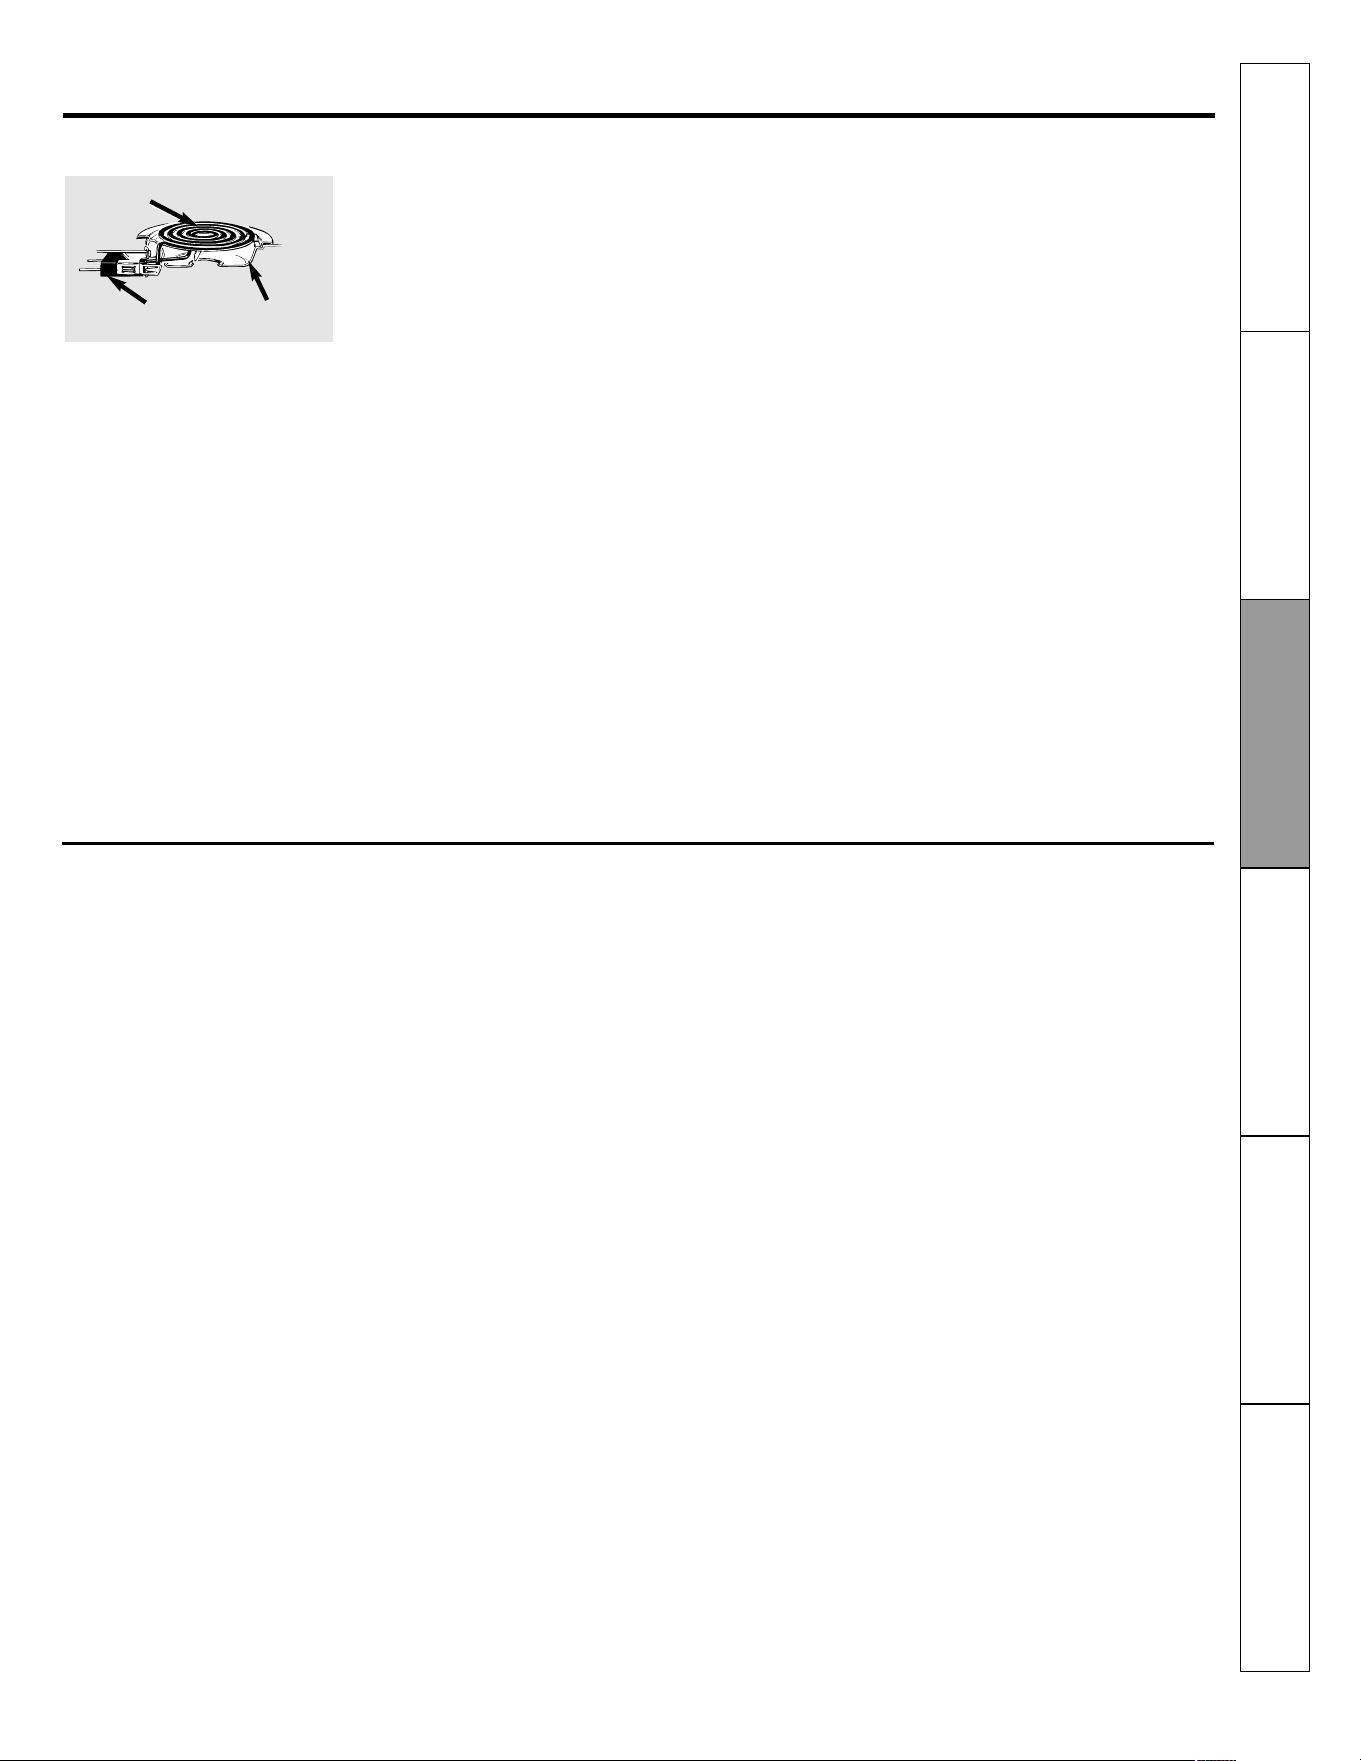
27
Cuidado y limpieza de la estufa
Quemadores eléctricos de espiral (en algunos modelos)
Asegúrese de que todos los controles se encuen-
tren en la posición de APAGADO y los quemado-
res estén fríos antes de tratar de removerlos.
Para limpiar los quemadores eléctricos de espi-
ral, gire el control hasta la posición más alta du-
rante un minuto. Las espirales quemarán toda
suciedad.
Para remover un quemador eléctrico de espi-
ral:
Para remover las charolas recolectoras para su
limpieza, deben removerse antes los quemado-
res eléctricos de espiral.
Levante el quemador eléctrico unos 2,5 cm por
encima de la charola recolectora y jálelo hacia
afuera.
No levante el quemador de espiral más de 2,5 cm.
Si lo hace, entonces podría no descansar horizon-
tal sobre la charola recolectora cuando lo conecte
de nuevo.
El levantar repetidamente el quemador eléctrico
de espiral más de 2,5 cm por encima de la charo-
la recolectora puede dañar permanentemente el
receptáculo.
Para reinstalar un quemador eléctrico de espi-
ral:
Reinstale la charola recolectora en el saque de la
cubierta. Asegúrese de que la abertura en la cha-
rola quede alineada con el receptáculo.
Introduzca las terminales del quemador eléctrico
de espiral a través de la abertura en la charola
recolectora y dentro del receptáculo.
Guíe el quemador eléctrico hasta su sitio de ma-
nera que descanse uniformemente.
• No sumerja los quemadores eléctricos en nin-
gún líquido.
• No lave los quemadores eléctricos en una lava-
vajillas.
• No doble las terminales de la clavija de los que-
madores eléctricos.
• No intente limpiar, ajustar o reparar de ninguna
manera el receptáculo de conexión.
Charolas recolectoras (si se incluyen)
Retire los quemadores eléctricos de espiral. En-
tonces levante y saque las charolas recolectoras.
Colóquelas en un contenedor cubierto. Agregue
1/4 de taza de amoníaco y déjelas remojar varias
horas o durante toda la noche. Lave, enjuague
bien y seque.
Las charolas recolectoras pueden lavarse tam-
bién en lavavajillas.
Limpie frecuentemente el área bajo las charolas
recolectoras. La suciedad acumulada, especial-
mente la grasa, puede incendiarse.
No cubra las charolas recolectoras con papel me-
tálico. El usar papel metálico tan cerca del recep-
táculo podría causar un choque eléctrico, fuego o
daños a la estufa.
NOTA: No limpie las charolas recolectoras en un
horno con autolimpieza.
Quemador de cubierta
Receptáculo
Charola
recolectora
Instrucciones de
seguridad
Instrucciones de
operación
Cuidado y limpieza
Solución
de problemas
Servicio
al consumidor
Instrucciones de
instalación

28
Cuidado y limpieza de la estufa
Ventana de vidrio (en algunos modelos)
Para limpiar el vidrio exterior, use un limpiador
para vidrios. Enjuague y pula con un trapo seco.
Superficies de acero inoxidable (en algunos modelos)
No use un fibra de lana de acero para tallar;
rayará la superficie.
Para limpiar la superficie de acero inoxidable,
use agua jabonosa tibia o un limpiador o pulidor
para superficies de acero inoxidable. Siempre ta-
lle la superficie en dirección del grano o veta.
Siga las instrucciones del limpiador para superfi-
cies de acero inoxidable.
Superficies pintadas (en algunos modelos)
Las superficies pintadas incluyen los laterales de
la estufa y los lados de la moldura de la puerta.
Para limpiar las superficies pintadas, use un tra-
po húmedo y caliente con un detergente suave
apropiado para estas superficies. Use un trapo
húmedo, limpio y caliente para remover el jabón.
Seque usando un trapo seco y limpio.
No use fibras metálicas para tallar, limpiadores
comerciales para hornos, polvos limpiadores ni
otros limpiadores abrasivos. Dañarán la superfi-
cie.
Ranuras de ventilación del horno
En modelos con cubierta de cristal, el horno se
ventila a través de una abertura que se encuen-
tra en la parte trasera de la cubierta.
En modelos con quemadores eléctricos de espi-
ral, el horno se ventila a través de una abertura
que se encuentra bajo el quemador eléctrico de
espiral trasero derecho.
Nunca cubra las aberturas con papel aluminio
ni con ningún otro material.
Instrucciones de
seguridad
Instrucciones de
operación
Cuidado y limpieza
Solución
de problemas
Servicio
al consumidor
Instrucciones de
instalación

29
Limpiando la cubierta de cristal (algunos modelos)
Limpieza normal de uso diario
Limpie la cubierta después de
un derrame. Use un limpiador
para cubiertas cerámicas.
Residuos quemados
Use una almohadilla limpiadora
especial para cubiertas cerámi-
cas.
1. Permita que la cubierta se enfríe.
2. Extienda unas pocas gotas de limpiador para
cubiertas cerámicas por toda el área que tie-
ne residuos quemados.
3. Utilizando la almohadilla para limpiar incluida
con el limpiador para cubiertas cerámicas,
frote el área aplicando presión según sea ne-
cesario.
4. Si quedan algunos residuos, repita los pasos
anteriores según sea necesario.
ADVERTENCIA: LA SUPERFICIE DE VIDRIO PUEDE DAÑARSE SI USA FIBRAS
PARA TALLAR DIFERENTES A LAS RECOMENDADAS.
Residuos quemados difíciles de remover
El raspador para cubiertas ce-
rámicas así como todos los su-
ministros recomendados están
disponibles a través de nues-
tros distribuidores.
NOTA: No use un raspador con
una navaja roma (sin filo) o me-
llada.
Use ÚNICAMENTE un limpiador para cubiertas
cerámicas para la cubierta de cristal. Otro tipo de
limpiadores pueden no ser tan efectivos.
Para mantener y proteger la superficie de la cu-
bierta de cristal, siga estos pasos:
1. Antes de usar la cubierta de cristal por prime-
ra vez, límpiela con limpiador para cubiertas
cerámicas. Esto ayuda a proteger la superfi-
cie y facilita la limpieza.
2. El uso diario de un limpiador para cubiertas
cerámicas ayudará a mantener la cubierta
luciendo como nueva.
3. Agite bien la crema limpiadora y aplique unas
pocas gotas directamente sobre la cubierta.
4. Utilice una toalla de papel especial para cu-
biertas cerámicas, para limpiar toda la super-
ficie de la cubierta.
5. Utilice un trapo seco o una toalla de papel
para remover todo residuo del producto de
limpieza. No es necesario enjuagar.
NOTA: Es muy importante que usted NO caliente
la cubierta sino hasta que ésta haya sido limpia-
da por completo.
5. Para obtener una protección adicional, des-
pués de que todos los residuos han sido re-
movidos, pula toda la superficie con un lim-
piador para cubiertas cerámicas y una toalla
de papel.
1. Permita que la cubierta se enfríe.
2. Use una raspador de una sola orilla filosa en
un ángulo aproximado de 45º contra la su-
perficie de vidrio y raspe la suciedad. Será
necesario aplicar presión al raspador para
remover los residuos.
3. Después de haber raspado con el raspador,
extienda unas pocas gotas de limpiador para
cubiertas cerámicas por toda el área con re-
siduos quemados. Use una almohadilla lim-
piadora especial para cubiertas cerámicas
para remover cualquier residuo remanente.
4. Para obtener una protección adicional, des-
pués de haber removido todos los residuos,
pula toda la superficie con limpiador para cu-
biertas cerámicas y una toalla de papel.
Instrucciones de
seguridad
Instrucciones de
operación
Cuidado y limpieza
Solución
de problemas
Servicio
al consumidor
Instrucciones de
instalación

30
Marcas metálicas y rayones
Los derrames azucarados
(como gelatinas, chocolate,
dulces, jarabes) o los plásticos
derretidos pueden causar po-
rosidad en la superficie de su
cubierta (lo cual no está cu-
bierto por la garantía) a me-
nos que remueva el derrame
mientras aún está caliente.
Debe tenerse un cuidado espe-
cial cuando se remueven subs-
tancias calientes.
Asegúrese de usar un raspa-
dor de navaja nuevo y afilado.
No use un raspador con una
navaja roma (sin filo) o mella-
da.
Superficie de cristal - Riesgo de daños permanentes
Daños ocasionados por derrames azucarados y plásticos derretidos
Sello de la cubierta
ADVERTENCIA: REVISE CUIDADOSAMENTE EL FONDO DE SUS CACEROLAS
BUSCANDO RUGOSIDADES QUE PUEDEN RAYAR LA CUBIERTA.
Limpiando la cubierta de cristal (algunos modelos)
1. Tenga cuidado de no arrastrar cacerolas y
sartenes sobre la cubierta de cristal. Esto de-
jará marcas metálicas sobre la superficie de
la cubierta de cristal.
Estas marcas se pueden remover usando
limpiador para cubiertas cerámicas y una al-
mohadilla limpiadora especial para cubiertas
cerámicas.
2. Si se deja que las cacerolas que tienen un re-
cubrimiento delgado de aluminio o cobre
hiervan hasta que el líquido se consuma, en-
tonces el recubrimiento puede dejar una de-
coloración negra sobre la cubierta. Esto debe
removerse inmediatamente antes de calentar
de nuevo o la decoloración puede ser perma-
nente.
Para limpiar el sello que se encuentra alrededor
de las orillas del vidrio, extienda un trapo mojado
sobre él durante unos pocos minutos, después
limpie usando limpiadores no abrasivos.
1. Apague todos los quemadores. Retire las cace-
rolas calientes.
2. Usando un guante para horno:
a. Use un raspador de navaja de una sola ori-
lla filosa para mover el derrame a una área
fría sobre la cubierta.
b. Remueva el derrame con toallas de papel.
3. Cualquier remanente del derrame debe dejar-
se hasta que la superficie de la cubierta se
haya enfriado.
4. No use los quemadores de nuevo sino hasta
que todos los residuos hayan sido removidos
por completo.
NOTA: Si ya se presentó una porosidad o melladu-
ra sobre la superficie de vidrio, entonces el cristal
de la cubierta tendrá que ser reemplazado. En
este caso, es necesario llamar al servicio.
Instrucciones de
seguridad
Instrucciones de
operación
Cuidado y limpieza
Solución
de problemas
Servicio
al consumidor
Instrucciones de
instalación
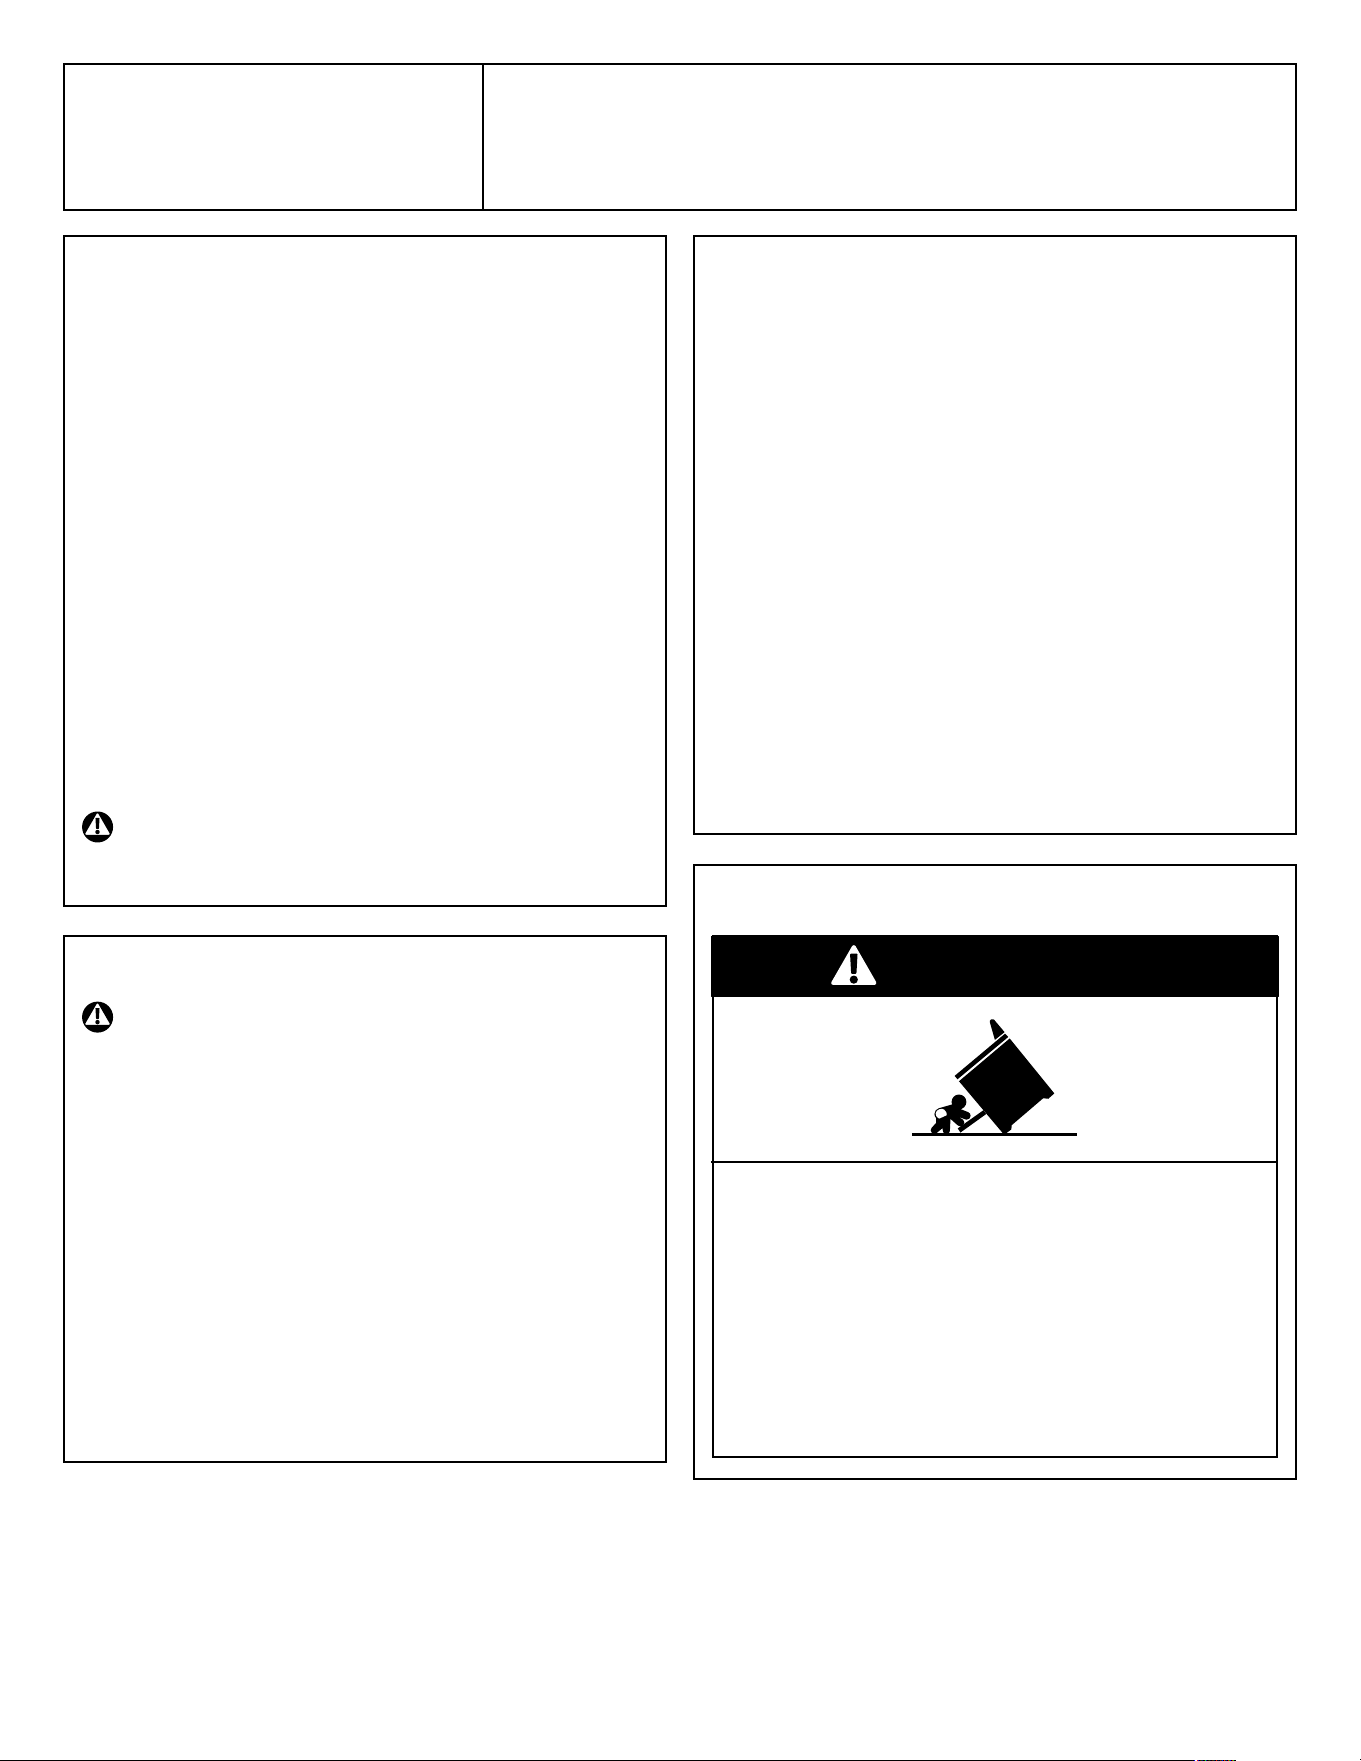
31
Instrucciones
de instalación
Estufas eléctricas GE de 24" (61 cm)
ANTES DE QUE USTED COMIENCE
Lea estas instrucciones completa y cuidadosamente.
• IMPORTANTE: Guarde estas instrucciones para ser usa-
das por el inspector local.
• IMPORTANTE: Observe todos los códigos y reglamentos
aplicables.
• Nota al instalador: Asegúrese de dejar estas instrucciones
con el Consumidor.
• Nota al consumidor: Guarde estas instrucciones para refe-
rencia futura.
• Nivel de habilidad necesario: La instalación de este apa-
rato electrodoméstico requiere habilidades mecánicas bá-
sicas.
• Tiempo necesario para la instalación: 1 a 3 horas.
• La instalación apropiada es la responsabilidad del instala-
dor.
• Si este producto falla por una instalación inapropiada, la
garantía no cubrirá este producto.
ADVERTENCIA: ESTE APARATO DEBE ESTAR
APROPIADAMENTE ATERRIZADO.
POR SU SEGURIDAD:
ADVERTENCIA: ANTES DE COMENZAR LA INSTA-
LACIÓN, INTERRUMPA EL SUMINISTRO DE
ENERGÍA ELÉCTRICA DESDE EL PANEL DE SER-
VICIO Y BLOQUEE LOS MEDIOS DE DESCO-
NEXIÓN DEL SERVICIO PARA PREVENIR QUE EL
SUMINISTRO DE ENERGÍA SEA RESTABLECIDO
ACCIDENTALMENTE. CUANDO LOS MEDIOS DE
DESCONEXIÓN DEL SERVICIO NO PUEDEN BLO-
QUEARSE, ASEGURE FIRMEMENTE UN DISPOSI-
TIVO DE ADVERTENCIA, COMO POR EJEMPLO
UNA ETIQUETA AL PANEL DE SERVICIO.
POR SU SEGURIDAD:
Debe cumplirse con todas las dimensiones de trazos y espacios
para obtener un uso seguro de la estufa. La electricidad que ali-
menta a la estufa puede desconectarse desde el contacto eléctrico
sin necesidad de mover la estufa siempre que el contacto se instale
en la ubicación preferida (hay que remover el cajón inferior del
aparato).
Para reducir el riesgo de quemaduras o incendio cuando se estira
sobre los quemadores calientes, debe evitarse el espacio de alma-
cenamiento de los gabinetes que se encuentran por encima de la
cubierta de la estufa. Si se va a proporcionar espacio de almacena-
miento en los gabinetes que se encuentran por encima de la cu-
bierta, el riesgo puede reducirse instalando una campana para es-
tufa que sobresalga 12,7 cm por lo menos más allá del frente de
los gabinetes. Los gabinetes instalados por encima de la cubierta
no deben ser más profundos que 33 cm
Asegúrese de que su aparato esté apropiadamente instalado y
aterrizado por un técnico calificado.
Asegúrese de que los gabinetes y el recubrimiento de los muros al-
rededor de la estufa puedan resistir las temperaturas generadas
por la estufa (de alrededor de 200 ºF (93,3 ºC).
DISPOSITIVO ANTIVOLCADURAS
Riesgo de Volcaduras
Un niño o un adulto pueden hacer volcar la estufa y morir.
Verifique que el soporte antivolcaduras se haya instalado y
ajustado correctamente.
Asegúrese de que el dispositivo antivolcaduras sea
reinstalado cuando se mueva la estufa. No utilice la estufa
sin que el dispositivo antivolcaduras esté instalado y
ajustado.
Si estas instrucciones no se siguen, como resultado se podrá
producir la muerte o quemaduras graves de niños y adultos.
ADVERTENCIA

32
Instrucciones de instalación
PREPÁRESE PARA INSTALAR LA ESTUFA
HERRAMIENTA QUE NECESITARÁ
Taladro con broca de 1/8" (3,2 mm)
Llave de tuercas ajustable (perico)
Pinzas
Destornillador con dado
de 1/4" (6,3 mm)
Destornillador Phillips
Anteojos de seguridad (gogles)
Flexómetro
Lápiz
Nivel
Destornillador de punta plana
PARTES INCLUIDAS
Juego de dispositivo antiladeos
RETIRE EL MATERIAL DE EMBARQUE1
Retire el material de empaque. El no remover todo el material
de empaque podría resultar en daños al aparato.
PREPARE EL SAQUE2
• Deje un claro de 2" (5 cm) entre la estufa y muros verticales
adyacentes por encima de la cubierta de cocción. Deje un
claro mínimo de 30" (76,2 cm) entre los quemadores de la
cubierta y la parte inferior de madera desprotegida o metal
de los gabinetes superiores, y 18" (45,72 cm) mínimo entre la
cubierta de la cocina y la parte inferior de gabinetes adya-
centes.
• Para eliminar el riesgo de quemaduras o incendio cuando se
estira sobre los quemadores calientes de la cubierta, debe
evitarse el espacio de almacenamiento en los gabinetes que
se encuentran por encima de la estufa. Si se va a proporcio-
nar espacio de almacenamiento en los gabinetes por enci-
ma de la cubierta, el riesgo puede reducirse instalando una
campana para estufa que sobresalga 5" (12,7 cm) por lo me-
nos más allá de los frentes de los gabinetes. Los gabinetes
instalados por encima de la cubierta de la estufa no deben
más profundos que 13" (33 cm).
Piso bajo la estufa
Su estufa, como muchos otros aparatos electrodomésticos, es
pesada y puede asentarse dentro de recubrimientos para
piso que son suaves como por ejemplo vinyl acojinado o al-
fombra.
Cuando se mueve la estufa sobre este tipo de piso, debe ins-
talarse sobre una hoja de triplay de 1/4" (6,3 mm) de espesor
(o material similar) como sigue:
En donde termina el recubrimiento para piso al frente de la
estufa, el área en donde descansará la estufa debe cubrirse
con triplay hasta el mismo nivel o más alto que el recubri-
miento del piso. Esto permitirá mover la estufa para limpieza
o darle servicio.
JCAS735
JCAS745
JCAP750
JCAP760
JCAP765
JCAS445
A
B
2
(5,08 cm)
C
(recomendada)
Modelo
47
(119,4 cm)
36 (91,4 cm)
24 3/8
(61,9 cm)
24 3/8 (61,9 cm) N.A. 41 (104,1 cm)
41
(104,1 cm)
D
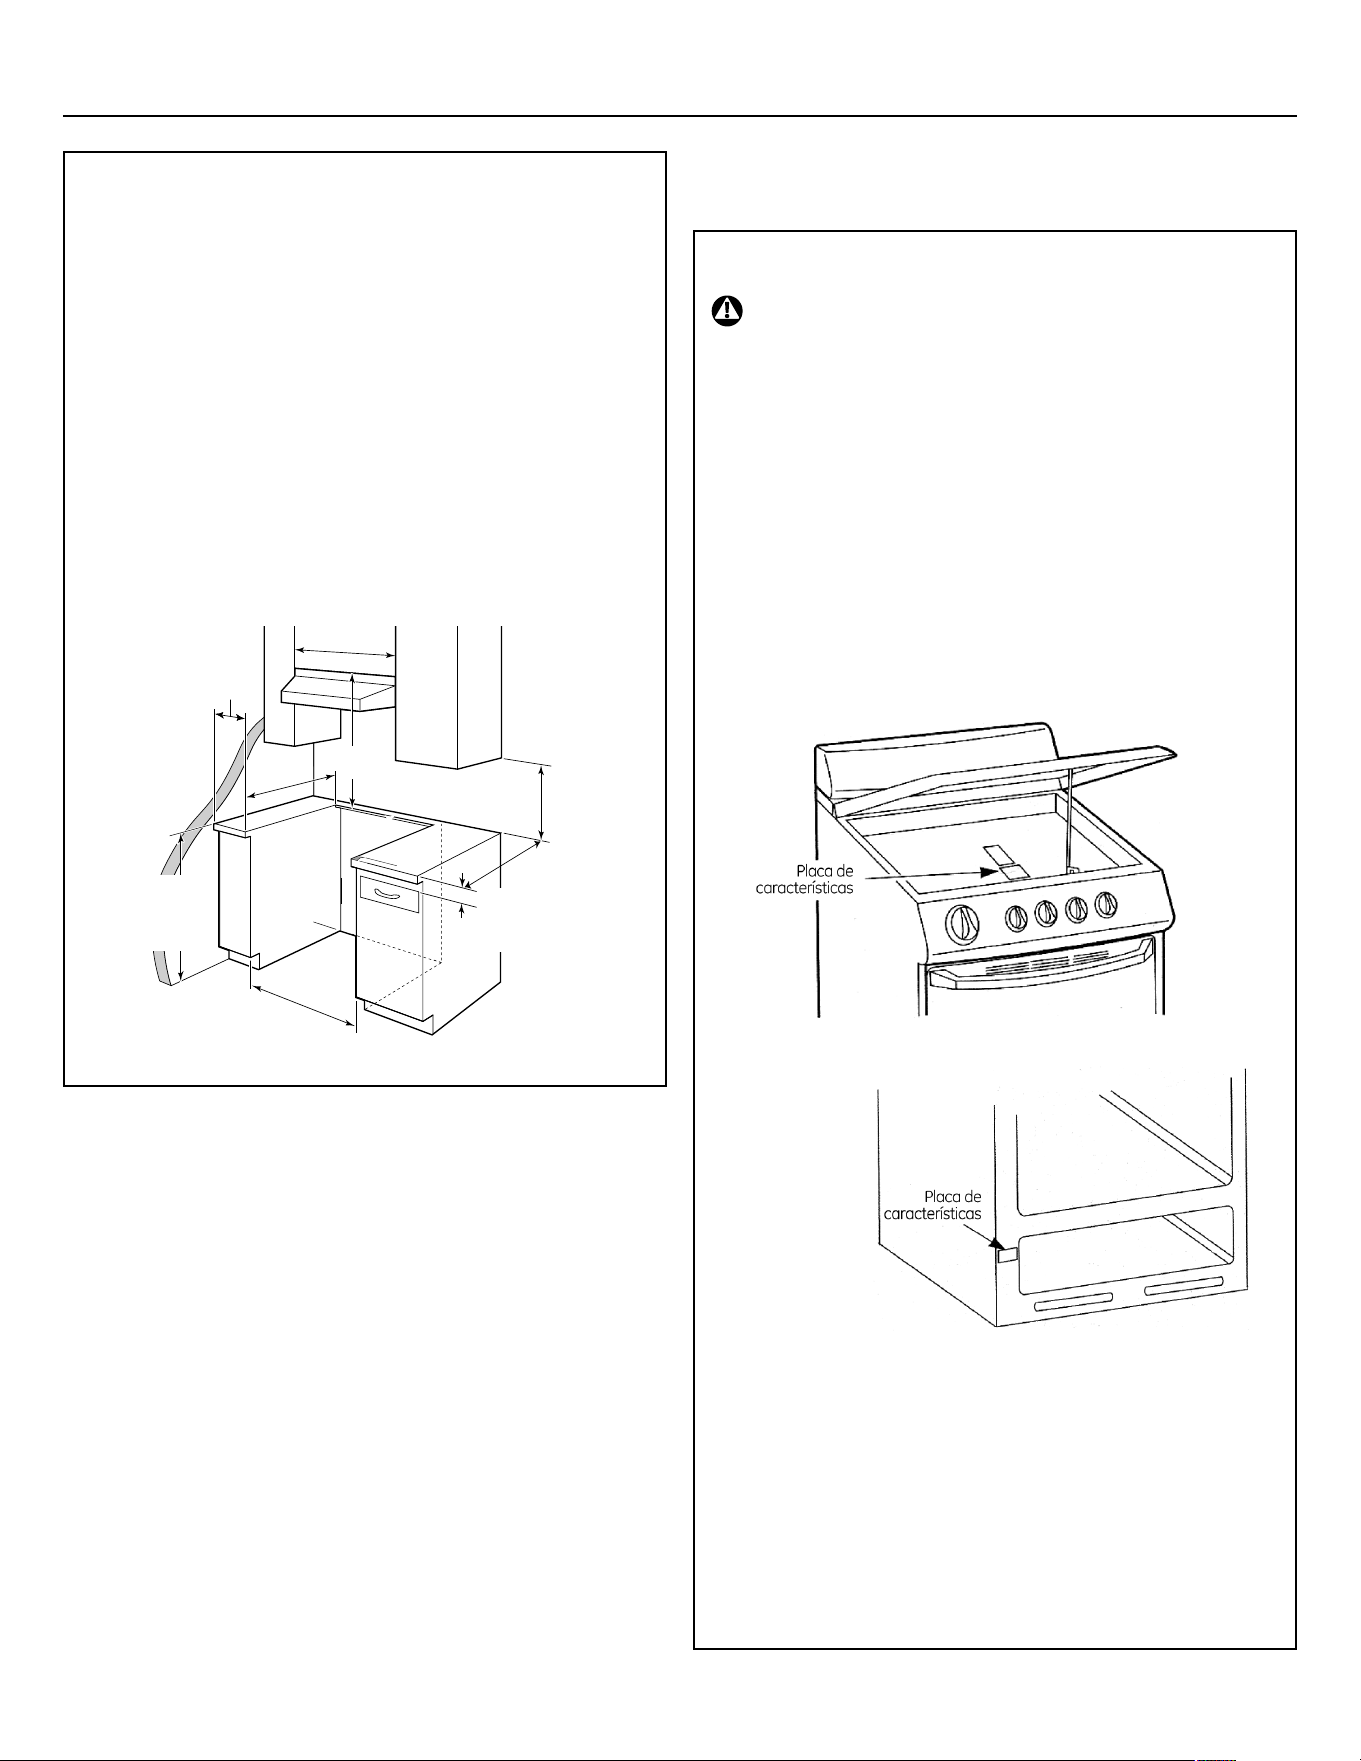
33
76,2 cm
mín.
Lea la
nota
B
abajo
38 cm mín.
76,2 cm
mín.
63,5 cm
3,1 cm mín. desde la
cubierta hasta la parte
superior del cajón
del gabinete
60,96 cm
± 0,16 cm
91,44 cm desde
el piso hasta la
cubierta de la
cocina
57,78
cm
Instrucciones de instalación
PREPARE EL SAQUE (JCAS445)
• Deje un claro de 2" (5 cm) entre la estufa y muros verticales adya-
centes por encima de la cubierta de cocción. Deje un claro míni-
mo de 30" (76,2 cm) entre los quemadores de la cubierta y la par-
te inferior de madera desprotegida o metal de los gabinetes su-
periores, y 18" (45,72 cm) mínimo entre la cubierta de la cocina y
la parte inferior de gabinetes adyacentes.
• Para eliminar el riesgo de quemaduras o incendio cuando se esti-
ra sobre los quemadores calientes de la cubierta, debe evitarse el
espacio de almacenamiento en los gabinetes que se encuentran
por encima de la estufa. Si se va a proporcionar espacio de alma-
cenamiento en los gabinetes por encima de la cubierta, el riesgo
puede reducirse instalando una campana para estufa que sobre-
salga 5" (12,7 cm) por lo menos más allá de los frentes de los ga-
binetes. Los gabinetes instalados por encima de la cubierta de la
estufa no deben más profundos que 13" (33 cm).
CONEXIONES ELÉCTRICAS
REQUERIMIENTOS ELÉCTRICOS
PRECAUCIÓN: POR SEGURIDAD PERSONAL, NO
USE UN CORDÓN ELÉCTRICO DE EXTENSIÓN
CON ESTE APARATO. ANTES DE COMENZAR
CON LA INSTALACIÓN, RETIRE EL FUSIBLE DEL
PANEL DE SERVICIO DE LA CASA O ABRA EL
DISYUNTOR DE CIRCUITOS.
Recomendamos hacer que un electricista calificado realice el ca-
bleado hacia la estufa y la conexión de la misma. Después de la
instalación, haga que el electricista le muestre la ubicación del me-
dio principal de desconexión de la estufa.
Revise con la empresa que le provee energía los códigos eléctricos
que aplican en su área. El no cablear su estufa de acuerdo con los
códigos vigentes podría resultar en una situación riesgosa. Si no
existen códigos locales, entonces su estufa debe ser cableada y
protegida con fusibles para cumplir los requerimientos de Código
Eléctrico Canadiense, Parte 1 de la edición más reciente.
Debe alimentarse a este aparato con el voltaje y frecuencia apro-
piados. Debe conectarse a un circuito derivado, protegido por un
disyuntor de circuitos o fusible del amperaje especificado en la
placa de características. La placa de características se ubica bajo
la cubierta o en el marco frontal. (Consulte las siguientes ilustracio-
nes).
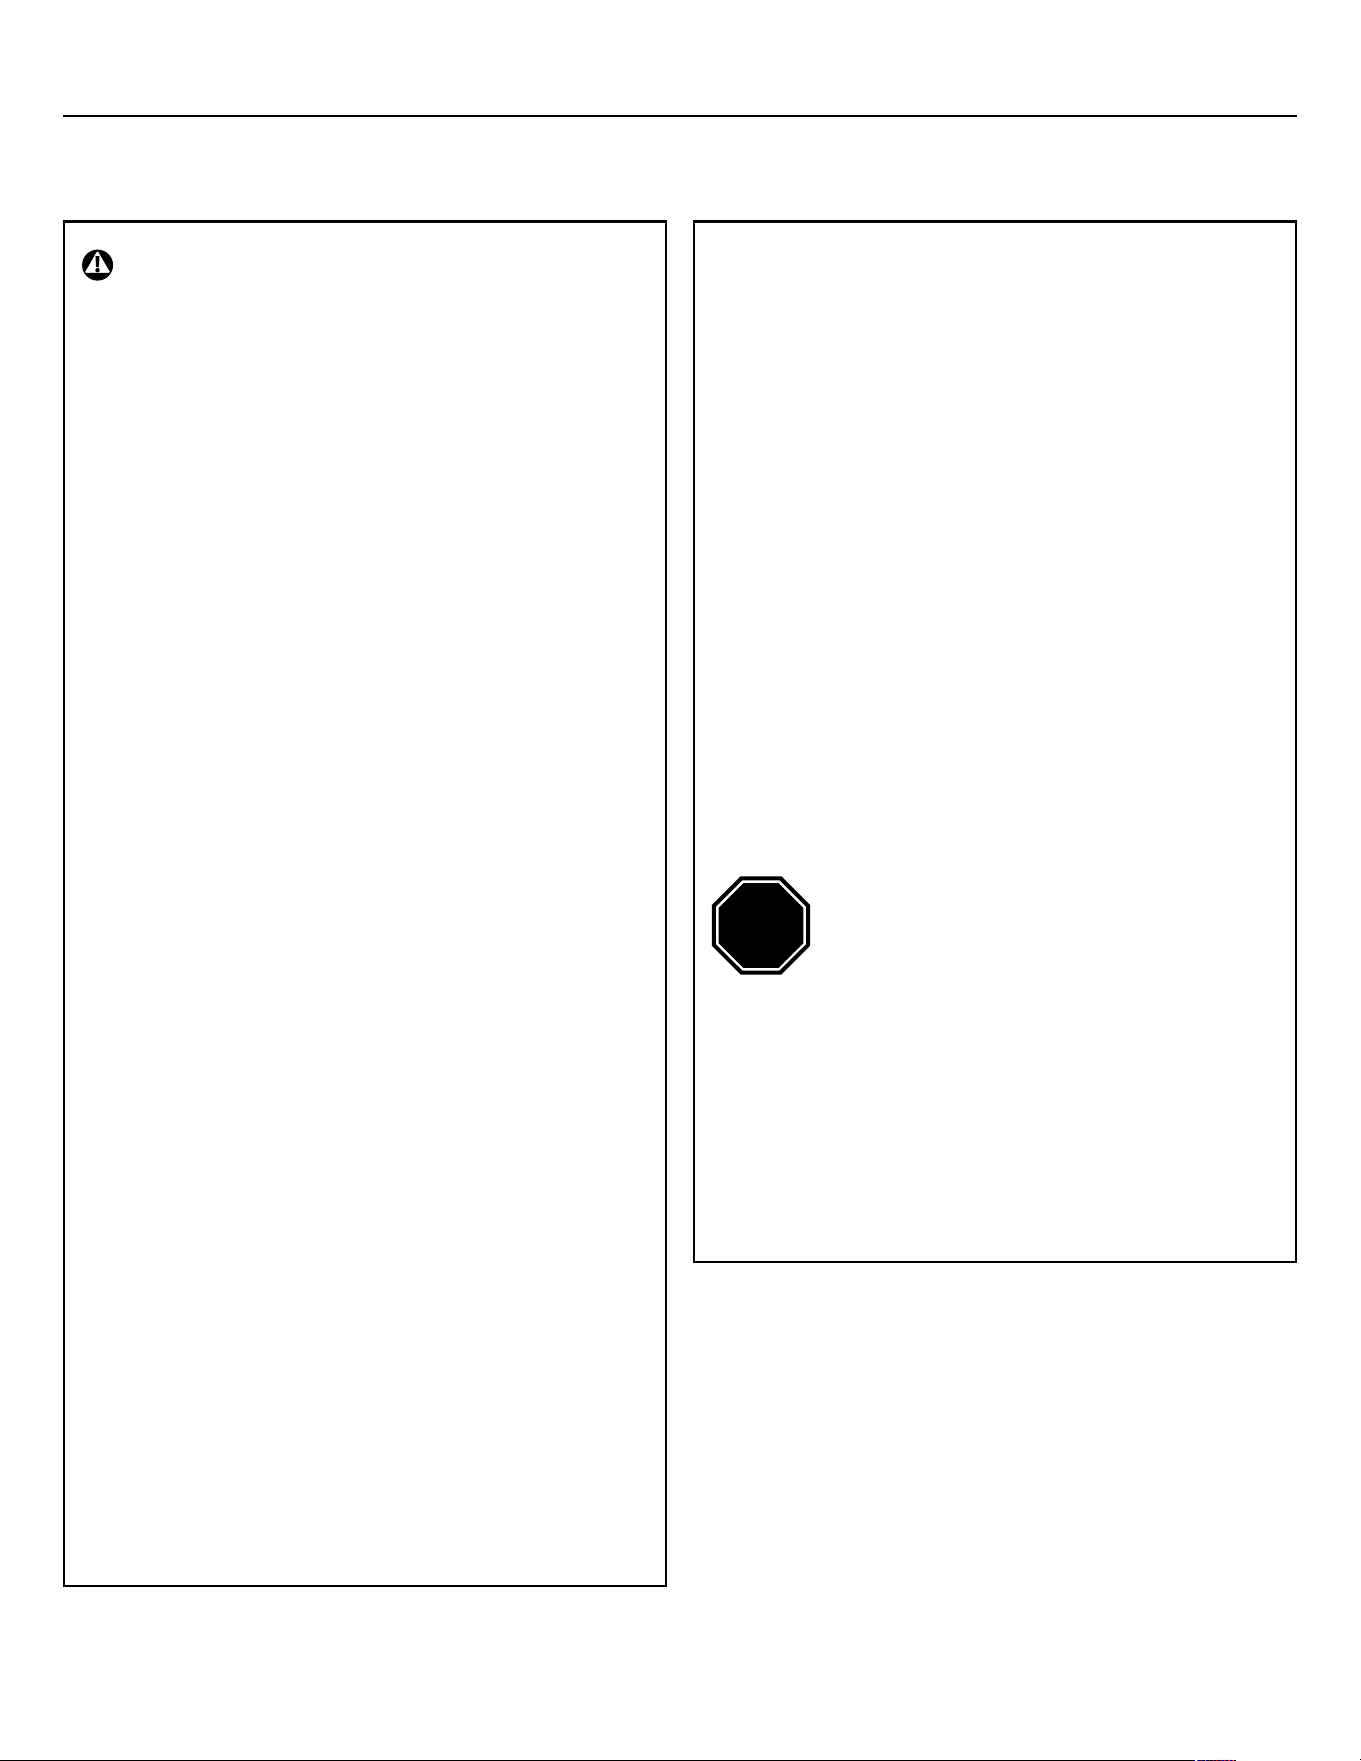
34
Instrucciones de instalación
Use exclusivamente un cordón eléctrico para estufa, enlistado
por UL de 3 hilos ó 4 hilos conductores. Estos cordones pueden
incluir terminales tipo anillo y un dispositivo para reducir la ten-
sión.
Se requiere como mínimo de un cordón eléctrico para estufa
clasificado en 40 Amperes y 125/250 Volts. No se recomienda
usar un cordón eléctrico clasificado en 50 Amperes, pero si se
decide a usarlo, debe ser alguno marcado para usarse con
agujeros para conexión de 1 3/8" (34,9 mm) de diámetro. Se
debe tener cuidado para centrar el cordón eléctrico y el dispo-
sitivo reductor de tensión dentro del agujero troquelado para
evitar que las orillas del agujero dañen al cordón eléctrico.
• Debido a que las terminales eléctricas de la estufa no son ac-
cesibles después de que la estufa ya está colocada en su po-
sición final, debe usarse conducto portacables flexible o cor-
dón eléctrico flexible.
NOTA: Si se usa conducto portacables (conduit) vaya al paso 3D
y luego siga los pasos 6 y 7.
• En algunos modelos, puede conectarse un capacitor de filtro
entre los conductores color blanco y negro en el bloque de
terminales.
REQUISITOS ELÉCTRICOS
Este aparato debe alimentarse con el voltaje y la frecuencia
apropiados, y debe conectarse a un circuito derivado individual
apropiadamente conectado a tierra, protegido por un disyuntor
de circuitos o fusible que cuente con un amperaje igual al esti-
pulado en la placa de características. La placa está localizada
por encima del cajón de almacenamiento en el marco del hor-
no.
Le recomendamos hacer que un técnico calificado realice la
instalación eléctrica de su aparato. Después de instalado el
aparato, pida al técnico que le muestre desde donde puede ser
desconectado completamente el aparato.
Revise con las empresas de servicio locales cuales con los re-
glamentos eléctricos que aplican en su área. El no conectar la
estufa de acuerdo a los reglamentos vigentes de su área, puede
resultar en una situación peligrosa. Si no existen reglamentos
locales, entonces la estufa debe conectarse de manera que
cumpla con los requisitos de la edición más reciente del
National Electrical Code, ANSI/NFPA No. 70. Puede adquirir una
copia escribiendo a:
Desde Enero 1, 1996, los códigos eléctricos nacionales re-
quieren que las construcciones nuevas (no existentes) utili-
cen conexiones de 4 conductores para estufas eléctricas.
Cuando instale una estufa eléctrica en una construcción
nueva, siga los pasos 3 y 5 para una conexión de 4 cables.
Usted debe usar un sistema eléctrico de 3 cables de una sola
fase c.a. 208Y/120 Volts o bien 240/120 Volts, 60 Hertz. Si usa
un cableado de aluminio, entonces deben usarse conectores
aprobados para cableado de aluminio e instalados correcta-
mente.
Si la instalación eléctrica disponible no cumple con las especifi-
caciones anteriores, solicite a un electricista matriculado la ins-
talación de un contacto eléctrico aprobado.
NOTA: No se recomienda usar con este producto interruptores
externos automáticos, inalámbricos o con cables que corten la
energía que alimenta a este aparato.
National Fire Protection Association
Batterymarch Park
Quincy, MA 02269
TODAS LAS INSTALACIONES NUEVAS
QUE INCLUYEN UN CIRCUITO DERIVADO,
LAS CASAS RODANTES, LOS VEHÍCULOS
RECREATIVOS ASÍ COMO LAS INSTALA-
CIONES EN DONDE LOS REGLAMENTOS
LOCALES NO PERMITEN LA CONEXIÓN A
TIERRA POR MEDIO DE NEUTRAL, RE-
QUIEREN DE UN CORDÓN ELÉCTRICO DE
4 CONDUCTORES.
ALTO
ADVERTENCIA: POR SU PROPIA SEGURIDAD, NO
USE UNA EXTENSIÓN ELÉCTRICA CON ESTE
APARATO. RETIRE EL FUSIBLE DE SU CASA O
ABRA EL DISYUNTOR DE CIRCUITOS ANTES DE
COMENZAR CON LA INSTALACIÓN.
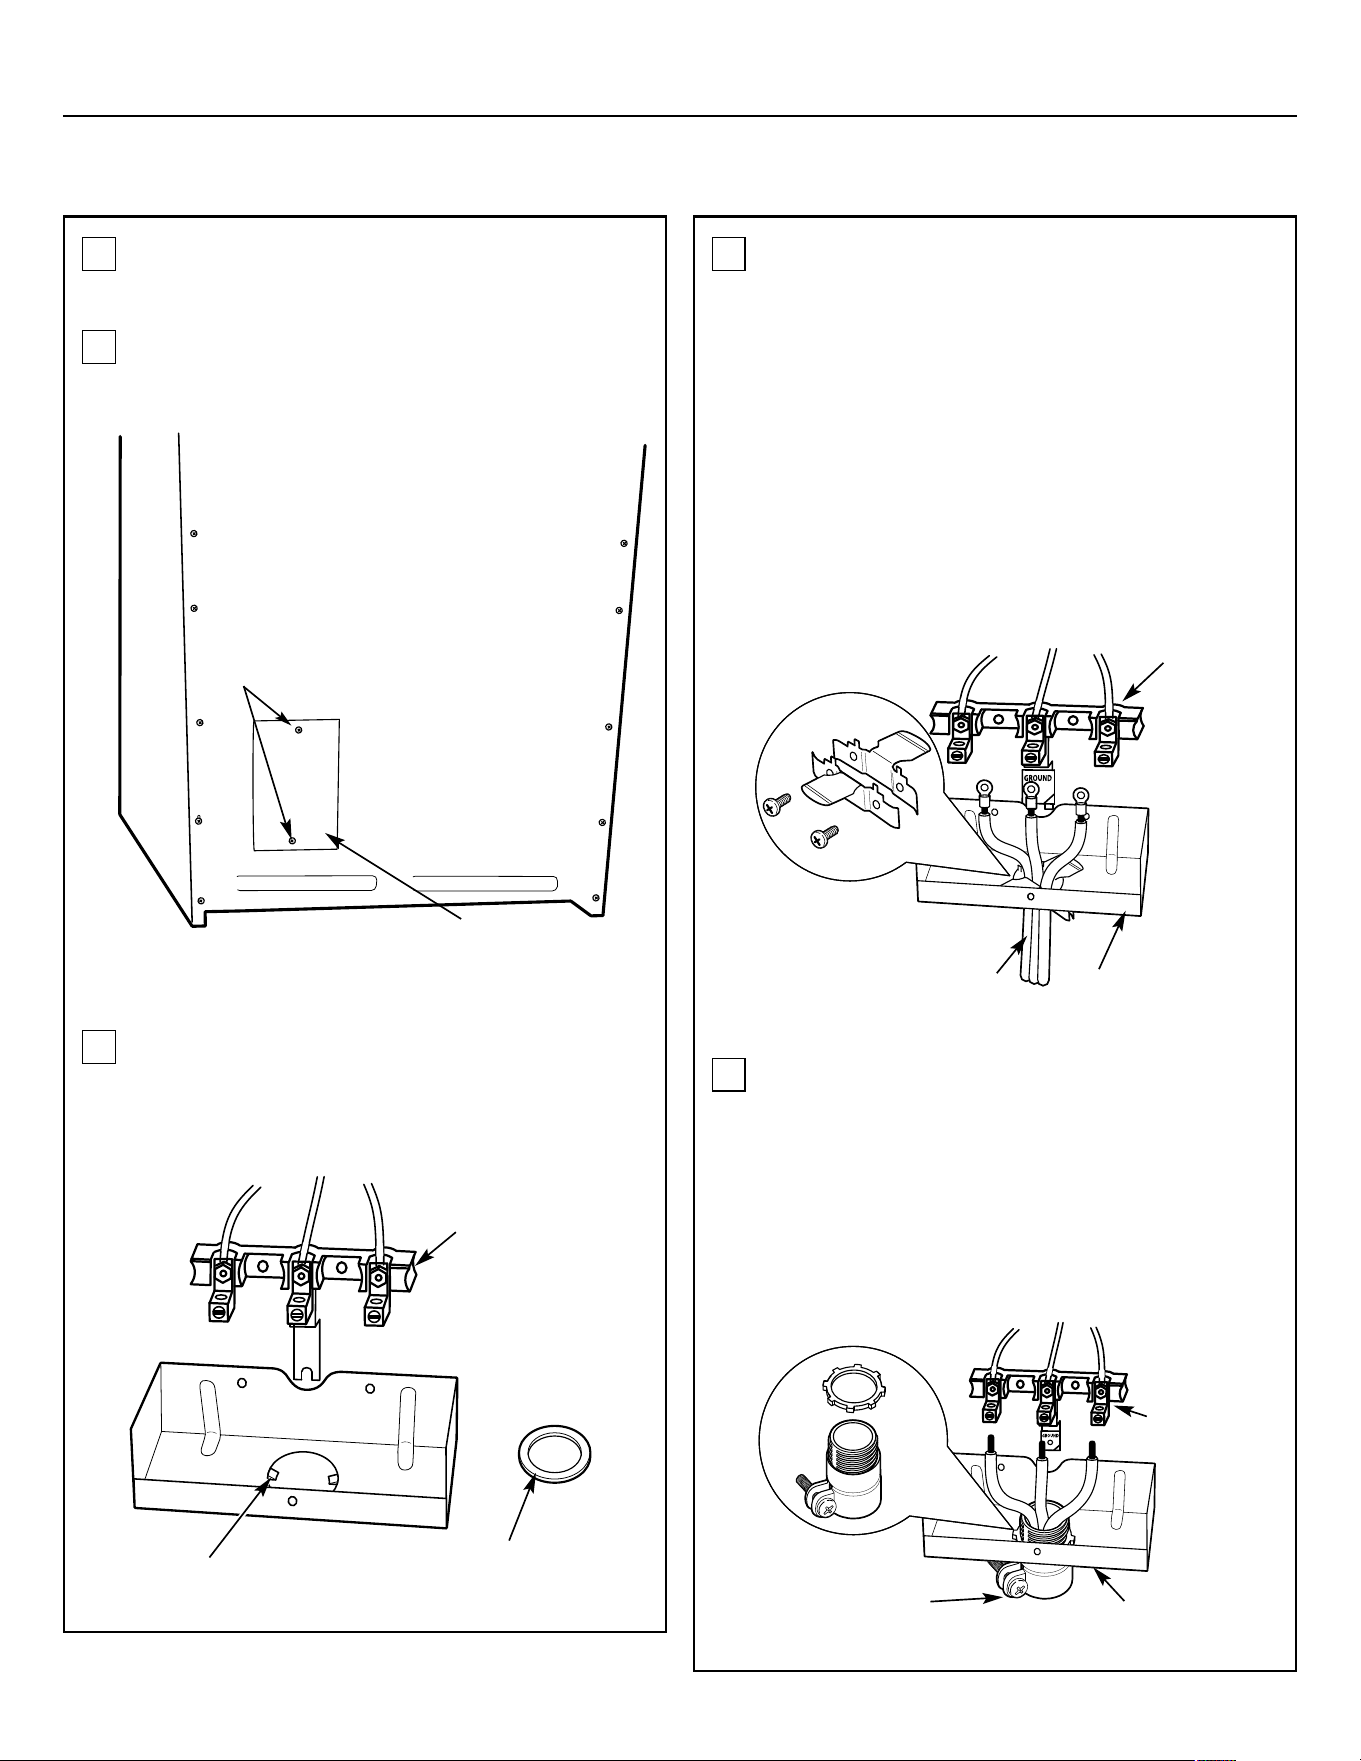
35
Conector
de presión
Tubo portacables
Soporte
Bloque de
terminales
eléctricas
Reductor
de tensión
Cordón eléctrico Soporte
Bloque de
terminales
eléctricas
2 tornillos para
retirar la cubierta
de los cables
Parte trasera
de la estufa
Cubierta de
los cables
Bloque de
terminales
eléctricas
(la apariencia
puede variar)
Anillo troquelado
en el soporte
Anillo troquelado
removido
Instrucciones de instalación
REQUISITOS ELÉCTRICOS (CONT.)
INSTALACIÓN DEL CORDÓN ELÉCTRICO Y
DISPOSITIVO REDUCTOR DE TENSIÓN
3
A
B
Solamente para instalaciones con tubo Portacables
(Conduit), adquiera un conector de presión qué encaje con
el diámetro de su tubo portacables (conduit) y ensamble
en el hueco del soporte. Inserte el tubo portacables a tra-
vés del conector de presión y apriete. Permita que los ca-
bles tengan la suficiente longitud para conectar los cables
al bloque para terminales. NOTA: No instale el tubo porta-
cables (conduit) sin un conector de presión. Verifique que
se haya instalado un conector de presión antes de colocar
la cubierta de cables al respaldo de la estufa.
Retire la cubierta de los cables (parte trasera de la estufa)
removiendo dos (2) tornillos con un destornillador Phillips.
No se deshaga de estos tornillos.
C
Retire el anillo troquelado (de 1 3/8" que son 34,9 mm) que
se encuentra en el soporte directamente debajo del blo-
que de terminales eléctricas. Para retirar el anillo troquela-
do, use unas pinzas para doblarlo alejándolo del soporte y
gire hasta removerlo.
Vaya directamente al paso 4 ó 5.
D
Solamente para instalaciones con cordón eléctrico (con-
sulte el siguiente paso si usa conducto portacables), en-
samble el dispositivo reductor de tensión en el agujero. In-
troduzca el cordón eléctrico a través del dispositivo reduc-
tor de tensión y apriete. Deje una longitud suficiente para
conectar con comodidad las terminales del cordón eléctri-
co con el bloque de terminales. Si el extremo del dispositi-
vo reductor de tensión alado viene con lengüetas, puede
removerlas para obtener un mejor acomodo.
NOTA: No instale el cordón eléctrico sin un dispositivo
reductor de tensión. El soporte del dispositivo reductor
de tensión debe instalarse antes de reinstalar la cubier-
ta de cables que se encuentra en la parte trasera de la
estufa.
Vaya directamente al paso 6 ó 7.

36
Antes
Cinta para
conexión a tierra
Bloque de
terminales
eléctricas
Tornillo
de conexión
a tierra
o bien
Terminal
neutral
Después
Bloque de
terminales
eléctricas
Cinta para
conexión a tierra
Terminal
neutral
Placa de
conexión
a tierra
(aterrizado
de la estufa)
Terminal
neutral
Cinta para
conexión a
tierra
Bloque de
terminales
eléctricas
(la
apariencia
puede
variar)
Placa
de tierra
Cordón
eléctrico
Instrucciones de instalación
REQUISITOS ELÉCTRICOS (CONT.)
INSTALACIÓN DE UN CORDÓN ELÉCTRICO
DE 3 CONDUCTORES
4
A
ADVERTENCIA: EL CABLE NEUTRAL O DE CO-
NEXIÓN A TIERRA DEL CORDÓN ELÉCTRICO
DEBE CONECTARSE A LA TERMINAL NEUTRAL
UBICADA AL CENTRO DEL BLOQUE DE TERMI-
NALES. LOS CONDUCTORES DE ENERGÍA DE-
BEN CONECTARSE EN LAS TERMINALES IZ-
QUIERDA Y DERECHA DEL BLOQUE DE TERMI-
NALES.
Retire las 3 tuercas inferiores del bloque de terminales. Inserte
los tres anillos terminales de los cables eléctricos en cada una
de las terminales del bloque de terminales. Asegúrese de qué
el cable blanco/neutral quede conectado en la terminal cen-
tral. Reinstale y apriete las tuercas con fuerza en el bloque de
terminales.
B
5
Vaya directamente al paso 8 y proceda con la instalación.
A
B
C
D
E
INSTALACIÓN DE UN CORDÓN ELÉCTRICO
DE 4 CONDUCTORES
ADVERTENCIA: EL CABLE NEUTRAL DEL CIRCUI-
TO DE ALIMENTACIÓN DEBE CONECTARSE A LA
TERMINAL NEUTRAL UBICADA AL CENTRO DEL
BLOQUE DE TERMINALES. LOS CONDUCTORES
DE ENERGÍA DEBEN CONECTARSE EN LAS TER-
MINALES IZQUIERDA Y DERECHA DEL BLOQUE
DE TERMINALES. EL 4TO. CONDUCTOR DE TIE-
RRA DEBE CONECTARSE A LA ESTRUCTURA DE
LA ESTUFA USANDO LA PLACA A TIERRA Y EL
TORNILLO A TIERRA.
Retire las tres tuercas inferiores del bloque de terminales eléc-
tricas. Retire el tornillo y placa de conexión a tierra y guárde-
los.
Corte y deshágase de la cinta de conexión a tierra. NO SE
DESHAGA DE NINGUNO DE LOS TORNILLOS.
Inserte el tornillo de tierra en el anillo del cable de tierra del
cordón eléctrico, a través de la placa de conexión a tierra y
ésta en la estructura de la estufa.
Vaya directamente al paso 8 y proceda con la instalación.
Inserte las tres tuercas de las terminales (que retiró antes) a
través de cada anillo de los cables del cordón eléctrico y den-
tro de las terminales del bloque de terminales. Asegúrese de
que el cable Blanco/Neutral se conecte a la terminal central
inferior del bloque de terminales. Apriete firmemente las tuer-
cas en el bloque de terminales.
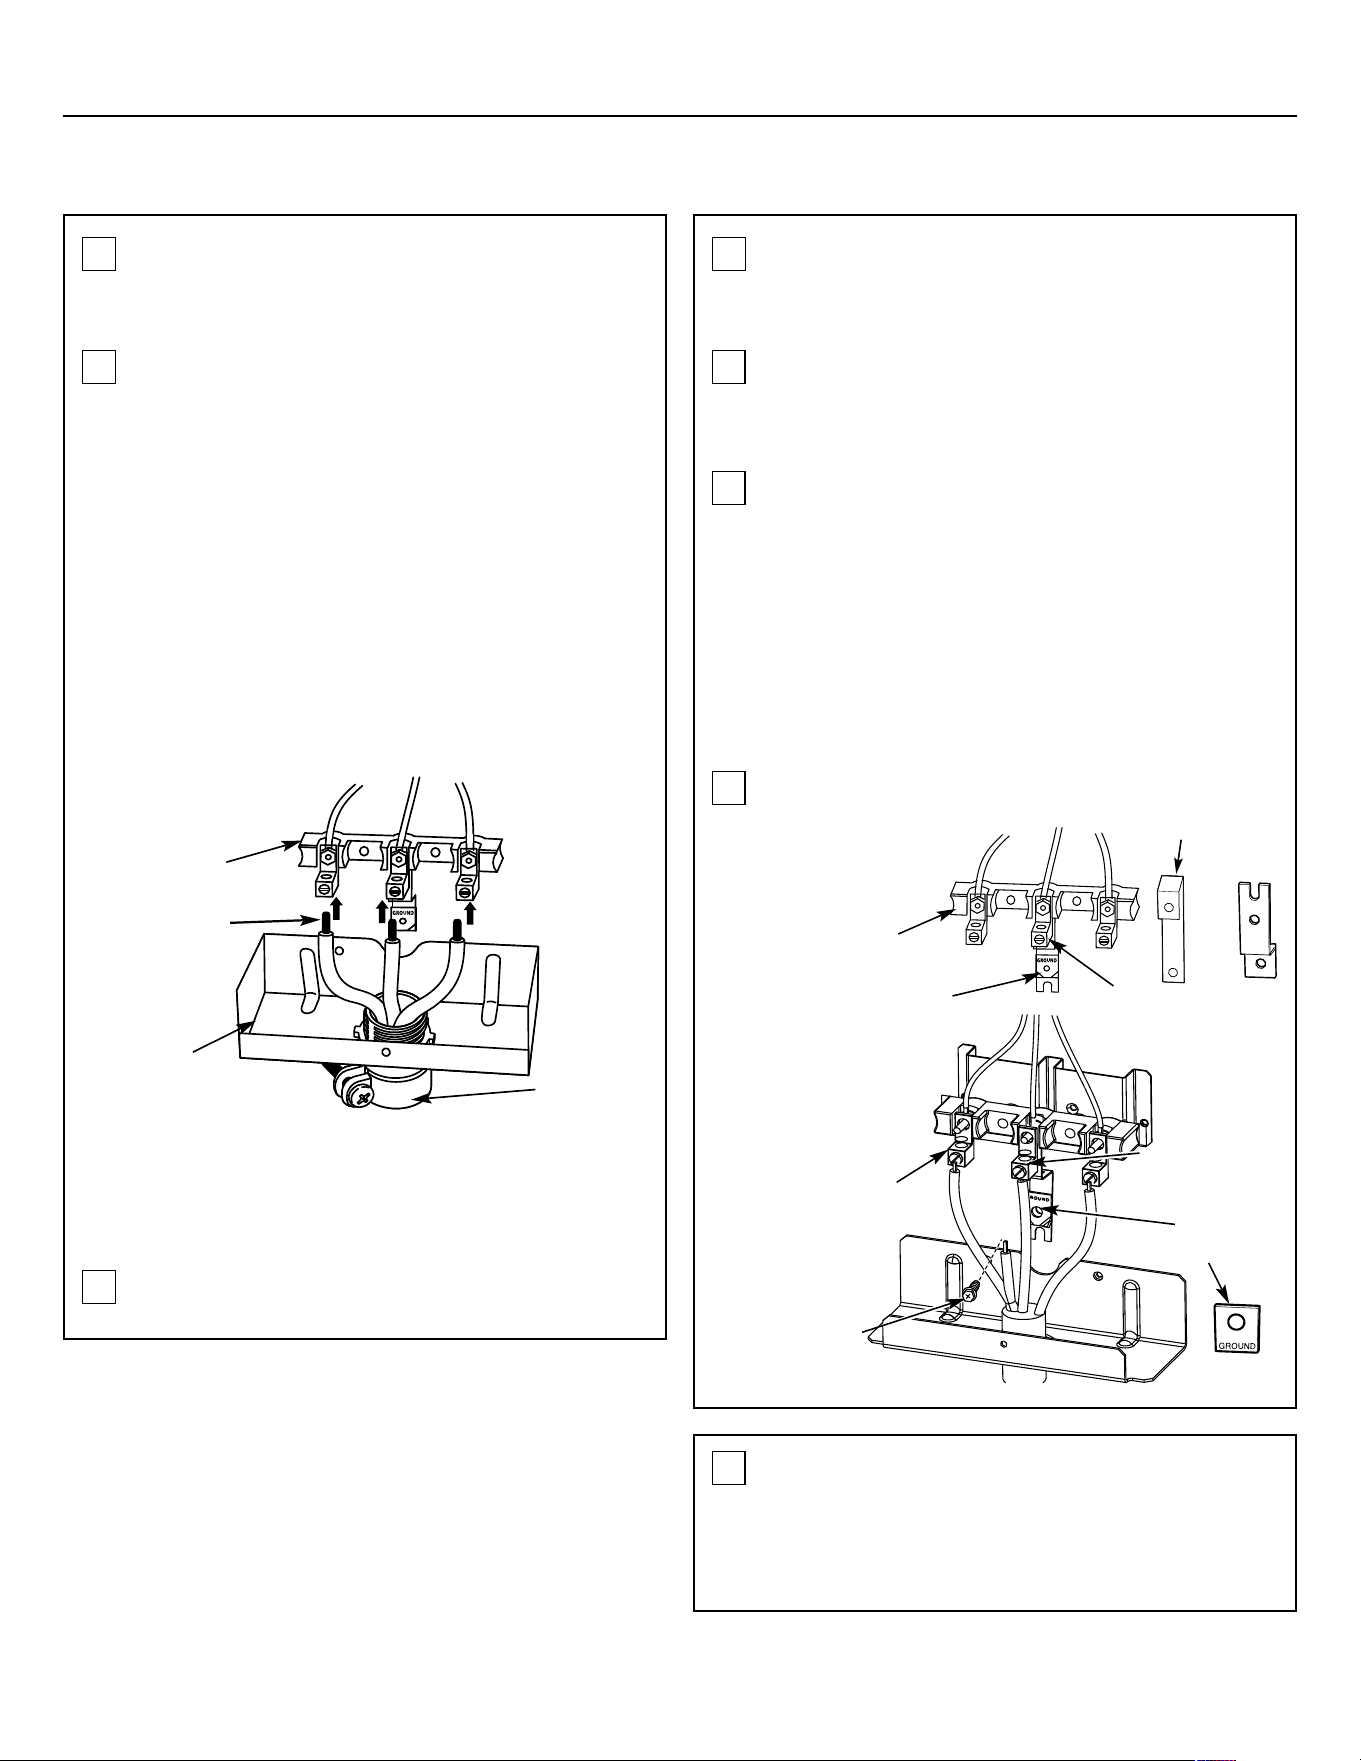
37
Antes
Terminal
neutral
Cinta para
conexión a tierra
Bloque de
terminales
eléctricas
Tornillo
de conexión
a tierra
o bien
Después
Cinta para
conexión a tierra
Bloque de
terminales
eléctricas
Terminal neutral
Placa de
conexión
a tierra
(aterrizado
de la estufa)
Soporte
Conducto
portacables
Puntas de
los cables
Bloque de
terminales
eléctricas
Instrucciones de instalación
REQUISITOS ELÉCTRICOS (CONT.)
INSTALACIÓN DE CONDUCTO
PORTACABLES (CONDUIT) DE 3
CONDUCTORES
6
A
INSTALACIÓN DE CONDUCTO
PORTACABLES (CONDUIT) DE 4
CONDUCTORES
7
Reinstale la cubierta de los cables contra el respaldo de la
estufa colocando los dos tornillos que retiró antes. Asegú-
rese que no quede ningún cable aplastado entre la cubier-
ta y el respaldo de la estufa.
Afloje los tres tornillos inferiores del bloque de terminales.
Inserte la punta del cable pelado (Blanco/Neutro) a través
del orificio de la terminal central del bloque de terminales.
En ciertos modelos, el cable necesitará ser insertado a tra-
vés del agujero de la cinta a tierra y después en el agujero
de la terminal central del bloque de terminales. Inserte las
otras dos puntas de los cables pelados dentro de las aber-
turas de las terminales izquierda y derecha del bloque de
terminales. Apriete los tornillos hasta que el cable quede
sujeto con firmeza (aproximadamente 20 lb-in)
B
A
B
C
8
NOTA: CABLES DE ALUMINIO:
Se pueden usar cables hechos de aluminio pero deben es-
tar fabricados para el voltaje y amperaje correctos para
hacer las conexiones. Conecte los cables de acuerdo con
los pasos 6 ó 7 dependiendo del número de hilos.
El cable usado, la ubicación y el aislamiento usado en
las conexiones, etc., debe estar de acuerdo con buenas
practicas de cableado y los reglamentos locales.
Vaya directamente al paso 8 y proceda con la instalación.
Afloje los tres tornillos inferiores del bloque de terminales.
Retire el tornillo y placa de conexión a tierra y apártelos.
Corte y deshágase de la cinta de conexión a tierra.
NO TIRE NINGÚN TORNILLO.
Inserte la punta del cable pelado de tierra entre la estruc-
tura de la estufa y la placa de tierra (removida en el paso
anterior) y asegúrelas en su sitio usando el tornillo de tie-
rra (también retirado en el paso anterior). Inserte las otras
dos puntas de los cables pelados dentro de las aberturas
de las terminales izquierda y derecha del bloque de termi-
nales. Apriete los tornillos hasta que los cables queden su-
jetos con firmeza (aproximadamente 20 lb-in).
El cable, la posición y el aislamiento usado en las co-
nexiones, etc., debe estar de acuerdo con buenas practi-
cas de cableado y los reglamentos locales.
Proceda ahora con el paso 8.
REINSTALE LA CUBIERTA DE LOS CABLES

38
Pata
niveladora
Bajar la
estufa
Elevar
la estufa
Instrucciones de instalación
INSTALE LA ESTUFA
INSTALACIÓN DEL DISPOSITIVO
ANTIVOLCADURAS
9
RETIRE EL CAJÓN DE ALMACENAMIENTO10
A
NIVELE LA ESTUFA11
A
B
Riesgo de Volcaduras
Un niño o un adulto pueden hacer volcar la estufa y morir.
Verifique que el soporte antivolcaduras se haya instalado y
ajustado correctamente.
Asegúrese de que el dispositivo antivolcaduras sea
reinstalado cuando se mueva la estufa. No utilice la estufa
sin que el dispositivo antivolcaduras esté instalado y
ajustado.
Si estas instrucciones no se siguen, como resultado se podrá
producir la muerte o quemaduras graves de niños y adultos.
ADVERTENCIA
Para reducir el riesgo de que la estufa se vuelque, ésta debe es-
tar asegurada con un soporte antivolcaduras apropiadamente
instalado. Consulte las instrucciones de instalación incluidas
con el soporte para los detalles completo antes de comenzarla
instalación.
Para revisar si el soporte esta instalado y enganchado de ma-
nera apropiada, mire por debajo de la estufa para asegurarse
de que el brazo antivolcaduras unido al panel lateral, se en-
cuentre enganchado al soporte. En algunos modelos, el cajón
de almacenamiento o el panel de protección se puede retirar
para una inspección mas cómoda. Si no es posible realizar una
inspección visual, deslice la estufa hacia adelante, confirme
que el soporte antivolcaduras esté firmemente sujeto al piso o
a la pared, y deslice la estufa hacia atrás de modo que el brazo
antivolcaduras se deslice justo por debajo del soporte antivol-
caduras. Si por cualquier razón usted jala la estufa separándola
de la pared, siempre repita este procedimiento a fin de verificar
que la estufa se encuentre apropiadamente asegurada por me-
dio del soporte antivolcaduras.
Instale las parrillas en el horno y acomode la estufa en el
lugar donde quedará instalada.
B
C
Jale el cajón hasta que se detenga.
Levante el frente del cajón hasta que los topes libren la
guía.
Retire el cajón.
Revise la nivelación del aparato colocando un nivel de bur-
buja o una taza parcialmente llena con agua, sobre una de
las parrillas del horno. Si usa un nivel de burbuja, tome dos
lecturas, primero con el nivel colocado diagonalmente en
una dirección y luego en la otra dirección.
C
D
Las patas niveladoras frontales pueden ajustarse desde su
parte inferior, y las traseras pueden ajustarse desde su
parte superior o desde su parte inferior.
Use una llave inglesa o una llave de tuercas ajustable
(perica) para ajustar las patas niveladoras, hasta que la es-
tufa quede nivelada.
39
Instrucciones de instalación
LISTA DE VERIFICACIÓN DE LA
INSTALACIÓN
11
• Revise para asegurarse de que el disyuntor de circuitos de
la casa esté cerrado (RESET).
• Asegúrese de que la energía eléctrica de la casa esté en ser-
vicio.
• Nota (en algunos modelos): Si el reloj parpadea la palabra
"bad" y después "LinE" con un tono de volumen alto, esto
significa que la conexión a neutral de la estufa es incorrecta.
Revise las conexiones de la caja de terminales y/o el cablea-
do de la casa para corregir esta situación.
• Revise para asegurarse de que todo el material de empaque
y la cinta adhesiva haya sido removida. Esto incluye cinta
adhesiva sobre el panel metálico, bajo las perillas de control
(si aplica), cinta adhesiva, amarres de alambre, cartón y
plástico de protección. El no remover estos materiales po-
dría resultar en daños al aparato una vez que el aparato se
ha encendido y las superficies se han calentado.
• Revise para asegurarse de que la pata niveladora trasera se
encuentre completamente insertada en el dispositivo antila-
deos y que la ménsula de soporte se encuentre firmemente
instalada.
LISTA DE VERIFICACIÓN DE LA OPERACIÓN12
• Encienda un quemador de la cubierta para observar que la
resistencia brilla dentro de un periodo de 60 segundos. Apa-
gue el quemador cuando detecte el brillo. Si no se detecta
brillo dentro del periodo límite de tiempo, revise de nuevo
las conexiones eléctricas de la estufa. Si se requiere de un
cambio, pruebe de nuevo. Si no se requiere de un cambio en
las conexiones, haga revisar el cableado de la casa para ve-
rificar que las conexiones y el voltaje sean apropiados.
• Revise para asegurarse de que la pantalla del reloj esté e-
nergizada (en modelos equipados con reloj). Si aparece en
pantalla una serie de líneas rojas horizontales, desconecte el
suministro de energía inmediatamente. Revise de nuevo las
conexiones de la estufa. Si se hace un cambio en las co-
nexiones, pruebe de nuevo. Si no se requiere de un cambio
en las conexiones, haga revisar el cableado de la casa para
verificar que las conexiones y el voltaje sean apropiados. Se
recomienda hacer reemplazar el reloj si aparecen las líneas
rojas.
• Asegúrese de que todos los controles de la estufa se en-
cuentren en la posición OFF (APAGADO) antes de dejar la es-
tufa.

40
Problema
Antes de que llame para solicitar servicio...
Consejos para solucionar problemas
Ahorre tiempo y dinero. Revise primero los cuadros en las siguientes páginas y quizá no necesite llamar para pedir un
servicio.
Causas posibles Qué hacer
Quemadores eléctricos radiantes
Los quemadores radian-
tes ciclan frecuentemente
encendiendo y apagán-
dose
Se están usando utensilios inapropia-
dos.
• Para minimizar dicho ciclaje, use utensilios de fondo plano so-
lamente.
Corrosión (o melladura) de
la cubierta de cristal
Se derramó una mezcla caliente con
azúcar sobre la cubierta de cristal.
• Llame a un técnico calificado para su reemplazo.
Plástico derretido sobre la
superficie
La cubierta caliente tuvo contacto con
plástico colocado sobre ella.
• Consulte la sección "Superficie de cristal- Riesgo de daño per-
manente" en la sección "Limpiando la cubierta de cristal".
Areas decoloradas en la
cubierta de cristal
Derrames de alimentos no limpiados
antes del siguiente uso.
• Consulte la sección "Limpiando la cubierta de cristal".
Superficie caliente en un modelo que
viene con una cubierta de cristal de
color claro.
• Esto es normal. La superficie puede lucir decolorada cuando
está caliente. Esto es temporal y desaparecerá mientras el
cristal se enfría.
Rayones (pueden lucir
como grietas) sobre la su-
perficie de cristal de la cu-
bierta
Se están usando métodos de limpieza
incorrectos.
Se están usando utensilios con fondos
ásperos o había partículas abrasivas
(sal o arena) entre los utensilios y la
superficie de la cubierta de cristal.
Se han deslizado utensilios a través de
la superficie de la cubierta de cristal.
• Los rayones no se pueden remover ya. Los rayones pequeños
se harán menos visibles con el tiempo como resultado de las
limpiezas.
• Para evitar rayones, use los procedimientos de limpieza reco-
mendados. Asegúrese de que el fondo de los utensilios esté
limpio antes de usarlos y use utensilios con fondos tersos.
Los controles están colocados en po-
siciones inapropiadas.
• Revise para asegurarse de que el control sea el correcto para el
quemador que usted trata de encender.
Los quemadores eléctri-
cos radiantes no trabajan
apropiadamente
Fusible quemado o disyuntor de cir-
cuitos disparado en el panel de servi-
cio de la casa.
• Reemplace el fusible o reacondicione el disyuntor de circuitos.
Los quemadores eléctri-
cos radiantes no mantie-
nen una ebullición conti-
nua o la cocción no es lo
suficientemente rápida.
Se están usando utensilios inapropia-
dos.
• Use cacerolas con fondos planos y que correspondan con el
diámetro del quemador radiante seleccionado.
Instrucciones de
seguridad
Instrucciones de
operación
Cuidado y limpieza
Solución
de problemas
Servicio
al consumidor
Instrucciones de
instalación

41
Problema Causas posibles Qué hacer
Quemadores eléctricos de espiral
Los controles están colocados en po-
siciones inapropiadas.
• Revise para asegurarse de que está usando el control correcto
para el quemador que usted trata de encender.
Los quemadores eléctri-
cos de espiral no trabajan
apropiadamente
Los quemadores no están bien conec-
tados.
• Con los controles en la posición de apagado, revise para ase-
gurarse de que el quemador eléctrico de espiral esté bien co-
nectado en su receptáculo.
Las charolas recolectoras no están
bien colocadas en la cubierta.
• Con los controles en la posición de apagado, revise para ase-
gurarse de que las charolas recolectoras se encuentren dentro
de los saques de la cubierta y que la abertura de la charola
esté alineada con el receptáculo.
Horno: Todos los modelos
El interruptor que opera la iluminación
está descompuesto.
• Llame para solicitar servicio.
La luz del horno no traba-
ja
El foco está flojo o defectuoso. • Apriete o reemplace el foco.
El horno no trabaja La clavija de la estufa no está comple-
tamente insertada en el contacto e-
léctrico.
• Asegúrese de que la clavija eléctrica esté conectada en un con-
tacto vivo y apropiadamente aterrizado.
Puede haberse fundido un fusible en
su casa o el disyuntor de circuitos se
disparó.
• Reemplace el fusible o reacondicione el disyuntor de circuito.
Controles de horno colocados inapro-
piadamente.
• Consulte la sección "Usando el horno".
En modelos con autolimpieza, se dejó
la puerta en la posición de bloqueo
(asegurada).
• Si fuera necesario, permita que el horno se enfríe, después des-
bloquee la puerta.
Los alimentos no se hor-
nean o rostizan apropia-
damente
Controles de horno colocados inapro-
piadamente.
• Consulte la sección "Usando el horno".
Posición de parrilla incorrecta o la pa-
rrilla no está nivelada.
• Consulte la sección "Usando el horno".
Se están usando utensilios inapropia-
dos o de tamaño inapropiado.
• Consulte la sección "Usando el horno".
El termostato del horno requiere de
ajuste.
• Consulte la sección "Ajuste el termostato del horno usted mis-
mo".
No hay energía en el con-
tacto eléctrico de conve-
niencia que se encuentra
en la parte superior del
copete (en algunos mode-
los)
La clavija del electrodoméstico peque-
ño que desea conectar no está bien
conectada en el contacto eléctrico de
conveniencia.
• Asegúrese de que la clavija del electrodoméstico pequeño esté
bien introducida en el contacto eléctrico de conveniencia.
El copete de la estufa está demasiado
caliente y el disyuntor de circuitos
que proteje al contacto de convenien-
cia se ha disparado.
• Permita que la estufa se enfríe, después reinicialice el disyuntor
de circuitos presionando el interruptor que se ubica cerca del
contacto eléctrico de conveniencia.
Antes de que llame para solicitar servicio...
Instrucciones de
seguridad
Instrucciones de
operación
Cuidado y limpieza
Solución
de problemas
Servicio
al consumidor
Instrucciones de
instalación
42
Problema Causas posibles Qué hacer
Los alimentos no se asan
apropiadamente
El horno no está programado en la
posición para ASAR.
• En modelos que vienen con una perilla de temperatura, asegú-
rese de que usted giró la perilla hasta la posición BROIL (ASAR).
En modelos con botón BROIL (ASAR), asegúrese de que esté en-
cendido.
Antes de que llame para solicitar servicio...
La puerta del horno no está abierta
hasta la posición de tope para asar
como se recomienda.
• Consulte la sección "Usando el horno".
Se está usando una posición inapro-
piada para la parrilla.
• Consulte la "Guía para asar".
Usted está asando los alimentos en
una cacerola caliente.
• Use la charola y rejilla para asar que vienen con su estufa. Ase-
gúrese de que estén frías.
Utensilios no apropiados para asar. • Use la charola y rejilla para asar que vienen con su estufa.
Se está usando papel aluminio para
recubrir la charola y rejilla para asar, y
no ha sido amoldado y rajado apro-
piadamente como se recomienda.
• Consulte la sección "Usando el horno".
En algunas áreas la potencia (voltaje)
podría estar baja.
• Precaliente la resistencia para asar durante 10 minutos.
• Ase durante el periodo de tiempo más largo que recomienda la
"Guía para asar".
El control emite señales
después de ingresar el
tiempo de cocción o el ini-
cio retrasado.
Usted olvidó ingresar una temperatu-
ra para hornear o un tiempo para la
autolimpieza.
• Presione el botón BAKE (HORNEAR) y después ingrese la tempe-
ratura deseada o el botón SELF CLEAN (AUTOLIMPIEZA) y des-
pués el tiempo de limpieza deseado.
La pantalla parpadea
"bAd" y después "linE" y se
escucha un tono de volu-
men alto
La unidad está mal cableada con a la
instalación eléctrica de la casa.
• Contacte al instalador o al electricista para corregir el cableado.
Instrucciones de
seguridad
Instrucciones de
operación
Cuidado y limpieza
Solución
de problemas
Servicio
al consumidor
Instrucciones de
instalación

43
Problema Causas posibles Qué hacer
No puede hacer que la
pantalla muestre las letras
"SF"
Los botones del control del horno no
fueron presionados apropiadamente.
• Los botones BAKE (HORNEAR) y BROIL (ASAR) deben presio-
narse al mismo tiempo y dejarse presionados durante 3 segun-
dos.
La pantalla parpadea Apagón. • Reajuste el reloj.
Apagón Apagón o pico en el voltaje. • Algunos modelos retoman sus posiciones automáticamente
una vez que se ha restablecido el suministro de energía. En mo-
delos equipados con reloj, usted debe reajustar el reloj. Si el
horno estaba en uso, usted debe reinicializarlo presionando el
botón OFF (APAGAR), ajuste el reloj y reprograme cualquier fun-
ción de cocción que estuviera usando.
La letra "F" y un número o
letra parpadean en la
pantalla
Se trata de un código de error de fun-
ción.
• Presione el botón OFF (APAGAR). Coloque el horno de nuevo en
operación.
Si el código de error se repite: • Desconecte todo suministro de energía que alimenta a la estu-
fa durante 30 segundos por lo menos y después reconecte la
energía. Si el código de error se repite, entonces llame para pe-
dir servicio.
• En modelos con autolimpieza, si aparece un código de función
de error durante el ciclo de autolimpieza, revise el cerrojo de la
puerta del horno. El cerrojo podría haberse movido, aunque sea
ligeramente de la posición de bloqueo. Asegúrese de haber
movido el cerrojo hacia la derecha, hasta donde llegue. Presio-
ne el botón OFF (APAGAR). Permita que el horno se enfríe du-
rante una hora. Ponga el horno de nuevo en operación.
El horno produce clics Es el sonido de la resistencia encen-
diendo y apagándose durante las fun-
ciones de cocción.
• Esto es normal.
La puerta del horno está
encorvada
La puerta está fuera de posición. • Debido a que la puerta del horno es removible, podría salir de
su posición durante la instalación. Para enderezar la puerta,
empuje hacia abajo la esquina más alta.
La pantalla se queda en
blanco
Puede haberse fundido un fusible en
su casa o el disyuntor de circuitos se
disparó.
• Reemplace el fusible o reacondicione el disyuntor de circuitos.
La pantalla no muestra el reloj. • Consulte la sección "Usando el reloj, el timer y el contacto eléc-
trico de conveniencia".
Controles de horno colocados inapro-
piadamente.
• Consulte la sección "Usando el reloj, el timer y el contacto eléc-
trico de conveniencia".
El reloj y el timer no traba-
jan
La clavija de la estufa no está bien in-
troducida en el contacto eléctrico.
• Asegúrese de que la clavija eléctrica esté conectada en un con-
tacto vivo y apropiadamente aterrizado.
Puede haberse fundido un fusible en
su casa o el disyuntor de circuitos se
disparó.
• Reemplace el fusible o reacondicione el disyuntor de circuitos.
Temperatura del horno
demasiado caliente o fría
El termostato del horno requiere ajus-
te.
• Consulte la sección "Ajuste usted mismo el termostato del hor-
no".
Antes de que llame para solicitar servicio...
Instrucciones de
seguridad
Instrucciones de
operación
Cuidado y limpieza
Solución
de problemas
Servicio
al consumidor
Instrucciones de
instalación

44
Antes de que llame para solicitar servicio...
Modelos con autolimpieza
Generación excesiva de
humo durante un ciclo de
autolimpieza.
Suciedad excesiva. • Presione el botón OFF (APAGAR). Abra las ventanas para despe-
jar la habitación del humo. Espere a que la luz del botón SELF-
CLEAN (AUTOLIMPIEZA) se apague. Limpie el exceso de sucie-
dad y reprograme el ciclo de limpieza.
El horno estaba demasiado sucio. • Antes de iniciar un ciclo de limpieza, limpie los derrames difíci-
les. Los hornos demasiado sucios podrían necesitar un ciclo
más de autolimpieza o un periodo de tiempo más largo lim-
piándose.
El horno inicia un ciclo de
autolimpieza cuando us-
ted deseaba hornear, ros-
tizar o asar.
Se bloqueo (aseguró) la puerta duran-
te la cocción.
• Gire la perilla de temperatura del horno hasta la posición OFF
(APAGADO). Deje que el horno se enfríe. Nunca force el mango
del cerrojo de la puerta.
Los controles del horno no se encuen-
tran en las posiciones apropiadas.
• Consulte la sección "Usando el horno de autolimpieza".
El horno no lleva a cabo el
ciclo de autolimpieza.
La temperatura del horno es demasia-
do alta para programar una opera-
ción de autolimpieza.
• Deje que la estufa se enfríe hasta temperatura ambiente y re-
programe los controles.
Problema Causas posibles Qué hacer
Fuerte olor. Las primeras veces que usa el horno,
es normal percibir un olor que provie-
ne del aislamiento alrededor del inte-
rior del horno.
• Esto es temporal.
Olor a quemado o "aceito-
so" que proviene de la ra-
nura de ventilación del
horno.
Esto es normal en un horno nuevo y
desaparecerá con el tiempo.
• Para acelerar el proceso, programe un ciclo de autolimpieza
por un mínimo de 3 horas. Consulte la sección "Usando el hor-
no de autolimpieza".
Crujidos o tronidos. Este es el sonido del metal calentán-
dose y enfriándose durante las fun-
ciones de cocción y limpieza.
• Esto es normal.
La puerta del horno no se
desbloquea.
Horno demasiado caliente. • Deje que el horno se enfríe hasta por debajo de la temperatura
de bloqueo.
El horno no está limpio
después de un ciclo de
limpieza.
Los controles del horno no estaban en
las posiciones apropiadas.
• Consulte la sección "Usando el horno de autolimpieza".
La puerta del horno no está en la posi-
ción de bloqueo (asegurada).
• Asegúrese de mover el mango del cerrojo hacia la derecha
hasta donde llegue.
Zumbido durante HORNEAR o ASAR. • Esto es normal.
El ventilador de enfriamiento se enciende automáticamente
cuando las temperaturas de las funciones ASAR y HORNEAR
son altas (alrededor de 475 ºF (246,1 ºC) para mantener una
temperatura segura para todos los componentes.
El ventilador de enfriamiento se apaga cuando la temperatura
del horno desciende por debajo de 375 ºF (190,6 ºC).
Ruido del ventilador. Zumbido durante un ciclo de autolim-
pieza.
• Esto es normal.
• La estufa está equipada con un ventilador de enfriamiento
para mantener los componentes a una temperatura segura. El
ventilador se enciende y apaga automáticamente mientras la
estufa se encuentra en el ciclo de autolimpieza.
Instrucciones de
seguridad
Instrucciones de
operación
Cuidado y limpieza
Solución
de problemas
Servicio
al consumidor
Instrucciones de
instalación

45
Accesorios
¿Está buscando algo más?
Para comprar partes o accesorios para su aparato, contacte al centro autorizado de servicio.
Quemadores eléctricos de espiral y
charolas recolectoras
Charola de asador
¿Cansado de parrillas de horno decoloradas? ¿Desearía tener parrillas para uso extra-pesado?
AHORA DISPONIBLES para su estufa:
¡Las innovadoras parrillas para horno GE, autolimpiables y recubiertas de porcelana!
• Uso pesado
• Durables
• Se pueden limpiar en horno de autolimpieza
Parrillas para horno
Resistencias para horno PerillasFocos
Limpiador RaspadorAlmohadillas limpiadoras
Instrucciones de
seguridad
Instrucciones de
operación
Cuidado y limpieza
Solución
de problemas
Servicio
al consumidor
Instrucciones de
instalación

46
Owner's Manual and
Installation Instructions
Write the model and serial
numbers here:
Model #
Serial #
You can find them on a label behind
the storage drawer on the oven
frame.
Coil Top and Radiant Top Models
Standard Clean
Models
JCAS745
JCAS445
JCAS735
183D9541P012
Self-Clean Models
JCAP750
JCAP760
JCAP765
Safety Information ............................................. 48-52
Operating Instructions
Surface Units ......................................................... 53-54
Cookware ........................................................................ 55
Controls ........................................................................... 56
Oven .......................................................................... 57, 58
Clock, Timer and Convenience Outlet ..... 59, 60
Timed Baking and Roasting ................................. 61
Special Features .................................................. 62-64
Sabbath Features ............................................... 65, 66
Temperature Conversions ..................................... 66
Thermostat ..................................................................... 67
Self Clean ................................................................ 68, 69
Care and Cleaning .............................................. 70-76
Installation Instructions ................................... 77-85
Troubleshooting Tips ........................................ 86-90
Accessories .................................................................... 91
Consumer Support
Consumer Support .................................................... 95
Warranty ........................................................................ 96
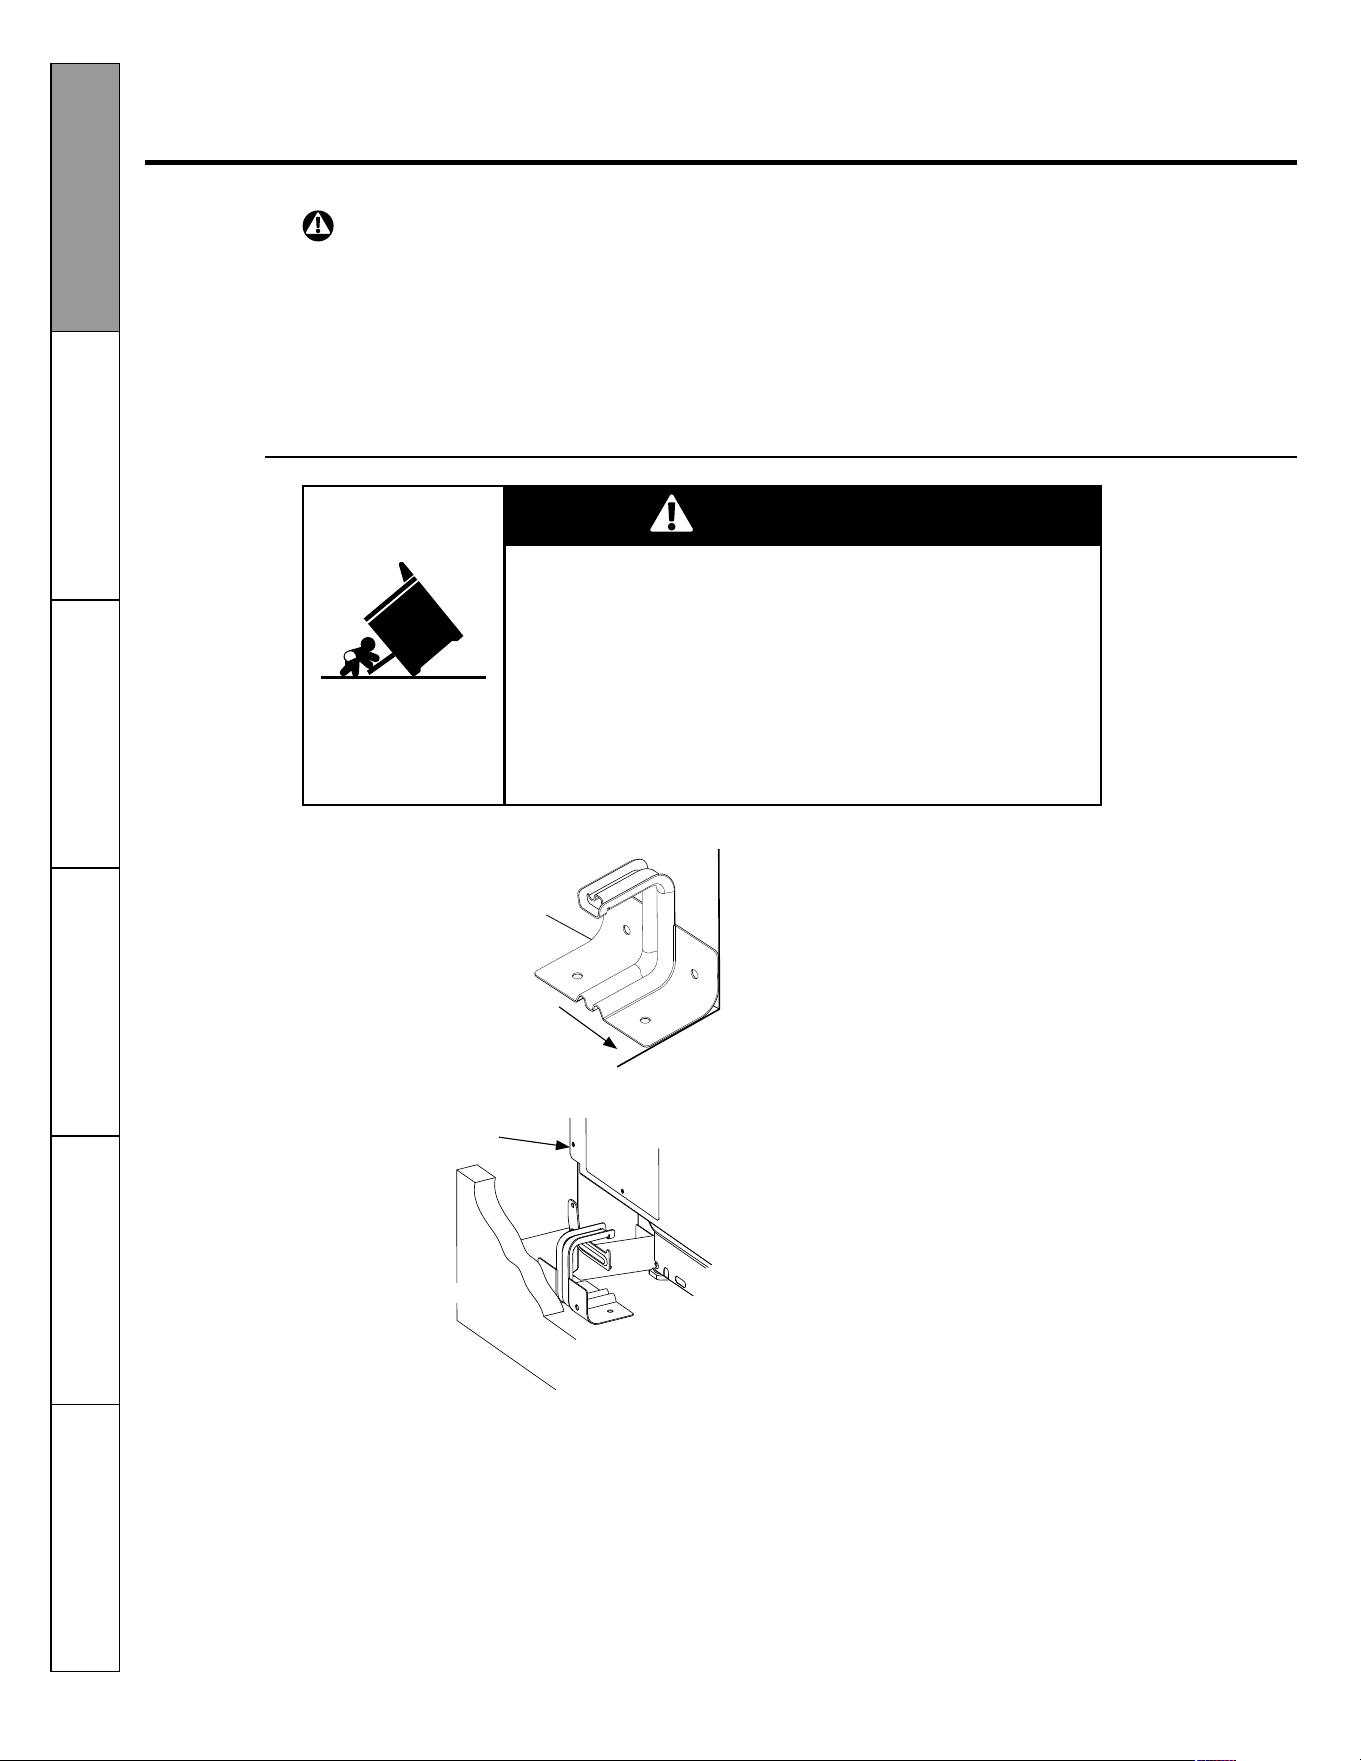
48
IMPORTANT SAFETY INFORMATION.
READ ALL INSTRUCTIONS BEFORE USING.
WARNING! READ ALL SAFETY INSTRUCTIONS BEFORE USING THE PRODUCT. FAILURE
TO FOLLOW THESE INSTRUCTIONS MAY RESULT IN FIRE, ELECTRIC SHOCK SERIOUS IN-
JURY OR DEATH.
ANTI-TIP DEVICE
Safety Instructions
Operating
Instructions
Care and Cleaning
Troubleshooting Tips
Consumer Support
Installation
Instructions
WARNING
Tip-Over Hazard
A child or adult can tip the range and be killed. Verify the anti-tip
bracket has been properly installed and engaged.
Ensure the anti-tip bracket is re-engaged when the range is
moved.
Do not operate the range without the anti-tip bracket in place
and engaged.
Failure to follow these instructions can result in death or serious
burns to children or adults.
Rear Wall
Adjacent cabinet or
final location of right
range side panel
Right Side
Panel
Rear Wall
For Freestanding Ranges
To check if the bracket is installed and engaged properly,
look underneath the range to see that the anti-tip arm at-
tached to the side panel is engaged in the bracket. On
some models, the storage drawer or kick panel can be re-
moved for easier inspection. If visual inspection is not
possible, slide the range forward, confirm the anti-tip
bracket is securely attached to the floor or wall, and slide
the range back so the antitip arm slides just under the
anti-tip bracket. If the range is pulled from the wall for
any reason, always repeat this procedure to verify the
range is properly secured by the anti-tip bracket.
To reduce the risk of tipping the range, the range must be
secured by a properly installed anti-tip bracket. See in-
stallation instructions shipped with the bracket for com-
plete details before attempting to install.
49
• Never wear loose-fitting or hanging garments
while using the appliance. Be careful when reach-
ing for items stored over the range. Flammable
material could be ignited if brought in contact with
hot surface units or heating elements and may
cause severe burns.
• Use only dry pot holders-moist or damp pot hold-
ers on hot surfaces may result in burns from
steam. Do not let pot holders touch hot surface
units or heating elements. Do not use a towel or
other bulky cloth.
• For your safety never use your appliance for
warming or heating the room.
• Do not let cooking grease or other flammable ma-
terials accumulate in or near the range.
• Do not use water on grease fires. Never pick up a
flaming pan. Turn the controls off. Smother a flam-
ing pan on a surface unit by covering the pan
completely with a well fitting lid, cookie sheet or
flat tray. Use a multipurpose dry chemical or
foam-type fire extinguisher.
Flaming grease outside a pan can be put out by
covering it with baking soda or, if available, by us-
ing a multipurpose dry chemical or foam type fire
extinguisher. Flame in the oven can be smothered
completely by closing the door and turning the
oven off or by using a multipurpose dry chemical
or foam type fire extinguisher.
COOK MEAT AND POULTRY THOROUGHLY...
Cook meat and poultry thoroughly—meat to at least an INTERNAL temperature of 160° F and poultry to at
least an INTERNAL temperature of 180°F. Cooking to these temperatures usually protects against foodborne
illness.
WARNING
SAFETY PRECAUTIONS
• Do not touch the surface units, the heating ele-
ments or the interior surface of the oven. These
surfaces may be hot enough to burn even though
they are dark in color. During and after use, do not
touch or let clothing or other flammable materials
contact, the surface units, areas nearby the sur-
face units or any interior area of the oven; allow
sufficient time for cooling first.
Potentially hot surfaces include the cooktop, areas
facing the cooktop, oven vent opening, surfaces
near the opening, crevices around the oven door
and metal trim parts above the door.
REMEMBER: The inside surface of the oven may
be hot when the door is opened.
• Do not store or use combustible materials, gaso-
line or other flammable vapors and liquids in the
vicinity of this or any other appliance.
• Keep the hood and grease filters clean to maintain
good venting and to avoid grease fires.
• Never block the vents (air openings) of the range.
They provide the air inlet and outlet that are nec-
essary for the range to operate properly with cor-
rect combustion. Air openings are located at the
rear of the cooktop, at the top and bottom of the
oven door, and at the bottom of the range under
the storage drawer.
Safety Instructions
Operating
Instructions
Care and Cleaning
Troubleshooting Tips
Consumer Support
Installation
Instructions
50
IMPORTANT SAFETY INFORMATION.
READ ALL INSTRUCTIONS BEFORE USING.
• Stand away from the range when opening the
oven door. Hot air or steam which escapes can
cause burns to hands, face and/or eyes.
• Do not heat unopened food containers. Pressure
could build up and the container could burst, caus-
ing an injury. Keep the oven vent unobstructed.
• Keep the oven free from grease buildup.
• Place the oven shelf in the desired position while
the oven is cool. If shelves must be handled when
hot, do not let pot holder contact the heating ele-
ments.
• Pulling out the shelf to the stop-lock is a conve-
nience in lifting heavy foods. It is also a precaution
against burns from touching hot surfaces of the
door or oven walls.
• When using cooking or roasting bags in the oven,
follow the manufacturer’s directions.
• Do not clean the door gasket. The door gasket is
essential for a good seal. Care should be taken not
to rub, damage or move the gasket.
• Clean only parts listed in this Owner's Manual.
• Do not use oven cleaners on self-clean models. No
commercial oven cleaner or oven liner protective
coating of any kind should be used in or around
any part of the oven. Residue from oven cleaners
will damage the inside of the oven when the self-
clean cycle is used.
• Before self-cleaning the oven, remove the broiler
pan, grid and other cookware.
SELF-CLEANING OVEN (on some models)
• Do not use the oven to dry newspapers. If over-
heated, they can catch on fire.
• Do not use the oven for a storage area. Items
stored in an oven can ignite.
• Do not leave paper products, cooking utensils or
food in the oven when not in use.
• Be sure to wipe up excess spillage before starting
the self-cleaning operation.
• If the self-cleaning mode malfunctions, turn the
oven off and disconnect the power supply. Have it
serviced by a qualified technician.
• Take the shelves out of the oven before you begin
the self-clean cycle or they may discolor.
Safety Instructions
Operating
Instructions
Care and Cleaning
Troubleshooting Tips
Consumer Support
Installation
Instructions
OVEN
51
SURFACE UNITS-ALL MODELS
• Never leave the surface units unattended at high
beat settings. Boilovers cause smoking and greasy
spillovers that may catch on fire.
• Only certain types of glass, glass/ceramic, earth-
enware or other glazed containers are suitable for
cooktop service, others may break because of the
sudden change in temperature.
• To minimize the possibility of burns, ignition of
flammable materials and spillage, the handle of a
container should be turned toward the center of
the range without extending over nearby surface
units.
• Always turn the surface units off before removing
cookware.
• Do not flame foods on the cooktop. If you do
flame foods under the hood, turn the fan on.
• Keep an eye on foods being fried at high or me-
dium high heat settings.
• Foods for frying should be as dry as possible. Frost
on frozen foods or moisture on fresh foods can
cause hot fat to bubble up and over the side of the
pan.
Use proper pan size-select cookware having flat bottoms large enough to cover the surface unit heating ele-
ment. The use of undersized cookware will expose a portion of the surface unit to direct contact and may re-
sult ignition of clothing. Proper relationship of cookware to surface unit will also improve efficiency.
• Use little fat for effective shallow or deep fat fry-
ing. Filling the pan too full of fat can cause
spillovers when food is added.
• If a combination of oils or fats will be used in fry-
ing, stir together before heating, or as fats melt
slowly.
• Always heat fat slowly, and watch as it heats.
• Use a deep fat thermometer whenever possible to
prevent overheating fat beyond the smoking
point.
Safety Instructions
Operating
Instructions
Care and Cleaning
Troubleshooting Tips
Consumer Support
Installation
Instructions

52
• Avoid scratching the glass cooktop. The cooktop can be
scratched with items such as sharp instruments, rings
or other jewelry and rivets on clothing.
• Large scratches or impacts to glass doors or cooktops
can lead to broken or shattered glass.
• Do not operate the radiant surface units if the glass is
broken. Spillovers or cleaning solution may penetrate a
broken cooktop and create a risk of electrical shock.
Contact a qualified technician immediately should your
glass cooktop become broken.
• Never use glass cooktop surface as a cutting board.
• Do not place or store items that can melt or catch fire
on the glass cooktop, even when it is not being used.
• Be careful when placing spoons or other stirring utensils
on the glass cooktop surface when it is in use. They
may become hot and could cause burns.
IMPORTANT SAFETY INFORMATION.
READ ALL INSTRUCTIONS BEFORE USING.
WARNING!
RADIANT SURFACE UNITS (on some models)
Use care when touching the cooktop. The glass surface of the cooktop will retain heat after the controls have been
turned off.
• Clean the cooktop with caution. If a wet sponge or cloth
is used to wipe spills on a hot surface unit, be careful to
avoid steam burns. Some cleaners can produce noxious
fumes if applied to a hot surface.
NOTE: We recommend that you avoid wiping any sur-
face unit areas until they have cooled and the indicator
light has gone off. Sugar spills are the exception to this.
Please see Cleaning the glass cooktop section.
• When the cooktop is cool, use only the recommended
cleaning cream to clean the cooktop.
• To avoid possible damage to the cooking surface, do
not apply cleaning cream to the glass surface when it is
hot.
• After cleaning, use a dry cloth or paper towel to remove
all cleaning cream residue.
• Read and follow all instructions and warnings on the
cleaning cream labels.
• Do not lift the cooktop. Lifting the cooktop can lead to
damage and improper operation of the range.
• Clean the cooktop with caution. If a wet sponge is used
to wipe spills on a hot cooktop, be careful to avoid
steam burns.
• To avoid the possibility of a burn or electric shock, al-
ways be certain that the controls for all surface units
are at the OFF position and all coils are cool before at-
tempting to lift or remove a unit.
• Do not immerse or soak the removable surface units.
Do not put them in a dishwasher.
WARNING!
COIL SURFACE UNITS (on some models)
READ AND FOLLOW THIS SAFETY INFORMATION CAREFULLY
SAVE THESE INSTRUCTIONS
• Be sure the drip pans and the vent duct are not covered
and are in place. Their absence during cooking could
damage range parts and wiring.
• Do not use aluminum foil to line the drip pans or any-
where in the oven except as described in this manual.
Misuse could result in a shock, fire hazard or damage to
the range.
Safety Instructions
Operating
Instructions
Care and Cleaning
Troubleshooting Tips
Consumer Support
Installation
Instructions
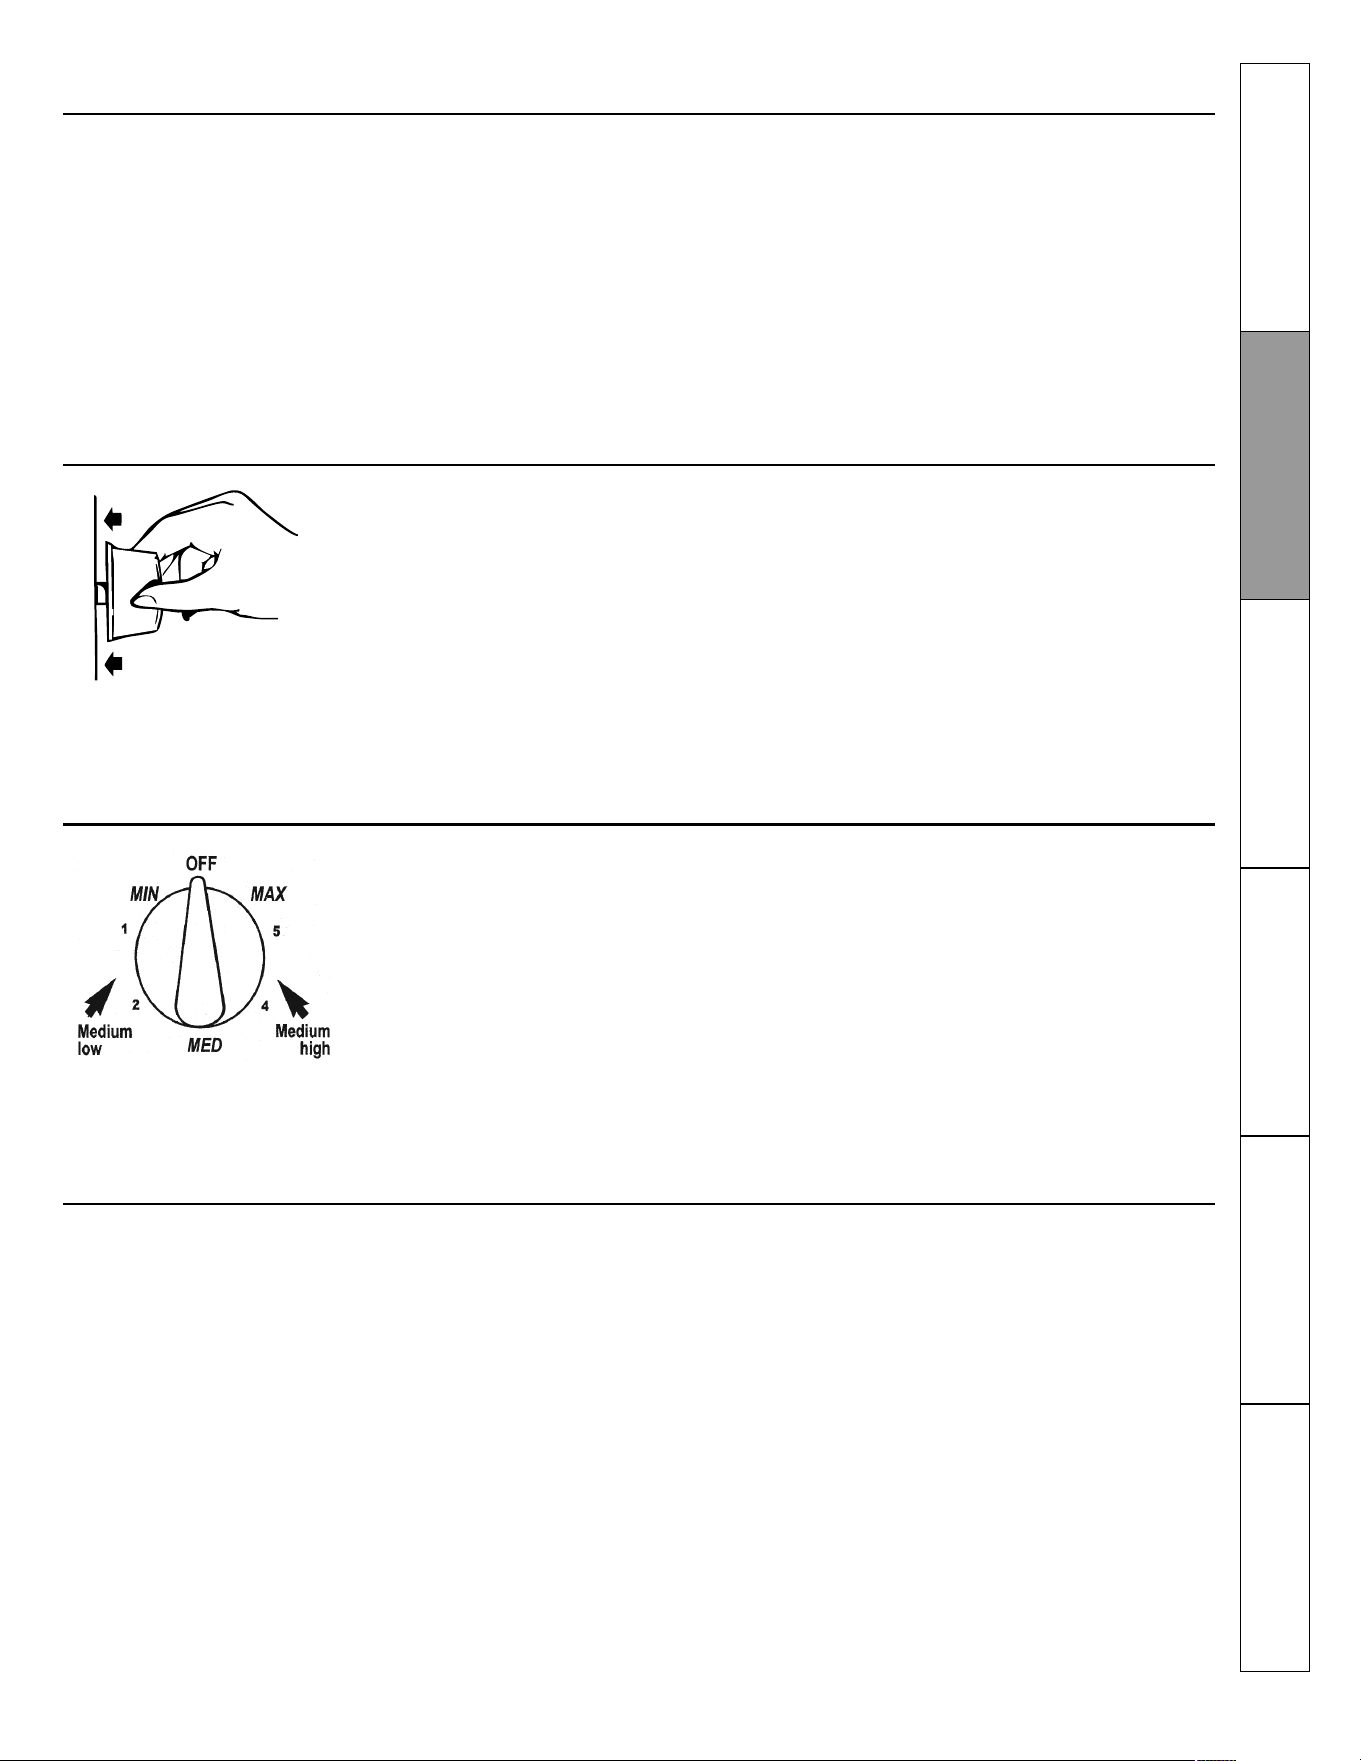
53
Using the surface units.
Throughout this manual, features and appearance may vary from your model.
How to Set the Controls
Surface Cooking Controls
Your surface units and controls are designed to
give you a variety of heat settings for surface
unit cooking.
At both LO and HI positions, there is a slight niche
so control clicks at those positions; HI marks the
highest setting; LO, the lowest setting.
In a quiet kitchen, you may hear slight clicking
sounds during cooking, indicating heat settings
selected are being maintained.
Switching heats to higher settings always shows
a quicker change in temperature than switching
to lower settings.
1. Push the control knob in.
2. Turn either clockwise or counterclockwise to
desired heat setting.
Control must be pushed in to set only from the
OFF position.
When control is in any position other than OFF,
you can turn it without pushing in.
Be sure you turn control to OFF when you finish
cooking. An indicator light will glow when ANY
surfaces unit is on.
A Burner On indicator light will glow when ANY
surface unit is on.
Heat Setting Guide
MAX - Quick start for cooking; bring water to boil.
MEDIUM HIGH - Fast fry, pan broil; maintain fast
boil on large amount of food.
MED - Sauce and brown; maintain slow boil on
large amount of food.
MEDIUM LOW - Cereal; maintain serving tem-
perature of most foods.
MIN - Cook after starting at HI; cook with little
water in covered pan. Use to steam rice.
NOTES:
1. At MAX or MEDIUM HIGH, never leave food un-
attended. Boilovers cause smoking; greasy
spillovers may catch fire.
2. At MIN, melt chocolate, butter on small unit.
Cooking Tips
Use medium- or heavyweight cookware. Alumi-
num cookware conducts heat faster than other
metals. Cast-iron and coated cast-iron cookware
is slow to absorb heat, but generally cooks
evenly at low or medium heat settings. Steel
pans may cook unevenly if not combined with
other metals.
Do not overfill cookware with fat that may spill
over when adding food. Frosty foods bubble vig-
orously. Watch foods frying at high tempera-
tures. Keep range and hood clean from accumu-
lated grease.
To conserve the most cooking energy, pans
should be flat on the bottom, have straight side
and tight-fitting lids. Match the size of the sauce-
pan to the size of the surface unit. A pan that ex-
tends more than an inch beyond the edge of the
drip pan traps heat, which causes "crazing" (fine
hairline cracks) on porcelain, and discoloration
ranging from blue to dark gray on chrome drip
pans.
Safety Instructions
Operating
Instructions
Care and Cleaning
Troubleshooting Tips
Consumer Support
Installation
Instructions
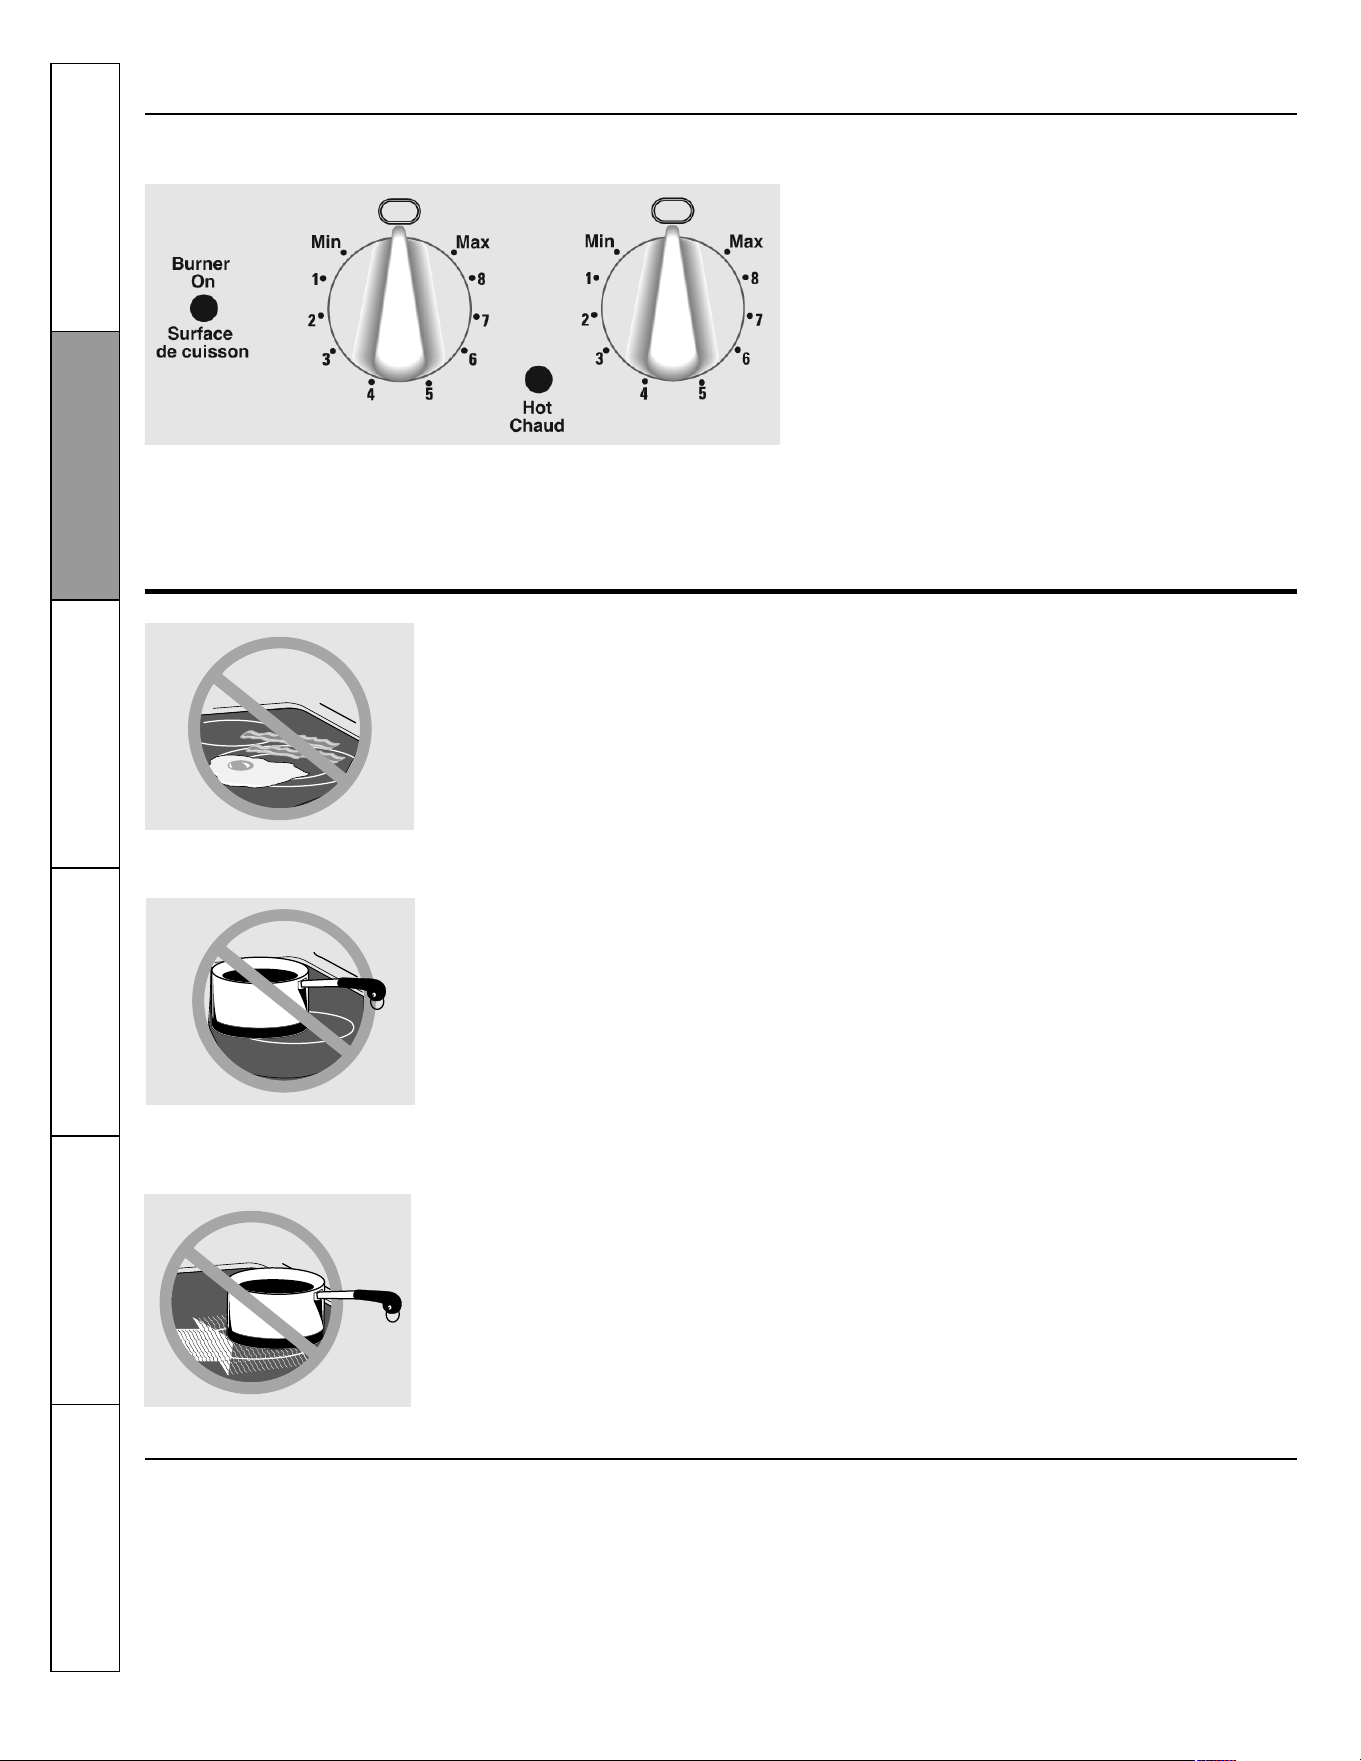
54
Using the radiant surface units. (on some models)
The radiant cooktop features heating units be-
neath a smooth glass surface.
NOTE: A slight odor is normal when a new cook-
top is used for the first time. It is caused by the
heating of new parts and insulating materials and
will disappear in a short time.
The surface unit will cycle on and off to maintain
your selected control setting.
It is safe to place hot cookware from the oven or
surface on the glass surface when the surface is
cool.
Even after the surface units are turned off, the
glass cooktop retains enough heat to continue
cooking. To avoid overcooking, remove pans
from the surface units when the food is cooked.
Avoid placing anything on the surface unit until it
has cooled completely.
Do not slide cookware across the cooktop be-
cause it can scratch the glass - the glass is
scratch resistant, not scratch proof.
About the radiant surface units...
Every radiant surface unit has a temperature
limiter. The temperature limiter protects the glass
cooktop from getting too hot.
The temperature limiter may cycle the units off
for a time if:
Always place the pan in the center
of the surface unit you are cooking
on.
Never cook directly on the glass. Al-
ways use cookware.
• The pan boils dry.
• The pan bottom is not flat.
• The pan is off center.
• There is no pan on the unit.
Temperature Limiter
• Water stains (mineral deposits) are removable
using the cleaning cream or full-strength white
vinegar.
• Use of window cleaner may leave an iridescent
film on the cooktop. The cleaning cream will re-
move this discoloration.
• Do not store heavy items above the cooktop. If
they drop onto the cooktop, they can cause
damage.
• Do not use the surface as a cutting board.
Off center
Surface
cooking
Dragging
Indicator Lights (on radiant glass models only).
A Hot indicator light will glow when any radiant elements
is turned on, and will remain on until the surface is cool
enough to touch.
A Burner On indicator light will glow when any surface
unit is on.
NOTE: The Hot indicator light may glow between the sur-
face control settings of Min and OFF, but there is no
power to the surface units.
Using the surface units.
Throughout this manual, features and appearance may vary from your model.
Safety Instructions
Operating
Instructions
Care and Cleaning
Troubleshooting Tips
Consumer Support
Installation
Instructions

55
Stainless Steel:
recommended
Selecting types of cookware.
The following information will help you choose cookware will give good performance on glass cooktops.
Check for flat bottoms by using a
straight edge.
Pans with rounded, curved, ridged
or warped bottoms are not recom-
mended.
Wok Cooking
We recommend that you use only a flat-bottomed
wok.
They are available at your local retail store. Do
not use woks that have support rings. Use of
these types of woks, with or without the ring in
place, can be dangerous.
Placing the ring over the surface unit will cause a
buildup of heat that will damage the porcelain
cooktop. Do not try to use such woks without the
ring. You could be seriously burned if the wok tips
over.
Use medium- or heavy-weight cookware. Alumi-
num cookware conducts heat faster than other
metals. Cast-iron and coated cast-iron cookware
are slow to absorb heat, but generally cook
evenly at low to medium heat settings. Steel
pans may cook unevenly if not combined with
other metals.
Surface Cookware Tips
For best cooking results, pans should be flat on
the bottom. Match the size of the saucepan to
the size of the surface unit. The pan should not
extend over the edge of the surface unit than 1
inch.
Not over 1 inch
Use only flat-bottomed woks
The following information will help you choose cookware which will give food performance on coil cooktops.
Home Canning Tips:
Be sure the canner is centered over the surface
unit.
Make sure the canner is flat on the bottom.
Use recipes and procedures from reputable
sources. These are available from manufacturers
such as Ball® and Kerr® and the Department of
Agriculture Extension Service.
To prevent burns from steam or heat, use cau-
tion when canning.
Stoneware:
usable, but not recommended
Poor performance. May scratch the surface.
Glass-ceramic:
usable, but not recommended
Poor performance. May scratch the surface.
Porcelain Enamel Covered Cast Iron:
recommended
As long as the cookware is covered completely
with porcelain enamel, this cookware is recom-
mended. Caution is recommended for cast-iron
cookware that is not completely covered with
smooth porcelain enamel, as it may scratch the
glass-ceramic cooktop.
Copper Bottom:
recommended
Copper may leave residues which can appear as
scratches. The residues can be removed, as long
as the cooktop is cleaned immediately. However,
do not let these pots boil dry. Overheated metal
can bond to glass cooktops. An overheated cop-
per bottom pot will leave a residue that will per-
manently stain the cooktop if not removed im-
mediately.
Aluminum:
heavy weight recommended.
Good conductivity. Aluminum residues some-
times appear as scratches on the cooktop, but
can be removed if cleaned immediately. Because
of its low melting point, thin-weight aluminum
should not be used.
Safety Instructions
Operating
Instructions
Care and Cleaning
Troubleshooting Tips
Consumer Support
Installation
Instructions
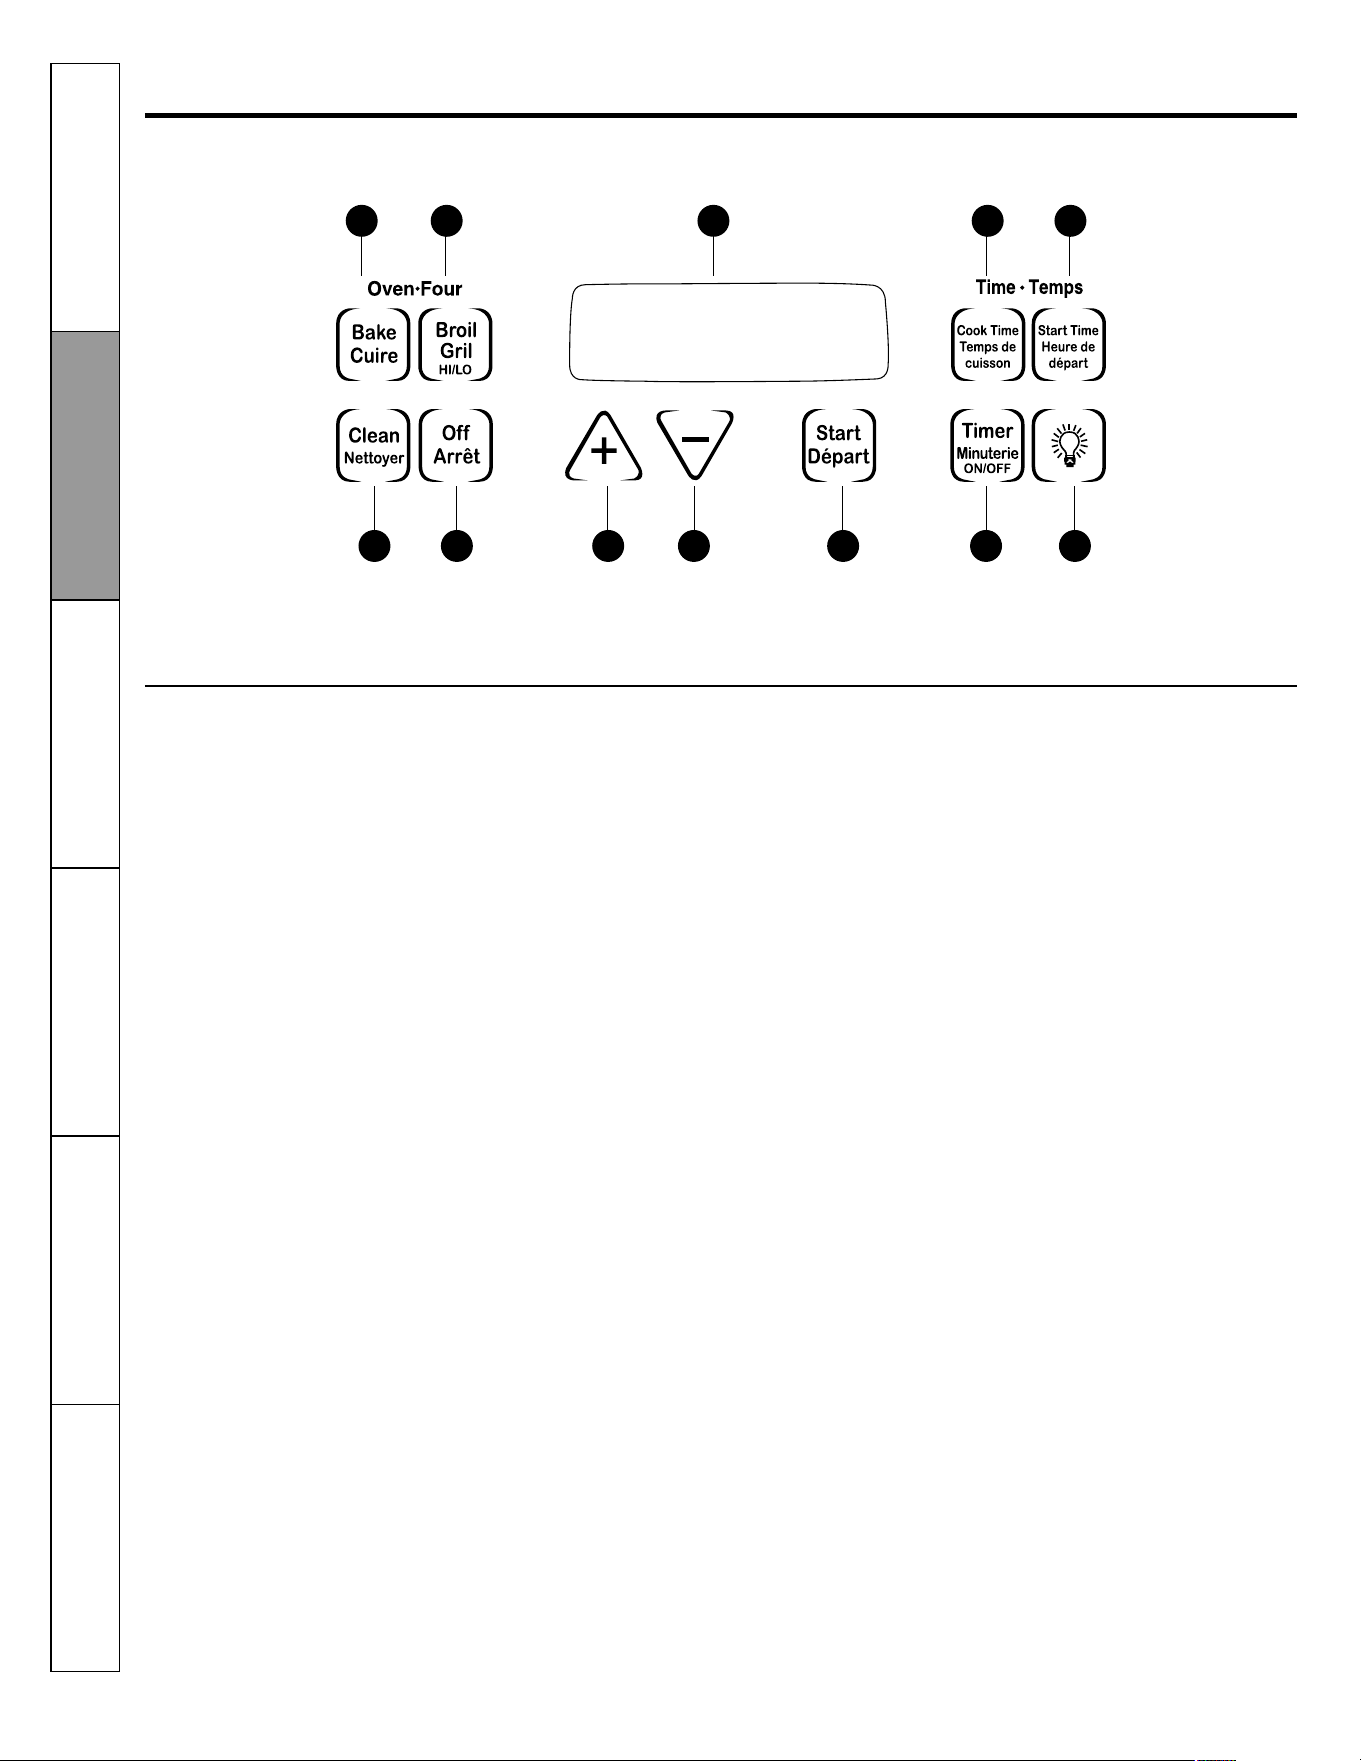
56
1. BAKE Pad
Touch this pad to select the bake function.
BAKE Light
Flashes while in edit mode - you can change the
oven temperature this point.
2. BROIL HI/LO Pad
Touch this pad to select the broil function.
BROIL Light
Flashes while in edit mode - you can switch from
HI to LO BROIL at this point.
3. Display
Shows the operations you have selected, the time
of day and the cooking status.
4. COOK TIME Pad
Touch this pad and then touch the + or – pad to
set the amount of time you want your food to
cook. The oven will shut off when the cooking
time has run out.
5. START TIME Pad
Use along with the COOK TIME or SELF CLEAN pad
to set the oven to start and stop automatically at
a time you set.
6. OVEN LIGHT ON/OFF Pad
Touch this pad to turn the oven light on or off.
7. TIMER/CLOCK Pad
Touch this pad to select the timer feature. Then
press + and – pads to adjust time.
To set the clock, touch this pad and hold 3 sec-
onds and then touch the + and – pads. The time
of day will flash in the display when the oven is
first turned on.
Using the oven controls. (on some models)
Throughout this manual, features and appearance may vary from your model.
Oven Control, Clock and Timer Features and Settings
8. START Pad
Must be touched to start any cooking function.
9. – Pad
Short taps to this pad will decrease the time or
temperature by small amounts. Touch and hold
the pad to decrease the time or temperature by
larger amounts.
10. + Pad
Short taps to this pad will increase the time or
temperature by small amounts. Touch and hold
the pad to increase the time or temperature by
larger amounts.
11. CLEAR/OFF Pad
Touch this pad to cancel ALL oven operations ex-
cept the clock and timer.
12. SELF CLEAN Pad
Touch this pad to select the self-cleaning func-
tion. See the Using the self-cleaning oven section.
CLEAN Light
Flashes while in edit mode-you can change the
length of time for the self-clean cycle at this
point. Glows when the oven is in the self-clean
cycle. After the self-clean cycle, the light will turn
off. Unlatch the door.
12 11 10
12 3 45
9876
If "F-and a number, or letter" flash in the display and
the oven control signals, this indicates a function er-
ror code.
Touch the CLEAR/OFF pad. Allow the oven to cool for
one hour. Put the oven back into operation.
If function error code repeats, disconnect power to
the oven and call for service.
Safety Instructions
Operating
Instructions
Care and Cleaning
Troubleshooting Tips
Consumer Support
Installation
Instructions
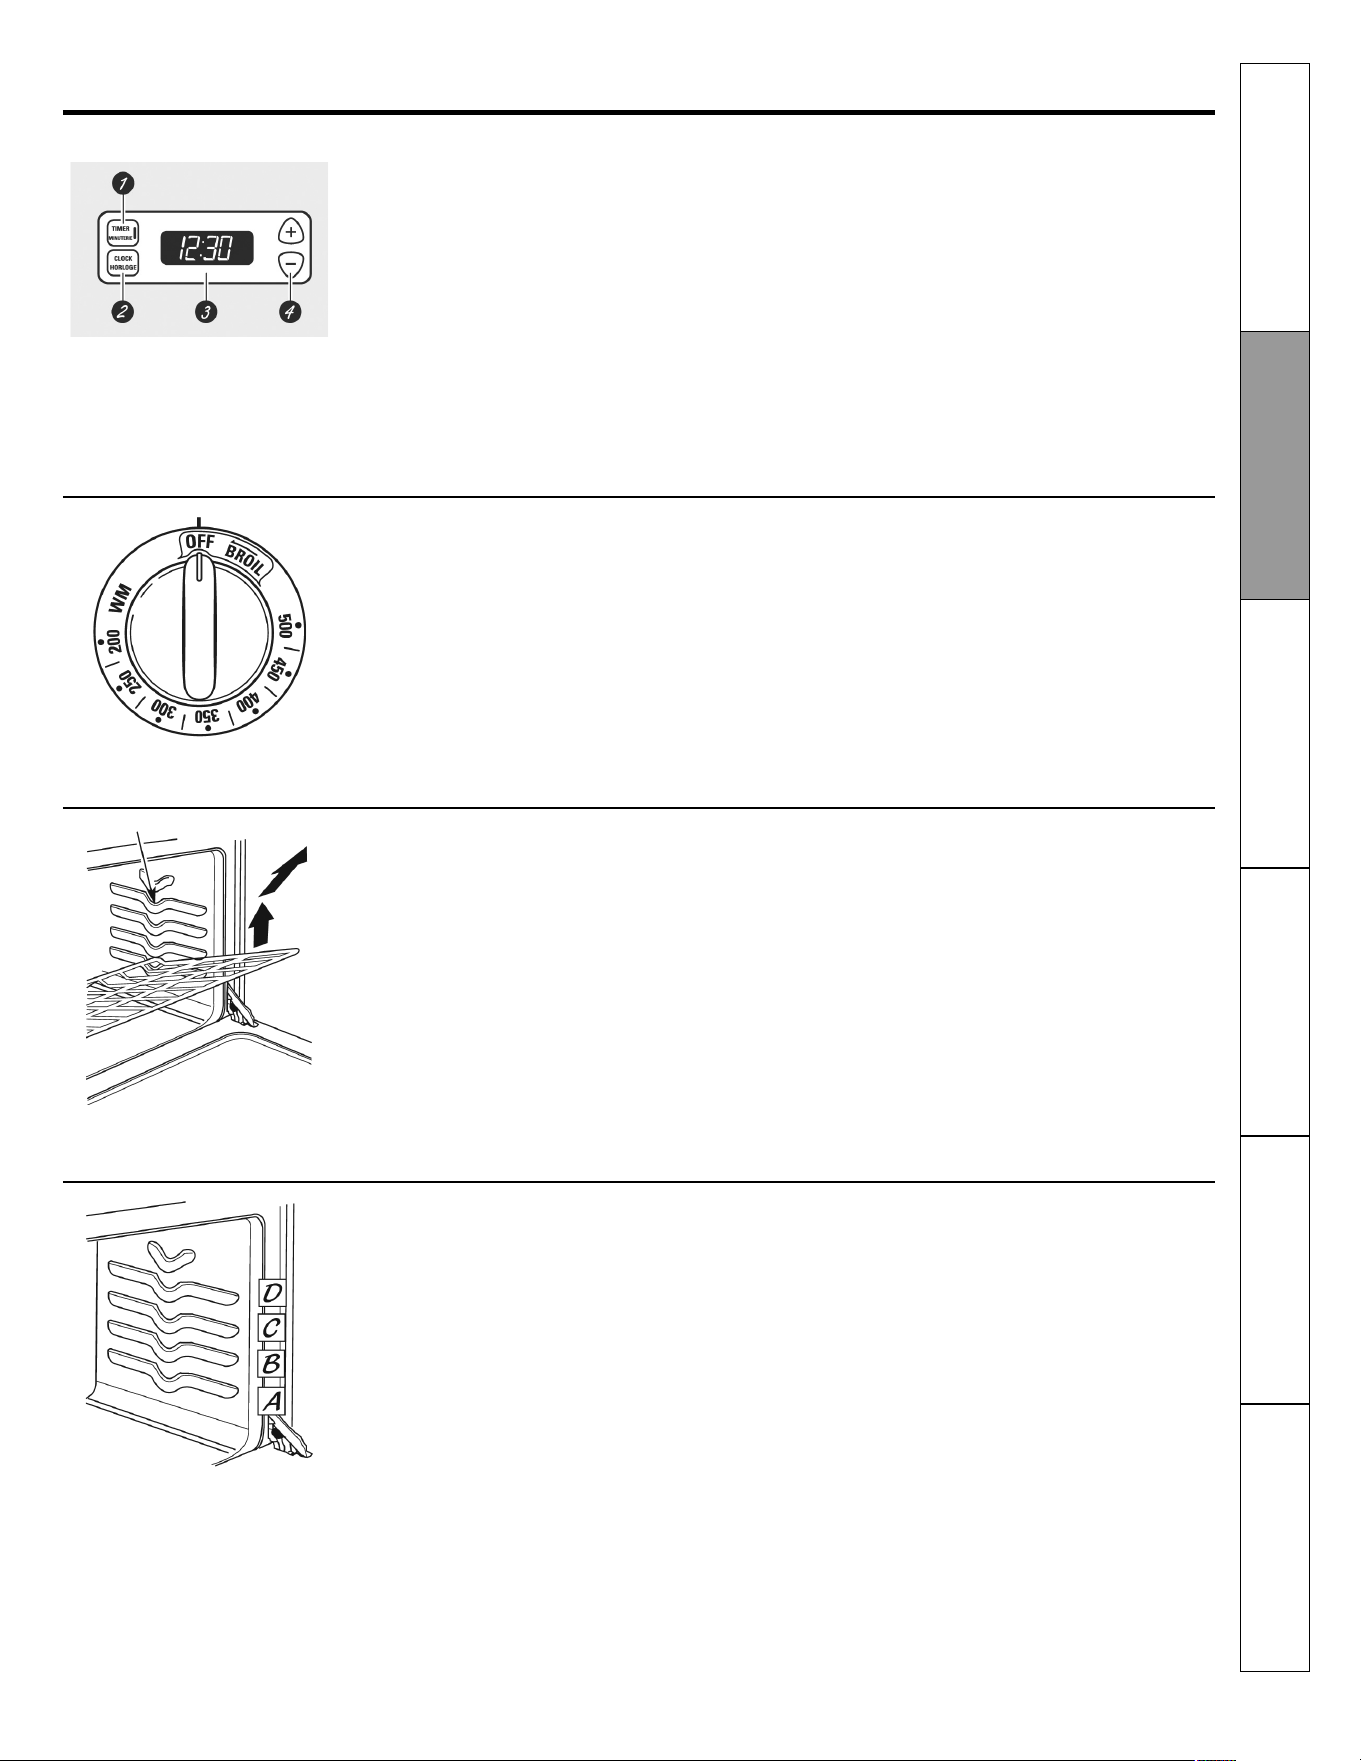
57
Using the oven.
Before you begin...
To avoid possible burns, place the shelves in the
desired position before you turn the oven on.
The shelves have stop-locks, so that when placed
correctly on the shelf supports (A through E), they
will stop before coming completely out, and will
not tilt.
When placing and removing cookware, pull the
shelf out to the bump on the shelf support.
To remove a shelf, pull it toward you, tilt the
front end up and pull it out.
To replace, place the end of the shelf (stop-locks)
on the support, tilt up the front and push the
shelf in.
NOTE: The shelf is not designed to slide out at the
special low shelf (R) position.
Oven Temperature Knob (on some models)
Appearance may vary.
Oven shelf positions
The oven has four shelf supports—A (bottom), B,
C and D (top).
The oven has 4 shelf positions.
Clock and Timer (on some models)
1. TIMER Pad
Touch this pad to select the timer feature.
2. CLOCK Pad
Touch this pad before setting the clock.
3. Display
Shows the time of day and the time set for the
timer, cook time or start time.
4. SET +/- Pads
These pads allow you to set the clock and
timer.
Turn this knob to the setting you want.
The oven cycling light glows until the oven
reaches your selected temperature, then goes
off and on with the oven element(s) during cook-
ing.
Safety Instructions
Operating
Instructions
Care and Cleaning
Troubleshooting Tips
Consumer Support
Installation
Instructions
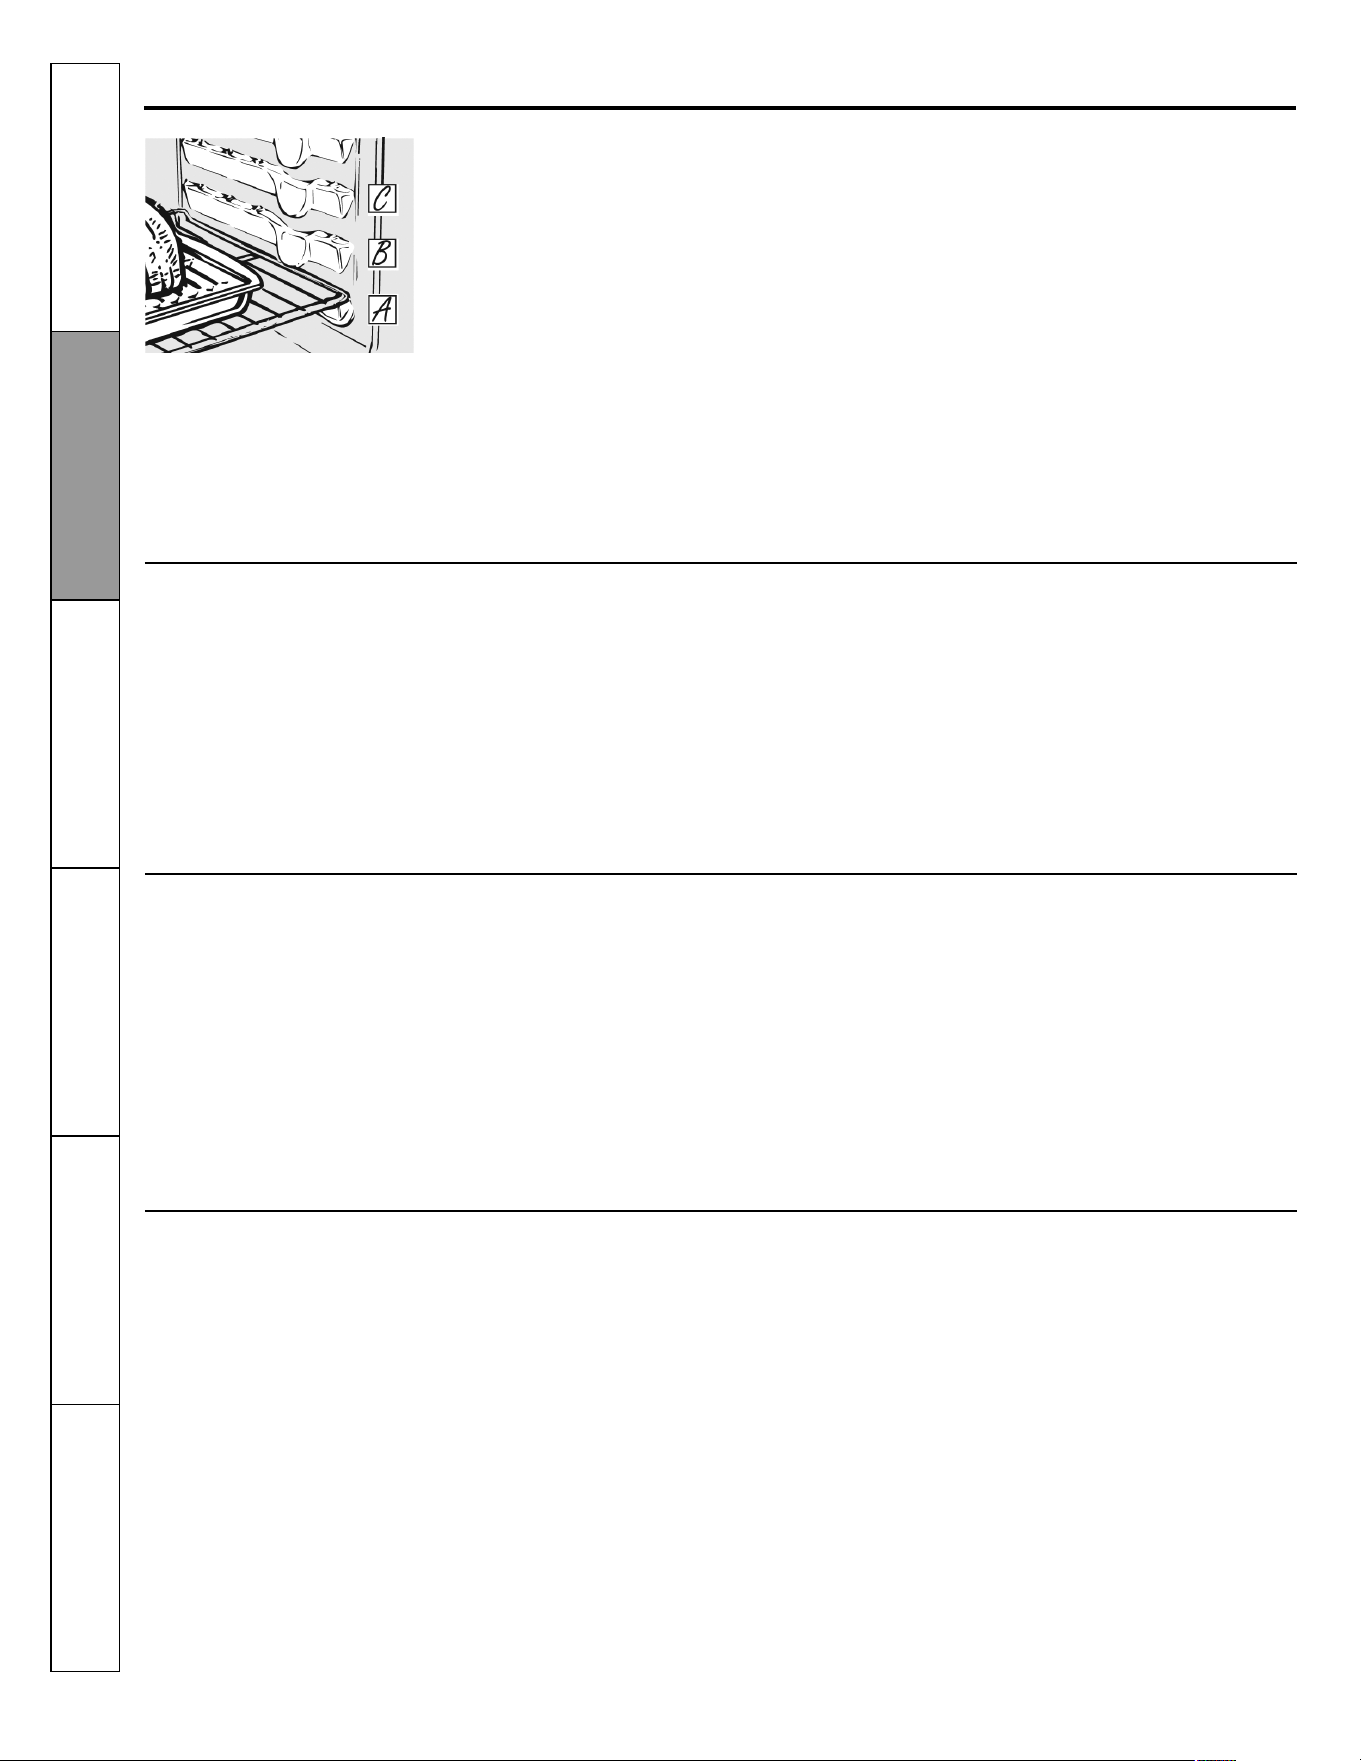
58
1. Touch the BAKE pad.
2. Touch the + or – pad to set the desired tem-
perature.
3. Touch the START pad.
4. Check food for doneness at minimum time on
recipe. Cook longer if necessary.
5. Touch the CLEAR/OFF pad when cooking is
complete.
How to Set the Oven for Baking or Roasting
NOTE: A cooling fan may automatically turn on
and off to cool internal parts. This is normal, and
the fan may continue to run even after the oven
is turned off.
Using the oven.
Preheating and Pan Placement
Preheat the oven if the recipe calls for it. To pre-
heat, set the oven at the correct temperature.
Preheating is necessary for good results when
baking cakes, cookies, pastry and breads.
For ovens without a preheat indicator light or
tone, preheat 10 minutes.
Baking results will be better baking pans are cen-
tered in the oven as much as possible. Pan
should not touch each other or the walls of the
oven. If you need to use two shelves, stagger the
pans so one is not directly above the other, and
leave approximately 1 ½" between pans, from
the front, back and slides of the wall.
Aluminum Foil
Do not use aluminum foil on the bottom of the
oven.
Never entirely cover a shelf with aluminum foil.
This will disturb the heat circulation and result in
poor baking.
A smaller sheet of foil may be used to catch a
spillover by placing it on a lower shelf several
inches below the food.
NOTE: Close the door before starting any broiling function.
On models without an oven temperature knob:
1. Place the meat or fish on a broiler grid in a broiler pan designed
for broiling.
2. Touch the BROIL HI/LO pad once for HI Broil.
To change to LO Broil, touch the BROIL HI/LO pad again.
3. Touch the START pad.
4. CLEAR/OFF pad. If your oven is connected to 208 volts, rare
steaks may be broiled by preheating the broiler and positioning
the oven shelf one position higher.
How to Set the Oven for Broiling
On models with an oven temperature knob:
1. Place the meat or fish on a broiler grid in a broiler pan.
2. Follow suggested rack positions in the Broiling Guide.
3. Close the oven door.
4. Turn the Oven Temperature Knob to Broil.
5. When broiling is finished, turn the Oven temperature Knob to
OFF.
Safety Instructions
Operating
Instructions
Care and Cleaning
Troubleshooting Tips
Consumer Support
Installation
Instructions

59
Make sure the clock is set to the
correct time of day.
Using the clock, timer and convenience outlet.
Not all features are on all models.
To Set the Clock
To Set the Timer
The timer is a minute timer
only.
The OFF pad does not affect the
timer.
(on some models)
The clock must be set to the correct time of day
for the automatic oven timing functions to work
properly. The time of day cannot be changed
during a timed baking or self-cleaning cycle.
1. Touch TIMER pad and hold for 3 seconds.
2. Touch the + or – pads.
If the + or – pads are not touched within one
minute after you touch the TIMER pad, the dis-
play reverts to the original setting. If this hap-
pens, touch the TIMER pad and reenter the time
of day.
3. Touch the START/ON pad until the time of day
shows in the display. This enters the time and
starts the clock.
To check the time of day when the display is
showing other information, simply touch the
TIMER pad. The time of day shows until another
pad is touched.
The timer does not control oven operations. The
maximum setting on the timer is 9 hours and 59
minutes.
1. Touch the TIMER pad.
2. Touch the + or – pads until the amount of time
you want shows in the display. The maximum
time that can be entered in minutes is 59.
Times more than 59 minutes should be
changed to hours and minutes.
If you make a mistake, touch the TIMER pad and
begin again.
3. Touch the START/ON pad. The time will start
counting down, although the display does not
change until one minute has passed.
4. When the timer reaches :00, the control will
beep 3 times followed by one beep every 6
seconds until the TIMER pad is touched.
TIMER
START
MINUTERIE
TIMER
START
MINUTERIE
Safety Instructions
Operating
Instructions
Care and Cleaning
Troubleshooting Tips
Consumer Support
Installation
Instructions
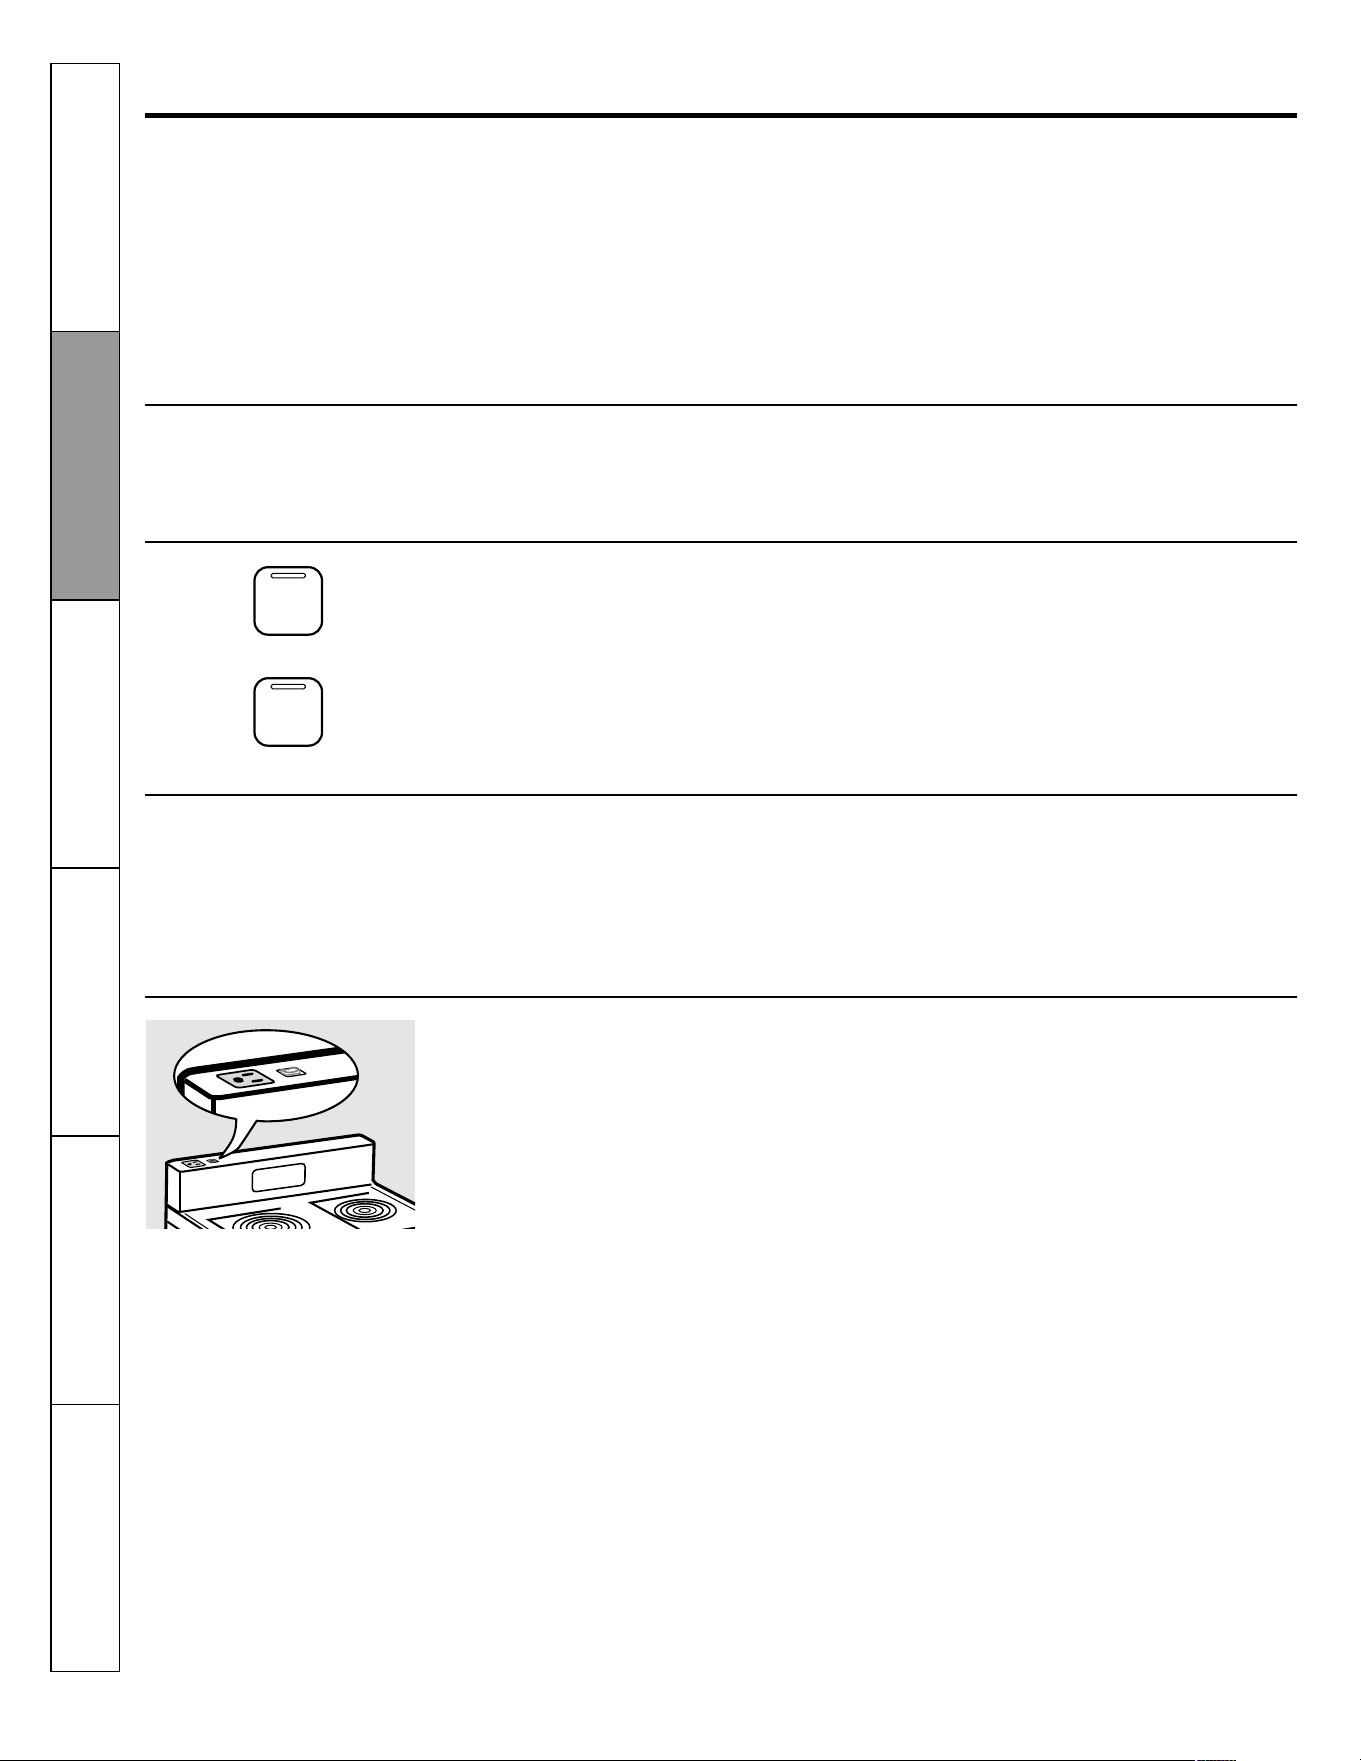
60
To Reset the Timer
To Cancel the Timer
Touch the TIMER pad twice.
Power Outage
End of Cycle Tones (on some models)
If the display is still showing the time remaining,
you may change it by touching the TIMER pad,
then touch the + or – pads until the time you
want appears in the display.
If the remaining time is not in the display (clock,
delay start or cooking timer are in the display),
recall the remaining timer by touching the TIMER
pad and then touching the + or – pads to enter
the new time you want.
Clear the tones by pressing the pad of the func-
tion you are using.
If a flashing time is in the display, you have expe-
rienced a power failure. Reset the clock.
To reset the clock, touch the TIMER pad twice. En-
ter the correct time of day by touching the + or –
pads. Touch the START/ON pad.
Convenience Outlet (on some models)
The 120 V convenience outlet located on the top
of the backguard may be used to plug in small
electrical appliances.
When using the outlet, be sure that the electrical
cord does not rest on or near a surface unit. If
the surface unit is turned on, the cord will be
damaged.
TIMER
MINUTERIE
COOK TIME
TEMPS DE
CUISSON
or
Using the clock, timer and convenience outlet.
Not all features are on all models.
(on some models)
To reset the circuit breaker, press the switch lo-
cated near the outlet on top of the backguard.
Safety Instructions
Operating
Instructions
Care and Cleaning
Troubleshooting Tips
Consumer Support
Installation
Instructions
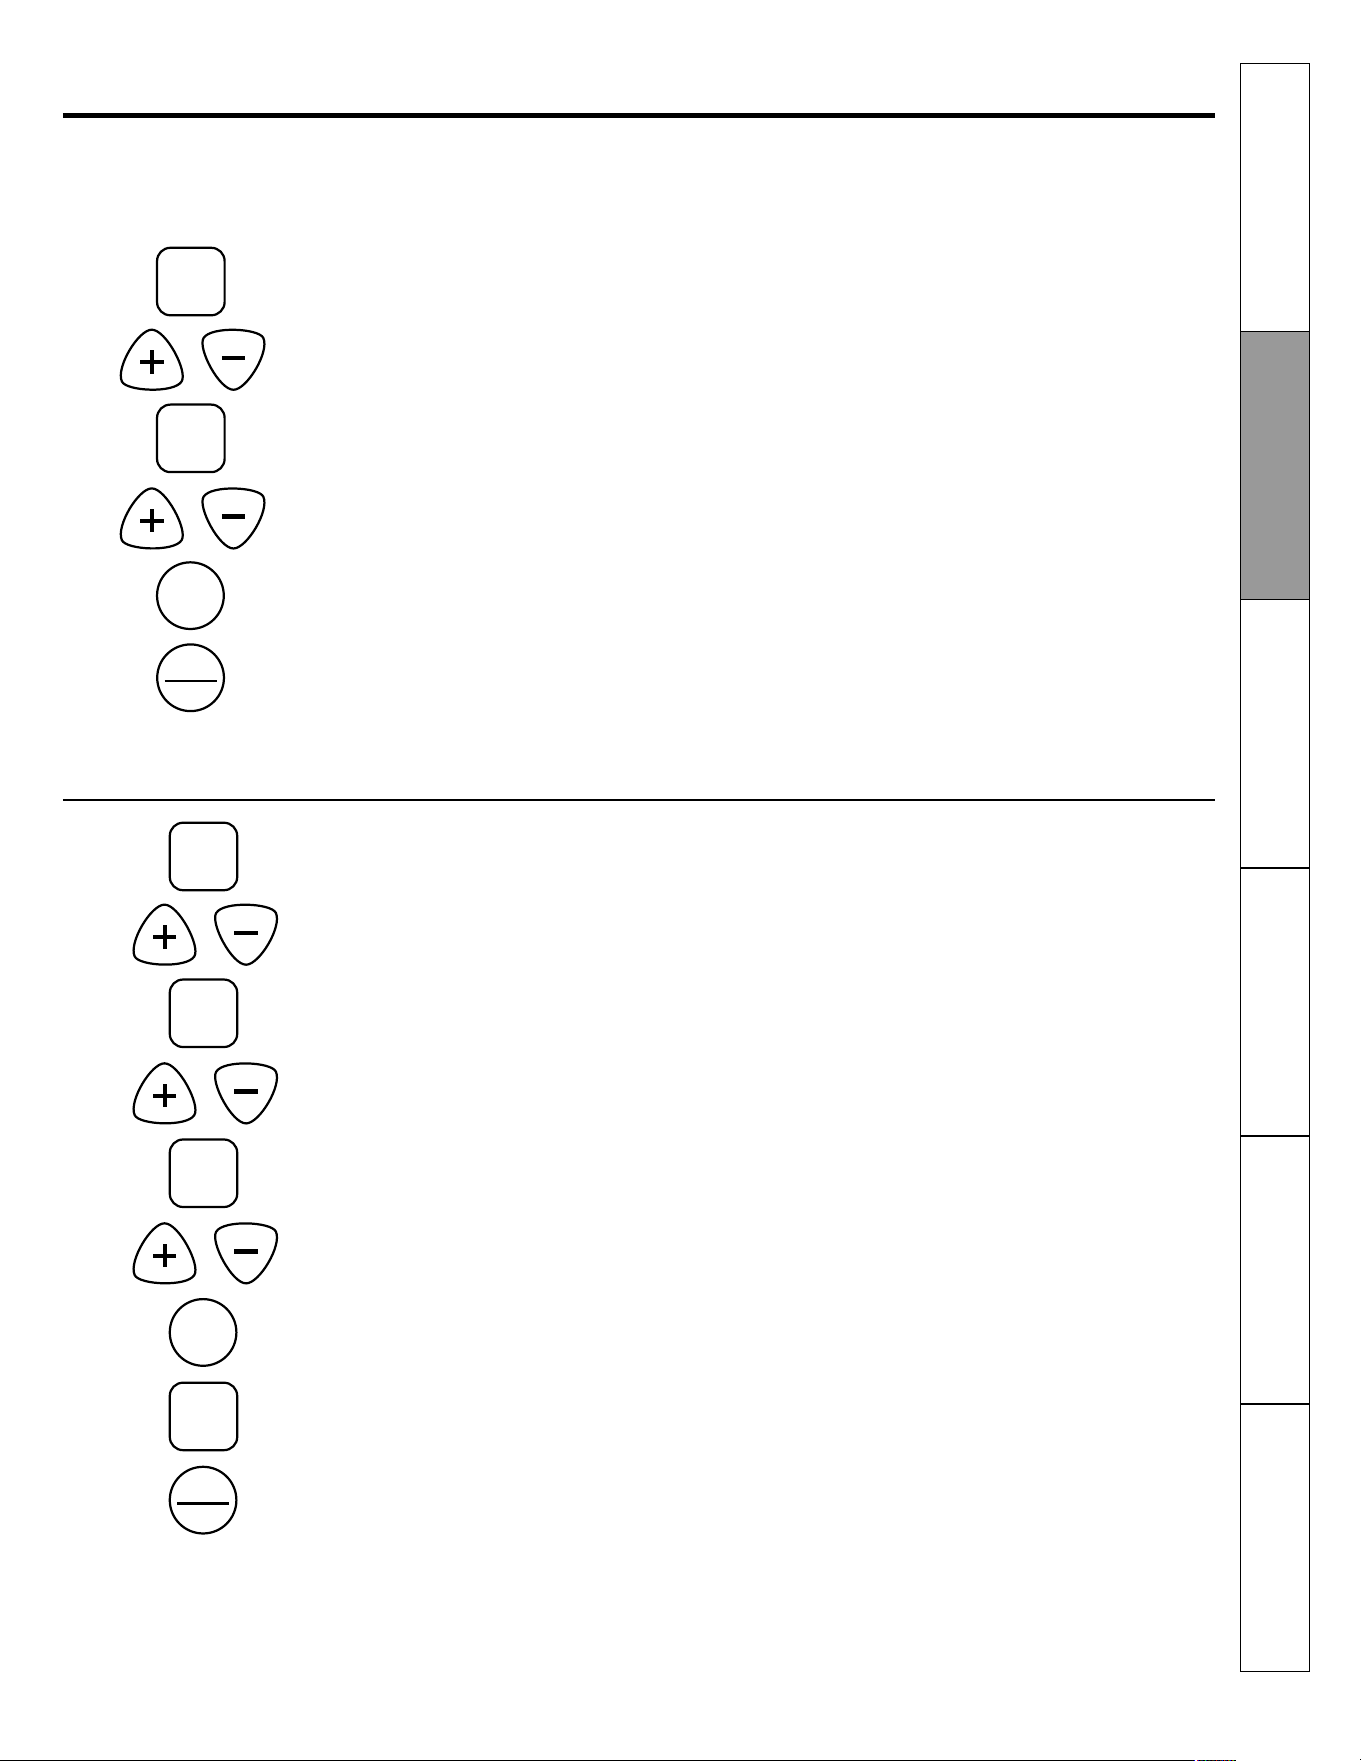
61
Using the timed baking and roasting features,
NOTE: Foods that spoil easily-such as milk, eggs, fish, stuffings, poultry and pork-should not be allowed to sit for more than 1 hour before
or after cooking. Room temperature promotes the growth of harmful bacteria. Be sure that the oven light is off because heat from the
bulb will speed harmful bacteria growth.
How to Set an Immediate Start and Automatic Stop
The oven will turn on immediately and cook for a
selected length of time. At the end of the cooking
time the oven will turn off automatically.
Make sure the clock shows the correct time of
day.
1. Touch the BAKE pad.
2. Using the + or – pad, enter the desired tem-
perature.
3. Touch the COOK TIME pad.
NOTE: If your recipe requires preheating, you
may need to additional time to the length of the
cooking time.
4. Using the + or – pad, enter the desired baking
time.
The oven temperature and the cooking time that
you entered will be displayed.
5. Touch the START pad.
The display shows the oven temperature that
you set and the cooking time countdown. The
display starts changing once the temperature
reaches 100° F.
The oven will continue to cook for the pro-
grammed amount of time, then shut off auto-
matically.
Touch the CLEAR/OFF pad to clear the display.
How to Set a Delayed Start and Automatic Stop
(on some models)
BAKE
COOK
TIME
START
CLEAR
OFF
CLEAR
OFF
START
TIME
START
START
TIME
COOK
TIME
BAKE
You can set the oven control to delay-start the
oven, cook for a specific length of time and then
turn off automatically.
Make sure the clock shows the correct time of
day.
1. Touch the BAKE pad.
2. Using the + or – pad, enter the desired tem-
perature.
3. Touch the COOK TIME pad.
NOTE: If your recipe requires preheating, you
may need to add additional time to the length of
the cooking time.
4. Using the + or – pad, enter the desired baking
time.
5. Touch the START TIME pad.
6. Using the + or – pad, enter the time of day you
want the oven to turn on and start cooking.
7. Touch the START pad.
NOTE: An attention tone will sound if you are us-
ing timed baking and do not touch the START pad
after entering the baking temperature.
If you would like to check the times you have set
touch the START TIME pad to check the start time
you have set or touch the COOK TIME pad to
check the length of cooking time you have set.
When the oven turns on at the time of day you
have set, the display will show the changing
temperature (starting at 100°F) and the cooking
time countdown.
At the end of timed baking, the oven will turn off.
The end of cycle tone will sound.
Touch the CLEAR/OFF pad to clear the display.
Safety Instructions
Operating
Instructions
Care and Cleaning
Troubleshooting Tips
Consumer Support
Installation
Instructions
62
Special features of your oven control.
Your new touch pad control has additional features that you may choose to use. The following are the features and how you may acti-
vate them.
The special feature modes can only be activated while the display is showing the time of day. They remain in the control's memory until
the steps are repeated.
When the display shows your choice, touch the START pad. The special features will remain in memory after a power failure, except for
the Sabbath feature, which will have to be reset.
12 Hour Shut-Off
With this feature should you forget and leave the
oven on, the control will automatically turn off
the oven after 12 hours during baking functions
or after 3 hours during a broil function.
If you wish to turn off this feature, follow the
steps below.
1. Touch the BAKE and BROIL HI/LO pads at the
same time for 3 seconds until the display
shows SF.
2. Touch the START TIME pad. The display will
show 12 shdn (12 hour shut-off). Touch the
START TIME pad again and the display will
show no shdn (no shut-off).
3. Touch the START pad to activate the no shut-
off and leave the control set in this special fea-
tures mode.
START
START
TIME
BAKE
BROIL
HI/LO
Fahrenheit or Celsius Temperature Selection
Your oven control is set to use the Fahrenheit
temperature selections buy you may change
this to use the Celsius selections.
1. Touch the BAKE and BROIL HI/LO pads at the
same time for 3 seconds until the display
shows SF.
2. Touch the BROIL HI/LO and COOK TIME pads at
the same time for 2 seconds. The display will
show F (Fahrenheit).
3. Touch the BROIL HI/LO and COOK TIME pads
again the same time for 2 seconds. The dis-
play will show C (Celsius).
4. Touch the START pad.
Control Lockout
Your control will allow you to lock down the
touch pads so they cannot be activated when
touched.
1. Touch the BAKE and BROIL HI/LO pad at the
same time for 3 seconds until the display
shows SF.
2. Touch the SELF CLEAN pad. The display will
show LOC OFF. Touch the SELF CLEAN pad
again. The display will show LOC ON.
3. Touch the START pad to activate the control
lockout feature and leave the control set in
this special features mode.
When this feature is on and the touch pads are
touched the control will beep and the display will
show LOC.
NOTE: The control lockout mode will not affect
the TIMER/CLOCK and OVEN LIGHT ON/ OFF
touch pads.
START
START
TIME
BAKE
BROIL
HI/LO
BAKE
SELF
CLEAN
START
BROIL
HI/LO
Safety Instructions
Operating
Instructions
Care and Cleaning
Troubleshooting Tips
Consumer Support
Installation
Instructions
63
START
BAKE
BROIL
HI/LO
BROIL
HI/LO
12 Hour, 24 Hour or Clock Black-Out
Your control is set to use a 12 hour clock.
If you would prefer to have a 24 hour military
time clock or blackout the clock display, follow
the steps below.
1. Touch the BAKE and BROIL HI/LO pads at the
same time for 3 seconds until the display
shows SF.
2. Touch the TIMER /CLOCK pad once. The display
will show 12 hr. If this is the choice you want
touch the START pad.
Touch the TIMER/CLOCK pad again to change to
the 24 hour military time clock. The display will
show 24 hr. If this is the choice you want touch
the START pad.
Touch the TIMER/CLOCK pad again to blackout
the clock display. The display will show OFF. If
this is the choice you want touch the START pad.
NOTE: If the clock is in the blackout mode you
will not be able to use the Delay Start function.
START
BAKE
BROIL
HI/LO
TIMER
CLOCK
HOLD 3 SEC.TO
SET CLOCK
Special features of your oven control.
Safety Instructions
Operating
Instructions
Care and Cleaning
Troubleshooting Tips
Consumer Support
Installation
Instructions
Tones at the End of a Timed Cycle
At the end of a timed cycle, 3 short beeps will
sound followed by one beep every 6 seconds un-
til the CLEAR/OFF pad is touched. This continu-
ous 6 second beep may be canceled.
To cancel the 6 second beep:
1. Touch the BAKE and BROIL HI/LO pads at the
same time for 3 seconds until the display
shows SF.
2. Touch the BROIL HI/LO pad. The displays
shows CON BEEP (continuous beep). Touch the
BROIL HI/LO pad again. The display shows
BEEP. (This cancels the one beep every 6 sec-
onds.)
3. Touch the START pad.

64
Cook and Hold
You new control has a cook and hold feature that
keeps cooked foods warm for to up to 3 hours af-
ter Timed Baking or Roasting is finished.
NOTE: This feature can only be programmed to
work with Timed Baking or Roasting (See the Us-
ing the timed baking and roasting features sec-
tion). After Timed Baking or Roasting has auto-
matically stopped, the programmed Cook and
Hold will automatically start.
To activate this feature for use after Timed Bak-
ing or Roasting, follow the steps bellow.
1. Touch the BAKE and BROIL HI/LO pads at the
same time for 3 seconds until the display
shows SF.
2. Touch the COOK TIME pad. The display will
show Hid OFF.
Touch the COOK TIME pad again to activate
the feature. The display will show Hid ON.
3. Touch the START pad to activate the cook and
hold feature and leave the control set in this
special features mode.
Changing the Speed of the + or – Pads
As you use the + or – pads when setting a time
or temperature, you may notice the display
changes slowly. This special feature allows you
to change the speed. To set the speed you prefer
follow the steps below.
1. Touch the BAKE and BROIL HI/LO pads at the
same time for 3 seconds until the display
shows SF.
2. Touch the + pad. The display will show you a
set speed between 1 and 5.
3. Touch the + pad to increase the speed up to
the number 5.
Touch the – pad to decrease the speed down
to the number 1.
4. Touch START to activate the setting and leave
the control set in this special mode.
START
BAKE
BROIL
HI/LO
COOK
TIME
BAKE
START
BROIL
HI/LO
Special features of your oven control.
Safety Instructions
Operating
Instructions
Care and Cleaning
Troubleshooting Tips
Consumer Support
Installation
Instructions
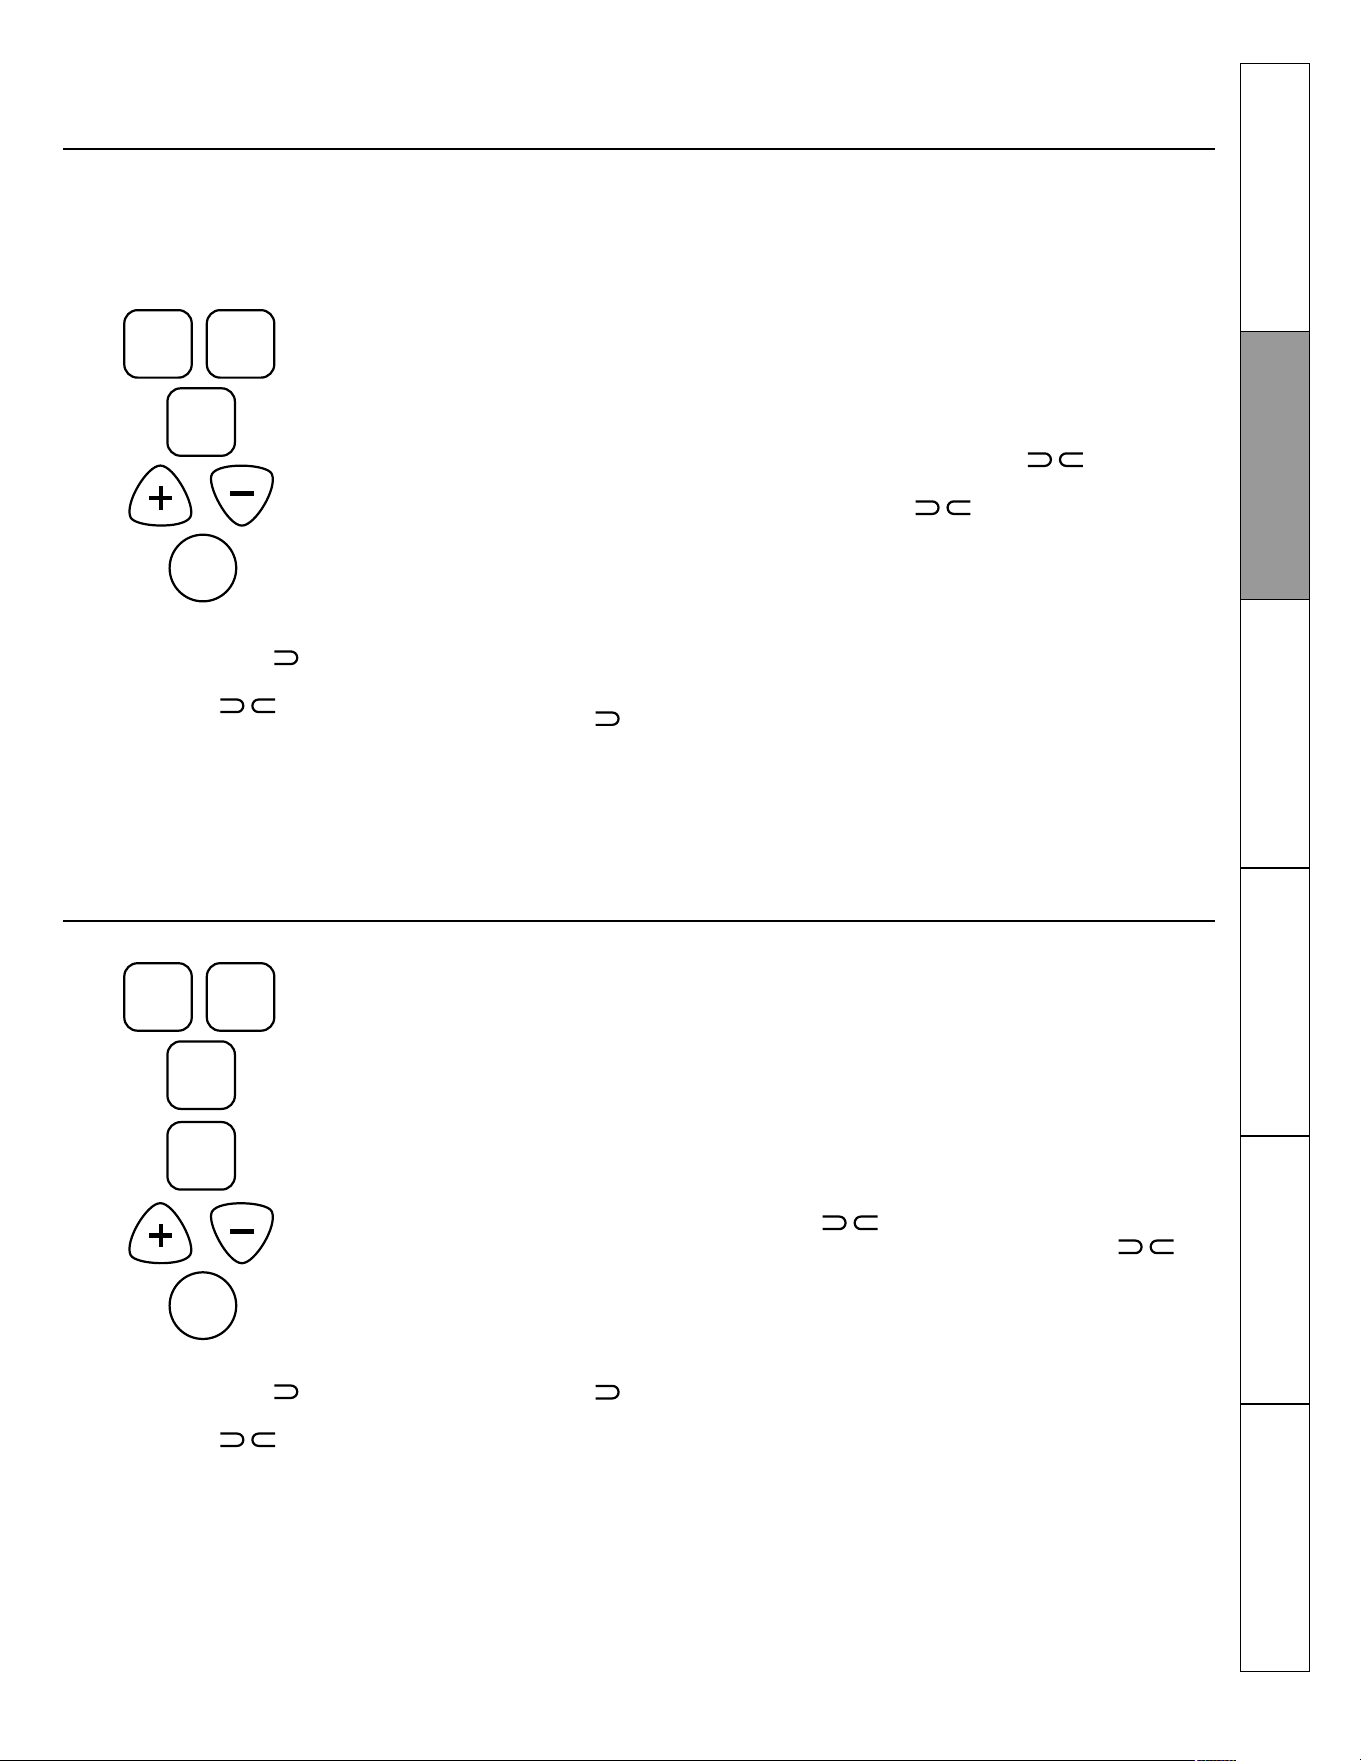
65
Using the Sabbath Feature.
(Designed for use on the Jewish Sabbath and Holidays) (on some models).
How to Set Sabbath Feature for Regular Baking /Roasting
NOTE: To understand how the oven control
works, practice using regular baking (non – Sab-
bath) before entering Sabbath mode.
Make sure the clock shows the correct time of
day.
1. Touch and hold both the BAKE and BROIL HI/
LO pads, at the same time, until the display
shows SF.
NOTE: If bake or broil appears in the display,
the BAKE and BROIL HI/LO pads were not
touched at the same time. Touch the CLEAR/
OFF pad and begin again.
2. Tap the START TIME pad until Sabbath appears
in this display.
3. Touch the START pad and
will appear in the
display.
4. Touch the BAKE pad. No signal will be given.
5. The preset starting temperature will automati-
cally be set to 350°. Tap the + or – pad to in-
crease or decrease the temperature in 5° in-
crements. The temperature can be set be-
tween 170° and 550°. No signal or tempera-
ture will be given.
6. Touch the START pad.
7. After a random delay period of approximately
30 seconds to 1 minute,
will appear in
the display indicating that the oven is baking/
roasting. If does not appear in the dis-
play, start again at step 4.
To adjust the oven temperature, touch the BAKE
pad and tap the + or – pad to increase or de-
crease the temperature in 5° increments. Touch
the START pad.
NOTE: The CLEAR/OFF and COOK TIME pads are
active during the Sabbath feature.
The Sabbath feature can be used for baking/roasting only. It cannot be used for broiling, self-cleaning, or Delay Start cooking.
NOTE: The oven light comes on automatically (on some models) when the door is opened and goes off when the door is closed. The bulb
may be removed. See the Oven Light Bulb section. On models with a light switch on the control panel, the oven light may be turned on
and left on.
How to Set Sabbath Feature for Timed Baking/Roasting—Immediate Start and
Automatic Stop.
NOTE: To understand how the oven control
works, practice using regular (non – Sabbath) im-
mediate Start and Automatic Stop before enter-
ing the Sabbath mode.
Make sure clock shows the correct time of day.
1. Touch and hold both the BAKE and BROIL HI/
LO pads, at the same time, until the display
shows SF.
NOTE: If bake or broil appears in the display,
the BAKE and BROIL HI/LO pads were not
touched at the same time. Touch the CLEAR/
OFF pad and begin again.
2. Tap the START TIME pad until Sabbath appears
in the display.
3. Touch the START pad and
will appear in the
display.
4. Touch the COOK TIME pad.
5. Touch the + or – pad to set the desired length
of cooking time between 1 minute and 9 hours
and 59 minutes. The cooking time that you en-
tered will be displayed.
6. Touch the START pad.
7. Touch the BAKE PAD. No signal will be given.
8. The preset starting temperature will automati-
cally be set to 350°. Tap the + or – pad to in-
crease or decrease the temperature in 5° in-
crements. The temperature can be set be-
tween 170° and 550°. No signal or tempera-
ture will be given.
9. Touch the START pad. After a random delay pe-
riod of approximately 30 seconds to 1 minute,
will appear in the display indicating
that the oven is baking/ roasting. If
does not appear in the display, start again at
step 7.
To adjust the oven temperature, touch the BAKE
pad and tap the + or – pad to increase or de-
crease the temperature in 5° increments. Touch
the START pad.
When cooking is finished, the display will change
from to and 0:00 will appear, indicating that the
oven has turned OFF but is still set in Sabbath.
Remove the cooked food.
When the display shows
the
oven is set in Sabbath. When
the display shows the
oven is baking/roasting.
When the display shows
the
oven is set in Sabbath. When
the display shows the
oven is baking/roasting.
BAKE
START
BROIL
HI/LO
START
TIME
BAKE
START
BROIL
HI/LO
START
TIME
COOK
TIME
Safety Instructions
Operating
Instructions
Care and Cleaning
Troubleshooting Tips
Consumer Support
Installation
Instructions
66
Using the Sabbath Feature.
(Designed for use on the Jewish Sabbath and Holidays) (on some models).
How to Exit the Sabbath Feature
1. Touch the CLEAR/OFF pad.
2. If the oven is cooking, wait for a random delay
period of approximately 30 seconds to 1
minute, until only is in the display.
3. Touch and hold both the BAKE and BROIL HI/
LO pads, at the same time, until the display
shows SF.
4. Tap the START TIME pad until 12 shdn or no
shdn appears in the display. 12 shdn indicates
that the oven will automatically turn off after
12 hour. no shdn indicates that the oven will
not automatically turn off.
5. Touch the START pad.
NOTE: If a power outage occurred while the oven
was in Sabbath mode, the oven will automati-
cally turn off and the oven control must be reset.
Temperature Conversions
140 150 170 200 250 275 300 325 350 375 400 425 450 475 500 525 550
60 65 75 95 120 135 150 160 175 190 205 220 230 245 260 275 290
º Fahrenheit
º Celsius
BAKE
START
BROIL
HI/LO
START
TIME
CLEAR
OFF
Safety Instructions
Operating
Instructions
Care and Cleaning
Troubleshooting Tips
Consumer Support
Installation
Instructions
Power Outage
If a flashing time is in the display, you have expe-
rienced a power failure. Reset the clock.
To reset the clock, touch the TIMER pad. Enter the
correct time of day by touching the + or - pads.
Touch the START/ON pad.
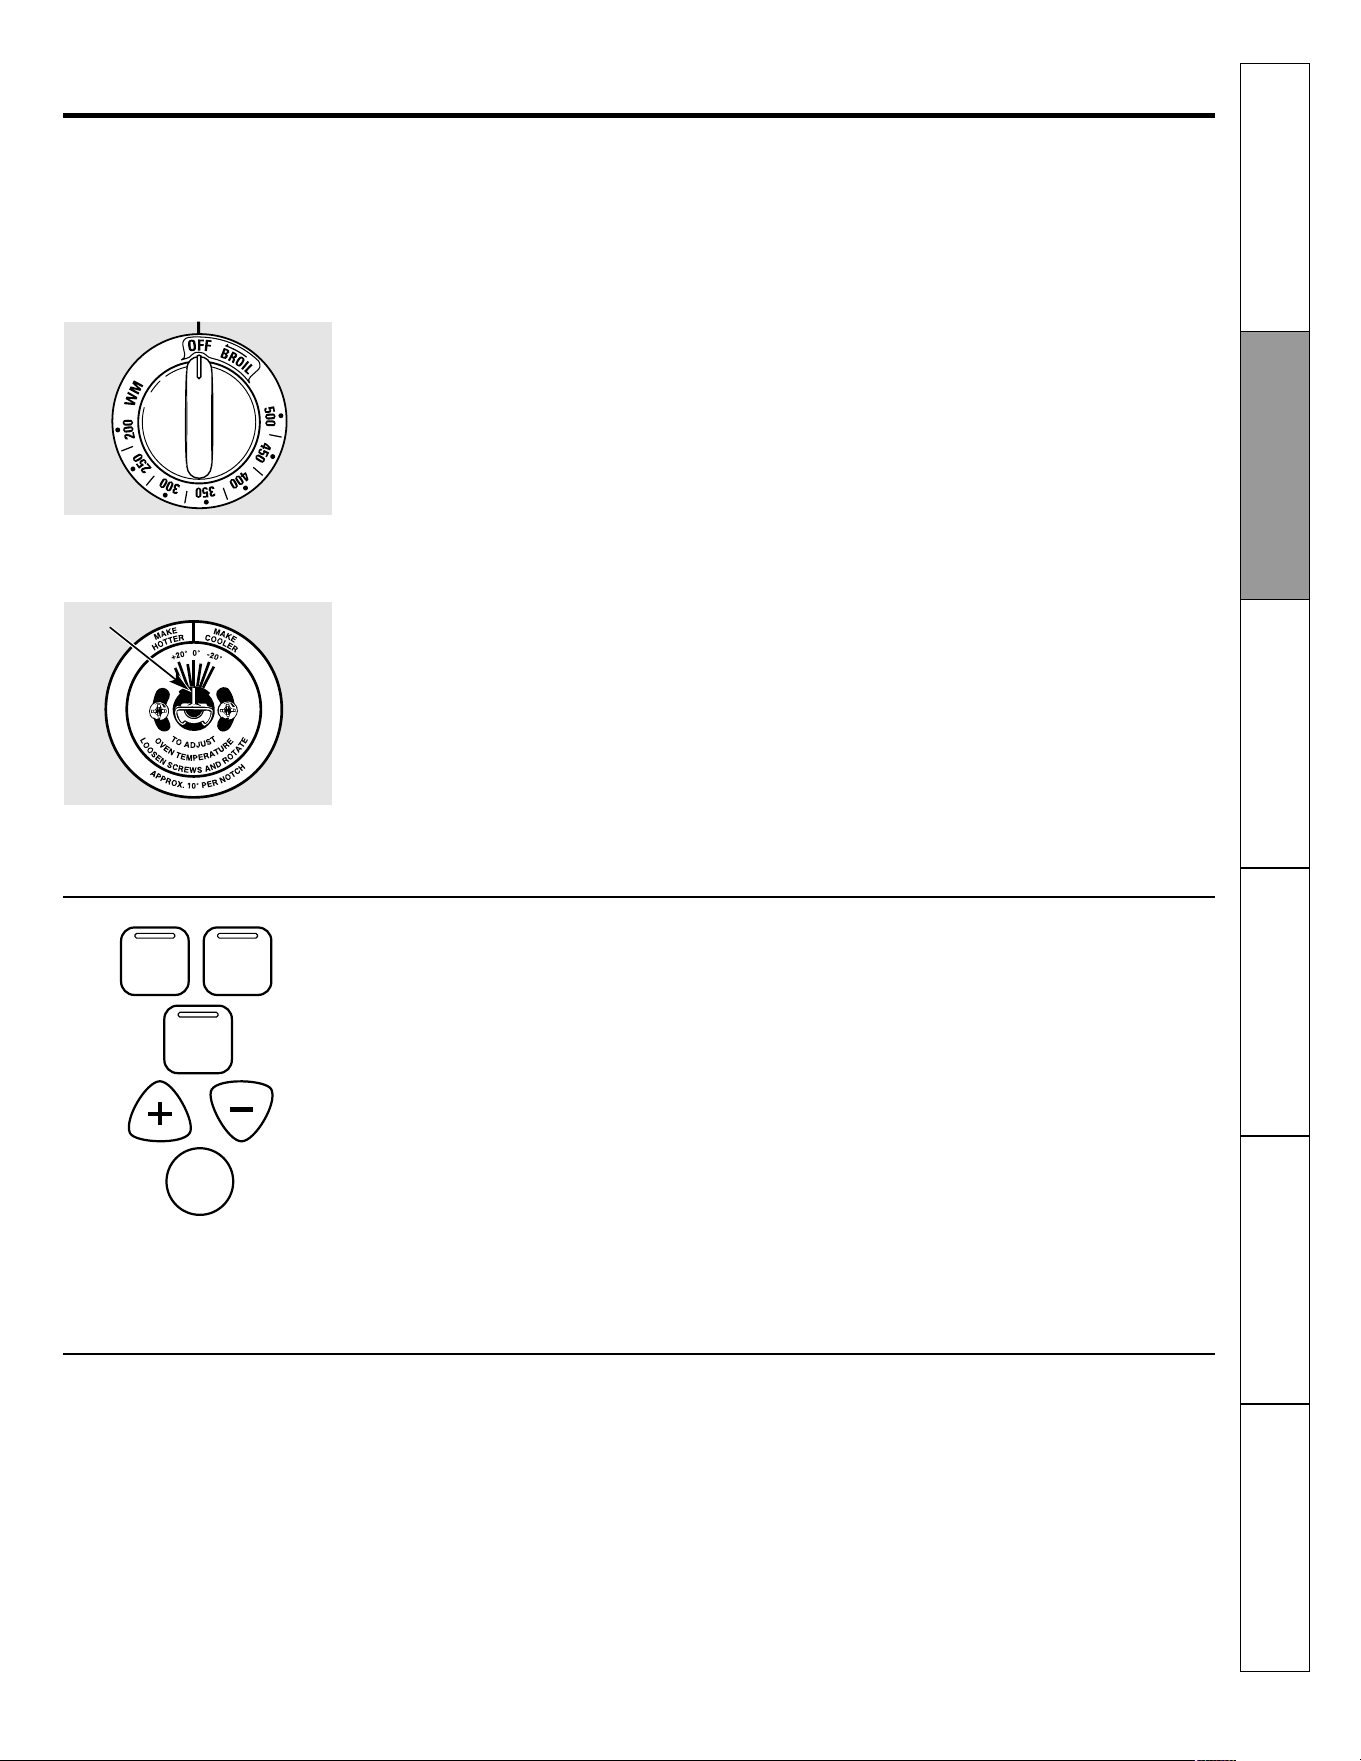
67
The type of margarine will affect baking performance!
Adjust the oven thermostat – Easy to do yourself!
You may find that your new oven cooks differently that the one it replaced. Use your new oven for a few weeks to become more familiar
with it. If you still think your new oven is too hot or too cold, you can adjust the thermostat yourself.
Do not use thermometers, such as those found in grocery stores, to check the temperature setting of your oven. These thermometers
may vary 20-40°F.
NOTE: This adjustment will not affect the broiling or the self-cleaning temperatures (on some models). The adjustment will be retained in
memory after a power failure.
To Adjust the Thermostat with this Type of Knob
1. Pull the Oven Temp knob off the shaft, look at
the back of the knob and note the current set-
ting before making any adjustments.
2. Loosen both screws on the back of the knob.
3. To increase the oven temperature, move the
pointer toward the words "MAKE HOTTER."
To decrease the oven temperature, turn the
pointer toward the words "MAKE COOLER."
Each notch changes the temperature by 10°F.
4. Tighten the screws.
5. Replace the knob matching the flat area of the
knob to the shaft.
1. Touch the BAKE and BROIL pads at the same
time for 2 seconds until the display shows SF.
2. Touch the BAKE pad. A two digit number shows
in the display.
3. The oven temperature can be adjusted up to
(+) 35° F hotter or (-) 35° F cooler. Touch the +
pad to increase the temperature in 1 degree
increments.
Touch the – pad to decrease the temperature
in 1 degree increments.
To Adjust the Thermostat on Other Models
Front of OVEN TEMP knob (knob
appearance may vary).
Back of OVEN TEMP knob.
4. When you have made the adjustment, touch
the START/ON pad to go back to the time of
day display. Use your oven as you would nor-
mally.
NOTE: This adjustment will not affect the broiling
or self-cleaning temperatures. It will be retained
in memory after a power failure.
Most recipes for baking have been developed us-
ing high fat products such as butter or margarine
(80% fat), If you decrease the fat, the recipe may
not give the same results as with a higher fat
product.
Recipe failure can result if cakes, pies pastries,
cookies or candies are made with low fat
spreads. The lower the fat content of a spread
product, the more noticeable these differences
become.
Federal standards require products labeled "mar-
garine" to contain at least 80% fat by weight.
Low-fat spreads, on the other hand, contain less
fat and more water. The high moisture content of
these spreads affects the texture and flavor of
baked goods. For best results with your old favor-
ite recipes, use margarine, butter or stick spreads
containing at least 70% vegetable oil.
Note: Except Model JCAS445
BAKE
CUIRE
START/
ON
DÉPART
BROIL
GRILL
BAKE
CUIRE
Pointer
Safety Instructions
Operating
Instructions
Care and Cleaning
Troubleshooting Tips
Consumer Support
Installation
Instructions
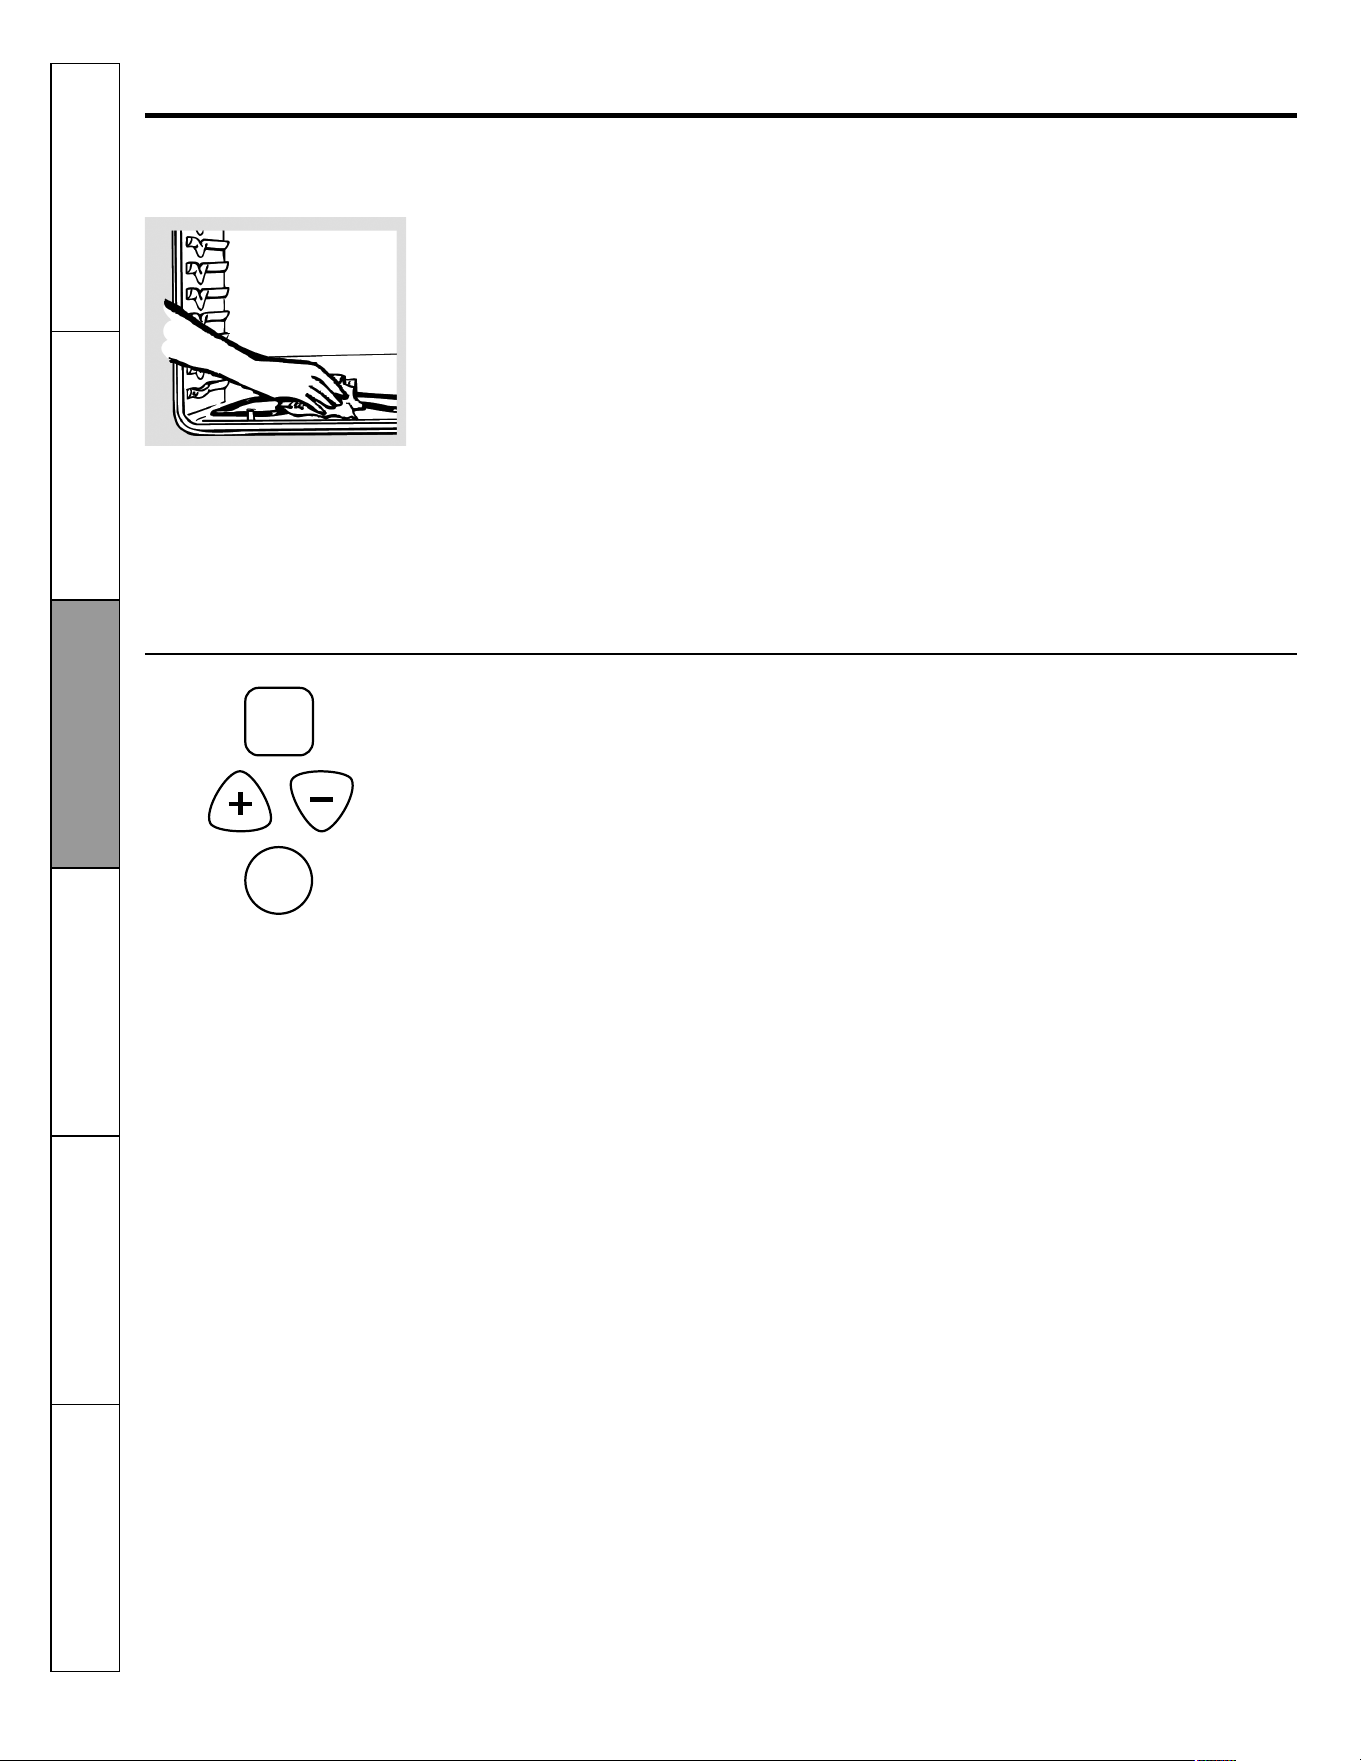
68
Using the self-cleaning oven.
The oven door must be closed and all controls must be set correctly for the cycle to work properly.
Before a Clean Cycle
How to Set the Oven for Cleaning
Wipe up heavy soil on the oven
bottom (appearance may vary).
(on some models)
The oven must be cool in order to set the self-
clean cycle.
We recommend venting your kitchen with an
open window or using a ventilation fan or hood
during the first self-clean cycle.
Remove broiler pan, broiler grid, all cookware
and any aluminum foil from the oven.
The shiny, silver, colored oven shelves (on some
models) can be self-cleaned, but they will darken,
lose their luster and become hard to slide.
Do not use abrasives or oven cleaners. Clean the
top, sides and outside of the oven door with soap
and water.
Make sure the oven light bulb cover (on some
models) is in place and the oven light is off.
IMPORTANT: The health of some birds is ex-
tremely sensitive to the fumes given off during
the self-cleaning cycle of any oven. Move birds to
another well ventilated room.
1. Touch the SELF CLEAN pad.
2. Using the + or – pad, enter the desired clean
time, if a time other than 4 hours is needed.
Clean cycle time is normally 4 hours. You can
change the clean time to any time between 3
hours and 5 hours, depending on how dirty your
oven is.
3. Touch the START pad.
The door locks automatically. The display will
show the clean time remaining. It will not be pos-
sible to open the oven door until the temperature
drops below the lock temperature and the
LOCKED DOOR light goes off.
When the LOCKED DOOR light is off, open the
door.
• The words LOCK DOOR will flash and the oven
control will signal if you set the clean cycle and
forget to close the oven door.
• To stop a clean cycle, touch the CLEAR/OFF
pad. When the LOCKED DOOR light goes off in-
dicating the oven has cooled below the locking
temperature, open the door.
SELF
CLEAN
START
Safety Instructions
Operating
Instructions
Care and Cleaning
Troubleshooting Tips
Consumer Support
Installation
Instructions
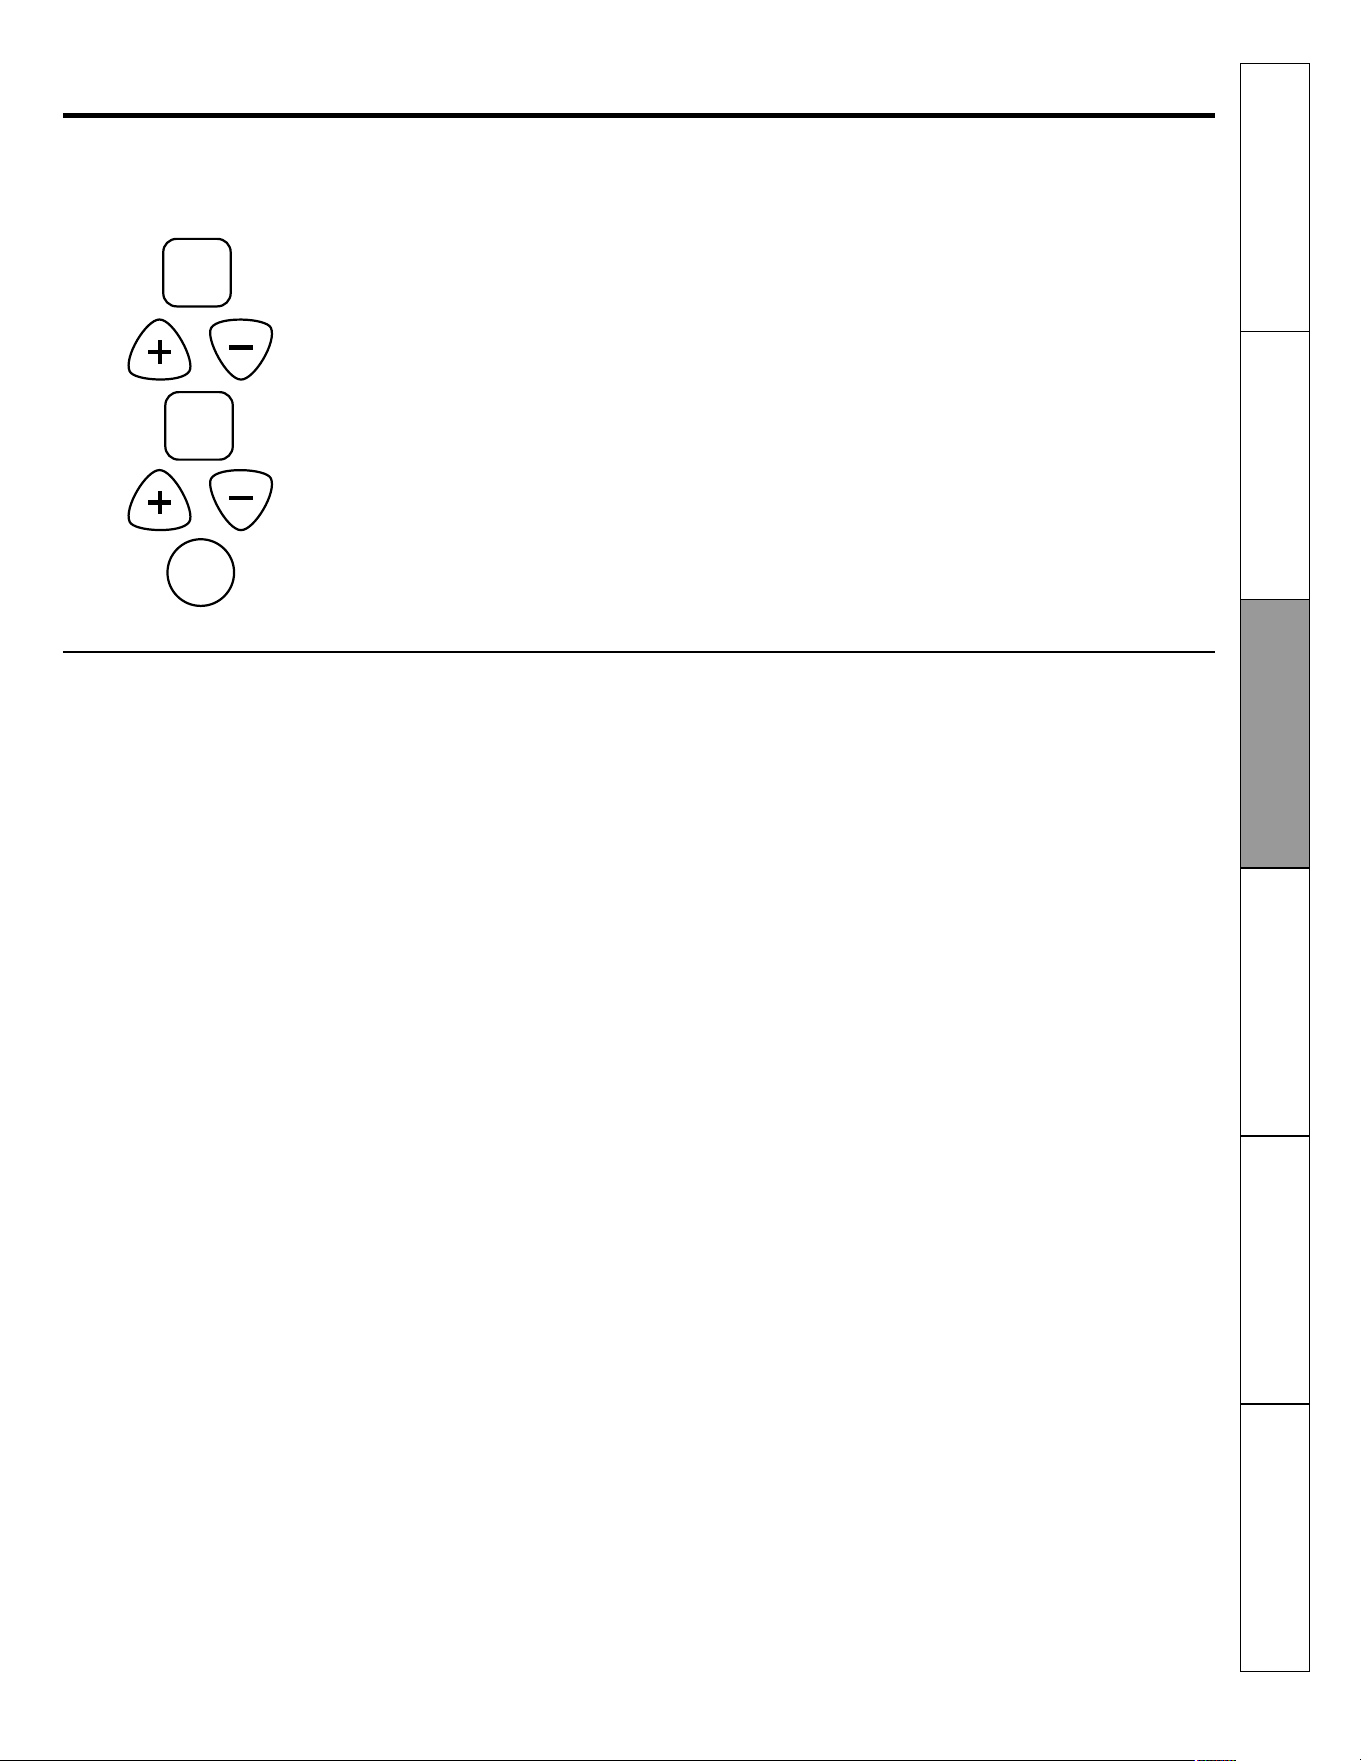
69
How to Delay the Start of Cleaning.
After a Clean Cycle
1. Touch the SELF CLEAN pad.
2. Using the + or – pad, enter the desired clean
time.
3. Touch the START TIME pad.
4. Using the + or – pad, enter the time of day you
want the clean cycle to start.
5. Touch the START pad.
You may notice some white ash in the oven.
Wipe it up with a damp cloth after the oven
cools.
If white spots remain, remove them with a soap-
filled scrubbing pad and rinse thoroughly with a
vinegar and water mixture.
These deposits are usually a salt residue that
cannot be removed by the clean cycle.
If the oven is not clean after one clean cycle, re-
peat the cycle.
• You cannot set the oven for cooking until the
oven is cool enough for the door to unlock.
• If the shelves become hard to slide, wipe the
shelf supports with cooking oil.
The door locks automatically. The display will
show the start time. It will not be possible to open
the oven door until the temperature drops below
the lock temperature and the LOCKED DOOR light
goes off.
When the LOCKED DOOR light is off, open the
door.
Using the self-cleaning oven.
The oven door must be closed and all controls must be set correctly for the cycle to work properly.
(on some models)
SELF
CLEAN
START
START
TIME
Safety Instructions
Operating
Instructions
Care and Cleaning
Troubleshooting Tips
Consumer Support
Installation
Instructions
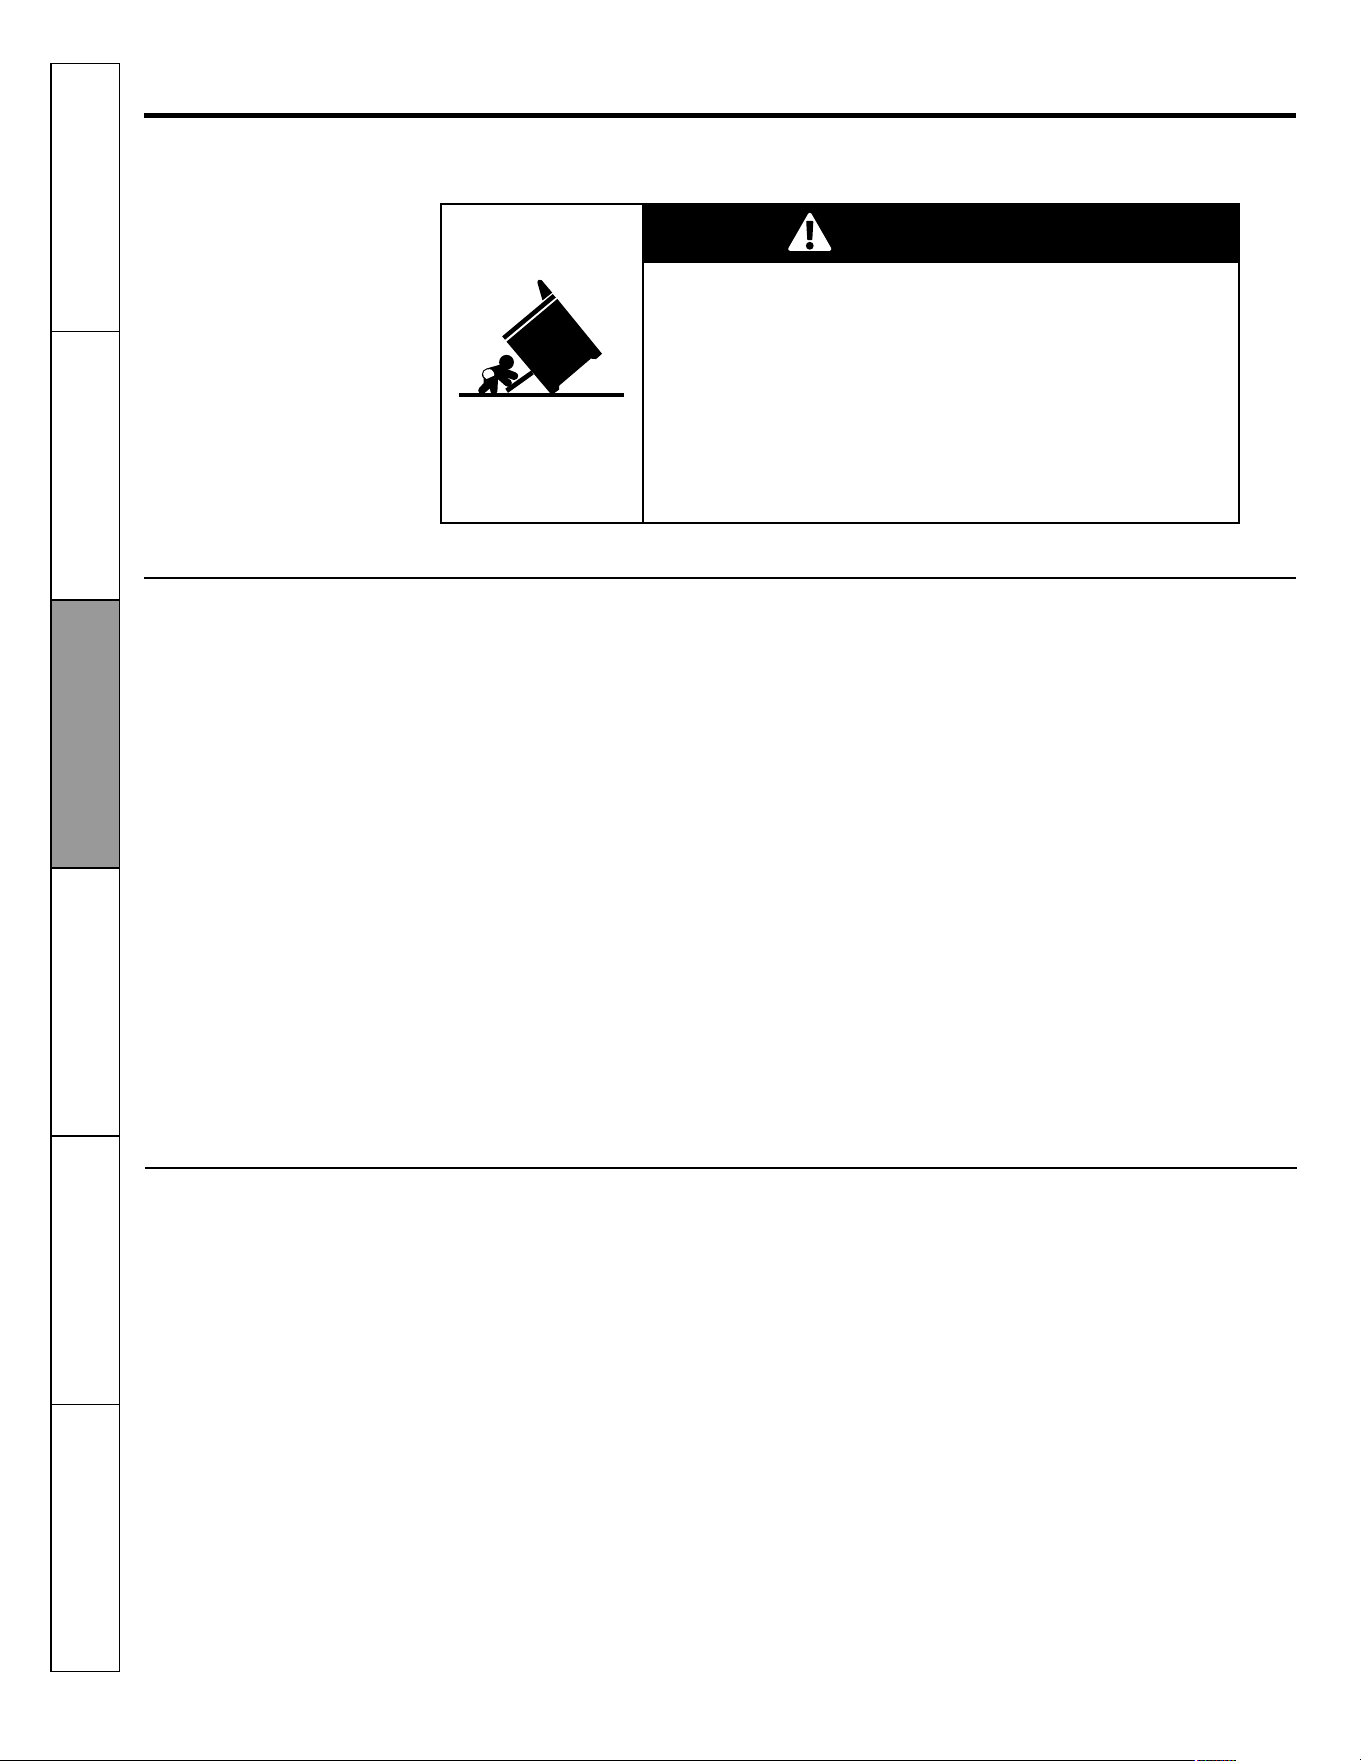
70
Care and cleaning of the range.
Be sure electrical power is off and all surfaces are cool before cleaning any part of the range.
Oven Interior (on standard-clean models)
To clean the inside of the door:
• Do not allow excess water to run into any
holes or slots in the door.
• Soap and water will normally do the job.
Heavy spattering or spillovers may re-
quire cleaning with a mild abrasive
cleaner. Soap-filled, steel-wool pads may
also be used.
Do not allow food spills with a high sugar or
acid content (such as milk, tomatoes,
sauerkraut, fruit juices or pie filling) to re-
main on the surface. They may cause a dull
spot even after cleaning.
To clean the outside of the door:
• Use soap and water to thoroughly clean
the top, sides and front of the oven door.
Rinse well. You may also use a glass
cleaner to clean the glass on the outside
of the door. Do not let water drip into the
vent openings.
• Spillage of marinades, fruit juices, tomato
sauces and basting materials containing
acids may cause discoloration and
should be wiped up immediately. When
surface is cool, clean and rinse.
• Do not use oven cleaners, cleaning pow-
ders or harsh abrasives on the outside of
the door.
To clean outside of the gasket:
The gasket is designed with a gap at the
bottom to allow for proper air circulation.
Because the area inside the gasket is
cleaned during the self-clean cycle, you do
not need to clean this by hand on self-
clean models.
The area outside the gasket and the front
frame can be cleaned with a soap-filled
steel-wool pad, hot water and detergent.
Rinse well with a vinegar and water solu-
tion.
Do not rub or clean the door gasket-it has
an extremely low resistance to abrasion.
If you notice the gasket becoming worn,
frayed or damaged in any way, or if it has
become displace on the door, you should
have it replaced.
Safety Instructions
Operating
Instructions
Care and Cleaning
Troubleshooting Tips
Consumer Support
Installation
Instructions
WARNING
Tip-Over Hazard
A child or adult can tip the range and be killed. Verify the anti-tip
bracket has been properly installed and engaged.
Ensure the anti-tip bracket is re-engaged when the range is
moved.
Do not operate the range without the anti-tip bracket in place
and engaged.
Failure to follow these instructions can result in death or serious
burns to children or adults.
With proper care, the porcelain enamel finish on
the inside of the oven - top, bottom, sides, back
and inside of the door- will stay new-looking for
years.
Let the range cool before cleaning. We recom-
mend that you wear rubber gloves when clean-
ing the range.
Soap and water will normally do the job. Heavy
spattering or spillovers may require cleaning
with a mild abrasive cleaner. Soap-filled scouring
pads may also be used.
IMPORTANT: Do not allow food spills with a high
sugar or acid content (such as milk, tomatoes,
sauerkraut, fruit juices or pie filling) to remain on
the surface. They may cause a dull spot even af-
ter cleaning.
Household ammonia may make the cleaning job
easier. Place 1/2 cup in a shallow glass or pottery
container in a cold oven overnight. The ammonia
fumes will help loosen the burned-on grease and
food.
If necessary, you may use an oven cleaner. Fol-
low the package directions.
Do not spray oven cleaner on the electrical con-
trols and switches because it could cause a short
circuit and result in sparking or fire.
Do not allow a film from the cleaner to build up
on the temperature sensor- it could cause the
oven to heat improperly. (The sensor is located at
the top of the oven.) Carefully wipe the sensor
clean after each oven cleaning, being careful not
to move the sensor as a change in its position
could affect how the oven bakes.
Do not spray any oven cleaner on the oven door,
handles or any exterior surface of the oven, cabi-
nets or painted surfaces. The cleaner can dam-
age these surfaces.
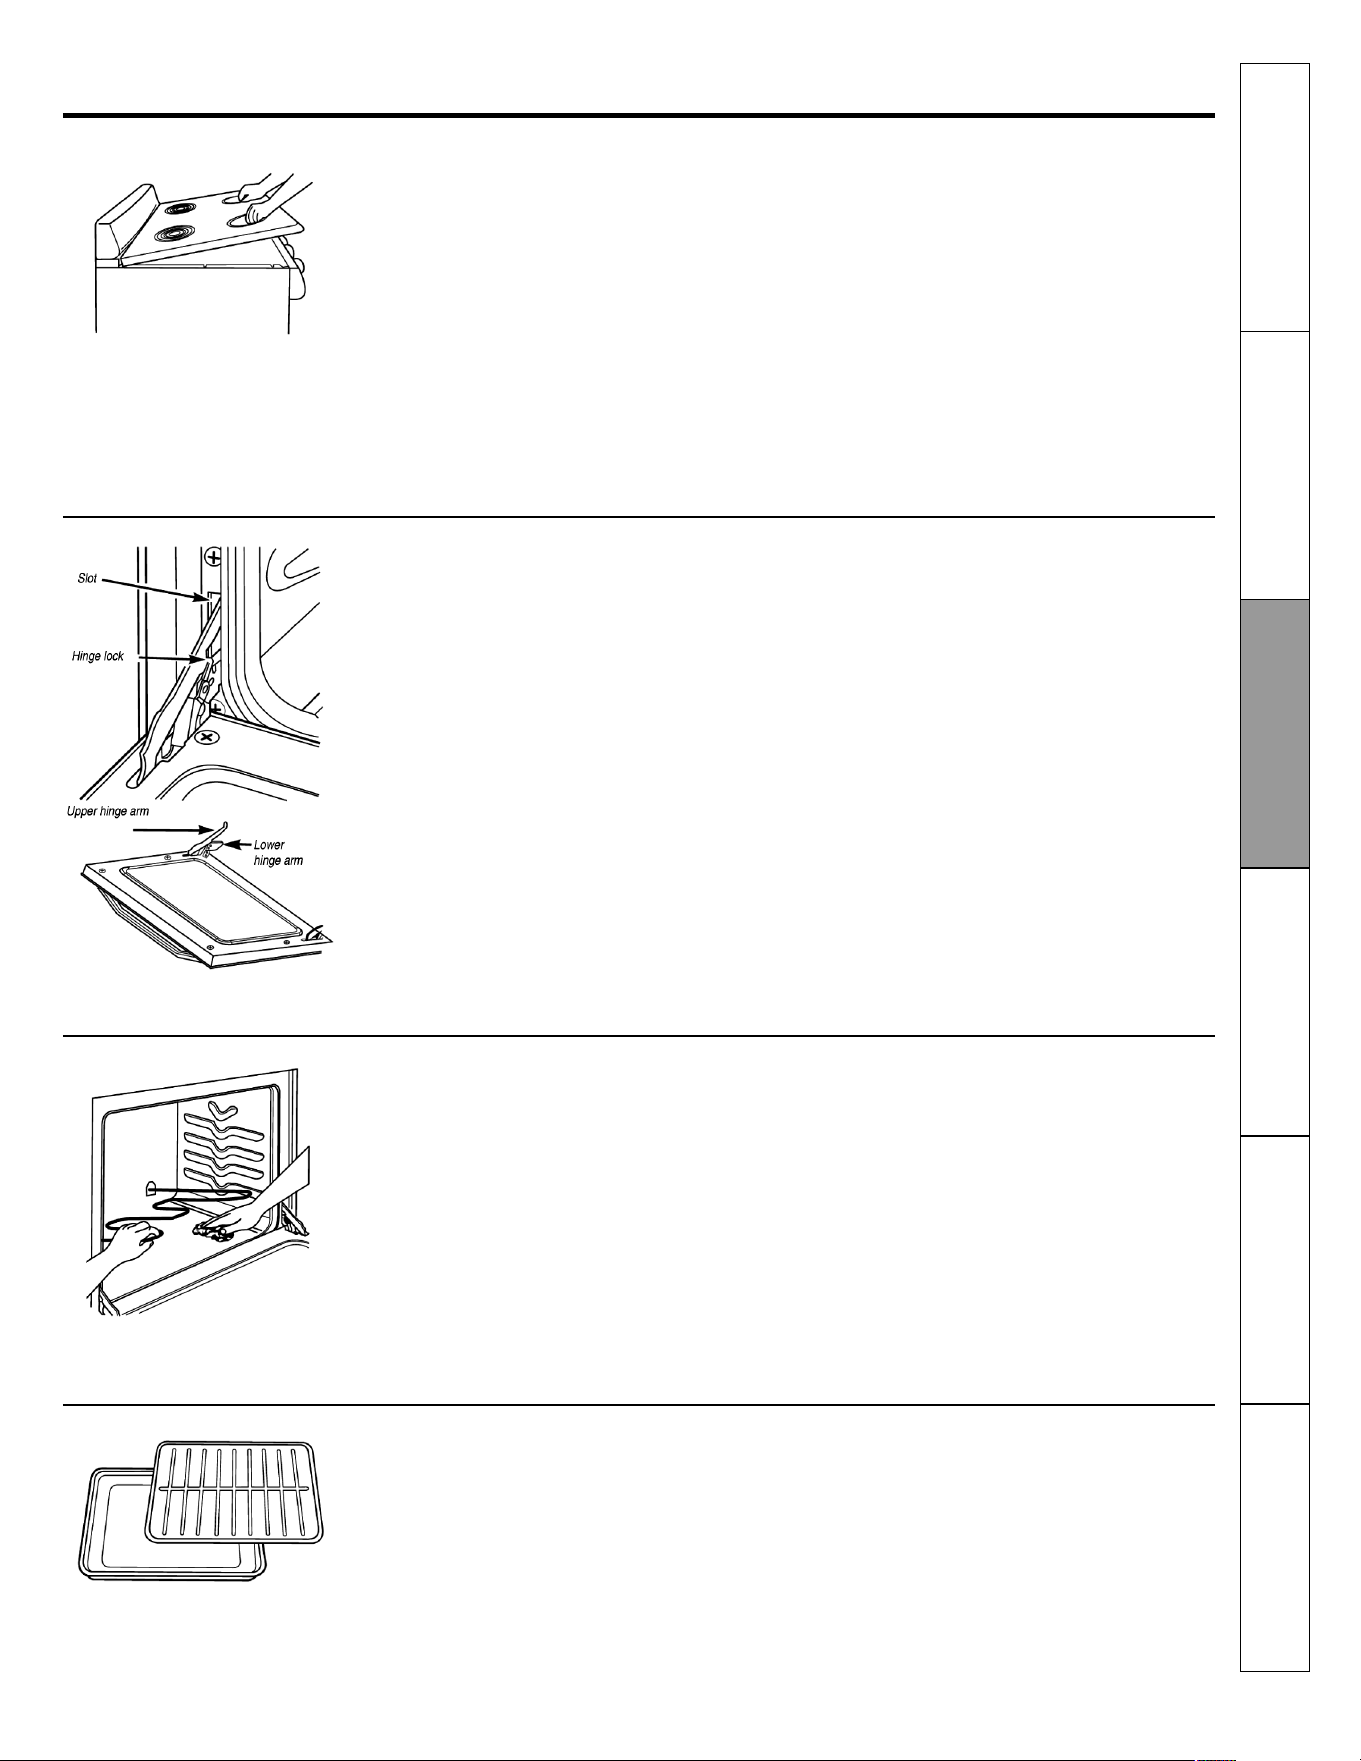
71
Broiler Pan and Grid
Care and cleaning of the range.
Lift-up Cooktop
Clean the area under the cooktop often. Builtup
soil, especially grease, may catch on fire.
To make cleaning easier, the cooktop may be
lifted up and propped open.
Be sure all surface units are turned off before
raising the cooktop.
Remove the front surface and drip pans. See the
Surface Units and Drip Pans section. Grasp the
two front surface unit wells and lift the cooktop
up and prop it open with the prop rod provided.
After cleaning underneath the cooktop with hot,
soapy water and a clean cloth, hold the cooktop
up, return the prop rod to its storage position and
lower the cooktop until it snaps into position. Be
careful not to pinch you fingers. Replace the two
front drip pans and surface units. See the Surface
Units and Drip Pans section.
Lift-Off Oven Door
The oven door is removable, but it is heavy. You
may need help removing and replacing the door.
To remove the door:
1. Open the door to the full open position.
2. Pull the hinge locks up over the hinge hooks on
both sides.
3. Grasp the door firmly on each side, lift slightly
and pull it straight out and away from the
oven.
To replace the door:
1. Firmly grasp both sides of the door at the top.
2. Insert and seat the upper and lower hinge
arms into the oven slots.
3. Push the hinge locks down from the hinge
hooks.
4. Close the oven door and make sure it is work-
ing properly. If it is not working properly, re-
move and replace it following the above steps.
DO NOT ATTEMPT TO CLOSE THE DOOR UNTIL
THIS STEP IS COMPLETE THE HINGE OR DOOR
COULD BE DAMAGED.
Oven Heating Elements
Do not clean the bake element or the broil ele-
ment. Any soil will burn off when the elements
are heated.
The bake elements can be lifted gently to clean
the oven floor. Do not attempt to clean any oven
surface when any burner element is on. Always
wear protective hand-wear when cleaning inte-
rior oven surfaces or surfaces near heating ele-
ments. If spillovers, residue or ash accumulate
around the bake element, gently wipe around the
element with warm water.
After broiling, remove the broiler pan from the
oven. Remove the grid from the pan. Carefully
pour out grease from the pan into a proper con-
tainer. Wash and rinse the broiler pan and grid in
hot water with a soap-filled or plastic scouring
pad.
If food has burned on, sprinkle the grid with de-
tergent while hot and cover with wet paper tow-
els or a dishcloth. Soaking the pan will remove
burned on foods.
Do not store a soiled broiler pan and grid any-
where in the range.
Both the broiler pan and grid
can also be cleaned in the dish-
washer.
Safety Instructions
Operating
Instructions
Care and Cleaning
Troubleshooting Tips
Consumer Support
Installation
Instructions
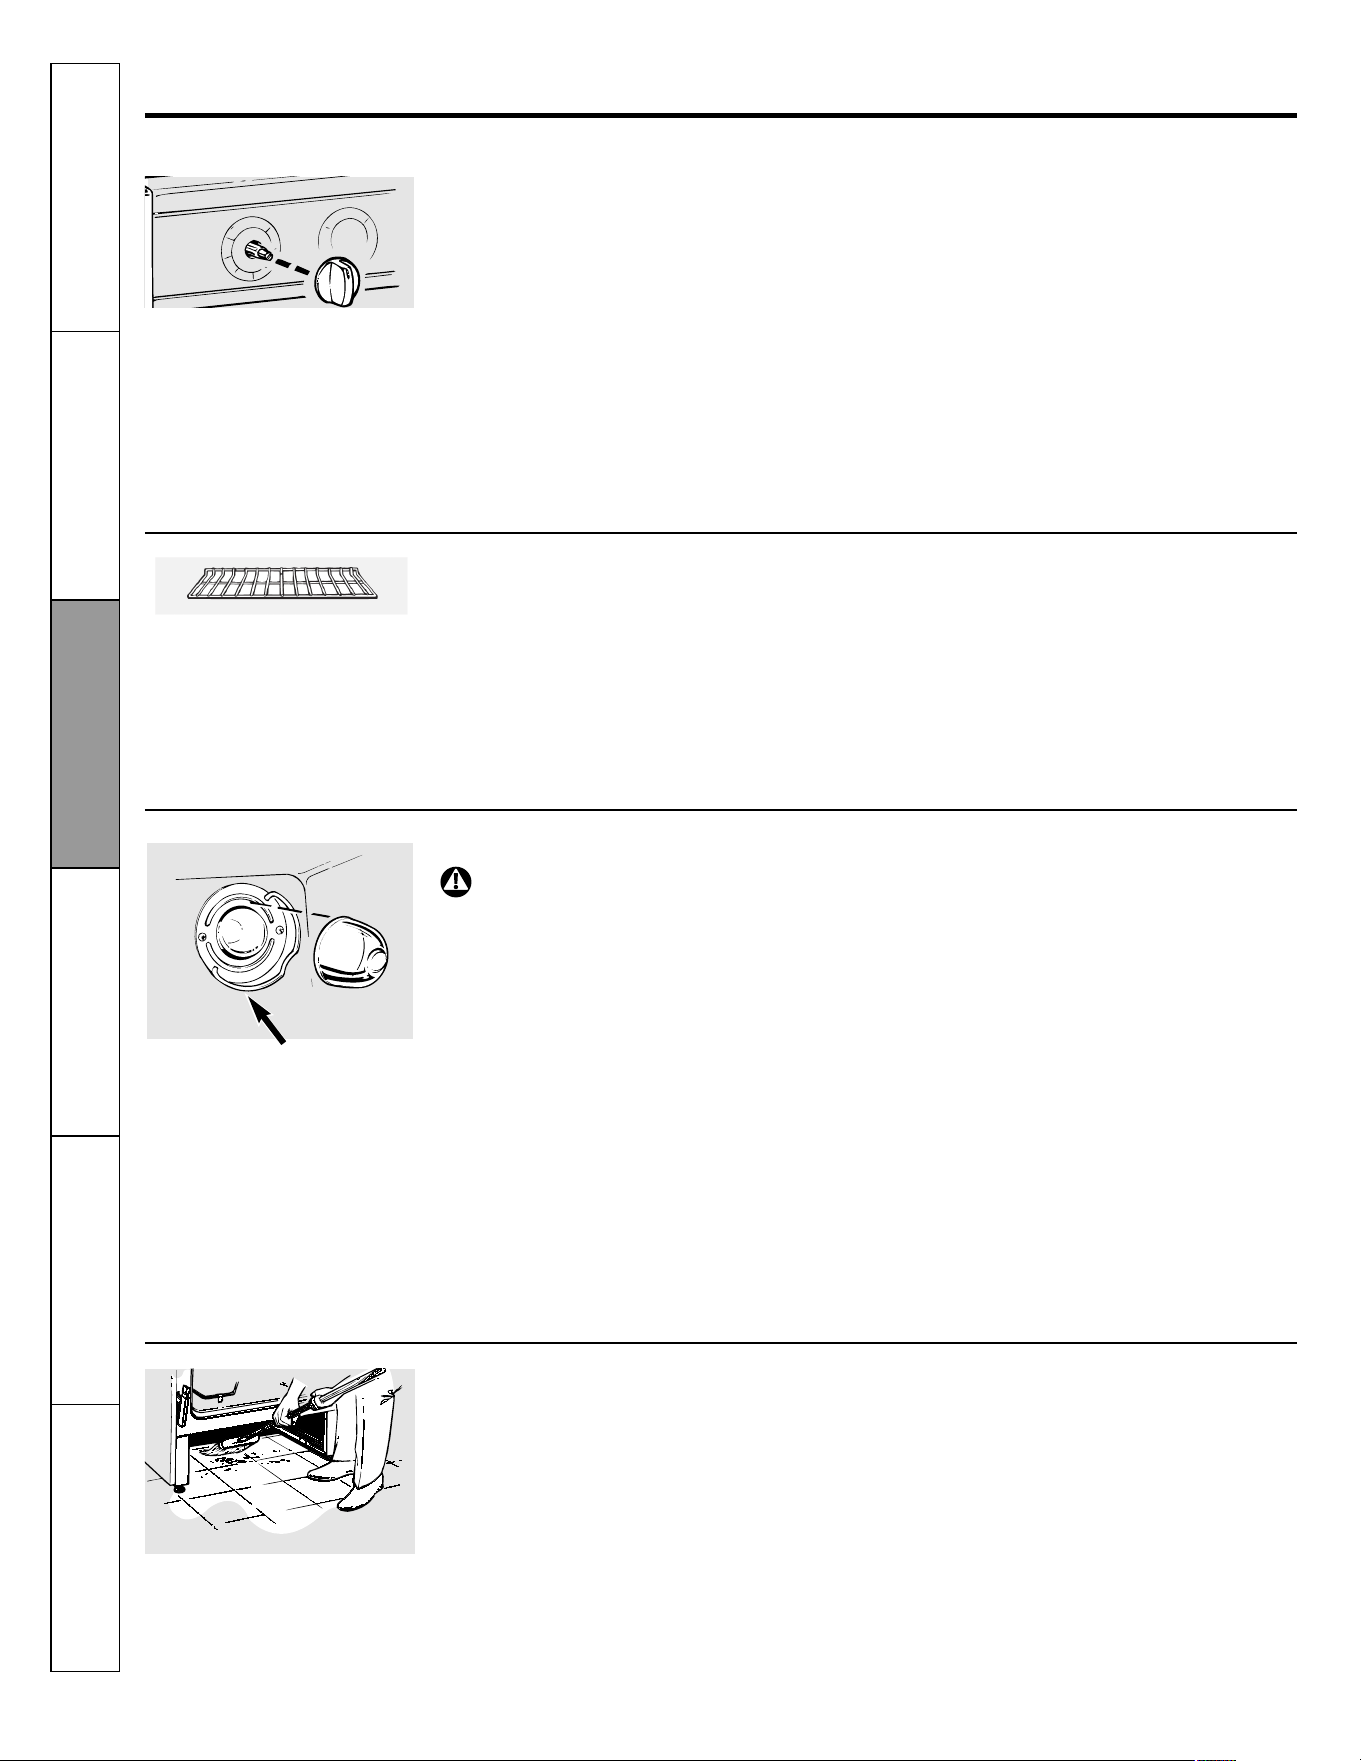
72
Storage Drawer Removal (on some models)
Control Panel and Knobs
Pull the knobs straight off the
stem.
To remove the storage drawer:
1. Pull the drawer out all the way.
2. Tilt up the front and remove it.
To replace the storage drawer:
1. Insert glides at the back of the drawer beyond
the stop on range glides.
2. Lift the drawer if necessary to insert easily.
3. Let the front of the drawer down, then push in
to close.
It is a good idea to wipe the control panel after
each use of the oven. Use a damp cloth to clean
or rinse. For cleaning, use mild soap and water or
a 50/50 solution of vinegar and water. For rins-
ing, use clean water. Polish dry with a soft cloth.
Do not use abrasive cleaners, strong liquid clean-
ers, plastic scouring pads or oven cleaners on the
control panel they will damage the finish.
The control knobs may be removed for easier
cleaning.
Make sure the knobs are in the OFF positions and
pull them straight off the stems for cleaning.
The knobs can be cleaned in a dishwasher or
they may also be washed with soap and water.
Make sure the insides of the knobs are dry before
replacing.
Replace the knobs in the OFF position to ensure
proper placement.
Oven Shelves
Clean the oven shelves with an abrasive cleanser
or scouring pad. After cleaning, rinse the shelves
with clean water and dry with a clean cloth.
NOTE: Take the shelves out of the oven before
you begin the self-clean cycle or they may dis-
color.
To make the shelves slide more easily, apply a
small amount of vegetable oil or cooking oil to a
paper towel and wipe the edges of the oven
shelves with the paper towel.
Wire cover holder
CAUTION: Before replacing your oven light bulb, turn the oven light off
and disconnect the electrical power to the range at the main fuse or cir-
cuit breaker panel.
Care and cleaning of the range.
Oven Light Replacement (on some models)
Be sure to let the light cover and bulb cool com-
pletely.
To remove the cover:
1. Hold a hand under the cover so it does not
fall when released. With fingers of the same
hand, firmly push back the wire cover holder.
Lift off the cover.
Do not remove any screws to remove the
cover.
2. Replace bulb with a 40-watt household appli-
ance bulb.
To replace the cover:
1. Place it into groove of the light receptacle. Pull
wire forward to the center of the cover until it
snaps into place.
2. Connect electrical power to the range.
Clean under the range
Safety Instructions
Operating
Instructions
Care and Cleaning
Troubleshooting Tips
Consumer Support
Installation
Instructions
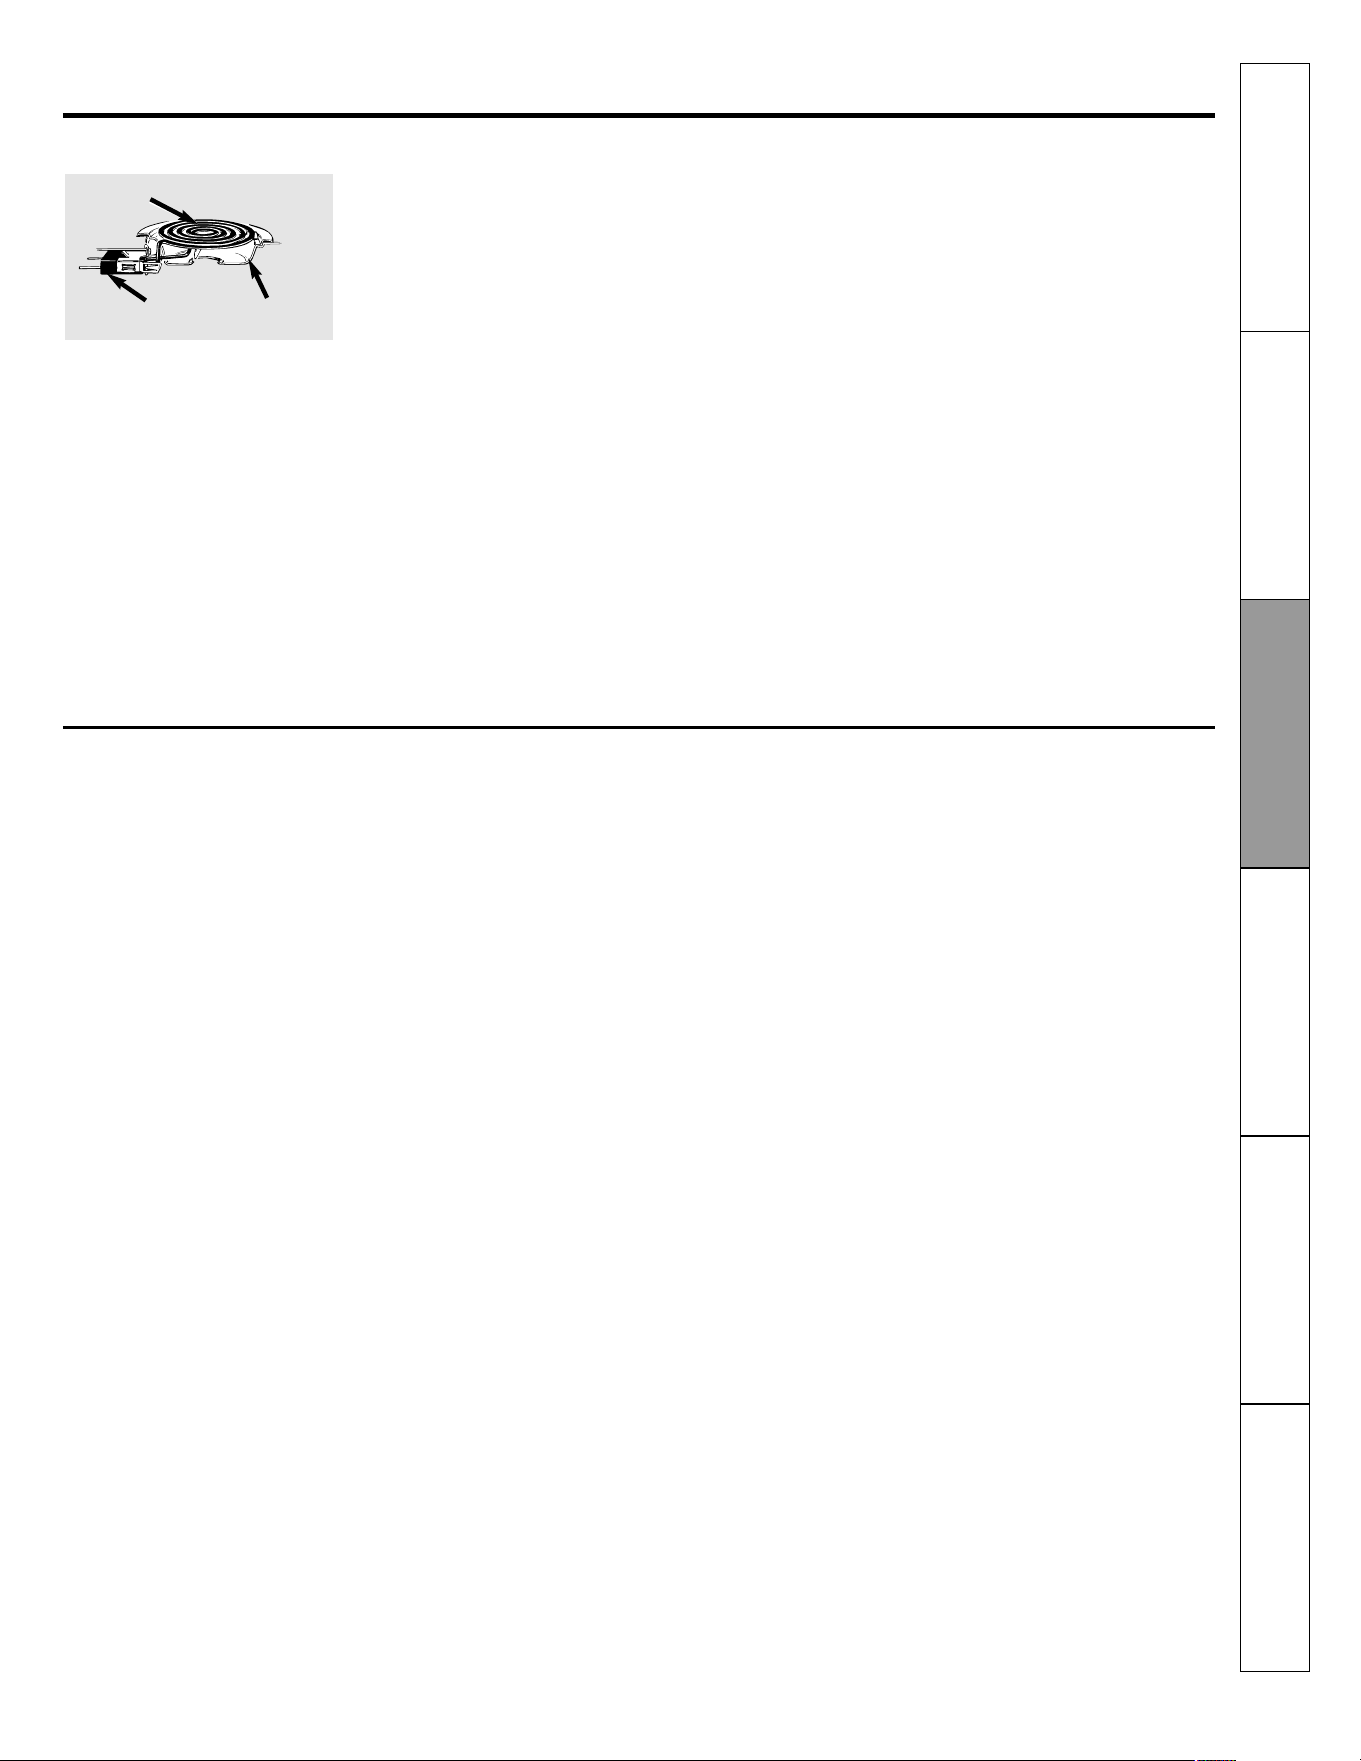
73
Surface Units (on some models)
Be sure all the controls are turned to OFF and the
surface units are cool before attempting to re-
move them.
To clean the surface units, turn the control to the
highest setting for a minute. The coils will burn
off any soil.
To remove a surface unit:
To remove the drip pans for cleaning, the surface
units must be removed first.
Lift the surface unit about 1 inch above the drip
pan and pull it out.
Do not lift the surface unit more than 1”. If you
do, it may not lie flat on the drip pan when you
plug it back in.
Repeated lifting of the surface unit more than 1
inch above the drip pan can permanently dam-
age the receptacle.
To replace a surface unit:
Replace the drip pan into the recess in the cook-
top. Make sure the opening in the pan lines up
with the receptacle.
Insert the terminals of the surface unit through
the opening in the drip pan and into the recep-
tacle.
Guide the surface unit into place so it rests
evenly.
Drip Pans (if included)
Remove the surface units. Then lift out the drip
pans.
Place them in a covered container. Add ¼ cup
ammonia and let soak several hours or over-
night. Wash rinse well and dry.
The drip pans may also be cleaned in the dish-
washer.
Clean the area under the drip pans often. Built-
up soil, especially grease, may catch fire.
Do not cover the drip pans with foil. Using foil so
close to the receptacle could cause shock, fire or
damage to the range.
NOTE: Do not clean the drip pans in a self-clean-
ing oven.
Care and cleaning of the range.
Surface Unit
Receptacle
Drain Pan
Do not immerse the surface units in liquids of
any kind.
Do not clean the surface units in a dishwasher.
Do not bend the surface unit plug terminals.
Do not attempt to clean, adjust or in any way
repair the plug-in receptacle.
Safety Instructions
Operating
Instructions
Care and Cleaning
Troubleshooting Tips
Consumer Support
Installation
Instructions
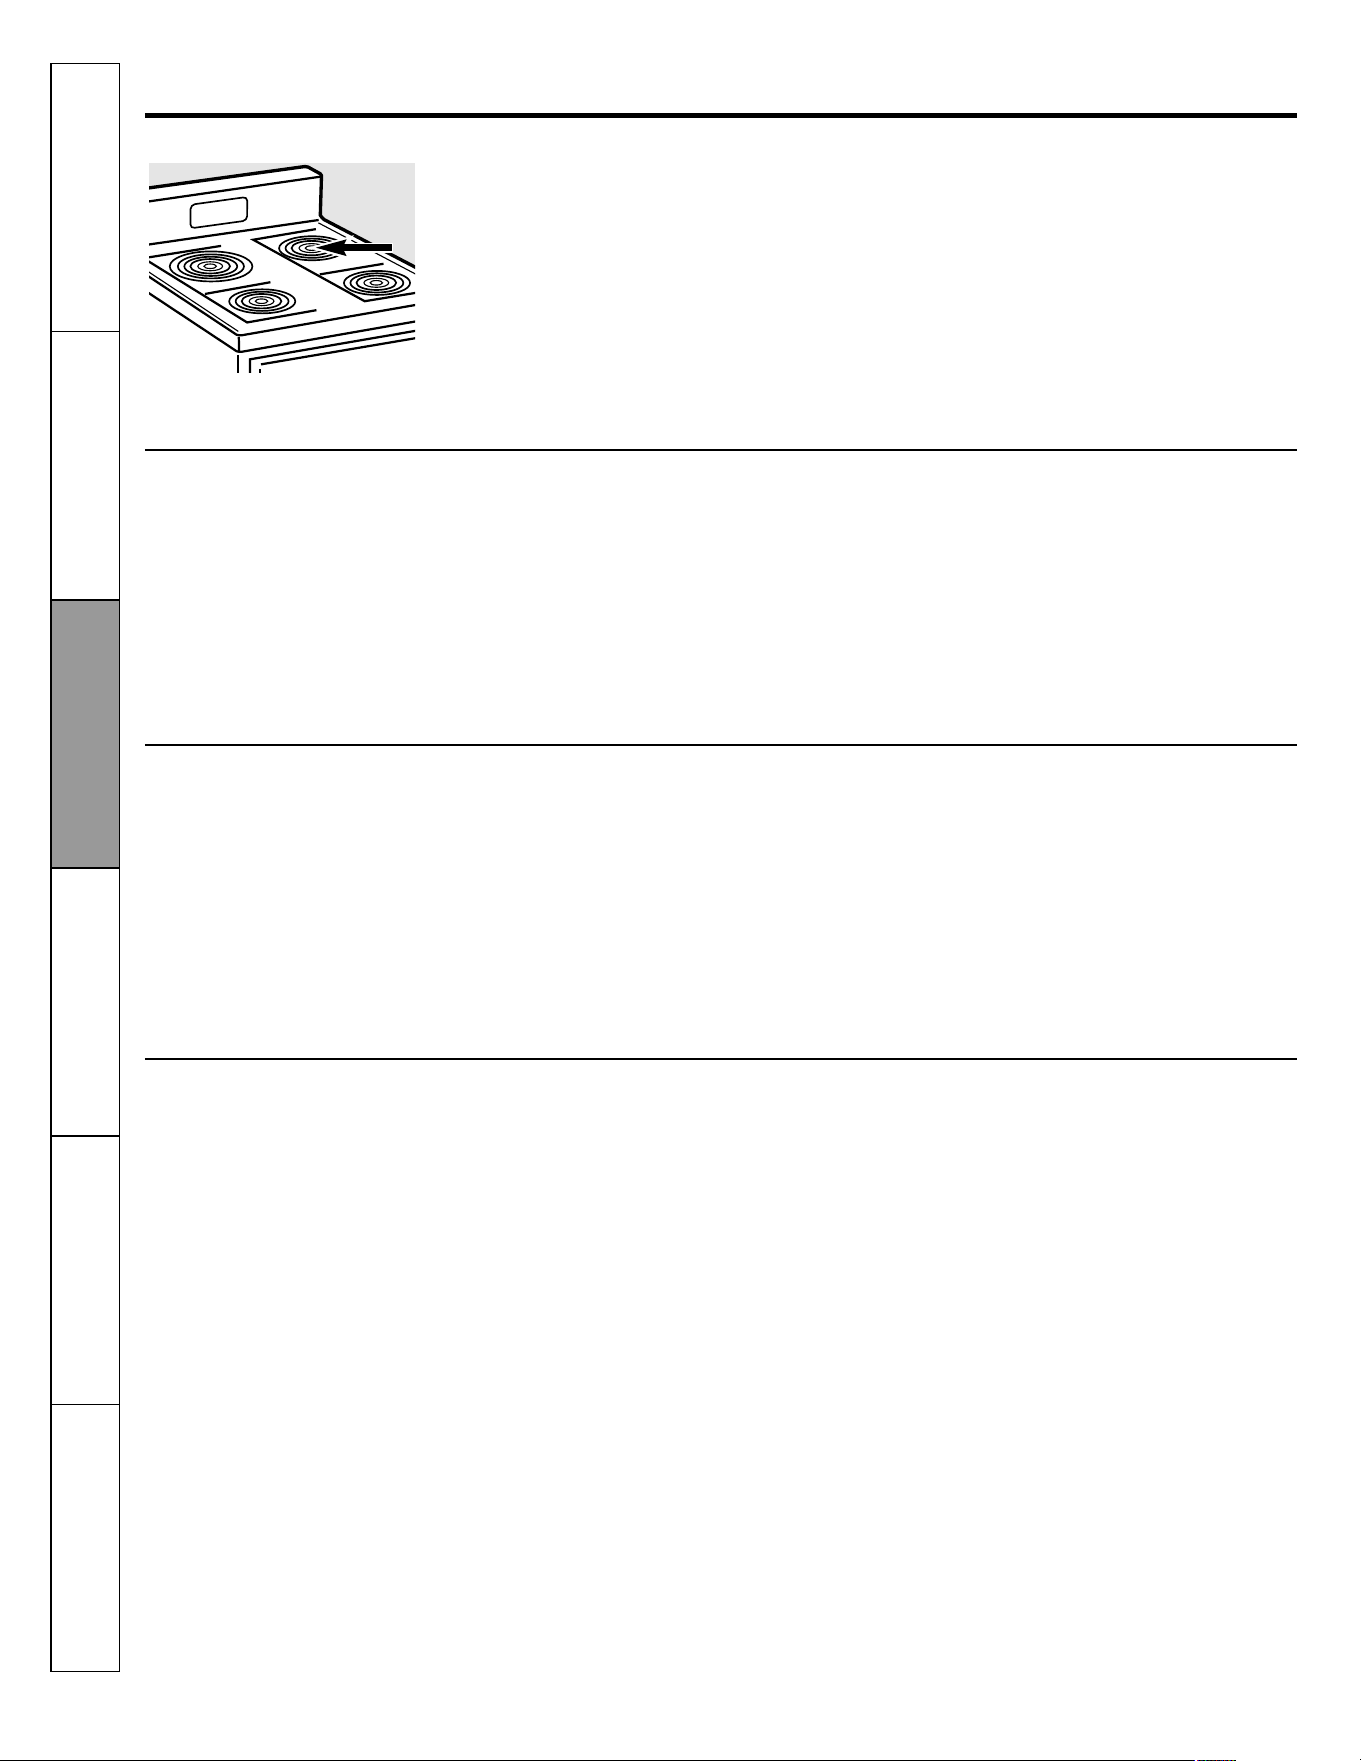
74
Glass Window (on some models)
To clean the outside glass finish, use a glass
cleaner. Rinse and polish with a dry cloth.
Stainless Steel Surfaces (on some models)
Do not use a steel wool pad; it will scratch the
surface.
To clean the stainless steel surface, use warm
sudsy water or a stainless steel cleaner or polish.
Always wipe the surface in the direction of the
grain. Follow the cleaner instructions for cleaning
the stainless steel surface.
Painted Surfaces (on some models)
Painted surfaces include the sides of the range
and the sides of the door trim.
To clean the painted surfaces, use a hot, damp
cloth with a mild detergent suitable for these sur-
faces. Use a clean, hot, damp cloth to remove
soap. Dry with a dry, clean cloth.
Do not use steel-wood pads, commercial oven
cleaners, cleaning powders or other abrasive
cleaners. They will damage the surface.
Oven Vent
On glass cooktop models, the oven is vented
through an opening at the rear of the cooktop.
On coil cooktop models, the oven is vented
through an opening under the right rear surface
unit.
Never cover the opening with aluminum foil or
any other material.
Care and cleaning of the range.
Safety Instructions
Operating
Instructions
Care and Cleaning
Troubleshooting Tips
Consumer Support
Installation
Instructions
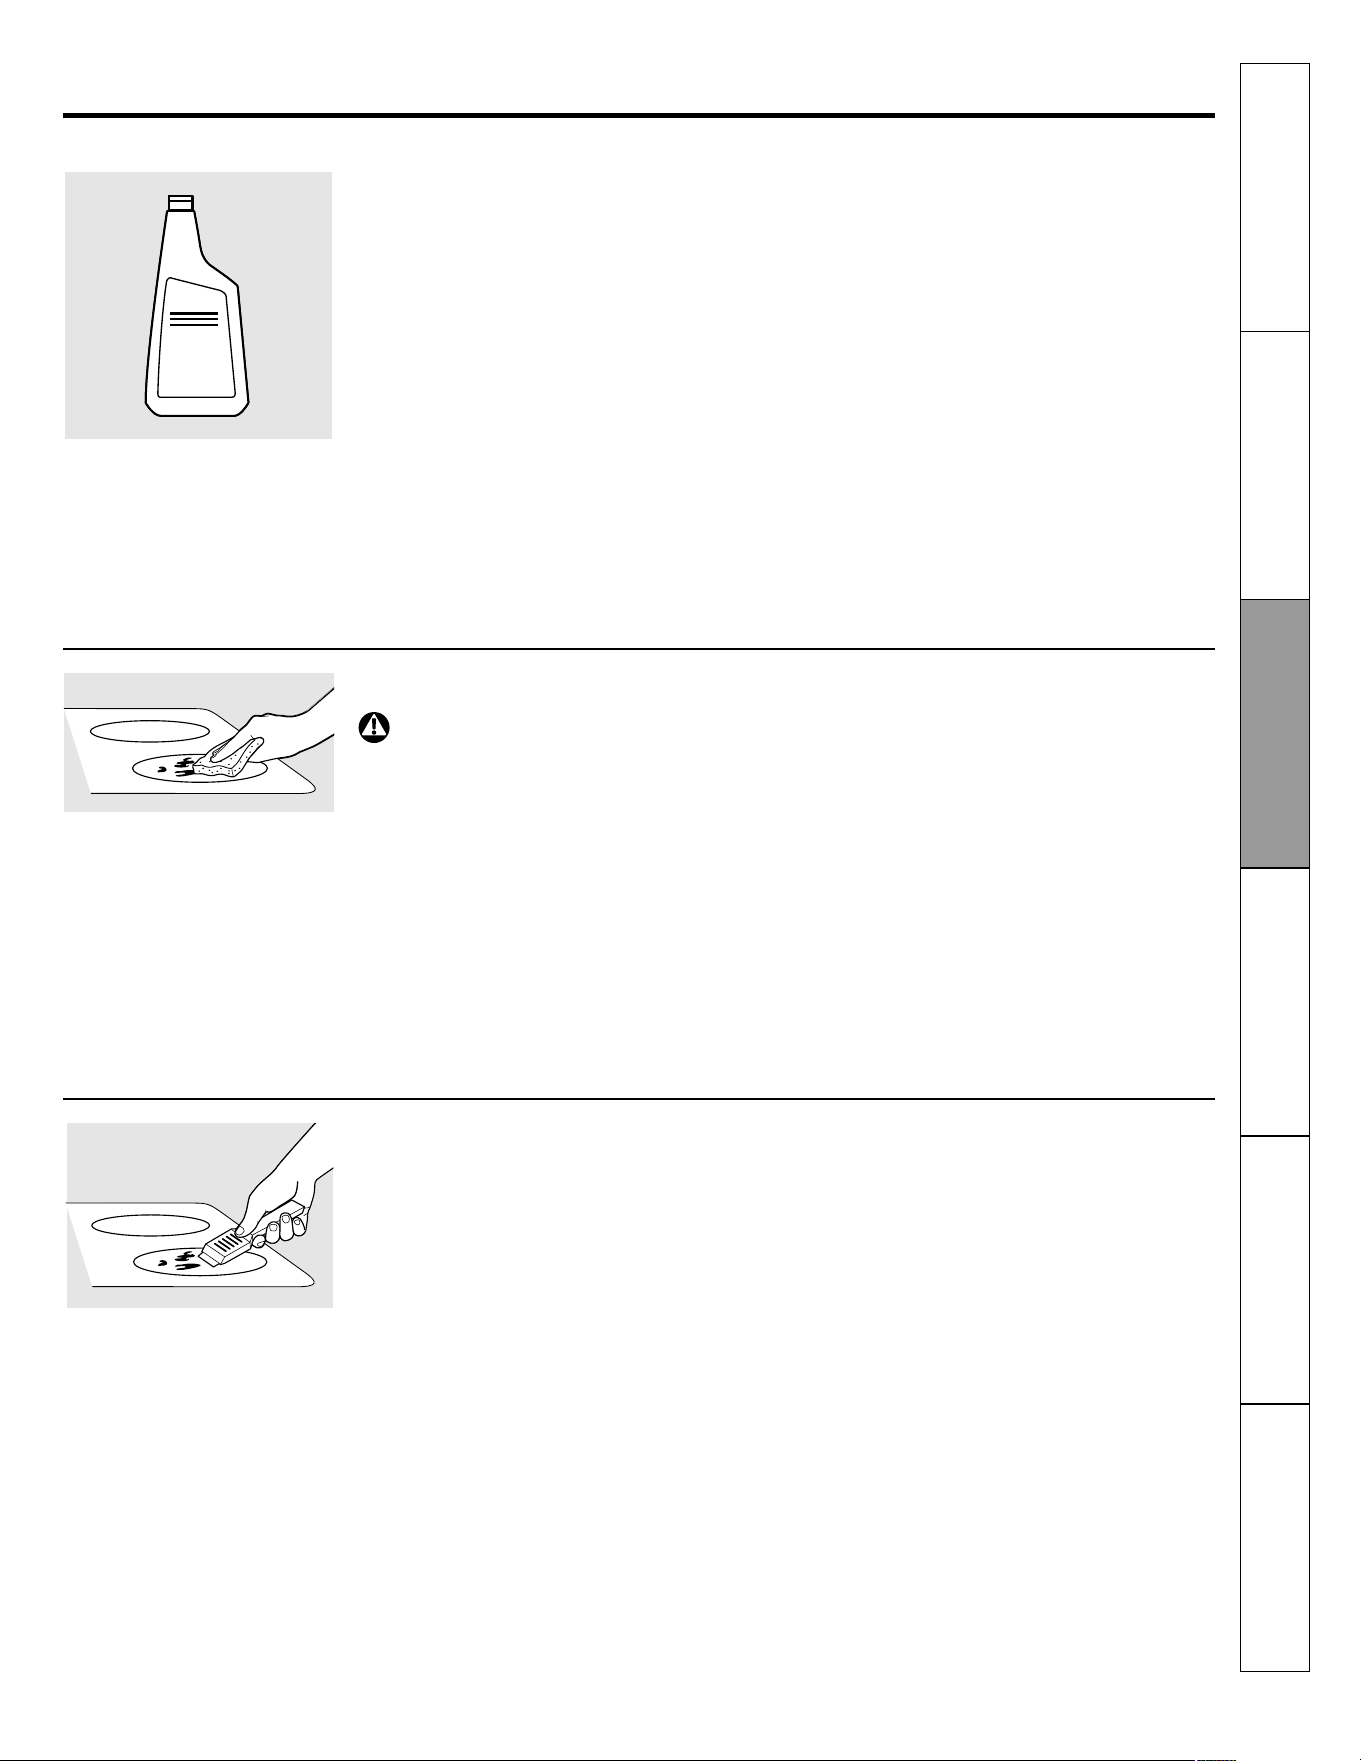
75
Cleaning the glass cooktop.
(on some models)
Normal Daily Use Cleaning
Clean your cooktop after each
spill. Use Ceramic Cooktop
Cleaner.
Burned-On Residue
WARNING: DAMAGE to your glass surface may occur if you use scrub
pads other than those recommended.
Heavy Burned-On Residue
The Ceramic Cooktop Scraper
and all recommended supplies
are available through our deal-
ers or through a Camco Parts
Store.
Note: Do not use a dull or
nicked blade.
ONLY use Ceramic Cooktop Cleaner on the glass
cooktop. Other types of cleaners may not be as
effective.
To maintain and protect the surface of your glass
cooktop, follow these steps.
1. Before using the cooktop for the first time,
clean it with Ceramic Cooktop Cleaner. This
helps protect the top and makes cleanup
easier.
2. Daily use of Ceramic Cooktop Cleaner will
help keep the cooktop looking new.
3. Shake the cleaning cream well. Apply a few
drops of Ceramic Cooktop Cleaner directly to
the cooktop.
4. Use a paper towel for Ceramic Cooktops to
clean the entire cooktop surface.
5. Use a dry cloth or paper towel to remove all
cleaning residue. No need to rinse.
NOTE: It is very important that you DO NOT heat
the cooktop until it has been cleaned thoroughly.
Safety Instructions
Operating
Instructions
Care and Cleaning
Troubleshooting Tips
Consumer Support
Installation
Instructions
1. Allow the cooktop to cool.
2. Spread a few drops of Ceramic Cooktop
Cleaner on the entire burned residue area.
3. Using the included Cleaning Pad for Ceramic
Cooktops, rub the residue area, applying pres-
sure as needed.
4. If any residue remains, repeat the steps listed
above as needed.
5. For additional protection, after all residue has
been removed, polish the entire surface with
Ceramic Cooktop Cleaner and paper towel.
Use a Cleaning Pad for Ceramic
Cooktops.
1. Allow the cooktop to cool.
2. Use a single-edge razor blade scraper at ap-
proximately a 45º angle against the glass sur-
face and scrape the soil. It will be necessary to
apply pressure to the razor scraper in order to
remove the residue.
3. After scraping with the razor scraper, spread a
few drops of Ceramic Cooktop Cleaner on the
entire burned residue area. Use the Cleaning
Pad to remove any remaining residue.
4. For additional protection, after all residue has
been removed, polish the entire surface with
Ceramic Cooktop Cleaner and a paper towel.
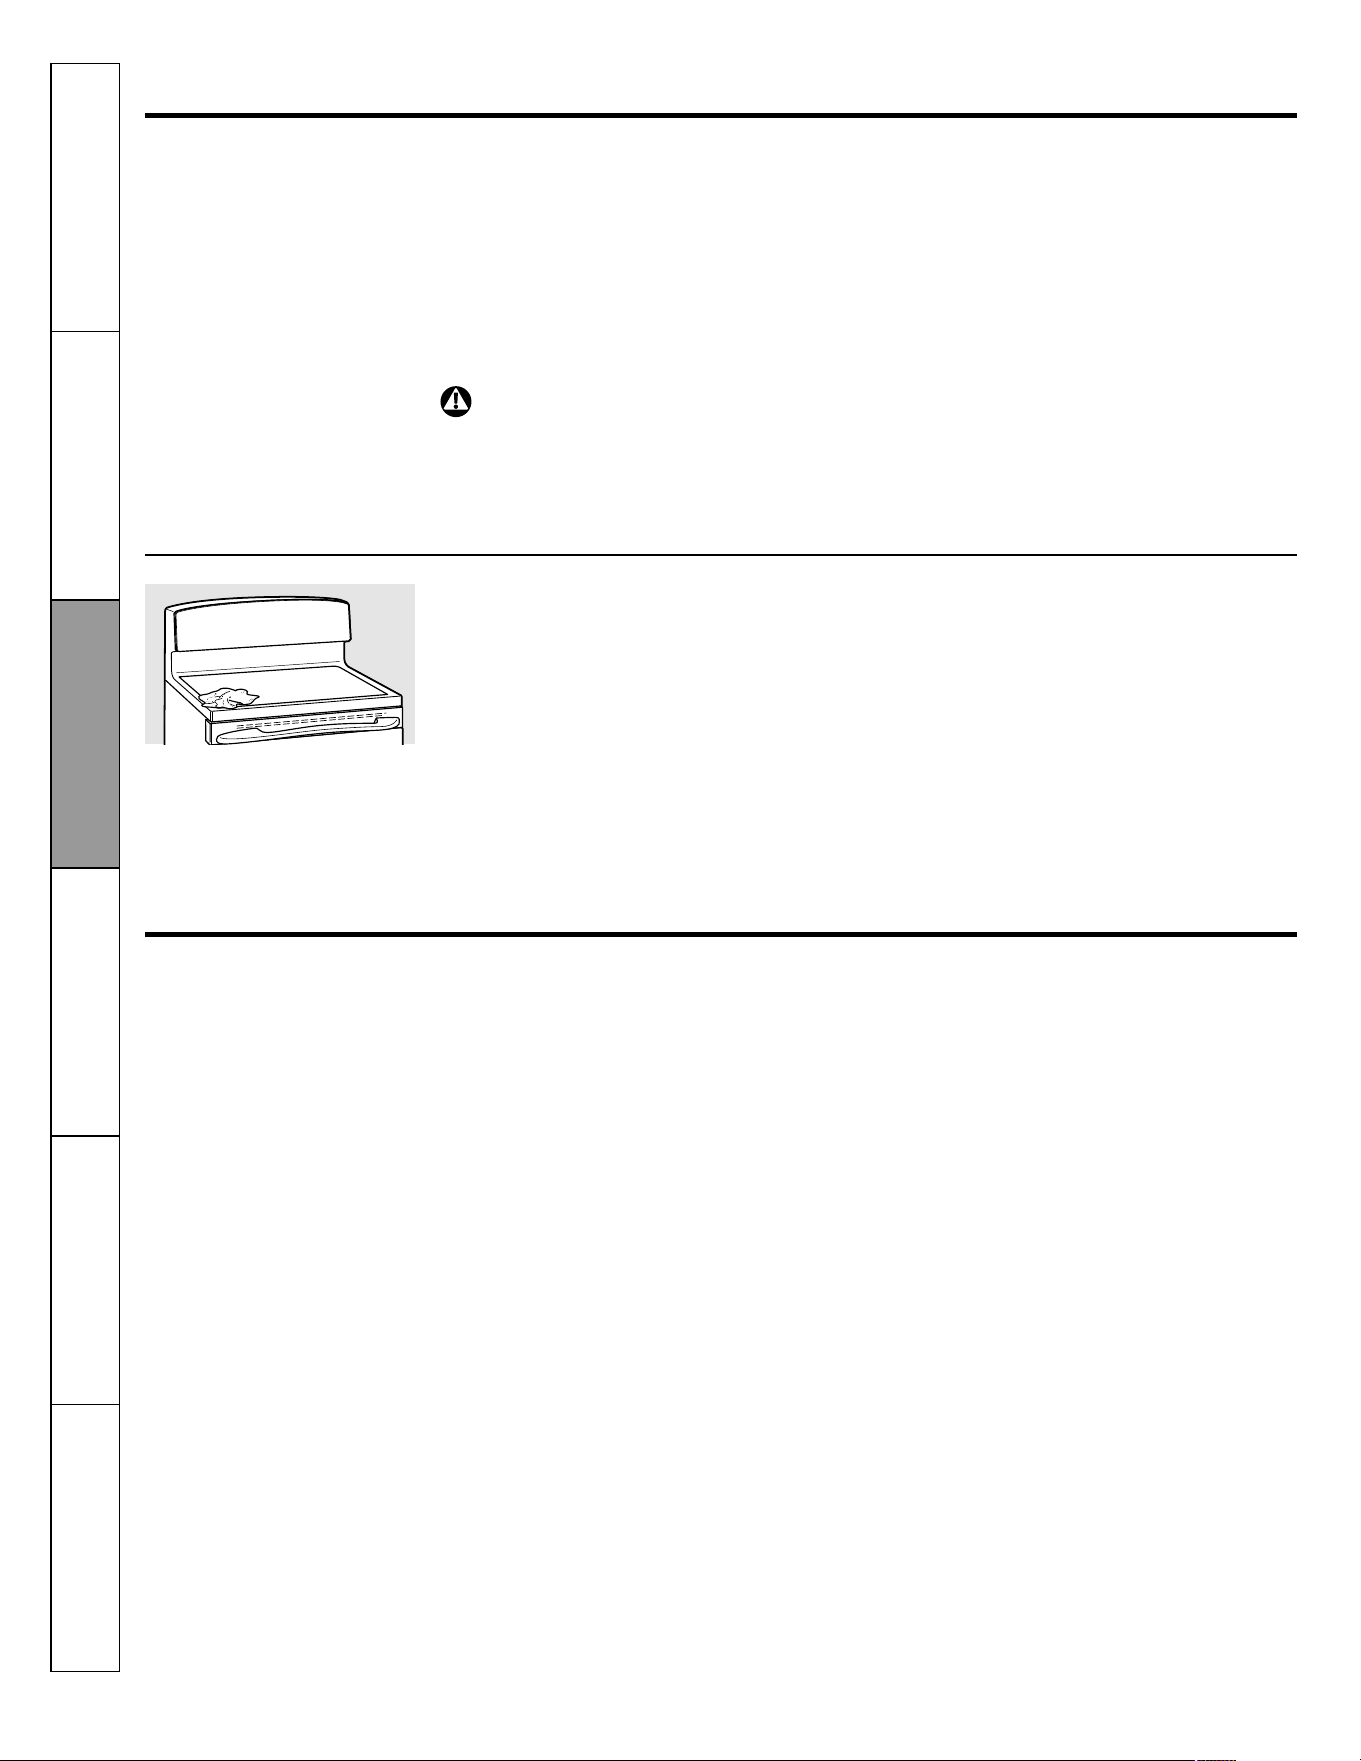
76
Metal Marks and Scratches
Sugary spillovers (such as jel-
lies, fudge, candy, syrups) or
melted plastics can cause pit-
ting of the surface of your
cooktop (not covered by the
warranty) unless the spill is re-
moved while still hot.
Special care should be taken
when removing hot sub-
stances.
Be sure to use a new, sharp ra-
zor scraper.
Do not use a dull or nicked
blade.
Glass surface – potential for permanent damage.
Damage from Sugary Spills and Melted Plastic
Cooktop Seal
WARNING: Carefully check the bottom of pans for roughness that would
scratch the cooktop.
Cleaning the glass cooktop. (on some models)
1. Be careful not to slide pots and pans across
your cooktop. It will leave metal markings on
the cooktop surface.
These marks are removable using the Ce-
ramic Cooktop Cleaner with the Cleaning Pad
for Ceramic Cooktops.
2. If pots with a thin overlay of aluminum or
copper are allowed to boil dry the overlay
may leave black discoloration on the cook-
top.
This should be removed immediately before
heating again or the discoloration may be
permanent.
To clean the cooktop seal around the edges of
the glass, lay a wet cloth on it for a few minutes,
then wipe clean with nonabrasive cleaners.
1. Turn off all surface units. Remove hot pans.
2. Wearing an oven mitt:
a. Use a single-edge razor blade scraper to
move the spill to a cool area on the cook-
top.
b. Remove the spill with paper towels.
3. Any remaining spillover should be left until
the surface of the cooktop has cooled.
4. Do not use the surface units again until all of
the residue has been completely removed.
NOTE: If pitting or indentation in the glass surface
has already occurred, the cooktop glass will have
to be replaced. In this case, service will be neces-
sary.
Safety Instructions
Operating
Instructions
Care and Cleaning
Troubleshooting Tips
Consumer Support
Installation
Instructions
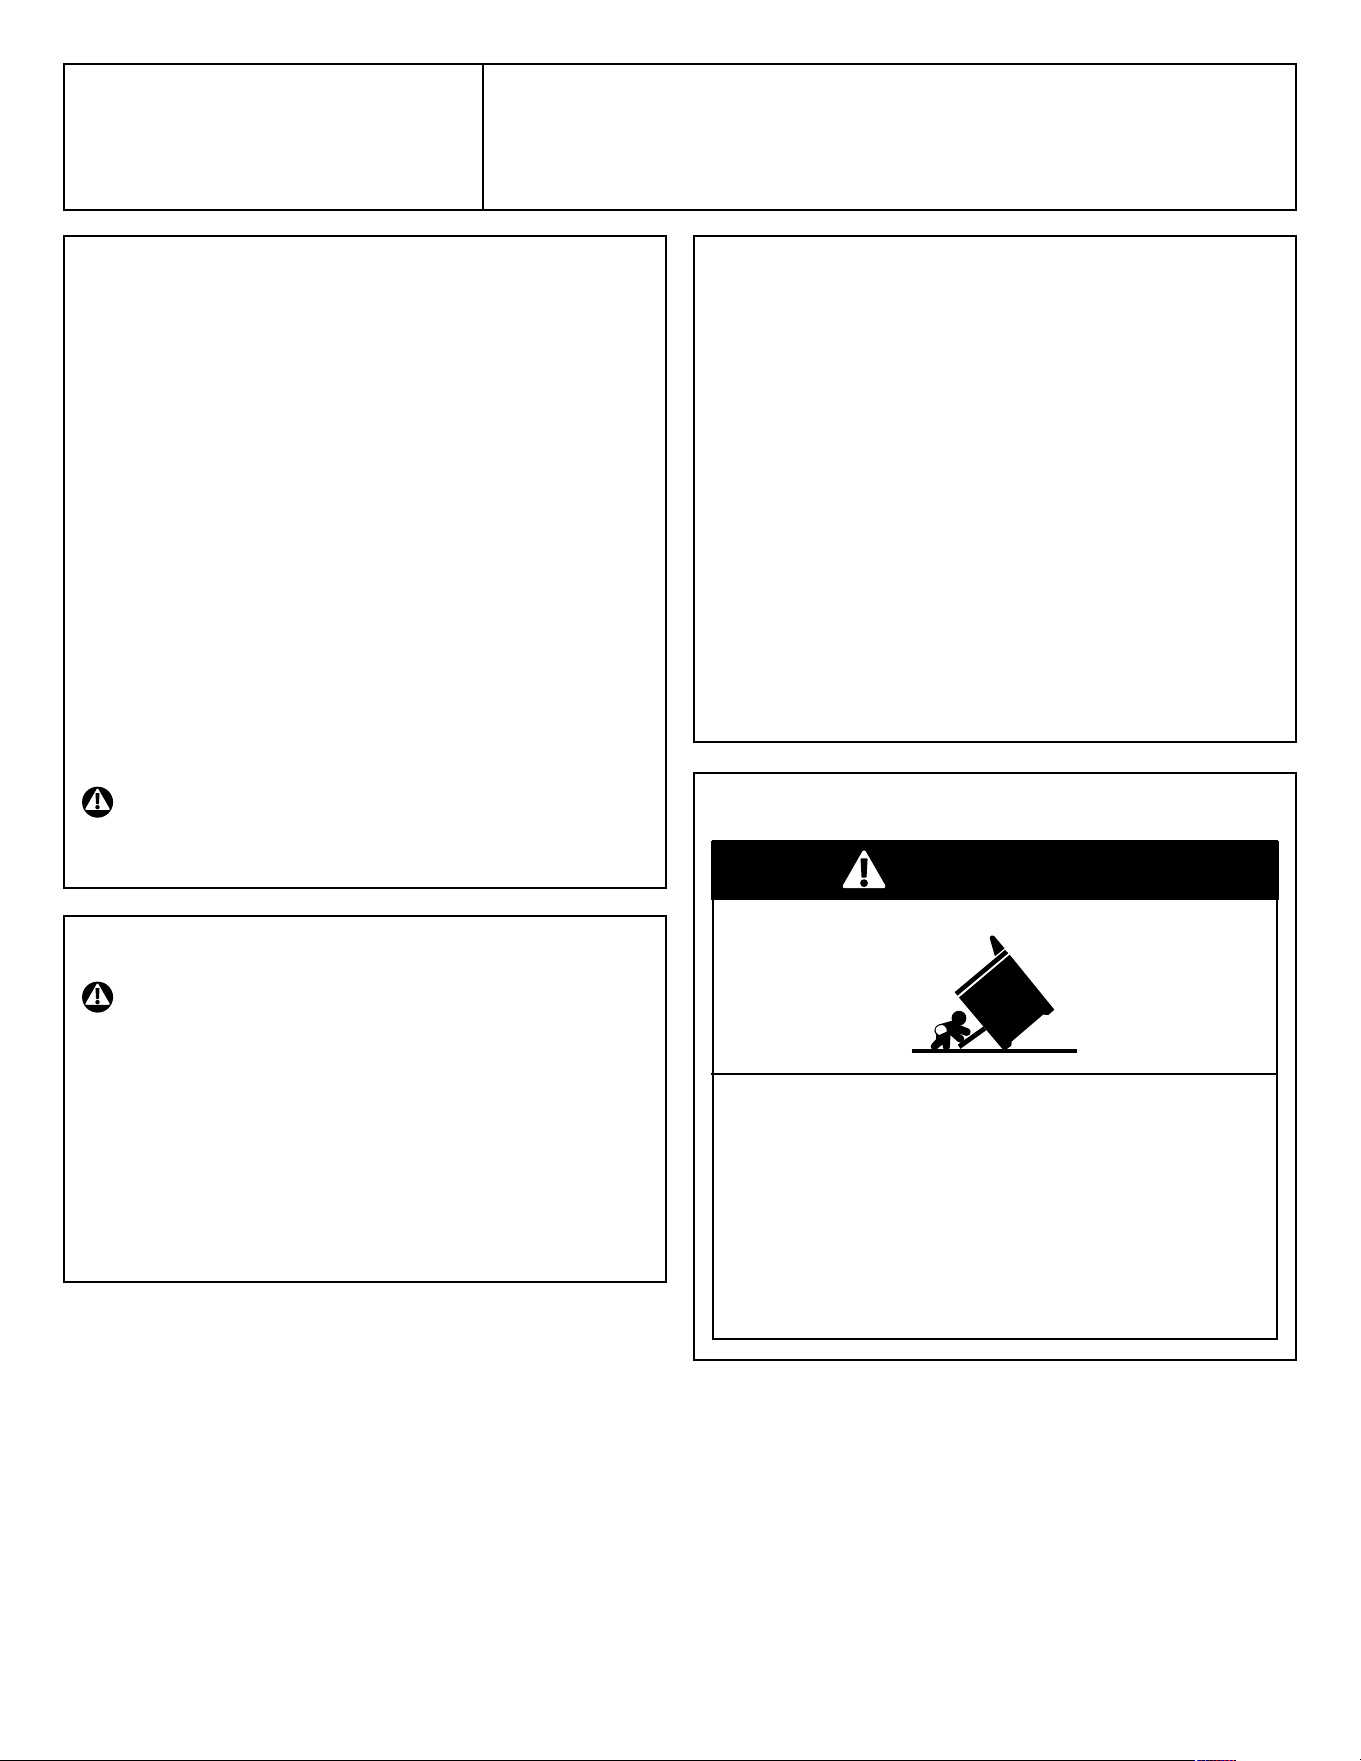
77
Installation
Instructions
24" GE Electric Ranges
BEFORE YOU BEGIN
Read these instructions completely and carefully.
• IMPORTANT - Save these instructions for local
inspector's use.
• IMPORTANT - Observe all governing codes and ordi-
nances.
• Note to Installer - Be sure to leave these instructions with
the Consumer.
• Note to Consumer - Keep these instructions for future ref-
erence.
• Skill level - Installation of this appliance requires basic me-
chanical skills.
• Completion time - 1 to 3 hours.
• Proper installation is the responsibility of the installer.
• Product failure due to improper installation is not covered
under the Warranty.
WARNING - This appliance must be properly
grounded.
FOR YOUR SAFETY:
WARNING - Before beginning the installation,
switch power off at service panel and lock the
service disconnecting means to prevent power
from being switched on accidentally. When the
service disconnecting means cannot be
locked, securely fasten a prominent warning
device, such as a tag, to the service panel.
FOR YOUR SAFETY:
All rough-in and spacing dimensions must be met for safe use
of your range. Electricity to the range can be disconnected at
the outlet without moving the range if the outlet is in the pre-
ferred location (remove lower drawer).
To reduce the risk of burns or fire when reaching over hot sur-
face elements, cabinet storage space above the cooktop should
be avoided. If cabinet storage space is to be provided above the
cooktop, the risk can be reduced by installing a range hood that
sticks out at least 5” beyond the front of the cabinets. Cabinets
installed above a cooktop must be no deeper than 13".
Be sure your appliance is properly installed and grounded by a
qualified technician.
Make sure the cabinets and wall coverings around the range
can withstand the temperatures (up to 200 °F) generated by the
range.
ANTI-TIP DEVICE
WARNING
Tip-Over Hazard
A child or adult can tip the range and be killed. Verify the
anti-tip bracket has been properly installed and engaged.
Ensure the anti-tip bracket is re-engaged when the range is
moved.
Do not operate the range without the anti-tip bracket in
place and engaged.
Failure to follow these instructions can result in death or se-
rious burns to children or adults.
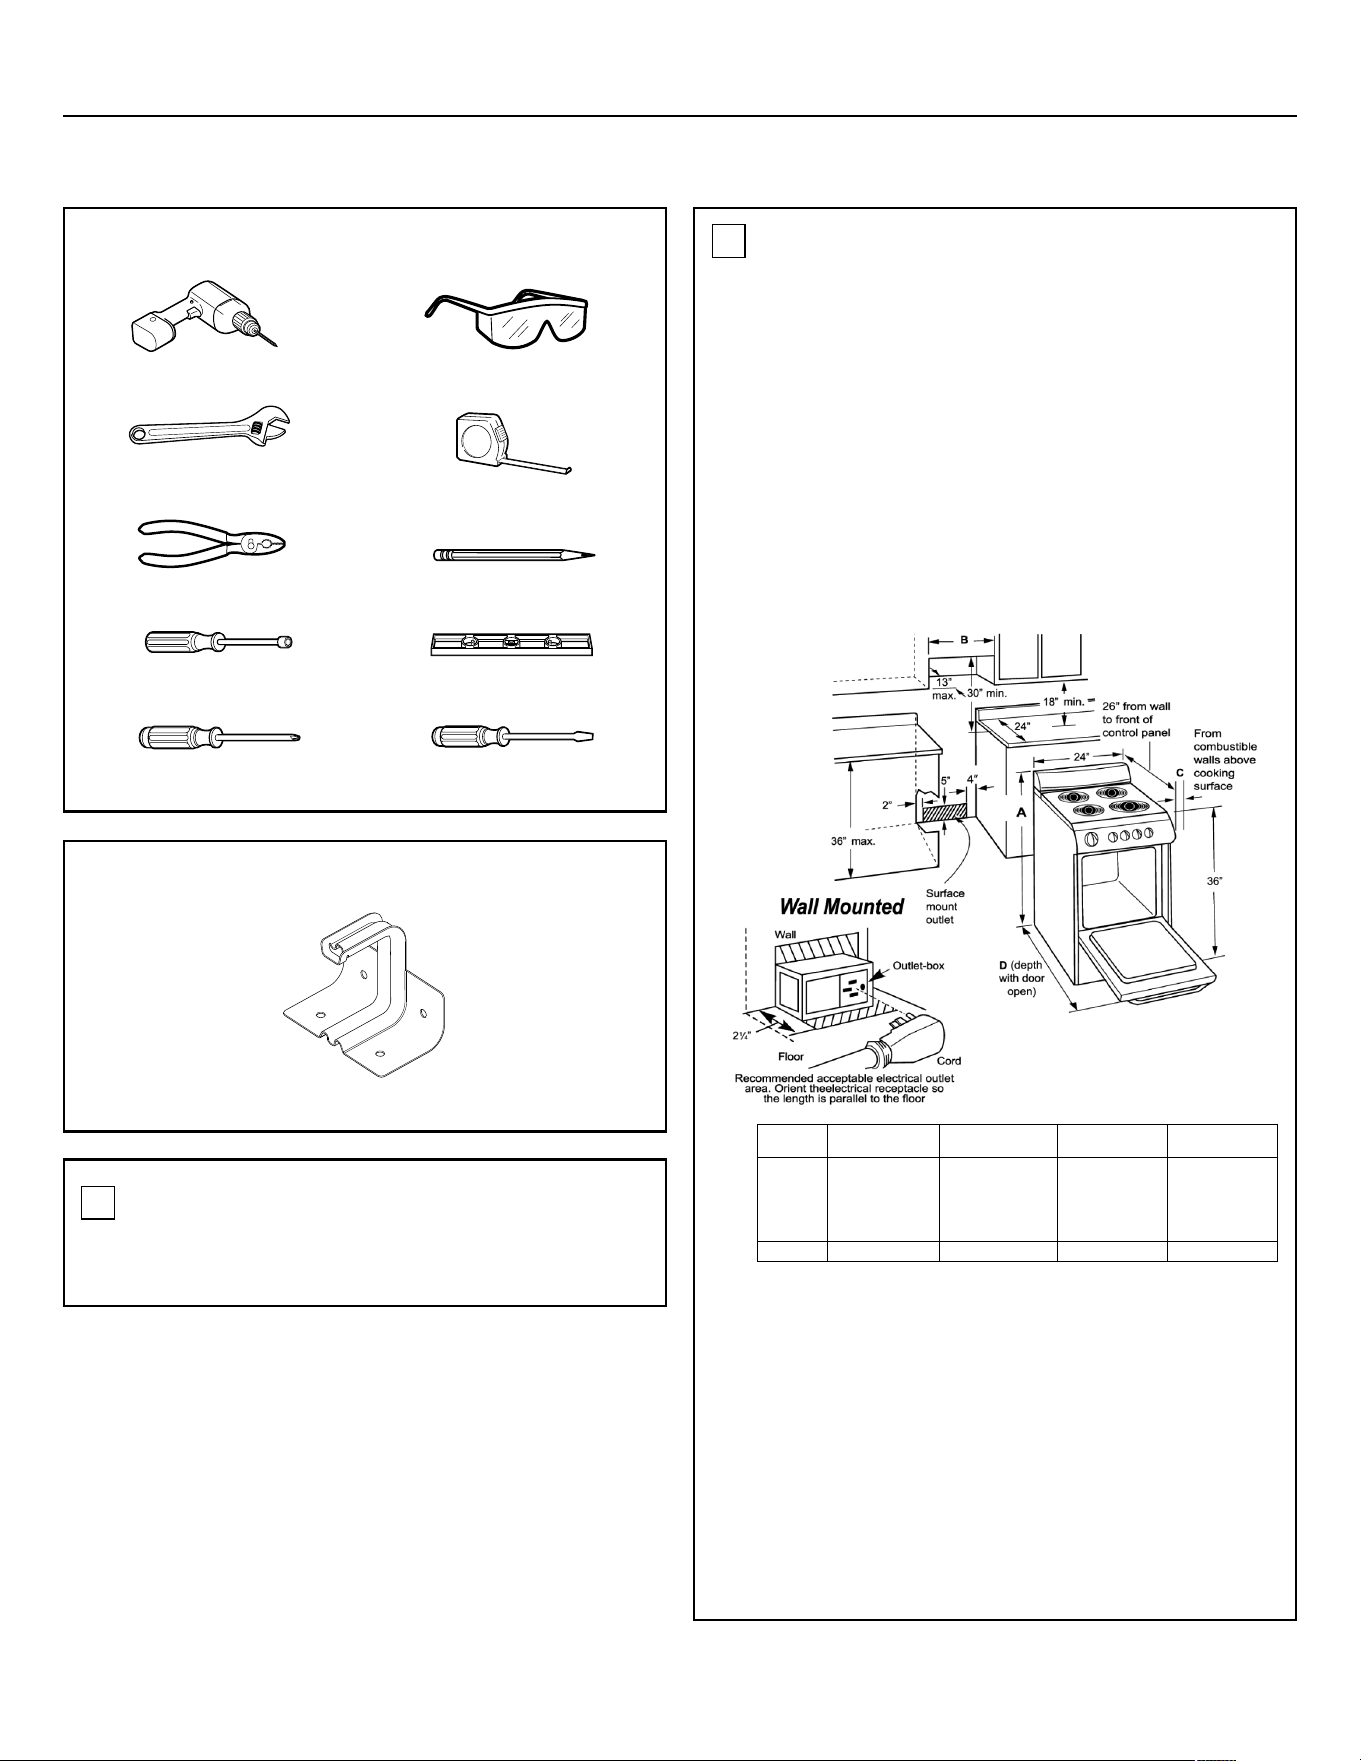
78
Installation Instructions
PREPARE TO INSTALL THE RANGE
TOOLS YOU WILL NEED
Drill with 1/8” Bit
Adjustable Wrench
Pliers
1/4” Nut Driver
Phillips Screwdriver
Safety Glasses
Tape Measure
Pencil
Level
Flat-blade Screwdriver
PARTS INCLUDED
Anti-Tip Bracket Kit
REMOVE SHIPPING MATERIAL1
Remove packaging materials. Failure to remove packaging
materials could result in damage to the appliance.
PREPARE THE OPENING2
• Allow 2" spacing from the range to adjacent vertical
walls above the cooktop surface. Allow 30" minimum
clearance between the surface units and the bottom of
unprotected wood or metal top cabinet, and 18" mini-
mum between the countertop and the adjacent cabinet
bottom.
• To eliminate the risk of burns or fire when reaching over
hot surface elements, cabinet storage space above the
cooktop should be avoided. If cabinet storage space is to
be provided above cooktop, the risk can be reduced by
installing a range hood that protrudes at least 5” beyond
the front of the cabinets. Cabinets installed above a
cooktop may be no deeper than 13".
Flooring under the range
Your range, like many other household items, is heavy and
can settle into soft floor coverings such as cushioned vinyl
or carpeting.
When moving the range on this type of flooring, it should
be installed on a 1/4" thick sheet of plywood (or similar
material) as follows:
When the floor covering ends at the front of the range, the
area that the range will rest on should be built up with ply-
wood to the same level or higher than the floor covering.
This will allow the range to be moved for cleaning or ser-
vicing.
JCAS735
JCAS745
JCAP750
JCAP760
JCAP765
JCAS445
A
B
2
C
(recommended)
Model
47
36
24 3/8
24 3/8 N.A. 41
41
D
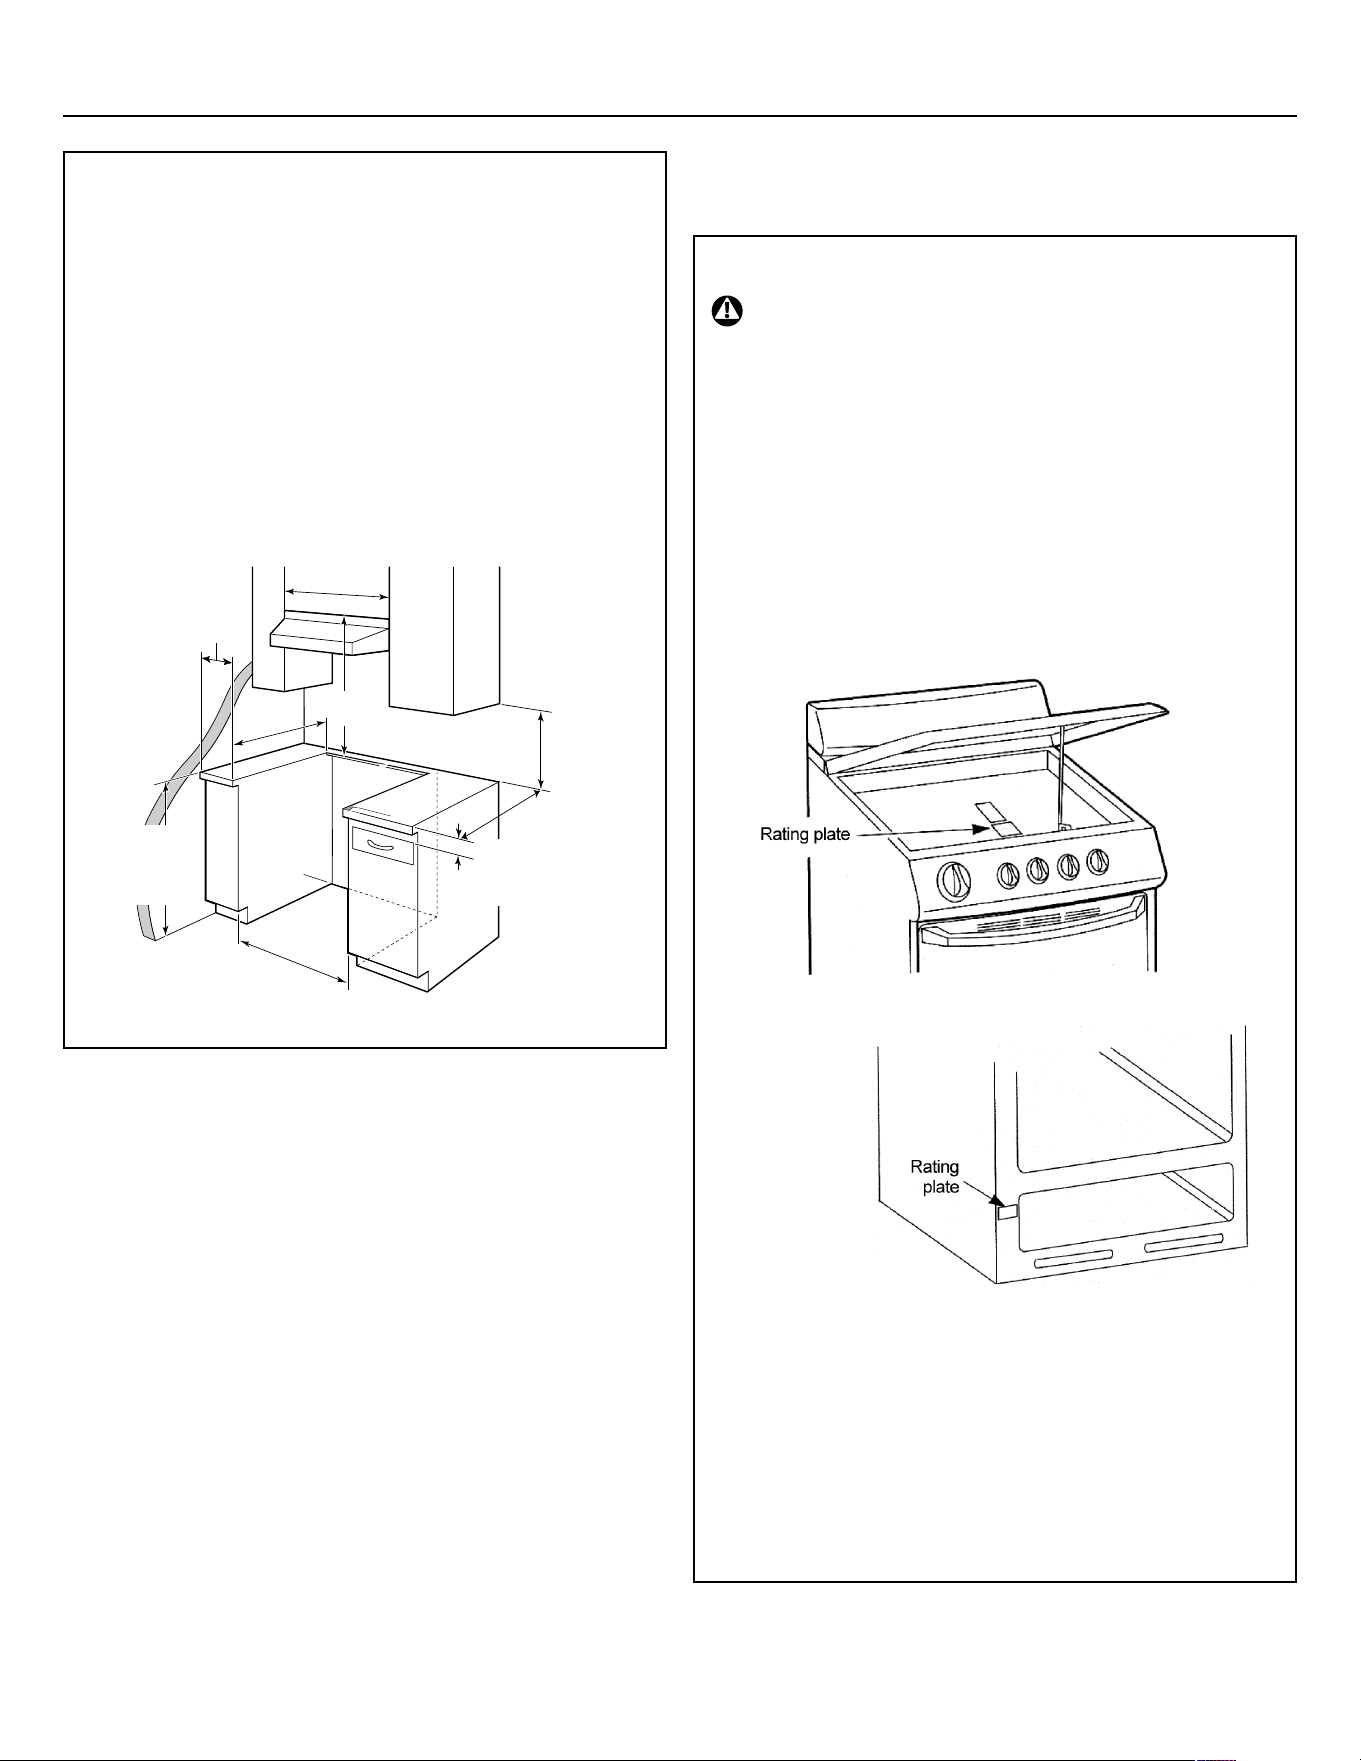
79
76,2 cm
(30) min.
See note
B
above
38 cm
(15) min.
76,2 cm
(30) min.
63,5 cm (25)
3,1 cm (1-1/4) min.
from countertop to
top of cabinet
drawer
60,96 cm
± 0,16 cm
(24 ± 1/16)
91,44 cm
(36,0) from
floor to
countertop
57,78
cm
(22-3/4)
Installation Instructions
PREPARE THE OPENING (JCAS445)
• Allow 2" spacing from the range to adjacent vertical walls
above the cooktop surface. Allow 30" minimum clearance be-
tween the surface units and the bottom of unprotected wood
or metal top cabinet, and 18" minimum between the counter-
top and the adjacent cabinet bottom.
• To eliminate the risk of burns or fire when reaching over hot
surface elements, cabinet storage space above the cooktop
should be avoided. If cabinet storage space is to be provided
above cooktop, the risk can be reduced by installing a range
hood that protrudes at least 5” beyond the front of the cabi-
nets. Cabinets installed above a cooktop may be no deeper
than 13".
ELECTRICAL CONNECTIONS
ELECTRICAL REQUIREMENTS
CAUTION: For personal safety, do not use an
extension cord with this appliance. Remove
house fuse or open circuit breaker before be-
ginning installation.
We recommend you have the electrical wiring and hookup of
your range connected by a qualified electrician. After installa-
tion, have the electrician show you where your main range dis-
connect is located.
Check with your local utilities for electrical codes which apply in
your area. Failure to wire your oven according to governing
codes could result in a hazardous condition. If there are no local
codes, your range must be wired and fused to meet the require-
ments of the Canadian Electrical Code, Part 1 Latest Edition.
This appliance must be supplied with the proper voltage and
frequency, and connected to an individual properly grounded
branch circuit, protected by a circuit breaker or fuse having an
amperage as specified on the rating plate. The rating plate is lo-
cated under the cooktop or in the front frame. (See below pic-
tures).
80
Installation Instructions
ELECTRICAL CONNECTIONS
Effective January 1, 1996, the National Electrical Code re-
quires that new construction (not existing) utilize a 4-con-
ductor connection to an electric range.
When installing an electric range in new construction, follow
Steps 3 and 5 for 4-wire connection.
You must use a 3-wire, single-phase A.C. 208Y/120 Volt or 240/
120 Volt, 60 hertz electrical system. If you connect to aluminum
wiring, properly installed connectors approved for use with alu-
minum wiring must be used.
If the electrical service provided does not meet the above speci-
fications, have a licensed electrician install an approved outlet.
NOTE: Use of automatic, wireless, or wired external switches
that shut off power to the appliance, are not recommended for
this product.
ELECTRICAL REQUIREMENTS
WARNING: For personal safety, do not use an
extension cord with this appliance. Remove
house fuse or open circuit breaker before be-
ginning installation.
This appliance must be supplied with the proper voltage and
frequency, and connected to an individual properly grounded
branch circuit, protected by a circuit breaker or fuse having
amperage as specified on the rating plate. The rating plate is lo-
cated above the storage drawer on the oven frame.
We recommend you have the electrical wiring and hookup of
your range connected by a qualified electrician. After installa-
tion, have the electrician show you where your main range dis-
connect is located.
Check with your local utilities for electrical codes which apply in
your area. Failure to wire your oven according to governing
codes could result in a hazardous condition. If there are no local
codes, your range must be wired and fused to meet the require-
ments of the National Electrical Code, ANSI/ NFPA No. 70- Latest
Edition. You can get a copy by writing:
National Fire Protection Association
Batterymarch Park
Quincy, MA 02269
Use only a 3-conductor or a 4-conductor UL-listed range cord.
These cords may be provided with ring terminals on wire and a
strain relief device.
A range cord rated at 40 amps with 125/250 minimum volt
range is required. A 50 amp range cord is not recommended
but if used, it should be marked for use with nominal 13/8" di-
ameter connection openings. Care should be taken to center
the cable and strain relief within the knockout hole to keep the
edge from damaging the cable.
• Because range terminals are not accessible after range is in
position, flexible service conduit or cord must be used.
NOTE: If conduit is being used, go to Step 3D and then to Step 6
or 7.
• On some models, a filter capacitor may be connected be-
tween the black and white leads on the junction block.
ALL NEW BRANCH CIRCUIT INSTALLA-
TIONS, MOBILE HOMES, RECREATIONAL
VEHICLES AND INSTALLATIONS WHERE
LOCAL CODES DO NOT ALLOW
GROUNDING THROUGH NEUTRAL, RE-
QUIRE A 4-CONDUCTOR CORD OR CON-
DUIT.
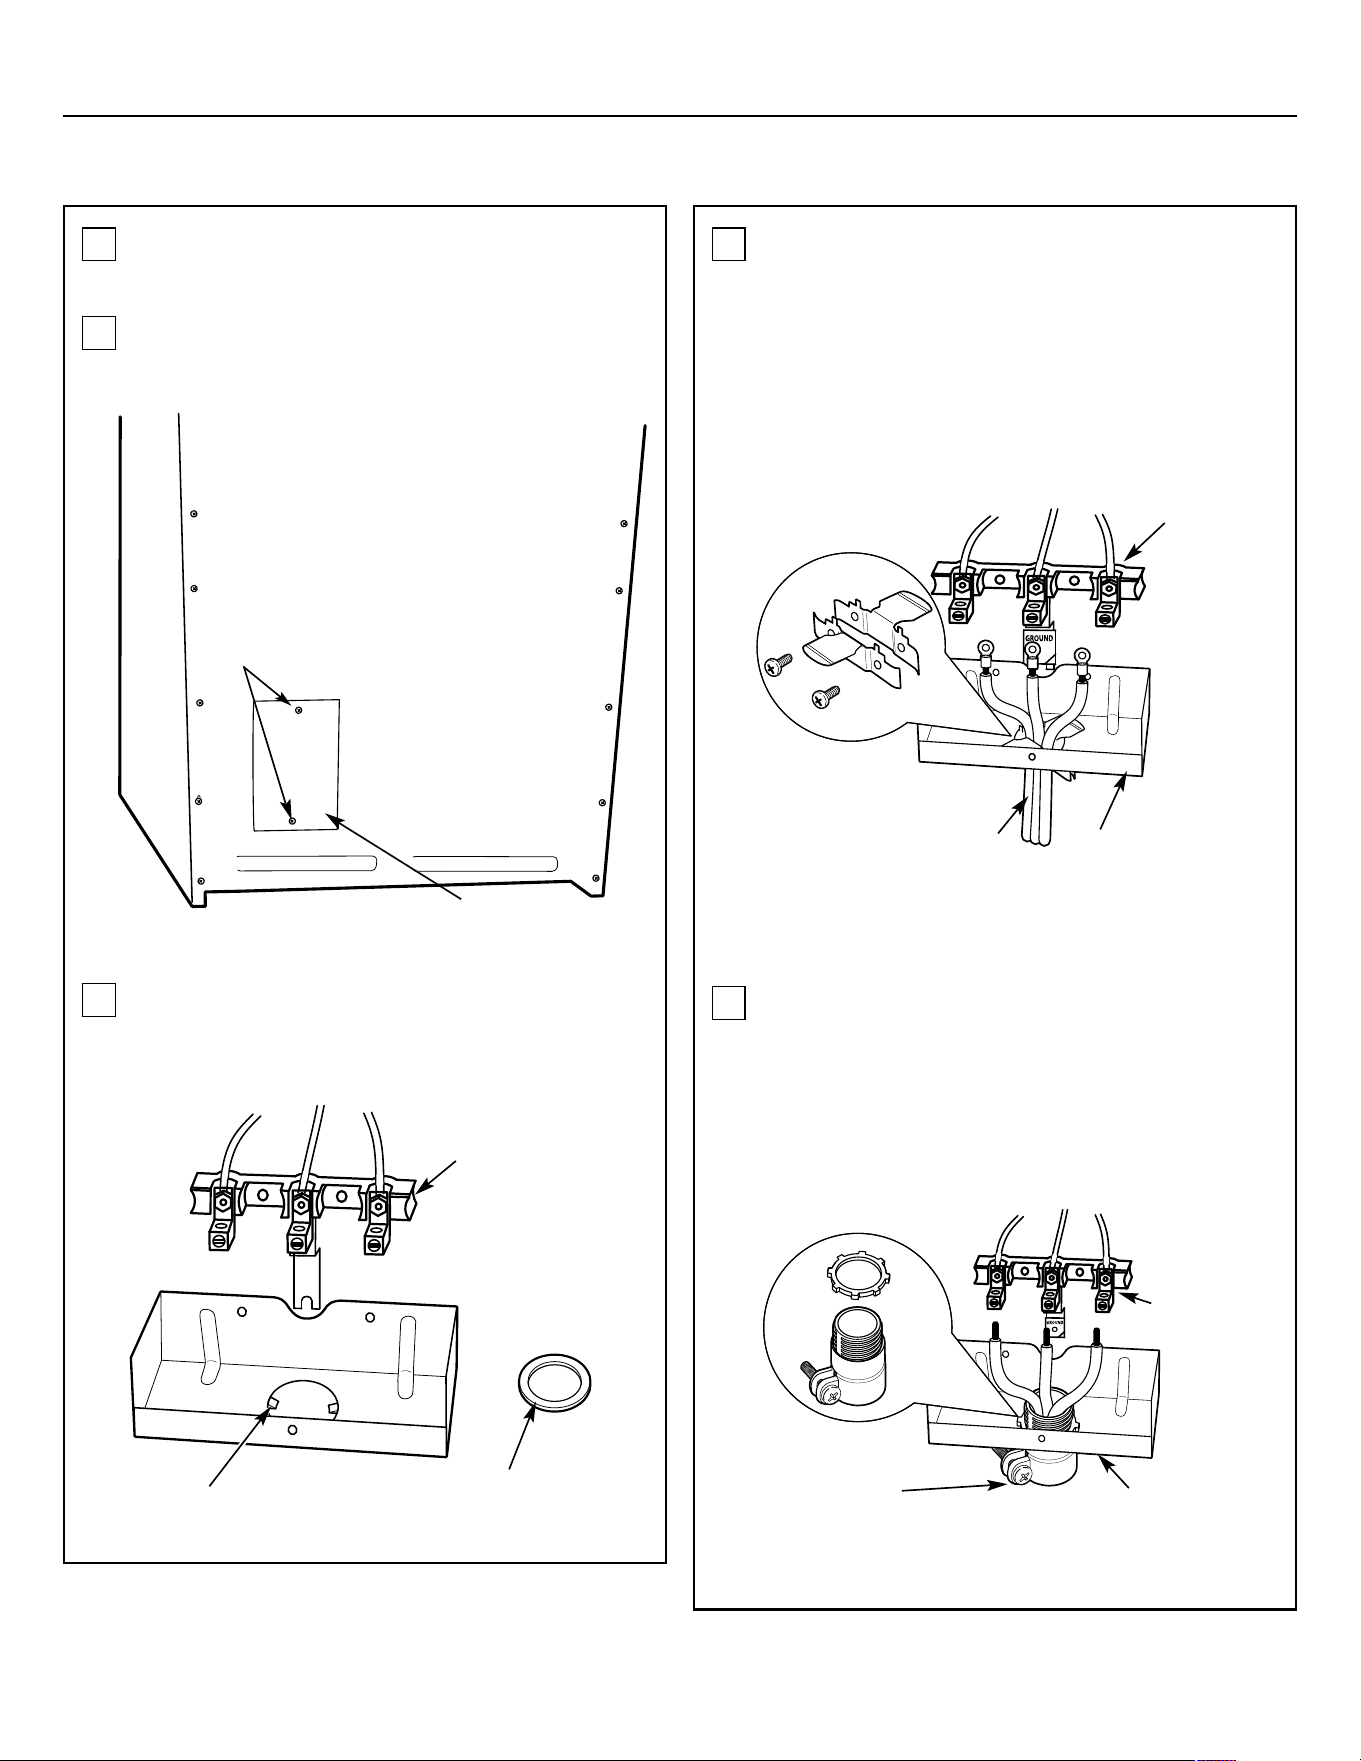
81
Strain relief
Power cord Bracket
Terminal
block
Terminal block
(appearance
may vary)
Knockout ring
in bracket
Knockout ring
removed
2 screws
to remove
wire cover
Back of Range
Wire cover
Installation Instructions
ELECTRICAL CONNECTIONS (CONT.)
POWER CORD AND STRAIN RELIEF
INSTALLATION
3
A
B
C
D
For conduit installations only, purchase a squeeze connec-
tor matching the diameter of your conduit and assemble it in
the hole. Insert the conduit through the squeeze connector
and tighten. Allow enough slack to easily attach the wires to
the terminal block.
NOTE: Do not install the conduit without a squeeze connector.
The squeeze connector should be installed before reinstalling
the rear range wiring cover.
Remove the wire cover (on the back of the range) by removing
two (2) screws using a Phillips screw driver.
Do not discard these screws.
Remove the knockout ring (1 3/8") located on bracket directly
below the terminal block. To remove the knockout, use a pair
of pliers to bend the knockout ring away from the bracket and
twist until ring is removed.
For power cord installations only (see the next step if using
conduit), assemble the strain relief in the hole. Insert the
power cord through the strain relief and tighten. Allow enough
slack to easily attach the cord terminals to the terminal block.
If tabs are present at the end of the winged strain relief, they
can be removed for better fit.
NOTE: Do not install the power cord without a strain relief.
The strain relief bracket should be installed before rein-
stalling the rear range wiring cover.
Skip to Step 4 or 5.
Skip to Step 6 or 7.
Squeeze
connector
Conduit
Bracket
Terminal
block
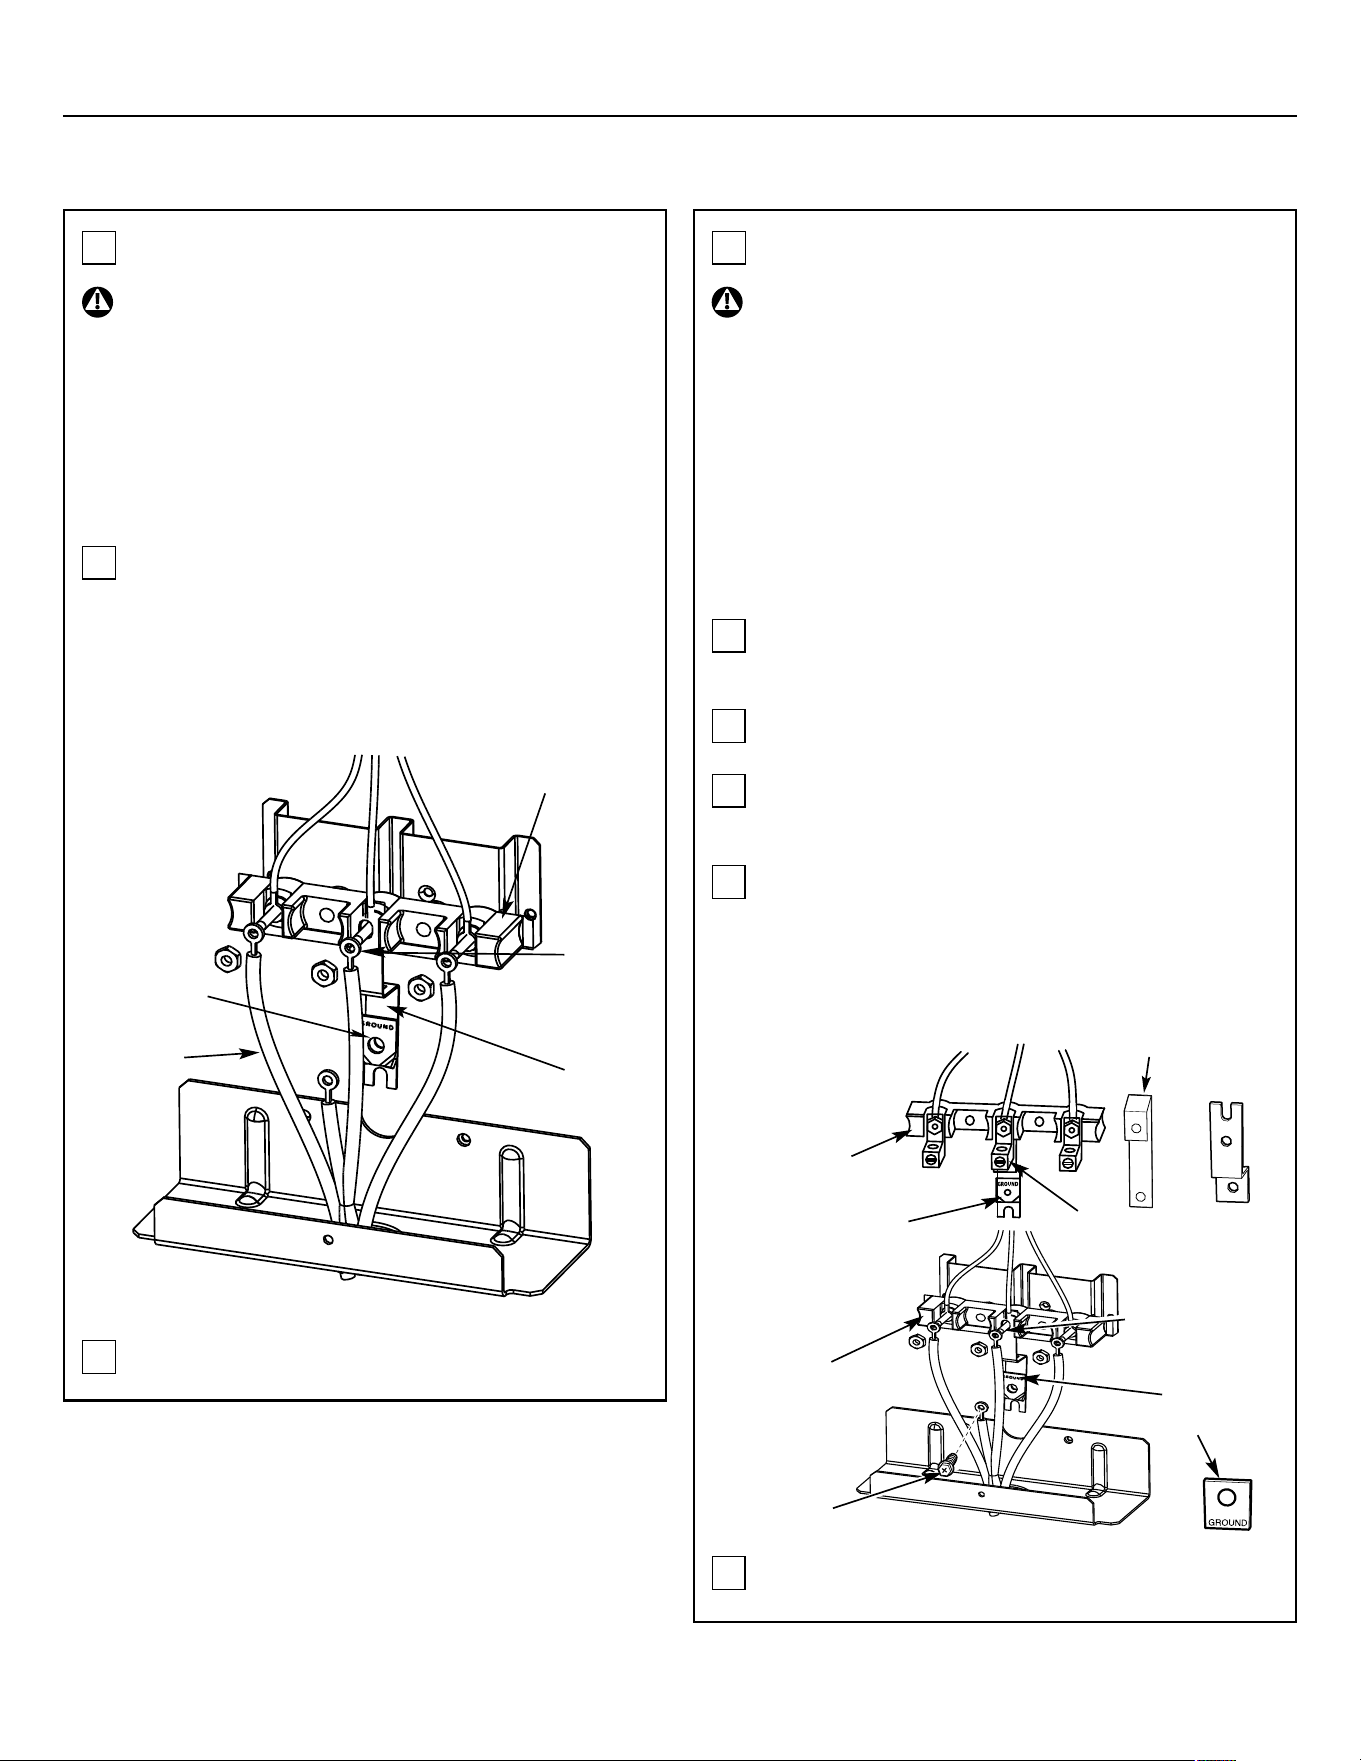
82
Before
Neutral
terminal
Ground strap
Terminal
block
Ground
plate
(grounding
to range)
Ground
screw
Ground strap
or
Neutral terminal
Terminal
block
After
Neutral
terminal
Ground
strap
Terminal block
(appearance
may vary)
Ground
plate
Power
cord
Installation Instructions
ELECTRICAL CONNECTIONS (CONT.)
3-WIRE POWER CORD INSTALLATION4
WARNING: The neutral or ground wire of the
power cord must be connected to the neutral
terminal located in the center of the terminal
block. The power leads must be connected to
the left and the right terminals of the terminal
block.
Insert the 3 terminal screws (removed earlier) through
each power cord terminal ring and into the lower terminals
of the terminal block. Be certain that the center wire
(white/neutral) is connected to the center lower position of
the terminal block. Tighten screws securely into the termi-
nal block.
A
Remove the 3 lower terminal screws from the terminal
block. Insert the 3 power cord terminal rings into each one
of the terminals of the terminal block. Be certain that the
center wire (white/neutral) is connected to the center of
the terminal block. Tighten nuts securely into the terminal
block.
DO NOT remove the ground strap connection.
B
A
Skip to Step 8 and proceed with the installation.
4-WIRE POWER CORD INSTALLATION5
WARNING: The neutral wire of the supply cir-
cuit must be connected to the neutral terminal
located in the center of the terminal block. The
power leads must be connected to the left and
the right terminals of the terminal block. The
4th grounding lead must be connected to the
frame of the range with the ground plate and
the ground screw.
B
C
D
Remove the 3 lower terminal nuts from the terminal block.
Remove the ground screw and ground plate and retain
them.
Cut and discard the ground strap. DO NOT DISCARD ANY
SCREWS.
Insert the one ground screw into the power cord ground
wire terminal ring, through the ground plate and into the
frame of the range.
Skip to Step 8 and proceed with the installation.
E
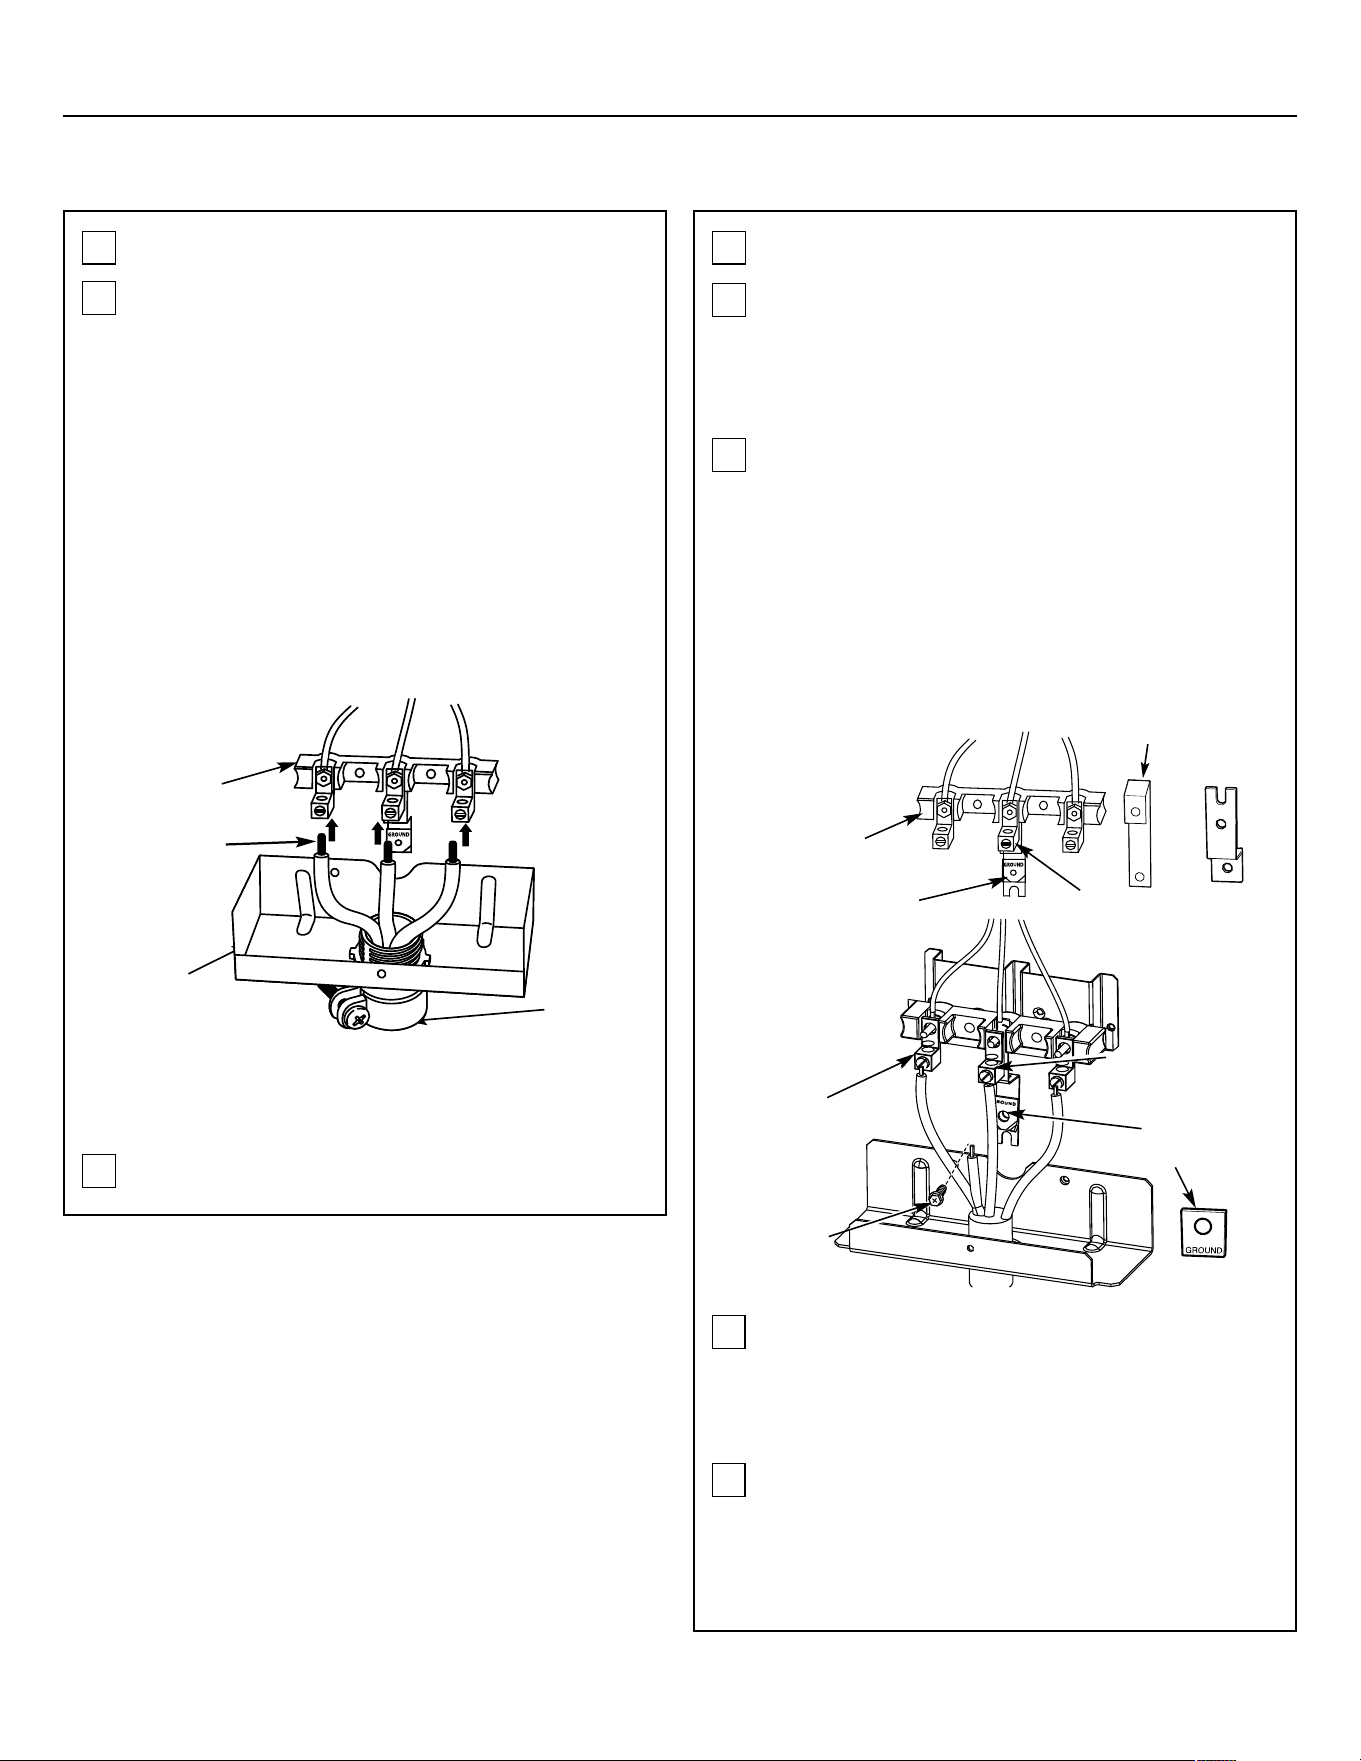
83
Before
Neutral
terminal
Ground strap
Terminal
block
Ground
plate
(grounding
to range)
Ground
screw
Ground strap
or
Neutral terminal
Terminal
block
After
Bracket
Conduit
Wire tips
Terminal
block
Installation Instructions
ELECTRICAL CONNECTIONS (CONT.)
3-WIRE CONDUIT INSTALLATION6 4-WIRE CONDUIT INSTALLATION7
A
A
B
C
8
B
Proceed to Step 8.
Loosen the 3 lower terminal screws from the terminal
block. Insert the center bare wire (white/ neutral) tip
through the bottom center terminal block opening. On cer-
tain models, the wire will need to be inserted through the
ground strap opening and then into the bottom center
block opening. Insert the two side bare wire tips into the
lower left and the lower right terminal block openings.
Tighten the screws until the wire is firmly secure (approxi-
mately 20 inch-lbs.).
NOTE: ALUMINUM WIRING:
Aluminum building wire may be used but it must be rated
for the correct amperage and voltage to make connection.
Connect wires according to this Step 6 or Step 7 depend-
ing on number of wires.
Wire used, location and enclosure of splices, etc., must
conform to good wiring practices and local codes.
Skip to Step 8 and proceed with the installation.
Loosen the three lower terminal screws from the terminal
block. Remove the ground screw and ground plate and re-
tain them.
Cut and discard the ground strap.
DO NOT DISCARD ANY SCREWS.
Insert the ground bare wire tip between the range frame
and the ground plate (removed earlier) and secure it in
place with the ground screw (removed earlier). Insert the
bare wire (white/neutral) tip through the bottom center of
the terminal block opening. Insert the two side bare wire
tips into the lower left and the lower right terminal block
openings. Tighten the screws until the wire is firmly secure
(approximately 20 inch-lbs.).
Wire used, location and enclosure of splices, etc., must
conform to good wiring practices and local codes.
Replace the wire cover on the range back by sliding its two
lower retaining tabs into the slots and replacing the screw
removed earlier. Make sure that no wires are pinched be-
tween the cover and the range back.
REPLACE THE WIRE COVER
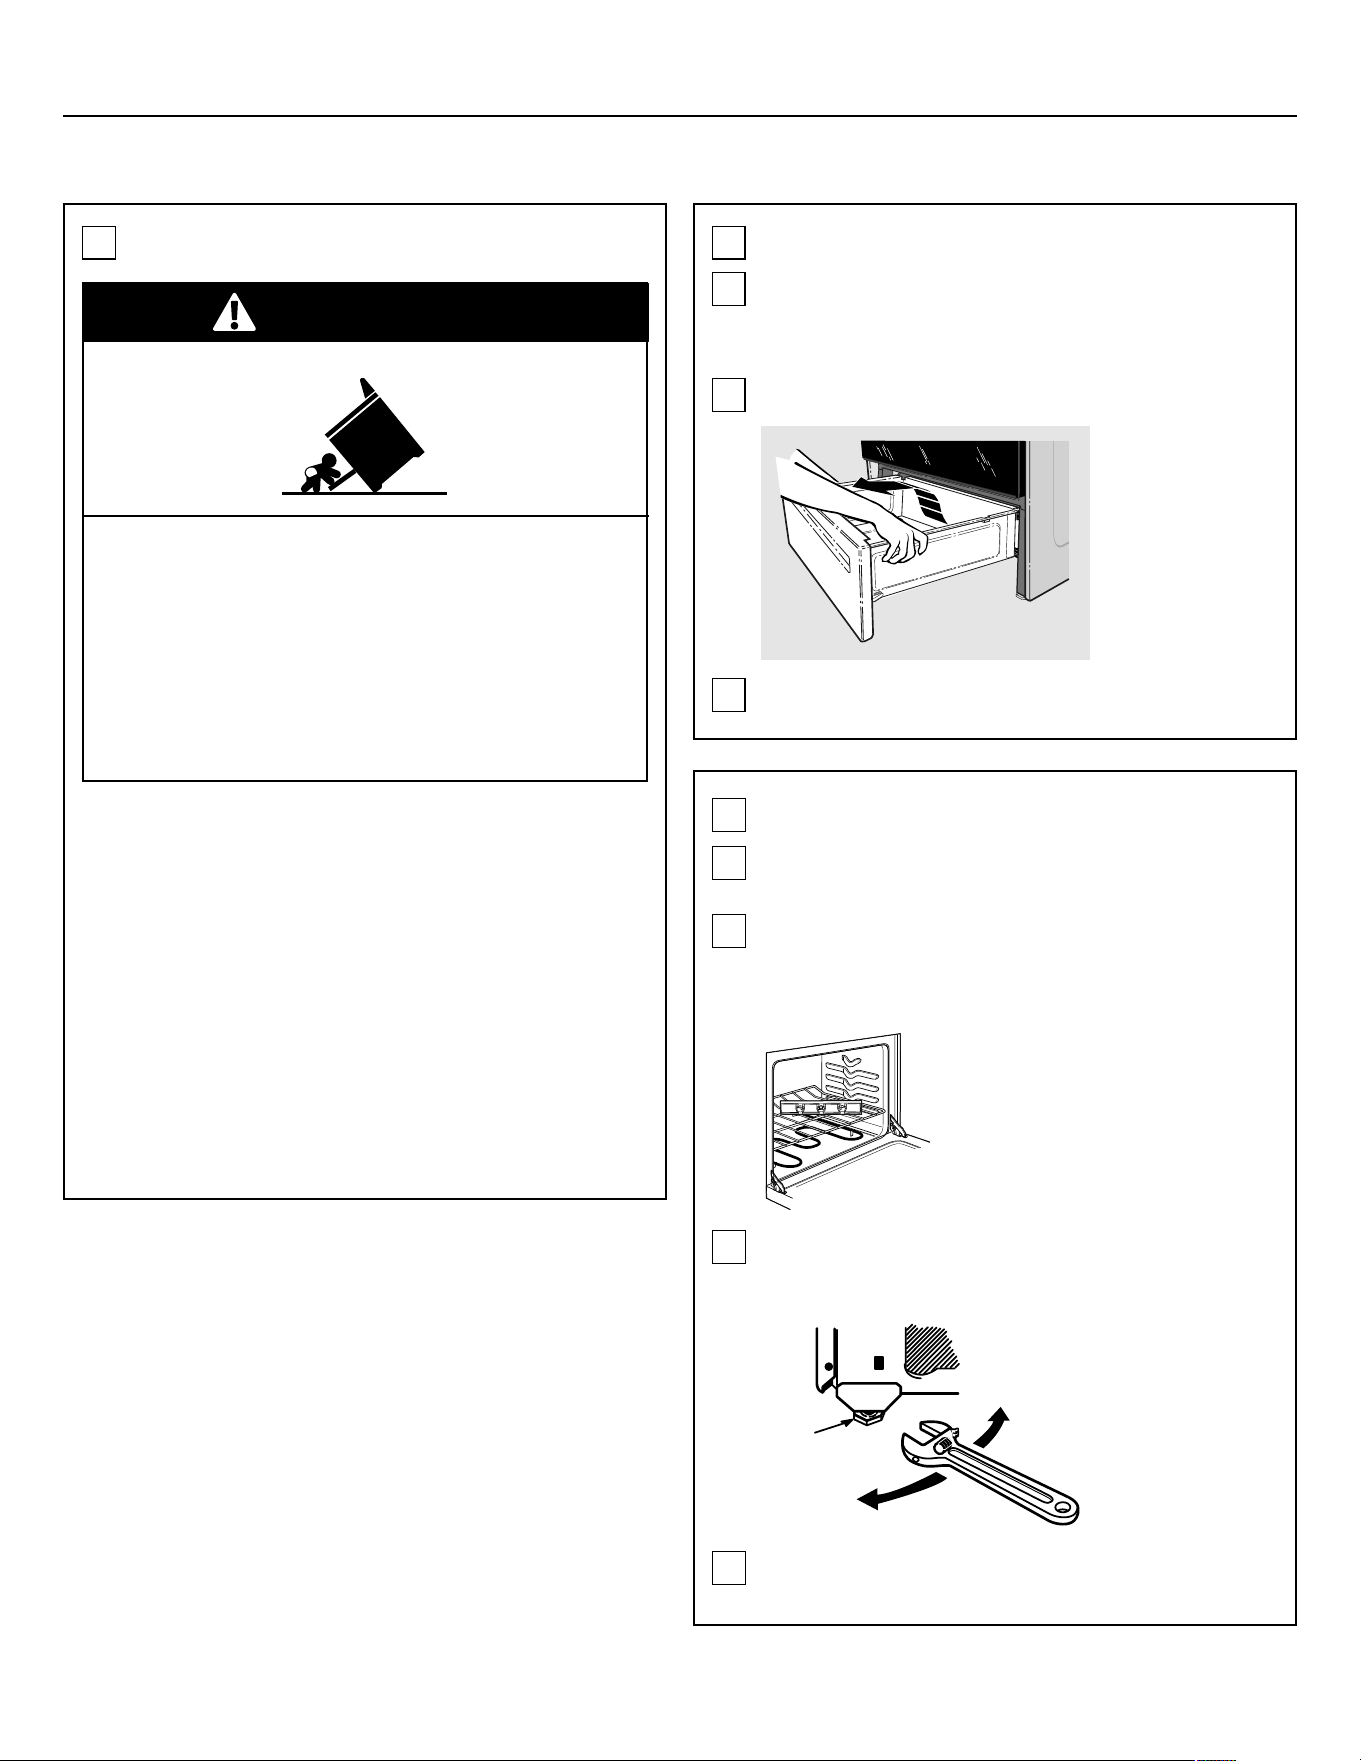
84
Leg
leveler
Lower
range
Raise
range
Installation Instructions
INSTALL THE RANGE
ANTI-TIP DEVICE INSTALLATION9 REMOVE STORAGE DRAWER10
A
LEVEL THE RANGE11
A
B
WARNING
Tip-Over Hazard
A child or adult can tip the range and be killed. Verify the
anti-tip bracket has been properly installed and engaged.
Ensure the anti-tip bracket is re-engaged when the range is
moved.
Do not operate the range without the anti-tip bracket in
place and engaged.
Failure to follow these instructions can result in death or se-
rious burns to children or adults.
To reduce the risk of tipping the range, the range must be se-
cured by a properly installed anti-tip bracket. See installation in-
structions shipped with the bracket for complete details before
attempting to install.
To check if the bracket is installed and engaged properly, look
underneath the range to see that the anti-tip arm attached to
the side panel is engaged in the bracket. On some models, the
storage drawer or kick panel can be removed for easier inspec-
tion. If visual inspection is not possible, slide the range forward,
confirm the anti-tip bracket is securely attached to the floor or
wall, and slide the range back so the anti-tip arm slides just un-
der the anti-tip bracket. If the range is pulled from the wall for
any reason, always repeat this procedure to verify the range is
properly secured by the anti-tip bracket.
Pull the drawer out all the way.
Lift the front of the drawer until the stops clear the guide.
Remove the drawer.
Check for levelness by placing a spirit level or a cup, par-
tially filled with water, on one of the oven racks. If using a
spirit level, take two readings - with the level placed diago-
nally first in one direction and then the other.
Lift the front of the drawer until the stops clear the guide.
Remove the drawer.
B
C
Install the oven racks in the oven and position the range
where it is to be installed.
The front leveling legs can be adjusted from the bottom
and the rear legs can be adjusted from the top or the bot-
tom.
C
D
Use an open-end or adjustable wrench to adjust the level-
ing legs until the range is level.
85
Installation Instructions
FINAL INSTALLATION CHECKLIST11
• Check to make sure the circuit breaker is closed (RESET)
or the circuit are replaced.
• Be sure power is in service to the building.
• Note (on some models): If the clock flashes "bad" and
then "LinE" with a loud tone, the neutral connection to
the range is miswired. Check the terminal block connec-
tions and/or house wiring to correct.
• Check to be sure that all packing materials and tape
have been removed. This will include tape on metal panel
under control knobs (if applicable), adhesive tape, wire
ties, cardboard and protective plastic. Failure to remove
these materials could result in damage to the appliance
once the appliance has been turned on and surfaces
have heated.
• Check to make sure that the rear leveling leg is fully in-
serted into the Anti-Tip bracket and that the bracket is
securely installed.
OPERATION CHECKLIST12
• Turn on one of the surface to observe that the element
glows within 60 seconds. Turn the unit off when glow is
detected. If the glow is not detected within the time limit,
recheck the range wiring connections. If change is re-
quired, retest again. If no change is required, have build-
ing wiring checked for proper connections and voltage.
• Check to make sure the Clock (on models so equipped)
display is energized. If a series of horizontal red lines ap-
pear in the display, disconnect power immediately. Re-
check the range wiring connections. IF change is made
to connections, retest again. If no change is required,
have building wiring checked for proper connections and
voltage. It is recommended that the clock be changed if
the red lines appear.
• Be sure all range controls are in the OFF position before
leaving the range.
86
Problem
Before you call for service...
Troubleshooting Tips
Save time and money! Review the charts on the following pages first and your may not need to call for service.
Possible Causes What To Do
Radiant Cooktops
Frequent cycling off and
on of surface units
Improper cookware being used. • Use only flat cookware to minimize cycling.
Pitting (or indentation) of
the cooktop
Hot sugar mixture spilled on the cook-
top.
• Call a qualified technician for replacement.
Plastic melted to the sur-
face
Hot cooktop came into contact with
plastic placed on the hot cooktop.
• See the Glass surface - potential for permanent damage sec-
tion in the Cleaning the glass cooktop section.
Areas of discoloration on
the cooktop
Food spillovers not cleaned before
next use.
• See the Cleaning the glass cooktop section.
Hot surface on a model with a light-
colored glass cooktop.
• This is normal. The surface may appear discolored when it is
hot. This is temporary and will disappear as the glass cools.
Scratches (may appear as
cracks) on cooktop glass
surface
Incorrect cleaning methods being
used.
Cookware with rough bottoms being
used or coarse particles (salt or sand)
were between the cookware and the
surface of the cooktop.
Cookware has been slid across the
cooktop surface.
• Scratches are not removable. Tiny scratches will become less
visible in time as result of cleaning.
• To avoid scratches, use the recommended cleaning proce-
dures. Make sure bottoms of cookware are clean before use,
and use cookware with smooth bottoms.
Cooktop controls improperly set. • Check to see the correct control is set for the surface unit you
are using.
Surface units do not work
properly
A fuse in your home may be blown or
the circuit breaker tripped.
• Replace the fuse or reset the circuit breaker.
Surface units will not
maintain a rolling boil or
cooking is not fast
enough.
Improper cookware being used. • Use pans which are flat and match the diameter of the surface
unit selected.
Safety Instructions
Operating
Instructions
Care and Cleaning
Troubleshooting Tips
Consumer Support
Installation
Instructions
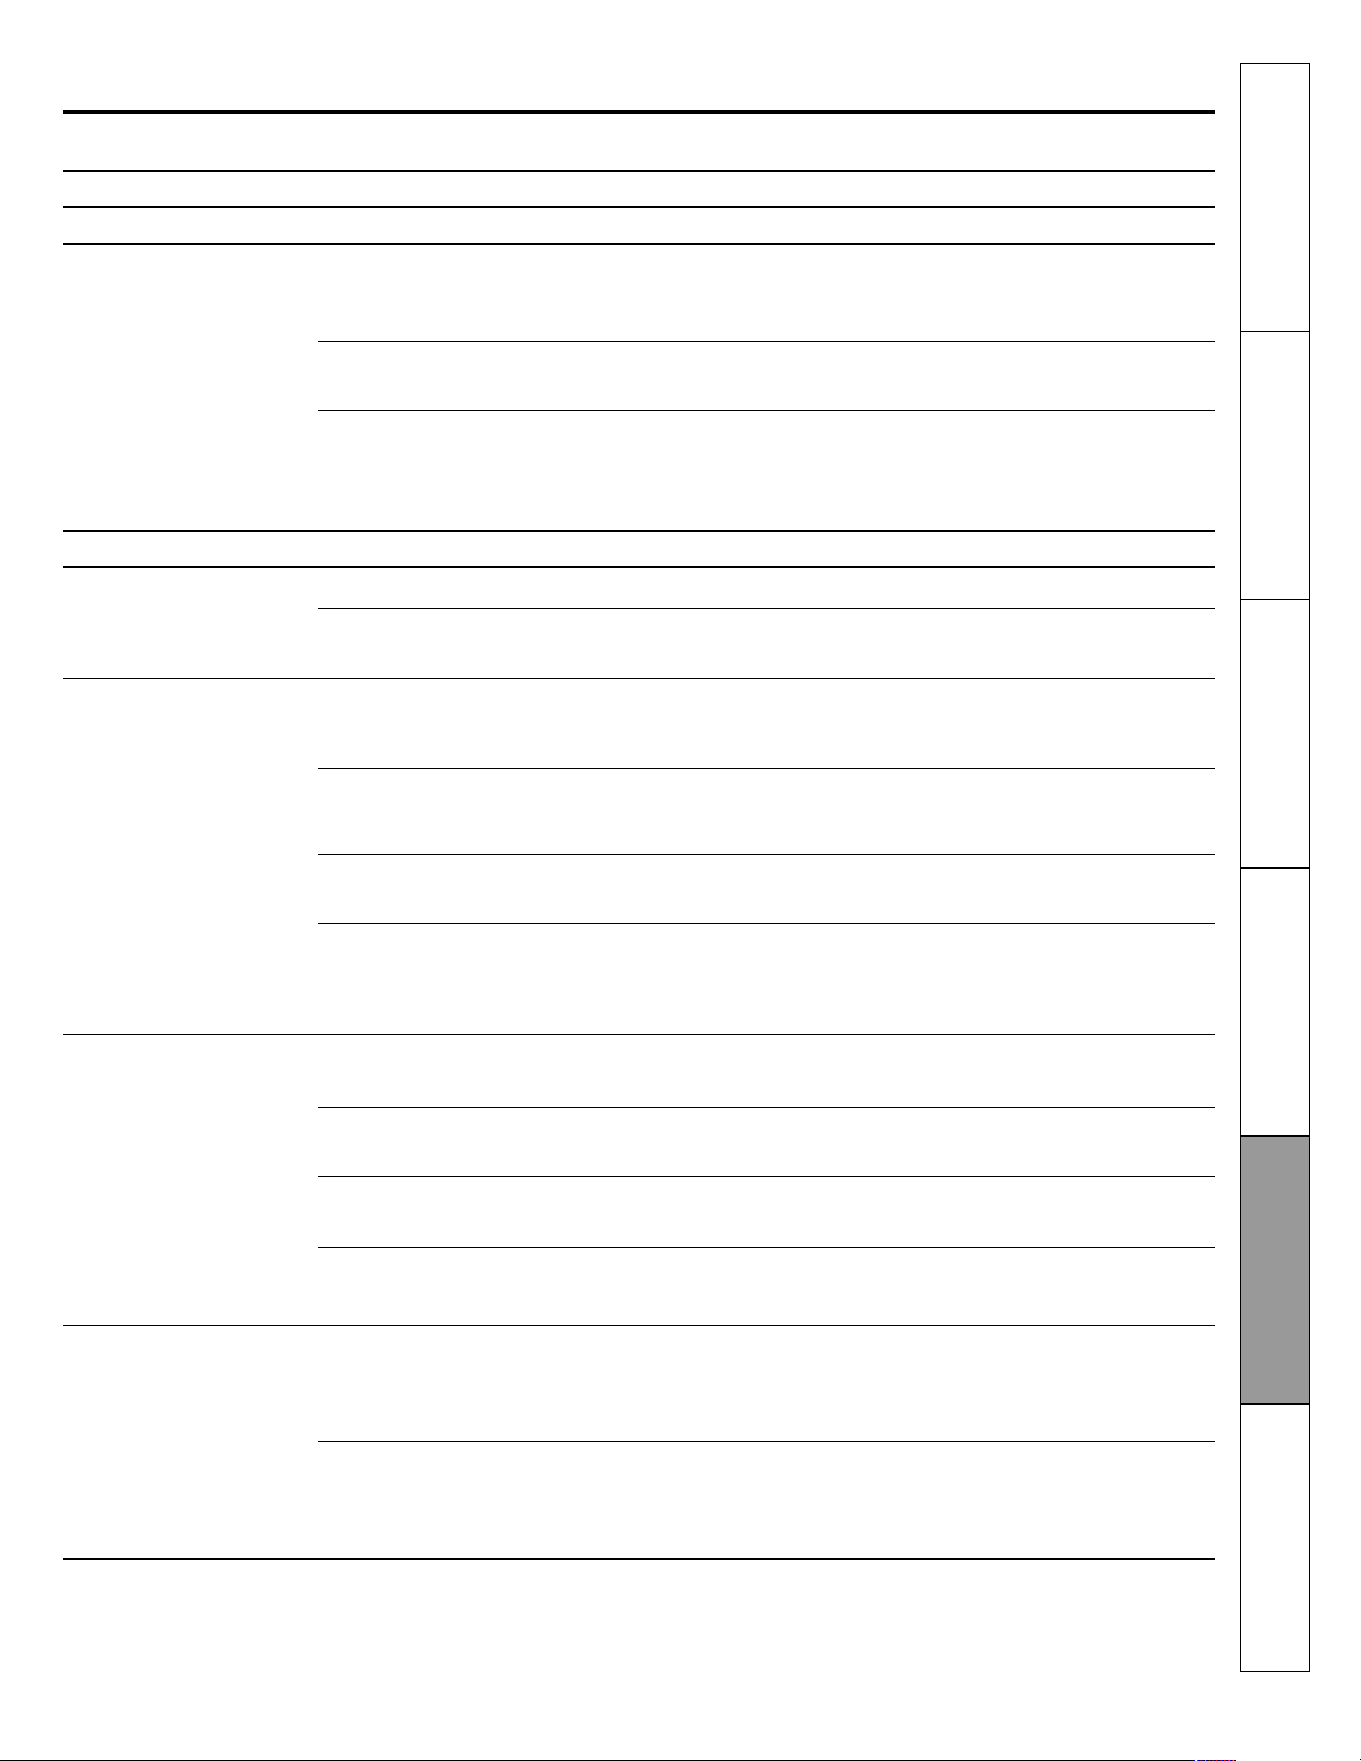
87
Coil Cooktops
The surface unit controls improperly
set.
• Check to see the correct control is set for the surface unit you
are using.
Surface units not func-
tioning properly
The surface units are not plugged in
solidly.
• With the controls off, check to make sure the surface unit is
plugged completely into the receptacle.
The drip pans are not set securely in
the cooktop.
• With the controls off, check to make sure the drip pan is in the
recess in the cooktop and that the opening in the pan lines up
with the receptacle.
Oven-All Models
Switch operating light is broken • Call for service.
Oven light does not work Light bulb is loose or defective. • Tighten or replace the bulb.
Oven will not work Plug on range is not completely in-
serted in the electrical outlet.
• Make sure electrical plug is plugged into a live properly
grounded outlet.
A fuse in your home may be blown or
the circuit breaker tripped.
• Replace fuse or reset circuit breaker.
Oven controls improperly set. • See the Using the oven section.
On self-cleaning models door left in
the locked position.
• If necessary, allow the oven to cool then unlock the door.
Food does not bake or
roast properly
Oven controls improperly set. • See the Using the oven section.
Shelf positions in incorrect or the shelf
is not level.
• See the Using the oven section.
Incorrect cookware or cookware of
improper size being used.
• See the Using the oven section.
Oven thermostat needs adjustment. • See the Adjust the oven thermostat-Easy to do yourself! Sec-
tion.
No power supply from
convenience outlet on top
of backguard (on some
models)
Small appliance plug is not completely
inserted in the convenience outlet.
• Make sure the small appliance plug is properly inserted.
The backguard is too hot and the con-
venience outlet breaker has tripped.
• Allow the range to cool, then reset the circuit breaker by press-
ing the switch located near the convenience outlet.
Before you call for service...
Problem Possible Causes What To Do
Safety Instructions
Operating
Instructions
Care and Cleaning
Troubleshooting Tips
Consumer Support
Installation
Instructions

88
Food does not broil prop-
erly
Oven is not set to BROIL. • On models with a temperature knob, make sure you turn it all
the way to the BROIL position. On models with a BROIL pad,
make sure it is turned on.
Before you call for service...
Door not open to the broil stop posi-
tion as recommended.
• See the Using the oven section.
Improper shelf position being used. • See the Broiling guide.
Food being cooked in a hot pan. • Use the broiling pan and grid that came with your range. Make
sure it is cool.
Cookware not suited for broiling. • Use the broiling pan and grid that came with your range.
Aluminium foil used on the broiling
pan and grid has not been fitted prop-
erly and slit as recommended.
• See the Using the oven section.
In some areas the power (voltage)
may be low.
• Preheat the broil element for 10 minutes.
• Broil for the longest, period of time recommended in the Broil-
ing guide.
Control signals after en-
tering cooking time or de-
lay start
You forgot to enter a bake tempera-
ture or cleaning time.
• Press the BAKE pad and desired temperature or the CLEAN pad
and desired clean time.
Display flashes "bAd" then
"linE" with a loud tone.
The installed connection from the
house to the unit is miswired.
• Contact installer or electrician to correct miswired.
Problem Possible Causes What To Do
Safety Instructions
Operating
Instructions
Care and Cleaning
Troubleshooting Tips
Consumer Support
Installation
Instructions

89
Unable to get the display
to show "SF"
Oven control pads were not pressed
properly.
• The BAKE and BROIL pads must be pressed at the same time
and held for 3 seconds.
Display flashes Power failure. • Reset the clock.
Power outage Power outage or surge. • Some models will automatically resume their setting once the
power is restored. On models with a clock, you must reset the
clock. If the oven was in use, you must reset it by pressing the
OFF pad, setting the clock and resetting any cooking function.
"F-and number or letter"
flash in the display
You have a function error code. • Press the OFF pad. Put the oven back into operation.
If the function code repeats: • Disconnected all power to the range for at least 30 seconds
and then reconnect power. If the function error code repeats,
call for service.
• On self-cleaning models, if a function error code appears dur-
ing the self-cleaning cycle, check the oven door latch. The latch
may have been moved, if only slightly, from the locked posi-
tion. Make sure the latch is moved to the right as far as it will
go. Press the OFF pad. Allow the oven to cool for one hour. Put
the oven back into operation.
Oven makes clicking noise This is the sound of the heating ele-
ment turning off and on during cook-
ing functions.
• This is normal.
Oven door is crooked The door is out of position. • Because the oven door is removable, it sometimes gets out of
position during installation. To straighten the door, push down
on the high corner.
Display goes blank A fuse in your home may be blown or
the circuit breaker tripped.
• Replace fuse or reset circuit breaker.
The clock is turned off from showing in
the display.
• See the Using the clock, timer and convenience outlet section.
Oven controls improperly set. • See the Using the clock, timer and convenience outlet section.
Clock and timer do not
work
Plug on range is not completely in-
serted in the electrical outlet.
• Make sure electrical plug is plugged into a live, properly
grounded outlet.
A fuse in your home may be blown or
the circuit breaker tripped.
• Replace fuse or reset circuit breaker.
Oven temperature too hot
or too cold
Oven thermostat needs adjustment. • See the Adjust the oven thermostat-Easy to do yourself! Sec-
tion.
Before you call for service...
Problem Possible Causes What To Do
Safety Instructions
Operating
Instructions
Care and Cleaning
Troubleshooting Tips
Consumer Support
Installation
Instructions
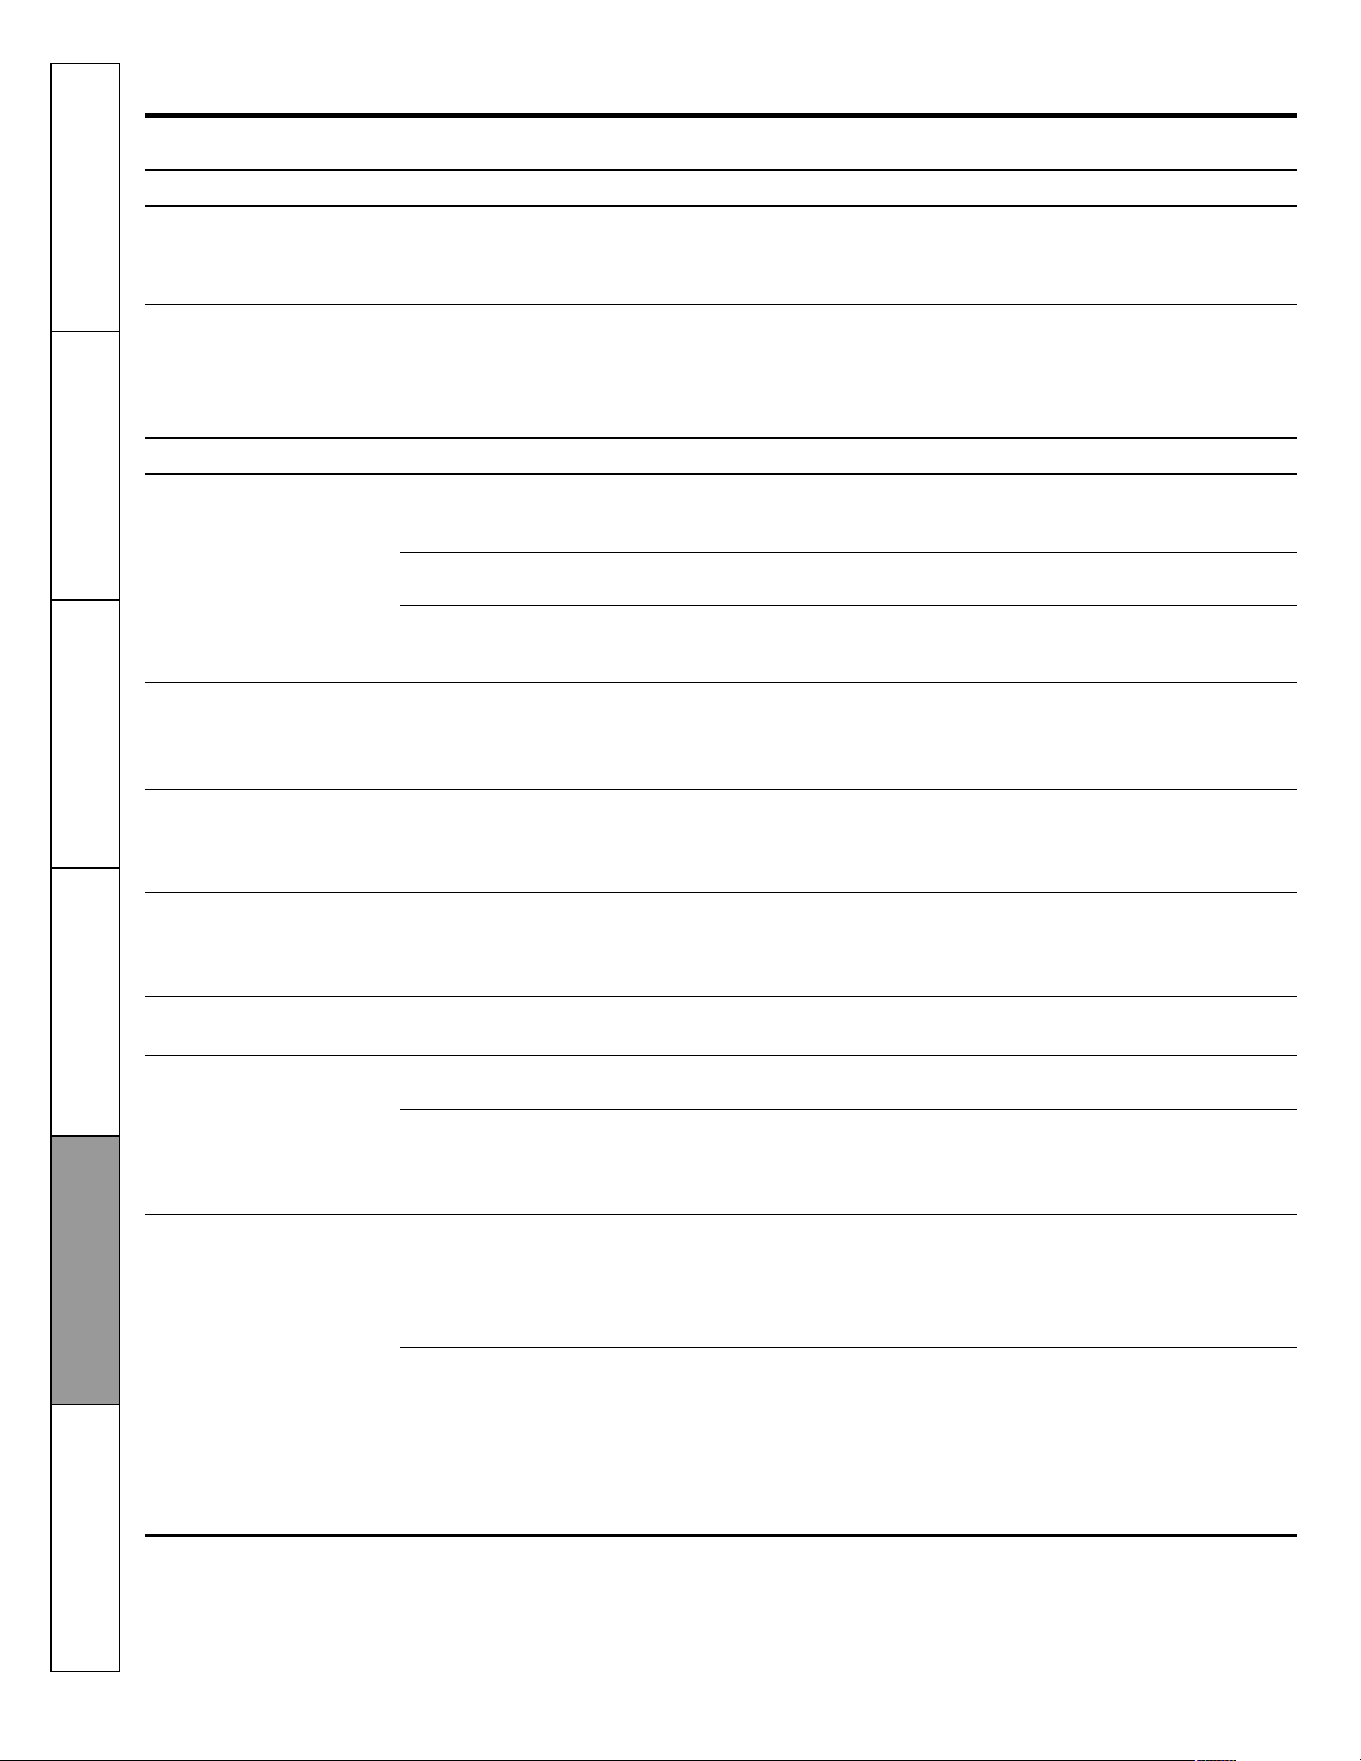
90
Before you call for service...
Self-Cleaning Models
Excessive smoking during
a clean cycle.
Excessive soil. • Press the OFF pad. Open the windows to rid the room of smoke.
Wait until the light on the CLEAN pad goes off. Wipe up the ex-
cess soil and reset the clean cycle.
Oven was heavily soiled. • Clean up heavy spillovers before starting the clean cycle.
Heavily soiled ovens may need to self-clean again or for a
longer period of time.
Oven starts a self-clean
cycle when you wanted to
bake, roast or broil.
Oven door locked during cooking. • Turn the Oven Temperature knob to OFF. Allow the oven to
cool. Never force the door latch handle.
Oven controls improperly set. • See the Using the self-cleaning oven section.
Oven will not self-clean The oven temperature is too high to
set a self-clean operation.
• Allow the range to cool to room temperature and reset the
controls.
Strong odor An odor from the insulation around
the inside of the oven is normal for the
first few times the oven is used.
• This is temporary.
"Burning" or "oily" odor
emitting from the oven
vent.
This is normal in a new oven and will
disappear in time.
• To speed the process set a self-clean cycle for a minimum of 3
hours. See the Using the self-cleaning oven section.
"Cracking" or “popping”
sound
This is the sound of the metal heating
and cooling during both the cooking
and cleaning functions.
• This is normal.
Oven door will not unlock Oven too hot. • Allow the oven to cool below locking temperature.
Oven not clean after a
clean cycle
Oven controls not properly set. • See Using the self-cleaning oven section.
Oven door is not in the locked position. • Make sure you move the door latch handle all the way to the
right.
Humming Noise on Bake/Broil • This is normal.
Cooling Fan will turned-on automatically for Broil Lo/Hi and for
High Baking temperatures (around 475° F) in order to maintain
safety temperatures for all components.
Cooling Fan will turn-off when the oven temperature cools
down below 375° F
Fan Noise Humming Noise on Self Clean cycle. • This is normal.
• Your range is equipped with a cooling fan to keep the compo-
nents under safety temperatures. Fan will turn on/ off auto-
matically while the range is on Self-Clean cycle.
Problem Possible Causes What To Do
Safety Instructions
Operating
Instructions
Care and Cleaning
Troubleshooting Tips
Consumer Support
Installation
Instructions
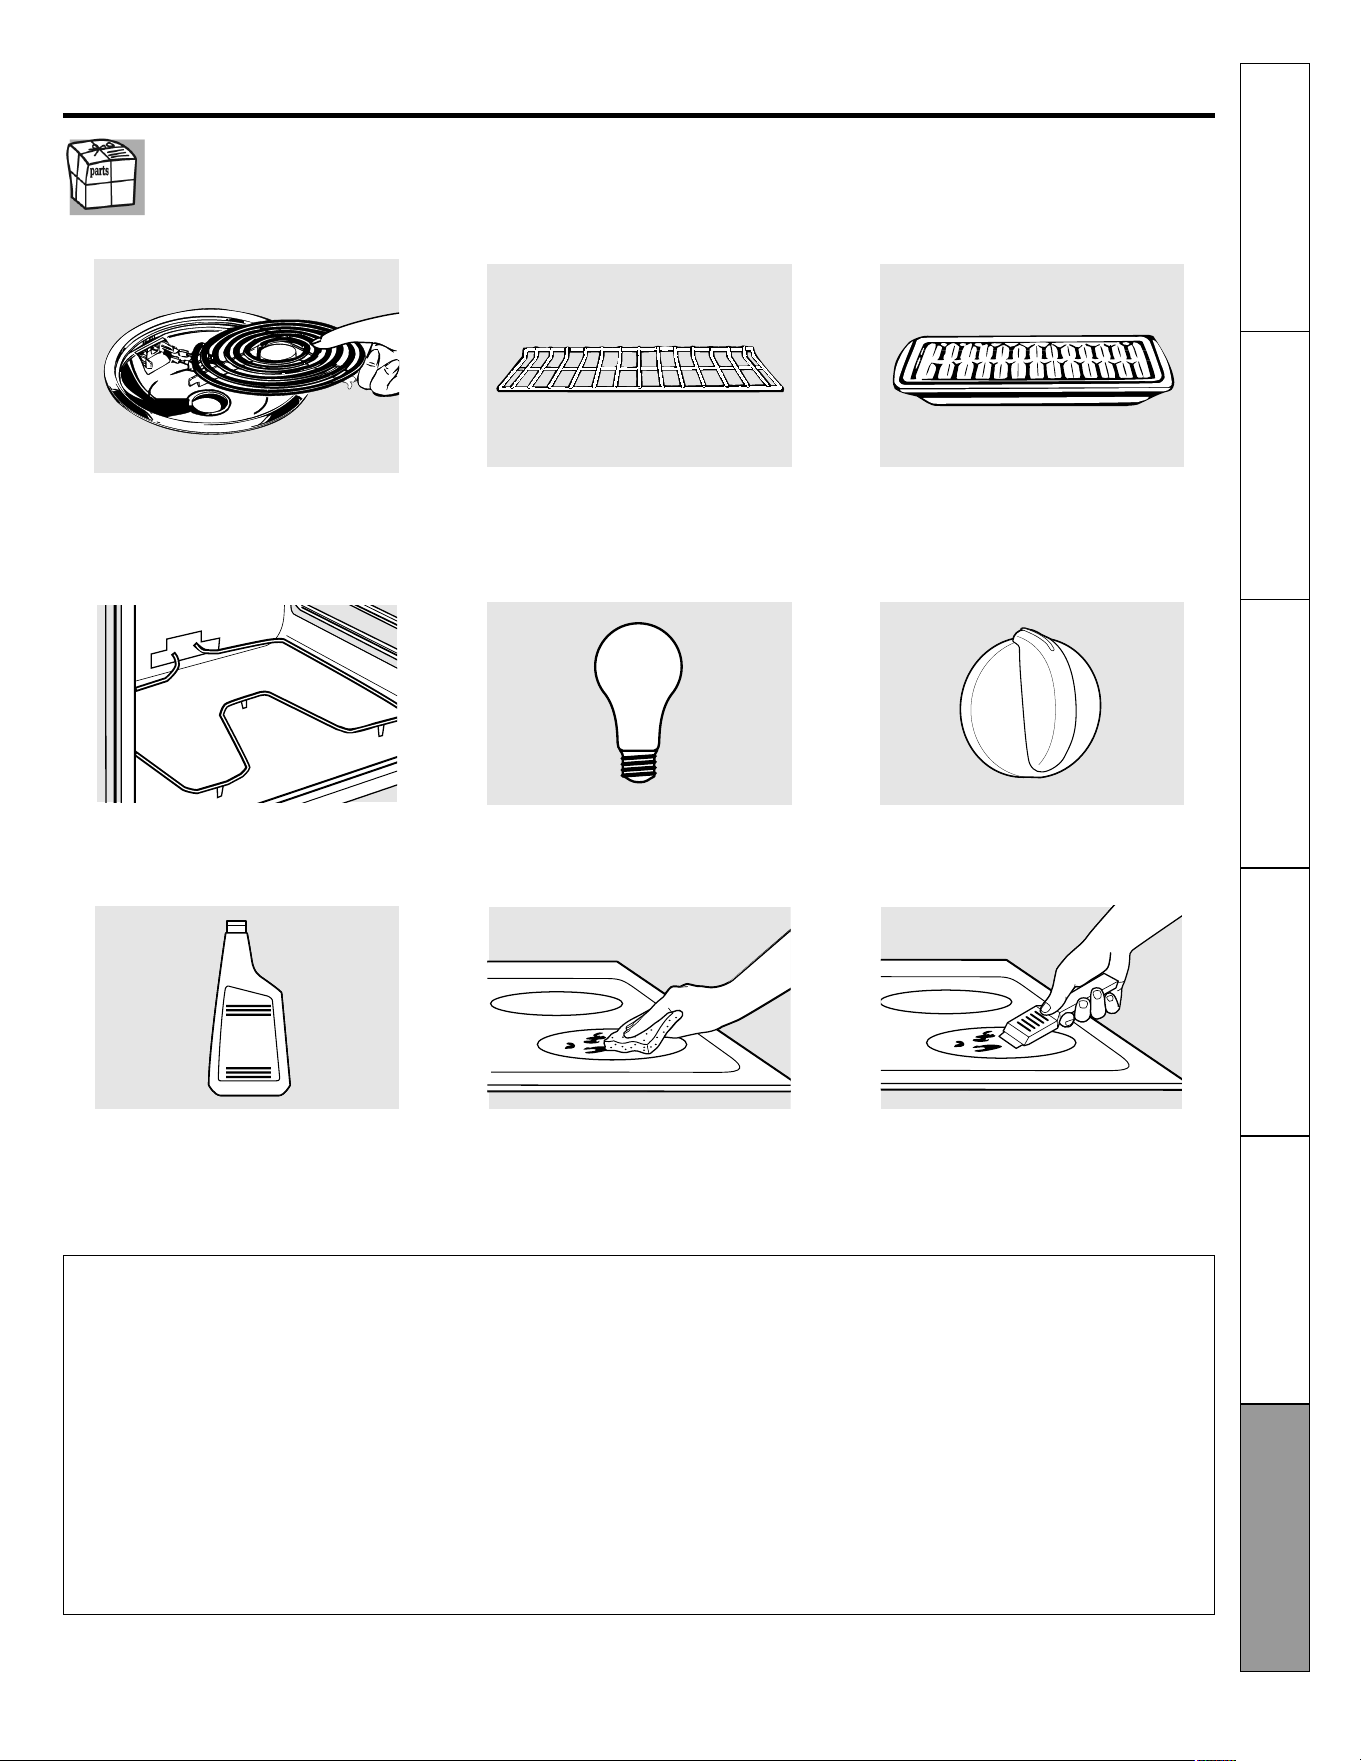
91
Accessories
Looking For Something More?
To inquire about purchasing a part or an accessory for your appliance, contact the authorized service center.
Surface Elements & Drip Pans Broiler Pan
Oven Racks
Oven Elements KnobsLight Bulbs
Cleaner ScraperCleaning Pads
Safety Instructions
Operating
Instructions
Care and Cleaning
Troubleshooting Tips
Consumer Support
Installation
Instructions
Tired of discolored racks? Wishing you had extra-heavy-duty oven racks?
NOW AVAILABLE for your range:
GE's innovative, self-cleanable porcelain-coated oven racks!
• Heavy Duty
• Durable
• Able to be cleaned in a self-cleaning oven

92
Notas/Notes
Instrucciones de
seguridad
Instrucciones de
operación
Cuidado y limpieza
Solución
de problemas
Servicio
al consumidor
Instrucciones de
instalación

93
Notas/Notes
Instrucciones de
seguridad
Instrucciones de
operación
Cuidado y limpieza
Solución
de problemas
Servicio
al consumidor
Instrucciones de
instalación

94
Notas/Notes
Instrucciones de
seguridad
Instrucciones de
operación
Cuidado y limpieza
Solución
de problemas
Servicio
al consumidor
Instrucciones de
instalación

95
Recuerde que su producto está respaldado por SERVIPLUS, la
empresa líder en Servicio para línea blanca, donde siempre
encontrará el trato amable de profesionales dispuestos a resolver
cualquier falla en el funcionamiento de su producto.
Antes de solicitar un servicio de garantía:
1) Asegúrese de haber seguido las indicaciones de instalación, uso
y cuidados que menciona el instructivo.
2) Localice y tenga a la mano su garantía debidamente sellada o
bien la factura, nota o comprobante de compra. Este documento
es indispensable para hacer válida la garantía.
3) Anote la marca, modelo y número de serie del producto y tenga
a la mano papel y lápiz.
4) En el directorio anexo, localice el Centro de Servicio más cercano
a su localidad y llame para reportar la falla que presenta el
aparato.
Además de respaldar la garantía de su producto, Serviplus le ofrece
los siguientes servicios:
• Instalación de línea blanca
• Reparaciones con cargo para aparatos fuera de garantía
• Contratos de extensión de garantía
• Contratos de mantenimiento preventivo
• Venta de refacciones originales
Tel. sin costo (dentro de México): 01.800.90.29.900
Internet: www.serviplus.com.mx
Atención al distribuidor (dentro de México): 01.800.50.91.600
Centros de servicio México
• Acapulco
Av. Costera Miguel Alemán
#68
Fracc. Las Playas
39390 Acapulco, Guerrero
(01.744) 482.9044, 45 y 46.
• Aguascalientes
Av. Aguascalientes #1119
Jardines de Bugambilias
20200 Aguascalientes, Ags.
(01.449) 978.8870 y 8871
• Cancún
Calle 12 Ote., Manzana 31
lote 14, Supermanzana 64
Centro
77500 Cancún, Quintana Roo
(01.998) 880.0760, 0820 y
0965
• Cd. Juárez
Porfirio Díaz # 852
ExHipódromo
32330 Cd. Juárez, Chihuahua
(01.656) 616.0418, 0453 y
0454
• Cd. Victoria
José de Escandón #1730
Zona Centro
89100 Cd. Victoria,
Tamaulipas
(01.834) 314.4830
• Culiacán
Blvd. E. Zapata #1585 Pte.
Fracc. Los Pinos
80120 Culiacán, Sinaloa
(01.667) 717.0353, 0458 y
714.1366
• Chihuahua
Av. de las Industrias # 3704
Nombre de Dios
31110 Chihuahua, Chihuahua
(01.614) 413.7901, 7012 y
3693
• Guadalajara
Calzada de las Palmas #130-C
San Carlos
44460 Guadalajara, Jalisco
(01.33) 3669.3125
• La Paz
Revolución #2125 entre
Allende y B. Juárez
Centro
23000 La Paz B.C. Sur
(01.612) 125.9978
• León
Prolongación Juárez #2830-B,
Plaza de Toros
37450 León, Guanajuato
(01.477) 770-0003, 06 y 07
• Matamoros
Porfirio Muñoz Ledo # 22
Magisterial Cebetis
87390 Matamoros,
Tamaulipas
(01.868) 817.6673 Fax:
817.6959
• Mérida
Calle 22 #323 X 13 y 13a.
Ampliación Cd. Industrial
97288 Mérida, Yucatán
(01.999) 946.0275, 0916, 3090,
3428 y 3429
• México D.F.
Prol. Ings. Militares #156
San Lorenzo Tlaltenango
11210 México, D.F.
(01.55) 5227.1000
• Monterrey
Carretera Miguel Alemán km
5
Vista sol
67130 Cd. Guadalupe, N.L.
(01.81) 8369.7990
• Nuevo Laredo
Guerrero # 2518 Local 3
Col. Juárez
88060 Nuevo Laredo,
Tamaulipas
(01.867) 714.9464
• Piedras Negras
Daniel Farías # 220 Nte.
Buenavista
26040 Piedras Negras,
Coahuila
(01.878) 783.2890
Venezuela
(0501) 737.8475
Argentina
(5411) 4489.8900
Colombia
Dentro de Bogotá
(571) 423.3177
Fuera de Bogotá
01800.051.6223
Costa Rica
(506) 260.4307
(506) 260.4207
Ecuador
1800.73.7847
Guatemala
(502) 5811.5990 y 5810.5266
Perú
Número gratuito:
(511) 0800.70.630
El Salvador
(503) 294.1444
Chile
600.364.3000
• Puebla
Calle 24 Sur # 3532 (entre 35
y 37 Ote.)
Col. Santa Mónica
72540 Puebla, Puebla
(01.222) 264.3731, 3490 y
3596
• Querétaro
Av. 5 de Febrero # 1325
Zona Industrial
Benito Juárez
76120 Querétaro, Qro.
(01.442) 211.4741, 4697 y
4731
• Reynosa
Calle Dr. Puig # 406 entre Dr.
Calderón y Dr. Glz.
Col. Doctores
88690 Reynosa, Tamaulipas
(01.899) 924.2254 y 924.6220
• San Luis Potosí
Manzana 10, Eje 128 s.n.
Zona Industrial del Potosí
78395 San Luis Potosí, S.L.P.
(01.444) 826.5686
• Tampico
Carranza # 502 Pte. Zona
Centro
89400 Cd. Madero,
Tamaulipas
(01.833) 215.4067, 216.4666 y
216.2169
México, D.F.
01-55-5227-1000
Monterrey
01-81-8369-7990
Guadalajara
01-33-3669-3125
Panamá
266.2222
• Tijuana
Calle 17 #217
Libertad Parte Alta
22300 Tijuana, B.C.
(01.664) 682.8217 y 19
• Torreón
Blvd. Torreón-Matamoros
#6301 Ote. Gustavo Díaz
Ordaz
27080 Torreón, Coahuila
(01.871) 721.5010 y 5070
• Veracruz
Paseo de Las Américas #400
esq. Av. Urano, Centro
comercial Plaza Santa Ana
Predio Collado Boticaria
94298 Boca del Río, Veracruz
(01.229) 921.1872, 2253, 9931
y 9934
• Villahermosa
Calle Carlos Green #119-C casi
esq. con Av. Gregorio
Méndez
ATASTA
86100 Villahermosa, Tabasco
(01.993) 354.7350, 7382, 7392
y 7397
Instrucciones de
seguridad
Instrucciones de
operación
Cuidado y limpieza
Solución
de problemas
Servicio
al consumidor
Instrucciones de
instalación
96
Producto:
Modelo:
Fecha de venta:
PARA SER LLENADO POR EL DISTRIBUIDOR
Marca:
No. de Serie:
Distribuidor:
Póliza de garantía
Instrucciones de
seguridad
Instrucciones de
operación
Cuidado y limpieza
Solución
de problemas
Servicio
al consumidor
Instrucciones de
instalación
Leiser S. de R.L. de C.V. garantiza este producto por 1 año a partir de la fecha de compra, contra cualquier
defecto atribuible a la calidad de sus materiales o mano de obra durante su fabricación, bajo las siguientes
condiciones:
1. Para hacer efectiva esta garantía, deberá recurrir a cualquiera de nuestros Centros de Servicio
SERVIPLUS, llamando a los teléfonos que se indican en el directorio que forma parte de esta garantía y
donde podrá obtener las partes, refacciones, consumibles y accesorios.
2. Leiser S. de R.L. de C.V. se compromete a reparar o reemplazar cualquier parte del producto encontrada
con falla, en el domicilio del cliente y sin ningún cargo para el consumidor por concepto de mano de
obra, refacciones y gastos de transportación del producto que pudieran generarse. Los técnicos de
SERVIPLUS están capacitados y cuentan con las herramientas necesarias para hacer las reparaciones a do-
micilio, asegurándose de que el producto funcione correctamente.
3. Cuando nuestro técnico de Serviplus asista a revisar el producto, se deberá presentar el producto con la
póliza de garantía debidamente sellada por la casa comercial donde se adquirió, o la factura, nota o
comprobante de compra.
4. El tiempo de reparación no excederá de 30 días, contados a partir de la recepción de la llamada en nues-
tros Centros de Servicio SERVIPLUS.
5. La garantía no podrá hacerse efectiva en los siguientes casos:
• Si el producto ha sido usado en condiciones distintas de las normales.
• Si no ha sido operado de acuerdo con el instructivo de uso proporcionado en idioma español.
• Si el producto ha sido alterado o reparado por personas y/o talleres de servicio no autorizados.
6. Limitaciones de la Garantía. Esta Garantía no será válida:
• Si no presenta la póliza de garantía debidamente sellada, factura, nota, o algún otro documento que
acredite la fecha de compra del producto.
• Si el producto se encuentra fuera del periodo de garantía otorgado por el fabricante.
• Si ha sido utilizado con fines comerciales, de prestación de servicios o cualquier otro propósito que no
sea estrictamente doméstico.
• Daños en pintura y partes de apariencia, cuando el producto esté expuesto a la intemperie.
• Rotura de piezas por mal manejo.
• Daños causados por fluctuaciones de voltaje provocadas por corto circuito, sobrecargas accidentales en
la línea de alimentación o sobrecargas por causa de descargas eléctricas.
• Daños por uso de partes que no sean genuinas.
• Daños en el producto causados en su transportación, cuando ésta sea por cuenta del comprador.
LEISER S. de R.L. de C.V.
Manzana 10, Eje 128 s/n Zona Industrial San Luis Potosí.
C.P. 78395 S.L.P., San Luis Potosí
Sello o firma:
Nota: Se sugiere revisar su artículo al momento de recibirlo. Las reclamaciones por
golpes y rayones en producto o accesorios, deberán realizarse a más tardar 30 días
después de la fecha de compra.