DVP3310
Register your product and get support at
www.philips.com/welcome
EN User manual


3
10 Glossary 29
Contents
1 Important 4
Safety and important notice 4
Trademark notice 5
2 Your DVD player 6
Feature highlights 6
Product overview 7
3 Connect 9
Connect video cables 9
Connect audio cables 10
Route audio to other devices 10
Connect to power outlet 11
4 Get started 12
Prepare the remote control 12
Find the correct viewing channel 13
Select menu display language 13
Turn on Progressive Scan 14
5 Play 15
Play from disc 15
Play video 16
Play music 18
Play photo 19
6 Adjust settings 21
General setup 21
Audio setup 21
Video setup 22
Preferences 23
7 Additional information 25
Update software 25
Care 25
8 Speci cation 26
9 Troubleshooting
28
Contents
English
EN

4
This product complies with the radio
interference requirements of the European
Community.
This product complies with the requirements
of the following directives and guidelines:
2006/95/EC, 2004/108/EC.
This product is in compliance with the EEE
directive.
About Progressive Scan
Consumers should note that not all high
de nition television sets are fully compatible
with this product and may cause artefacts to
be displayed on the picture. In case of 525
or 625 progressive scan picture problems,
it is recommended that the user switch the
connection to the ‘standard de nition’ output.
If there are questions regarding our TV set
compatibility with this model 525p and 625p
DVD player, please contact our customer
service centre.
Recycling
Your product is designed and manufactured
with high quality materials and components,
which can be recycled and reused.
When you see the crossed-out wheeled bin
symbol attached to a product, it means the
product is covered by the European Directive
2002/96/EC:
1 Important
Safety and important notice
Warning
Risk of overheating! Never install the DVD player in •
a con ned space such as a bookcase. Always leave a
space of at least four inches around the DVD player
for ventilation. Ensure curtains or other objects
never cover the ventilation slots on the DVD player.
Never place the DVD player, remote control or
•
batteries near naked ames or other heat sources,
including direct sunlight.
Only use this DVD player indoors. Keep this DVD
•
player away from water, moisture and liquid- lled
objects.
Never place this DVD player on other electrical
•
equipment.
Keep away from this DVD player during lightning
•
storms.
Where the mains plug or an appliance coupler is
•
used as the disconnect device, the disconnect device
shall remain readily operable.
Visible and invisible laser radiation when open. Avoid
•
exposure to beam.
Mains fuse (UK only)
This DVD player is tted with an approved
moulded plug. Should it become necessary to
replace the mains fuse, this must be replaced
with a fuse of the same value as indicated on
the plug (example 10A).
1 Remove fuse cover and fuse.
2 The replacement fuse must comply with
BS 1362 and have the ASTA approval
mark. If the fuse is lost, contact your
dealer in order to verify the correct type.
3 Re t the fuse cover.
In order to maintain conformity to the EMC
directive, the mains plug on this product must
not be detached from the mains cord.
EN
5
Copyright notice
This product incorporates copyright
protection technology that is protected
by method claims of certain U.S. patents
and other intellectual property rights
owned by Macrovision Corporation and
other rights owners. Use of this copyright
protected technology must be authorised
by Macrovision Corporation, and is intended
for home and other limited viewing uses only
unless otherwise authorised by Macrovision
Corporation. Reverse engineering or
disassembly is prohibited.
Copyright in the U.K.
Recording and playback of material may
require consent. See Copyright Act 1956 and
The Performers’ Protection Acts 1958 to
1972.
Trademark notice
Manufactured under license from Dolby
Laboratories. Dolby and the double-D symbol
are trademarks of Dolby Laboratories.
Windows Media and the Windows logo are
trademarks, or registered trademarks of
Microsoft Corporation in the United States
and/or other countries.
Never dispose of your product with other
household waste. Please inform yourself about
the local rules on the separate collection of
electrical and electronic products. The correct
disposal of your old product helps prevent
potentially negative consequences for the
environment and human health.
Your product contains batteries covered by
the European Directive 2006/66/EC, which
cannot be disposed of with normal household
waste.
Please inform yourself about the local rules
on the separate collection of batteries. The
correct disposal of batteries helps prevent
potentially negative consequences for the
environment and human health.
Important
English
EN

6
Region codes
You can play discs with the following region
codes.
DVD region code Countries
Europe
Russia
2 Your DVD
player
Congratulations on your purchase, and
welcome to Philips! To fully bene t from the
support that Philips offers; register your product
at www.philips.com/welcome.
This DVD player brings audio and video to life.
Plays practically any disc format, including digital
photos with absolutely no compromise to
picture quality.
Feature highlights
Screen Fit
View the movie in full screen display on any
TV.
Progressive scan component video
Pushes the limits of standard resolution and
provides a more lm-like image display that
is more pleasing for viewing DVDs on a TV
display.
EN
7
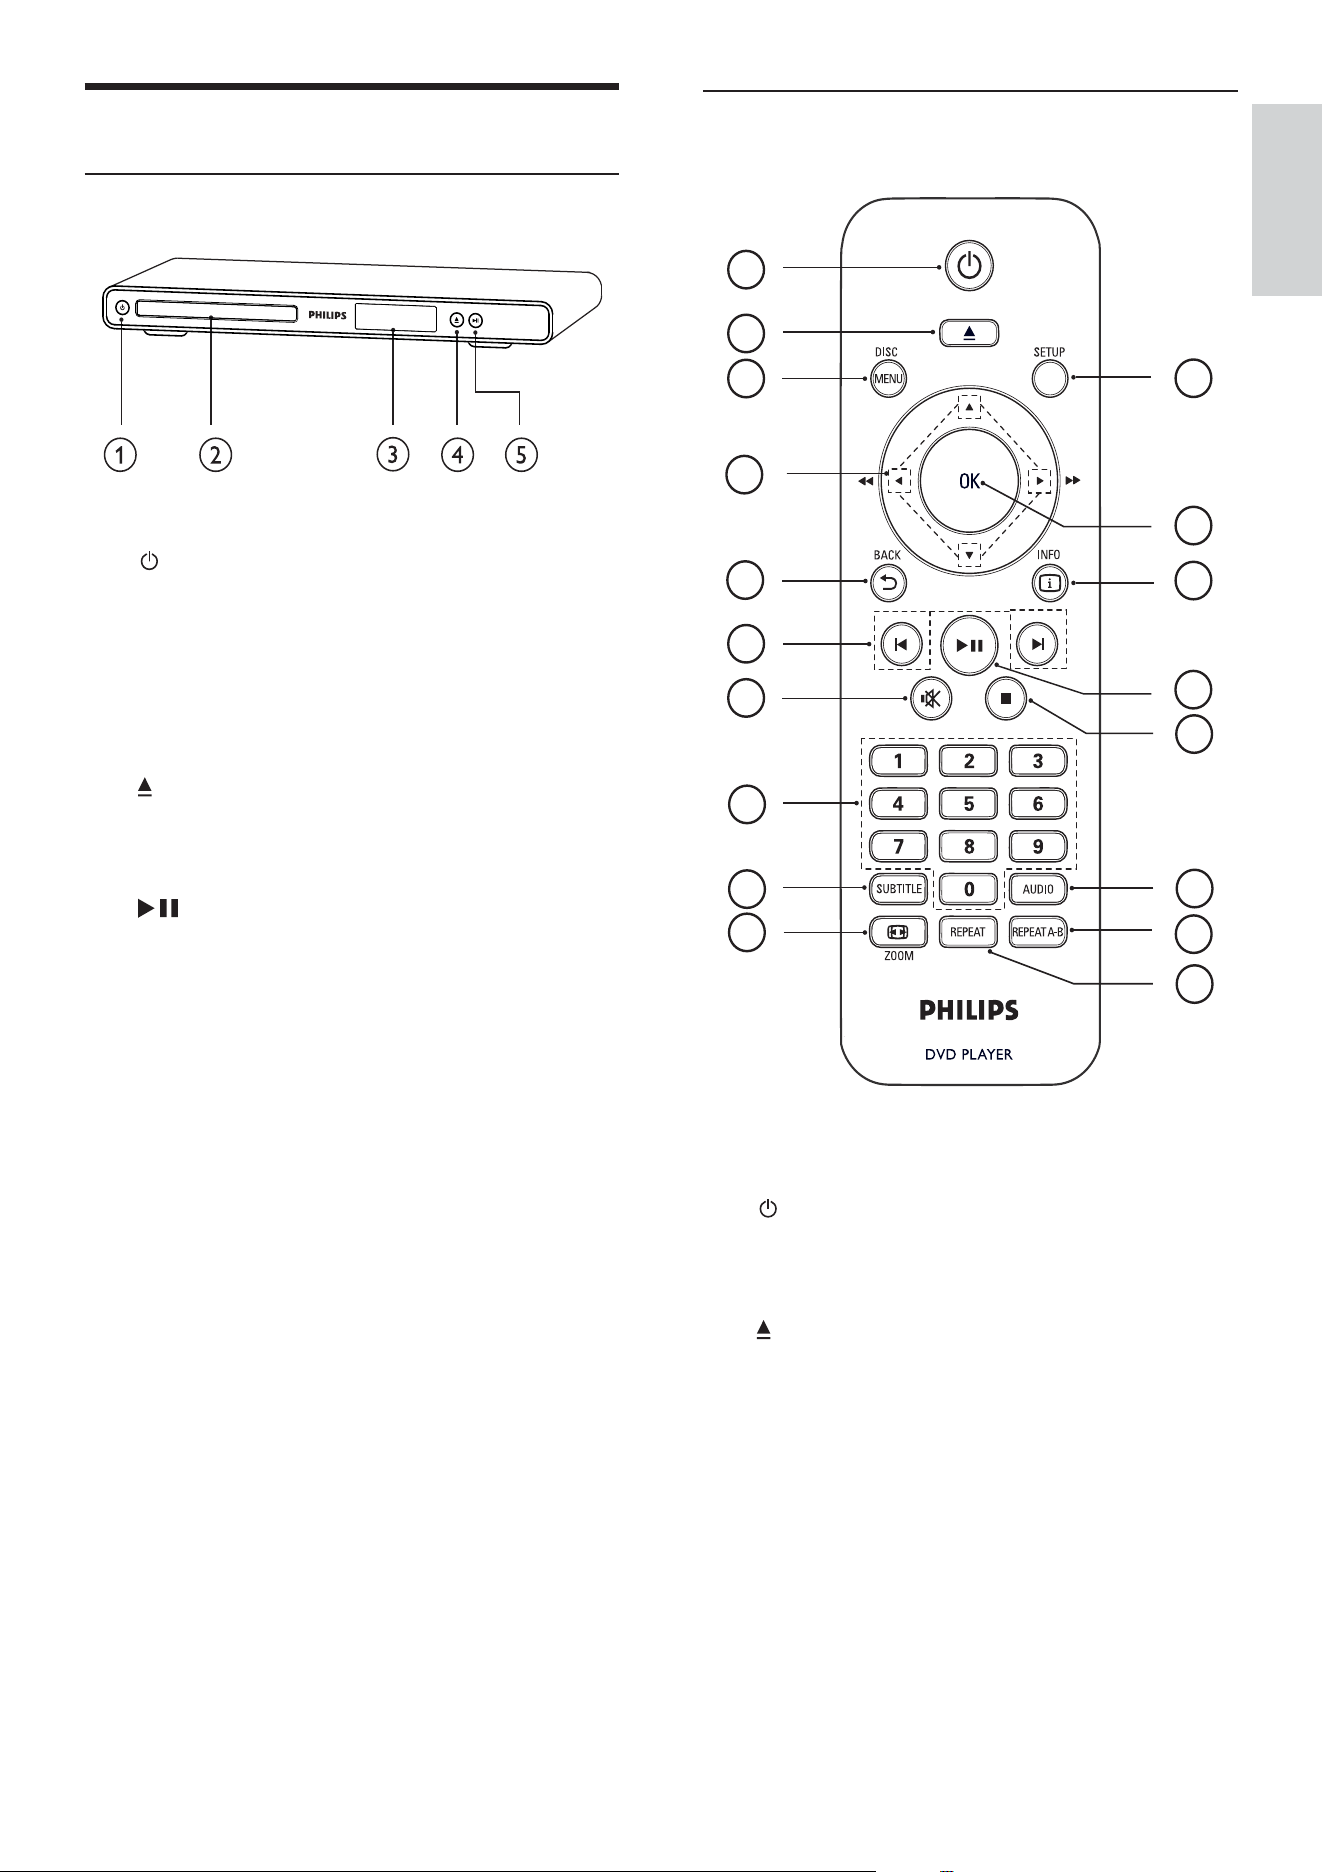
Remote control
a ( Standby-On )
Turns on the DVD player or switches •
to standby mode.
b
( Open/Close )
Opens or closes the disc •
compartment.
c DISC MENU
Accesses or exits the disc menu. •
For VCD and SVCD, turns PBC •
(playback control) on or off in PBC
mode.
4
3
6
7
9
8
1
5
2
16
17
12
15
13
14
10
11
18
Product overview
Main unit
a ( Standby-On )
Turns on the DVD player or switches •
to standby mode.
b Disc compartment
c Display panel
d
( Open/Close )
Opens or closes the disc •
compartment.
e
( Play/Pause )
Starts, pauses or resumes disc play.•
Your DVD player
English
EN

8
m AUDIO
Selects an audio language or channel •
on a disc.
n
( Stop )
Stops disc play.•
o
( Play/Pause )
Starts, pauses or resumes disc play.•
p
INFO
For discs, displays information about •
the current status or the disc.
For slideshows, displays a thumbnail •
view of photo les.
q OK
Con rms an entry or selection.•
r SETUP
Accesses or exits the setup menu.•
d
( Navigation buttons )
Navigates through the menus.•
Searches fast-forward (right) or fast-•
backward (left). Press repeatedly to
change the search speed.
Searches slow-forward (up) or slow-•
backward (down). Press repeatedly
to change the search speed.
e
BACK
Returns to the previous menu.•
For DVD, navigates to title menu.•
For VCD version 2.0 or SVCD with •
PBC turned on, returns to the menu.
f
/ ( Previous/Next )
Skips to the previous or next title, •
chapter or track.
Press and hold for fast-backward or •
fast-forward search.
g
( Mute )
Mutes or restores audio output.•
h Numeric buttons
Selects an item to play.•
i SUBTITLE
Selects the subtitle language on a •
disc.
j
ZOOM
Fits the picture format to the TV •
screen.
Zooms in or out of the picture.•
k REPEAT
Toggles between various repeat •
modes.
l REPEAT A-B
Marks the section for repeat play or •
turns off repeat mode.
EN
9
Note
You must connect this DVD player directly to a TV. •
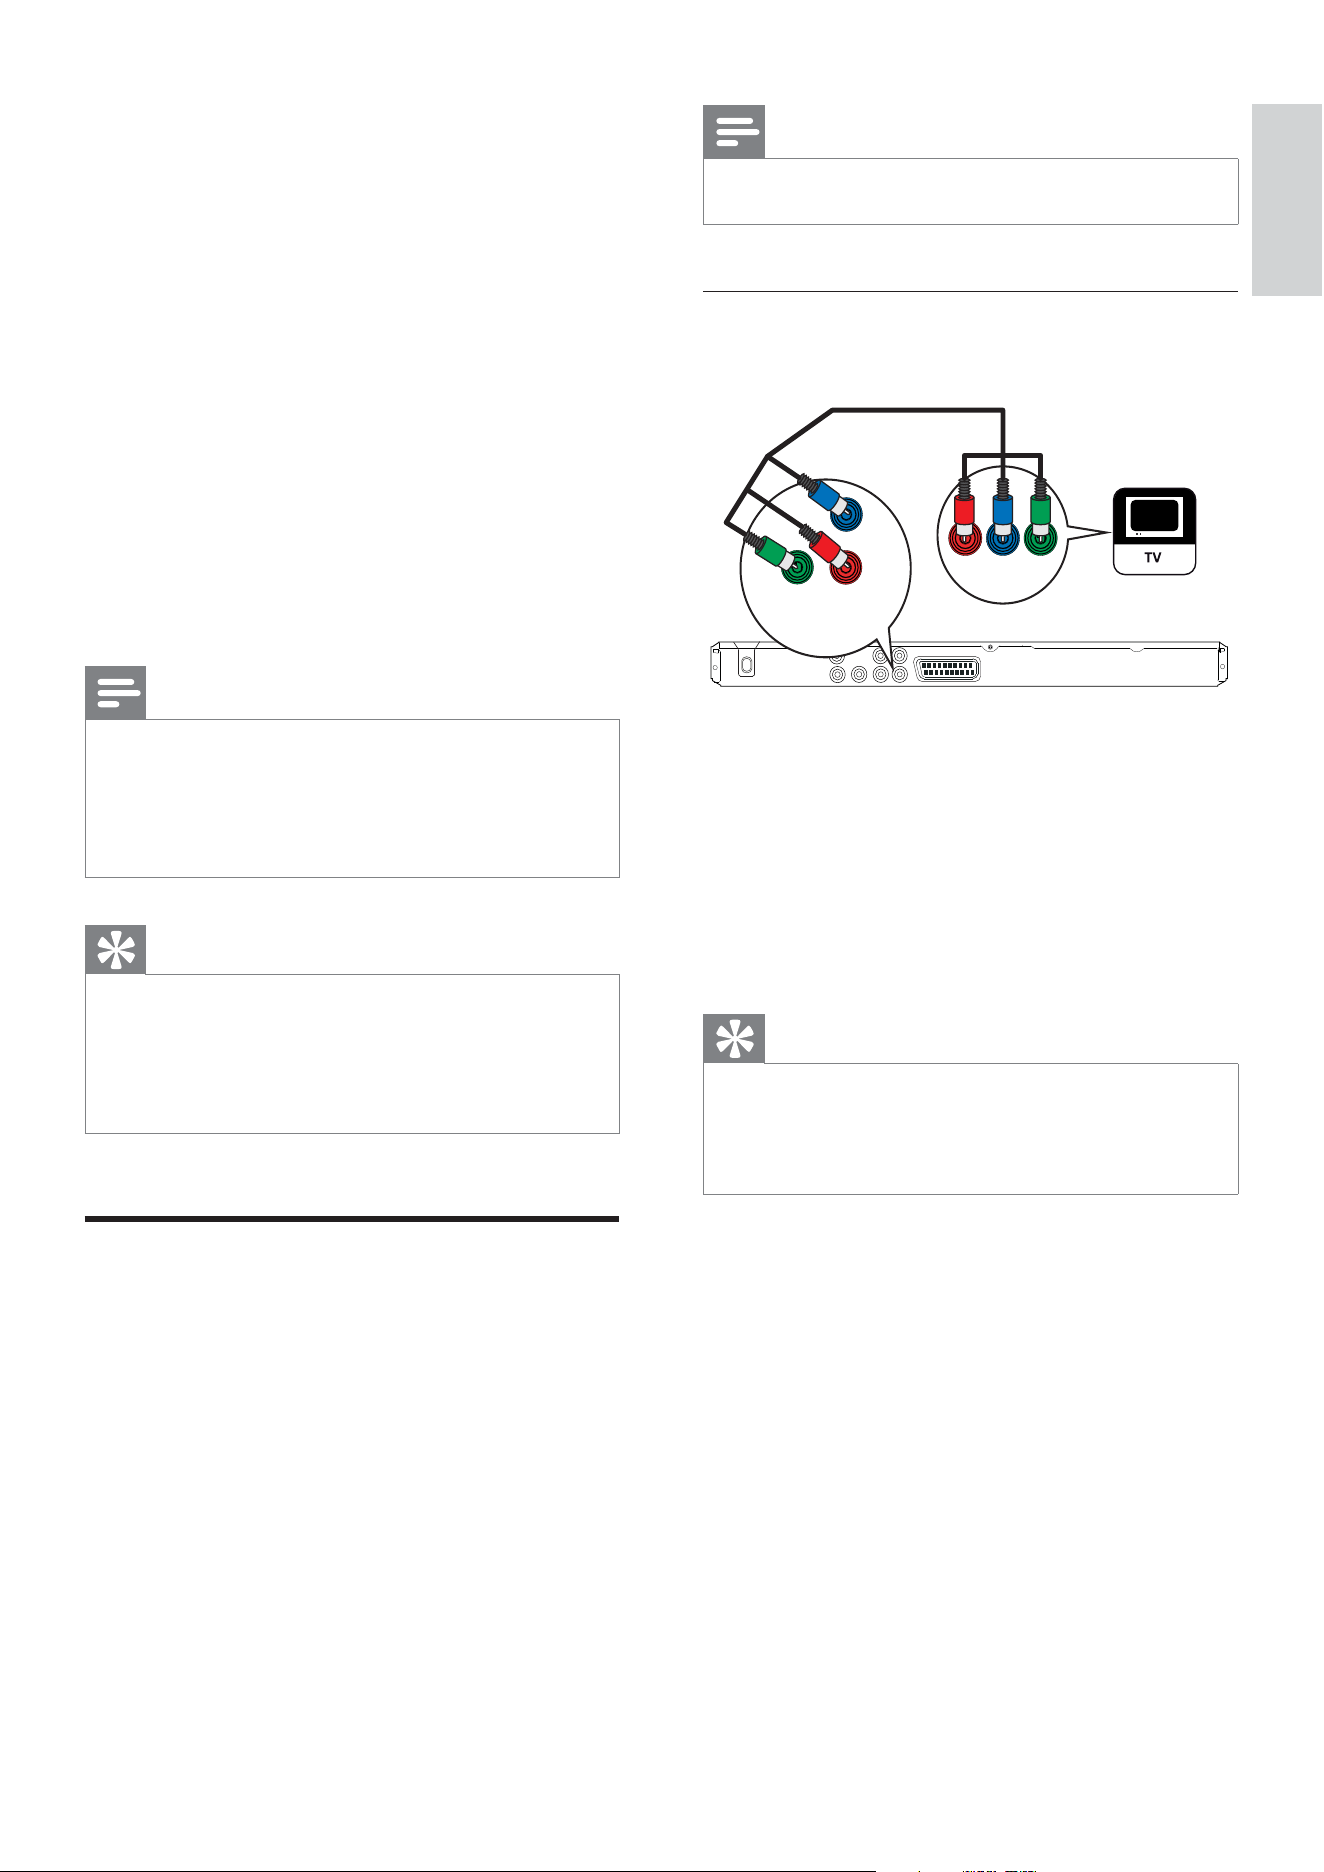
Option 1: Connect to component
video jacks
1 Connect the component video cables
(not supplied) to the Y Pb Pr jacks on this
DVD player and the component video
input jacks on the TV.
If a progressive scan TV is used, you •
may turn on the progressive scan
mode.
Tip
The component video input jacks on the TV may be •
labelled as Y Pb/Cb Pr/Cr or YUV.
This type of connection provides good picture
•
quality.
Pb
COMPONENT
VIDEO IN
Y
Pr
Pb
COMPONENT VIDEO OUT
Y
Pr
3 Connect
Make the following connections to use your
DVD player.
Basic connections:
Video•
Audio•
Optional connections:
Route audio to other devices:•
Digital ampli er/receiver•
Analogue stereo system•
Note
Refer to the type plate at the back or bottom of the •
product for identi cation and supply ratings.
Before you make or change any connections, ensure
•
that all the devices are disconnected from the power
outlet.
Tip
Different types of connectors may be used to •
connect this product to your TV, depending on
availability and your needs. A comprehensive
interactive guide to help you connect your product is
available at www.connectivityguide.philips.com.
Connect video cables
Connect this DVD player to TV to view disc
play. Select the best video connection that the
TV can support.
Option 1: Connect to component video •
jacks (for a standard TV or Progressive
Scan TV).
Option 2: Connect to scart jack (for a •
standard TV).
Option 3: Connect to video (CVBS) jack •
(for a standard TV).
Connect
English
EN
10
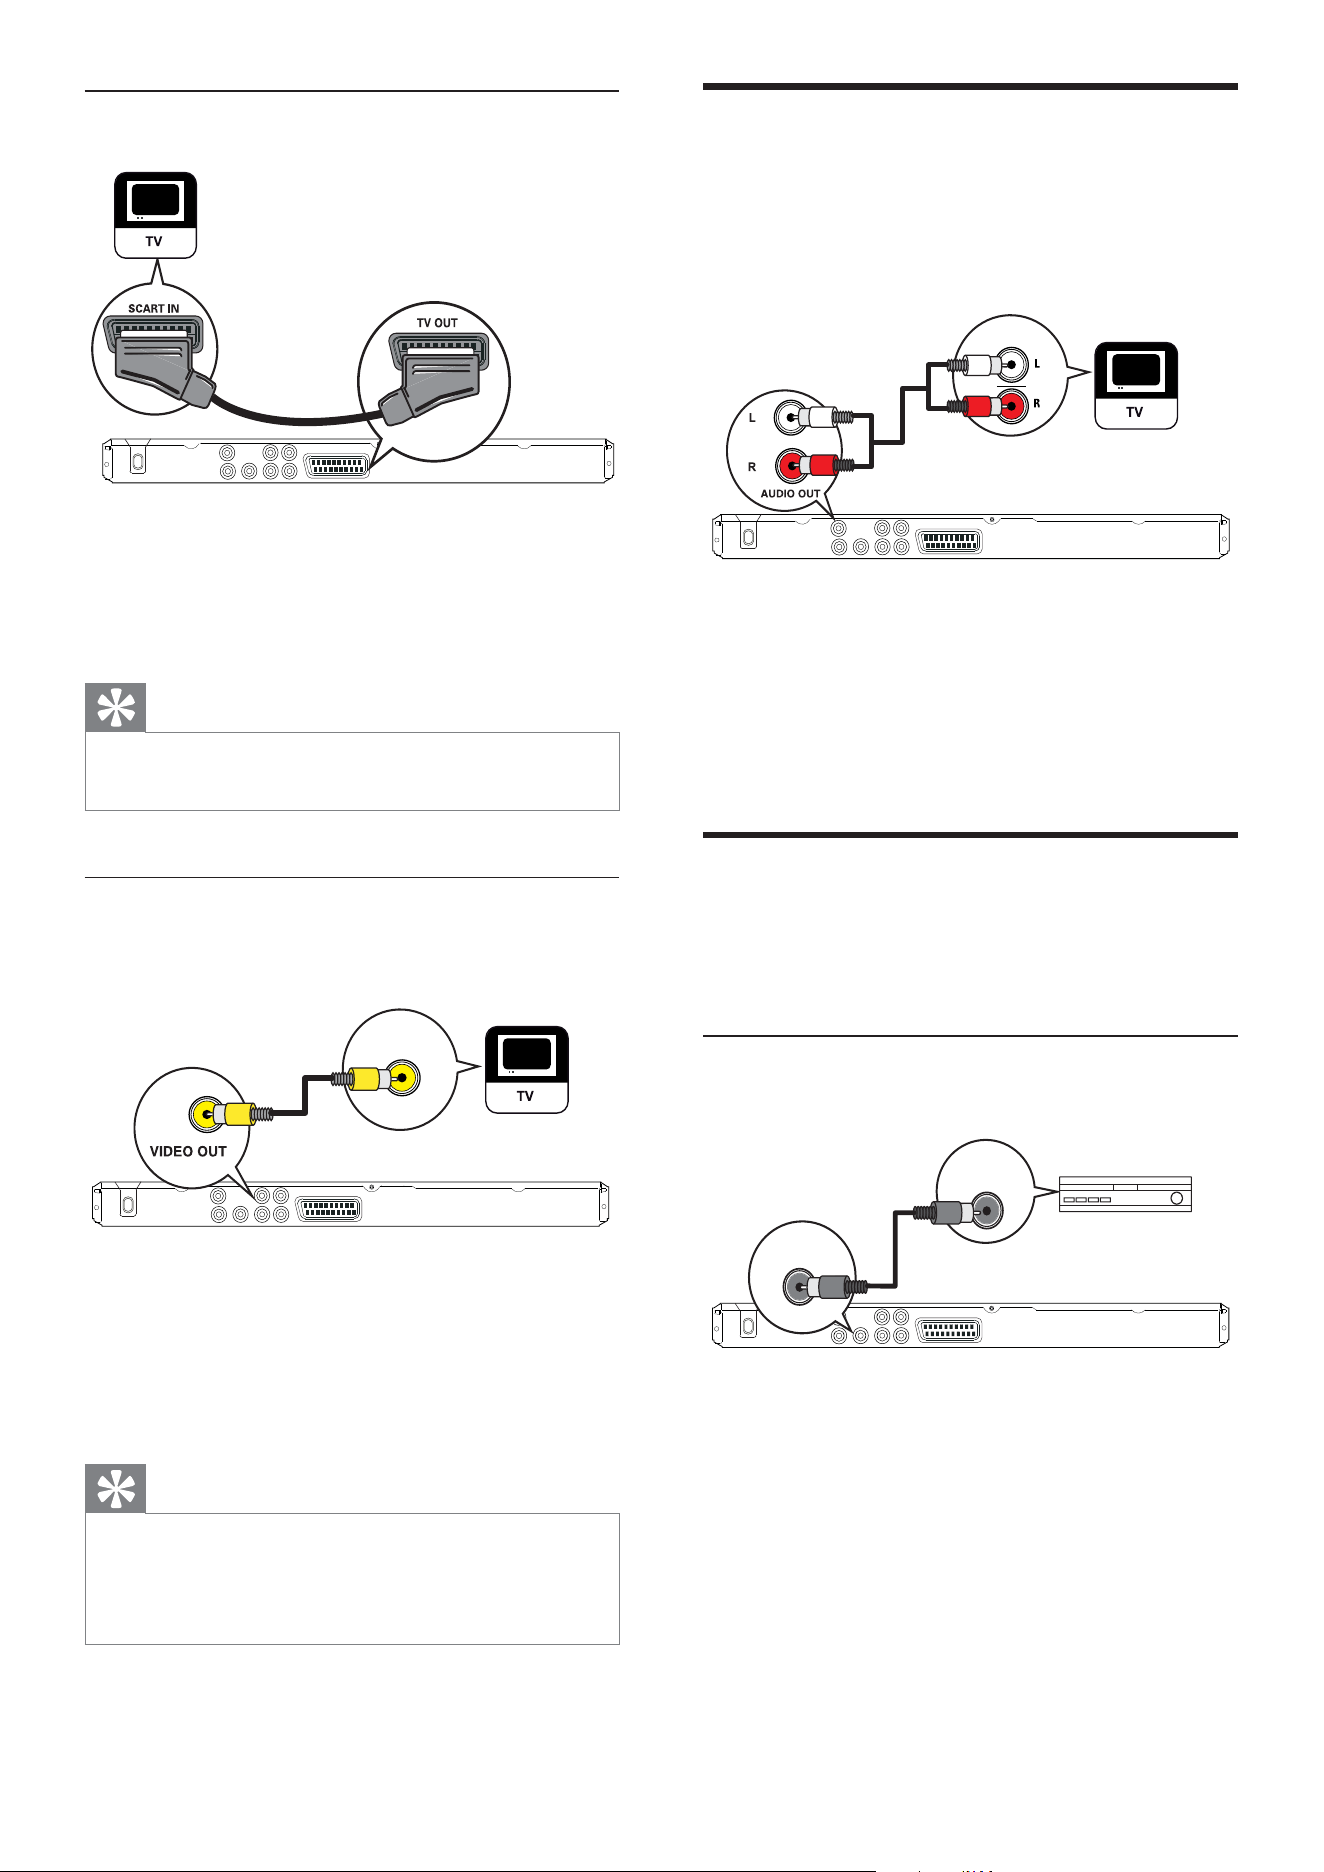
Connect audio cables
Connect the audio from this DVD player to
the TV to allow sound output through the TV.
1 Connect the audio cables (not supplied)
to the AUDIO OUT L/R jacks on this
DVD player and the audio input jacks on
the TV.
Route audio to other devices
Route the audio from this DVD player to other
devices to enhance audio play.
Connect to digital ampli er/receiver
1 Connect a coaxial cable (not supplied)
to the COAXIAL/DIGITAL OUT jack
on this DVD player and the COAXIAL/
DIGITAL input jack on the device.
AUDIO IN
DIGITAL IN
COAXIAL
DIGITAL
OUT
Option 2: Connect to scart jack
1 Connect a scart cable (not supplied) to
the TV OUT jack on this DVD player and
the scart input jack on the TV.
Tip
This type of connection provides good picture •
quality.
Option 3 : Connect to video (CVBS)
jack
1 Connect a composite video cable (not
supplied) to the VIDEO OUT jack on this
DVD player and the video input jack on
the TV.
Tip
The video input jack on the TV may be labelled as •
A/V IN, VIDEO IN, COMPOSITE or BASEBAND.
This type of connection provides standard picture
•
quality.
VIDEO IN
EN
11
Connect to power outlet
Warning
Risk of product damage! Ensure that the power •
supply voltage corresponds to the voltage printed on
the back or the underside of the DVD player.
1 Connect the power cord to the power
outlet.
The DVD player is ready to be set up »
for use.
Tip
You can optimise the audio output (see chapter •
‘Adjust settings’ - [Audio Setup] > [Digital output] )
for details.
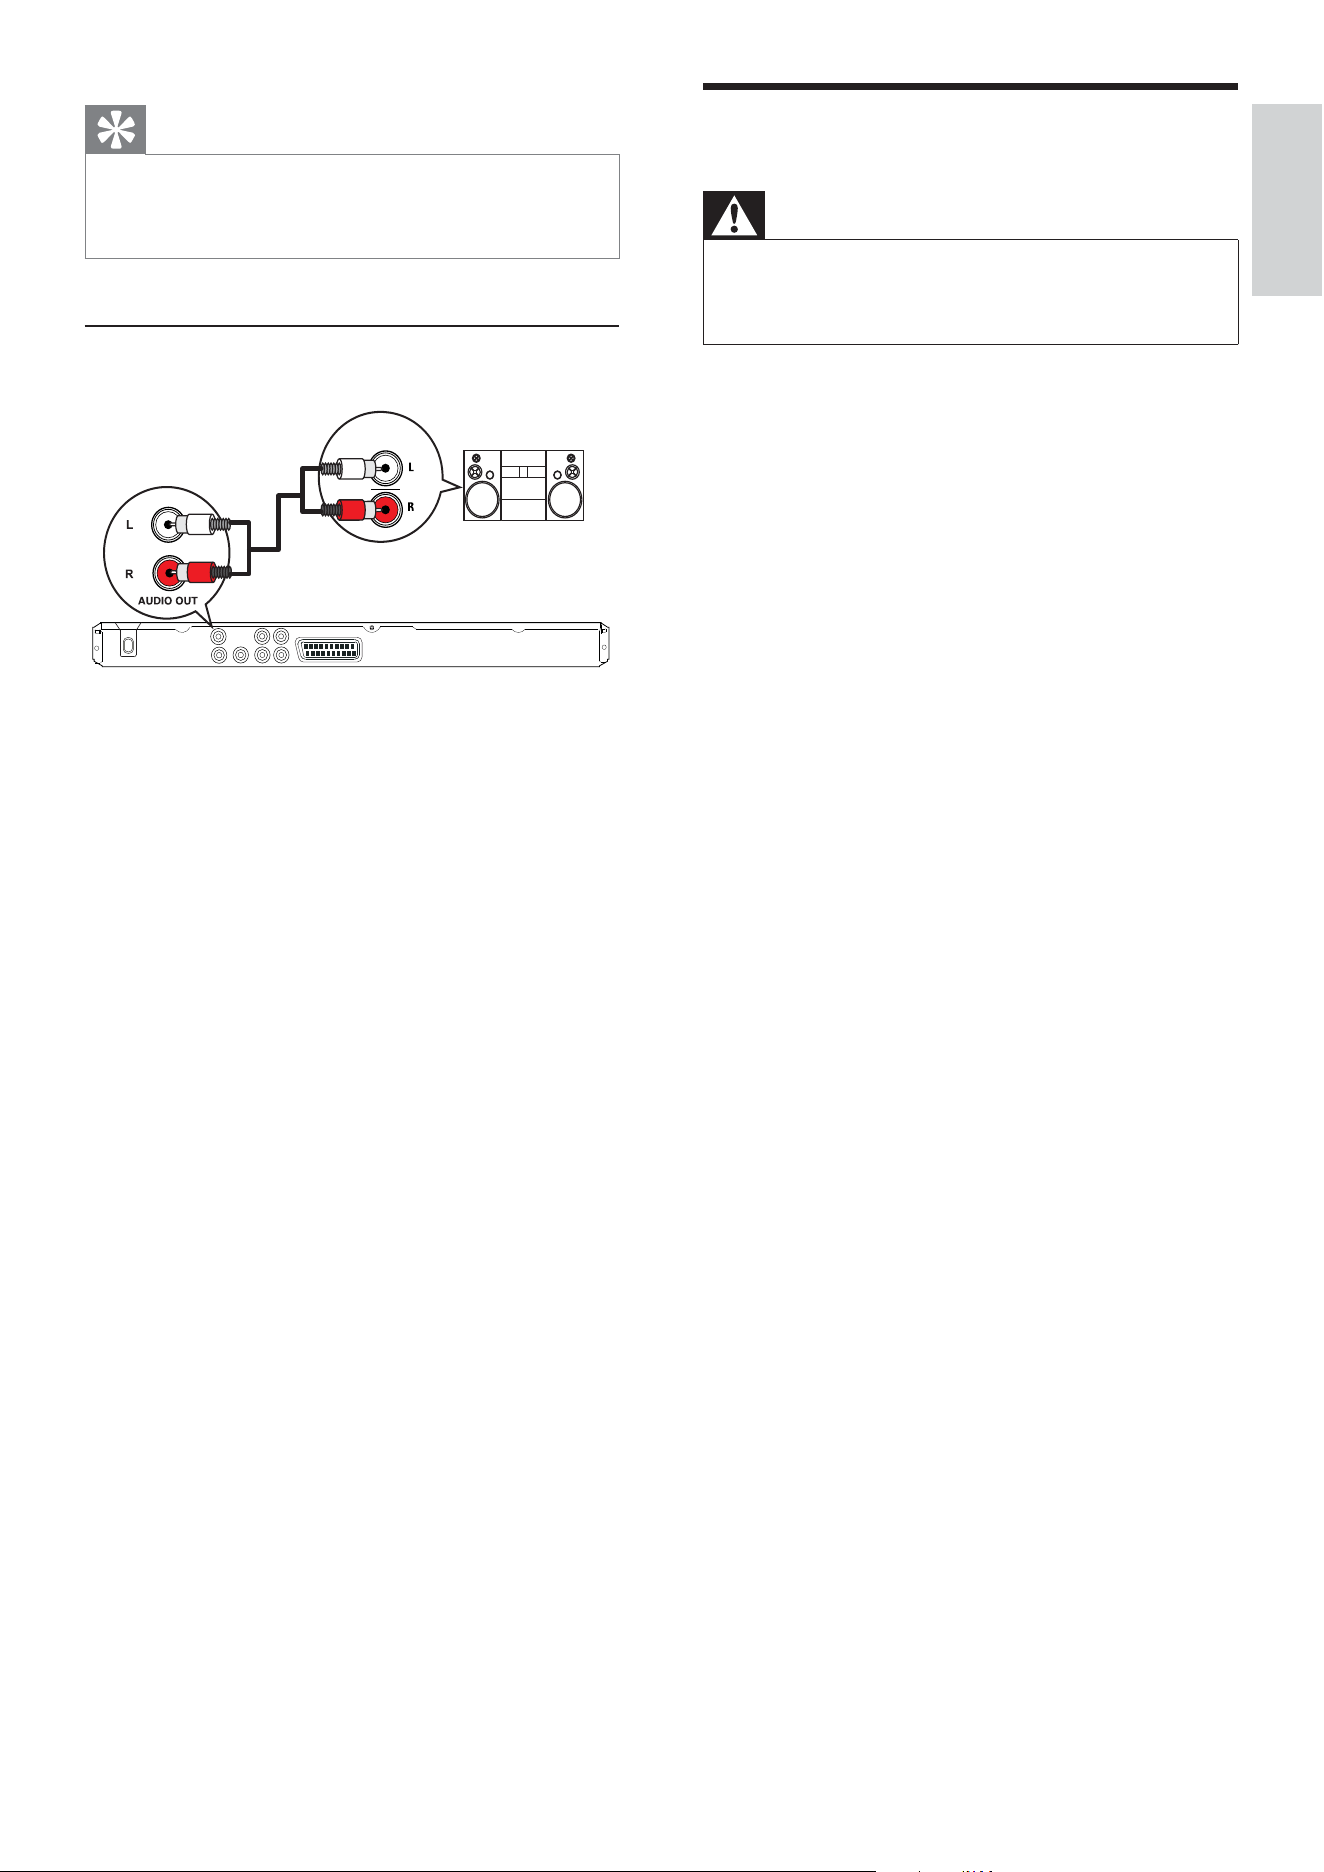
Connect to analogue stereo system
1 Connect the audio cables (not supplied)
to the AUDIO OUT L/R jacks on this
DVD player and the audio input jacks on
the device.
AUDIO IN
Connect
English
EN
12
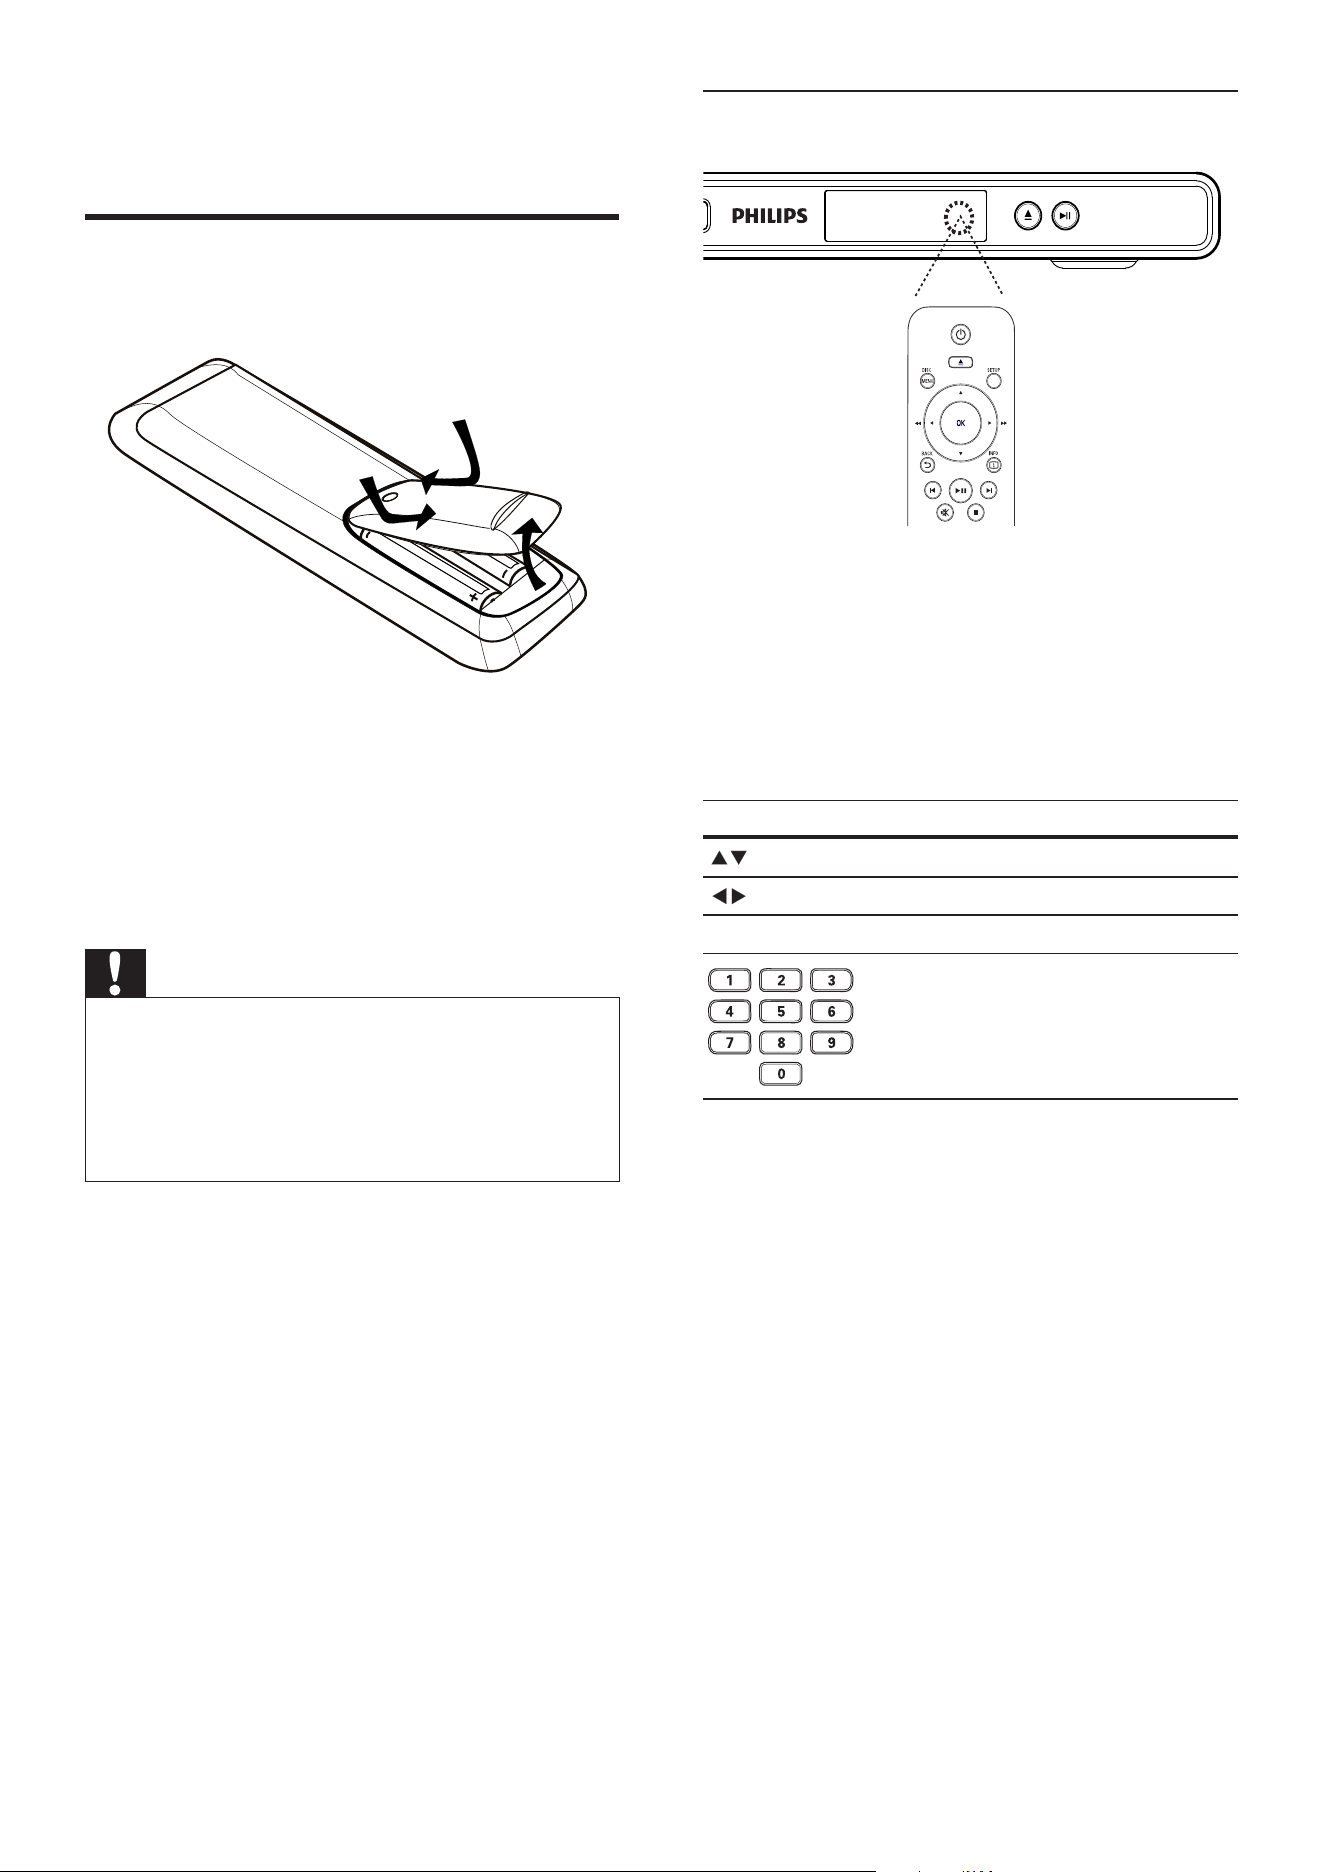
Navigate the menu
1 Point the remote control directly at the
remote sensor on this DVD player and
select the desired function.
2 Use the following buttons on the remote
control to navigate through the on-screen
menus.
Button Action
Moves up or down.
Moves left or right.
OK Con rms a selection.
Enters numbers
4 Get started
Prepare the remote control
1 Push to open the battery compartment
cover.
2 Insert 2 AAA batteries with correct
polarity (+/-) as indicated.
3 Close the cover.
Caution
Remove batteries if they are exhausted or if the •
remote control is not to be used for a long time.
Do not mix batteries (old and new or carbon and
•
alkaline, etc.).
Batteries contain chemical substances, they should
•
be disposed off properly.
EN
13
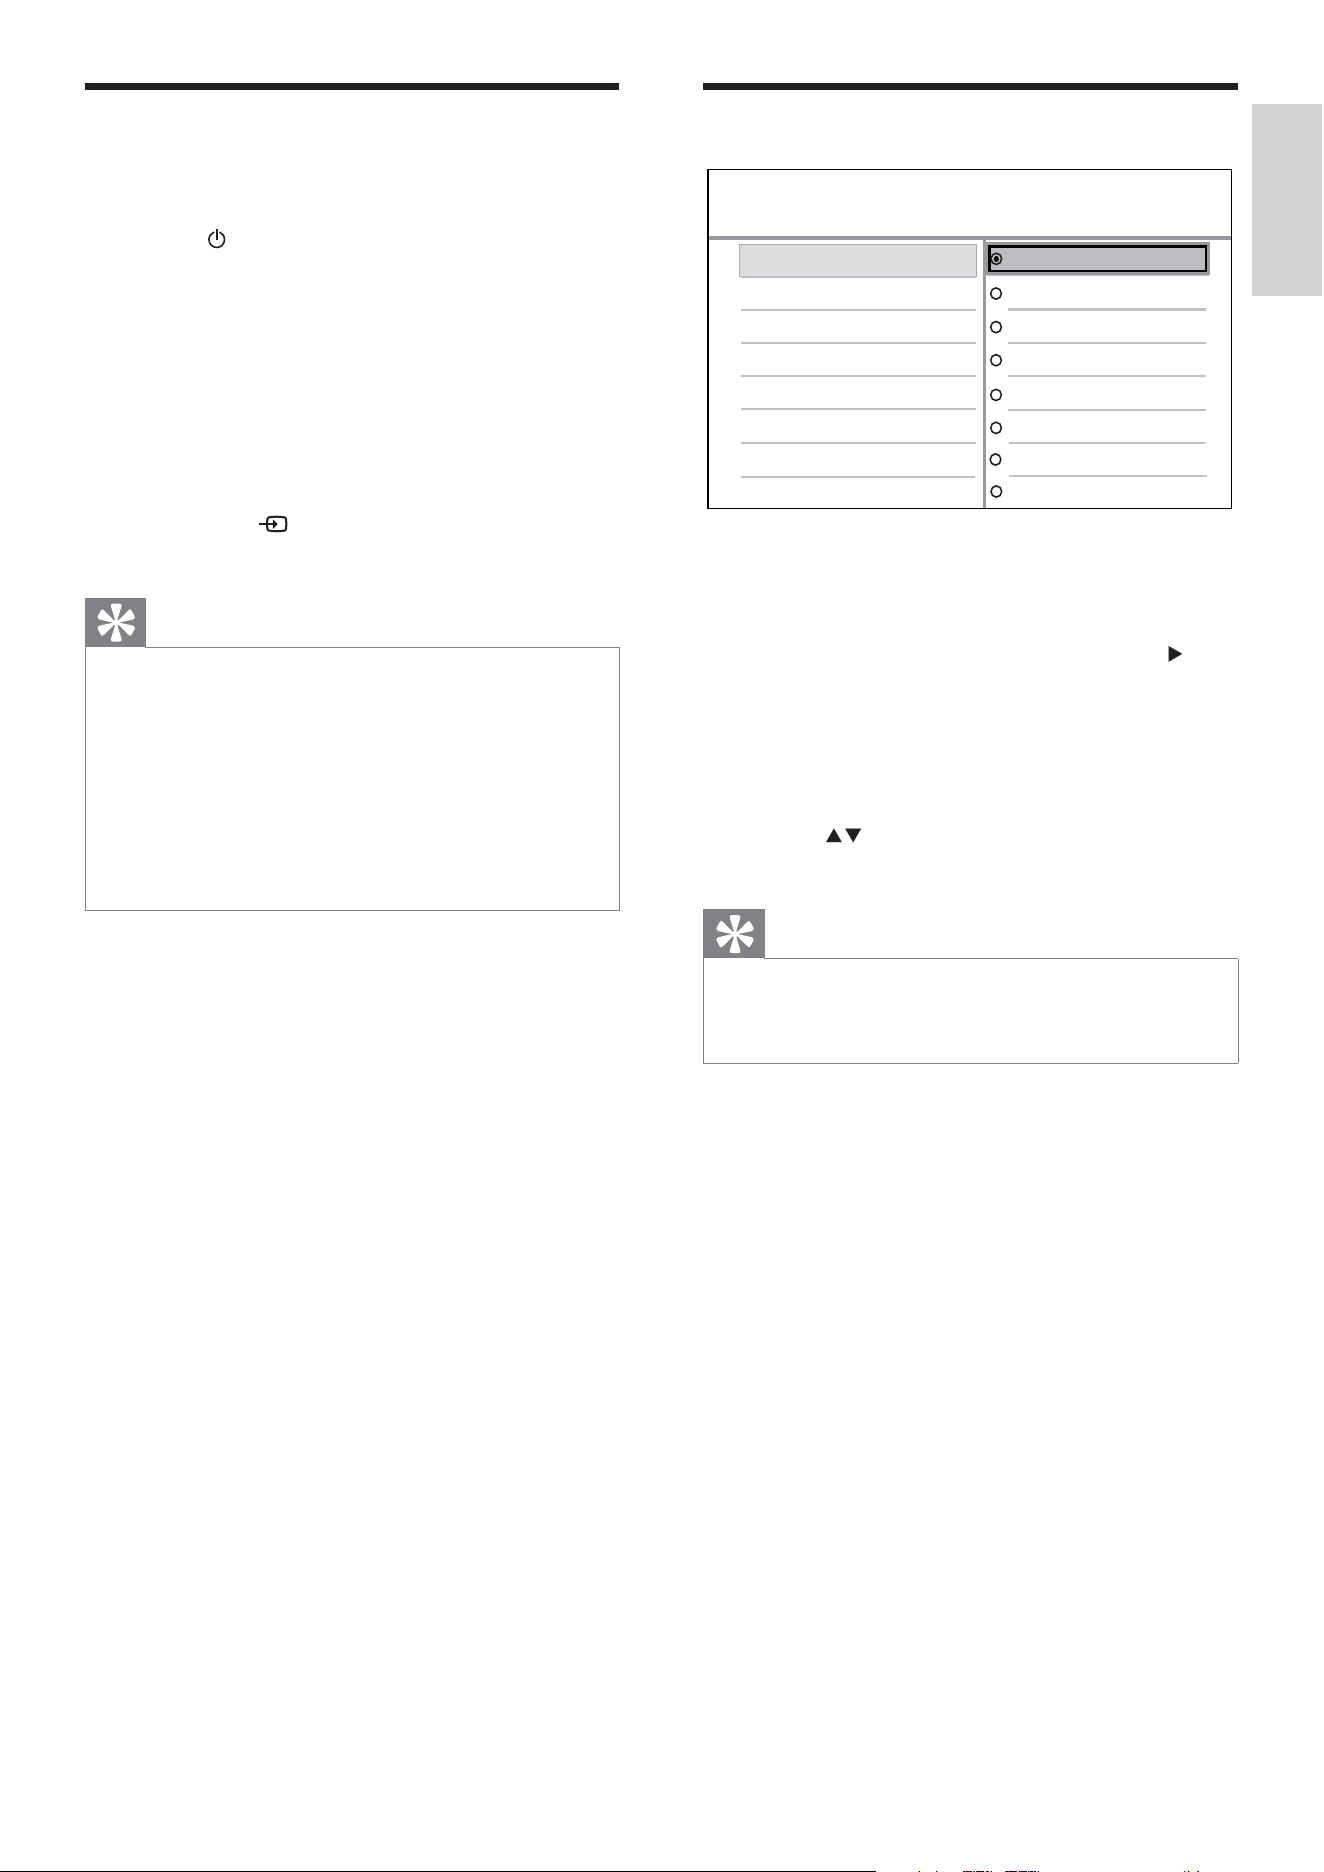
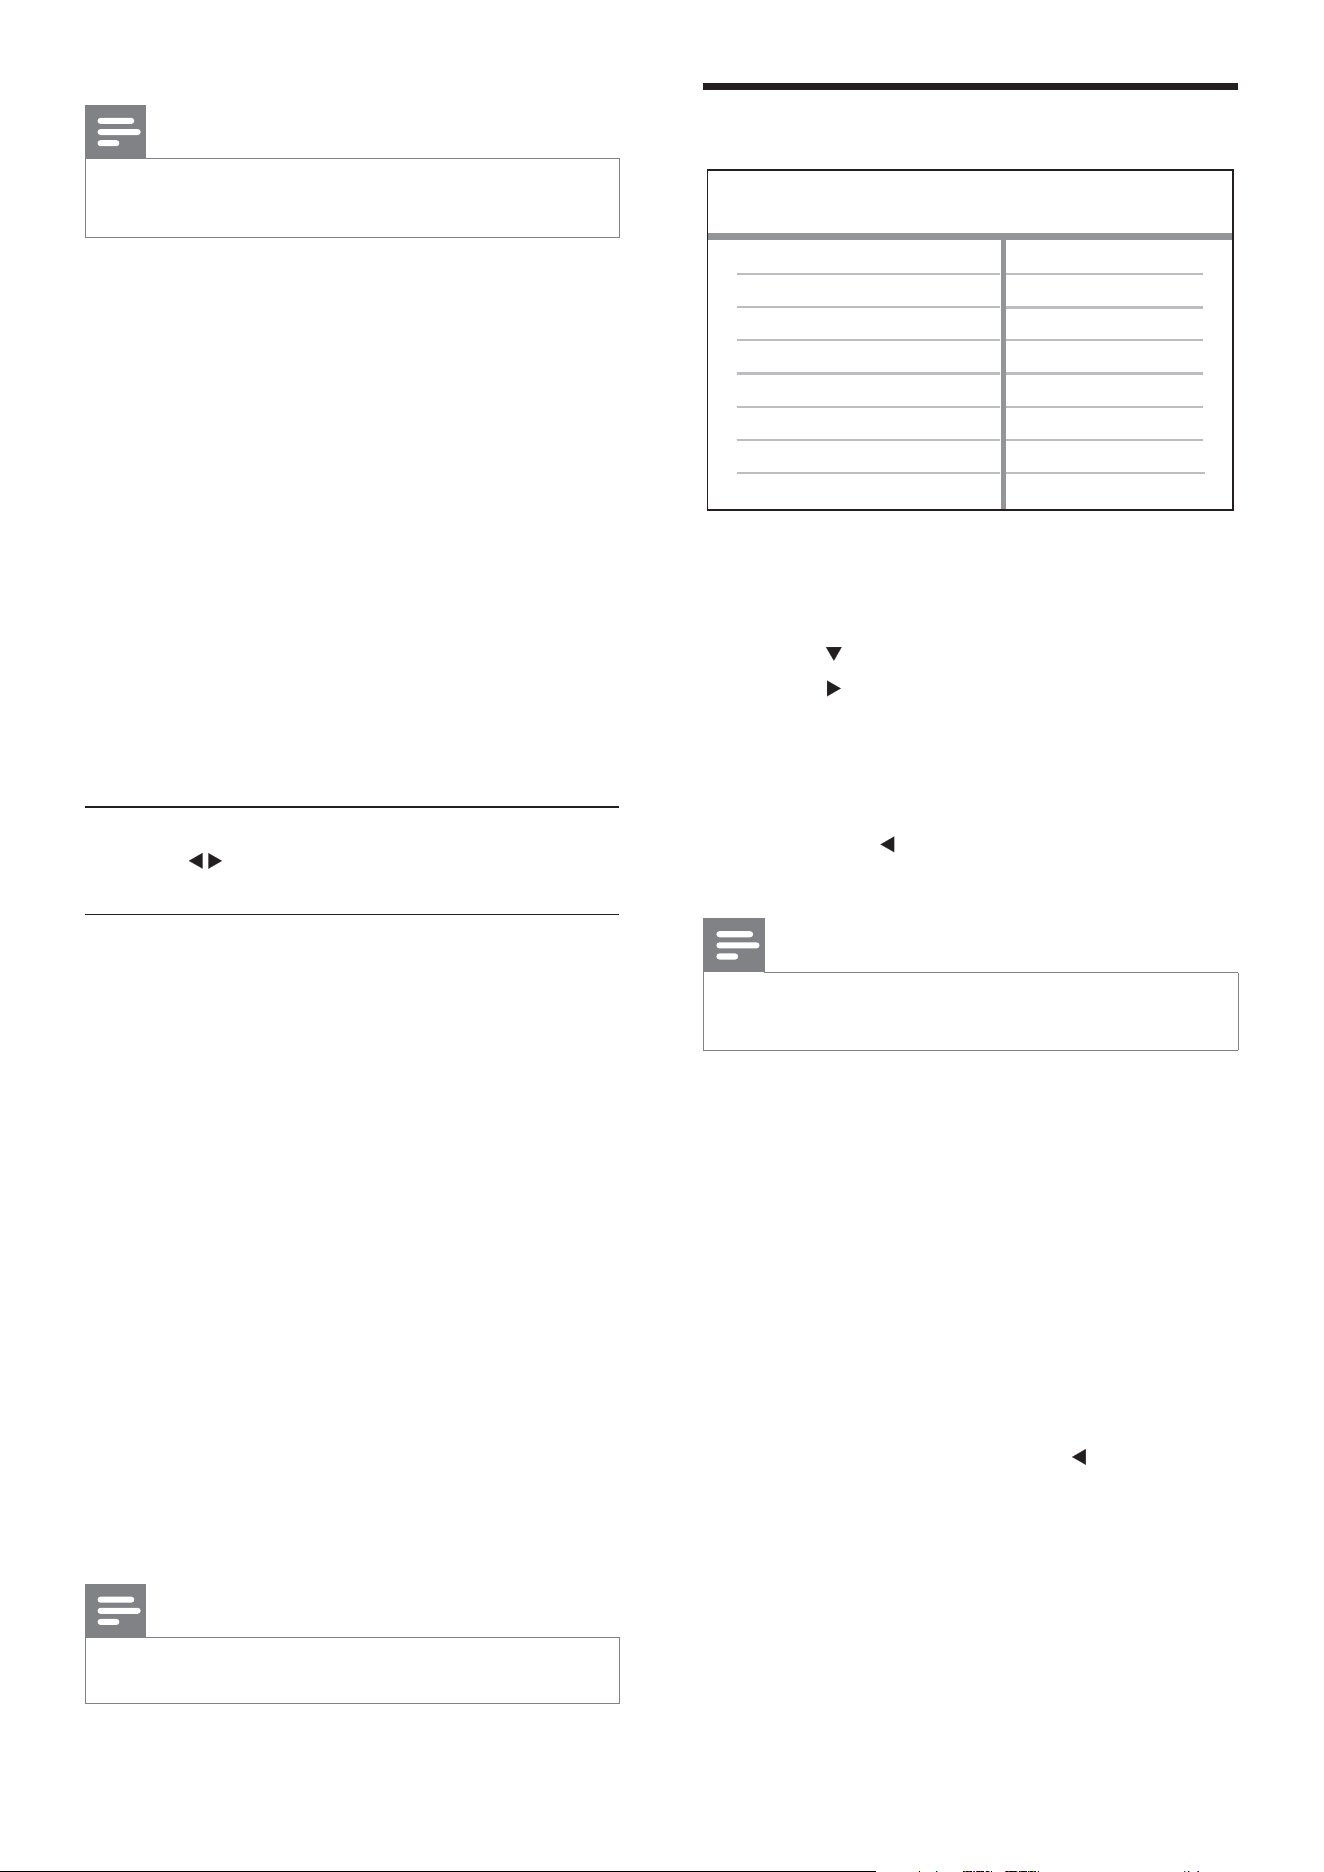
Select menu display language
1 Press SETUP .
» [General Setup] menu is displayed.
2 Select [OSD Language] , then press .
The language options are different •
depending on your country or
region. It may not correspond to the
illustration shown here.
3 Press to select a language, then press
OK .
Tip
You can set the default language for DVD audio •
and disc menu, see the ‘Adjust settings’ chapter-
[Preferences] for details.
Svenska
Português
Nederlands
Auto Standby
OSD Language
General Setup
English
Français
Deutsch
Italiano
Español
Find the correct viewing
channel
1 Press to turn on the DVD player.
2 Turn on the TV and switch to the correct
video-in channel in one of the following
ways:
Go to the lowest channel on your •
TV, then press the Channel Down
button until you see the Philips
screen.
Press •
SOURCE button repeatedly
on the remote control of your TV.
Tip
The video-in channel is between the lowest and •
highest channels and may be called FRONT, A/V IN,
VIDEO, HDMI etc.. See the TV user manual on how
to select the correct input on your TV.
If the audio output of this DVD player is routed
•
to another audio device (such as an audio system
or receiver), turn on the audio device to the
appropriate audio input channel. Refer to the device
user manual for details.
Get started
English
EN
14
Note
During play, when progressive scan mode is on for •
both this DVD player and the TV, distorted picture
may be displayed. Turn off the progressive scan
feature on both this DVD player and the TV.
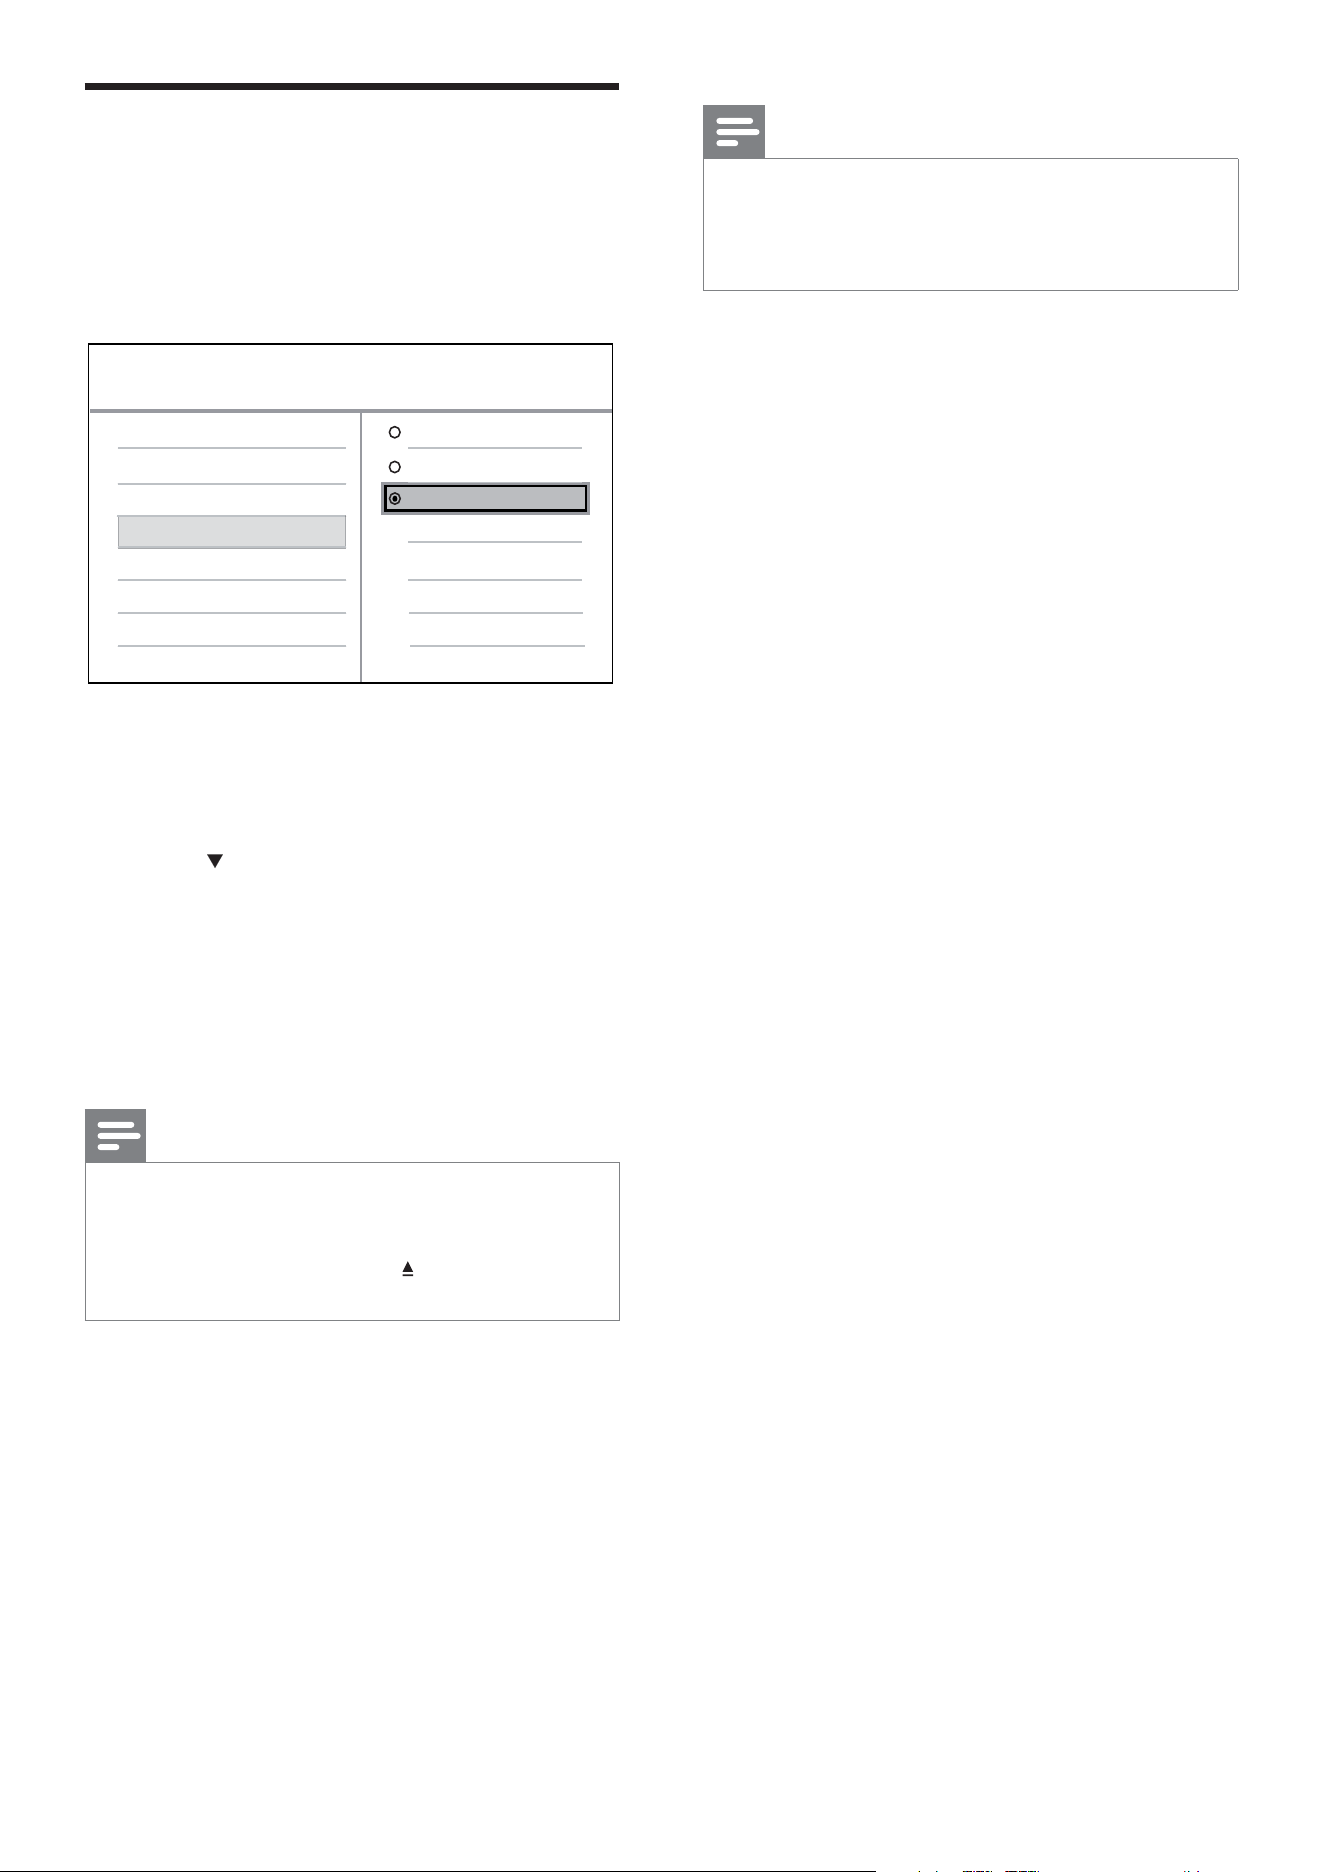
Turn on Progressive Scan
Connect a progressive scan TV with component
video jacks (see the ‘Connect video cables
- Option 1: Connect to component video jacks’
chapter for details).
1 Turn on the TV to the correct viewing
channel for this DVD player.
2 Press SETUP .
3 Press to select [Video Setup] .
4 Select [Component Video] > [P-Scan] ,
then press OK .
A warning message is displayed. »
5 To proceed, select [Yes] and press OK .
The progressive setup is complete. »
Note
If a blank/distorted screen is displayed, wait for 15 •
seconds for the auto recover.
If no picture displayed, turn off the progressive
•
scan mode as follows: 1) Press to open the disc
compartment. 2) Press the Numeric button ‘1’ .
6 Press SETUP to exit the menu.
7 You can now turn on the progressive
scan mode on the TV (see the TV user
manual).
Video Setup
Component Video
TV Display
TV System
Picture Setting
Interlaced
RGB
P-Scan
EN

15
Tip
If the password entry menu is displayed, you have to •
enter the password before it can be played.
If you pause or stop a disc for about 5 minutes, the
•
screen saver activates. To deactivate the screen
saver, press DISC MENU .
After you pause or stop a disc and no buttons
•
are pressed within 15 minutes, this DVD player
automatically switches to standby mode.
5 Play
Play from disc
Note
DVDs and DVD players are designed with regional •
restrictions. Ensure that the DVD video you play is
for the same region zone as your player (indicated on
its reverse).
The DVD player can support play of the following le
•
formats: MP3/WMA/JPEG.
To play DVD-R, DVD+R or DVD-RW, the disc must
•
be nalised.
Play a disc
Caution
Never place any objects other than discs into the disc •
compartment.
1 Press to open the disc compartment.
2 Insert a disc with its label facing up.
For double-sided discs, load the •
playing side facing up.
3 Press to close the disc compartment.
To view disc play, turn on the TV to •
the correct viewing channel for this
DVD player.
If play does not start automatically, •
press
.
4 To stop disc play, press .
Play
English
EN
16
Change video play
1 Play a title.
2 Use the remote control to change the
video play.
Button Action
AUDIO Selects an audio language or
channel on a disc.
Only applicable to discs with
multiple audio language or
channel.
SUBTITLE Selects the subtitle language on
a disc.
Only applicable to discs with
multiple subtitle language.
REPEAT Selects or turns off repeat mode.
Repeat options vary depending
on the disc type.
For VCD/SVCD, repeat play is
only possible if the PBC mode is
turned off.
ZOOM
(Screen
Fit)
Fits the picture format to the TV
screen.
Press repeatedly until the image
is scaled to t to the TV screen.
ZOOM Toggles between screen aspect
ratio and different zoom factor.
To pan through the zoomed
image, press the Navigation
buttons .
INFO Displays the current status or
disc information.
You can change the video play
options here without interrupting
disc play.
Note
Some operations may not work with some discs. See •
the information accompanying the disc for details.
Play video
Note
For video disc, play always resumes from the point •
where it was last stopped. To start play from the
beginning, press
while the message is displayed.
Control a title
1 Play a title.
2 Use the remote control to control the
title.
Button Action
Starts, pauses or resumes disc
play.
Stops disc play.
Skips to the next title or chapter.
Skips to the beginning of the
current title or chapter. Press
twice to jump to the previous
title or chapter.
, Searches fast-forward (right)
or fast-backward (left). Press
repeatedly to change the search
speed.
, Searches slow-forward (up) or
slow-backward (down). Press
repeatedly to change the search
speed.
For VCD/SVCD, slow-backward
search is not available.
EN
17
Quick skip play to a speci c time
1 During play, press INFO .
The disc status menu is displayed. »
2 Select the current elapsed playing time,
then press
.
• [TT Time] (title time)
• [Ch Time] (chapter time)
• [Disc time] (disc time)
• [Track time] (track time)
3 Press the Numeric buttons to enter the
time where you want to skip to, then
press OK
Display play time
1 During play, press INFO .
The disc status menu is displayed. »
2 Select [Time Disp.] , then press .
The display options are different »
depending on the disc type.
Option Action
[Title Elapsed]
/ [Chapter
Elapsed]
Displays DVD title or
chapter elapsed play time.
[Title Remain]
/ [Chapter
Remain]
Displays DVD title or
chapter remaining play
time.
[Total Elapsed] /
[Single Elapsed]
Displays VCD/SVCD disc
or track elapsed play time.
[Total Remain] /
[Single Remain]
Displays VCD/SVCD disc
or track remaining play
time.
3 Select an option, then press OK .
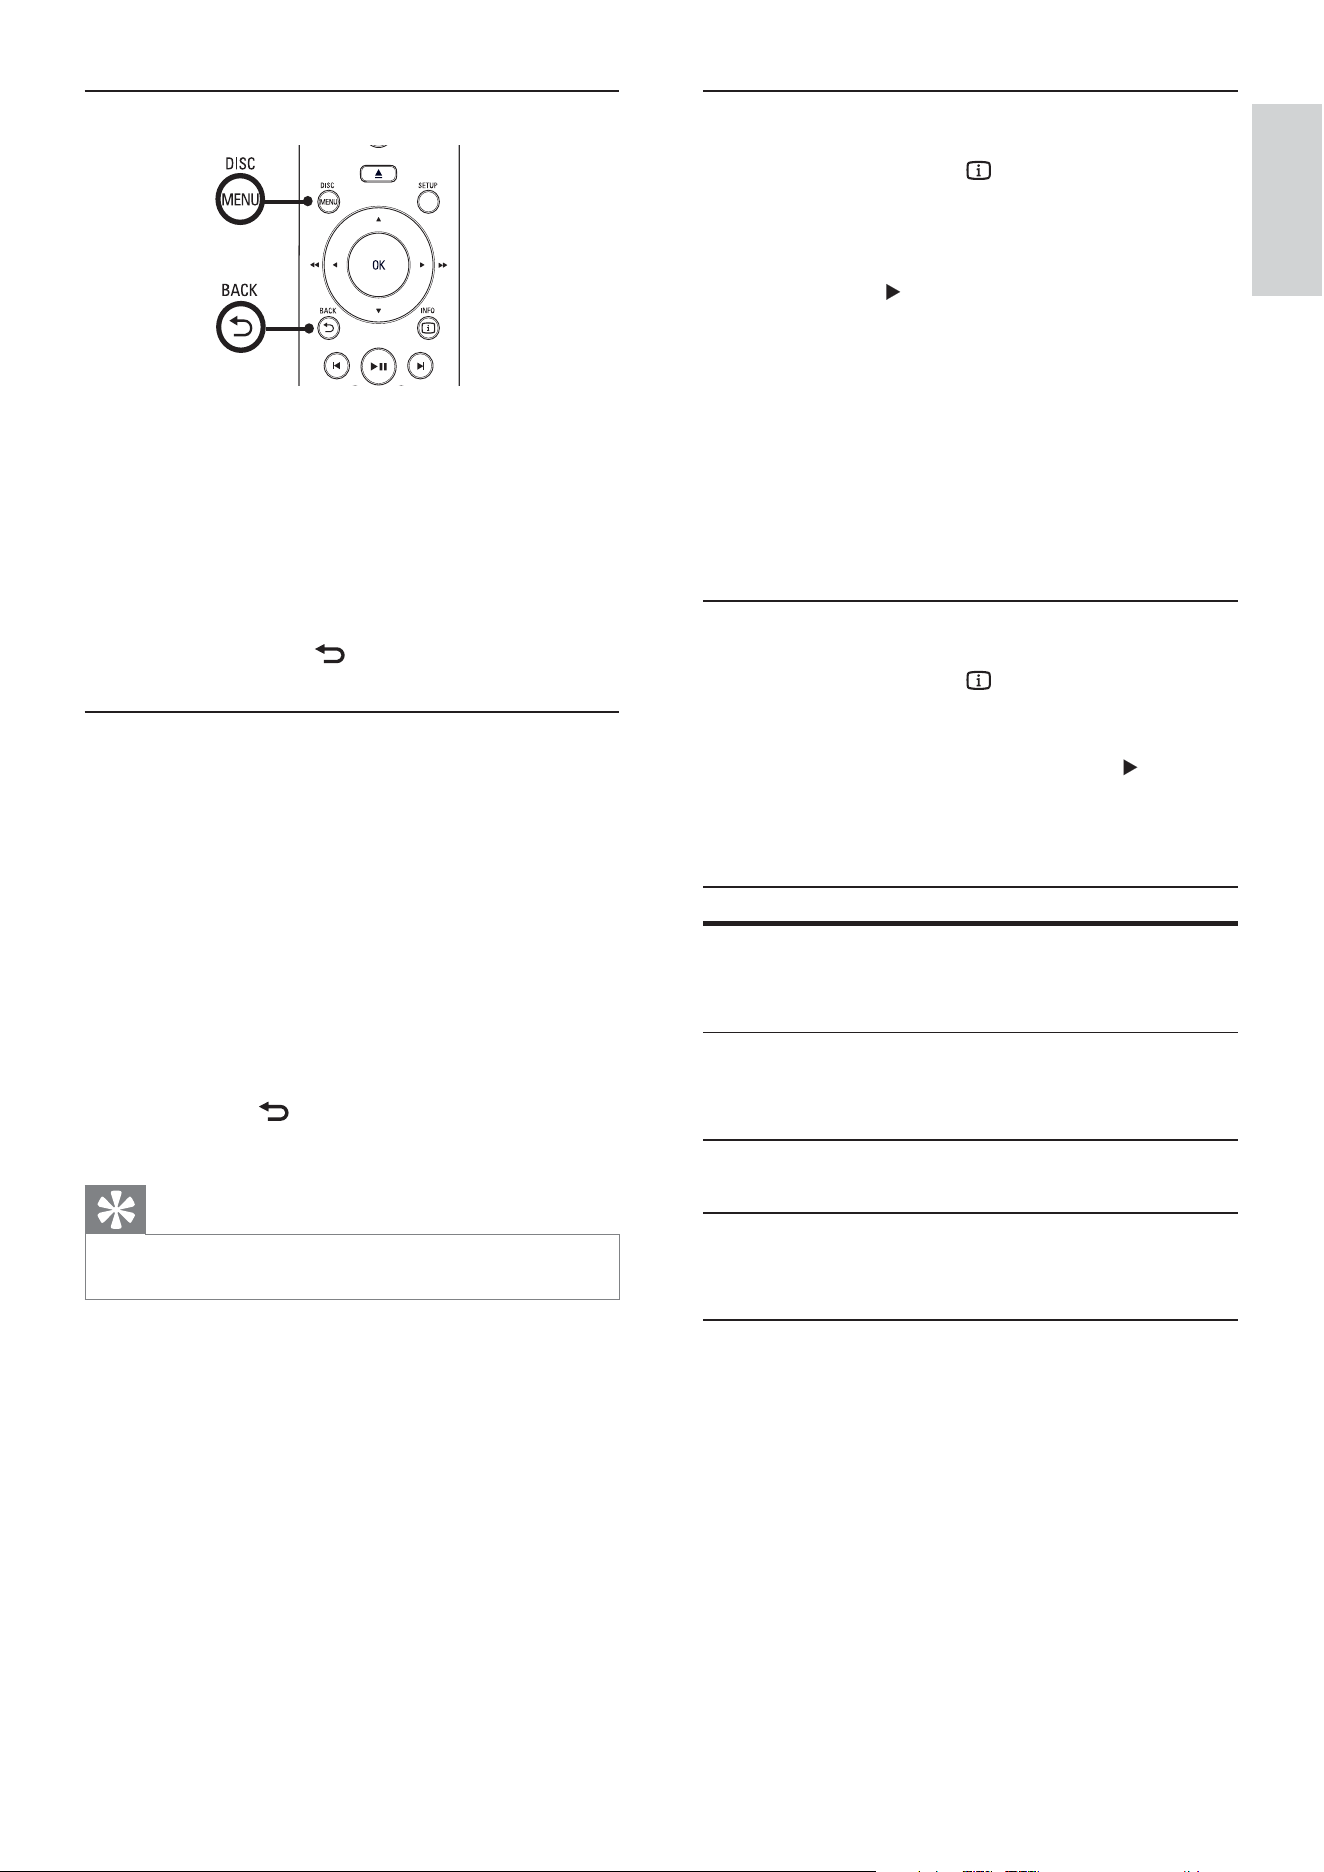
Access DVD menu
1 Press DISC MENU to access disc main
menu.
2 Select a play option, then press OK .
In some menus, press the • Numeric
buttons to input your selection.
To return to the title menu during •
play, press
BACK .
Access VCD menu
The PBC (Playback Control) for VCD/SVCD
is turned on by default in the factory. When
you load in a VCD/SVCD, the contents menu
is displayed.
1 Press Numeric buttons to select a play
option, then press OK to start play.
If PBC is off, it skips the menu and •
starts play from the rst track.
To return to the menu during play, •
press
BACK (only possible if the
PBC mode is on).
Tip
Press • DISC MENU to turn on or off the PBC mode.
Play
English
EN
18
Play music
Note
For some commercial audio discs, play may resume •
from the point where it was last stopped. To start
play from the rst track, press
.
Control a track
1 Play a track.
2 Use the remote control to control the
track.
Button Action
Starts, pauses or resumes
disc play.
Stops disc play.
Skips to the next track.
Skips to the beginning of
the current track. Press
twice to jump to the
previous track.
Selects an item to play.
, Searches fast-forward
(right) or fast-backward
(left). Press repeatedly to
change the search speed.
To change search
speed, press this button
repeatedly.
View video play from different camera
angles
1 During play, press INFO .
The disc status menu is displayed. »
2 Select [Angle] , then press .
3 Press the Numeric buttons to change the
angle.
Play changes to the selected angle. »
Note
Applicable only to discs containing multi-angle •
scenes.
Repeat play a speci c section
1 During play, press REPEAT A-B where
you want to set as the starting point.
2 Press REPEAT A-B again to set the
ending point.
Repeat play starts. »
3 To cancel repeat play, press REPEAT A-B
again.
Note
The marked section for repeat play is only possible •
within a track/title.
EN
19
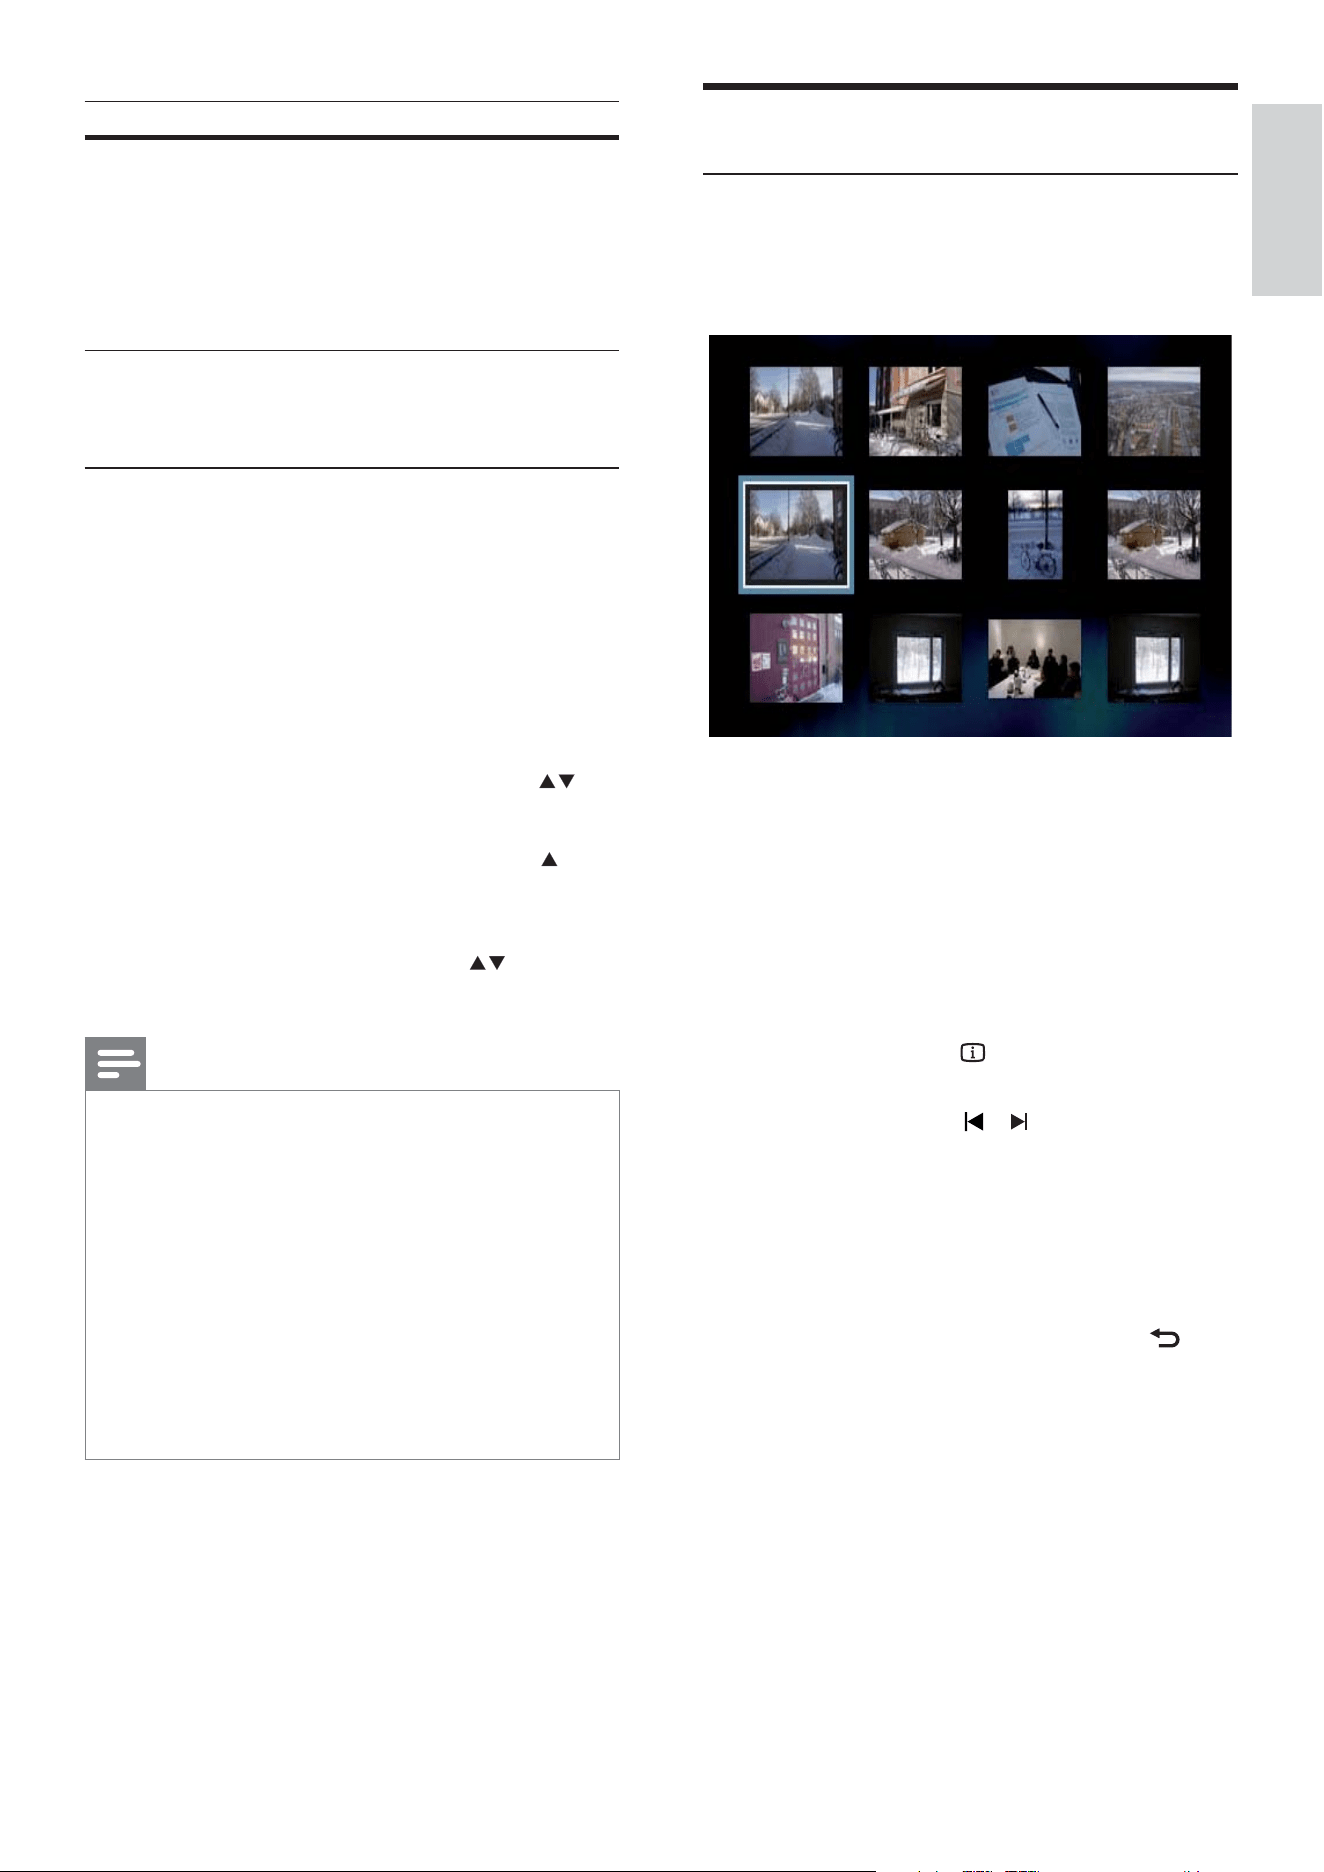
Play photo
Play photo as slideshow
This DVD player can play JPEG photos ( les
with .jpeg or .jpg extensions).
1 Insert a disc that contains the JPEG
photos.
Slideshow begins (for Kodak disc) or »
a contents menu (for JPEG disc) is
displayed.
2 Select the folder/album you want to play.
To preview the photos in the folder/•
album, press
INFO .
To go to previous or next screen •
display, press
/ .
To select a photo, press the •
Navigation buttons .
To display the selected photo only, •
press OK .
3 Press OK to start slideshow play.
To return to the menu, press •
BACK .
Button Action
REPEAT Toggle through various
repeat play modes; or
turn off repeat mode.
Repeat options vary
depending on the disc
type.
Play MP3/WMA music
MP3/WMA is a type of highly compressed
audio le ( les with .mp3, .wma extensions).
1 Insert a disc that contains the MP3/WMA
music.
A contents menu is displayed. »
2 Play starts.
To select another track, press •
,
then press OK .
3 To return to the main menu, press until
the root menu is selected, then press
OK .
To select a folder, press •
, then
press OK .
Note
For CDs recorded in multiple sessions, only the rst •
session is played.
This DVD player does not support MP3PRO audio
•
format.
If any special characters are present in the MP3
•
track name (ID3) or album name, it may not display
correctly on the screen because these characters are
not supported.
Some WMA is protected by Digital Rights
•
Management (DRM), it cannot be played on this
DVD player.
Folders/ les exceeding the supported limit of this
•
DVD player are not displayed or played.
Play
English
EN
20
Play musical slideshow
Play MP3 music les and JPEG photo les
simultaneously to create musical slideshow.
The MP3 and JPEG les must be stored on the
same disc.
1 Play MP3 music.
2 Navigate to the photo folder/album and
press OK to start slideshow play.
Slideshow begins and continues till the »
end of the photo folder or album.
Audio continues to play till the end of »
the disc.
To return to the menu, press •
BACK .
To stop slideshow play, press •
.
To stop music play, press •
again.
Note
You may require longer time to display the disc •
content on the TV due to the large number of songs/
photos compiled onto one disc.
If the JPEG photo is not recorded with an ‘exif’ type
•
le, the actual thumbnail picture is not shown on the
display. It is replaced by a ‘blue mountain’ thumbnail
picture.
This DVD player can only display digital camera
•
pictures according to the JPEG-EXIF format, typically
used by almost all digital cameras. It cannot display
Motion JPEG and pictures in formats other than
JPEG, or sound clips associated with pictures.
Folders/ les that exceed the supported limit of this
•
DVD player are not displayed or played.
Control photo play
1 Play photo slideshow.
2 Use the remote control to control the
photo.
Button Action
Rotates the photo anti-
clockwise.
Rotates the photo clockwise.
Rotates the picture 180°.
Rotates the picture 180°.
ZOOM Zooms in or out of the
picture.
Play pause in zoom mode.
Stops play.
EN
21
2 Press .
3 Select an option, then press OK .
4 Select a setting, then press OK .
To return to the previous menu, •
press
.
To exit the menu, press • SETUP .
[OSD Language]
Selects the default on-screen menu language.
[Auto Standby]
Turns off or on automatic standby switching
mode. It is an energy saving feature.
• [On] – Switches to standby after 15
minutes of inactivity (for example, in
pause or stop mode).
• [Off] – Disables auto standby mode.
Audio setup
1 Press SETUP .
» [General Setup] menu is displayed.
2 Press to select [Audio Setup] , then
press
.
3 Select an option, then press OK .
4 Select a setting, then press OK .
To return to the previous menu, •
press
.
To exit the menu, press • SETUP .
Night Mode
Volume
Digital Output
Down Sampling
Audio Setup
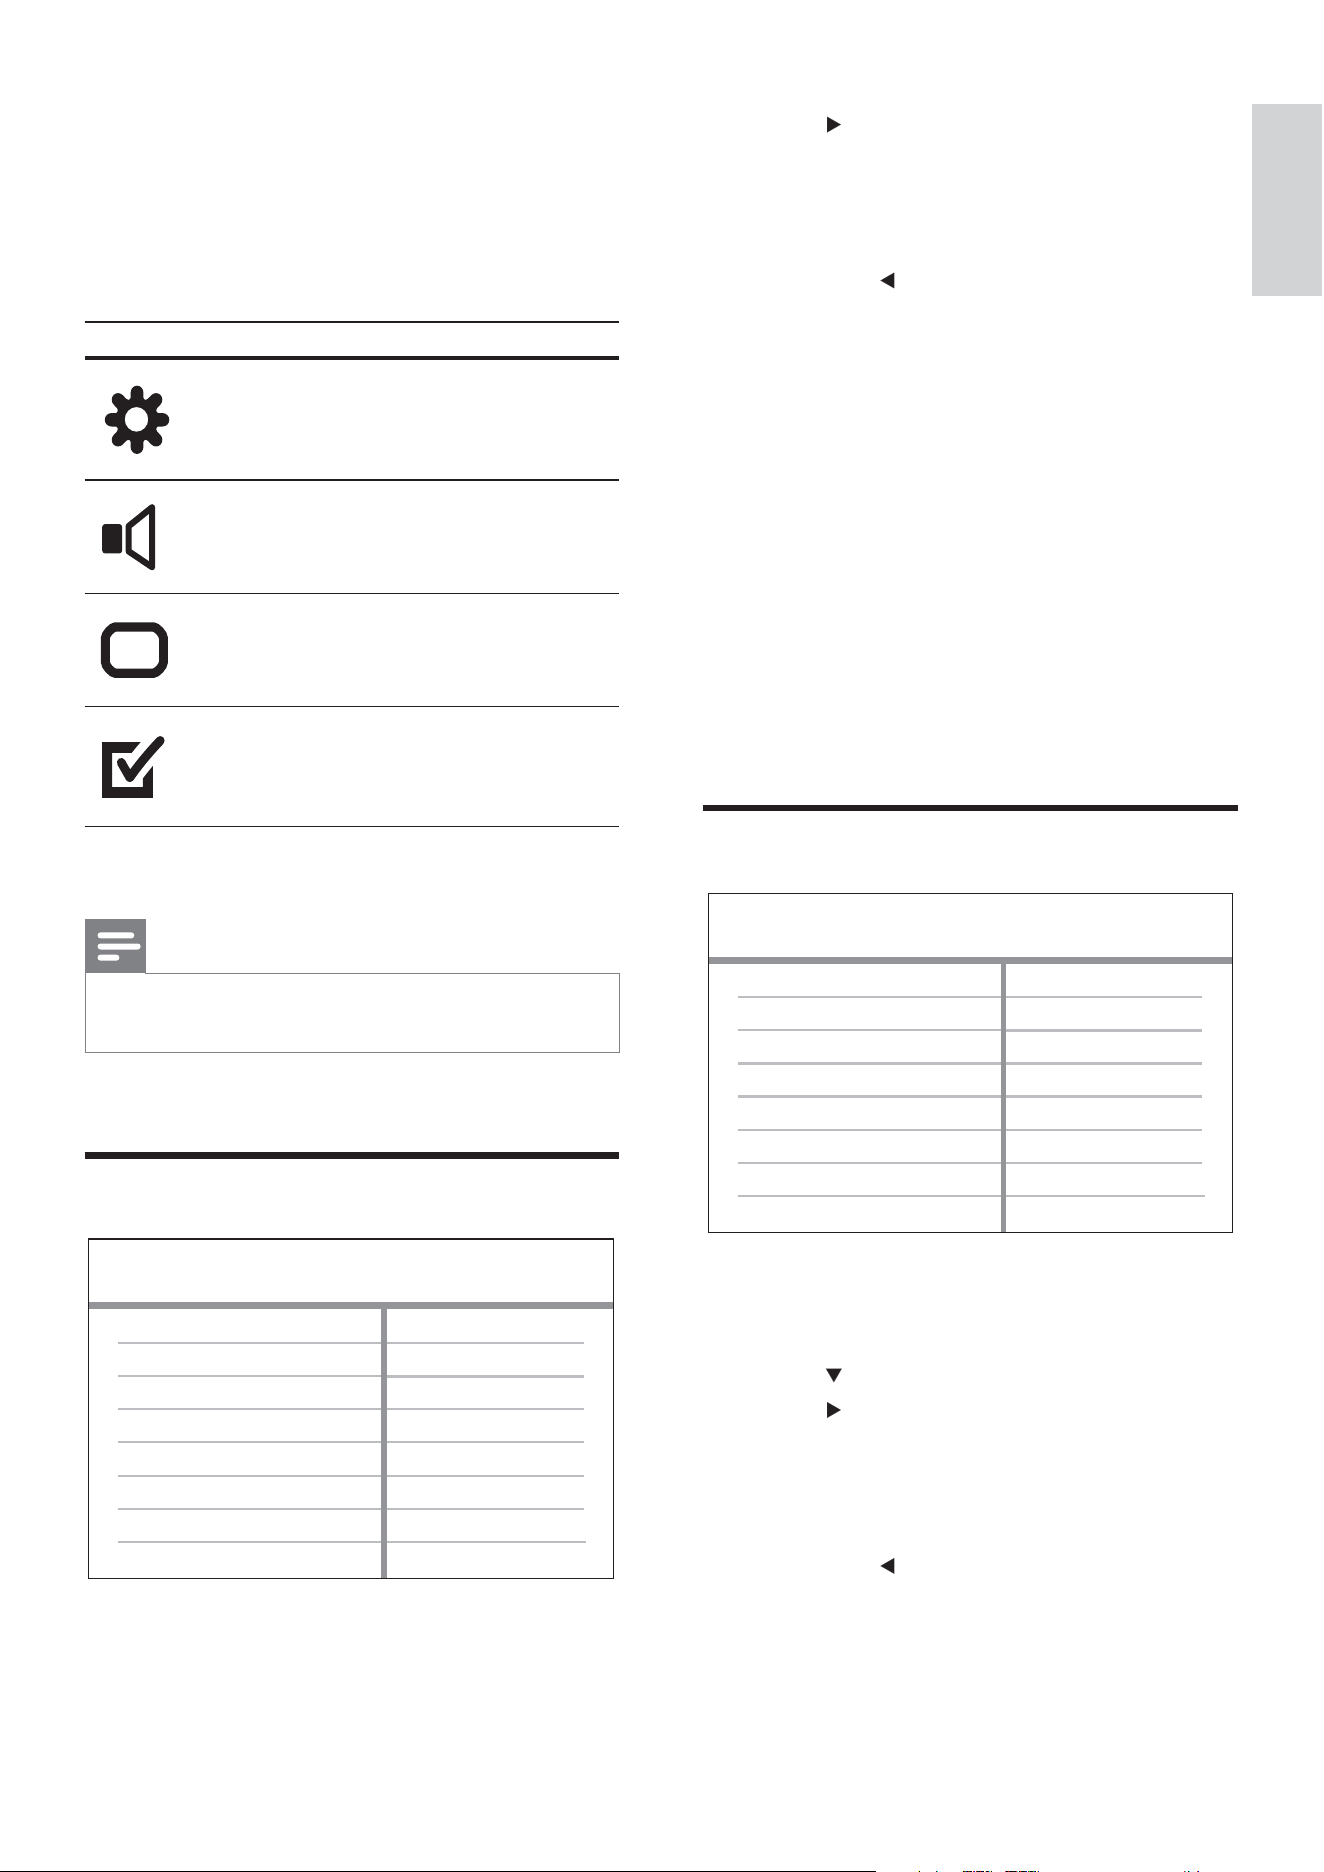
6 Adjust settings
This section describes the various setting
options of this DVD player.
Symbol Option
[General Setup]
[Audio Setup]
[Video Setup]
[Preferences]
Note
If the setup option is grayed out, it means the setting •
cannot be changed at the current state.
General setup
1 Press SETUP .
» [General Setup] menu is displayed.
Auto Standby
OSD Language
General Setup
Adjust settings
English
EN
22
Video setup
1 Press SETUP .
» [General Setup] menu is displayed.
2 Press to select [Video Setup] , then
press
.
3 Select an option, then press OK .
4 Select a setting, then press OK .
To return to the previous menu, •
press
.
To exit the menu, press • SETUP .
Note
See the explanations of the above options in the •
following pages.
[TV System]
Change this setting if the video does not
appear correctly. By default, this setting
matches the most common setting for TVs in
your country.
• [NTSC] – For NTSC-system TV.
• [PAL] – For PAL-system TV.
• [Multi] – For TV that is compatible with
both PAL and NTSC.
Con rm the setting by pressing
to select
[Yes] , then press OK .
Video Setup
Component Video
TV Display
TV System
Picture Setting
Note
See the explanations of the above options in the •
following pages.
[Digital Output]
Selects the setting based on the digital
ampli er/receiver that is connected through
the digital jack.
• [Off] - Disables digital output.
• [PCM] - Downmixes to PCM format (2
channel).
• [All] - Supports multi-channel audio
formats.
[Volume]
Sets the default volume level when you play
a disc.
1. Press OK .
2. Press
to set the volume.
3. Press OK to con rm and exit.
[Down Sampling]
Selects the output sampling rate for better
sound quality.
• [On] - for discs recorded at a sampling
rate of 48 kHz.
• [Off] - for discs recorded at a sampling
rate of 96 kHz.
[Night Mode]
Makes loud sound level softer and soft sound
level louder so that you can watch the DVD
movies at a low volume, without disturbing
others.
• [On] – Enjoy quiet viewing at night.
• [Off] – Enjoy surround sound with a full
dynamic range.
Note
Applicable only to Dolby Digital encoded DVD. •
EN
23
Preferences
Note
Stop disc play before you can access to • [Preferences].
1 Press SETUP .
» [General Setup] menu is displayed.
2 Press to select [Preferences] , then
press
.
3 Select an option, then press OK .
4 Select a setting, then press OK .
To return to the previous menu, •
press
.
To exit the menu, press • SETUP .
Note
See the explanations of the above options in the •
following pages.
[Audio]
Selects the default audio language for disc play.
[Subtitle]
Selects the default subtitle language for disc
play.
Preferences
Parental Control
Version Info
Password
Subtitle
Audio
Disc Menu
Default
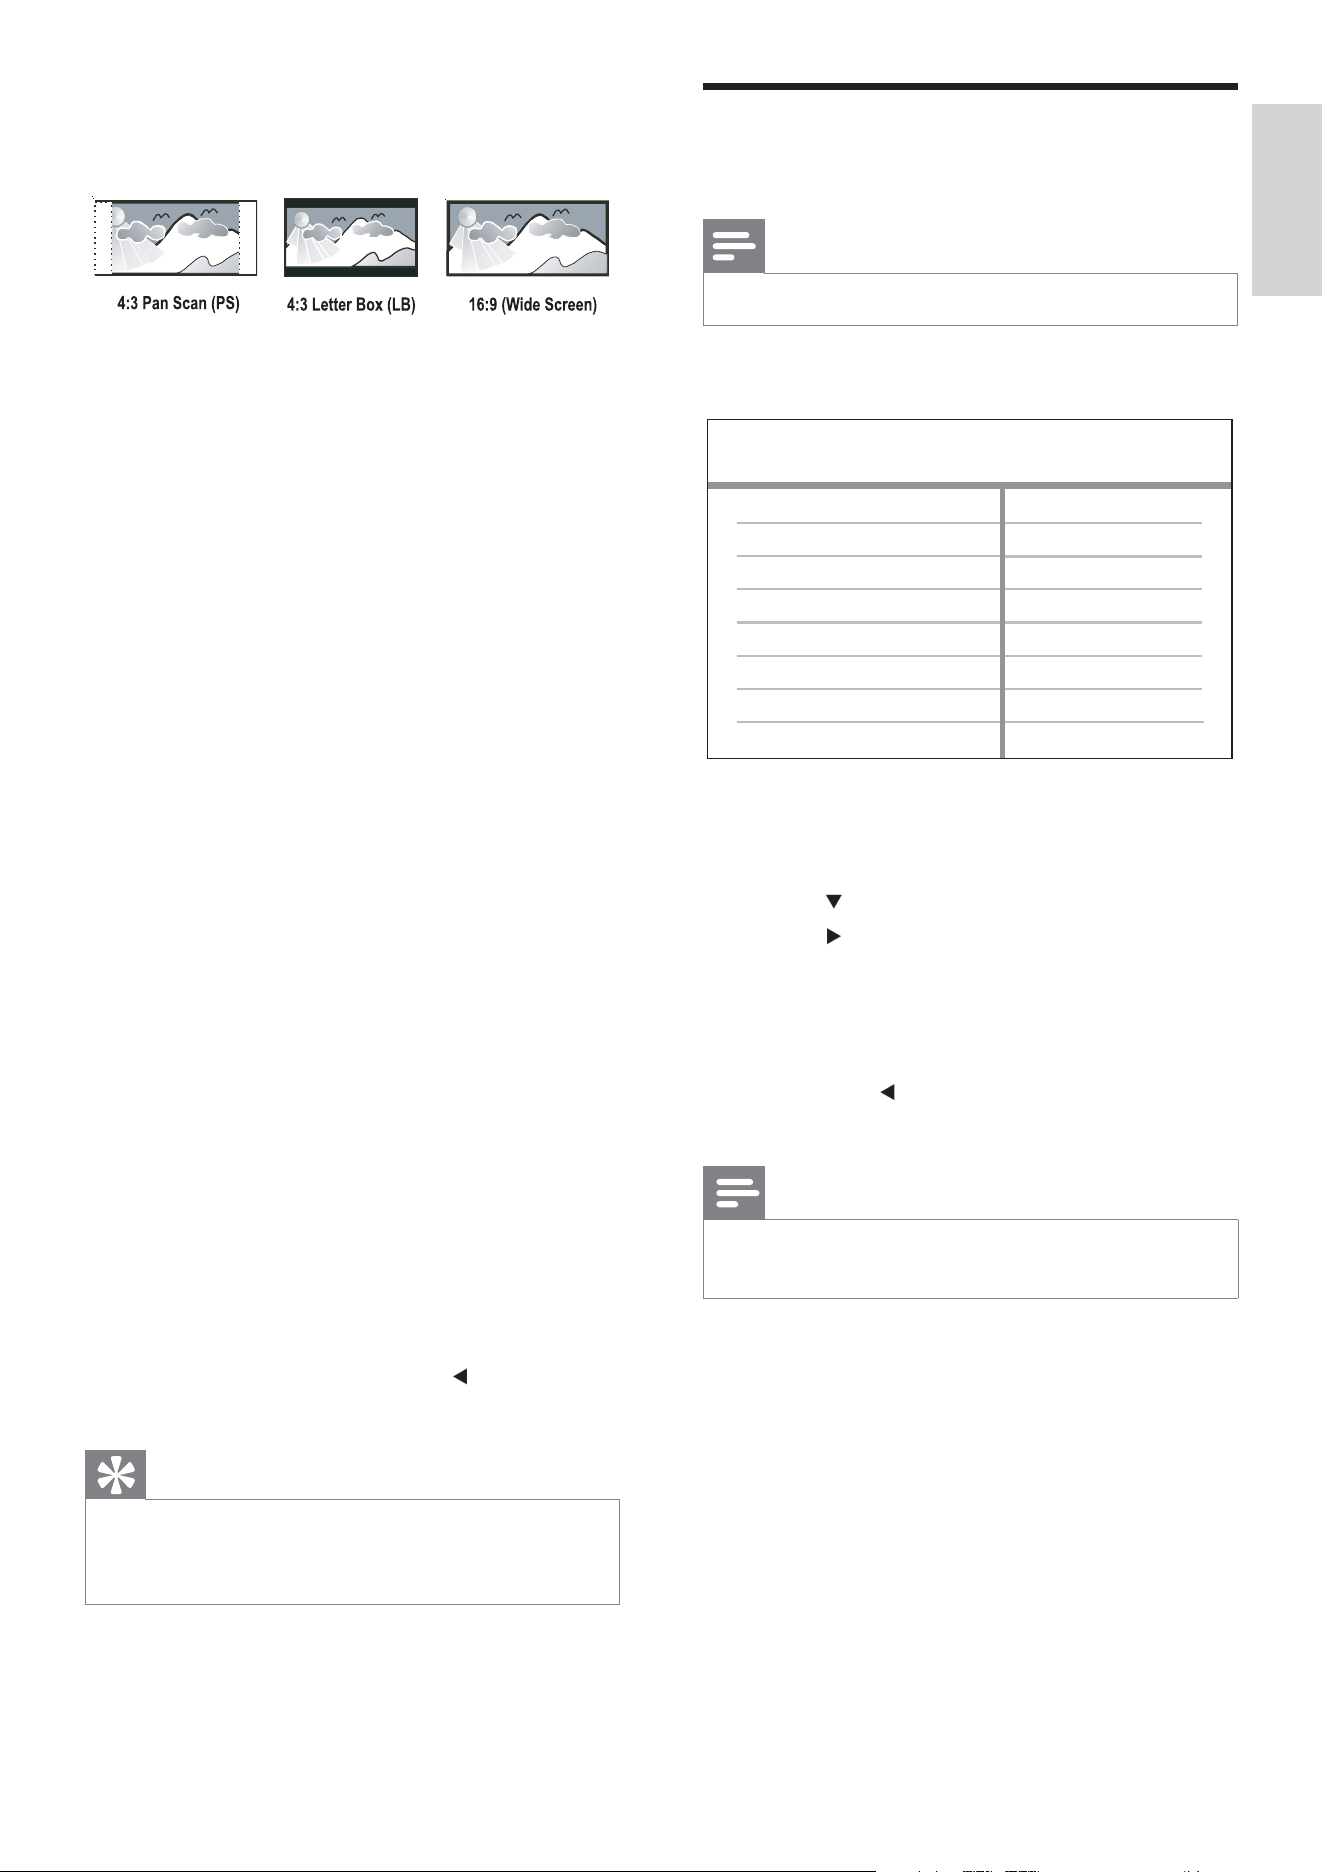
[TV Display]
Selects one of the following display formats:
• [4:3 Pan Scan] – For 4:3 screen TV: full-
height display with the trimmed sides.
• [4:3 Letter Box] – For 4:3 screen TV:
wide-screen display with black bars on
the top and bottom of the screen.
• [16:9] – For wide-screen TV: display ratio
16:9.
[Picture Setting]
Selects a prede ned set of picture colour
settings or customises the personal setting.
• [Standard] – Original colour setting.
• [Bright] – Vibrant colour setting.
• [Soft] – Warm colour setting.
• [Personal] – Customises the colour
setting. Set the level of brightness,
contrast, tint and colour saturation, then
press OK .
[Component Video]
Selects the video output that matches the
video connection between this DVD player
and the TV.
• [Interlaced] – Component video ( Y Pb
Pr ) connection.
• [RGB] – Scart ( TV OUT ) connection.
• [P-Scan] - Component video ( Y Pb Pr )
connection with progressive scan mode.
Con rm the setting by pressing
to select
[Yes] , then press OK .
Tip
A more detailed description is available. See the •
‘Get started - Turn on Progressive Scan’ chapter for
details.
Adjust settings
English
EN
24
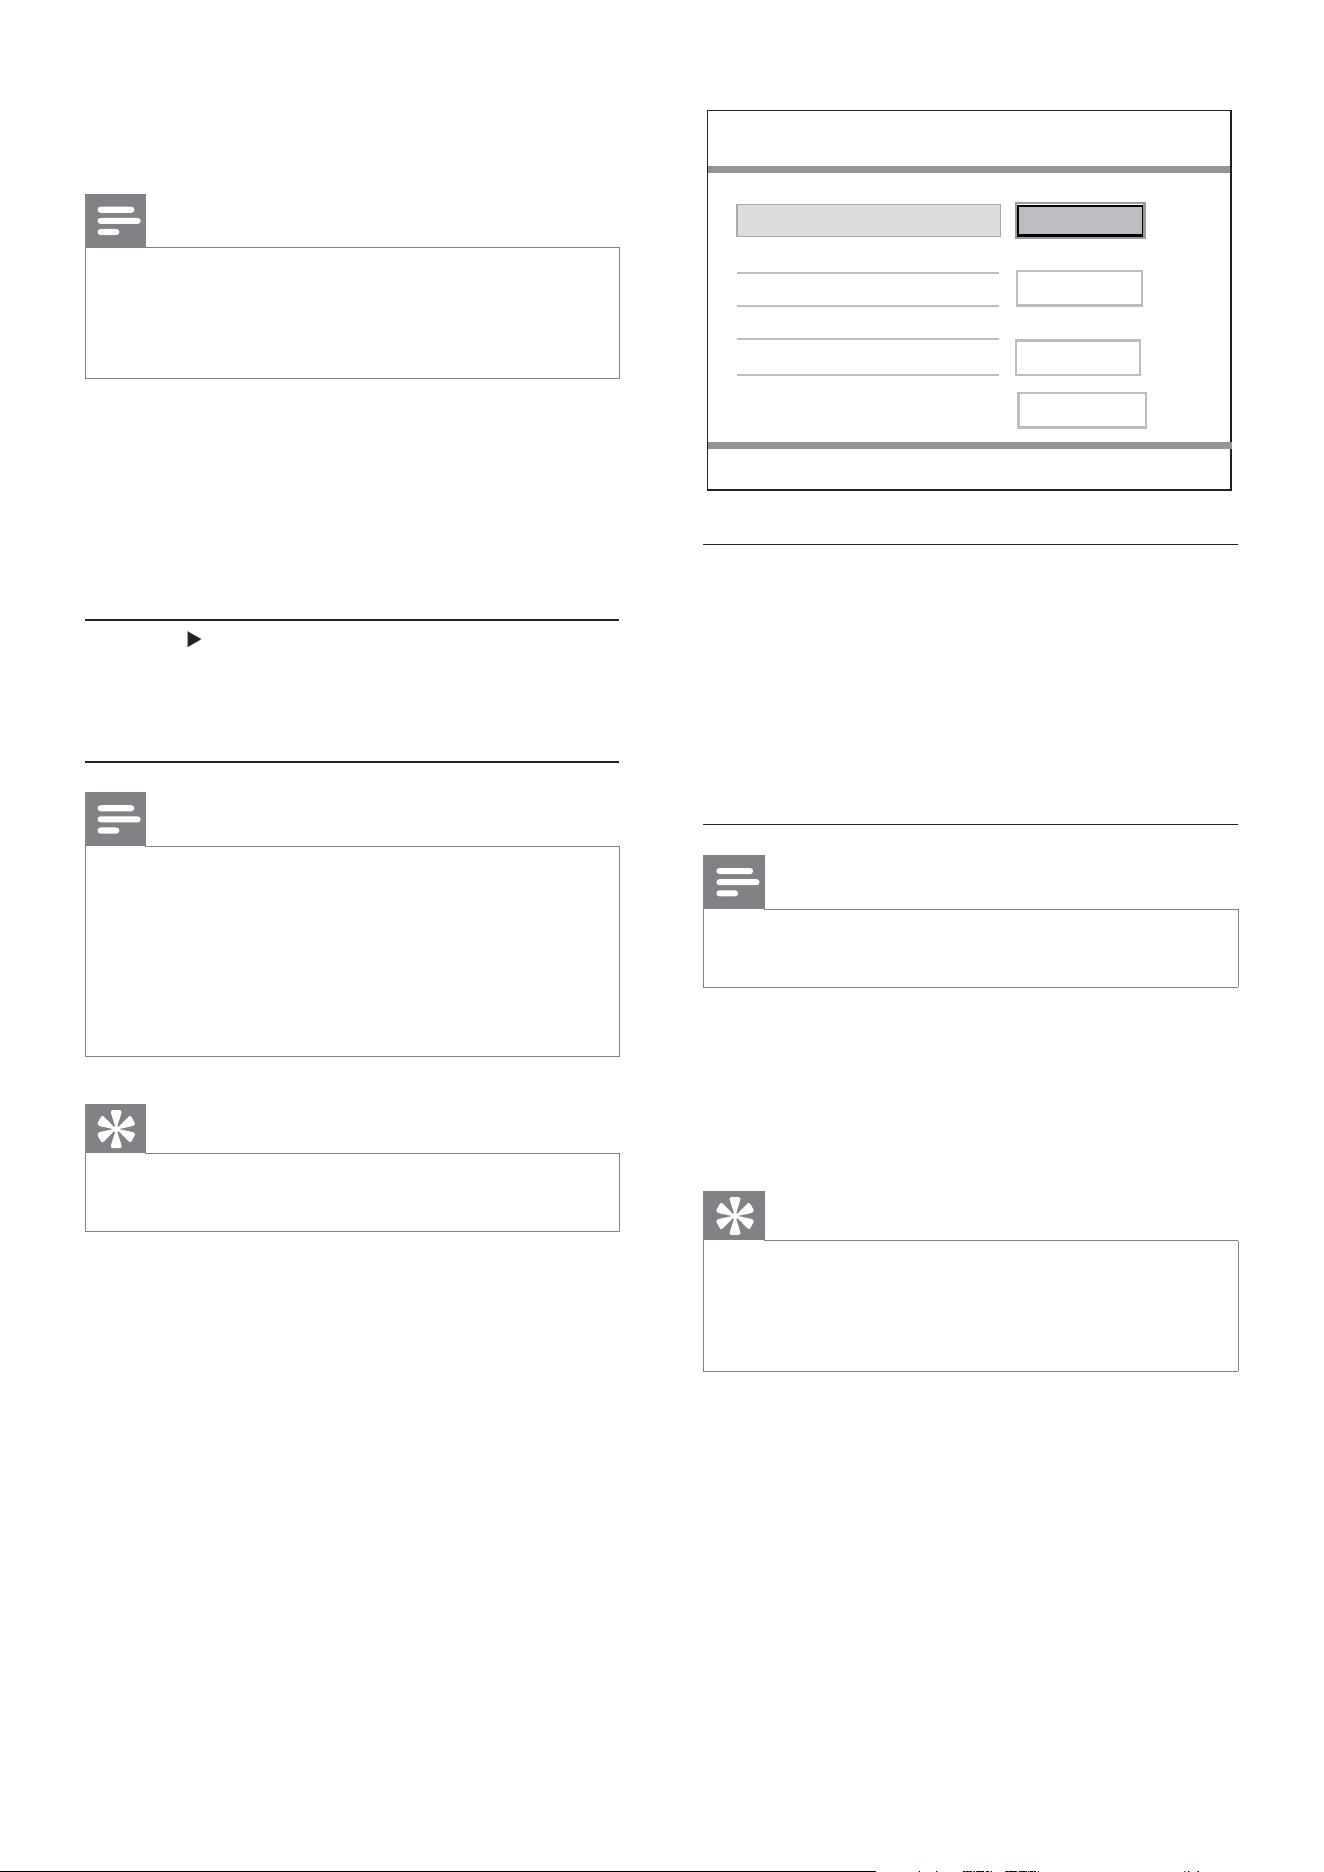
1) Press the Numeric buttons to enter
‘0000’ or the last set password at [Old
Password] eld.
2) Enter the new password at [New
Password] eld.
3) Enter the new password again at [Con rm
new password] eld.
4) Press OK to exit the menu.
Note
If you forget the password, enter ‘0000’ before you •
set a new password.
[Version Info]
Displays the software version of this DVD
player.
Tip
This information is required when you want to nd •
out if a newer software version is available at the
Philips website that you may download and install on
this DVD player.
[Default]
Resets all the settings of this DVD player to
factory default, except for [Parental Control]
and [Password] settings.
New Password
Confirm new password
Old Password
Preferences
Change password
OK
[Disc Menu]
Selects the disc menu language.
Note
If the language you have set is not available on the •
disc, the disc uses its own default language.
For some DVDs, the subtitle/audio language can only
•
be changed from the disc menu.
[Parental Control]
Restricts access to discs that are unsuitable
for children. These types of discs must be
recorded with ratings.
1. Press .
2. Select a rating level, then press OK .
3. Press the Numeric buttons to enter the
password.
Note
DVDs rated above the level you set in • [Parental
Control] require a password to be played.
The ratings are country-dependent. To allow all discs
•
to play, select ‘ 8 ’.
Some discs have ratings printed on them but are not
•
recorded with ratings. This function has no effect on
such discs.
Tip
You can set or change the password, go to •
[Preferences] > [Password] .
[Password]
Sets or changes the password for locked discs
and play restricted DVDs.
EN
25
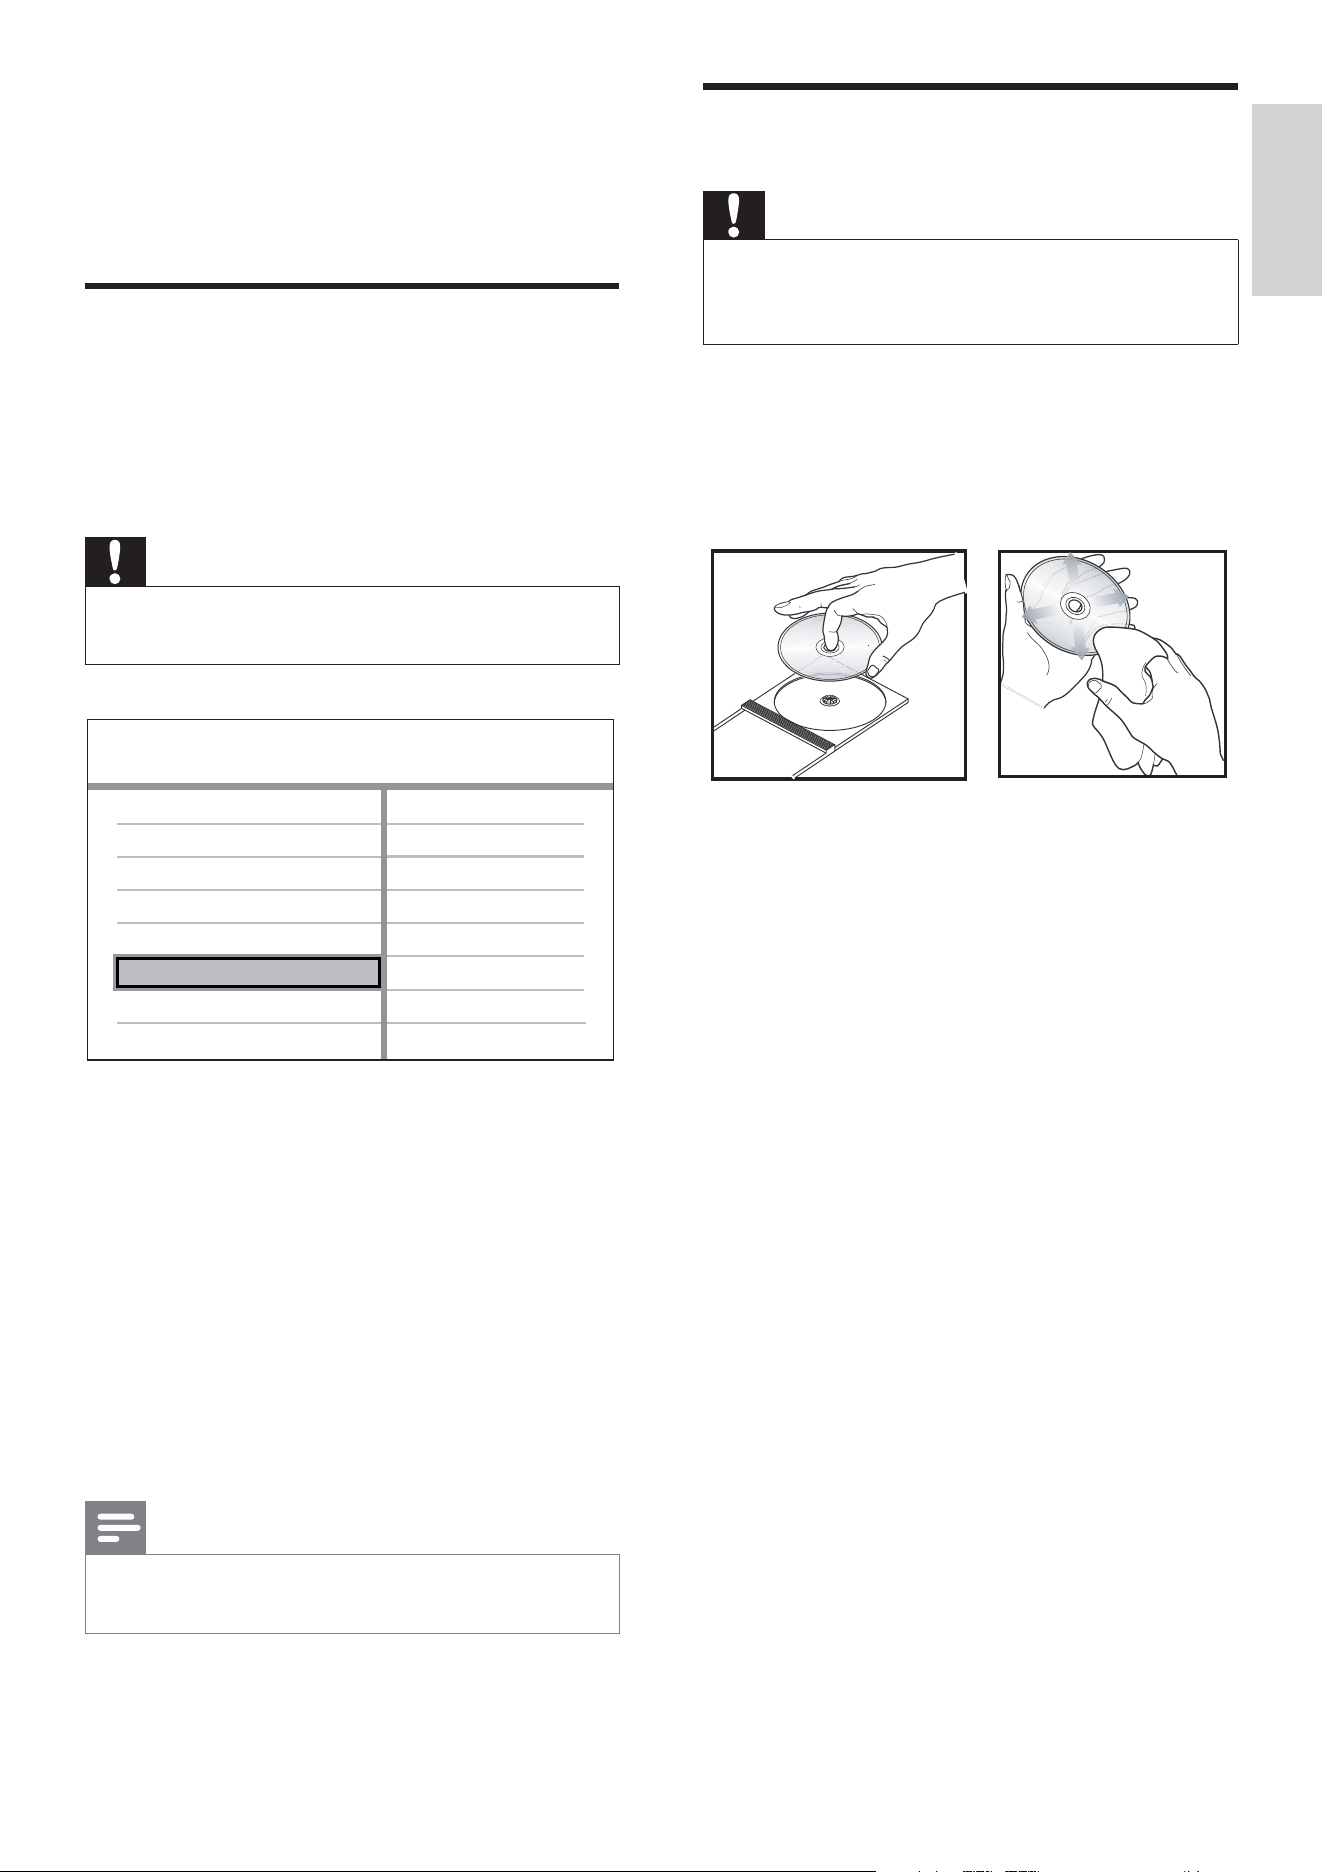
Care
Caution
Never use solvents such as benzene, thinner, •
cleaners available commercially or anti-static sprays
intended for discs.
Clean discs
Wipe the disc with a micro bre cleaning cloth
from the centre to the edge in a straight line
movement.
7 Additional
information
Update software
To check for new updates, compare the current
software version of your DVD player with
the latest software version (if available) at the
Philips website.
Caution
Power supply must not be interrupted during •
software upgrade.
1 Press SETUP .
2 Select [Preferences] > [Version Info] ,
then press OK .
3 Write down the le name, then press
SETUP to exit the menu.
4 Visit www.philips.com/support to check
for the latest software version, using the
le name for this DVD player.
5 Refer to the upgrade instructions for
more information.
Note
Disconnect the power cord for a few seconds and •
connect again to reboot the system.
Preferences
Parental Control
Password
Subtitle
Audio
Disc Menu
Default
Version Info
Additional information
English
EN

26
Audio performance
DA converter: 24 bits, 192 kHz•
Frequency response: •
DVD: 4 Hz - 22 kHz (48 kHz); •
4 Hz - 44 kHz (96 kHz)
SVCD: 4 Hz - 20 kHz (44.1 kHz); •
4 Hz - 22 kHz (48 kHz)
CD/VCD: 4 Hz - 20 kHz (44.1 kHz) •
Signal-Noise (1 kHz): > 100 dB (A-•
weighted)
Dynamic range (1 kHz): > 90 dB •
(A-weighted)
Crosstalk (1 kHz): > 100 dB•
Distortion/noise (1 kHz): > 85 dB•
MPEG MP3: MPEG Audio L3•
Audio format
Digital: •
MPEG/AC-3/PCM: Compressed •
digital (16, 20, 24 bits fs, 44.1, 48, 96
kHz)
MP3 (ISO 9660): 96, 112, 128, 256 •
kbps & variable bit rate fs, 32, 44.1,
48 kHz
Analogue sound stereo•
Dolby surround compatible downmix •
from Dolby Digital multi-channel sound
Connections
Scart output: Euroconnector•
Y Pb Pr output: Cinch 3x•
Video output: Cinch (yellow)•
Audio output (L+R): Cinch (white/red)•
Digital output: •
1 coaxial: IEC60958 for CDDA/•
LPCM; IEC61937 for MPEG 1/2,
Dolby Digital
8 Specification
Note
Speci cation and design are subject to change •
without notice.
Accessories supplied
Quick Start Guide•
Remote control and batteries•
User Manual CD (use for PC & Mac)•
Playback media
DVD-Video, Video CD/SVCD, Audio CD, •
CD-R/CD-RW, DVD+R/+RW, DVD-R/-
RW, Picture CD, MP3-CD, WMA-CD
TV standard
Number of lines:•
625 (PAL/50Hz); 525 (NTSC/60Hz)•
Playback: Multi-standard (PAL/NTSC)•
Video performance
Video DAC: 14 bits, 108 MHz•
Y Pb Pr: 0.7 Vpp ~ 75 ohm•
Video output: 1 Vpp ~ 75 ohm•
Video format
Digital compression:•
MPEG 2: DVD/SVCD•
MPEG 1: VCD•
Horizontal resolution:•
DVD: 720 pixels (50 Hz); 720 pixels •
(60 Hz)
VCD: 352 pixels (50 Hz); 352 pixels •
(60 Hz)
Vertical resolution:•
DVD: 576 pixels (50 Hz); 480 pixels •
(60 Hz)
VCD: 288 lines (50 Hz); 240 lines •
(60 Hz)
EN

27
Main unit
Dimensions (w x h x d): 360 x 37 x 209 •
(mm)
Net Weight: approximately 1.3 kg•
Power
Power supply rating: •
For U.K.: 240 V; 50 Hz•
For the rest of the Europe: 230 V; •
50 Hz
Power consumption: < 10 W•
Power consumption in standby mode: < •
1 W
Laser speci cation
Type: Semiconductor laser InGaAIP •
(DVD), AIGaAs (CD)
Wave length: 655 nm (DVD), 790 nm •
(CD)
Output Power: 10 mW (DVD), 5 mW •
(VCD/CD)
Beam divergence: 60 degrees•
Speci cation
English
EN

28
9 Troubleshooting
Warning
Risk of electric shock. Never remove the casing of •
the DVD player.
To keep the warranty valid, never try to repair
the system yourself.
If you encounter problems when using the
DVD player, check the following points before
requesting service. If the problem remains
unsolved, register your DVD player and get
support at www.philips.com/welcome.
If you contact Philips, you will be asked for the
model and serial number of your DVD player.
The model number and serial number are on
the back or underside of your DVD player.
Write the numbers here:
Model No. __________________________
Serial No. ___________________________
Main unit
The buttons on this unit do not work.
Disconnect this DVD player from the •
power outlet for a few minutes, then
connect again.
Picture
No picture.
See the TVs user manual on how to •
select the correct input on the TV.
Change the TV channel until you see the
Philips screen.
If you have turned on the progressive scan
setting or change the TV system setting,
switch back to default mode: 1) Press
to
open the disc compartment. 2) Press the
Numeric button ‘1’ (for progressive scan) or
the Numeric button ’3’ (for TV system).
Sound
No sound.
Ensure that the audio cables are connected •
and the connected device is turned on to
the correct input source.
Play
The aspect ratio of the screen is not aligned
with the TV display setting.
The aspect ratio is xed on the disc.•
EN

29
10 Glossary
A
Aspect ratio
Aspect ratio refers to the length to height
ratio of TV screens. The ratio of a standard
TV is 4:3, while the ratio of a high-de nition or
wide TV is 16:9. The letter box allows you to
enjoy a picture with a wider perspective on a
standard 4:3 screen.
J
JPEG
A very common digital still picture format.
A still-picture data compression system
proposed by the Joint Photographic Expert
Group, which features small decrease in image
quality in spite of its high compression ratio.
Files are recognized by their le extension ‘.jpg’
or ‘.jpeg.’
M
MP3
A le format with a sound data compression
system. MP3 is the abbreviation of Motion
Picture Experts Group 1 (or MPEG-1) Audio
Layer 3. With the MP3 format, one CD-R or
CD-RW can contain about 10 times more
data than a regular CD.
P
PBC
Playback Control. A system where you
navigate through a Video CD/Super VCD with
on-screen menus that are recorded onto the
disc. You can enjoy interactive playback and
search.
Progressive scan
The progressive scan displays twice the
number of frames per second than in an
ordinary TV system. It offers higher picture
resolution and quality.
W
WMA
Windows Media™ Audio. Refers to an
audio compression technology developed by
Microsoft Corporation. WMA data can be
encoded with Windows Media player version
9 or Windows Media player for Windows XP.
Files are recognised by their le extension
‘.wma.’
Glossary
English
EN

30

31

© 2009 Koninklijke Philips Electronics N.V.
All rights reserved.
sgptt_0913/05/12_1