
Loading ...
Loading ...
Loading ...
• Cut at a steady pace. If the blade begins to bog down, you
are edging too fast; slow your pace. Do not force the
blade into ground.
• Light contact of the blade against the sidewalk edge,
curb, etc., is acceptable and will not damage the edger.
• Best appearance is obtained when grass is dry. Avoid
edging in wet soil or wet grass areas or the blade guard
might clog and result in an uneven edge. If the blade
guard becomes clogged, stop the edger, remove the
battery, and remove debris from the blade guard.
10 MAINTENANCE
IMPORTANT
Read and understand the safety regulations and the
maintenance instructions before you clean, repair or do the
maintenance work on the machine.
IMPORTANT
Make sure that all nuts, bolts and screws are tight. Examine
regularly that you install the handles tightly.
IMPORTANT
Use only the replacement parts and accessories of the initial
manufacturer.
10.1 GENERAL INFORMATION
IMPORTANT
Only your dealer or approved service center can do the
maintenance that is not given in this manual.
Before the maintenance operations:
• Stop the machine.
• Remove the battery pack.
• Cool the motor.
• Store the machine in cool and dry place.
• Use correct clothing, protective gloves and safety glasses.
10.2 CLEAN THE MACHINE
• Clean the machine after use with a moist cloth dipped in
neutral detergent.
• Do not use aggressive detergents or solvents to clean the
plastic parts or handles.
• Keep the trimmer head free of grass, leaves, or excessive
grease.
• Keep the air vents clean and free of debris to avoid
overheating and damage to the motor or the battery.
• Do not spray water onto the motor and electrical
components.
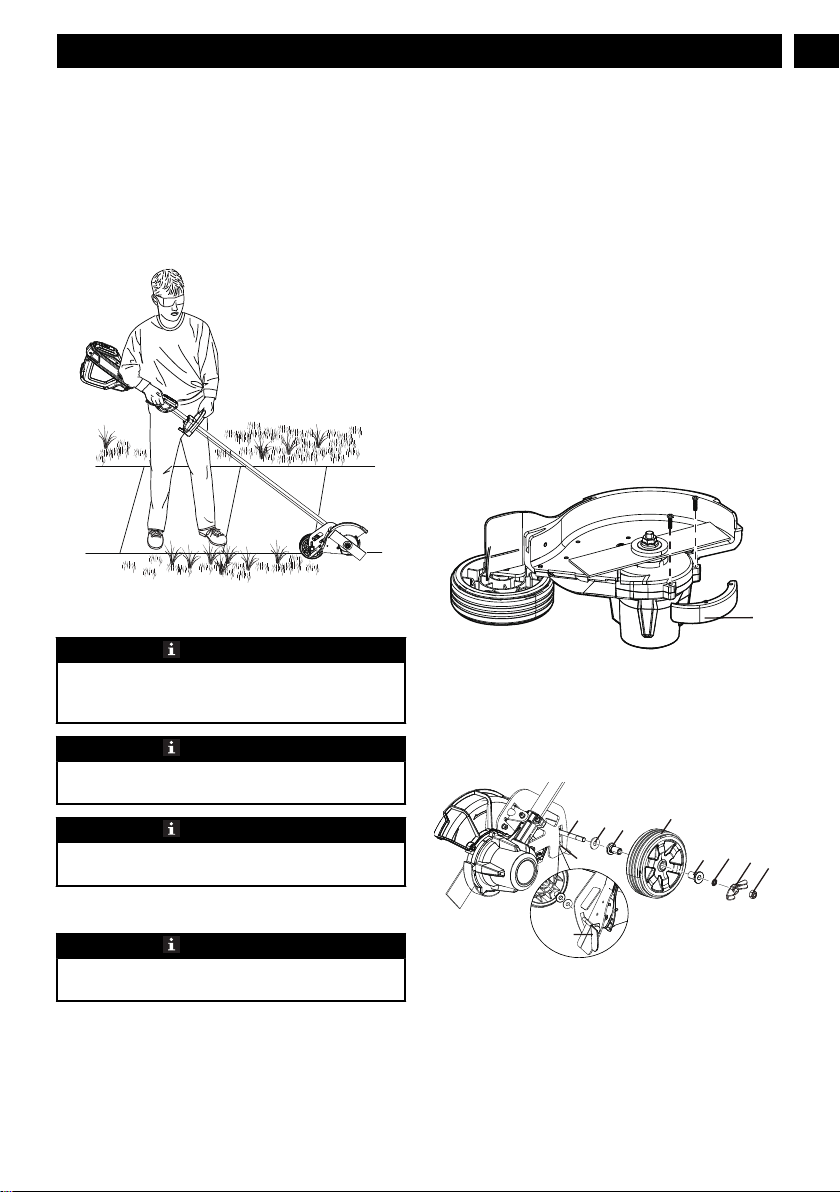
10.3 REPLACE THE SKID PLATE
1. Remove the screws with a Phillips Head screwdriver (not
included).
2. Replace with the new skid plate (1).
3. Tighten the screws.
1
10.4 REPLACE THE WHEEL
1. Remove the battery.
2. Remove the nut (1), knob (2), washer (3), axle sleeve (4),
wheel (5), axle sleeve (4), rubber washer (6) and wheel
axle (7) orderly from the wheel assembly.
8
2
1
3
4
5
4
6
7
7
3. Replace with the new wheel.
4. Insert the wheel axle (7) through the slot (8) downward,
then put the rubber washer (6), axle sleeve (4), wheel (5),
axle sleeve (4), washer (3), knob (2) and nut (1) orderly
through the wheel axle (6).
9
English
EN
Loading ...
Loading ...
Loading ...