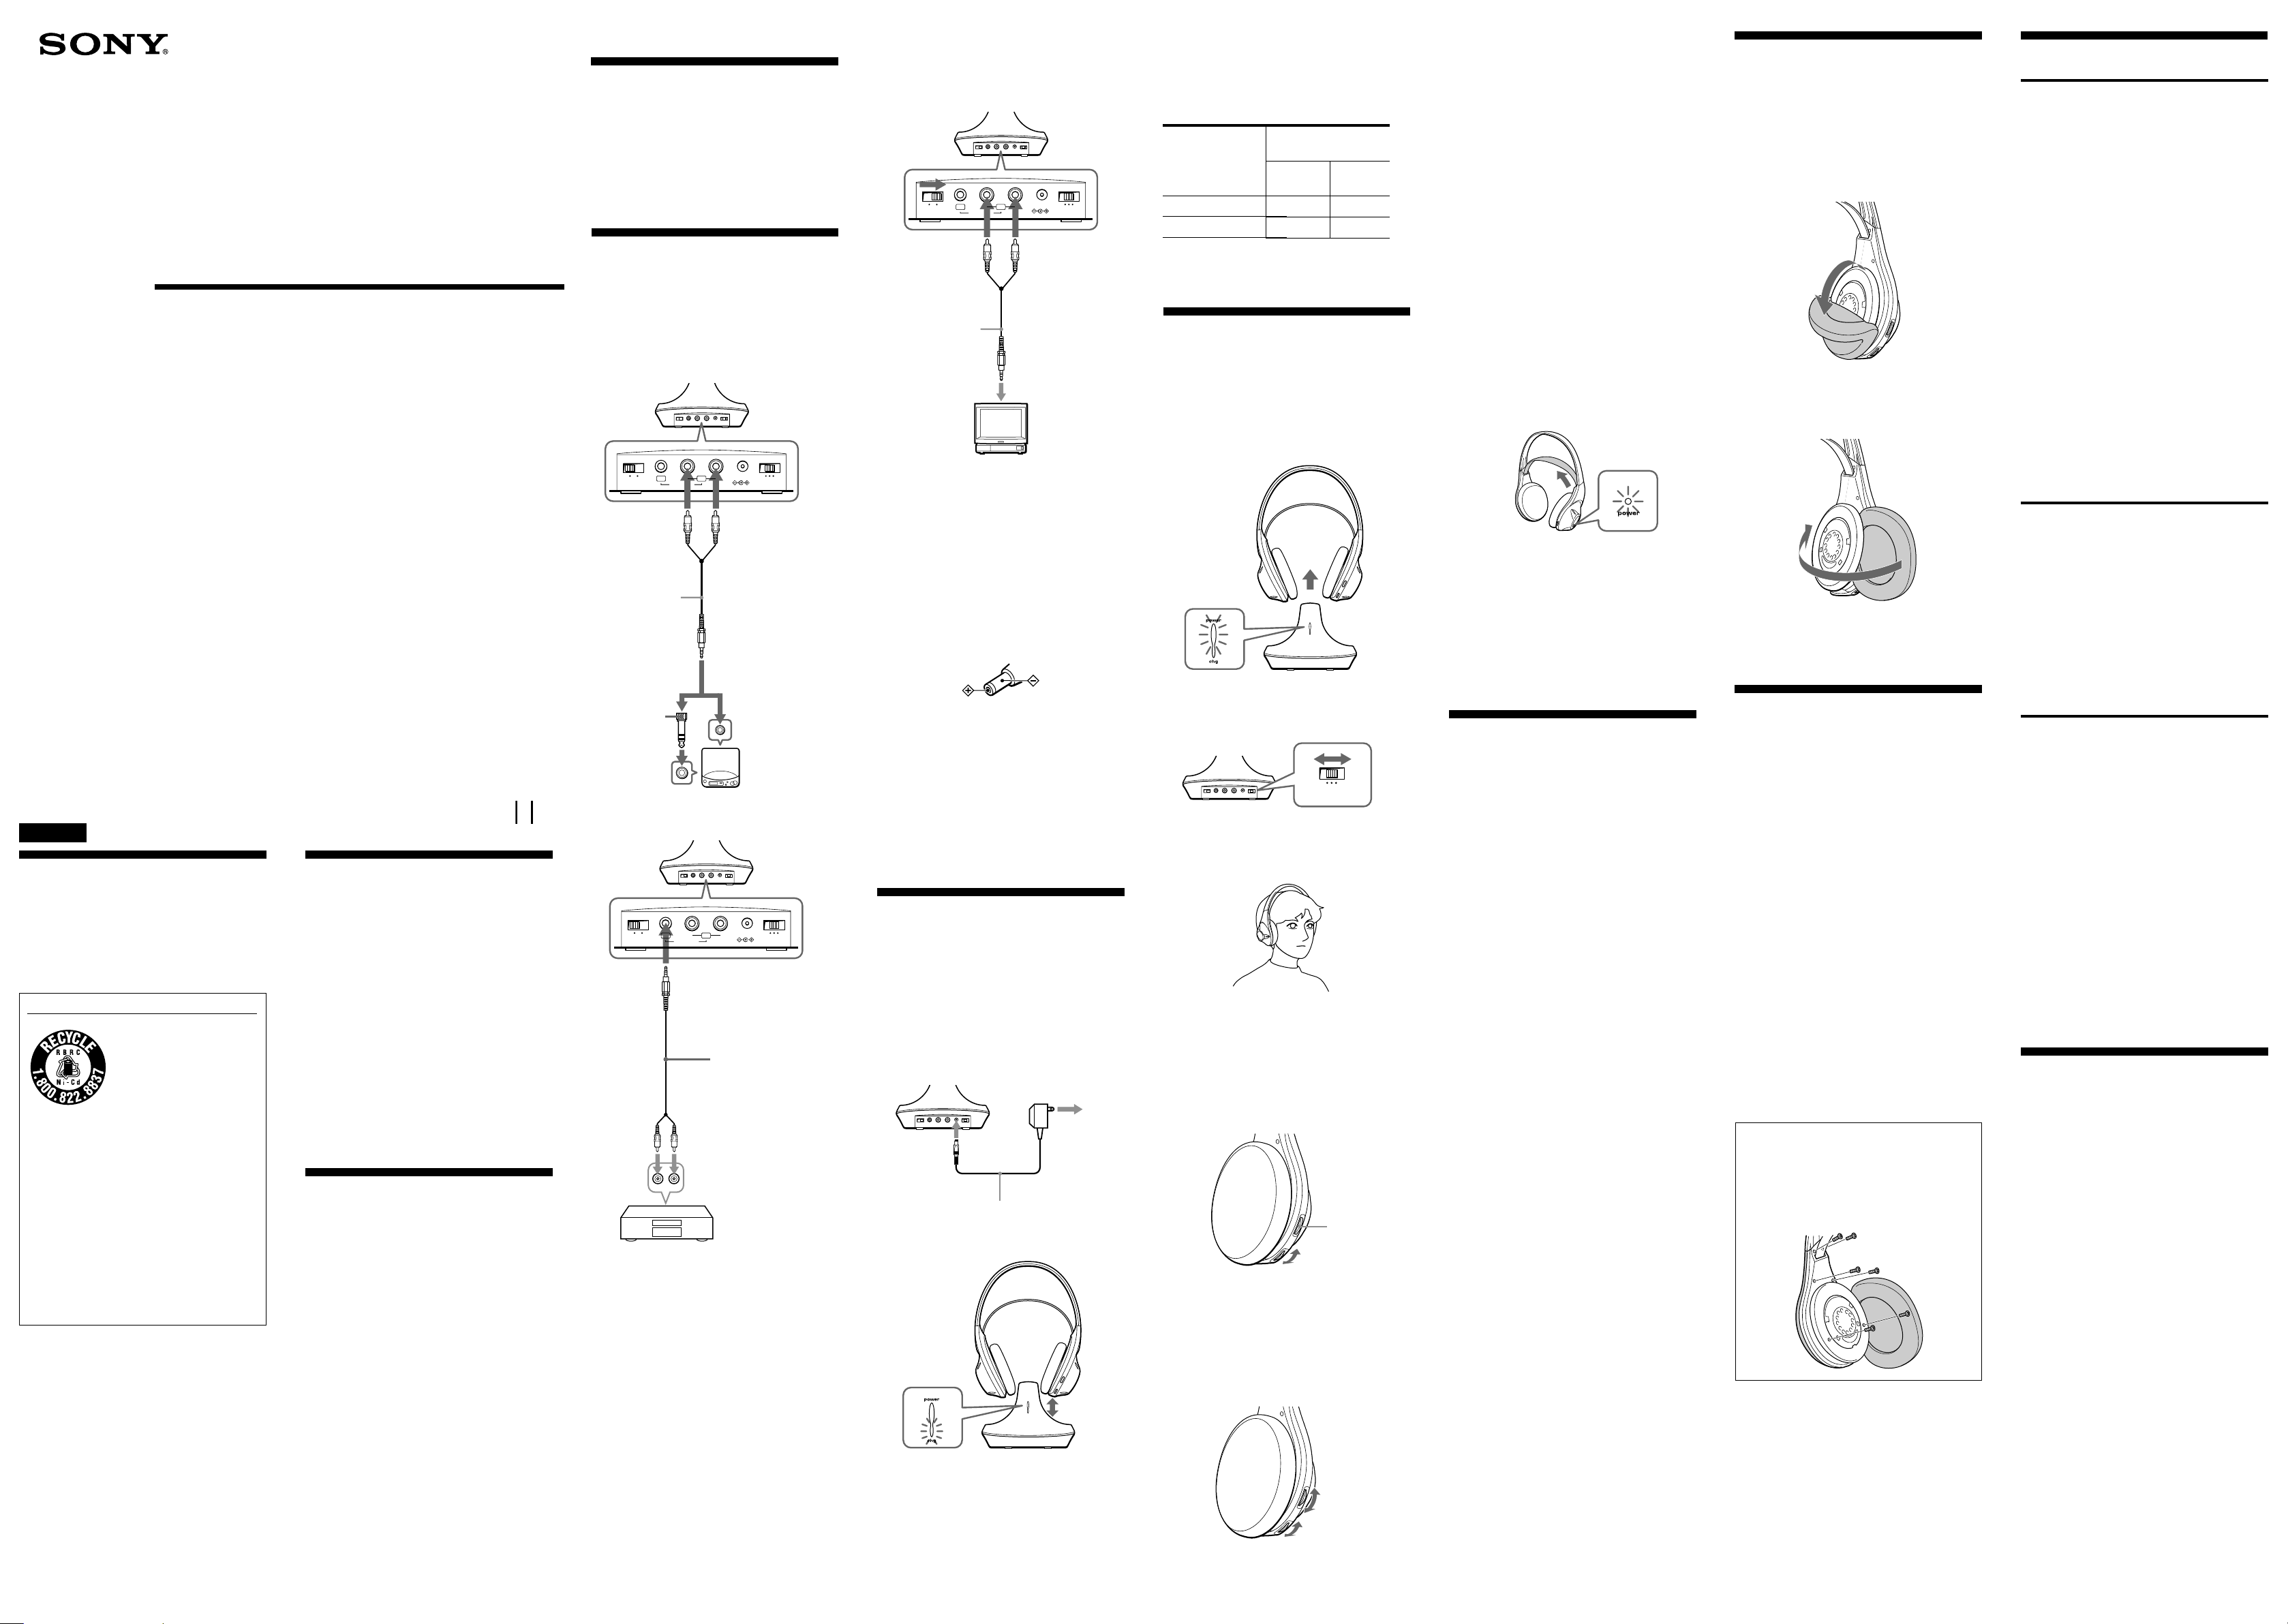
DC IN 9V
OFF ON
FILTERNOISE
123
CHANNEL
RBAL
AUDIO IN
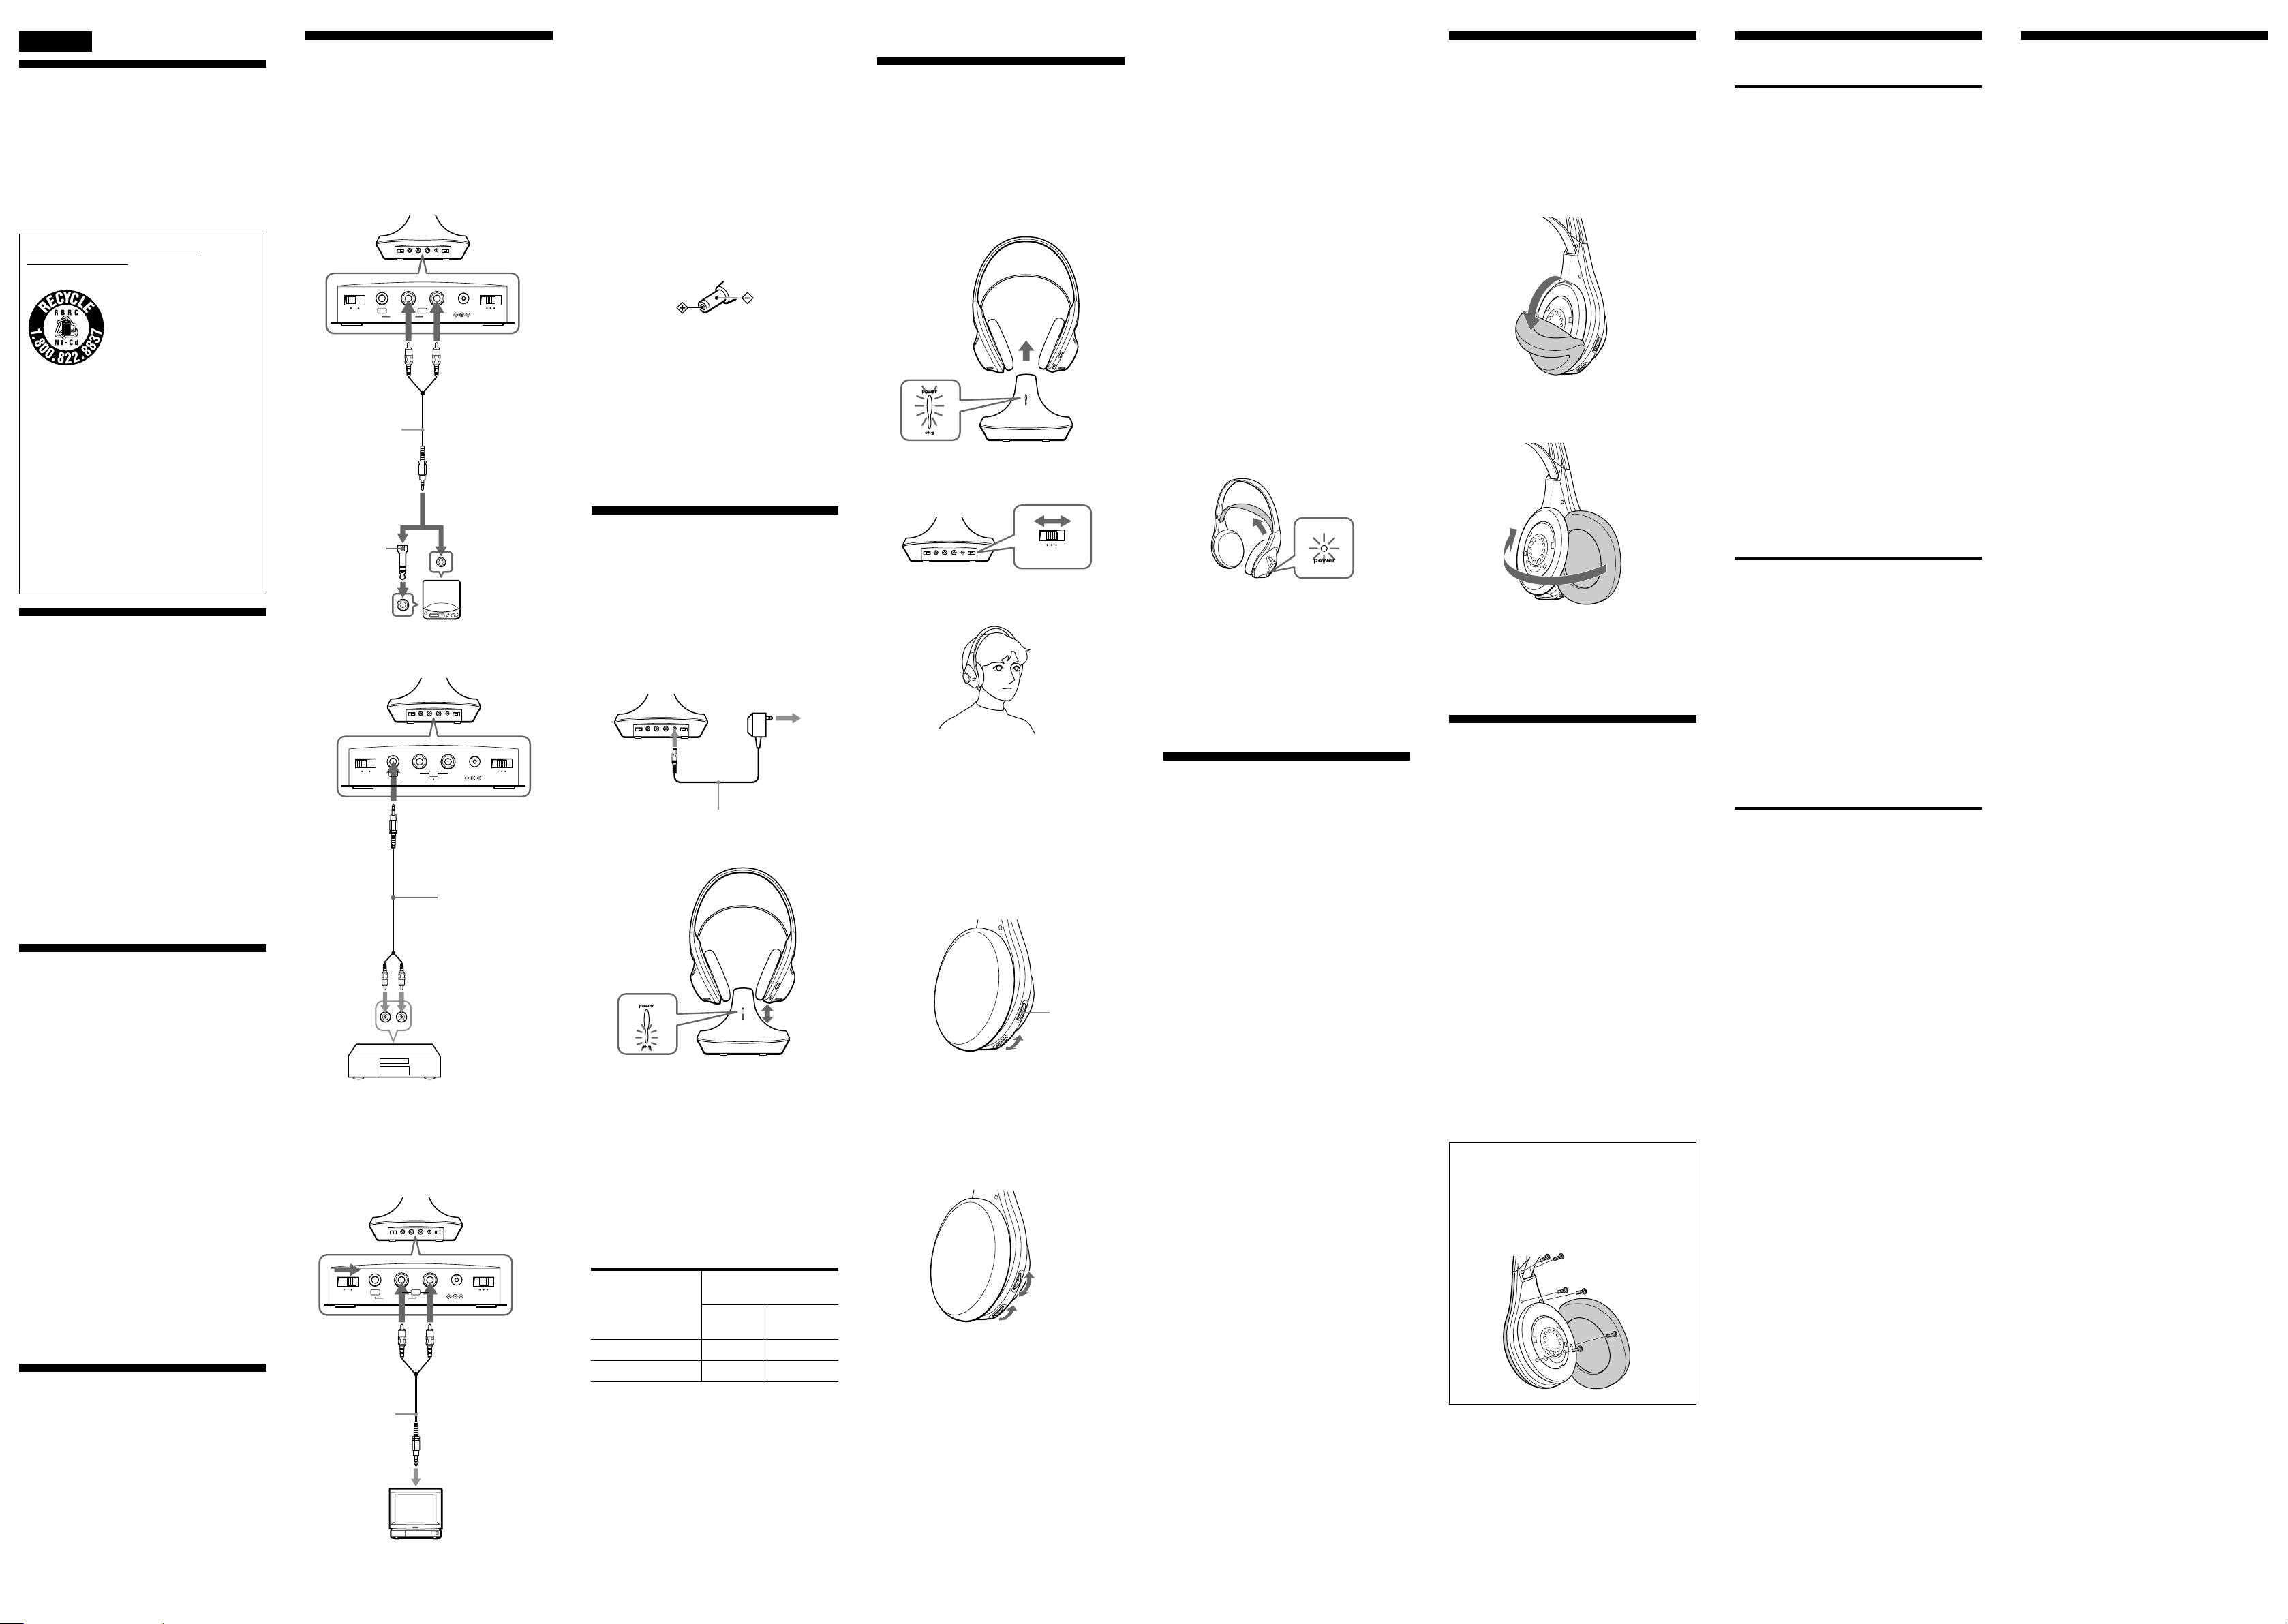
DC IN 9V
OFF ON
FILTERNOISE
123
CHANNEL
RBAL
AUDIO IN
RECYCLING NICKEL-CADMIUM BATTERIES
Nickel-Cadmium batteries
are recyclable. You can help
preserve our environment by
returning your unwanted
batteries to your nearest
point for collection, recycling
or proper disposal.
Note: In some areas the disposal of nickel-
cadmium batteries in household or
business trash may be prohibited.
RBRC (Rechargeable Battery Recycling
Corporation) advises you about spent battery
collection by the following phone number.
Call toll free number: 1-800-822-8837 (United
States and Canada only)
Caution: Do not handle damaged or leaking
nickel-cadmium batteries.
To recharge the headphone battery after
use
Since little electric current is used for charging,
there is no need to worry about overcharging.
Charging and using hours
* at 1 kHz, 1 mW + 1 mW output
** The hours required to fully charge empty battery
N Operating the system
Listening to a program
1 First turn on the audio/video equipment
and start playing.
2 Remove the headphones from the
transmitter.
The transmitter’s power indicator will
light in red.
3 Select the radio frequency with the
CHANNEL selector.
4 When you put on the headphones the
headphone power turns on
automatically.
5-A Turn up the volume to a moderate
level with the VOL control.
Press the TUNING button briefly for
automatic tuning of the headphones.
If you do not receive a clear audio
signal, press it again.
A MDR-RF945RK
5-B Turn up the volume to a moderate
level with the VOL control, then tune
the headphones in to the frequency of
the transmitter with the TUNING
control until you can hear the audio
signal loud and clear.
B MDR-RF915RK
Try the above steps 3 and 5 until the
receiving performance becomes better.
C To connect to TV, etc.
If noise occurs when the transmitter is
connected to the headphone jack of your
TV or VCR, set the NOISE FILTER switch
to ON.
Notes
• If you connect the transmitter to LINE OUT or REC
OUT jack, do not set the NOISE FILTER switch to
ON. Otherwise, the volume will be limited.
• The NOISE FILTER switch effects the sound only in
cases such as connection diagram C. In diagrams A
and B, the switch has no effect.
• When the transmitter is placed on or near a TV, it
may pick up a noise. In such case, place the
transmitter away from the TV.
2 Connect the transmitter to an AC outlet
using the supplied AC power adaptor.
Notes
• Use only the supplied AC power adaptor. Do not use
any other AC power adaptor.
Polarity of the plug
• When you connect the connecting cord directly to an
earphone jack, the audio signal will not be output
through the right channel. In such a case, use the
separately sold PC-236HG plug adaptor.
• If the connected equipment has the AVLS (Automatic
Volume Limiter System) function, be sure to turn the
function off when using the transmitter. Otherwise, you
will have to turn up the volume of the headphones, and
that may cause noise.
• Do not place the transmitter near a fluorescent lamp, etc.
when using the system.
* WALKMAN is a registered trademark of Sony
Corporation.
Charging the
headphone battery
Using the headphones for the first
time
When you use the headphones for the first time,
charge the battery in the following manner.
1 Connect the transmitter to a power
source.
2 Place the headphones on the transmitter.
Place the headphone on the transmitter such that
the charging pins on the transmitter engage the
charging contacts on the bottom of the right-hand
housing.
The charge indicator on the transmitter will light
in green to indicate that the battery is being
charged.
Setting up the
transmitter
1 Connect the transmitter to audio/video
equipment. Select one of the hookups
below depending on the jack type:
A To connect to a headphones jack
B To connect to LINE OUT or REC OUT
jacks
DC IN 9V
OFF ON
FILTERNOISE
123
CHANNEL
RBAL
AUDIO IN
Operating Instructions
Mode d’emploi
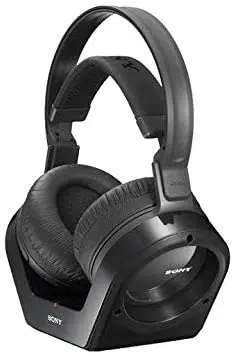
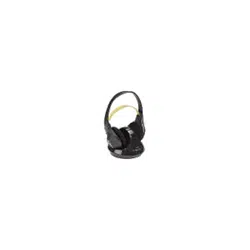
Wireless Stereo
Headphone System
Sony Corporation © 2001 Printed in Korea
MDR-RF945RK
MDR-RF915RK
3-233-607-21(1)
Sending RF signals from the Transmitter
The transmitter starts sending the RF signals
automatically, when it detects audio signals from
the equipment connected.
If it does not detect an audio signal for more than
approximately four minutes, the transmitter will
stop sending RF signals, and the power indicator
turns off.
When the transmitter receives an audio signal
again, it starts sending the RF signals, and the
power indicator will light in red again.
If the audio signal is very weak, the transmitter
does not send RF signals. If the transmitter is
connected to a headphone jack, make sure the
volume of the equipment connected is set to 5 – 6
or higher.
You may not hear the beginning of the sound from
the headphones until the transmitter starts sending
the RF signals after detecting an audio signal.
Note
If the transmitter is connected to the headphones jack of
the source equipment, set the volume of that equipment
as high as possible without distorting the audio signal.
Auto power on/off function
When you remove the headphones from your
head, the power turns off automatically. Do not
allow the self adjusting band to be pulled up,
otherwise the headphones will be switched on.
The power turns on.
Note
If a hissing noise is heard move closer to the transmitter.
After listening to a program
Take the headphones off and rest them away on
the transmitter, and recharge them.
Note
Do not hang the headphones by the self adjusting band,
otherwise, the self adjusting band will be pulled up and
the headphones will be switched on.
The effective areas of
the transmitter
The optimum distance is up to approximately 150
feet (46 m) without the system picking up some
interference. However, the distance may vary
according to the surroundings and environment. If
the system picks up some noise while using it
within the above mentioned distance, reduce the
distance between the transmitter unit and the
headphones, or select the other channel.
Notes
• When you use the headphones inside the effective areas
of the transmitter, the transmitter can be placed in any
direction from the listener.
• Even within the signal reception area, there are some
spots (dead spot) where the RF signal can not be
received. This is a characteristic inherent to RF signals,
and does not indicate malfunction. By slightly moving
the transmitter, location of the dead spot can be
changed.
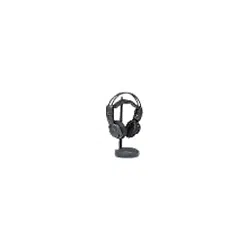
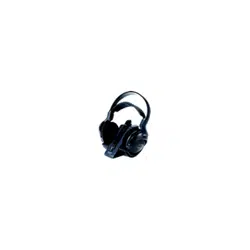
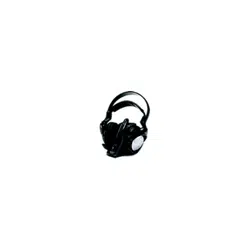
Transmitter
Left channel
(white)
Right channel
(red)
Unimatch plug
adaptor
(supplied)
Discman, MD,
WALKMAN*, VCR,
etc.
to headphones
jack (stereo
mini jack)
Connecting cord
(supplied)
to AUDIO IN
A jacks
to headphones
jack (stereo
phone jack)
TV, etc.
to stereo mini jack
Transmitter
to AUDIO IN
A jack
Left channel
(white)
Right channel
(red)
Connecting cord
(supplied)
Transmitter
to AUDIO IN
B jack
Connecting cord
(supplied)
Right channel
(red)
Left channel
(white)
to LINE OUT or REC
OUT jacks
Stereo system, VCR, etc.
No sound/Muffled sound
, Turn on the transmitter first, then put on the
headphones.
, Check the connection of the audio/video
equipment or the AC power adaptor.
, Check that the audio/video equipment is turned
on.
, Turn up the volume on the connected audio/
video equipment, if the transmitter is connected
to the headphones jack.
, MDR-RF915RK:
Change the radio frequency with the CHANNEL
selector on the transmitter, then tune the
headphones with the TUNING control.
MDR-RF945RK:
Change the radio frequency with the CHANNEL
selector on the transmitter, then press the
TUNING button again.
, The mute function is activated.
Use the headphones near the transmitter.
, The headphones’ POWER indicator light is weak
or turned off.
•Charge the built-in rechargeable battery or if the
POWER indicator is still off after charging the
built-in rechargeable battery, take the
headphones to a Sony dealer for replacement of
the rechargeable battery.
, If you connect the transmitter to the LINE OUT or
REC OUT jack of an audio reproducer, make sure
that the NOISE FILTER switch is set to OFF.
, Make sure that the NOISE FILTER switch is set to
either ON or OFF (If the switch gets stuck
between ON and OFF, the sound will be cut off).
Distortion
, If the transmitter is connected to the headphones
jack, turn down the volume of the connected
audio/video equipment.
, Change the radio frequency with the CHANNEL
selector on the transmitter.
, The headphones’ POWER indicator light is weak
or turned off.
•Charge the built-in rechargeable battery or if the
POWER indicator is still off after charging the
built-in rechargeable battery, take the
headphones to a Sony dealer for replacement of
the rechargeable battery.
, If you connect the transmitter to LINE OUT or
REC OUT jack of an audio reproducer, make sure
that the NOISE FILTER switch is set to OFF.
Loud background noise
, Move closer to the transmitter. As you move
away from the transmitter, more noise is likely to
be heard.
, If the transmitter is connected to the headphones
jack, turn up the volume of the connected audio/
video equipment.
, MDR-RF915RK:
Change the radio frequency with the CHANNEL
selector on the transmitter, then tune the
headphones with the TUNING control.
MDR-RF945RK:
Change the radio frequency with the CHANNEL
selector on the transmitter, then press the
TUNING button again.
, The headphones’ POWER indicator light is weak
or turned off.
•Charge the built-in rechargeable battery or if the
POWER indicator is still off after charging the
built-in rechargeable battery, take the
headphone to a Sony dealer for replacement of
the rechargeable battery.
, If you connect the transmitter to the LINE OUT or
REC OUT jack of an audio reproducer, make sure
that the NOISE FILTER switch is set to OFF.
Specifications
General
Carrier frequency
913.5 – 914.5 MHz
Channel Ch1, Ch2, Ch3
Modulation FM stereo
Frequency response
20 – 20,000 Hz
Transmitter TMR-RF945R, TMR-RF915R
Power source DC 9 V: supplied AC power adaptor
Audio input phono jacks/stereo mini jack
Dimensions Approx. 150 mm dia. × 108 mm
(6 × 4
1
/
3
in.) (w/h)
Mass Approx. 190 g (6.7 oz.)
Headphones MDR-RF945R, MDR-RF915R
Power source DC 2.4 V: Built-in rechargeable
battery
Mass Approx. 240 g (8.5 oz.) incl.
built-in rechargeable battery
Built-in Ni-Cd rechargeable battery
Model name NC-AA
Voltage 1.2 V
Capacity 700 mAh
Optional accessory
Plug adaptor PC-236HG (stereo mini jack y
monaural mini plug)
Design and specifications are subject to change without
notice.
Troubleshooting
Welcome!
Thank you for purchasing the Sony
MDR-RF945RK/RF915RK Wireless Stereo
Headphone System. Before operating the unit,
please read this manual thoroughly and retain it
for future reference.
Some features are:
• Wireless system that allows you to listen to a
program free from the restriction of a cord
• High fidelity sound reproduction
• A compact transmitter with an AC power
adaptor (supplied) enables simple charging of
the headphone battery. Just by placing the
headphones on the transmitter, headphone
battery can be charged.
• Comfortable Supra-aural headphones with self
adjusting head band
• Automatic ON/OFF function on headphones to
preserve battery power
Notes on receiving
performance
The system for this equipment utilizes very high
frequency signals in the 900 MHz band so the
receiving performance may deteriorate due to the
surroundings. The following examples illustrate
conditions that may reduce the possible receiving
range or cause interference with reception.
• Inside a building with walls containing steel
beams.
• Area with many steel file cabinets, etc.
• Area with many electrical appliances capable of
generating electromagnetic noise.
• Transmitter is placed on a metal instrument.
• Area facing roadways.
• Noise or interfering signals exist in the
surroundings due to radio transceivers in trucks,
etc.
• Noise or interfering signals exist in the
surroundings due to wireless communication
systems installed along roadways.
to an AC outlet
To DC IN
9 V jack
AC power adaptor
(supplied)
Transmitter
123
CHANNEL
TUNING
button
VOL control
Replacing the ear
pads
When the ear pads become dirty or damaged, you
can get replacements from your Sony dealer.
Replace them as illustrated below.
1 Remove the old ear pad by pulling it out
of the groove on the housing.
2 Place the new ear pad on the driver unit
and insert the edge of the pad into the
groove as illustrated.
Make sure that the entire edge of the ear pad is
securely inserted into the groove.
N Additional information
Precautions
• When the transmitter is not to be used for a long
period of time, disconnect the AC power
adaptor from the AC outlet holding the plug. Do
not pull on the cord.
• Do not leave the wireless stereo headphone
system in a location subject to direct sunlight,
heat or moisture.
Notes on headphones
Preventing hearing damage
Avoid using headphones at high volume. Hearing
experts advise against continuous, loud and
extended play. If you experience a ringing in your
ears, reduce the volume or discontinue use.
Caring for others
Keep the volume at a moderate level. This will
allow you to hear outside sounds and to be
considerate to the people around you.
If you have any questions or problems concerning
the system that are not covered in this manual,
please consult the nearest Sony dealer.
Be sure to bring the headphones and the
transmitter to the Sony dealer when requiring
repair work.
Disposing of the headphones
Be sure to remove the built-in rechargeable
batteries from the headphones before you
dispose of the headphones.
First remove the left headphone’s ear pad.
You will see six screws. Remove the six screws
and open the housing.
English
Note
This device complies with RSS-210 of Industry
Canada. Operation is subject to the following two
conditions: (1) this device may not cause
interference, and (2) this device must accept any
interference, including interference that may cause
undesired operation of the device.
TUNING
control
VOL control
N Getting started
Unpacking
Check that you have the following items:
• The headphones
• The transmitter
• AC power adaptor
• Unimatch plug adaptor (stereo mini jack t
stereo phone plug)
• Connecting cord (phono plugs y stereo mini
plug), 1 m
Approx. charging
hours
1
24**
Approx. using time*
MDR-
RF945RK
50 minutes
20 hours
MDR-
RF915RK
55 minutes
23 hours
Raccordement du
transmetteur
1 Raccordez le transmetteur à l’appareil
audio/vidéo. Sélectionnez une des
liaisons suivantes selon le type de prise:
A Raccordement à une prise de casque
B Raccordement aux prises LINE OUT ou
REC OUT
C Pour raccorder un téléviseur, etc.
Si des parasites sont audibles quand le
transmetteur est relié à la prise casque de
votre téléviseur ou magnétoscope, réglez
le commutateur NOISE FILTER sur ON.
Remarques
• Si vous raccordez le transmetteur à la prise LINE
OUT ou REC OUT d’un lecteur audio tel qu’un
lecteur MD ou un lecteur CD, ne réglez pas le
commutateur NOISE FILTER sur ON, sinon le
volume sera limité.
• Le commutateur NOISE FILTER est actif
uniquement dans le cas du raccordement illustré
dans les diagrammes A de la page 4 et C. Dans le
diagramme B, le commutateur n’a pas d’effet.
• Si le transmetteur est placé à proximité ou sur un
téléviseur, il peut capter du bruit.
Dans ce cas, éloignez-le du téléviseur.
2 Raccordez le transmetteur sur une prise
secteur à l’aide de l’adaptateur secteur
fourni.
Remarques
• Utilisez uniquement l’adaptateur secteur fourni à
l’exclusion de tout autre.
Polarité de la fiche
• Quand vous raccordez directement le cordon de liaison
à une prise de casque, le signal audio ne sort pas du
canal droit. Dans ce cas, utilisez l’adaptateur de fiche
PC-236HG vendu séparément.
• Si l’appareil raccordé présente la fonction AVLS
(système de limitation automatique du volume),
désactivez cette fonction quand vous utilisez le
transmetteur, sinon vous devrez augmenter le volume
du casque, ce qui provoquera du bruit.
• N’installez pas le transmetteur près d’une lampe
fluorescente, etc. lorsque vous utilisez le système.
* WALKMAN est une marque déposée de Sony
Corporation.
Recharge de la pile
du casque
Utilisation du casque pour la première fois
Lorsque vous utilisez le casque pour la première
fois, chargez la pile comme suit.
1 Raccordez le transmetteur à une source
d’alimentation.
2 Mettez en place le casque sur l'émetteur.
Placez le casque sur le transmetteur de sorte que
les broches de chargement du transmetteur
s’engagent sur les contacts correspondants situés
dans la partie inférieure du compartiment droit.
L’indicateur de charge du transmetteur s’allumera
en vert pour indiquer que la pile est en cours de
chargement.
Pour recharger la pile du casque après
utilisation
Comme le courant utilisé pour la recharge est très
faible, il n’y a pas de problème de surcharge.
Durée de recharge et d’utilisation
* Sortie de 1 mW + 1 mW, à 1 kHz
** Durée requise pour une recharge complète de pile
vides.
Durée de recharge
(approximative)
1 heure
24 heures**
Durée d’utilisation
approximatif*
MDR- MDR-
RF945RK RF915RK
50 minutes 55 minutes
20 heures 23 heures
DC IN 9V
OFF ON
FILTERNOISE
123
CHANNEL
RBAL
AUDIO IN
DC IN 9V
OFF ON
FILTERNOISE
123
CHANNEL
RBAL
AUDIO IN
DC IN 9V
OFF ON
FILTERNOISE
123
CHANNEL
RBAL
AUDIO IN
Français
Remarque
Ce dispositif satisfait aux exigences d’Industrie
Canada, prescrites dans le document CNR-210.
Son utilisation est autorisée seulement aux
conditions suivantes: (1) il ne doit pas produire de
brouillage et (2) l’utilisateur du dispositif doit être
prêt à accepter tout brouillage radioeléctrique reçu,
même si ce brouillage est susceptible de
compromettre le fonctionnement du dispositif.
RECYCLAGE DES BATTERIES AU
NICKEL-CADMIUM
Les batteries au nickel-
cadmium sont recyclables.
Vous pouvez contribuer à
préserver l’environnement en
rapportant les batteries usées
dans un point de ramassage,
recyclage ou retraitement.
Remarque:Dans certain pays, il est interdit de
jeter les batteries au nickel-cadmium
avec les ordures ménagères ou dans
les poubelles de bureau.
Questionnez chez RBRC (Rechargeable Battery
Recycling Corporation) pour les batteries usées.
Le numéro est: 1-800-822-8837 (Etats-Unis et
Canada uniquement)
Avertissement: Ne pas utiliser des batteries au
nickel-cadmium qui sont endommagées ou qui
fuient.
Bienvenue!
Nous vous remercions pour l’achat de ce système
de casque stéréo infrarouge MDR-RF945RK/
RF915RK Sony. Avant la mise en service de cet
appareil, nous vous prions de lire attentivement ce
mode d’emploi et de le conserver pour toute
référence ultérieure.
Cet appareil offre, entre autres, les caractéristiques
suivantes:
• Système infrarouge permettant d’écouter un
programme sans l’inconvénient d’un cordon
• Reproduction sonore de haute fidélité
• Transmetteur compact avec adaptateur secteur
(fourni), permettant une recharge simplifiée de
la pile du casque. Placez simplement le casque
sur le transmetteur pour charger la pile du
casque.
• Casque d’écoute confortable supra-aural avec
serre-tête s’adaptant automatiquement à la tête
• Mise sous/hors tension (ON/OFF) automatique
pour économiser l’énergie des piles
Remarques sur les
performances de
réception
Comme le système de cet appareil utilise des
signaux de très haute fréquence dans la gamme de
900 MHz, l’environnement peut avoir une
influence sur la qualité de la réception. Les
exemples suivants illustrent les situations pouvant
réduire la plage de réception et perturber la
réception.
• A l’intérieur d’un bâtiment à structure
métallique.
• Pièce contenant de nombreux classeurs à tiroirs
métalliques.
• A proximité d’appareils électriques pouvant
engendrer des parasites électromagnétiques.
• Installation sur un instrument métallique.
• A proximité d’une route.
• Parasites ou interférences dans le voisinage,
provenant d’émetteurs-récepteurs de camions,
etc.
• Parasites ou interférences dans le voisinage,
provenant de systèmes de communication,
installés le long de routes.
N Préparatifs
Déballage
Vérifiez que tous les éléments suivants se trouvent
dans l’emballage:
• Casque
• Transmetteur
• Adaptateur secteur
• Adaptateur de prise universel (mini-fiche stéréo
t prise stéréo)
• Cordon de liaison (prise phono y
mini-fiche stéréo), 1 m
N Utilisation du système
Ecoute d’un programme
1 Mettez tout d’abord l’équipement
audio/vidéo sous tension, puis lancez la
lecture.
2 Retirez le casque du transmetteur.
L’indicateur de mise sous tension du
transmetteur s’allumera en rouge.
3 Sélectionnez la fréquence radio avec le
sélecteur CHANNEL.
4 Lorsque vous mettez le casque, celui-ci
se met automatiquement sous tension.
5-A Réglez le volume sur un niveau
modéré à l’aide de la commande
VOL.
Appuyez brièvement sur la touche
TUNING pour une syntonisation
automatique du casque.
Si le signal audio que vous recevez
n’est pas clair, appuyez de nouveau
sur cette touche.
A MDR-RF945RK
5-B Réglez le volume à un niveau modéré
avec la commande VOL, puis
accordez le casque sur la fréquence du
transmetteur avec la commande
TUNING jusqu’à ce que le signal
audio soit fort et clair.
B MDR-RF915RK
Répétez les étapes 3 et 5 jusqu’à ce que la
réception soit meilleure.
Emission des signaux RF par le
transmetteur
Le transmetteur se met automatiquement à émettre
des signaux RF quand il détecte des signaux audio
de l’appareil raccordé.
Lorsque le transmetteur ne reçoit aucun signal
audio pendant quatre minutes environ, le
transmetteur cessera d’envoyer des signaux RF et
son voyant d’alimentation s’éteindra.
Lorsque le transmetteur recevra des signaux audio,
il commencera à envoyer des signaux RF et son
voyant d’alimentation s’allumera de nouveau en
rouge.
Si le signal audio est très faible, le transmetteur
n’enverra pas de signaux RF. Si le transmetteur est
raccordé à une prise de casque, réglez le volume
de l’appareil raccordé sur 5 - 6 ou supérieur.
Vous ne pourrez peut-être pas entendre le début
du son fourni par le casque quand le transmetteur
se remet à émettre des signaux RF après la
détection d’un signal.
Remarque
Si le transmetteur est raccordé à la prise de casque de
l’appareil source, réglez le volume le plus haut possible
sur l’appareil en évitant les distorsions du son.
Mise sous tension et hors tension
automatique
Lorsque vous retirez le casque de votre tête, celui-
ci se met automatiquement hors tension. Veillez à
ne pas tirer sur le serre-tête auto-adaptable, sinon
il se mettra sous tension.
Mise sous tension
Remarque
Si un sifflement se fait entendre, rapprochez-vous du
transmetteur.
Après l’écoute d’un programme
Retirez le casque, éloignez-le de l’émetteur et
rechargez-le.
Remarque
Ne suspendez pas le casque par le serre-tête auto-
adaptable, sinon il sera tiré vers le haut et le casque se
mettra sous tension.
Portée du transmetteur
La distancia óptima es de aproximadamente 46
metros sin que el sistema capte interferencias. Sin
embargo, la distancia puede variar de acuerdo con
las condiciones ambientales. Si el sistema capta
ruido cuando lo esté utilizando dentro de la
distancia mencionada, reduzca la distancia entre el
transmisor y los auriculares, o seleccione otro
canal.
Remarques
• Quand vous utilisez le casque dans la zone de
couverture du transmetteur, la direction du
transmetteur par rapport à l’auditeur n’a aucune
importance.
• Dans la zone de réception des signaux, il existe toutefois
certains endroits (zones de silence) où les signaux de
radiofréquence ne peuvent pas être reçus. Il s’agit d’un
caractéristique inhérente aux signaux RF et non d’une
dysfonctionnement. Un léger déplacement du
transmetteur suffit souvent à modifier la zone de silence
en question.
Remplacement des
oreillettes
Quand les oreillettes sont sales ou usées, vous
pouvez vous en procurer des neuves auprès de
votre revendeur Sony. Remplacez les oreillettes
comme indiqué ci-dessous.
1 Enlevez l’oreillette usée en la sortant de
la rainure du boîtier.
2 Placez l’oreillette neuve sur le
transducteur et insérez le bord dans la
rainure comme indiqué sur l’illustration.
Vérifiez que toute la bordure de l’oreillette est bien
insérée dans la rainure.
N Informations
complémentaires
Précautions
• Si vous ne comptez pas utiliser le transmetteur
pendant longtemps, débranchez l’adaptateur
secteur de la prise murale en tirant sur la fiche et
non pas sur le cordon.
• Ne laissez pas le système de casque stéréo
infrarouge dans un endroit exposé au soleil, à la
chaleur ou à l’humidité.
Remarques sur le casque
Prévention des dommages auditifs
Evitez d’écouter à un volume élevé.
Les experts déconseillent l’écoute prolongée sans
interruption à un volume élevé. Si vous percevez
un bourdonnement dans les oreilles, réduisez le
volume ou interrompez l’écoute.
Civisme
Ecoutez à un volume modéré. Vous pourrez ainsi
entendre les sons extérieurs et vous ne dérangerez
pas les personnes qui sont près de vous.
Pour toute question ou problème au sujet de ce
casque non mentionné dans ce mode d’emploi,
veuillez contacter votre revendeur Sony.
Veillez à apporter le casque et le transmetteur à
votre revendeur Sony pour toute réparation.
Avant de jeter le casque
Assurez-vous d’enlever les piles rechargeables
intégrées du casque avant de jeter ce dernier.
Retirez dans un premier temps l’oreillette
gauche du casque. Vous apercevrez alors six
vis. Retirez les six vis et ouvrez le
compartiment.
à la prise de
casque
(prise stéréo)
Transmetteur
aux prises
AUDIO IN A
Canal droit
(rouge)
Canal gauche
(blanc)
Cordon de
liaison (fourni)
Adaptateur de
prise universel
(fourni)
à la prise de casque
(mini-fiche stéréo)
Discman, MD,
WALKMAN*,
Magnétoscope,
etc.
Chaîne stéréo,
Magnétoscope, etc.
Transmetteur
à la prise
AUDIO IN B
Cordon de
liaison (fourni)
Canal gauche
(blanc)
Canal droit
(rouge)
aux prises LINE OUT
ou REC OUT
Cordon de
liaison (fourni)
Transmetteur
aux prises
AUDIO IN A
Canal droit
(rouge)
Canal gauche
(blanc)
Téléviseur, etc.
à la mini-fiche
stéréo
à une prise secteur
à la prise
DC IN 9 V
Adaptateur secteur (fourni)
Transmetteur
123
CHANNEL
Commande
TUNING
Commande VOL
Touche
TUNING
Commande VOL
Guide de dépannage
Pas de son/son étouffé
, Mettez le transmetteur sous tension, puis posez le
casque sur la tête.
, Vérifiez les branchements de l’appareil audio/
vidéo ou de l’adaptateur d’alimentation secteur.
, Assurez-vous que l’appareil audio/vidéo est sous
tension.
, Augmentez le volume de l’appareil audio/vidéo
raccordé, si le transmetteur est raccordé à la prise
de casque.
, MDR-RF915RK:
Modifiez la fréquence radio avec le sélecteur
CHANNEL du transmetteur, puis accordez le
casque avec la commande TUNING.
MDR-RF945RK:
Modifiez la fréquence radio avec le sélecteur
CHANNEL du transmetteur, puis appuyez de
nouveau sur la touche TUNING.
, Le silencieux est en service.
Approchez-vous du transmetteur quand vous
utilisez le casque.
, Le voyant POWER du casque luit faiblement ou
est éteint.
•Rechargez la pile rechargeable intégrée ou, si
l’indicateur POWER ne s’allume toujours pas
après avoir rechargé la pile rechargeable
intégrée, confiez votre casque à un revendeur
Sony agréé afin de remplacer la pile
rechargeable.
, Si vous raccordez le transmetteur à la prise LINE
OUT ou REC OUT d’un lecteur audio, assurez-
vous que le commutateur NOISE FILTER est réglé
sur OFF.
, Assurez-vous que le commutateur NOISE FILTER
est réglé ON ou OFF (Si le commutateur est
bloqué entre ON et OFF, le son sera interrompu).
Distorsion
, Si le transmetteur est raccordé à la prise de
casque, baissez le volume de l’appareil audio/
vidéo raccordé.
, Modifiez la fréquence radio avec le sélecteur
CHANNEL du transmetteur.
, Le voyant POWER du casque luit faiblement ou
est éteint.
•Rechargez la pile rechargeable intégrée ou, si
l’indicateur POWER ne s’allume toujours pas
après avoir rechargé la pile rechargeable
intégrée, confiez votre casque à un revendeur
Sony agréé afin de remplacer la pile
rechargeable.
, Si vous raccordez le transmetteur à la prise LINE
OUT ou REC OUT d’un lecteur audio, assurez-
vous que le commutateur NOISE FILTER est réglé
sur OFF.
Bruit de fond important
, Rapprochez-vous du transmetteur. Plus vous
vous éloignez du transmetteur, plus le bruit de
fond augmente.
, Si le transmetteur est raccordé à la prise de
casque, augmentez le volume de l’appareil audio/
vidéo raccordé.
, MDR-RF915RK:
Modifiez la fréquence radio avec le sélecteur
CHANNEL du transmetteur, puis accordez le
casque avec la commande TUNING.
MDR-RF945RK:
Modifiez la fréquence radio avec le sélecteur
CHANNEL du transmetteur, puis appuyez de
nouveau sur la touche TUNING.
, Le voyant POWER du casque luit faiblement ou
est éteint.
•Rechargez la pile rechargeable intégrée ou, si
l’indicateur POWER ne s’allume toujours pas
après avoir rechargé la pile rechargeable
intégrée, confiez votre casque à un revendeur
Sony agréé afin de remplacer la pile
rechargeable.
, Si vous raccordez le transmetteur à la prise LINE
OUT ou REC OUT d’un lecteur audio, assurez-
vous que le commutateur NOISE FILTER est réglé
sur OFF.
Spécifications
Données générales
Fréquence porteuse
913,5 – 914,5 MHz
Canal Canal 1, Canal 2, Canal 3
Modulation FM stéréo
Réponse en fréquence
20 – 20 000 Hz
Transmetteur TMR-RF945R, TMR-RF915R
Alimentation CC 9 V: adaptateur secteur (fourni)
Entrée audio Prise phono/Mini-fiche stéréo
Dimensions Env. 150 mm diam. × 108 mm
(6 × 4
1
/
3
pouces) (l/h)
Poids Env. 190 g (6,7 onces)
Casque MDR-RF945R, MDR-RF915R
Alimentation 2,4 V CC: Pile rechargeable
intégrée
Poids Env. 240 g (8,5 onces) avec la pile
rechargeable intégrée
Pile rechargeable Ni-Cd intégrée
Nom de modèle
NC-AA
Tension 1,2 V
Capacité 700 mAh
Accessoire en option
Adaptateur de fiche
PC-236HG (Mini-fiche stéréo y
mini-fiche monophonique)
La conception et les spécifications sont sujettes à
modifications sans préavis.