Loading ...
Loading ...
Loading ...
12
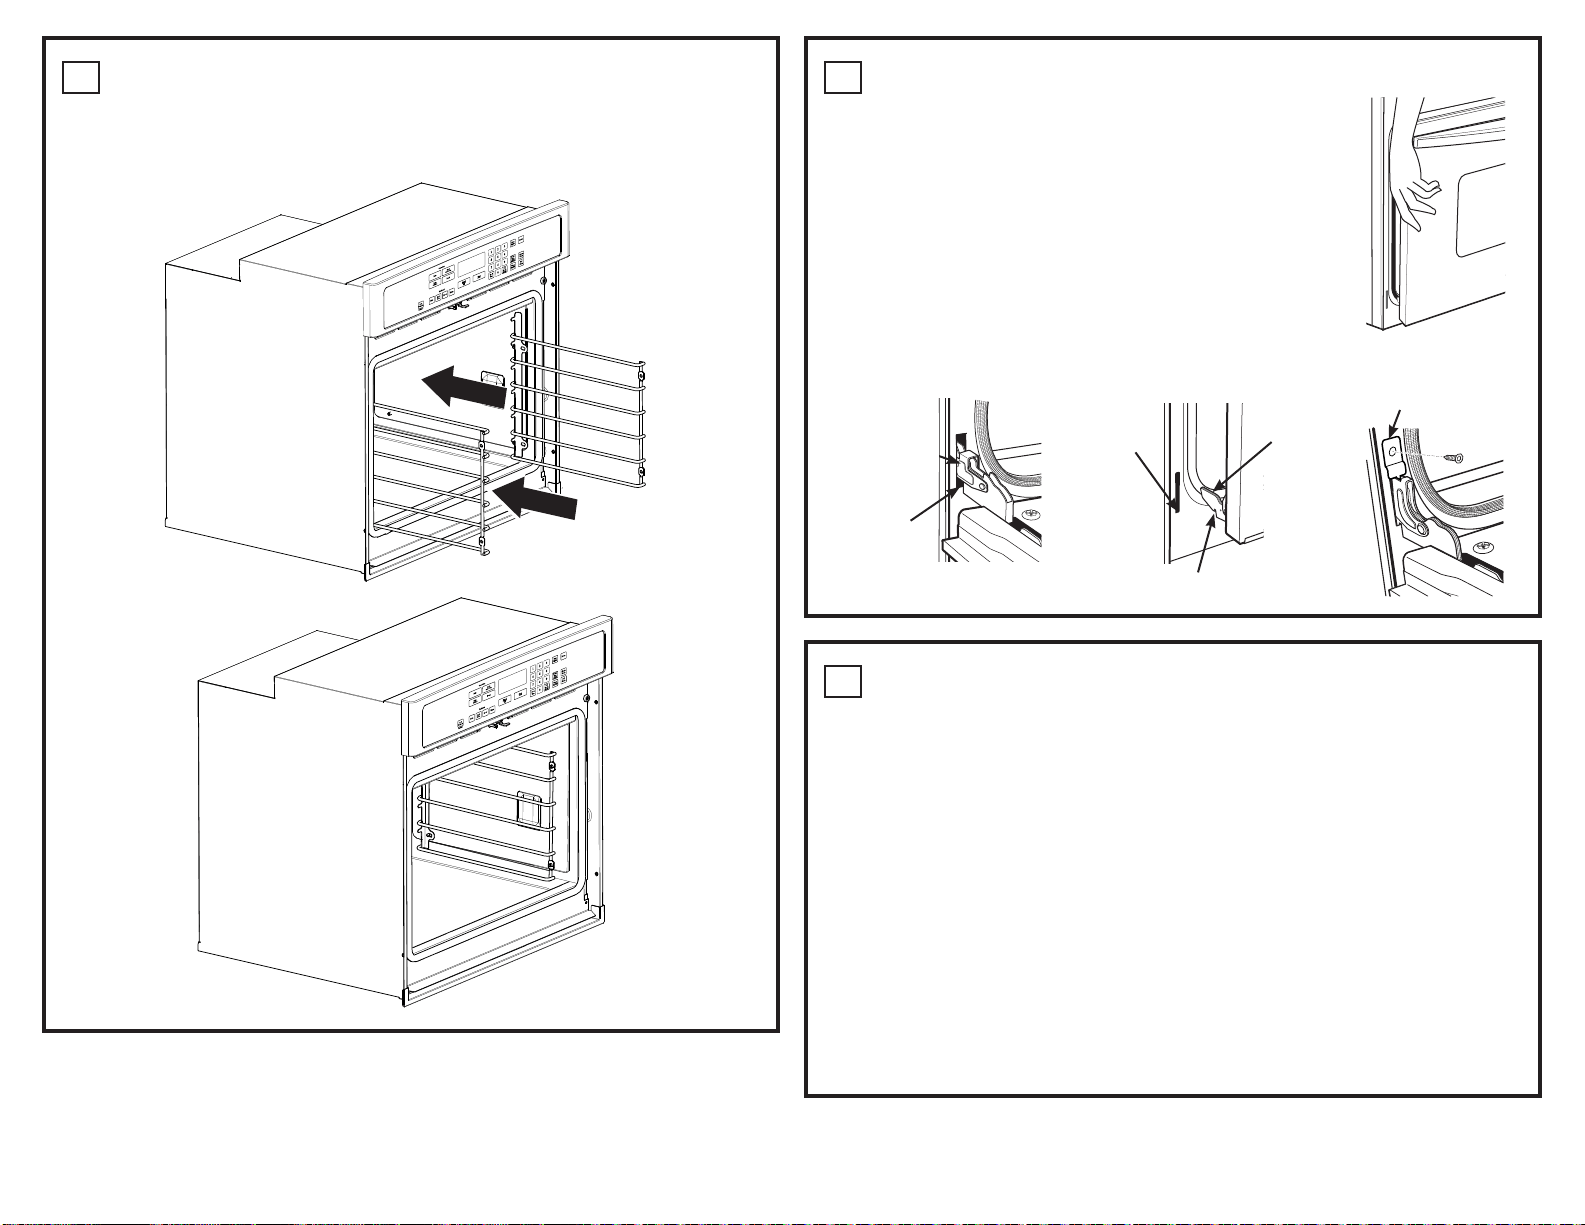
OVEN RACK GUIDE INSTALLATION (IF APPLICABLE)
A. Locate included oven rack guide mouting hardware.
B. Place oven rack guides on cavity wall studs with L bracket towards back of cavity as shown.
C. Install guides using the 8 provided mounting nuts.
13
REPLACING THE OVEN DOOR
NOTE: The oven door is heavy. You may need help lifting the door high enough
to slide it into the hinge slots. Do not lift the door by the handle.
A. Lift the oven door by grasping each side.
B. With the door at the same angle as the removal position (approximately
1”–2” [2.5 cm–5.1 cm] from the closed position), seat the notch of the hinge
arm into the bottom edge of the hinge slot. The notch of the hinge arm must
be fully seated into the bottom of the slot.
C. Fully open the door. If the door will not fully open, the indentation is not
seated correctly in the bottom edge of the slot.
D. Push the hinge locks up against the front frame of the oven cavity,
to the locked position.
E. Replace hinge bracket. The hinge bracket must be replaced for proper door
functionality.
F. Close the oven door.
14
FINAL INSTALLATION CHECKLIST
• Check to make sure the circuit breaker is closed (RESET) or the circuit fuses are replaced.
• Be sure power is in service to the building.
• Check that all packing material and tape have been removed. Failure to remove these materials
could result in damage to the appliance once the appliance has been turned on and surfaces have
heated.
• Remove all items from inside the oven.
• Check to be sure that the mounting screws are installed and flush with the side trim
(see Section 10).
• Check that the bottom trim is installed properly (see Section 11).
• Ensure that air duct opening at bottom of unit is free of obstructions.
• Check that oven rack guides (if applicable) are installed correctly and oven racks function smoothly.
OPERATION CHECKLIST
• Turn on the power to the oven (refer to your Owner’s Manual). Verify that the bake and broil units and
all cooking functions operate properly.
• See your Owner’s Manual for the troubleshooting list.
• Be sure all of the oven controls are OFF before leaving the oven.
Hinge in
Locked
Position
Notch of Hinge
Securely Fitted
Into Bottom of
Hinge Slot
Bottom
Edge of
Slot
Hinge
Arm
Hinge Notch
Oven rack
guide shown
in place.
Hinge Bracket
Loading ...
Loading ...
Loading ...