Loading ...
Loading ...
Loading ...

10
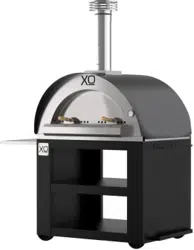
using the oven
LIGHTING THE OVEN CONTINUED:
1. Place two large diameter pieces of firewood approximately 10 - 12 inches apart in
the mouth of the oven pointing outward.
2. Place your tinder (i.e. wadded newspaper) between the two logs.
3. Lay a level of kindling from side to side so that it bridges the gap between the two
logs on the bottom and is suspended above the newspaper tinder. There should be
about 1/2” between each piece of kindling.
4. Place another layer of kindling on the first, set at 90 degrees so that it resembles
a checkerboard.
5. Repeat steps 3 and 4 creating two more layers of kindling.
6. Add a layer small (3/4” - 1” ) firewood on top of the kindling.
7. Lay a large piece of firewood side to side in front of the stack you have built and
use it to push the stack evenly into the center of the oven. Now remove that log.
Your fire is now ready to light using a torch, long wooden matches or long reach lighter.
Ideally, you want to light the newspaper/tinder in several places.
As the kindling and then small wood catches fire, you can add additional firewood
getting progessively larger.
Once the fire is burning robustly, spread the bed of embers out to heat the floor of the
oven evenly.
After the desired cooking temperature is reached (approx. 750 F chamber / 650 F
oven floor) rake the fire to the left side of the oven and put the brazier in place to hold
it. Sweep the floor with the brush and you are ready to cook.
Add small and medium size wood as needed to maintain temperature.
Always pre-heat your oven prior to using.
(TIP: Use a digital thermometer to check the temperature of the oven floor.)
Loading ...
Loading ...
Loading ...