Please read these instructions carefully before using this
product, and save this manual for future use.
THE FOLLOWING APPLIES ONLY IN CANADA.
THE FOLLOWING APPLIES ONLY IN THE U.S.A.
Keep the unit as far away as possible from electromagnetic
equipment (such as microwave ovens, TVs, video games,
radio transmitters, high-voltage lines etc.).
• Do not use the camera near cell phones because doing so may
result in noise adversely affecting the pictures and sound.
• If the camera is adversely affected by electromagnetic equipment
and stops functioning properly, turn the camera off and remove the
battery and/or the connected AC adaptor. Then reinsert the battery
and/or reconnect the AC adaptor and turn the camera on.
The lens can be used with a digital camera compatible with the lens
mount standard for the “Micro Four Thirds
TM
System”.
• It cannot be mounted on the Four Thirds
TM
mount specification
camera.
• The appearance and specifications of products described in this
manual may differ from the actual products you have purchased
due to later enhancements.
• Micro Four Thirds
TM
and Micro Four Thirds Logo marks
are trademarks or registered trademarks of Olympus
Imaging Corporation, in Japan, the United States, the
European Union and other countries.
• Four Thirds
TM
and Four Thirds Logo marks are trademarks or
registered trademarks of Olympus Imaging Corporation, in Japan,
the United States, the European Union and other countries.
• G MICRO SYSTEM is an interchangeable lens type digital camera
system of LUMIX based on a Micro Four Thirds System standard.
• LEICA is a registered trademark of Leica Microsystems IR GmbH.
ELMARIT is a registered trademark of Leica Camera AG. The
LEICA DG lenses are manufactured using measurement
instruments and quality assurance systems that have been certified
by Leica Camera AG based on the company’s quality standards.
• Other names of systems and products mentioned in these
instructions are usually the registered trademarks or trademarks of
the manufacturers who developed the system or product concerned.
∫ Lens Care
• This lens has a dust-proof and splash-proof construction. When
using it, please be careful of the following. If the lens is not working
properly, consult the dealer or your nearest Service Center.
– Please attach the lens to a dust-proof and splash-
proof digital camera.
– When detaching the lens from the digital camera, take
care to ensure that sand, dust, splashes of water etc.,
do not get into the lens or the terminals.
– This lens is not waterproof and cannot be used to record
underwater. For splash-proofing, the lens is constructed to
resist the entry of water. If splashes of water etc. do adhere
to the lens, wipe after use with a soft dry cloth.
• To improve the dust-proofing and splash-proofing of this lens, a
lens mount rubber is used in the mounting portion. After changing
the lens a number of times, you may find that the lens mount
rubber has marked the mount portion of the digital camera body,
which does not affect its performance. For information on changing
the lens mount rubber, contact your nearest Service Center.
• Do not press the lens with excessive force.
• When there is dirt (water, oil, and fingerprints, etc.) on the surface
of the lens, the picture may be affected. Lightly wipe the surface
of the lens with a soft, dry cloth before and after taking pictures.
• To prevent dust and other particles from accumulating on or entering
the lens, attach the lens rear cap when the lens is not in use.
• To protect the lens contact points 1, do not place the
lens with its mount surface facing down. In addition, do
not allow the lens contact points to become dirty.
(See illustration )
∫ About Condensation (Fogging of the Lens)
• Condensation occurs when there are differences in
temperature and humidity as described below. Condensation
can cause the lens to become dirty and lead to mold and
malfunctioning, so exercise caution in the following situations:
– When the camera is brought indoors from outside
during cold weather
– When the camera is brought into an air-conditioned car
– When cold air from an air conditioner is directly blown
onto the lens
– In humid places
• If condensation occurs, turn the power off and leave it for about
two hours. Once the camera acclimatizes to the surrounding
temperature the condensation will go away naturally.
Product numbers correct as of January 2017. These may
be subject to change.
1 Lens Pouch
2 Lens Cap
3 Lens Rear Cap
4 Lens Hood
• The lens rear cap and lens cap are attached to the
interchangeable lens at the time of purchase.
1 Lens surface
2 Focus ring
Rotate to focus when taking pictures with manual
focus (MF).
3 Zoom ring
Rotate the zoom ring when you wish to take large
(tele) or wide (wide angle) pictures.
4 [O.I.S.] switch
When the lens is attached to the camera the stabilizer
function is set to activate if the O.I.S. switch is set to [ON].
• We recommend setting the O.I.S. switch to [OFF]
when using a tripod.
5 [AF/MF] switch
This allows you to switch between Auto Focus (AF)
and Manual Focus (MF).
• When either the [AF/MF] switch of the lens or the setting of
the camera is set to [MF], Manual Focus (MF) is enabled.
6 Lens fitting mark
7 Contact points
8 Lens mount rubber
Note
• When recording on the wide-angle side and using the
flash, the periphery of the screen may darken. In such
cases, we recommend using the external flash.
• If you zoom after focusing, focusing errors may occur.
After zooming, please perform the focusing again.
• In very quiet situations Auto Focus operating sounds
may be recorded during motion picture recording. This is
not a malfunction. In such situations, switching to
Manual Focus will improve the situation.
• If you set the O.I.S. to [ON] when recording a motion
picture, operating sounds may be recorded. If they
become bothersome, we recommend setting the O.I.S.
switch to [OFF] and mounting the camera on a tripod.
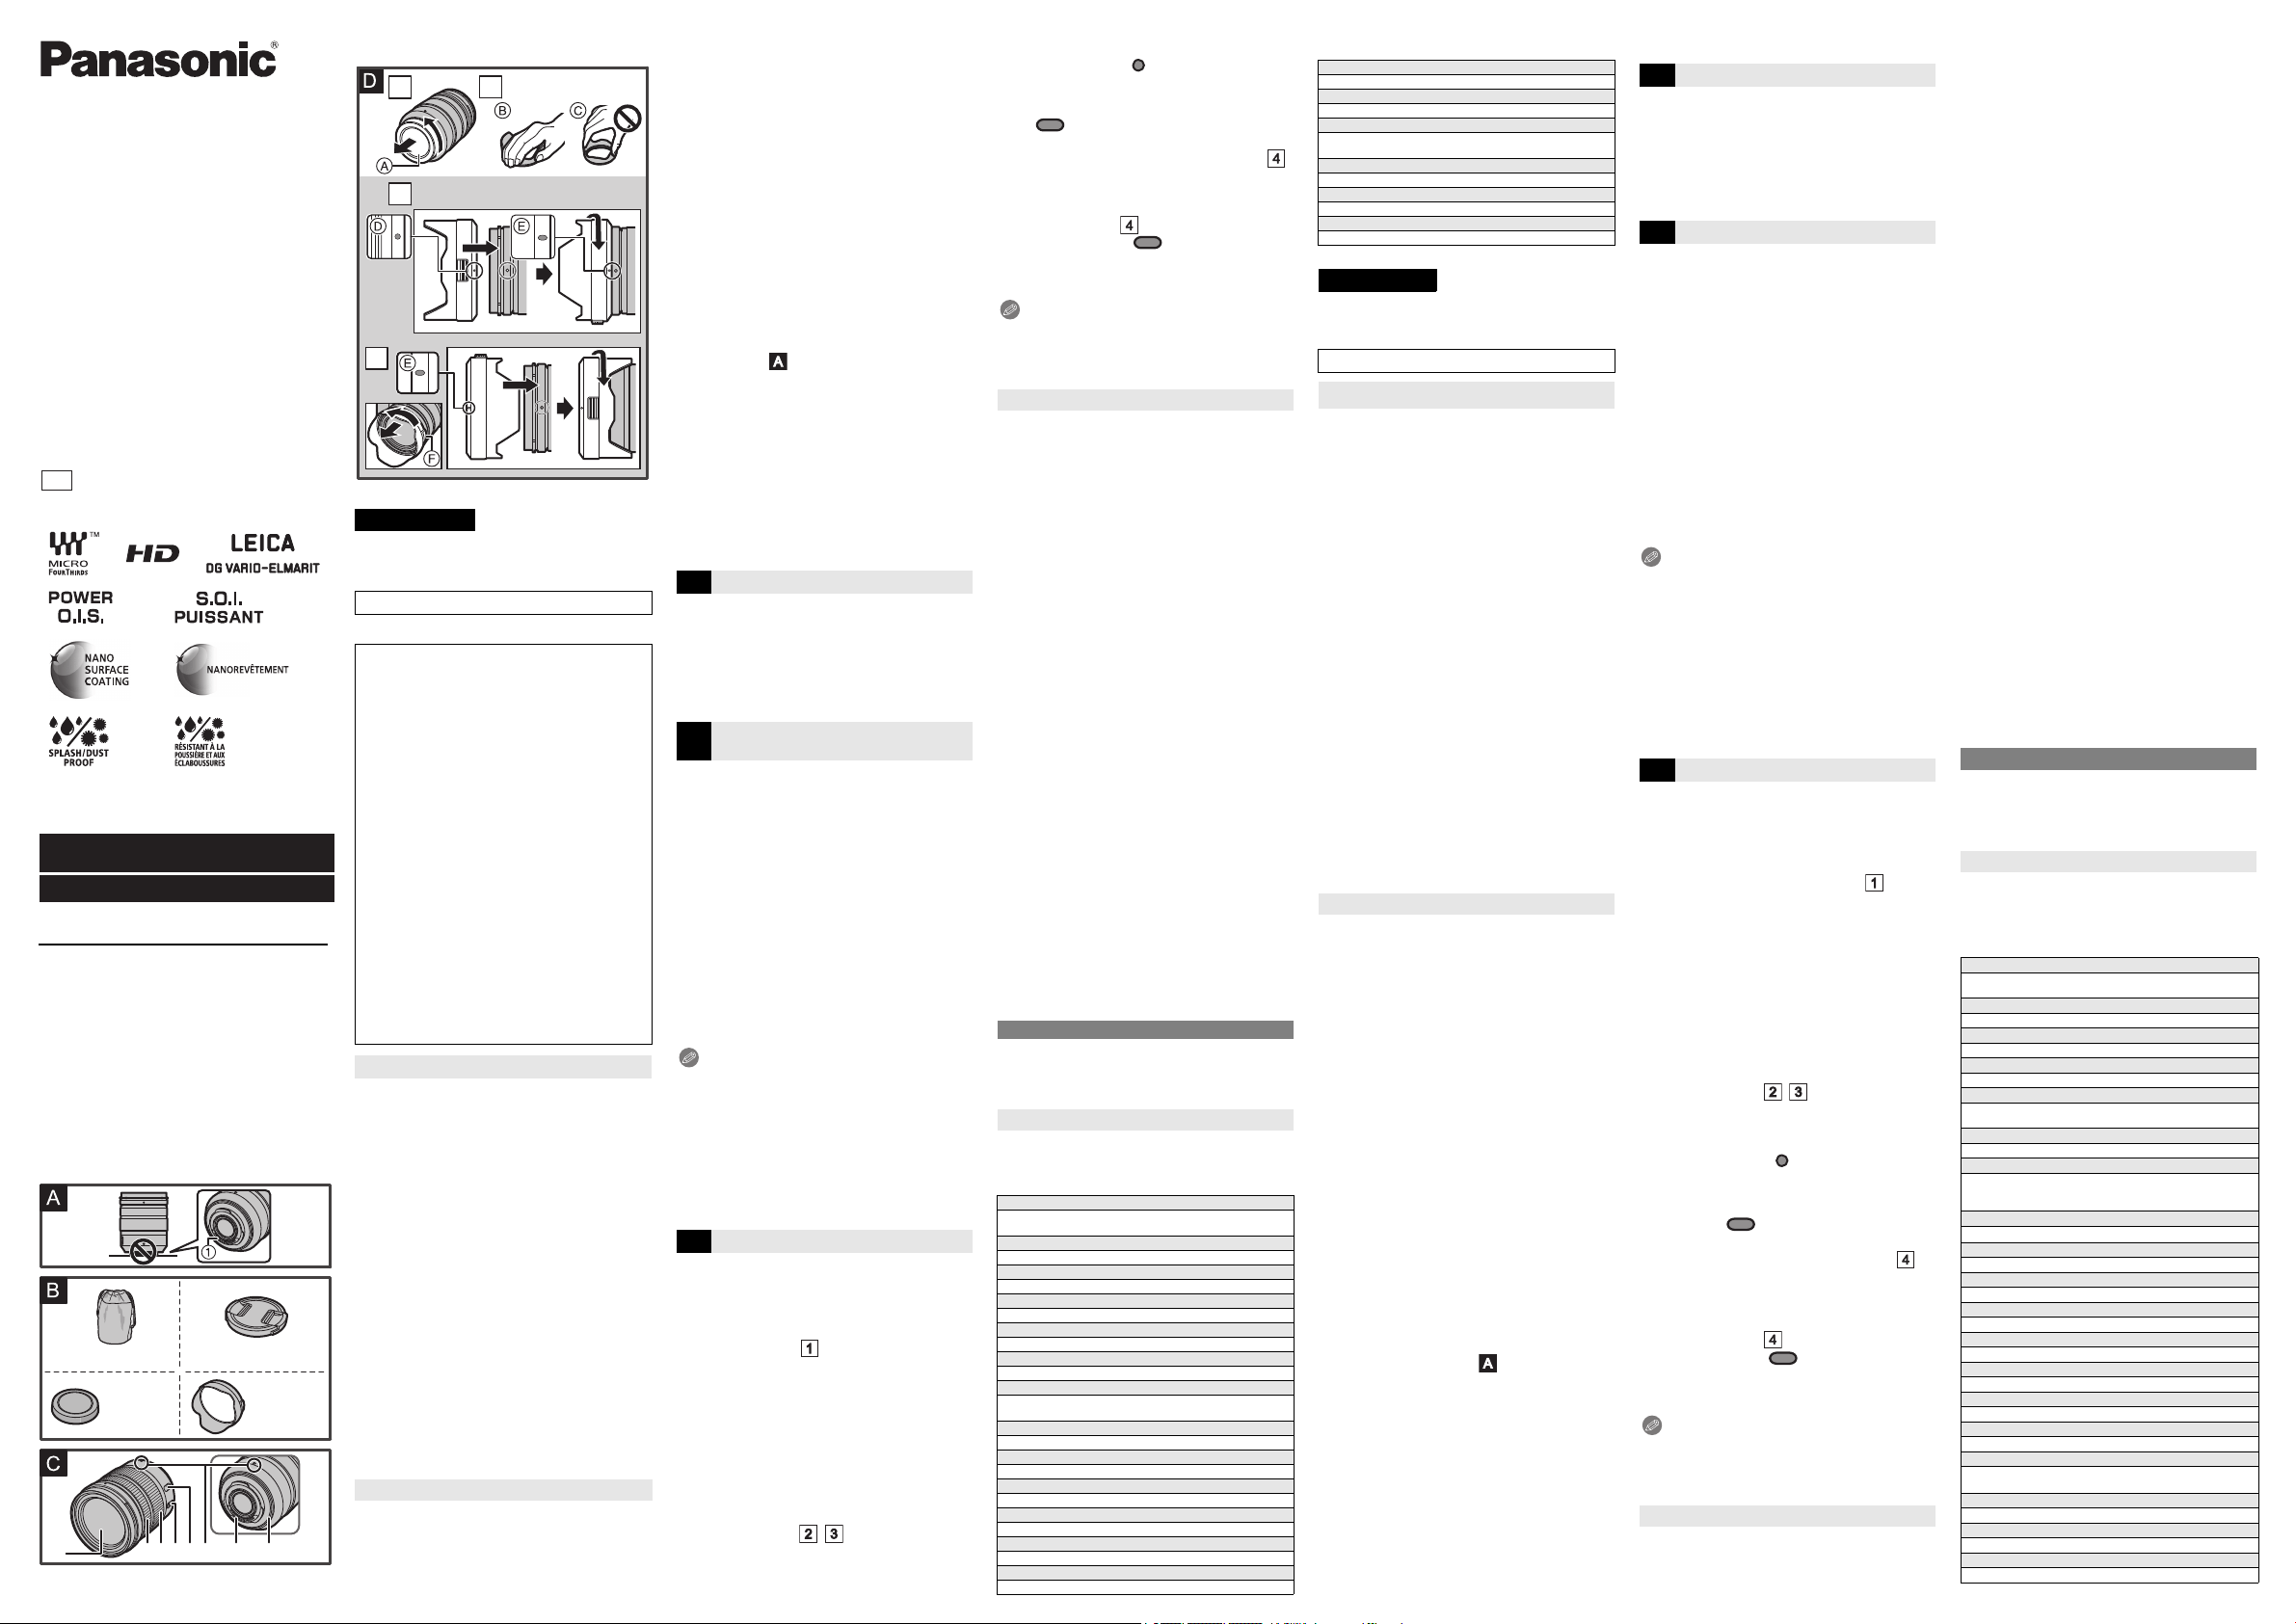
For information on how to attach and remove the lens,
refer to the owner’s manual for your digital camera.
• Before attaching or detaching the lens, check that
the digital camera is turned off.
• Before attaching the lens to the digital camera, remove
the lens rear cap
A
by rotating it in the direction of the
arrow.(See illustration )
• To prevent dust and other particles from accumulating on
or entering the lens, be sure to attach the lens cap/lens
rear cap after detaching the lens from the digital camera.
∫ Attaching Filters
• Vignetting may occur if using 2 or more filters at the same time.
• It is possible to attach the lens cap with the filter already attached.
• When using the lens hood and a filter at the same time,
attach the filter first.
• You cannot attach a conversion lens or adaptor to this
lens. A filter may be used, but attaching any other
element may cause damage to the lens.
∫
Attaching the Lens Hood (Supplied Accessory)
(See illustration / )
Hold the lens hood with your fingers placed as shown
in the picture (
B
).
• Do not hold the lens hood in a way that twists or bends it. (
C
)
1 Align the mark D ( ) on the lens hood with
the mark on the tip of the lens.
2 Rotate the lens hood in the direction of the
arrow until it clicks and then align the mark
E ( ) on the lens hood with the mark on
the tip of the lens.
∫
Removing the lens hood (See illustration )
Rotate the lens hood in the direction of the arrow
while pushing the button
F
on the lens hood.
∫ Temporarily Storing the Lens Hood
(See illustration )
1 Align the mark E ( ) on the lens hood
with the mark on the tip of the lens.
2 Rotate the lens hood in the direction of the
arrow until it clicks into place.
Note
• When taking pictures with the flash with the lens hood attached, the
lower portion of the screen may turn dark (vignetting effect) and the
control of the flash may be disabled because the photo flash may be
obscured by the lens hood. We recommend detaching the lens hood.
Take care not to drop or knock the lens. Also take care
not to put a lot of pressure on the lens.
• Take care not to drop the bag that you inserted the lens in as it may
strongly shock the lens. The camera may stop operating normally and
pictures may no longer be recorded. Also, the lens may be damaged.
• When carrying the digital camera with the lens attached, hold both the
digital camera and the lens.
When using pesticides and other volatile substances around
the camera make sure that they do not get onto the lens.
• If such substances get onto the lens they can damage
the exterior case or cause the paint to peel.
Do not point the lens at the sun or other strong light sources.
• This could cause the lens to collect an excessive amount
of light, resulting in fire and malfunction.
• Under no circumstances should the unit be stored in any
of the following locations since doing so may cause
problems in operation or malfunctioning.
– In direct sunlight or on a beach in summer
– In locations with high temperatures and humidity levels or
where the changes in temperature and humidity are acute
– In locations with high concentrations of sand, dust or dirt
– Where there is fire
– Near heaters, air conditioners or humidifiers
– Where water may make the unit wet
– Where there is vibration
– Inside a vehicle
• Refer also to the owner’s manual of the digital camera.
• When the unit is not going to be used for a prolonged period, we
recommend storing with a desiccant (silica gel). Failure to do so
may result in performance failure caused by mold, etc. It is
recommended that you check the unit’s operation prior to use.
• Do not leave the lens in contact with rubber or plastic
products for extended periods of time.
• Do not touch the lens contact point. Doing so can cause
failure of the unit.
• Do not disassemble or alter the unit.
Do not use while directly touching the lens at low
temperatures for a long period of time.
• In cold places (environments below 0 oC (32 oF), such as
ski slopes), prolonged direct contact with the metal parts
of the lens may cause skin injury. Use gloves or similar
when using the lens for long periods.
Do not use benzine, thinner, alcohol or other similar
cleaning agents to clean the lens glass or exterior cabinet.
• Using solvents can damage the lens or cause the paint to peel.
• Wipe off any dust or fingerprints with a soft, dry cloth.
• Use a dry, dust cloth to remove dirt and dust on the lens
mount rubber, zoom ring, or focus ring.
• Do not use a household detergent or a chemically treated cloth.
A sound is heard when the camera is turned on or off.
A sound is heard from the lens when taking a picture
of a bright subject such as when outdoors.
• This is the sound of lens or aperture movement and is
not a malfunction.
Specifications are subject to change without notice.
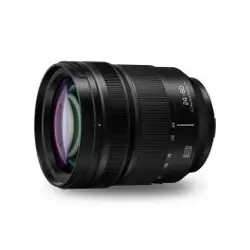
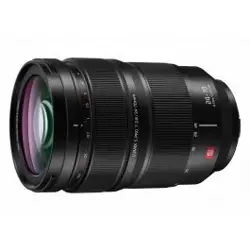
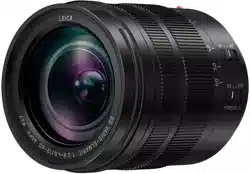
INTERCHANGEABLE LENS FOR DIGITAL CAMERA
“LEICA DG VARIO-ELMARIT 12-60 mm/F2.8-4.0 ASPH./
POWER O.I.S.”
•
Il est recommandé de lire attentivement ce manuel avant
d’utiliser l’appareil et de le conserver pour consultation ultérieure.
CE QUI SUIT NE S’APPLIQUE QU’AU CANADA.
Évitez d’approcher l’appareil de tout équipement
magnétisé (four à micro-ondes, téléviseur, équipement
de jeux vidéo, émetteur radio, ligne à haute tension, etc.).
• N’utilisez pas l’appareil photo à proximité d’un téléphone
cellulaire : cela pourrait entraîner un bruit nuisible à
l’image et au son.
• Advenant le cas où le fonctionnement de l’appareil serait
dérangé par un champ magnétique, coupez le contact,
retirez la batterie ou débranchez l’adaptateur secteur
pour ensuite soit remettre la batterie en place, soit
rebrancher l’adaptateur. Remettez l’appareil en marche.
L’objectif peut être utilisé de pair avec un appareil photo
numérique compatible avec le système de monture
normalisé “Micro Four Thirds
TM
System” (Micro Quatre Tiers).
• Il ne peut pas être monté sur les appareils à monture
Four Thirds
TM
(Quatre Tiers).
• L’apparence et les spécifications des produits décrits
dans le présent manuel peuvent différer des produits que
vous avez achetés en raison de bonifications ultérieures.
• Micro Four Thirds
TM
(Micro Quatre Tiers) et le logo Micro Four
Thirds sont des marques de commerce ou des marques
déposées d’Olympus Imaging Corporation au Japon, aux
États-Unis, en Union européenne et dans d’autres pays.
•Four Thirds
TM
(Quatre Tiers) et le logo Four Thirds sont
des marques de commerce ou des marques déposées
d’Olympus Imaging Corporation au Japon, aux États-
Unis, en Union européenne et dans d’autres pays.
• G MICRO SYSTEM est un système d’appareil photo
numérique à objectif interchangeable de LUMIX basé sur la
norme du système Micro Four Thirds
TM
(Micro Quatre Tiers).
• LEICA est une marque déposée de Leica Microsystems
IR GmbH. ELMARIT est une marque déposée de Leica
Camera AG. Les objectifs DG de LEICA sont fabriqués
avec des instruments de mesure homologués par Leica
Camera AG et des systèmes de contrôle de la qualité
fondés sur des normes approuvées par Leica.
• Les autres noms de systèmes et produits mentionnés
dans ce manuel d’utilisation sont habituellement des
marques déposées ou des marques de commerce des
fabricants qui ont développé le système ou le produit.
∫ Entretien de l’objectif
• Cet objectif possède un dispositif anti-poussière et anti-
éclaboussure. Lorsque vous l’utilisez, soyez attentif aux
points suivants. Si l’objectif ne fonctionne pas
correctement, consultez le revendeur ou votre centre
d’assistance le plus proche.
– Veuillez installer l’objectif sur un appareil photo
numérique anti-poussière et anti-éclaboussure.
– Lorsque vous détachez l’objectif de l’appareil photo numérique,
veillez à ce que le sable, la poussière, les gouttes d’eau, etc.,
n’entrent pas en contact avec l’objectif ou les bornes.
– Cet objectif n’est pas étanche et ne doit pas être utilisé pour
enregistrer sous l’eau. Concernant le dispositif anti-
éclaboussure, l’objectif est construit pour résister à l’entrée
de l’eau. Si des projections d’eau, etc., adhèrent à l’objectif,
essuyez après utilisation avec un chiffon doux et sec.
• Pour améliorer la performance anti-poussière et anti-
éclaboussure de cet objectif, une garniture en caoutchouc
est utilisée dans la partie de montage. Après avoir changé
l’objectif un certain nombre de fois, vous pouvez constater
que la garniture en caoutchouc de l’objectif a marqué la
partie de montage du boîtier de l’appareil photo numérique,
ce qui n’affecte pas ses performances.
Pour plus d’informations sur la garniture en caoutchouc de
l’objectif, contactez votre service d’assistance.
• N’appuyez pas avec force sur l’objectif.
• Lorsqu’il a des salissures (eau, huile, traces de doigts, etc.)
sur la surface de l’objectif, cela peut avoir une incidence sur
l’image. Essuyez légèrement la surface de l’objectif avec un
chiffon sec et doux avant et après la prise de photos.
• Pour éviter que la poussière et d'autres corps étrangers
s'accumulent ou pénètrent à l'intérieur de l'objectif, fixez le
capuchon d’objectif arrière lorsque l'objectif n'est pas utilisé.
• Pour protéger les points de contact de l'objectif
1
, ne
posez pas l'objectif sur le côté de sa surface de montage.
Faites en sorte, également, que les points de contact ne se
salissent pas. (Voir illustration )
∫
À propos de la condensation (Objectif embué)
• Il y a formation de condensation lorsque la température et
l’humidité changent comme suit. La condensation peut
salir l’objectif, entraîner de la moisissure et des problèmes
de fonctionnement. Aussi, est-il important de prendre des
précautions dans les circonstances suivantes :
– Lorsque l’appareil est transporté de l’extérieur à
l’intérieur par temps froid
– Lorsque l’appareil est placé dans un véhicule climatisé
– Lorsque l’air frais d’un climatiseur arrive directement
sur l’objectif
– Lorsque l’appareil est utilisé ou placé dans un endroit humide
• En cas de condensation, mettez l’appareil photo hors
marche et laissez-le ainsi pendant environ 2 heures.
Lorsque la température de l’appareil photo se rapproche
de celle ambiante, la buée disparaît naturellement.
Les codes du produit sont corrects à compter de janvier
2017. Ceux-ci sont susceptibles d’être modifiés.
1 Étui pour objectif
2 Capuchon d’objectif
3 Capuchon arrière d’objectif
4 Parasoleil
• Le capuchon arrière d’objectif et le capuchon d’objectif sont
fixés à l’objectif interchangeable au moment de l’achat.
1 Surface de l’objectif
2 Bague de mise au point
Faites tourner afin de mettre au point lors de la prise
de photos en mise au point manuelle (MPM).
3 Bague de zoom
Tournez la bague de réglage du zoom pour une prise
de vue rapprochée (téléobjectif) ou à grand-angle.
4 Commutateur [O.I.S.] (S.O.I.)
Lorsque l’objectif est fixé à l’appareil photo, la fonction
de stabilisation optique de l’image est activée si le
commutateur O.I.S. (S.O.I.) est réglé sur [ON] (OUI).
• Nous vous conseillons de régler le commutateur O.I.S.
(S.O.I.) sur [OFF] (NON) lorsque vous utilisez un trépied.
5 Commutateur [AF/MF] (MPA/MP)
Ceci vous permet de basculer entre la mise au point
automatique (AF) et la mise au point manuelle (MF).
• Si le commutateur [AF/MF] de l'objectif ou le
paramètre de l'appareil photo est réglé sur [MF], la
mise au point manuelle (MF) est activée.
6 Repère pour la mise en place de l’objectif
7 Points de contact
8 Garniture en caoutchouc de l’objectif
Nota
• En enregistrant sur le coté grand-angle et en utilisant le
flash, la périphérie de l’écran peut s’assombrir. Dans ce
cas, nous vous conseillons d’utiliser un flash externe.
• Si vous zoomez après avoir fait la mise au point, une
erreur de mise au point peut survenir. Après avoir
zoomé, veuillez refaire la mise au point.
• Dans un endroit très silencieux les sons du
fonctionnement de la mise au point automatique peuvent
être enregistrés en même temps que le film. Il ne s’agit
pas d’un dysfonctionnement. Dans de tels cas, passer
en mise au point manuelle peut améliorer la situation.
• Si vous paramétrez le commutateur O.I.S. (S.O.I.) sur [ON]
(OUI) pour enregistrer un film, les sons de fonctionnement
peuvent être enregistrés. S’ils deviennent gênants, nous vous
conseillons de paramétrer le commutateur O.I.S. (S.O.I.) sur
[OFF] (NON) et de monter l’appareil photo sur un trépied.
Pour de plus amples informations sur la manière
d’installer et de retirer l’objectif, consultez le manuel
d'utilisation de l’appareil photo numérique.
• Avant d’installer ou de retirer l’objectif, vérifiez que
l’appareil photo numérique est hors marche.
• Avant d’installer l’objectif sur l’appareil photo numérique,
retirez le capuchon d’objectif arrière
A
en le tournant
dans le sens de la flèche. (Voir illustration )
• Pour éviter que la poussière et d'autres corps étrangers
s'accumulent ou pénètrent à l'intérieur de l'objectif, assurez-
vous de fixer le capuchon d’objectif/capuchon d’objectif arrière
une fois que l'objectif a été retiré de l'appareil photo numérique.
∫ Fixation de filtres
• Un effet de vignettage peut survenir si 2 filtres ou plus
sont présents en même temps.
• Il est possible d’installer le capuchon d’objectif fourni
avec le filtre déjà en place.
• Pour utiliser le parasoleil et un filtre en même temps,
installez d'abord le filtre.
• Vous ne pouvez pas installer de lentilles d’objectif ou
d’adaptateur sur cet objectif. Un filtre peut être utilisé, mais
installer un autre élément peut causer des dommages à l’objectif.
∫ Fixation du parasoleil (Fourni)
(Voir illustration / )
Tenez le parasoleil avec vos doigts placés comme
montré sur l’image. (B)
• Ne tenez pas le parasoleil de manière à le tordre ou le
plier. (C)
1
Alignez le repère
D
( ) présent sur le parasoleil
avec le repère situé à l’extrémité de l’objectif.
2
Faites tourner le parasoleil dans le sens de la flèche
jusqu’à ce qu’il fasse entendre un clic, puis alignez
le repère
E
( ) présent sur le parasoleil avec le
repère situé à l’extrémité de l’objectif.
∫ Retrait du parasoleil (Voir illustration )
Tournez le parasoleil dans le sens de la
flèche tout en appuyant sur la touche F
située sur celui-ci.
∫ Rangement temporaire du parasoleil
(Voir illustration )
1
Alignez le repère
E
( ) présent sur le parasoleil
avec le repère situé à l’extrémité de l’objectif.
2
Faites tourner le parasoleil dans le sens de la flèche
jusqu’à ce qu’il s’enclenche avec un déclic.
Nota
• Lorsque vous prenez des photos avec le flash et que le
parasoleil est monté, la partie inférieure de l’écran peut
s’assombrir (effet de vignetage) et le contrôle du flash peut être
empêché car l’éclair du flash peut être obscurci par le
parasoleil. Nous vous recommandons de retirer le parasoleil.
Prenez soin de ne pas faire tomber ni de cogner l’objectif.
De plus, ne mettez pas trop de pression dessus.
• Attention à ne pas faire tomber le sac où se trouve l’objectif, car
celui-ci pourrait être endommagé. L’appareil photo pourrait ne plus
marcher normalement et les images ne seraient plus enregistrées.
• Lorsque vous transportez l'appareil photo numérique
avec l'objectif fixé, tenez-les tous les deux.
Si des pesticides ou toute autre substance volatile
sont utilisés près de l’appareil, veuillez protéger
l’objectif contre toute éclaboussure ou vaporisation.
• Si de telles substances atteignent l’objectif, celui-ci pourrait
être endommagé, ou la peinture pourrait s’écailler.
Ne pointez pas l'objectif vers le soleil ou d'autres
sources intenses de lumière.
•L
’
objectif pourrait recueillir une quantité excessive de
lumière, causant un feu et un dysfonctionnement.
• En aucunes circonstances vous ne devez ranger l’objectif
dans les endroits indiqués ci-dessous car cela pourrait causer
des problèmes d’utilisation ou de mauvais fonctionnement.
– À la lumière directe du soleil ou sur la plage en été
– Dans des endroits ayant des niveaux de température et
d’humidité élevés ou dans des endroits où les changements
de température et d’humidité sont prononcés
– Dans des endroits ayant une forte concentration de
sable, de poussière ou de saleté
– Où il y a du feu
– Près de radiateurs, climatiseurs, humidificateurs
– Où l’eau pourrait mouiller l’objectif
– Où il y a des vibrations
– À l’intérieur d’un véhicule
• Reportez-vous également au manuel d’utilisation de
l’appareil photo.
• Si l’appareil ne doit plus être utilisé pendant une période
prolongée, nous vous conseillons de le ranger avec un
produit déshydratant (gel de silice). Tout manquement à
cela pourrait provoquer une panne causée par la
moisissure, etc. Nous vous conseillons de vérifier le
fonctionnement de l’objectif avant de l’utiliser.
• Évitez que l’objectif ne soit en contact avec des produits en
plastique ou en caoutchouc pendant une longue période.
• Ne touchez pas les points de contact de l’objectif. Ceci pourrait
causer un mauvais fonctionnement de l’objectif.
• Ne désassemblez ni ne tentez de modifier l’objectif.
Sous de basses températures, ne l'utilisez pas en tenant,
durant de longs moments, l'objectif à mains nues.
• Dans les endroits froids (température ambiante en-
dessous de 0 oC (32 oF), comme sur les pistes de ski), le
contact direct et prolongé avec une pièce métallique de
l'objectif peut causer des blessures. Utilisez des gants
ou quelque chose de similaire pour utiliser l'objectif
durant de longs moments.
N’utilisez pas de benzène, d’alcool ni aucun autre
produit nettoyant similaire pour nettoyer l’appareil.
• L’emploi de solvants peut endommager l’objectif ou faire
s’écailler la peinture.
• Essuyez toute poussière ou traces de doigts avec un
chiffon doux et sec.
• Utilisez un chiffon à poussière sec pour retirer les
salissures et la poussière sur la garniture en caoutchouc de
l'objectif, la bague du zoom ou la bague de mise au point.
• N’utilisez pas de détergent de cuisine ou de linge chimique.
Un bruit se fait entendre à la mise en marche et hors
marche de l’appareil photo.
Un bruit se fait entendre lors de la prise de vue d’un
sujet fortement éclairé, comme à l’extérieur.
• Il s’agit du bruit de l’objectif ou du mouvement de
l’ouverture et ce n’est pas un défaut de fonctionnement.
Ces spécifications peuvent subir des changements sans
avis préalable.
OBJECTIF INTERCHANGEABLE POUR APPAREIL
PHOTO NUMÉRIQUE
“LEICA DG VARIO-ELMARIT 12-60 mm/F2.8-4.0 ASPH./
S.O.I PUISSANT”
CAN ICES-3(B)/NMB-3(B)
FCC Note:
This equipment has been tested and found to comply with the limits
for a Class B digital device, pursuant to Part 15 of the FCC Rules.
These limits are designed to provide reasonable protection
against harmful interference in a residential installation. This
equipment generates, uses, and can radiate radio frequency
energy and, if not installed and used in accordance with the
instructions, may cause harmful interference to radio
communications. However, there is no guarantee that
interference will not occur in a particular installation. If this
equipment does cause harmful interference to radio or
television reception, which can be determined by turning the
equipment off and on, the user is encouraged to try to correct
the interference by one or more of the following measures:
• Reorient or relocate the receiving antenna.
• Increase the separation between the equipment and receiver.
• Connect the equipment into an outlet on a circuit
different from that to which the receiver is connected.
• Consult the dealer or an experienced radio/TV
technician for help.
Any unauthorized changes or modifications to this equipment
would void the user’s authority to operate this device.
This device complies with Part 15 of the FCC Rules.
Operation is subject to the following two conditions: (1) This
device may not cause harmful interference, and (2) this
device must accept any interference received, including
interference that may cause undesired operation.
Responsible Party:
Panasonic Corporation of North America
Two Riverfront Plaza, Newark, NJ 07102-5490
Support Contact:
http://shop.panasonic.com/support
Information for Your Safety
Precautions
1 2
3
4
ENGLISH
B
Supplied Accessories
C
Names and Functions of
Components
D
Attaching/Detaching the Lens
Cautions for Use
Troubleshooting
Specifications
Focal length
f=12 mm to 60 mm
(35 mm film camera equivalent: 24 mm to 120 mm)
Aperture type
9 diaphragm blades/circular aperture diaphragm
Maximum aperture
F2.8 (Wide) to F4.0 (Tele)
Minimum aperture value
F22
Lens construction
14 elements in 12 groups (4 aspherical lenses, 2 ED lenses)
Nano surface coating
Yes
In focus distance
0.20 m (0.66 feet) to
(Wide) / 0.24 m (0.79 feet) to
(Tele)
(from the focus distance reference line)
Maximum image magnification
0.3k (35 mm film camera equivalent: 0.6k)
Optical image stabilizer
Available
[O.I.S.] switch
Available (Switching ON/OFF)
[AF/MF] switch
Available (Switching AF/MF)
Mount
“Micro Four Thirds Mount”
Angle of view
84x (Wide) to 20x (Tele)
Filter diameter
62 mm
Max. diameter
Approx. 68.4 mm (2.7 inch)
Overall length
Approx. 86 mm (3.4 inch) (from the tip of the lens to the
base side of the lens mount)
Mass (Weight)
Approx. 320 g (0.70 lb)
Operating temperature
j10 oC to 40 oC (14 oF to 104 oF)
Dust-proof and splash-proof
Available
CAN ICES-3(B)/NMB-3(B)
Précautions à prendre
Précautions
FRANÇAIS
B
Accessoires fournis
C
Noms et fonctions des composants
D
Fixation/Retrait de l’objectif
Précautions d’utilisation
Dépannage
Spécifications
Distance focale
f=12 mm à 60 mm
(Équivalent à un film de 35 mm : 24 mm à 120 mm)
Type d’ouverture
9 lamelles de diaphragme/diaphragme à ouverture circulaire
Ouverture maximale
F2.8 (Grand-angle) à F4.0 (Téléobjectif)
Valeur d’ouverture minimum
F22
Composition de l’objectif
14 éléments en 12 groupes
(4 lentilles asphériques, 2 lentilles ED)
Nanorevêtement
Oui
Distance de mise au point
0,20 m (0,66 pi) à ¶ (Grand-angle) / 0,24 m (0,79 pi) à 
(Téléobjectif) (à partir de la ligne de référence de la
distance de mise au point)
Grossissement maximum de l’image
0,3k (Équivalent à un film de 35 mm : 0,6k)
Stabilisateur optique de l’image
Disponible
Commutateur [O.I.S.] (S.O.I.)
Disponible (Commutation ON/OFF)
Commutateur [AF/MF] (MPA/MP)
Disponible (Commutation AF/MF)
Monture
“Micro Quatre Tiers” (Micro Four Thirds)
Angle de vue
84x (Grand-angle) à 20x (Téléobjectif)
Diamètre de filtre
62 mm
Diamètre maximum
Environ 68,4 mm (2,7 pouces)
Longueur totale
Environ 86 mm (3,4 pouces) (du bout de l’objectif à la
base de montage de l’objectif)
Poids
Environ 320 g (0,70 lb)
Température de service
j10 oC à 40 oC (14 oF à 104 oF)
Anti-poussière et anti-éclaboussure
Oui
Owner’s Manual/
Manuel d’utilisation/
Instrucciones de
funcionamiento
INTERCHANGEABLE LENS FOR
DIGITAL CAMERA
OBJECTIF INTERCHANGEABLE
POUR APPAREIL PHOTO NUMÉRIQUE
ÓPTICA INTERCAMBIABLE PARA
CÁMARA DIGITAL
Model No./Modèle/Modelo N.
H-ES12060
Register online at
http://shop.panasonic.com/support
(U.S. customers only/
Pour les États-Unis seulement)
Panasonic Corporation of North America
Two Riverfront Plaza, Newark, NJ 07102-5490
http://shop.panasonic.com
Panasonic Canada Inc.
5770 Ambler Drive, Mississauga, Ontario L4W 2T3
www.panasonic.com
C Panasonic Corporation 2017
Printed in China / Imprimé en Chine
Pour toute assistance supplémentaire, visiter :
www.panasonic.ca/french/support
If you have any questions, visit:
USA : http://shop.panasonic.com/support
Canada : www.panasonic.ca/english/support
1
SYF0083
2
3 4
1ZE4Z260ZVFC4605
VFC4430
1236784 5
until
2017/01/31
DVQX1160ZA
F1216KD0
PP
DVQX1160ZA_PP.fm 1 ページ 2016年12月6日 火曜日 午後4時11分
Lea cuidadosamente estas instrucciones antes de usar este
producto, y guarde este manual para usarlo en el futuro.
LO SIGUIENTE SÓLO INTERESA A CANADÁ.
LO SIGUIENTE SÓLO SE APLICA EN LOS EE. UU.
Mantenga la unidad lo más lejos que sea posible de
equipos electromagnéticos (como hornos de
microondas, televisores, vídeo juegos, trasmisores
radio, líneas de alto voltaje, etc.).
• No utilice la cámara cerca de teléfonos móviles, ya que
lo de hacerlo puede producir ruido que afectará
negativamente a las imágenes y el sonido.
• Si la cámara queda afectada negativamente por un equipo
electromagnético y deja de funcionar correctamente,
apague la cámara y quite la batería y/o el adaptador de CA
conectado. Luego vuelva a insertar la batería y/o vuelva a
conectar el adaptador de CA y encienda la cámara.
CAN ICES-3(B)/NMB-3(B)
Notas FCC:
Se ensayó este equipo y se comprobó que está de
conformidad con los límites de un dispositivo digital de la
clase B, de acuerdo con la Parte 15 de las Reglas FCC.
Estos límites se han ideado para proporcionar una razonable
protección contra las interferencias dañinas en una instalación
residencial. Este equipo genera, utiliza y puede radiar energía de
frecuencia radio y, por si no se instala y se utiliza de acuerdo con
las instrucciones, puede ocasionar interferencia dañina a las
comunicaciones radio. Aunque no hay garantía de que no pueda
tener lugar interferencia en especiales instalaciones. Si este
equipo causa interferencia a la recepción de radio o televisión
que pueden determinarse apagando y encendiendo el equipo, se
anima al usuario intentar corregir la interferencia tomando una de
las medidas a continuación:
• Vuelva a orientar o a colocar la antena receptora.
• Aumente la separación entre el equipo y el receptor.
• Conecte el equipo a una toma de un circuito diferente
del que está conectado el receptor.
• Llame al concesionario o un técnico experto de radio y
televisión para ayuda.
Todo cambio o modificación a este equipo sin autorizar invalidará
el título del usuario para hacer funcionar este dispositivo.
Este dispositivo cumple con la Parte 15 de las Reglas FCC. El
funcionamiento está sujeto a las dos condiciones a continuación:
(1) Este dispositivo podría no causar interferencia dañina y (2)
este dispositivo tiene que aceptar toda la interferencia recibida,
incluyendo la que puede causar un funcionamiento no deseado.
Parte responsable:
Panasonic Corporation of North America
Two Riverfront Plaza, Newark, NJ 07102-5490
Contacto para atención:
http://shop.panasonic.com/support
Información para su seguridad
1
SYF0083
2
3 4
1ZE4Z260ZVFC4605
VFC4430
1236784 5
1 2
3
4
ESPAÑOL
El objetivo puede usarse con una cámara digital
compatible con el estándar de montaje de objetivos del
“Micro Four Thirds
TM
System”.
• No se puede montar en una cámara con estándar de
soporte Four Thirds
TM
.
• E aspecto y las especificaciones de los productos descritos
en este manual pueden diferir de los productos reales que
usted ha comprado debido a aumentos sucesivos.
• El logotipo Micro Four Thirds
TM
y Micro Four Thirds son
marcas comerciales o marcas comerciales registradas
de Olympus Imaging Corporation, en Japón, Estados
Unidos, la Unión Europea y otros países.
• El logotipo Four Thirds
TM
y Four Thirds son marcas
comerciales o marcas comerciales registradas de
Olympus Imaging Corporation, en Japón, Estados
Unidos, la Unión Europea y otros países.
• G MICRO SYSTEM es un sistema de cámara digital con
objetivo intercambiable de LUMIX basado en el estándar
Micro Four Thirds System.
• LEICA es una marca registrada de Leica Microsystems
IR GmbH. ELMARIT es una marca registrada de Leica
Camera AG. Los objetivos LEICA DG se fabrican
usando instrumentos de medida y sistemas de garantía
de calidad certificados por Leica Camera AG en base a
los estándares de calidad de la compañía.
• Los nombres de los sistemas y productos que se
mencionan en estas instrucciones generalmente son
marcas comerciales registradas o marcas comerciales
de los fabricantes que desarrollaron el sistema o
producto en cuestión.
∫ Atención del objetivo
• Esta lente tiene una construcción con resistencia al polvo y las
salpicaduras. Al usarla, tenga cuidado con lo siguiente.
Si la lente no está funcionando correctamente, consulte a su
distribuidor o a su centro de servicio más cercano.
– Coloque la lente en una cámara digital con resistencia
al polvo y las salpicaduras.
– Al retirar la lente de la cámara digital, tenga cuidado y
asegúrese de que la arena, polvo, salpicaduras de
agua, etc. no entren en la lente o los terminales.
– Esta lente no es impermeable y no se puede usar para
grabar abajo del agua. Para la resistencia a salpicaduras,
la lente está construida para resistir la entrada de agua. Si
las salpicaduras de agua, etc. no se adhieren a la lente,
límpiela después de usarla con un paño suave y seco.
• Para mejorar la función de resistencia al polvo y la
salpicadura de esta lente, se usa una goma de montaje de
la lente en la parte de montaje. Luego de cambiar la lente
varias veces, puede encontrar que la goma de montaje de
la lente haya marcado la parte de montaje del cuerpo de la
cámara digital, lo que no afecta su rendimiento.
Para obtener información sobre cómo cambiar la goma de
montaje de la lente, comuníquese con el centro de servicio
más cercano.
• No ejerce demasiada presión en el objetivo.
• Cuando hay suciedad (agua, aceite, huellas dactilares,
etc.) en la superficie del objetivo, la imagen puede salir
afectada. Limpie ligeramente con un paño blando y seco
antes y después de tomar las imágenes.
• Para evitar que se introduzcan o acumulen polvo y otras
partículas en la lente, instale la tapa trasera de esta
cuando no la utilice.
• Para proteger los puntos de contacto de la lente 1, no
la coloque con la superficie de montaje orientada hacia
abajo. Evite además que los puntos de contacto de la
lente se ensucien. (Ver ilustración )
∫ Acerca de la condensación
(Empañamiento del objetivo)
• La condensación ocurre cuando se encuentra una diferencia
en la temperatura y humedad como se describe abajo. La
condensación puede hacer ensuciar el objetivo y producir
hongos y un funcionamiento defectuoso, por lo tanto ponga
cuidado en las situaciones a continuación:
– Cuando lleva la cámara en casa desde el aire libre
durante un tiempo frío
– Cuando lleva la cámara dentro de un coche con aire
acondicionado
– Cuando sopla en el objetivo aire frío desde un
acondicionador de aire
– En lugares húmedos
• Si ocurre condensación, apague la alimentación y la
deje así durante dos horas. Una vez de que la cámara
se haya aclimatado a la temperatura ambiente en
empañamiento desaparece naturalmente.
Números de productos correctos a partir de enero de
2017. Pueden estar sujetos a cambio.
1 Estuche de la lente
2 Tapa del objetivo
3 Tapa trasera del objetivo
4 Visera del objetivo
• La tapa trasera del objetivo y
la tapa del objetivo
intercambiable al momento de la compra.
1 Superficie del objetivo
2 Anillo del enfoque
Gire para enfocar cuando tome fotografías con el
enfoque manual (MF).
3 Anillo del zoom
Gire el anillo del zoom cuando quiere tomar imágenes
grandes (teleobjetivo) o anchas (granangular).
4 Interruptor [O.I.S.]
Cuando a la cámara está unido el objetivo, está
ajustada la función estabilizadora para ver si el
interruptor O.I.S. está ajustado en [ON].
• Le recomendamos que ajuste el interruptor O.I.S. a
[OFF] cuando usa un trípode.
5 Interruptor [AF/MF]
Esto le permite cambiar entre el enfoque automático
(AF) y el enfoque manual (MF).
• Cuando el interruptor [AF/MF] del objetivo o de la
configuración de la cámara se establece a [MF], se
habilita el enfoque manual (MF).
6 Marca para ajustar el objetivo
7 Punto de contacto
8 Goma de montaje de la lente
Nota
• Cuando graba en el lado de gran angular y usando el
flash, la periferia de la pantalla se puede oscurecer. En
esos casos, le recomendamos usar el flash externo.
• Si hace zoom después de hacer enfoque, pueden
ocurrir errores de enfoque. Luego de hacer zoom,
realice de nuevo el enfoque.
• En situaciones muy tranquilas es posible que se grabe
el sonido de funcionamiento del enfoque automático
durante la grabación de una película. Esto no significa
un mal funcionamiento. En tales situaciones, si cambia a
enfoque manual mejorará la situación.
• Si establece O.I.S. a [ON] cuando graba una película, es
posible que se grabe el ruido de funcionamiento. Si le
molesta, le recomendamos que establezca el interruptor
O.I.S. a [OFF] e instale la cámara en un trípode.
Para obtener información sobre cómo colocar y
retirar la lente, consulte las instrucciones de
funcionamiento de su cámara digital.
• Antes de colocar o quitar la lente, compruebe que la
cámara digital está apagada.
• Antes de colocar la lente en la cámara digital, quite la
tapa trasera de la lente
A
girándola en el sentido de la
flecha. (Ver ilustración )
• Para evitar que se introduzcan o acumulen polvo y otras
partículas en la lente, no olvide instalar la tapa trasera de
la lente una vez que la haya retirado de la cámara digital.
∫ Unión de los filtros
• Se podrían generar viñetas si se usan 2 o más filtros a la vez.
• Se puede colocar la tapa del objetivo con el filtro ya colocado.
• Si utiliza la visera de la lente y un filtro al mismo tiempo,
instale el filtro en primer lugar.
• No consigue acoplar un objetivo de conversión o
adaptador a este objetivo. Puede usarse un filtro, pero
acoplar cualquier otro elemento puede dañar el objetivo.
∫ Unión de la visera del objetivo (Accesorio
suministrado) (Ver ilustración / )
Sostenga la cubierta de la lente con sus dedos
colocados como se muestra en la imagen (
B
).
• No sostenga la cubierta de la lente de forma que pueda
doblarla o torcerla (
C
).
1 Alinee la marca D ( ) en la visera de la
lente con la marca en el extremo de la lente.
2 Gire la visera de la lente en la dirección de
la flecha hasta que haga clic y después
alinee la marca E ( ) en la visera de la
lente con la marca en el extremo de la lente.
∫
Cómo retirar la visera
del objetivo
(Ver ilustración )
Gire la visera de la lente en el sentido de la
flecha mientras presiona el botón F en ella.
∫ Almacenamiento temporal de la visera del
objetivo (Ver ilustración )
1 Alinee la marca E ( ) en la visera de la
lente con la marca en el extremo de la lente.
2
Gire la visera de la lente en la dirección de la
flecha hasta que se encaje en su posición.
Nota
• Cuando toma las imágenes con el flash y tiene unida la
visera del objetivo, la porción inferior de la pantalla
podría ponerse oscura (efecto de viñeteado) y el control
del flash podría inhabilitarse debido a que éste podría
ser oscurecido por la misma visera. Le recomendamos
que quite dicha visera.
Tenga cuidado de no hacer caer el objetivo ni le
choque contra. Asimismo tenga cuidado de no
presionarlo demasiado.
• Tenga cuidado de no hacer caer la bolsa en la que cabe el
objetivo. Éste podría dañarse, la cámara podría dejar de
funcionar normalmente y las imágenes ya podrían no grabarse.
• Cuando lleve la cámara digital con el objetivo montado,
sostenga la cámara digital y la lente a la vez.
Cuando usa pesticidas y otras substancias volátiles
alrededor de la cámara tenga cuidado de que no entre
en el objetivo.
• Si dichas substancias caen en el objetivo, éstas pueden
dañarlo o hacer desconchar su barniz.
No apunte con el objetivo al sol u otras fuentes de luz intensa.
• Esto podría hacer que el objetivo recogiera demasiada
luz, lo que podría provocar un incendio y una avería.
• De ninguna manera la unidad debe ser usada o almacenada
en uno de los siguientes lugares ya que lo de hacerlo podría
perjudicarla o producir un funcionamiento defectuoso.
– Bajo la luz directa del sol o bien a lo largo de la costa
durante el verano
– En lugares donde haya altas temperaturas o altos
niveles de humedad o bien donde sean repentinos los
cambios de temperatura y humedad
– En lugares donde haya altas concentraciones de
arena, polvo o suciedad
– Donde haya llamas
– Cerca de calefactores, acondicionadores de aire o
humedecedores
– Donde el agua puede hacer mojar la unidad
– Donde haya vibraciones
– Dentro de un vehículo
• Se refiera también a las instrucciones de funcionamiento
de la cámara digital.
• Cuando no ha de ser usada la unidad por un período
prolongado, le recomendamos guardar con un desecante
(silicagel). El hecho de no hacerlo podría ocasionar una
avería causada por el moho etc. Se recomienda que
compruebe el funcionamiento de la unidad antes de usarla.
• No deje el objetivo en contacto con productos de
plástico durante largos períodos de tiempo.
• No toque los contactos eléctricos de la unidad. Lo de
hacerlo puede causar avería en la unidad.
• No desmonte ni modifique la unidad.
No la utilice si va a tocar directamente la lente a bajas
temperaturas durante un periodo de tiempo prolongado.
• Dans les endroits froids (température ambiante en-dessous de
0
o
C (32
o
F), comme sur les pistes de ski), le contact direct et
prolongé avec une pièce métallique de l'objectif peut causer
des blessures. Utilisez des gants ou quelque chose de
similaire pour utiliser l'objectif durant de longs moments.
No utilice gasolina, diluyente, alcohol u otros agentes
de limpieza parecidos para limpiar la unidad.
• El hecho de usar disolventes puede dañar el objetivo y
hacer desconchar su barniz.
• Quite cualquier indicio de polvo o huellas dactilares con
un paño blando y seco.
• Use un paño seco para sacar la suciedad y el polvo de la goma
de montaje de la lente, el anillo de zoom y el anillo de enfoque.
• No use detergentes para cocina o un paño tratado químicamente.
Se oye un sonido cuando se enciende o se apaga la cámara.
Se escucha un sonido desde la lente al tomar la imagen de
un sujeto brillante como en exteriores.
• Éste es el sonido del objetivo o el movimiento de
abertura y no es un funcionamiento defectuoso.
Las especificaciones están sujetas a cambio sin previo aviso.
ÓPTICA INTERCAMBIABLE PARA CÁMARA DIGITAL
“LEICA DG VARIO-ELMARIT 12-60 mm/F2.8-4.0 ASPH./
POWER O.I.S.”
Limited Warranty
Limited Warranty Coverage (For USA Only)
If your product does not work properly because of a
defect in materials or workmanship, Panasonic
Corporation of North America (referred to as “the
warrantor”) will, for the length of the period indicated on
the chart below, which starts with the date of original
purchase (“warranty period”), at its option either (a)
repair your product with new or refurbished parts, (b)
replace it with a new or a refurbished equivalent value
product, or (c) refund your purchase price. The decision
to repair, replace or refund will be made by the warrantor.
During the “Labor” warranty period there will be
no charge for labor. During the “Parts” warranty
period, there will be no charge for parts. This
Limited Warranty excludes both parts and labor
for non-rechargeable batteries, antennas, and
cosmetic parts (cabinet). This warranty only
applies to products purchased and serviced in the
United States. This warranty is extended only to
the original purchaser of a new product which was
not sold “as is”.
When shipping the unit, carefully pack, include all
supplied accessories listed in the Owner’s
Manual, and send it prepaid, adequately insured
and packed well in a carton box. When shipping
Lithium Ion batteries please visit our Web Site at
http://shop.panasonic.com/support
as Panasonic
is committed to providing the most up to date
information. Include a letter detailing the
complaint, a return address and provide a
daytime phone number where you can be
reached. A valid registered receipt is required
under the Limited Warranty.
IF REPAIR IS NEEDED DURING THE WARRANTY
PERIOD, THE PURCHASER WILL BE REQUIRED
TO FURNISH A SALES RECEIPT/PROOF OF
PURCHASE INDICATING DATE OF PURCHASE,
AMOUNT PAID AND PLACE OF PURCHASE.
CUSTOMER WILL BE CHARGED FOR THE
REPAIR OF ANY UNIT RECEIVED WITHOUT
SUCH PROOF OF PURCHASE.
Limited Warranty Limits and Exclusions
This warranty ONLY COVERS failures due to
defects in materials or workmanship, and DOES
NOT COVER normal wear and tear or cosmetic
damage. The warranty ALSO DOES NOT
COVER damages which occurred in shipment, or
failures which are caused by products not
supplied by the warrantor, or failures which result
from accidents, misuse, abuse, neglect,
mishandling, misapplication, alteration, faulty
installation, set-up adjustments, misadjustment of
consumer controls, improper maintenance, power
line surge, lightning damage, modification,
introduction of sand, humidity or liquids,
commercial use such as hotel, office, restaurant,
or other business or rental use of the product, or
service by anyone other than a Factory Service
Center or other Authorized Servicer, or damage
that is attributable to acts of God.
THERE ARE NO EXPRESS WARRANTIES
EXCEPT AS LISTED UNDER “LIMITED
WARRANTY COVERAGE”.
THE WARRANTOR IS NOT LIABLE FOR
INCIDENTAL OR CONSEQUENTIAL
DAMAGES RESULTING FROM THE USE OF
THIS PRODUCT, OR ARISING OUT OF ANY
BREACH OF THIS WARRANTY.
(As examples, this excludes damages for lost
time, travel to and from the servicer, loss of or
damage to media or images, data or other
memory or recorded content. The items listed are
not exclusive, but for illustration only.)
ALL EXPRESS AND IMPLIED WARRANTIES,
INCLUDING THE WARRANTY OF
MERCHANTABILITY, ARE LIMITED TO THE
PERIOD OF THE LIMITED WARRANTY.
Some states do not allow the exclusion or
limitation of incidental or consequential damages,
or limitations on how long an implied warranty
lasts, so the exclusions may not apply to you.
This warranty gives you specific legal rights and
you may also have other rights which vary from
state to state. If a problem with this product
develops during or after the warranty period, you
may contact your dealer or Service Center. If the
problem is not handled to your satisfaction, then
write to:
Consumer Affairs Department
Panasonic Corporation of North America
661 Independence Pkwy
Chesapeake, VA 23320
PARTS AND SERVICE, WHICH ARE NOT
COVERED BY THIS LIMITED WARRANTY, ARE
YOUR RESPONSIBILITY.
As of July 2015
Panasonic Canada Inc.
5770 Ambler Drive, Mississauga, Ontario L4W 2T3
PANASONIC PRODUCT – LIMITED
WARRANTY
Panasonic Canada Inc. warrants this product to
be free from defects in material and workmanship
under normal use and for a period as stated
below from the date of original purchase agrees
to, at its option either (a) repair your product with
new or refurbished parts, (b) replace it with a new
or a refurbished equivalent value product, or (c)
refund your purchase price. The decision to
repair, replace or refund will be made by
Panasonic Canada Inc.
This warranty is given only to the original
purchaser, or the person for whom it was
purchased as a gift, of a Panasonic brand product
mentioned above sold by an authorized
Panasonic dealer in Canada and purchased and
used in Canada, which product was not sold “as
is”, and which product was delivered to you in
new condition in the original packaging.
IN ORDER TO BE ELIGIBLE TO RECEIVE
WARRANTY SERVICE HEREUNDER, A PURCHASE
RECEIPT OR OTHER PROOF OF DATE OF
ORIGINAL PURCHASE, SHOWING AMOUNT PAID
AND PLACE OF PURCHASE IS REQUIRED
LIMITATIONS AND EXCLUSIONS
This warranty ONLY COVERS failures due to
defects in materials or workmanship, and DOES
NOT COVER normal wear and tear or cosmetic
damage. The warranty ALSO DOES NOT COVER
damages which occurred in shipment, or failures
which are caused by products not supplied by
Panasonic Canada Inc., or failures which result from
accidents, misuse, abuse, neglect, mishandling,
misapplication, alteration, faulty installation, set-up
adjustments, misadjustment of consumer controls,
improper maintenance, improper batteries, power
line surge, lightning damage, modification,
introduction of sand, humidity or liquids, commercial
use such as hotel, office, restaurant, or other
business or rental use of the product, or service by
anyone other than a Authorized Servicer, or damage
that is attributable to acts of God
.
Dry cell batteries, printer ink cartridge and paper are
also excluded from coverage under this warranty.
Rechargeable batteries are warranted for ninety
(90) days from date of original purchase.
THIS EXPRESS, LIMITED WARRANTY IS IN
LIEU OF ALL OTHER WARRANTIES, EXPRESS
OR IMPLIED, INCLUDING ANY IMPLIED
WARRANTIES OF MERCHANTABILITY AND
FITNESS FOR A PARTICULAR PURPOSE. IN
NO EVENT WILL PANASONIC CANADA INC. BE
LIABLE FOR ANY SPECIAL, INDIRECT OR
CONSEQUENTIAL DAMAGES RESULTING
FROM THE USE OF THIS PRODUCT OR
ARISING OUT OF ANY BREACH OF ANY
EXPRESS OR IMPLIED WARRANTY.
(As examples, this warranty excludes damages
for lost time, travel to and from the Authorized
Servicer, loss of or damage to media or images,
data or other memory or recorded content. This
list of items is not exhaustive, but for illustration
only.)
In certain instances, some jurisdictions do not allow the
exclusion or limitation of incidental or consequential
damages, or the exclusion of implied warranties, so the
above limitations and exclusions may not be applicable.
This warranty gives you specific legal rights and you
may have other rights which vary depending on your
province or territory.
WARRANTY SERVICE
For product operation, repairs and information
assistance, please visit our Support page:
www.panasonic.ca/english/support
Garantie limitée
Panasonic Canada Inc.
5770, Ambler Drive, Mississauga (Ontario) L4W 2T3
PRODUIT PANASONIC – GARANTIE LIMITÉE
Panasonic Canada Inc. garantit que ce produit est
exempt de défauts de matériaux et de main-d’œuvre
dans un contexte d’utilisation normale pendant la
période indiquée ci-après à compter de la date
d’achat original et, dans l’éventualité d’une
défectuosité, accepte, à sa discrétion, de (a) réparer
le produit avec des pièces neuves ou remises à
neuf, (b) remplacer le produit par un produit neuf ou
remis à neuf d’une valeur équivalente ou (c)
rembourser le prix d’achat. La décision de réparer,
remplacer ou rembourser appartient à Panasonic
Canada Inc.
La présente garantie n’est fournie qu’à l’acheteur
original d’un des produits de marque Panasonic
indiqués plus haut, ou à la personne l’ayant reçu
en cadeau, vendu par un détaillant Panasonic
agréé au Canada et utilisé au Canada. Le produit
ne doit pas avoir été “vendu tel quel” et doit avoir
été livré à l’état neuf dans son emballage
d’origine.
POUR ÊTRE ADMISSIBLE AUX SERVICES AU
TITRE DE LA PRÉSENTE GARANTIE, LA
PRÉSENTATION D’UN REÇU D’ACHAT OU DE
TOUTE AUTRE PIÈCE JUSTIFICATIVE DE LA
DATE D’ACHAT ORIGINAL, INDIQUANT LE
MONTANT PAYÉ ET LE LIEU DE L’ACHAT, EST
REQUISE.
RESTRICTIONS ET EXCLUSIONS
La présente garantie COUVRE SEULEMENT les
défaillances attribuables à un défaut des
matériaux ou à un vice de fabrication et NE
COUVRE PAS l’usure normale ni les dommages
esthétiques. La présente garantie NE COUVRE
PAS NON PLUS les dommages subis pendant le
transport, les défaillances causées par des
produits non fournis par Panasonic Canada Inc. ni
celles résultant d’un accident, d’un usage abusif
ou impropre, de négligence, d’une manutention
inadéquate, d’une mauvaise application, d’une
altération, d’une installation ou de réglages
impropres, d’un mauvais réglage des contrôles de
l’utilisateur, d’un mauvais entretien, de piles
inadéquates, d’une surtension temporaire, de la
foudre, d’une modification, de la pénétration de
sable, de liquides ou d’humidité, d’une utilisation
commerciale (dans un hôtel, un bureau, un
restaurant ou tout autre usage par affaires ou en
location), d’une réparation effectuée par une
entité autre qu’un centre de service Panasonic
agréé ou encore d’une catastrophe naturelle.
Les piles sèches, les cartouches d’encre et le
papier sont également exclus de la présente
garantie.
Les piles rechargeables sont couvertes par une
garantie de quatre-vingt-dix (90) jours à compter
de la date d’achat original.
CETTE GARANTIE LIMITÉE ET EXPRESSE
REMPLACE TOUTE AUTRE GARANTIE,
EXPRESSE OU IMPLICITE, INCLUANT LES
GARANTIES IMPLICITES DU CARACTÈRE
ADÉQUAT POUR LA COMMERCIALISATION ET
UN USAGE PARTICULIER. PANASONIC
CANADA INC. N’AURA D’OBLIGATION EN
AUCUNE CIRCONSTANCE POUR TOUT
DOMMAGE DIRECT, INDIRECT OU
CONSÉCUTIF RÉSULTANT DE L’UTILISATION
DE CE PRODUIT OU DÉCOULANT DE TOUTE
DÉROGATION À UNE GARANTIE EXPRESSE
OU IMPLICITE. (À titre d’exemples, cette garantie
exclut les dommages relatifs à une perte de
temps, le transport jusqu’à et depuis un centre de
service agréé, la perte ou la détérioration de
supports ou d’images, de données ou de tout
autre contenu en mémoire ou enregistré. Cette
liste n’est pas exhaustive et n’est fournie qu’à des
fins explicatives.)
Certaines juridictions ne reconnaissent pas les
exclusions ou limitations de dommages indirects
ou consécutifs, ou les exclusions de garanties
implicites. Dans de tels cas, les limitations
stipulées ci-dessus peuvent ne pas être
applicables. La présente garantie vous confère
des droits précis; vous pourriez aussi avoir
d’autres droits pouvant varier selon votre province
ou territoire de résidence.
SERVICE SOUS GARANTIE
Pour tout renseignement sur les produits,
réparation ou assistance technique, veuillez
visiter notre page Soutien :
www.panasonic.ca/french/support
Prevención contra las averías
B
Accesorios suministrados
C
Nombres y funciones de los
componentes
D
Unir y quitar el objetivo
Precauciones para el uso
Búsqueda de averías
Especificaciones
Longitud focal
f=12 mm a 60 mm
(Igual a una cámara de película de 35 mm: de 24 mm a
120 mm)
Tipo de abertura
9 aspas de diafragma/Diafragma de apertura circular
Apertura máxima
F2.8 (Granangular) a F4.0 (Teleobjetivo)
Valor de abertura mínimo
F22
Estructura del objetivo
14 elementos en 12 grupos (4 lentes asféricas, 2 lentes ED)
Revestimiento de superficie Nano
Sí
En la distancia del enfoque
0,20 m (0,66 pies) a ¶ (Gran angular) / 0,24 m
(0,79 pies) a ¶ (Teleobjetivo) (desde la línea de
referencia de la distancia de enfoque)
Máxima ampliación de la imagen
0,3k (Igual a una cámara de película de 35 mm: 0,6k)
Estabilizador óptico de la imagen
Disponible
Interruptor [O.I.S.]
Disponible (ENCENDER/APAGAR)
Interruptor [AF/MF]
Disponible (Cambie AF/MF)
Soporte
“Micro Four Thirds Mount”
Ángulo visual
84x (Granangular) a 20x (Teleobjetivo)
Diámetro del filtro
62 mm
Diámetro máx.
Aprox. 68,4 mm (2,7 pulgadas)
Longitud total
Aprox. 86 mm (3,4 pulgadas) (desde la punta del
objetivo hasta la base lateral de la montura del objetivo)
Peso
Aprox. 320 g (0,70 lb)
Temperatura de funcionamiento
j10 oC a 40 oC (14 oF a 104 oF)
Resistencia al polvo y a las salpicaduras
Sí
ONLY FOR U.S.A.
Panasonic Products Limited Warranty
Product or part name
Parts Labor
Interchangeable Lens
for Digital Camera
1 Year 1 Year
All included Accessories
(Except Non-
Rechargeable Batteries)
90 Days
Not
Applicable
Only Non-
Rechargeable Batteries
10 Days
Not
Applicable
Mail-In Service
--Online Repair Request
Online Repair Request
To submit a new repair request and for quick
repair status visit our Web Site at
http://shop.panasonic.com/support
.
ONLY FOR CANADA
Interchangeable Lens
for Digital Camera
One (1) year, parts
and labour
Objectif interchangeable
pour appareil photo
numérique
Un (1) an, pièces
et main-d’œuvre
DVQX1160ZA_PP.fm 2 ページ 2016年12月6日 火曜日 午後4時11分