Loading ...
Loading ...
Loading ...
12
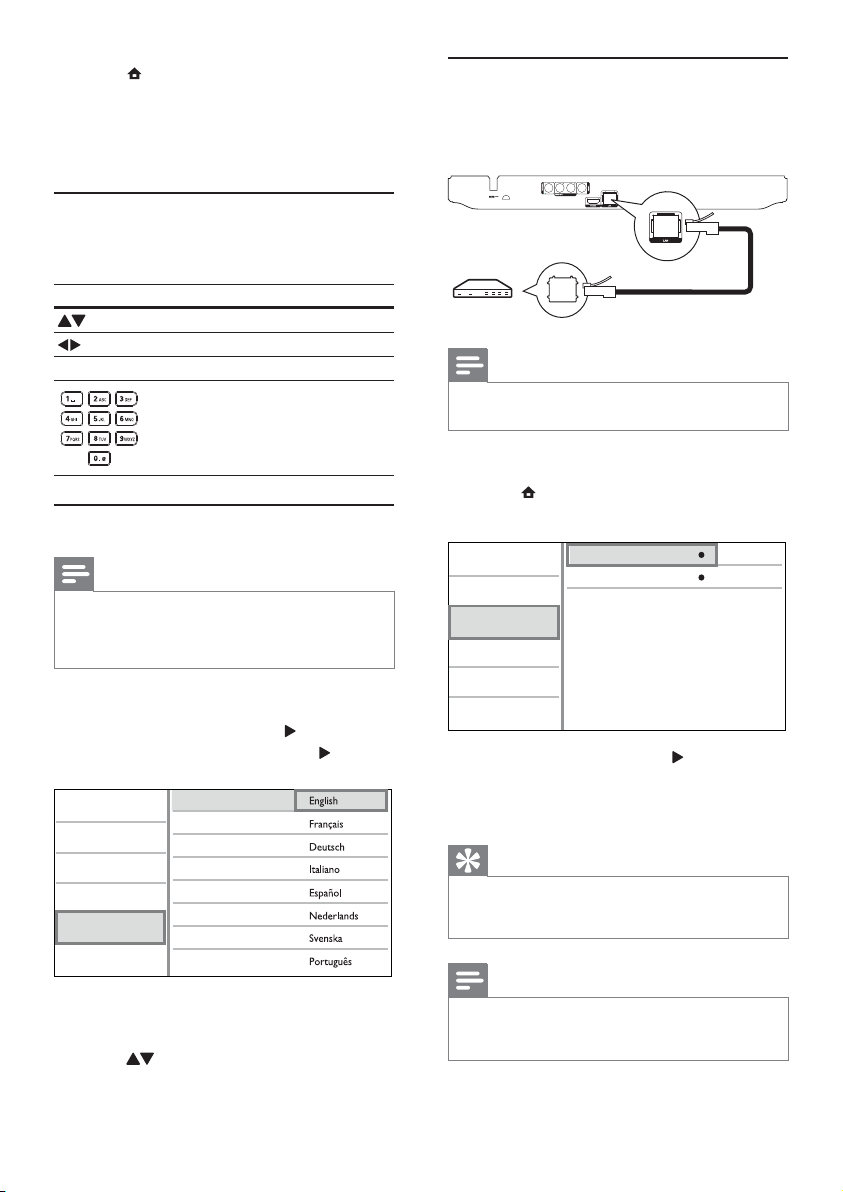
Set up a network
To enjoy software updates of this player and BD-
Live for certain Blu-ray discs, set up the network
connection.
Note
Ensure that the network cable is properly connected and •
the router is switched on.
1 Connect this player to the broadband modem
or router.
2 Press to display the home menu.
3 Select [Setup] and press OK.
View Network Settings
Network Installation
Video Setup
Advanced Setup
Audio Setup
Network Setup
Preference Setup
EasyLink Setup
4 Select [Network], and press .
5 Select [Network Installation], and press OK.
6 Follow the on-screen instructions to complete
the network installation.
Tip
You can check the status of the wired connection of •
this player (see “Adjust settings” > “Network Setup” >
[View Network Settings]).
Note
Loading BD-Live content from the internet may take •
some time, depending on the file size and the speed of
the internet connection.
1 Press to display the home menu.
To start disc play, select • [play Disc].
To view the USB contents, select •
[browse USB].
To access the setup menus, select •
[Setup].
Navigate a menu
1 When a menu is displayed, press the buttons
on the remote control to navigate.
Button Action
Move up or down.
Move left or right.
OK Confirm a selection.
Enter numbers.
Select a menu display language
Note
If this player is connected to a HDMI CEC compliant •
TV, skip this setting. It switches automatically to the
same OSD menu language as per your TV setting (if the
language set on TV is supported by this player).
1 In the Home menu, select [Setup] and press
OK.
2 Select [Preference], and press .
3 Select [Menu Language], and press .
Video Setup
Advanced Setup
Audio Setup
Network Setup
Preference Setup
EasyLink Setup
Menu Language
Parental Control
Disc Menu
Audio
Subtitle
Screen Saver
Change Password
Auto Subtitle Shift
The language options may vary from •
different regions.
4 Press to select a language, and press OK.
EN
Loading ...
Loading ...
Loading ...