
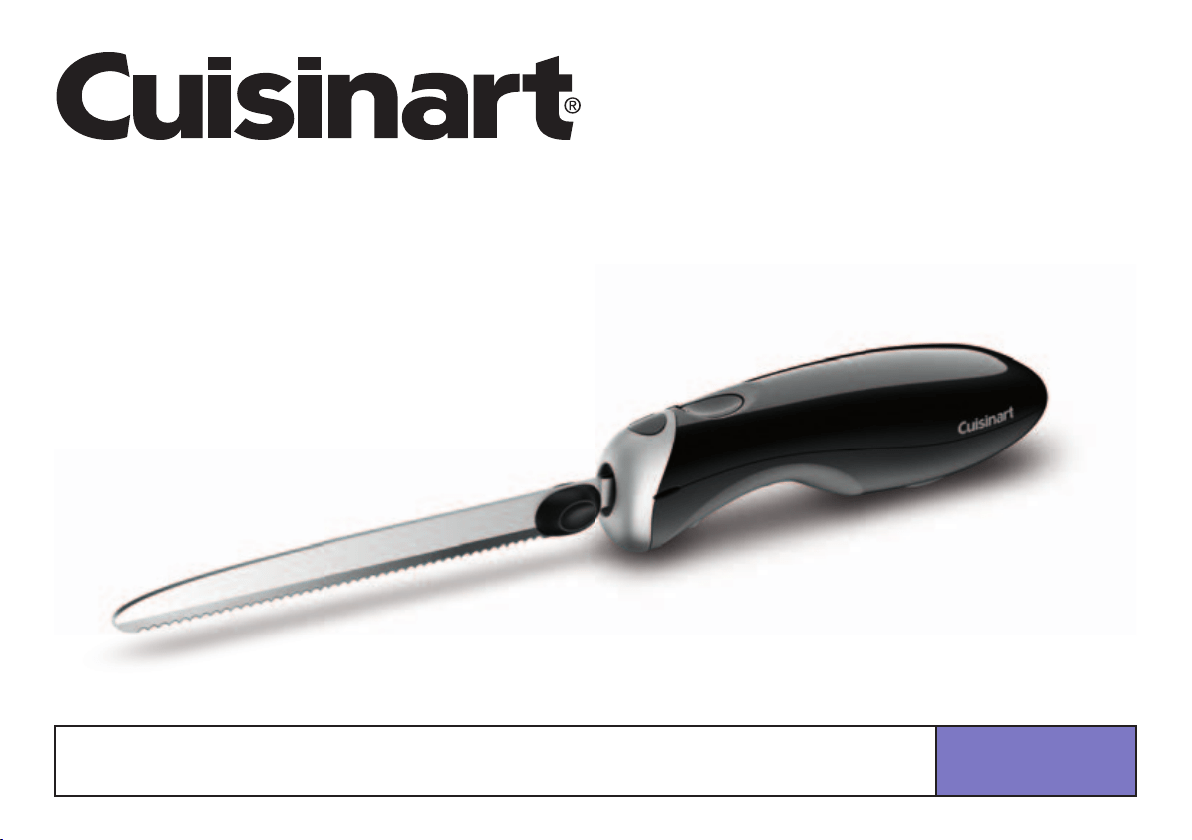
INSTRUCTION
BOOKLET
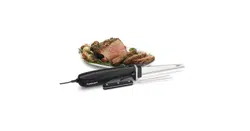
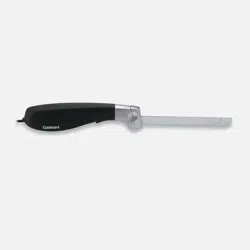
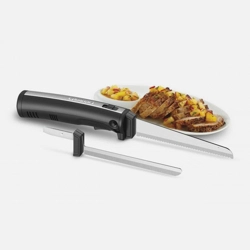
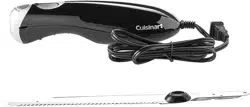
CEK-30 Electric Knife

2
CONTENTS
Important Safeguards . . . . . . . . . . . . . . . . . .2
Features and Benefits . . . . . . . . . . . . . . . . . .3
Use and Care . . . . . . . . . . . . . . . . . . . . . . . . .4
Cleaning, Storage and Maintenance . . . . . . .4
Helpful Hints . . . . . . . . . . . . . . . . . . . . . . . . . .4
How to Carve a Turkey . . . . . . . . . . . . . . . . . .4
Best Methods of Slicing Bread . . . . . . . . . . .5
How to Carve Ham on the Bone . . . . . . . . . .5
Warranty . . . . . . . . . . . . . . . . . . . . . . . . . . . . .6
IMPORTANT
SAFEGUARDS
When using an electrical appliance, basic
safety precautions should always be taken,
including the following:
1. READ ALL INSTRUCTIONS.
2. Unplug from outlet when not in use,
before putting on or taking off parts,
and before cleaning.
3. To protect against risk of electrical
shock, do not put the knife handle in
water or other liquid. If handle or cord
falls into liquids, unplug the cord from
outlet immediately. Do not reach into
the liquid. Do not operate knife in water or
under running water.
4. To avoid possible accidental injury,
close supervision is necessary when any
appliance is used by or near children or
individuals with certain disabilities.
5. Avoid contact with moving parts. Keep
hands, hair, clothing and other utensils
away from blade during operation to
reduce risk of injury to persons and/or
damage to the knife.
6. Do not operate any appliance with a
damaged cord or plug or after the
appliance has malfunctioned or has been
dropped or damaged in any way or is not
operating properly. Return the appliance
to the nearest Cuisinart Consumer
Service Center for examination, repair,
mechanical or electrical adjustment.
7. The use of attachments not recommended
by Cuisinart may cause fire, electrical
shock, or risk of injury.
8. Do not use outdoors or anywhere the cord
or knife might come into contact with
water while in use.
9. To avoid the possibility of the knife
being accidentally pulled off work area,
which could result in damage to the knife
or personal injury, do not let cord hang
over edge of table or counter.
10. To avoid damage to cord and possible
fire or electrocution hazard, do not let cord
contact hot surfaces, including a stove.
11. Unplug cord from outlet when inserting,
removing or changing blades.
12. Blades are sharp. Handle carefully. Always
handle blades with hand away from cutting
edge. Always store blades with cutting
edge away from you.
13. Do not operate your appliance in an
appliance garage or under a wall cabinet.
When storing in an appliance garage,
always unplug the unit from the
electrical outlet. Not doing so could
create a risk of fire, especially if the
appliance touches the walls of the
garage or the door touches the unit
as it closes.
14. Carefully route the power supply cord
to avoid damage from the knife blade
while cutting.
SAVE THESE
INSTRUCTIONS
FOR HOUSEHOLD
USE ONLY
NOTICE:
This appliance has a polarized plug (one prong
is wider than the other). As a safety feature,
this plug will fit into a polarized outlet only one
way. If the plug does not fit fully in the outlet,
reverse the plug. If it still does not fit, contact
a qualified electrician. Do not attempt to
defeat this safety feature.
3
UNPACKING
INSTRUCTIONS
IMPORTANT
PLEASE READ
This package contains a Cuisinart
®
Electric
Knife with the following parts:
• Knife Handle with Combination Carving
and Bread Blade
• Instruction Booklet
To avoid any injury to yourself or damage to
the Cuisinart
®
Electric Knife, please follow
these unpacking instructions:
1. Place the gift box containing your
Cuisinart
®
Electric Knife on a flat, sturdy
surface before unpacking.
2. Remove the Instruction Booklet and other
printed materials.
3. Next, turn the box on its side and slide the
entire unit out, including packing materials.
4. Carefully remove the unit from the
protective bag.
5. Place the unit on a counter or table
and read the instructions thoroughly
before using.
6. Save shipping carton and inserts for
later use.
NOTE: Remember to return your warranty
card with all information carefully and com-
pletely filled out.
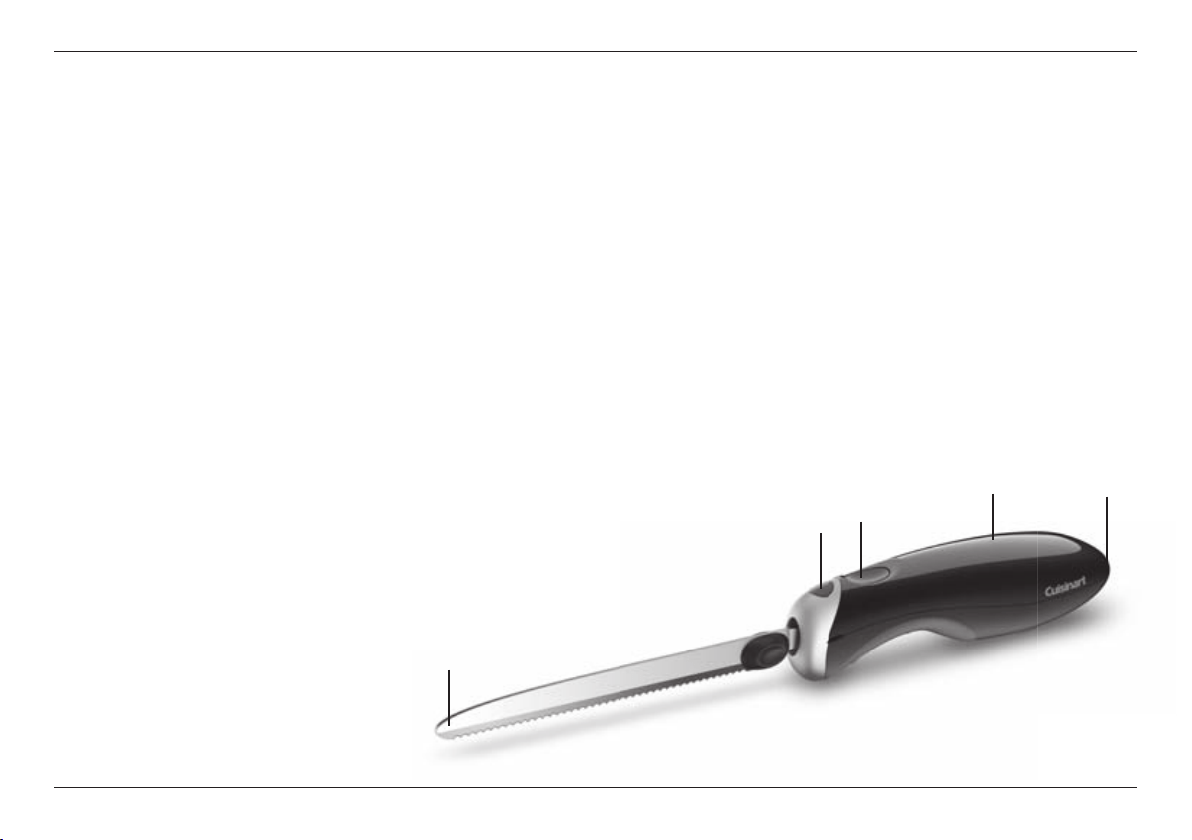
FEATURES
AND BENEFITS
1. Blade:
Carving/Bread blade combination.
2. Blade Release Button
3. On/Off Control:
One-touch, pressure-activated on/off
trigger control for simple operation.
Convenient for left- or right-hand use.
4. Handle:
Elegant ergonomic handle reflects look
and feel of fine cutlery.
5. Electrical cord:
5-foot cord for maximum flexibility.
6. BPA free (not shown):
All materials that come in contact with
food are BPA free.
3
4
1
5
2

4
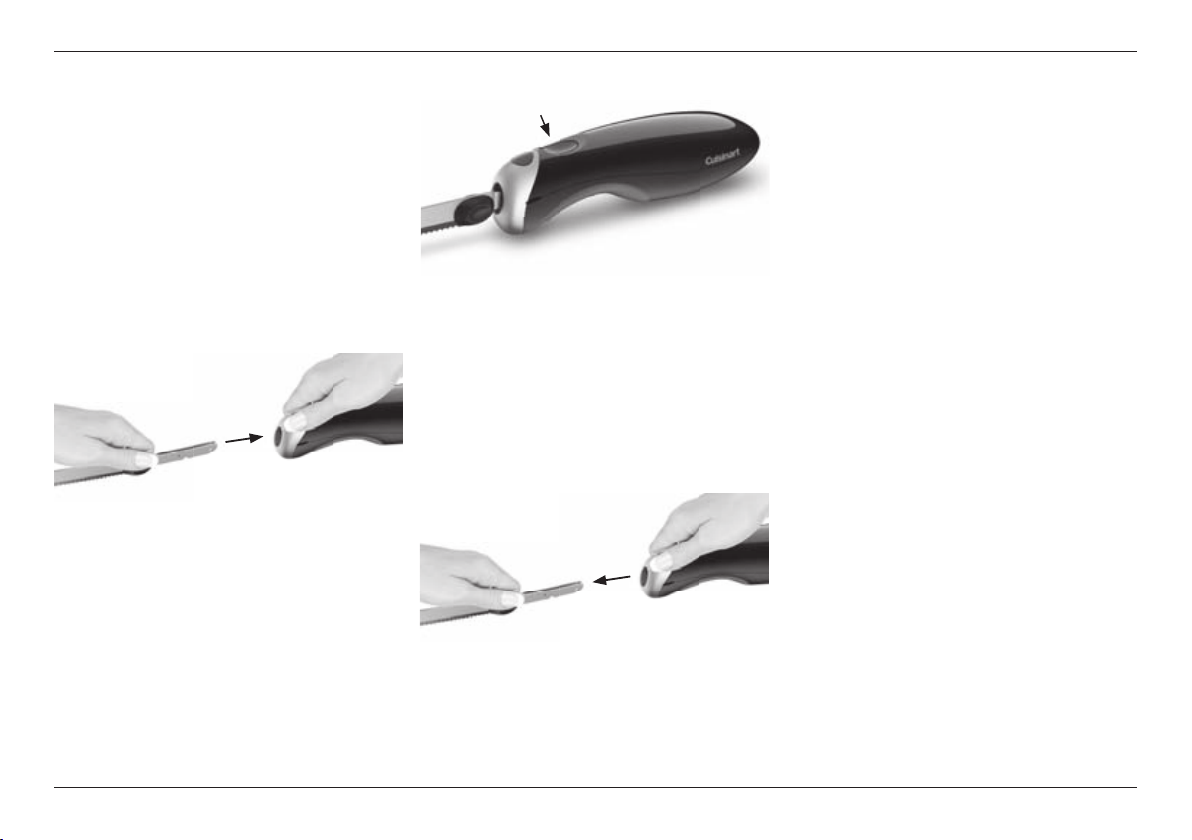
USE AND CARE
Assembling the Blade:
1. Remove protective sleeves.
Before first use, wash blade in hot, soapy
water or the dishwasher. CAUTION:
BLADE IS SHARP. HANDLE WITH
CARE. Dry thoroughly.
Using your Cuisinart
®
Electric Knife:
1. The knife should be unplugged when
fitting the blade.
While holding the blade with the serrated
edge away from you, insert blade in handle
until you hear a click.
Caution: The blade is very sharp; be careful
when handling it.
2. Plug the cord into a standard
electrical outlet.
3. Squeeze and hold the trigger button with
your fingers as you cut.
Caution: NEVER place your hand on top of
the blade to support it while operating the
knife, as the blade is designed to move back
and forth.
4. Blade automatically stops when trigger
is released.
CLEANING, STORAGE
AND MAINTENANCE
1. To remove the blade, unplug the knife.
Squeeze the Blade Release Button and
grasp the blade with the cutting edge
away from you. Slowly pull blade out from
knife handle.
2. Wash blade in hot, soapy water or the
dishwasher and dry thoroughly.
3. Clean the handle with a slightly damp cloth
and wipe dry.
Caution: Do not clean handle with blade
in place. Do not immerse the appliance
in water or other liquids or place it under run-
ning water.
Maintenance: Any other servicing should
be performed by an authorized service
representative.
HELPFUL HINTS
This blade is very versatile. In addition to
slicing meats such as turkey, chicken, salami,
ham and roasts, it can also be used to cut
fruits like melon and pineapple, vegetables
such as squash, eggplant and zucchini, as
well as medium hard cheeses.
It also glides through loaves of bread for
consistent, even slicing. It can also be used
to slice bagels and sandwich rolls.
HOW TO CARVE
A TURKEY
Carving a large bird, especially in front of
hungry guests, can be a daunting task—the
watering mouths, critical eyes, rumbling stom-
achs. With the Cuisinart
®
Electric Knife, a little
guidance and some helpful hints...we hope to
make this task a pleasurable experience.
Tip: Cut dark meat first, as it does not dry out
as quickly as the white meat of the breast.
Preparation:
1. Remove the turkey from the oven.
2. Cover loosely with foil and let stand
15–30 minutes to let the juices set and the
meat firm up. The turkey will be more
moist, easier to carve, and the slices will
hold together better.
3. Remove the stuffing.
4. Place turkey on a carving board, breast
side up, with the legs facing you. You’ll
need your Cuisinart
®
Electric Knife and a
large carving fork to hold the bird.

5
Cutting the legs and wings:
1. Hold the tip of one drumstick with your
fingers and gently pull the leg away from
the body of the turkey.
2. Holding the turkey steady with a carving
fork, cut the skin between the thigh and
the breast.
3. Pull the leg out farther to expose the
joint where the thigh connects, and cut
through joint with the knife to remove
the leg.
4. Next, hold the drumstick with the fork and
cut at the joint between the drumstick and
thigh to separate the two pieces.
5. Slice the meat on the drumstick by cutting
along the bone to get thick slices.
6. Turn the drumstick and continue
slicing along the bone until all of the meat
is removed.
7. To remove meat from the thigh, cut
thick slices to the bone. If the turkey is
small, the drumstick and thigh may be
served whole.
8. Using the fork, hold the wing away from
the body and cut through the joint. The
wing can be served as is.
9. Repeat on other side to remove leg
and wing.
Tip: The key to carving the thighs, legs, and
wings is to cut through the joints, and not
through the bones. We do not recommend
using your Cuisinart
®
Electric Knife on
bones as it could cause damage to the
knife or personal injury.
Carving the breast:
1. Hold the breast with the carving fork,
and starting at the outer side of one
breast, cut slices parallel to the rib cage,
from the top of the breast downward. The
slices should be thin, even and the entire
length of the breast. The slices will get
larger as you work toward the rib cage.
Continue slicing until you reach the bones.
2. Repeat on the other side of the breast.
Tip: Angle the knife parallel to the rib cage,
rather than digging into the meat.
Tip: Some yummy leftovers that can be made
from the smaller pieces of meat near the
bones include: soup, casserole, chili, salad,
tacos, etc.
BEST METHODS OF
SLICING BREAD
How to cut bread:
There are several ways to cut bread. Two of
the most popular are to cut straight across, or
in a herringbone pattern, which works only
with rounded loaves of bread.
Standard slices:
1. First, to cut the bread straight across,
place the loaf on a carving board.
2. Holding the bread firmly yet gently in
one hand, place the knife over the bread,
parallel to the carving board, making sure
the tip of the knife extends past the side
of loaf.
3. Cut slices to preference.
Tip: The Cuisinart
®
Electric Knife works well
on bread by gently pulling the knife toward
you as it cuts downward through the bread.
Herringbone pattern:
Cutting bread in a herringbone pattern is
more difficult and produces smaller pieces of
bread, although you still control the thickness
of the slice.
1. To begin, hold the bread firmly yet gently
in one hand and angle the knife across the
corner of one of the smaller ends of the
loaf, making sure the blade is parallel to
the carving board. The slice should start in
the middle of the loaf and angle toward the
outside, cutting off the rounded crust.
2. The next slice starts again from the
center of the loaf, but angles toward the
other side of the bread, cutting off a larger
slice with crust.
3. Repeat step 1, alternating cutting each
side at an angle.
Tip: To cut in the herringbone pattern, you
may need to turn the bread or vary your
stance as you switch cutting sides.
HOW TO CARVE HAM
ON THE BONE
1. Remove the ham from the oven,
cover loosely with foil and let stand for
20 minutes.
2. Place ham on a carving board.
3. Holding the ham steady with a carving
fork, use your Cuisinart
®
Electric Knife to
trim away the excess fat from the outside
of the ham.

6
4. Next, stand the ham on end, holding the
shank (smaller) end in your hand.
5. Slice into the ham just below the shank, at
the stifle joint, where the ham gets bigger.
6. Cut along the bone, which is curved, and
then around the socket joint at the sirloin
end. The meat will not cut completely
away from the bone yet.
7. Rotate the ham so the uncut side is
up, and holding the shank end with your
hand, slice into the ham at the joint,
cutting downward until the meat falls
away from bone.
8. Cut off any large remaining pieces of
meat. Carve the ham in even slices,
keeping your knife parallel to the carving
board and holding the ham securely
with a carving fork.
Limited 18-month Warranty
(U.S. and Canada ONLY)
This warranty is available to consumers only.
You are a consumer if you own a Cuisinart
®
Electric Knife that was purchased at retail for
personal, family or household use. Except as
otherwise required under applicable law, this
warranty is not available to retailers or other
commercial purchasers or owners. We warrant
that your Cuisinart
®
Electric Knife will be free
of defects in materials and workmanship
under normal home use for 18-month from the
date of original purchase.
We recommend that you visit our website,
www.cuisinart.com for a fast, efficient way to
complete your product registration. However,
product registration does not eliminate the
need for the consumer to maintain the original
proof of purchase in order to obtain the war-
ranty benefits. In the event that you do not
have proof of purchase date, the purchase
date for purposes of this warranty will be the
date of manufacture.
CALIFORNIA RESIDENTS ONLY
California law provides that for In-Warranty
Service, California residents have the option of
returning a nonconforming product (A) to the
store where it was purchased or (B) to another
retail store that sells Cuisinart
®
products of the
same type. The retail store shall then, accord-
ing to its preference, either repair the product,
refer the consumer to an independent repair
facility, replace the product, or refund the pur-
chase price less the amount directly attribut-
able to the consumer’s prior usage of the
product. If neither of the above two options
results in the appropriate relief to the consum-
er, the consumer may then take the product to
an independent repair facility, if service or
repair can be economically accomplished.
Cuisinart and not the consumer will be
responsible for the reasonable cost of such
service, repair, replacement, or refund for non-
conforming products under warranty.
California residents may also, according to
their preference, return nonconforming prod-
ucts directly to Cuisinart for repair or, if neces-
sary, replacement by calling our Consumer
Service Center toll-free at 800-726-0190.
Cuisinart will be responsible for the cost of the
repair, replacement, and shipping and han-
dling for such nonconforming products under
warranty.
BEFORE RETURNING YOUR
CUISINART
®
PRODUCT
If your Cuisinart
®
Electric Knife should prove
to be defective within the warranty period,
we will repair or, if we think necessary,
replace it. To obtain warranty service, please
call our Customer Service Center toll-free at
1-800- 726-0190 or write to: Cuisinart, 7475
North Glen Harbor Blvd. Glendale, AZ 85307.
To facilitate the speed and accuracy of your
return, enclose $10.00 for shipping and han-
dling. (California residents need only supply
a proof of purchase and should call 1-800-
726-0190 for shipping instructions.) Please
be sure to include your return address,
description of the product’s defect, product
serial number, and any other information
pertinent to the return. Please pay by check
or money order. NOTE: For added protection
and secure handling of any Cuisinart
®
prod-
uct that is being returned, we recommend
you use a traceable, insured delivery service.
Cuisinart cannot be held responsible for in-
transit damage or for packages that are not
delivered to us. Lost and/or damaged prod-
ucts are not covered under warranty.
Your Cuisinart
®
Electric Knife has been man-
ufactured to the strictest specifications and
has been designed for use only in 120 volt
outlets and only with authorized accessories
and replacement parts. This warranty
expressly excludes any defects or damages
caused by attempted use of this unit with a
converter, as well as use with accessories,
replacement parts or repair service other
than those authorized by Cuisinart. This war-
ranty does not cover any damage caused by

7
accident, misuse, shipment or other than ordi-
nary household use. This warranty excludes all
incidental or consequential damages. Some
states do not allow the exclusion or limitation
of these damages, so these exclusions may
not apply to you. You may also have other
rights, which vary from state to state.
Important: If the nonconforming product is to
be serviced by someone other than Cuisinart’s
Authorized Service Center, please remind the
servicer to call our Consumer Service Center
at 1-800-726-0190 to ensure that the problem
is properly diagnosed, the product is serviced
with the correct parts, and to ensure that the
product is still under warranty.

ROASTING AND CARVING A TURKEY
Chef Steven Shipley, Culinary Arts Instructor Johnson & Wales University
Do you have Thanksgiving Day anxiety when roasting a turkey? It can be challenging, but you
can do it with these few easy steps.
If you are using a frozen turkey, the first step is to thaw it. Whenever possible, refrigerator thaw-
ing is the best method, though if you don’t have time for that, cold-water thawing will work.
Never thaw a turkey at room temperature, as this will allow for bacterial growth and is never
recommended. If thawing your turkey in the refrigerator, 24 hours per four pounds of meat will
be necessary (make sure to place the bird on a tray to catch any juices). If thawing in cold
water, submerge the unopened turkey, breast side down, and soak for 30 minutes per pound
(be sure to change the water occasionally). Of course, if you are working with a fresh turkey,
thawing is not necessary.
Here we go. The day before Thanksgiving, remove your thawed, whole turkey from its wrapper
and place it in a clean kitchen sink. Remove the giblet bag from inside the turkey and rinse each
item with cold water, then, give the bird itself a thorough rinse using cold water inside and out,
then pat dry with paper towels. Move the turkey to a clean, dry surface, for instance, place it on
parchment paper. Then, make sure to clean your sink with soap and water to avoid any cross
contamination. Tuck the wing tips behind the backbone and drizzle a small amount of olive oil
on the outside of the bird. Lightly season the turkey and giblets with kosher salt and coarse
ground black pepper. Make sure to season the inside of the turkey. If you’d like, chop some
Italian parsley, rosemary and fresh thyme and add this herb mixture to some softened, unsalted
butter. With a moist index finger, gently lift the skin away from each breast lobe and rub the
herbed butter mixture evenly under the skin. Make sure to smooth out the skin afterwards.
In a shallow roasting pan, add coarsely chopped onions, carrots, celery and giblets (including
the neck) to the bottom of the pan. Add a roasting rack, the turkey, and cover and place in the
refrigerator. This could all be done the day before, or on Thanksgiving Day itself by following
the same steps. Keeping the turkey covered with plastic or foil in the fridge until you’re ready to
cook it the next day is how many restaurants and hotels prepare turkeys, chicken and other
items in advance. It also gives the seasoning a chance to add that extra bit of flavor to the bird.
Thanksgiving Day. Remove your turkey from the fridge about 30 minutes before you place it in
the oven. This will allow the bird to come to room temperature and shorten the amount of
cooking time in the oven. By keeping the turkey elevated on a rack when roasting, heat is able
to hit all parts of the turkey and promote a crispy skin. Add one cup of chicken stock and one
cup of water over the vegetables just before placing everything in the oven.
Place your oven rack in the lowest position and preheat the oven to 400 degrees F. Roast your
turkey in the oven for 30 minutes, then reduce the oven temperature to 325 degrees F. If possi-
ble, remove turkey from the oven and place it on the cooktop or the counter, and loosely cover
the breast meat with aluminum foil to avoid excessive browning. Many cooks carry out this pro-
cedure while leaving the turkey on the oven door, which unfortunately results in significant heat
loss from the oven. Baste the turkey with its own juices before returning it to the oven.
Continue to roast the bird at 325 degrees F for approximately 15-20 minutes per pound.
This is only an estimate, so be sure to use a meat thermometer to get achieve the perfect level
of doneness.
Continue to roast the turkey, basting every 30 minutes until an instant-read meat thermometer
reaches 180 degrees F and the juices run clear when it is inserted into the thickest part of the
thigh meat without touching the thigh bone. Remember to remove the foil 30 minutes before
the turkey is cooked to ensure even browning. Make sure that your turkey is cooked! It sounds
simple, but it is probably your most important step. Even if your turkey comes with a plastic
pop-up thermometer, check it to make sure.
Remove the turkey from the oven and place it on a serving platter. Loosely tent with aluminum
foil and allow it to rest out of the oven for a minimum of 20 minutes. This is a very important
step that allows all the delicious juices inside the turkey to settle.
Making the gravy. For basic pan gravy, remove the rack from the roasting pan and carefully pour
and strain the pan juices into a measuring cup or fat separator. Let the juices stand for a few
minutes to allow the fat to separate and rise to the top. Many chefs will place the cooked mire-
poix (onions, carrots and celery from the bottom of the roasting pan) into a blender with some
additional chicken broth and purée the mixture. This is a natural thickener that doesn’t require
flour or cornstarch. If you used a fat separator, you can simply pour off the juices, leaving the
fat behind and combine the broth with the puréed vegetables. If it gets too thick, loosen with
additional chicken broth. Season to taste with salt and pepper if needed, and you’ll have a rich
and nutritious gravy!
Carving the turkey. Start with the right tools: preferably an electric carving knife and a two-
pronged meat fork. The use of the electric carving knife will make this task pleasurable and
quick. Start by gently pulling the drumstick away from the bird and cut where the thigh is
joined to the body. Slice the thigh from the leg and cut the thigh meat into slices. This will leave
you with an even carving surface for more equal slices of breast meat. Make a deep horizontal
cut above the wing and hold down the bird with your two-pronged fork. Carefully shave off
thin slices of the breast with the electric knife in a downward motion. Serve with your favorite
sides and listen for the sound of your guests scraping their plates with their silverware. You
won’t have to ask them if it’s good, you’ll see and hear the results!
Happy cooking!
©2016 Cuisinart
150 Milford Road
East Windsor, NJ
08520
Printed in China
16CE019323
F IB-14231-ESP
Any other trademarks or service marks referred to
herein are the trademarks or service marks of their
respective owners.
MANUAL
DE INSTRUCCIONES
CEK-30 Cuchillo eléctrico

2
ÍNDICE
Medidas de seguridad importantes . . . . . . 2
Piezas y características . . . . . . . . . . . . . . . . 3
Instrucciones de uso . . . . . . . . . . . . . . . . . . 4
Limpieza, mantenimiento y almacenaje . . . 4
Consejos útiles . . . . . . . . . . . . . . . . . . . . . . 4
Cómo trinchar pavo . . . . . . . . . . . . . . . . . . 4
Mejores métodos para rebanar pan . . . . . . 5
Cómo trinchar jamón con hueso. . . . . . . . . 5
Garantía . . . . . . . . . . . . . . . . . . . . . . . . . . . . 6
MEDIDAS DE
SEGURIDAD
IMPORTANTES
Al usar aparatos eléctricos, siempre debe
tomar precauciones básicas de seguridad,
incluso las siguientes:
1. LEA TODAS LAS INSTRUCCIONES.
2. Desconecte el aparato cuando no está
en uso, antes de instalar/sacar piezas
y antes de limpiarlo.
3. Para reducir el riesgo de electrocución,
no coloque el mango del cuchillo en agua
ni en ningún otro líquido. Si el mango o el
cable cayeran al agua, desconecte el
cable inmediatamente; no toque el agua.
No haga funcionar el aparato en agua o
bajo agua corriente.
4. Supervise el uso de este aparato
cuidadosamente cuando sea usado por o
cerca de niños o personas con ciertas
discapacidades.
5. Evite el contacto con las piezas móviles.
Para evitar el riesgo de heridas y/o daños
al cuchillo, mantenga los dedos, cabello,
ropa, espátulas y otros utensilios lejos del
filo durante el funcionamiento.
6. No utilice este aparato si el cable o la
clavija estuviesen dañados, después de
que hubiese funcionado mal o que se
hubiese caído o si estuviese dañado;
regréselo a un centro de servicio
autorizado para su revisión, reparación o
ajuste.
7. El uso de accesorios no recomendados
por Cuisinart presenta un riesgo de
incendio, electrocución o heridas.
8. No lo use en exteriores ni en lugares
donde el aparato o el cable podrían
mojarse.
9. No permita que el cable cuelgue del borde
de la encimera o de la mesa, donde se
pueda jalar o tropezar.
10. No permita que el cable haga contacto
con superficies calientes, incluso hornillas;
esto podría resultar en un incendio o
provocar un choque eléctrico.
11. Desconecte el cable de la toma de
corriente antes de instalar, retirar o
cambiar la hoja.
12. Las cuchillas son muy filosas; manipúlelas
con mucho cuidado. Manipule las hojas
con mucho cuidado, sosteniéndolas por el
lado opuesto al filo. Guarde las hojas de
manera que el filo apunte hacia el lado
opuesto a su cuerpo.
13. No haga funcionar el aparato debajo o
dentro de un armario/gabinete. Siempre
desconecte el aparato antes de
guardarlo en un armario/gabinete. Dejar
el aparato conectado presenta un riesgo
de incendio, especialmente si este toca
las paredes o la puerta del armario/
gabinete cuando cierra.
14. Oriente el cable con cuidado, de manera
que las hojas del cuchillo no lo puedan
dañar durante el corte.
GUARDE ESTAS
INSTRUCCIONES
PARA USO
DOMÉSTICO
SOLAMENTE
AVISO:
el cable de este aparato está dotado de una
clavija polarizada (una pata es más ancha que
otra). Como medida de seguridad, se podrá
enchufar de una sola manera en la toma de
corriente polarizada. Si no entrara en la toma
de corriente, inviértala. Si aún no entrara
completamente, comuníquese con un
electricista. No intente ir en contra de esta
función de seguridad.

3
DESEMBALAJE
IMPORTANTE
Esta caja contiene un cuchillo eléctrico
Cuisinart
®
con las piezas siguientes:
• El mango del cuchillo con una hoja para
trinchar/cortar pan
• El manual de instrucciones
Para evitar las heridas o los daños al aparato,
desembale el aparato cuidadosamente,
siguiendo las instrucciones a continuación:
1. Ponga la caja sobre una superficie
espaciosa, plana y segura.
2. Retire el manual de instrucciones y otros
folletos de la caja.
3. Voltee la caja para que repose en su lado
y retire el contenido, incluso el material de
embalaje.
4. Retire cuidadosamente la unidad de la
bolsa protectora..
5. Coloque el aparato sobre una mesa/
encimera y lea cuidadosamente las
instrucciones antes de usarlo.
6. Le aconsejamos que guarde el material
de embalaje.
NOTA: llene cuidadosamente el formulario de
registro de su producto y regréselo a la
dirección indicada.
PIEZAS Y
CARACTERÍSTICAS
1. Hoja:
Hoja para trinchar/cortar pan.
2. Botón de liberación de la hoja
3. Botón de encendido/apagado:
Enciende/apaga el aparato al toque de un
botón, para una operación sencilla.
Práctico para usuarios diestros o zurdos.
4. Mango:
Mango elegante y ergonómico de calidad.
5. Cable:
Cable de 1.50 m, para mayor comodidad.
6. Sin BPA (no ilustrado):
Ninguna de las piezas en contacto con los
alimentos contiene bisfenol A (BPA).
3
2
4
1
5
4
INSTRUCCIONES
DE USO
Ensamblaje e instalación de la hoja:
1. Retire las fundas protectoras.
Antes del primer uso, lave la hoja en agua
jabonosa caliente o en el lavavajillas.
PRECAUCIÓN: LA HOJA ES MUY
FILOSA. MANEJAR CON CUIDADO.
Seque bien.
Modo de empleo de su cuchillo
eléctrico Cuisinart
®
:
1. Cerciórese que el cuchillo está
desconectado antes de instalar la hoja.
Sostenga la hoja con el filo apuntando
hacia fuera e introduzca la hoja en el
mango, presionando hasta que haga
“clic”.
Precaución: la hoja es muy filosa; manéjela
con sumo cuidado.
2. Conecte el cable a una toma de corriente.
3. Mantener el gatillo apretado para cortar.
Precaución: NUNCA ponga la mano encima
la hoja durante el funcionamiento, ya que la
hoja mueve hacia adelante y atrás.
4. La hoja se detendrá automáticamente al
soltar el gatillo.
LIMPIEZA,
MANTENIMIENTO
Y ALMACENAJE
1. Desconecte el cuchillo antes de retirar las
hojas. Presione el botón de liberación de
la hoja en ambos lados del mango y
agarre la hoja, el filo apuntando hacia
fuera. Jale suavemente la hoja fuera del
mango.
2. Lave la hoja en agua jabonosa caliente o
en el lavavajillas; seque bien.
3. Limpie el mango con un paño ligeramente
humedecido; séquelo bien.
Precaución: no limpie el mango mientras la
hoja sigue puesta. No sumerja el aparato en
agua ni en ningún otro líquido y no lo
enjuague bajo agua corriente.
Mantenimiento: cualquier otro servicio debe
ser realizado por un técnico autorizado.
CONSEJOS ÚTILES
La hoja de su cuchillo es muy versátil.
Además de cortar carnes y aves como pavo,
pollo, salami, jamón y carnes asadas, también
puede cortar frutas como melón y piña,
verduras como calabaza, berenjena y
calabacín, así como quesos duros medianas.
También se desliza suavemente por el pan,
produciendo rebanadas consistentes.
También puede usarse para cortar panecillos
(“bagels”) y pancitos.
CÓMO TRINCHAR PAVO
Trinchar un ave grande, sobre todo delante de
invitados hambrientos y de sus ojos críticos,
puede ser una tarea de enormes
proporciones. Con el cuchillo eléctrico
Cuisinart
®
y algunos consejos útiles,
esperamos hacer de esta tarea una
experiencia placentera.
Consejo: corte la carne oscura primero, ya
que no se seca tan rápido como la carne
blanca de la pechuga.
Preparación:
1. Sacar el pavo del horno.
2. Cubrir sin apretar con papel de aluminio y
dejar reposar durante 15–30 minutos. La
carne será más jugosa y fácil de cortar, y
las rebanadas serán más consistentes.

5
3. Sacar el relleno.
4. Colocar el pavo sobre una tabla de cortar/
trinchar, la pechuga hacia arriba y las
piernas hacia su cuerpo. Preparar el
cuchillo eléctrico Cuisinart
®
y un tenedor
trinchante.
Cortar las piernas y las alas:
1. Sostener la extremidad de la pierna con
los dedos y jalar suavemente la pierna
hacia fuera.
2. Sostener firmemente el pavo con el
tenedor trinchante y cortar la piel entre el
muslo y la pechuga.
3. Jalar un poco más la pierna para exponer
la coyuntura del muslo y cortar esta para
separar la pierna.
4. Sostener la pierna con el tenedor
trinchante y cortar la coyuntura entre la
pierna y el muslo.
5. Cortar la carne de la pierna en rebanadas
gruesas, a lo largo del hueso.
6. Voltear la pierna y seguir cortando a lo
largo del hueso.
7. Cortar la carne del muslo en rebanadas
gruesas, hasta el hueso. Nota: si el pavo
es pequeño, puede servir la pierna y el
muslo de una pieza.
8. Sostener el ala con el tenedor trinchante
y cortar la coyuntura. Servir el ala sin
cortarla.
9. Repetir en el otro lado para cortar la otra
pierna y la otra ala de la misma manera.
Consejo: el secreto para cortar los muslos, las
piernas y las alas es cortar las coyunturas, no
los huesos. No se aconseja usar el cuchillo
eléctrico Cuisinart
®
para cortar huesos, ya
que esto podría dañar el cuchillo o causar
heridas.
Cortar la pechuga:
1. Sostener la pechuga con el tenedor
trinchante y, empezando en la parte
externa, cortar lonchas en forma paralela
al costillar, desde arriba hasta abajo. Las
lonchas deben estar finas, uniformes y del
mismo largo que la pechuga. Las lonchas
se volverán más gruesas acercándose al
costillar. Seguir cortando hasta llegar a los
huesos.
2. Repetir en el otro lado de la pechuga.
Consejo: sostener el cuchillo y cortar en
forma paralela al costillar.
Consejo: puede usar la carne cerca del hueso
para preparar deliciosos platos de sobras
tales como sopas, guisos/estofados, chiles,
ensaladas, tacos, etc.
MEJORES MÉTODOS
PARA REBANAR PAN
Cómo cortar pan:
Hay varios métodos para cortar el pan. Los
más populares consisten en cortar en línea
recta, o en “espiga” (este método solo
funciona con hogazas redondas).
Rebanadas rectas:
1. Colocar el pan sobre una tabla de
cortar/trinchar.
2. Sujetar el pan firmemente con una mano y
sostener el cuchillo encima de este, en
forma paralela a la tabla de cortar y
cerciorándose que la punta de la hoja está
del otro lado del pan.
3. Cortar rebanadas del grosor deseado.
Consejo: jalar suavemente el cuchillo hacia
atrás mientras corta.
Rebanadas en “espiga”:
Cortar el pan en “espiga” es más difícil y
produce rebanadas más pequeñas, aunque
sigue controlando el grosor de las rebanadas.
1. Sujetar el pan firmemente con una mano y
sostener el cuchillo en ángulo desde la
extremidad del pan, en forma paralela a la
tabla de cortar. Cortar un lado del pico en
ángulo, desde el centro de la hogaza.
2. Cortar la segunda rebanada desde el
centro también, pero en ángulo hacia el
otro lado del pan, cortando una rebanada
más grande con corteza.
3. Repetir el paso 1, cortando cada lado, uno
tras otro, en ángulo.
Consejo: para cortar el pan en “espiga”,
puede que sea necesario virar el pan o
cambiar de posición cada vez que cambia
de lado.
CÓMO TRINCHAR
JAMÓN CON HUESO
1. Sacar el jamón del horno, cubrir sin
apretar con papel de aluminio y dejar
reposar durante 20 minutos.
2. Colocar el jamón sobre una tabla de
cortar/trinchar.

6
3. Sostener el jamón con un tenedor
trinchante y cortar el exceso de grasa.
4. Parar el jamón de punta, sosteniendo la
extremidad más pequeña de la pierna con
su mano.
5. Cortar en el jamón debajo de la punta de
la pierna, en la coyuntura, justo donde el
jamón se vuelve más grueso.
6. Cortar a lo largo del hueso curvo, y luego
alrededor de la rótula en el lado del lomo.
La carne no se separará del hueso
todavía.
7. Voltear el jamón de manera que el lado no
cortado apunte hacia arriba. Sostener la
pierna con la mano y cortar verticalmente
a la coyuntura hasta que la carne se
separe del hueso.
8. Cortar los grandes pedazos de carne
restantes. Cortar el jamón en rebanadas
uniformes, sosteniendo el cuchillo en
forma paralela a la tabla de cortar y
sujetando el jamón firmemente con un
tenedor trinchante.
GARANTÍA LIMITADA
DE 18 meses
(válida en los EE.UU. y en
Canadá solamente)
Esta garantía es para los consumidores
solamente. Usted es un consumidor si ha
comprado su aparato Cuisinart
®
en una
tienda, para uso personal o casero. A
excepción de los estados donde la ley lo
permita, esta garantía no es para los
detallistas, los otros comerciantes ni los
dueños. Cuisinart garantiza este aparato
contra todo defecto de materiales o
fabricación durante 18 meses después de la
fecha de compra original, siempre que el
aparato haya sido utilizado para uso
doméstico y según las instrucciones.
Le aconsejamos que llene el formulario de
registro disponible en www.cuisinart.com a fin
de facilitar la verificación de la fecha de
compra original. Sin embargo, no es necesario
registrar el producto para recibir servicio bajo
esta garantía. En ausencia del recibo de
compra, el período de garantía será calculado
a partir de la fecha de fabricación.
RESIDENTES DE CALIFORNIA
La ley del estado de California ofrece dos
opciones bajo el período de garantía. Los
residentes del estado de California pueden (A)
regresar el producto defectuoso a la tienda
donde lo compraron o (B) a otra tienda que
venda productos Cuisinart
®
de este tipo. La
tienda, a su opción, reparará el producto,
referirá al consumidor a un centro de servicio
independiente, cambiará el producto o
reembolsará al consumidor el precio original
del producto, menos la cantidad imputable al
uso del producto por el consumidor hasta que
este se dañe. Si estas dos opciones no
satisfacen al consumidor, podrá llevar el
aparato a un centro de servicio independiente,
siempre que se pueda ajustar o reparar el
aparato de manera económica. Cuisinart será
responsable por los gastos de servicio,
reparación, reemplazo o reembolso de los
productos defectuosos durante el período de
garantía. Los residentes de California también
pueden, si lo desean, mandar el aparato
defectuoso directamente a Cuisinart para
que lo reparen o lo cambien. Para esto, se
debe llamar a nuestro servicio posventa al
800-726-0190.
Cuisinart será responsable por los gastos de
reparación, reemplazo, manejo y envío de
los productos defectuosos durante el
período de garantía.
ANTES DE HACER REPARAR
SU APARATO
Si este aparato presentara algún defecto de
materiales o fabricación durante el período
de garantía, lo repararemos o
reemplazaremos (a nuestra opción). Para
obtener servicio bajo esta garantía, llame a
nuestra línea directa gratuita al 1-800-726-
0190 o regrese el aparato defectuoso a:
Cuisinart, 7475 North Glen Harbor Blvd.
Glendale, AZ 85307. Regrese el producto
defectuoso, junto con su recibo de compra
y un cheque o giro postal de US$10.00 para
cubrir los gastos de manejo y envío. Los
residentes de California solo necesitan dar
una prueba de compra y deben llamar al
1-800-726-0190 para recibir instrucciones
de envío. Recuerde incluir su nombre,
dirección y teléfono, la descripción del
problema, así como cualquier información
pertinente. Sentimos no poder aceptar otras
formas de pago. NOTA: para mayor
seguridad, le aconsejamos que mande su
paquete por un método de entrega con
seguro y seguimiento. Cuisinart no será
responsable por los daños ocurridos
durante el transporte o por los paquetes
mandados a una dirección equivocada. Los

7
productos perdidos y/o dañados durante el
envío no serán cubiertos bajo esta garantía.
Este aparato satisface las más altas
exigencias de fabricación y ha sido diseñado
para uso sobre corriente de 120 V, usando
accesorios y piezas de repuesto autorizados
solamente. Esta garantía excluye
expresamente los daños causados por
accesorios, piezas o reparaciones no
autorizados por Cuisinart, así como los daños
causados por el uso de un convertidor de
voltaje. Esta garantía no cubre el uso
institucional o comercial del producto, y no es
válida en caso de daños causados por mal
uso, negligencia o accidente. Esta garantía
excluye expresamente todos los daños
incidentales o consecuentes. Algunos Estados
no permiten la exclusión o limitación de daños
incidentales o consecuentes, de modo que las
limitaciones mencionadas pueden no regir
para usted. Usted puede tener otros derechos
que varían de un Estado a otro.
Importante: si debe llevar el producto
defectuoso a un centro de servicio no
autorizado, por favor informe al personal del
centro de servicio que deberían llamar al
servicio posventa de Cuisinart al 1-800-726-
0190 a fin de diagnosticar el problema
correctamente, usar las piezas correctas para
repararlo y asegurarse de que el producto
esté bajo garantía.

©2016 Cuisinart
150 Milford Road
East Windsor, NJ
08520
Impreso en China
16CE019323
F IB-14231-ESP
Todas las marcas registradas, comerciales o de
servicio mencionadas en este documento
pertenecen a sus titulares respectivos.
CÓMO ASAR Y TRINCHAR PAVO
Chef Steven Shipley
Profesor de arte culinario en la Universidad Johnson & Wales
¿Le produce ansiedad la idea de cocinar pavo para el Día de Acción de Gracia? Puede ser difícil,
pero usted lo puede hacer siguiendo estos sencillos pasos.
Si utiliza pavo congelado, el primer paso consiste en descongelarlo. Siempre que sea posible,
descongelar el pavo en el refrigerador es el mejor método. Sin embargo, si el tiempo no lo permite,
descongelarlo en agua fría es otra opción. Nunca deje que el pavo se descongele a temperatura
ambiente, puesto que esto favorece la proliferación de bacterias. Si descongela el pavo en el
refrigerador, necesitará 24 horas por 4 libras (1.8 kg) de carne. Cerciórese de colocar el pavo en una
bandeja para recoger el líquido. Si lo descongela en agua, sumerja el pavo entero (aún cerrado) en
agua fría, la pechuga apuntando hacia abajo. Necesitará 30 minutos por cada libra (455 g) de carne.
Cerciórese de cambiar el agua de vez en cuando. Por supuesto, sin usa pavo fresco, no necesitará
descongelarlo.
Aquí vamos... El día anterior al Día de Acción de Gracia, coloque el pavo fresco o descongelado en
el fregadero limpio de la cocina. Retire la bolsa de menudillos del pavo y lave cada artículo en agua
fría. Luego, enjuague el pavo con agua fría, por dentro y por fuera, y séquelo con papel absorbente.
Coloque el pavo sobre una superficie limpia y seca, por ejemplo encima de papel sulfurizado. Lave
el fregadero con agua y jabón para evitar los riesgos de contaminación cruzada. Meta las puntas de
las alas detrás del espinazo y rocíe el exterior del pavo con una pequeña cantidad de aceite de oliva.
Sazone ligeramente el pavo y los menudillos con sal kosher y pimiento negro recién molido.
Cerciórese de sazonar el interior del pavo. Si desea, pique un poco de perejil italiano, romero y
tomillo frescos y revuelva la mezcla con mantequilla sin sal a temperatura ambiente. Mójese el dedo
índice con agua, levante suavemente la piel de cada pechuga y frote la mezcla de mantequilla con
hierbas debajo de la piel, distribuyéndola uniformemente. Cerciórese de suavizar la piel después de
esto.
Pique cebollas, zanahorias, apio y los menudillos (incluso el cuello) y dispóngalo en el fondo de una
bandeja para asar. Ponga la parrilla encima, y luego el pavo. Cubra con papel de aluminio y meta al
refrigerador. Esto puede hacerse el día anterior o el mismo día, siguiendo los mismos pasos.
Guardar el pavo en el refrigerador hasta el momento de cocer, cubierto con papel film/plástico o
papel de aluminio es el método que muchos restaurantes y hoteles emplean para preparar los pavos,
pollos y otras aves por adelantado. Esto también da más sabor al pavo.
El Día de Acción de Gracia: Saque el pavo del refrigerador aproximadamente 30 minutos antes de
meterlo al horno. Esto permitirá que llegue a temperatura ambiente, lo que reducirá el tiempo de
cocción. Usar una bandeja para asar con parrilla permite que el pavo se cocine por todas partes,
resultando en una piel crujiente. Agregue una taza (235 ml) de caldo de pollo y una taza (235 ml)
de agua a los vegetales, justo antes de meter el pavo al horno.
Coloque la bandeja sobre la rejilla más baja del horno y precaliente el horno a 400 °F (200 °C). Ase
el pavo durante 30 minutos. Después de este tiempo, ajuste la temperatura a 325 °F (160 °C). Si es
posible, retire el pavo del horno y cubra las pechugas con papel de aluminio para evitar que se
re-cuezan. Muchas personas hacen esto poniendo la bandeja sobre la puerta del horno, lo que
lamentablemente causa una bajada significativa de calor en el horno. Riegue el pavo con su propio
jugo antes de volver a meterlo al horno. Siga asando el pavo a 325 °F (160 °C) durante
aproximadamente 15–20 minutos por libra de carne.
Esta es solamente una estimación. Cerciórese de usar un termómetro de cocina para asegurarse de
que el pavo alcance el punto de cocción perfecto.
Siga asando el pavo, regando el ave con su jugo cada 30 minutos, hasta que la temperatura interna
de la carne alcance 180˚F (82 °C) y que el jugo en la parte más gruesa del muslo salga claro al
insertar la punta de un cuchillo sin tocar el hueso. Recuerda retirar el papel de aluminio 30 minutos
antes del final de la cocción para que el pavo se dore uniformemente. ¡Asegúrese de que su pavo
esté bien cocido! Parece simple, pero es probablemente la etapa más importante. Incluso si el pavo
viene con un termómetro de plástico que sale cuando el pavo está cocido, averigüe que lo está.
Retire el pavo del horno y colóquelo sobre un plato de servir. Cubra el pavo sin apretar con papel
de aluminio y permita que repose a temperatura ambiente durante 20 minutos o más. Esto es un
paso muy importante que permite que los deliciosos jugos adentro del pavo se asienten.
Para preparar la salsa: Para preparar una salsa básica, saque la parrilla de la bandeja y cuele
cuidadosamente el jugo de cocción. Permita que los jugos de asienten durante unos minutos para
que se separe la grasa. Muchos cocineros licuan el “mirepoix” (la mezcla de cebollas, zanahorias y
apio) con caldo de pollo. El puré así obtenido espesa la salsa naturalmente, sin tener que usar harina
o maicena. Separe la grasa del jugo de cocción, usando un separador de grasa o una espumadera, y
combine el jugo de cocción con los vegetales licuados. Si la mezcla está demasiado espesa, agregue
un poco de caldo de pollo. ¡Sazone con sal y pimienta si desea, y obtendrá una salsa rica y nutritiva!
Para trinchar el pavo: Empiece con los utensilios adecuados: preferiblemente, un cuchillo eléctrico y
un tenedor de dos dientes para la carne. Usar un cuchillo eléctrico hará que esta tarea sea rápida y
placentera. Primero, aleje suavemente el muslo del pavo y corte la carne y la piel al nivel de la
coyuntura. Separe el muslo de la pierna y corte la carne del muslo en lonchas. Esto proporcionará
una superficie plana para cortar lonchas uniformes de pechuga. Haga un corte horizontal profundo
arriba del ala y sostenga firmemente el pavo con el tenedor de dos dientes. Corte cuidadosamente la
pechuga en lonchas finas, moviendo el cuchillo eléctrico desde arriba hasta abajo. Sirva el pavo con
sus platos de acompañamiento favoritos y escuche el sonido de los cubiertos raspando los platos. No
tendrá que preguntar a sus invitados si les gustó la comida. ¡Podrá ver y escuchar los resultados!
¡Disfrute!