Loading ...
Loading ...
Loading ...
16
1
2
3
4
5
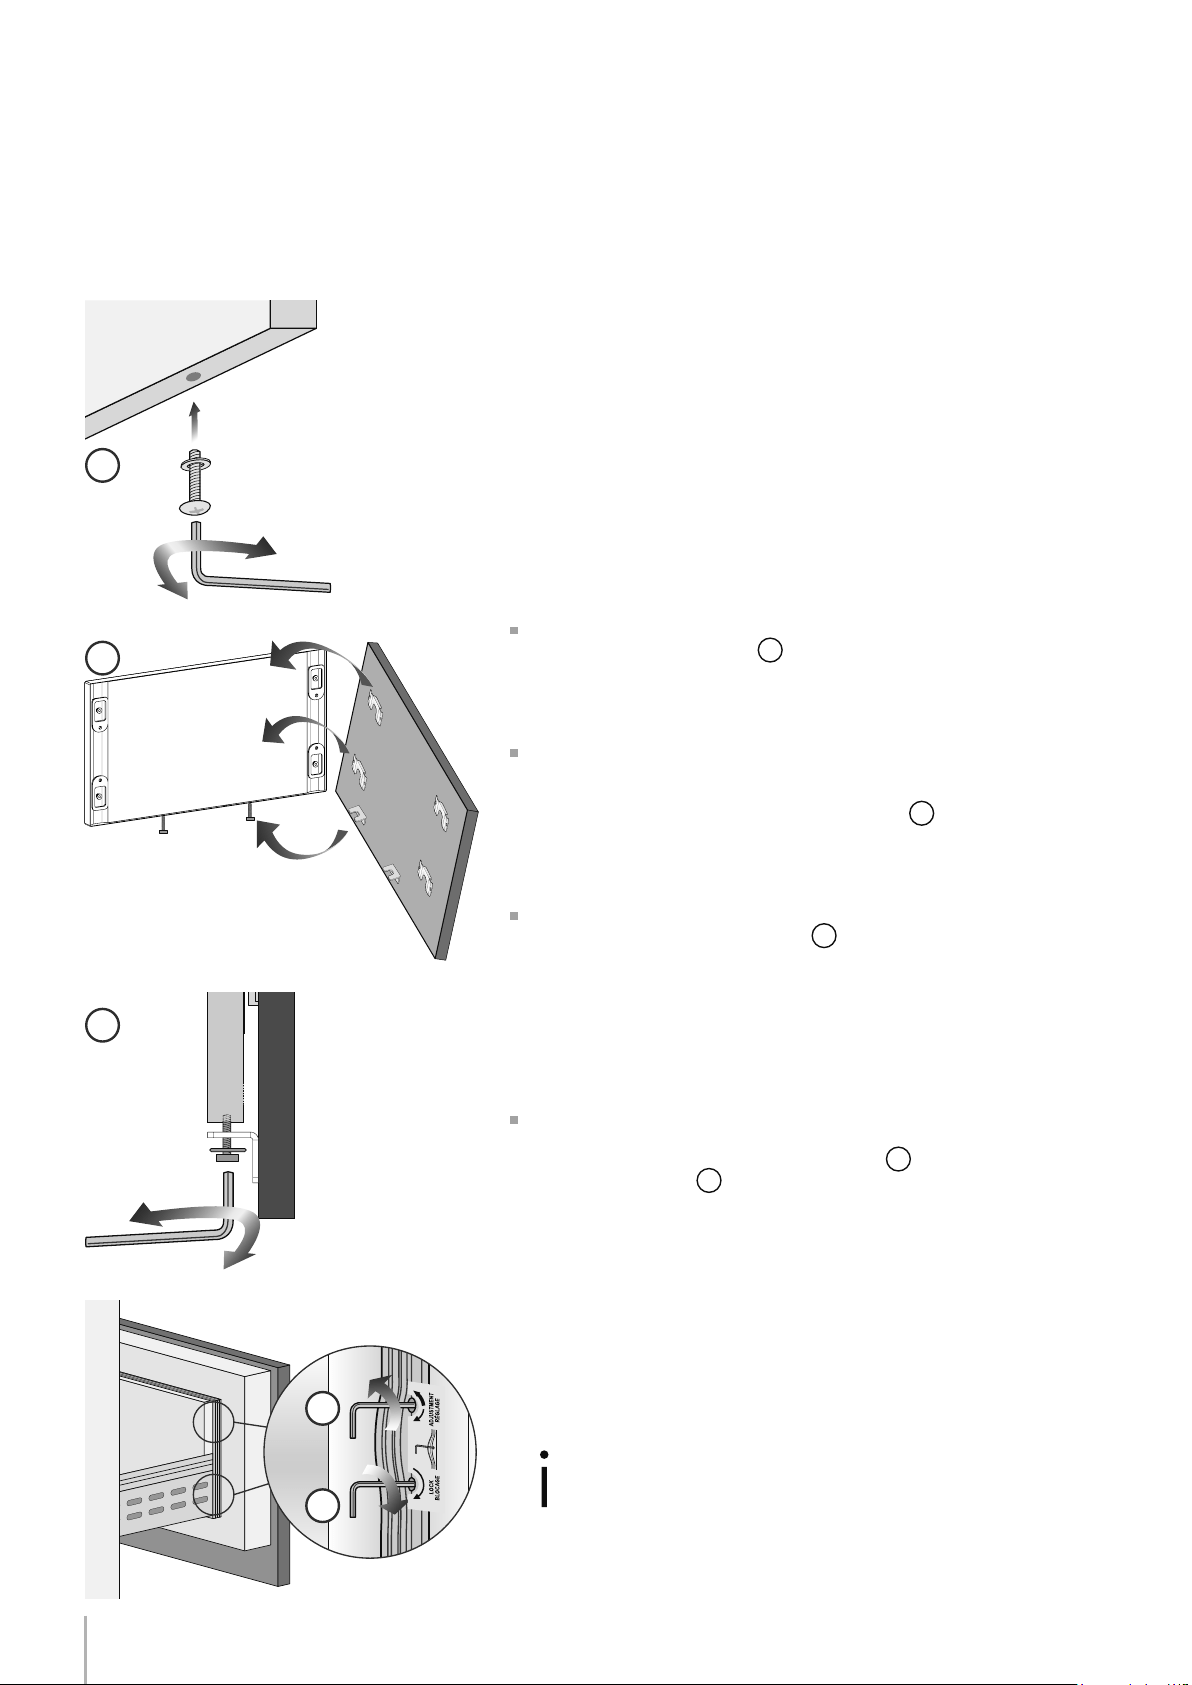
Mounting panels to the door and the drawer of Integrated units
Install 1 hanger bolt about 3 threads deep and 1 depth set screw
ush to foam gasket in each mounting cavity.
Once all brackets and small brackets have been applied to the pan-
els, you can begin installing the bottom drawer.
Operate as follows:
Partially install the adjustment bolt with washer into the two holes
in the bottom of the drawer
1
.
Ensure the L-brackets align with the adjustment bolts on the bot-
tom, place panel against the drawer face with the hanger brackets
above the hanger bolts and allow the panel to drop down. Ensure all
the hanger brackets engage the hanger bolts
2
.
It is now possible to align panels to adjacent cabinets in height us-
ing the lower alignment brackets,
3
tightening or untighteningthe
bolts into position as needed. With the hanger bolts slighty tightened,
move the panel sideways to align it to the other panels on the unit
or other adjacent structures. Tapping the panel with a rubber mallet
is a good way to make small adjustments to the X-alignment of the
panel.
Depth alignment: working from the inside of the drawer, after lift-
ing up the magnetic seal, adjust the panel position so it is closer to or
further away from the door using the holes
4
and then secure the
panel using the holes
5
.
Turning in the direction of the thick arrow pulls the panel closer to the
door / drawer face, turning in the direction of the thin arrow pushes
the panel away from the face of the door / drawer.
Series: Integrated (BI)
Once the front panel has been ad-
justed, check that the gasket has
been repositioned correctly to as-
sure the door/drawer are closing
correctly and avoid operational er-
rors of the unit.
Loading ...
Loading ...
Loading ...