Loading ...
Loading ...
Loading ...
9
garden hose threaded connector such as a braided
stainless hose found at typical hardware stores will
strip or damage the solenoid threads. It is recom-
mended to use only the supplied 1/4” quick connect
elbow adapter for connecting a 1/4” copper or poly-
ethylene source water line to the appliance.
Do not use extension cords and/or mul-
tiple adapters for the power supply con-
nection.
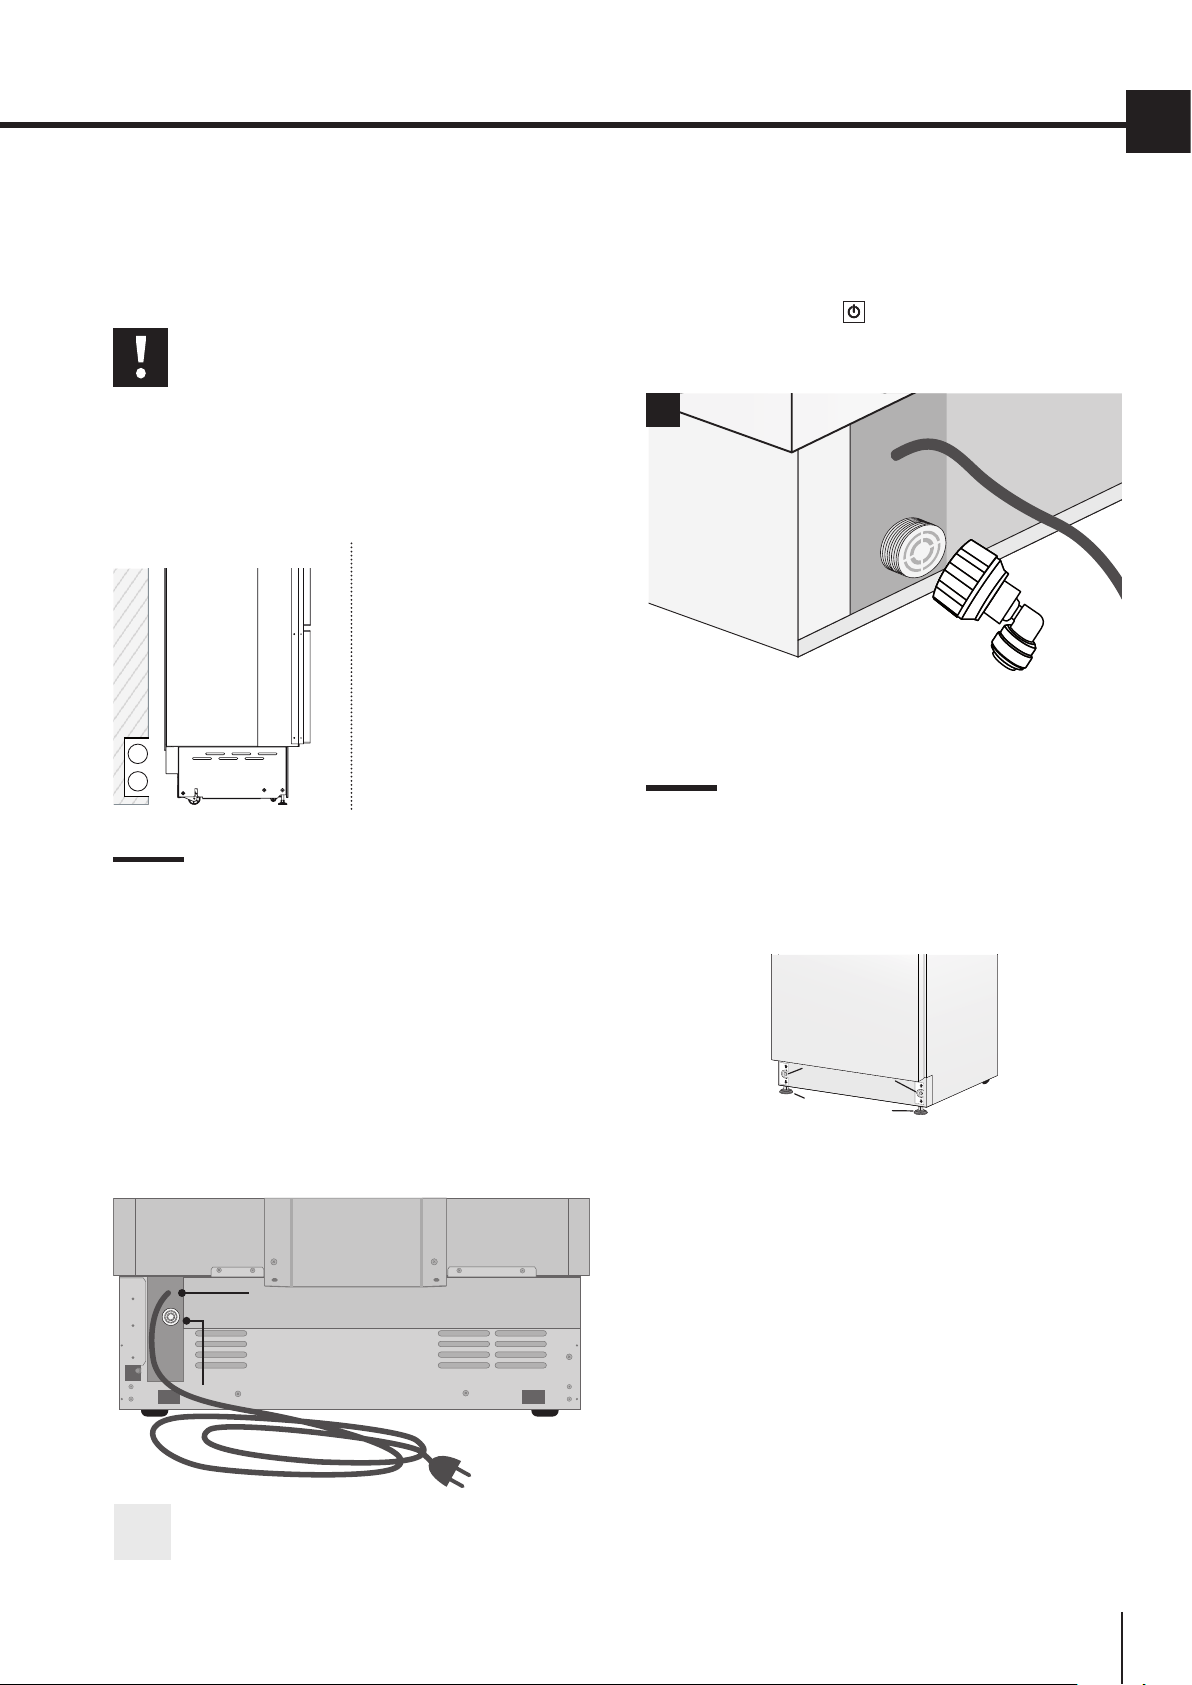
ELECTRICAL AND WATER SUPPLY
BEHIND THE UNIT
3.3 Energy: Alternatives and Home Auto-
mation
If energy is supplied through an alternative en-
ergy power source (solar, geothermal, etc..) or
if home automation systems are installed with
carrier signals in the power lines, it may be nec-
essary to install an isolation transformer (not
supplied) to prevent interference with the appli-
ance’s electronics.
fig.1 Back of appliance
Operate as follows:
> Unwind the electric cable and connect it directly to
the wall socket.
> Make sure the appliance is in the Stand-by con-
dition and that all lights are o; should it be not so
press the Unit button to switch it o.
> Connect the water cable behind the appliance [ 1 ].
Water connection
Electrical connection
3.4 Levelling
Adjust the appliance level by means of the front
levelling feet and the rear adjustable wheels.
Operate as follows:
> If necessary, remove the bottom plinth or grille
(it is kept in position by magnets), adjust the
height of the levelling feet [ 1 ] by means of a 17
mm (11/16”) wrench.
> Then adjust the height of the rear wheels by
turning the front adjusting bolts [ 2 ] clockwise
(raise) or counter-clockwise as it may be re-
quired.
Take care if using a power driver for this and
lower the clutch to prevent damaging the leveling
mechanism.
> Remount the bottom plinth or grille.
EN
E
W
E
W
1
2
1
2
1
Loading ...
Loading ...
Loading ...