Loading ...
Loading ...
Loading ...
Installation instructions
Notes:
Unplug the power cord and release the
brake before moving the cabinet.
Do not put any goods on top of the cabinet
and avoid slanting the cabinet when
moving it.
Push the cabinet from the rear making
sure the door does not open.
To avoid short circuits, do not position the
cabinet in an area that may become damp.
Do not let children climb on the cabinet or
move the cabinet to another location.
Keep the caster brake in “ON” position
while in desired location.
Cabinet must be placed on a level surface.
Cabinet will reach its cooling efficiency
after one hour.
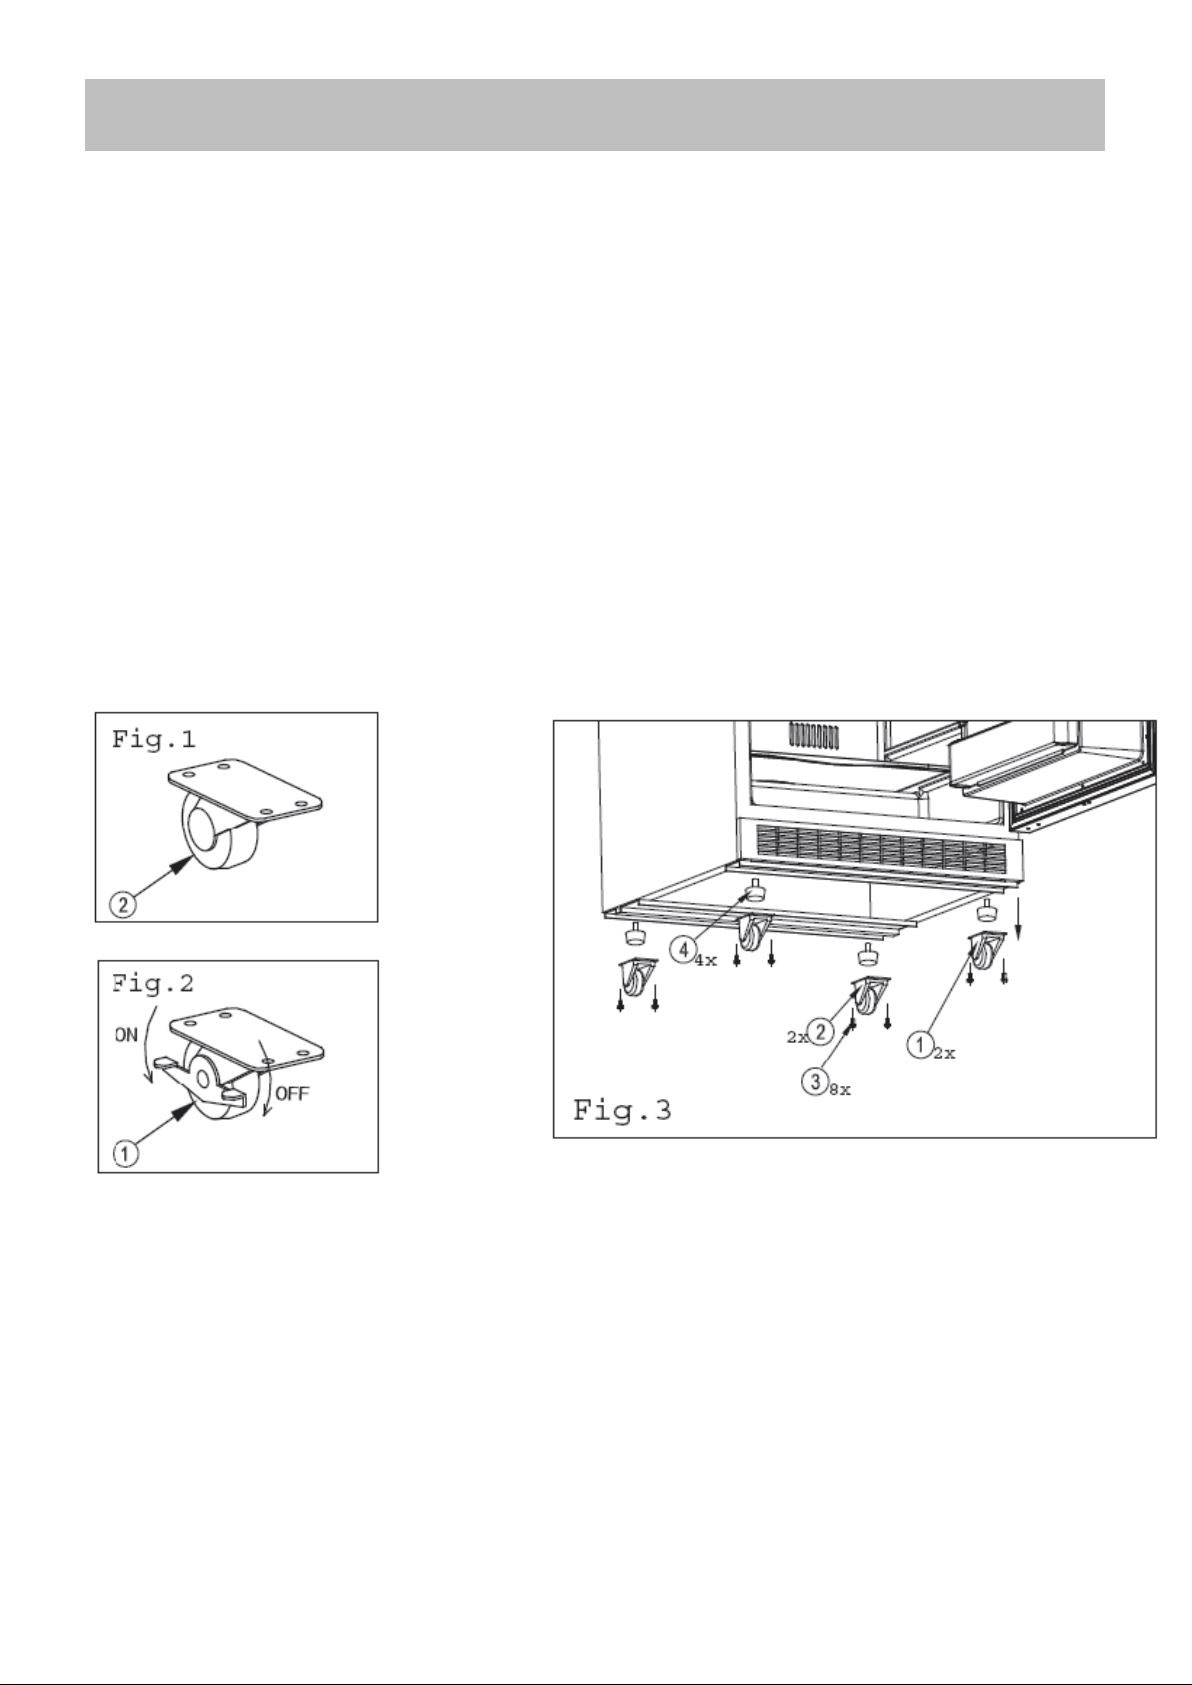
Replacing cabinet legs with casters
a) Tilt the unit on its back on a level surface
and remove the 4 cabinet legs (Fig. 3
number 4).
Reserve the cabinet legs.
b) Assemble the casters with brake (Fig. 2)
on the cabinet front bottom and the other 2
casters (Fig. 1) at the cabinet rear bottom.
c) Assemble each caster to the bottom of the
unit with (2) M5x10 screws with a star or
Phillips screwdriver (Fig. 3).
d) The caster brake (Fig. 3 number 1) at the
front bottom of the cabinet comes with a
braking function. When the brake handle
is “ON” (Fig. 2)’ unit wont roll; when brake
handle is “OFF” (released), it will roll.(Fig. 2)
Electrical connection
A 115 Volt (AC only) 60 Hz grounded
electrical supply equipped with a 15- or 20-
amp fuse or circuit breaker is required. It is
recommended that a separate circuit serving
only your appliance be provided. Use outlets
that cannot be turned off by a switch or pull
chain. Connect this appliance to a 3-prong
power supply outlet that has a ground
terminal. If you only have a 2-prong outlet,
have it replaced by a qualified technician
with an outlet that meets the local codes. DO
NOT USE AN EXTENSION CORD.
Required nominal voltage and frequency are
indicated on the rating plate. The connection
to the power supply and grounding has to be
made according to current standards and
regulations.
7
Loading ...
Loading ...
Loading ...