Loading ...
Loading ...
©2016 Hestan Commercial Corporation
3
EN
CHANGING ORIFICES
(continued)
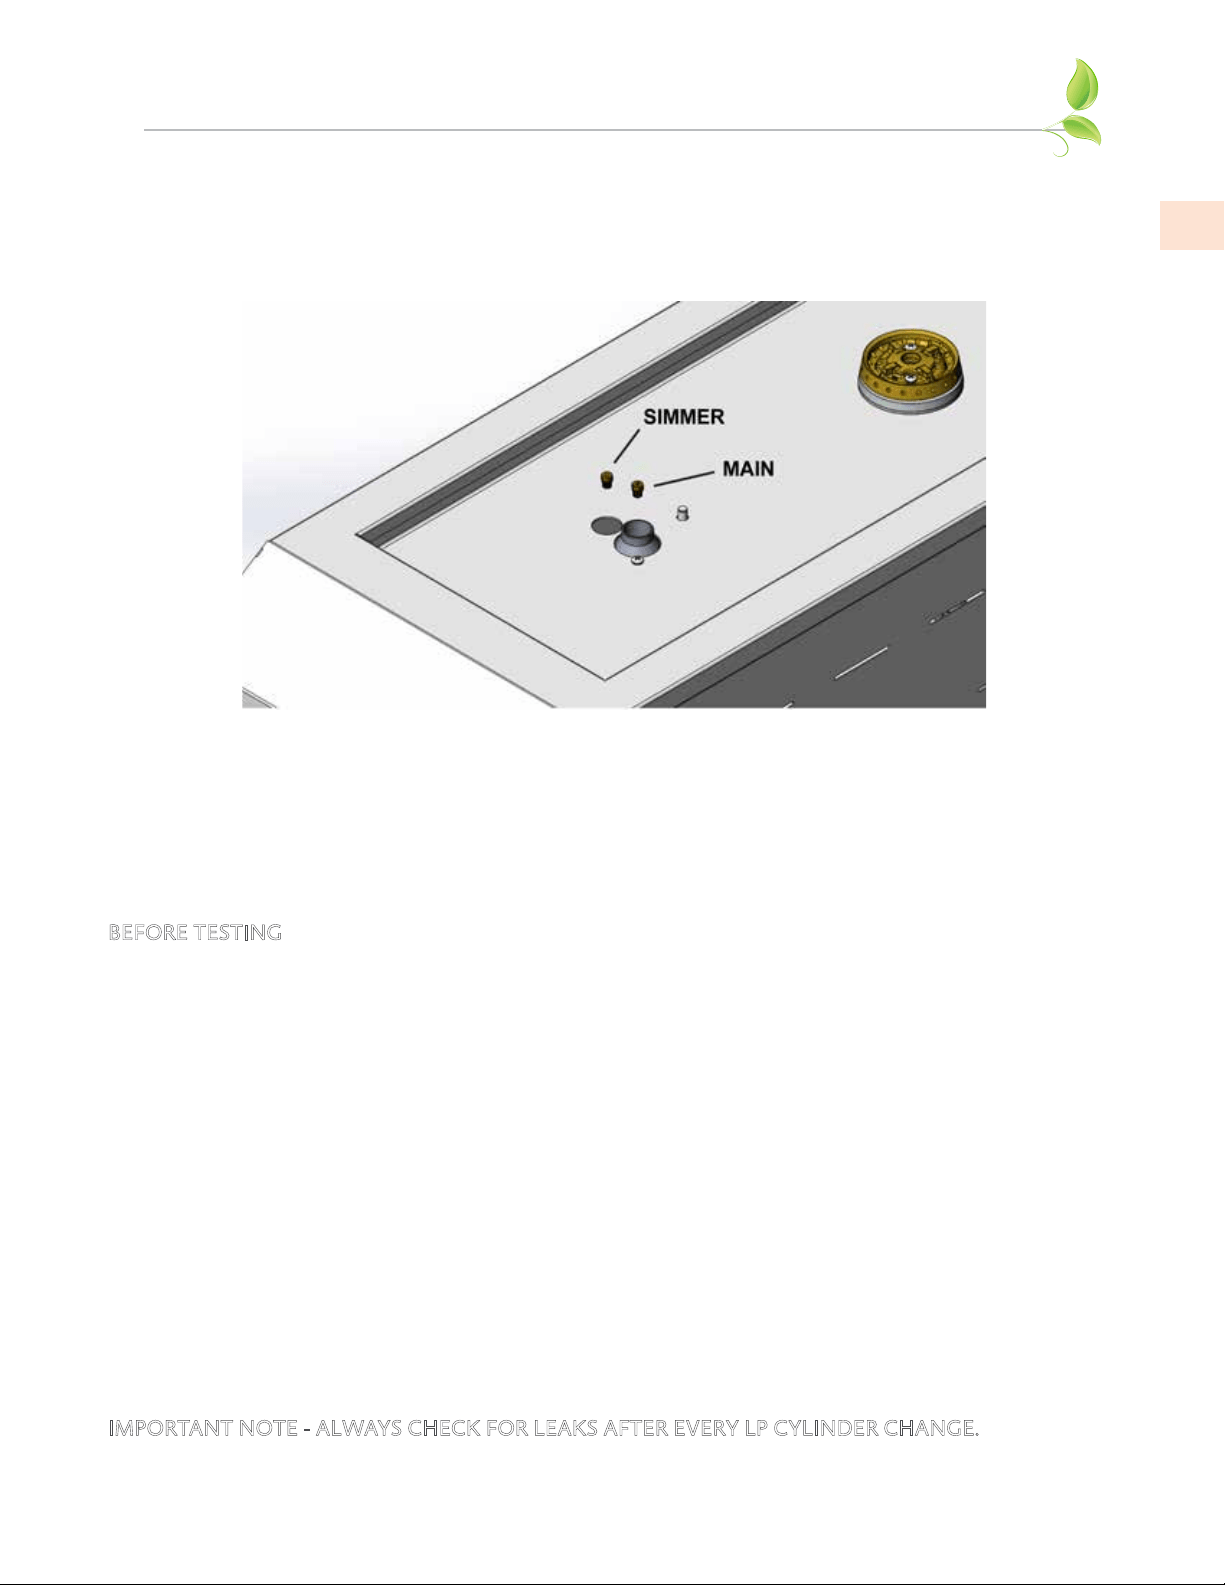
3. Use a nut driver or deep socket wrench (9/32” or 7 mm) to remove the orifices from the orifice
holder. It is recommended to change one orifice at a time. Consult the chart at the end of this
manual for what size is used at each location for your altitude. Install the new orifices and remount
the burner base in the same manner it was removed. Repeat this process for the secondary burner if
applicable.
TESTING & ADJUSTMENT
LEAK TESTING
GENERAL
A complete gas tightness check must be performed of all gas-carrying components due to possible
movement during installation, or excessive pressure unknowingly being applied to parts of the unit.
BEFORE TESTING
• Do not smoke while leak testing.
• Never leak test with an open flame.
• Make a soap solution of one part liquid detergent and one part water for leak testing purposes.
• Apply the solution to the gas fittings by using a spray bottle or a brush.
• For LP units, always check with a full LP cylinder.
TO TEST
• Make sure all control valves are in the “OFF” position.
• Apply the soap solution described above to all fittings.
• Turn the gas supply on.
• Check all connections from the supply line, or LP cylinder up to and including the manifold pipe
assembly.
• Soap bubbles will appear where a leak is present. If a leak is present, immediately turn off gas supply,
tighten any leaking fittings, turn the gas supply back on, and recheck.
• If you cannot stop a gas leak, turn off the gas supply and call the dealer where you purchased your
side burner.
• Do not use the side burner until all connections have been checked and do not leak.
IMPORTANT NOTE - ALWAYS CHECK FOR LEAKS AFTER EVERY LP CYLINDER CHANGE.
Loading ...
Loading ...