Loading ...
Loading ...
Loading ...
Installation and connection en
9
¡ Installation material
¡ Installation instructions
¡ User manual
¡ Customer service directory
¡ Warranty enclosure
1
¡ Energy label
¡ Information on energy consump-
tion and noises
4.2 Criteria for the installation
location
WARNING
Risk of explosion!
If the appliance is in a space that is
too small, a leak in the refrigeration
circuit may result in a flammable mix-
ture of gas and air.
▶
Only install the appliance in a
space with a volume of at least
1m
3
per 8g refrigerant. The
volume of refrigerant is indicated
on the rating plate. →"Appliance",
Fig. 1 /
4
, Page11
The weight of the appliance ex works
may be up to 40kg depending on
the model.
The subfloor must be sufficiently
stable to bear the weight of the appli-
ance.
Permitted room temperature
The permitted room temperature de-
pends on the appliance's climate
class.
The climate class can be found on
the rating plate. →"Appliance", Fig.
1 /
4
, Page11
Climate
class
Permitted room tem-
perature
SN 10°C to 32°C
N 16°C to 32°C
Climate
class
Permitted room tem-
perature
ST 16°C to 38°C
T 16°C to 43°C
The appliance is fully functional within
the permitted room temperature.
If an appliance with climate class SN
is operated at colder room temperat-
ures, the appliance will not be dam-
aged up to a room temperature of
5°C.
Built-under
Attachment under certain worktops,
e.g. stone, glass or stainless steel, is
frequently not possible. You can or-
der accessories from customer ser-
vice for installation on the side walls.
→"Customer Service", Page21
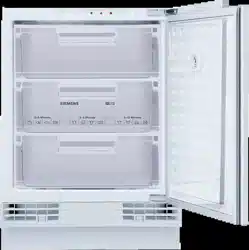
4.3 Installing the appliance
▶
Install the appliance in accordance
with the enclosed installation in-
structions.
4.4 Preparing the appliance
for the first time
1. Remove the informative material.
2. Remove the protective foil and
transit bolts, e.g. remove the ad-
hesive strips and carton.
3. Clean the appliance for the first
time. →Page17
4.5 Connecting the appliance
to the electricity supply
1. Insert the mains plug of the appli-
ance's power cable in a socket
nearby.
1
Not in all countries
Loading ...
Loading ...
Loading ...