Loading ...
Loading ...
Loading ...
5
STEP 3:
Thread the Battery Backup Sump Pump onto thedual size pipe tee provided. Once
the pump is threaded tight and oriented parallel to the discharge pipe, turn the pipe
to the 2 o’clock position to prevent air from being trapped in the pump housing.
Then cement the installation tee to the discharge pipe with PVC primer and PVC
cement.
STEP 5:
Attach the automatic
oat switch to the
discharge pipe so that
the switch is tethered
1-1/4” from the dis-
charge pipe. Use the
supplied wire straps
to mount the oat
switch cord to the
discharge pipe.
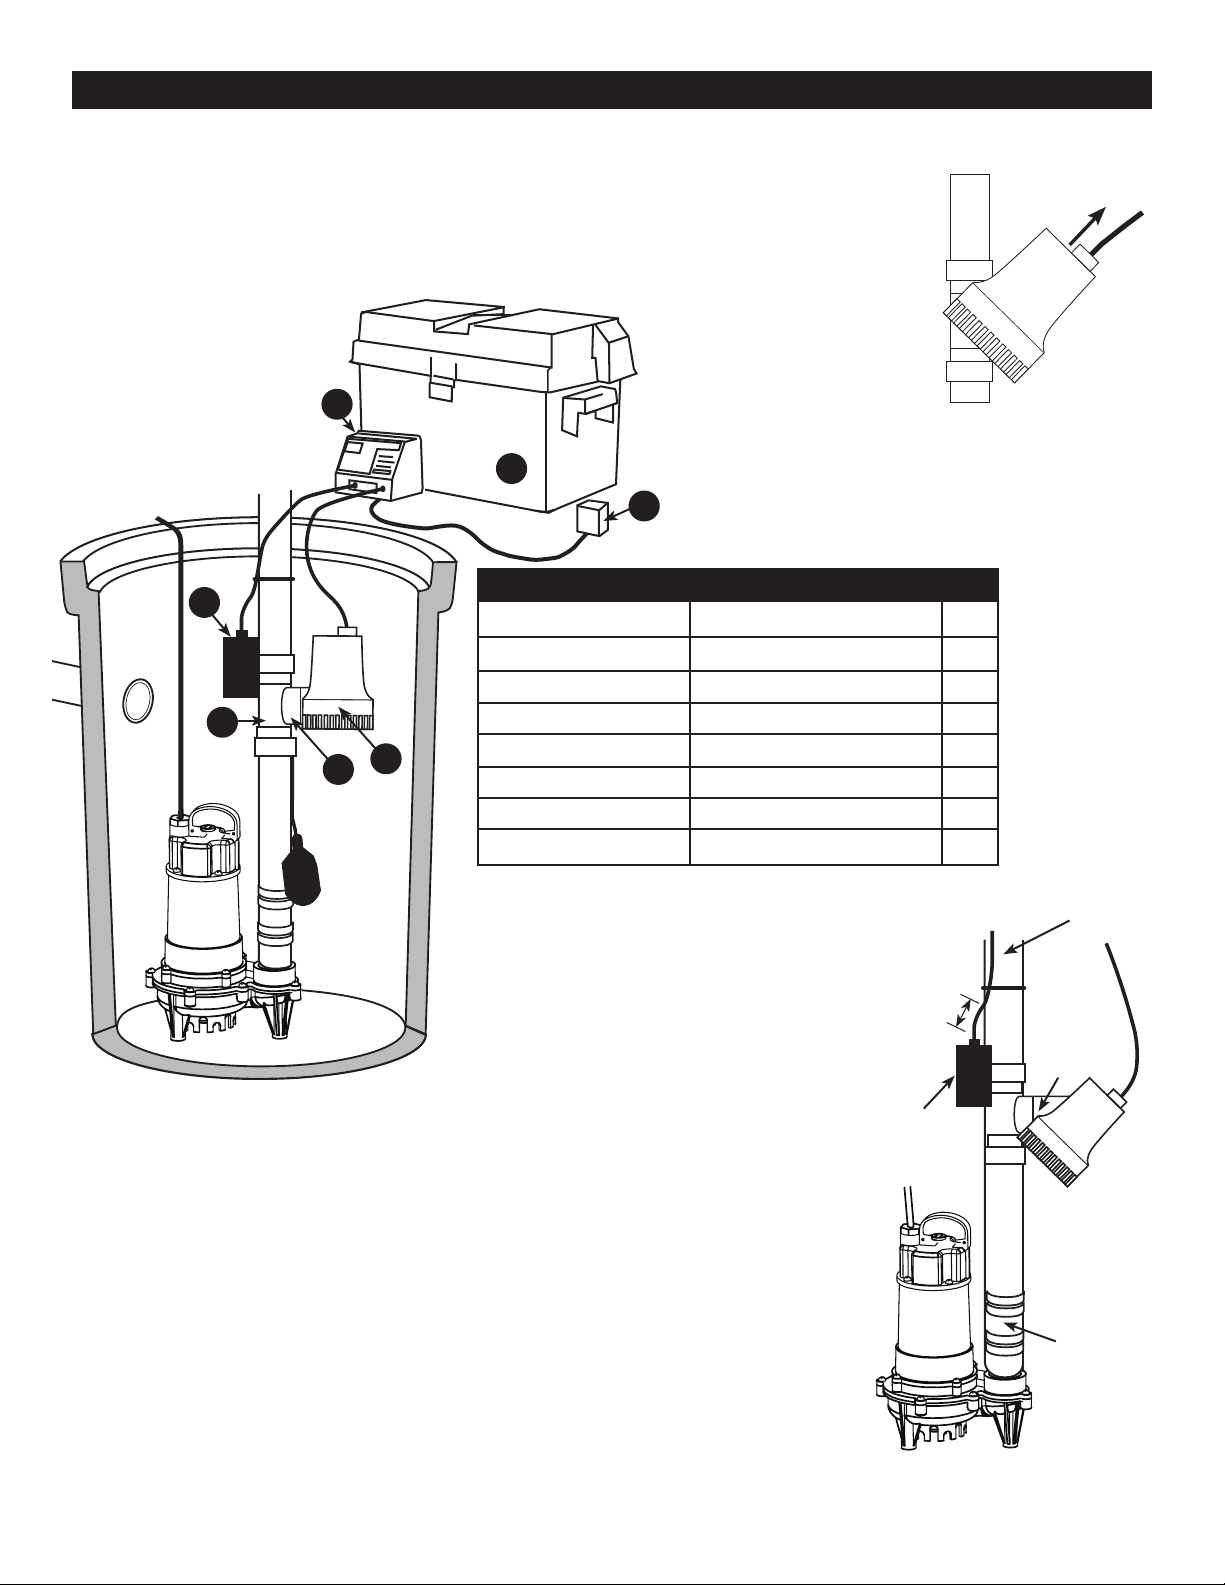
INSTALLATION
Check
Valve
Backup Pump
Suction Inlet
Float Sensor
Discharge Pipe
1-1/4”
Tether
3
4
5
12
1
2
The top of the Battery Backup Pump
should be at least 4” below the top of the
sump and at least 1” above the highest
water level of the primary sump pump.
Connect the remaining discharge pipes,
check valve and couplings.
STEP 4:
Replace primary
sump pump and
Battery Backup
Pump assembly
into the sump
basin.
REPLACEMENT PARTS
Part Number Description No.
EF091EBBS14 Battery Box* 1
EF091EBBS15 Control 2
EF091EBBS16 12V. Transformer/Plug 3
EF091EBBS17 Pump - 2700GPH 4
EF091EBBS18 Float Switch 5
EF091EBBS19 Inline Tee 6
EF091EBBS20 Check Valve 7
* Battery Box does not include battery or control.
7
6
4
5
2
3
1
Loading ...
Loading ...
Loading ...