
1
Write the model and serial
numbers here:
Model #
Serial #
Owner's Manual
You can find them on a label on the
front of the oven behind the oven door.
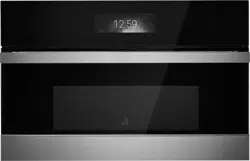
MCRS20SFSS
Pub. No. 29-5929
222D9114P001
Safety Instructions ......................... 2-4
Operating Instructions
Clock and Timer ................................. 8
Convection ....................................... 15
Oven Controls ............................... 5-19
Sabbath Feature ................................ 12
Steam Clean ...................................... 21
Special Features .......................... 10, 11
Thermostat ........................................ 20
Timed Baking and Roasting ............... 9
Timed Convection ....................... 18-19
Using the Probe ................................ 14
Care and Cleaning
Control Panel .................................... 24
Glass Surfaces .................................. 24
Heating Element ............................... 24
Lift-Off Oven Door .......................... 22
Light ................................................. 25
Oven Interior .................................... 25
Painted Surfaces ............................... 24
Racks ................................................ 23
Stainless Steel Surfaces .................... 24
Troubleshooting Tips ................. 26-28
Consumer Support
Accessories ....................................... 31
Consumer Support ............. Back Cover
Warranty ........................................... 35

2
IMPORTANT SAFETY INFORMATION.
READ ALL INSTRUCTIONS BEFORE USING.
WARNING!
For your safety, the information in this manual must be followed to minimize the risk of fire or explosion,
electric shock, or to prevent property damage, personal injury, or loss of life.
SAFETY PRECAUTIONS
When using electrical appliances, basic safety precautions should be followed, including the following:
Do not allow anyone to climb, stand or hang on
the door. They could damage the oven, or cause
severe personal injury.
Be sure the oven is securely installed in a
cabinet that is firmly attached to the house
structure. Never allow anyone to climb, sit,
stand or hang on the oven door.
Never leave the oven door open when you are
not watching the oven.
Always keep combustible wall covering,
curtains or drapes a safe distance from your
oven.
Always keep dish towels, dish cloths, pot
holders and other linens a safe distance from
your oven.
Always keep wooden and plastic utensils and
canned food a safe distance away from your
oven.
Teach children not to play with the controls or
any other part of the oven.
Large scratches or impacts to glass doors can
lead to broken or shattered glass.
Use this appliance only for its intended purpose
as described in this Owner's Manual.
Be sure your appliance is properly installed and
grounded by a qualified technician in
accordance with the provided installation
instructions.
Do not attempt to repair or replace any part of
your oven unless it is specifically recommended
in this manual. All other servicing should be
referred to a qualified technician.
Have the installer show you the location of the
circuit breaker or fuse. Mark it for easy
reference.
Before performing any service, disconnect the
oven power supply at the household distribution
panel by removing the fuse or switching off the
circuit breaker.
Do not leave children alone-children should not
be left alone or unattended in an area where an
appliance is in use. They should never be
allowed to sit or stand on any part of the
appliance.
Consumer Support Troubleshooting Tips Care and Cleaning Operating Instructions Safety Instructions

3
WARNING!
SAFETY PRECAUTIONS
Do not store flammable materials in an
oven.
Stand away from the oven when opening the
oven door. Hot air or steam which escapes can
cause burns to hands, face and/or eyes.
Do not heat unopened food containers. Pressure
could build up and the container could burst,
causing an injury.
Keep the oven vent unobstructed.
Keep the oven free from grease buildup.
Place the oven rack in the desired position
while the oven is cool. If racks must be handled
when hot, do not let pot holder contact the
heating elements.
When using cooking or roasting bags in the
oven, follow the manufacturer's directions.
Do not touch the heating elements or the
interior surface of the oven. These surfaces may
be hot enough to burn even though they are
dark in color. During and after use, do not
touch, or let clothing or other flammable
materials contact any interior area of the oven;
allow sufficient time for cooling first.
Potentially hot surfaces include oven vent
openings, surfaces near the openings, crevices
around the oven door, the edges of the window
and metal trim parts above the door.
REMEMBER: The inside surface of the oven may
be hot when the door is opened.
PRECAUTION: Items of interest to children
should not be stored in cabinets above an oven;
children climbing on the oven to reach items
could be seriously injured.
Never wear loose-fitting or hanging garments
while using the appliance. Be careful when
reaching for items stored in cabinets over the
oven. Flammable material could be ignited if
brought in contact with hot surfaces or heating
elements and may cause severe burns.
Use only dry pot holders-moist or damp pot
holders on hot surfaces may result in burns from
steam. Do not let pot holders touch hot heating
elements. Do not use a towel or other bulky
cloth.
For your safety, never use your appliance for
warming or heating the room.
Do not let cooking grease or other flammable
materials accumulate in or near the oven.
Do not use water on grease fires. Never pick up
a flaming pan. Turn the controls off.
Flame in the oven can be smothered completely
by closing the oven door and turning the oven
off by using a multi-purpose dry chemical or
foam-type fire extinguisher.
Never leave jars or cans of fat drippings in or
near your oven.
Do not store or use combustible materials,
gasoline or other flammable vapors and liquids
in the vicinity of this or any other appliance.
Consumer SupportTroubleshooting TipsCare and CleaningOperating InstructionsSafety Instructions
4
IMPORTANT SAFETY INFORMATION.
READ ALL INSTRUCTIONS BEFORE USING.
WARNING!
SAFETY PRECAUTIONS
Pulling out the rack to the stop-lock is a
convenience in lifting heavy foods. It is also a
precaution against burns from touching hot
surfaces of the door or oven walls.
Do not use the oven to dry newspapers. If
overheated, they can catch on fire.
Do not use the oven for a storage area. Items
stored in an oven can ignite.
Do not leave paper products, cooking utensils or
food in the oven when not in use.
After broiling, always take any broiler pan out
of the oven and clean it. Leftover grease in a
broiler pan can catch fire next time you use the
pan.
Clean only parts listed in this Owner's Manual.
Do not use aluminum foil to line oven bottoms.
Improper installation of aluminum foil may
result in a risk of electric shock or fire.
COOK MEAT AND POULTRY THOROUGHLY...
Cook meat and poultry thoroughly-meat to at least an INTERNAL temperature of 160°F and poultry to at least an
INTERNAL temperature of 180 °F Cooking to these temperatures usually protects against foodbome illness.
READ AND FOLLOW THIS SAFETY INFORMATION CAREFULLY.
SAVE THESE INSTRUCTIONS
Consumer Support Troubleshooting Tips Care and Cleaning Operating Instructions Safety Instructions
5
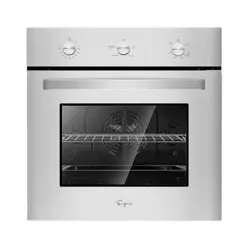
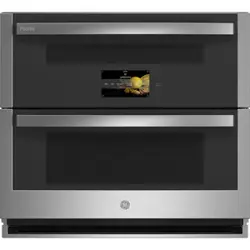
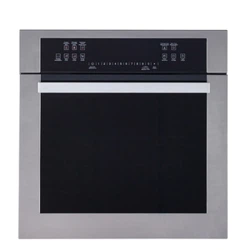
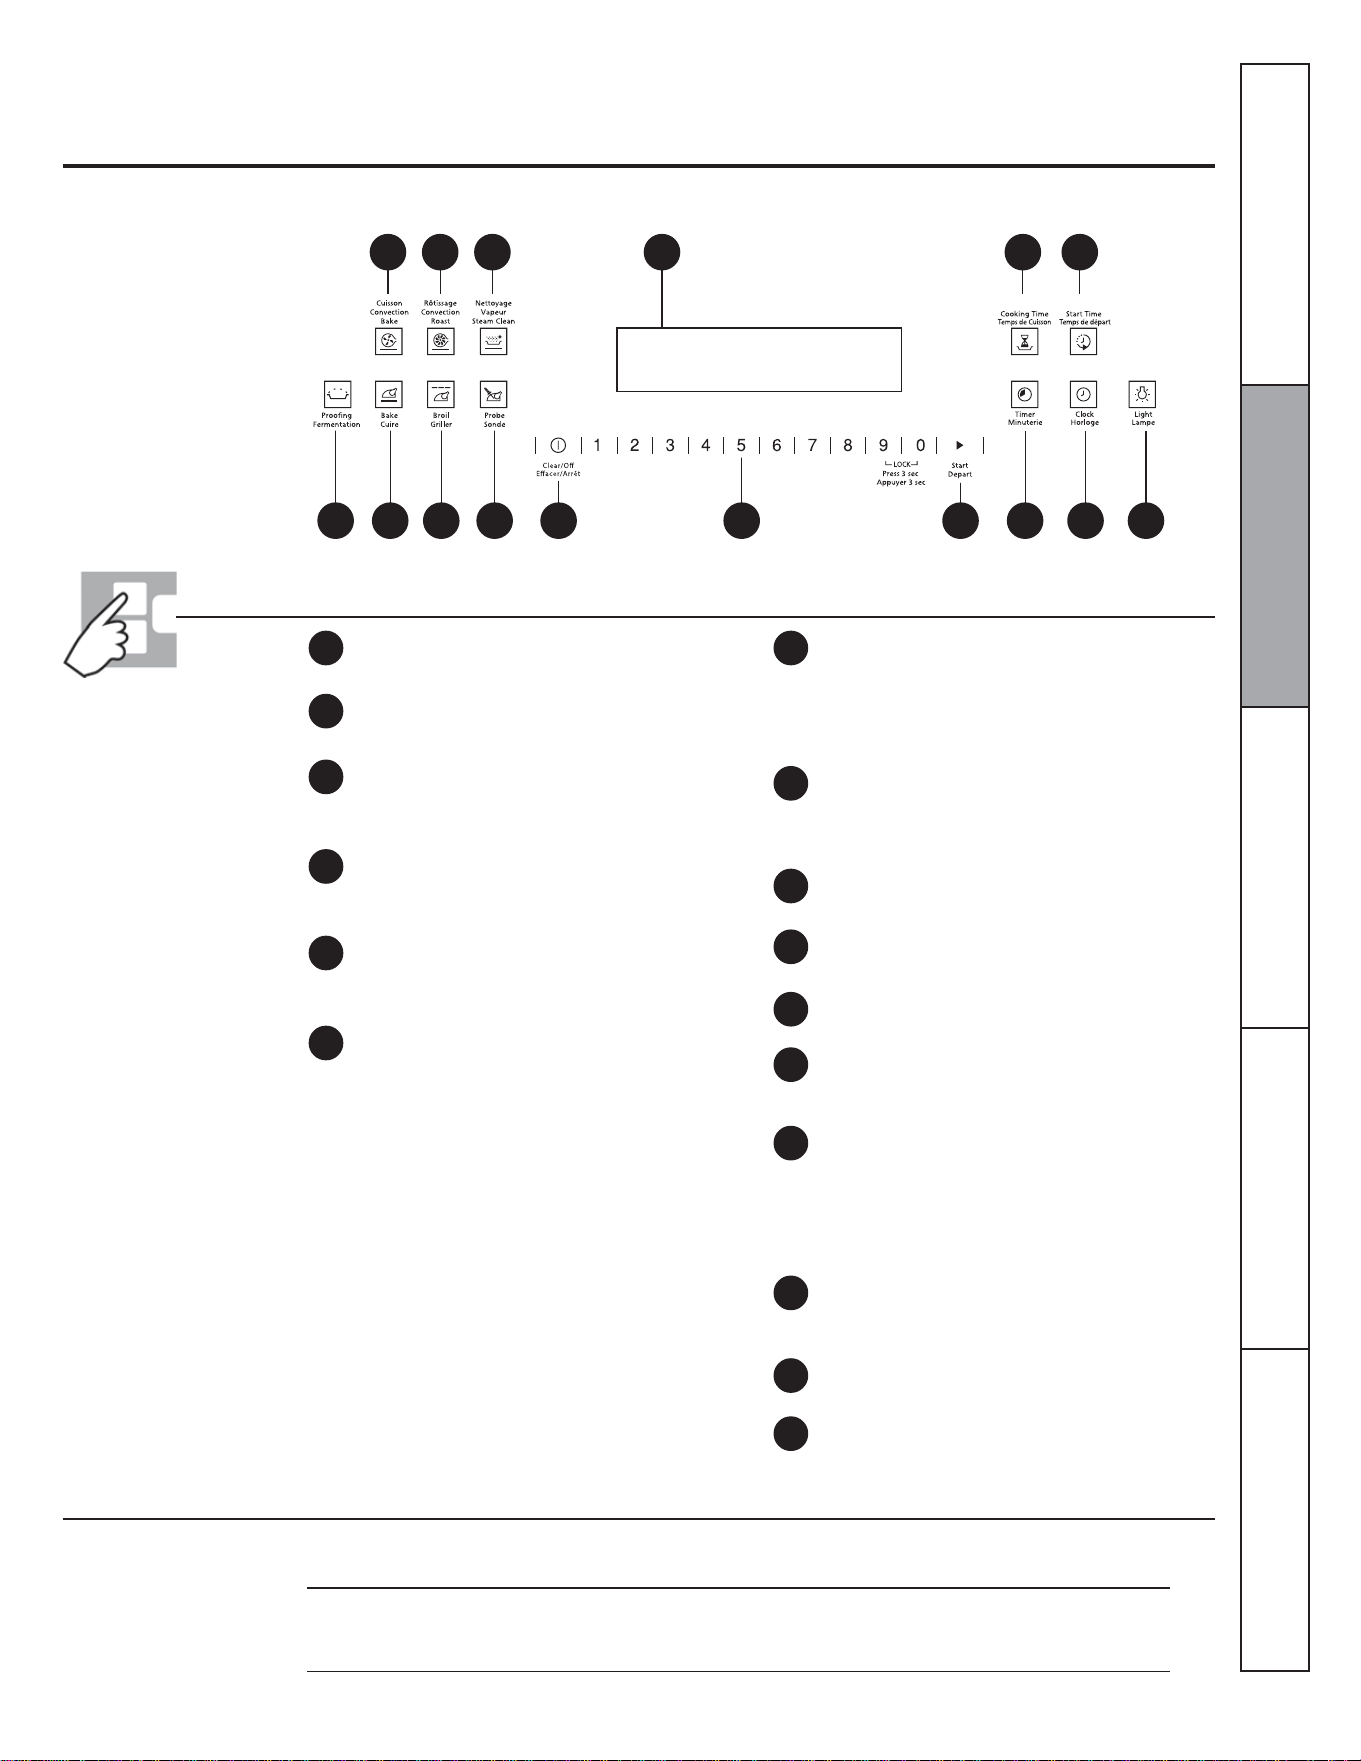
3 4 5 6 7 8
1214152116 13 11 10
9
Using the oven controls.
Throughout this manual, features and appearance may vary from your model.
BAKE Pad
Touch to select the bake function.
LIGHT Pad
Touch to turn the oven light on or off.
Temperature Conversions
Oven Control, Clock and Timer Features and Settings
Fahrenheit°
140
Celsius°
60
1
2
3
4
5
6
7
STEAM CLEAN Pad
Touch to select steam clean function. See the
Using the steam-clean oven section.
Display
Shows the time of day, oven temperature
whether the oven is in the bake, broil or Steam
Clean mode and the times set for the timer or
automatic oven operations.
PROBE Pad
Touch to select sensor cooking temperature.
TIMER Pad
Touch to select the timer feature.
Number Pads
Use to set any function requiring numbers such
as the time of day on the clock, the timer, the
oven temperature, the internal food temperature,
the delay start and length of operation for timed
baking.
CLOCK Pad
Touch before setting the clock.
CLEAR/OFF Pad
Touch to cancel ALL oven operations except the
clock and timer.
COOKING TIME Pad
Touch and then touch the number pads to set
the amount of time you want your food to
cook. The oven will shut off when the cooking
time has run out.
START Pad
Must be touched to start any cooking or cleaning
function.
CONVECTION ROAST Pad
Touch to select roasting with the convection
function.
CONVECTION BAKE Pad
Touch to select baking with the convection
function.
BROIL Pad
Touch to select the broil function.
If "F-and a number or letter" flash in the display
and the oven control signals, this indicates a
function error code. Touch the OFF pad. Allow the
oven to cool for one hour. Put the oven back into
operation. If the function error code repeats,
disconnect the power to the oven and call for
service. If your oven was set for a timed oven
operation and a power outage occurred, the clock
and all programmed functions must be reset. The
time of day will flash in the display when there has
been a power outage.
8
9
10
11
12
13
14
15
16
START TIME Pad
Use along with COOKING TIME pad to set the
oven to start and stop automatically at a time you
set.
PROOFING Pad
Touch to select a warm environment, useful for
rising yeast-leavened products.
Consumer SupportTroubleshooting TipsCare and CleaningOperating InstructionsSafety Instructions
150
65
170
75
200
95
250
120
275
135
300
150
325
160
350
175
375
190
400
205
425
220
450
230
475
245
500
260
525
275
550
290
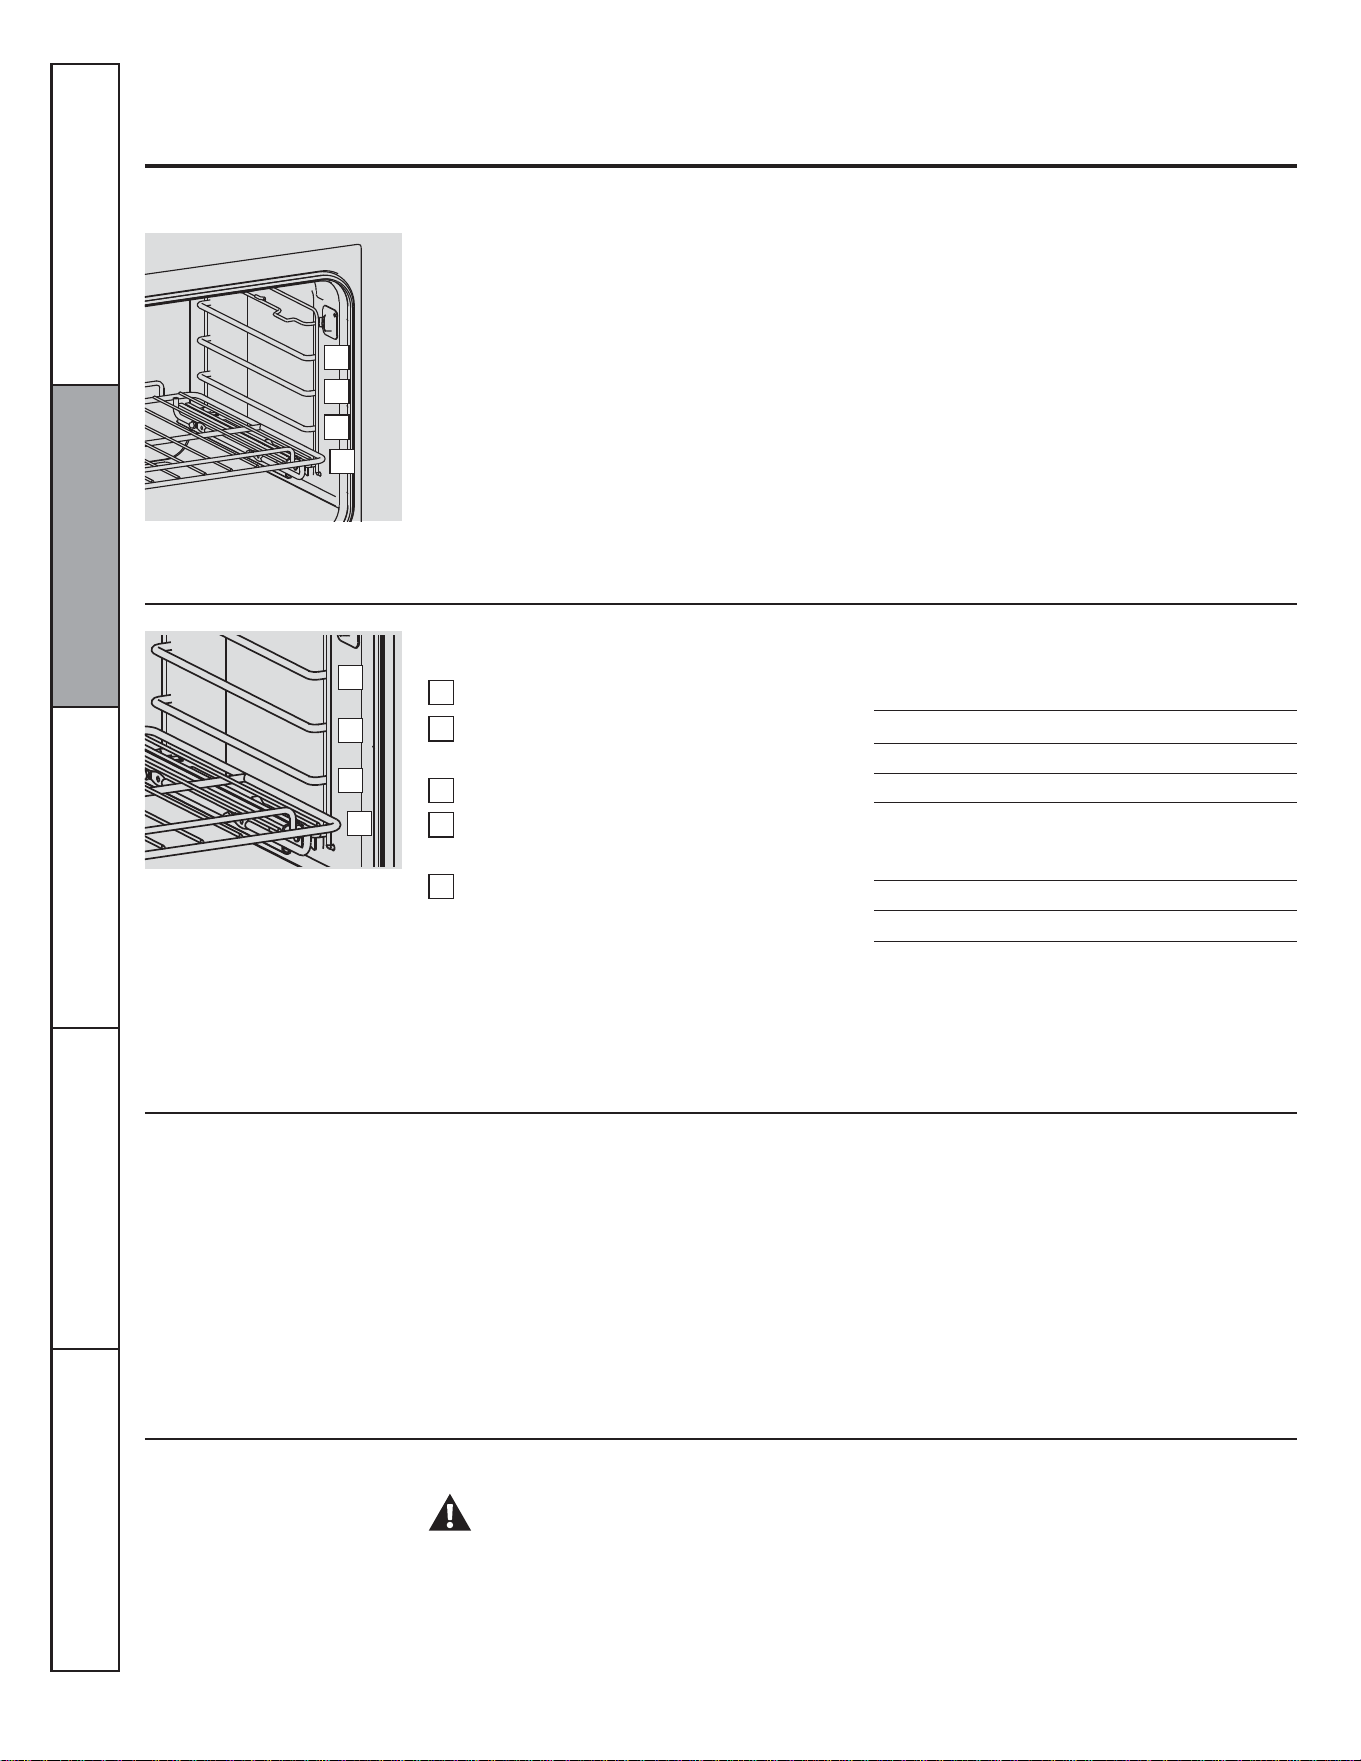
6
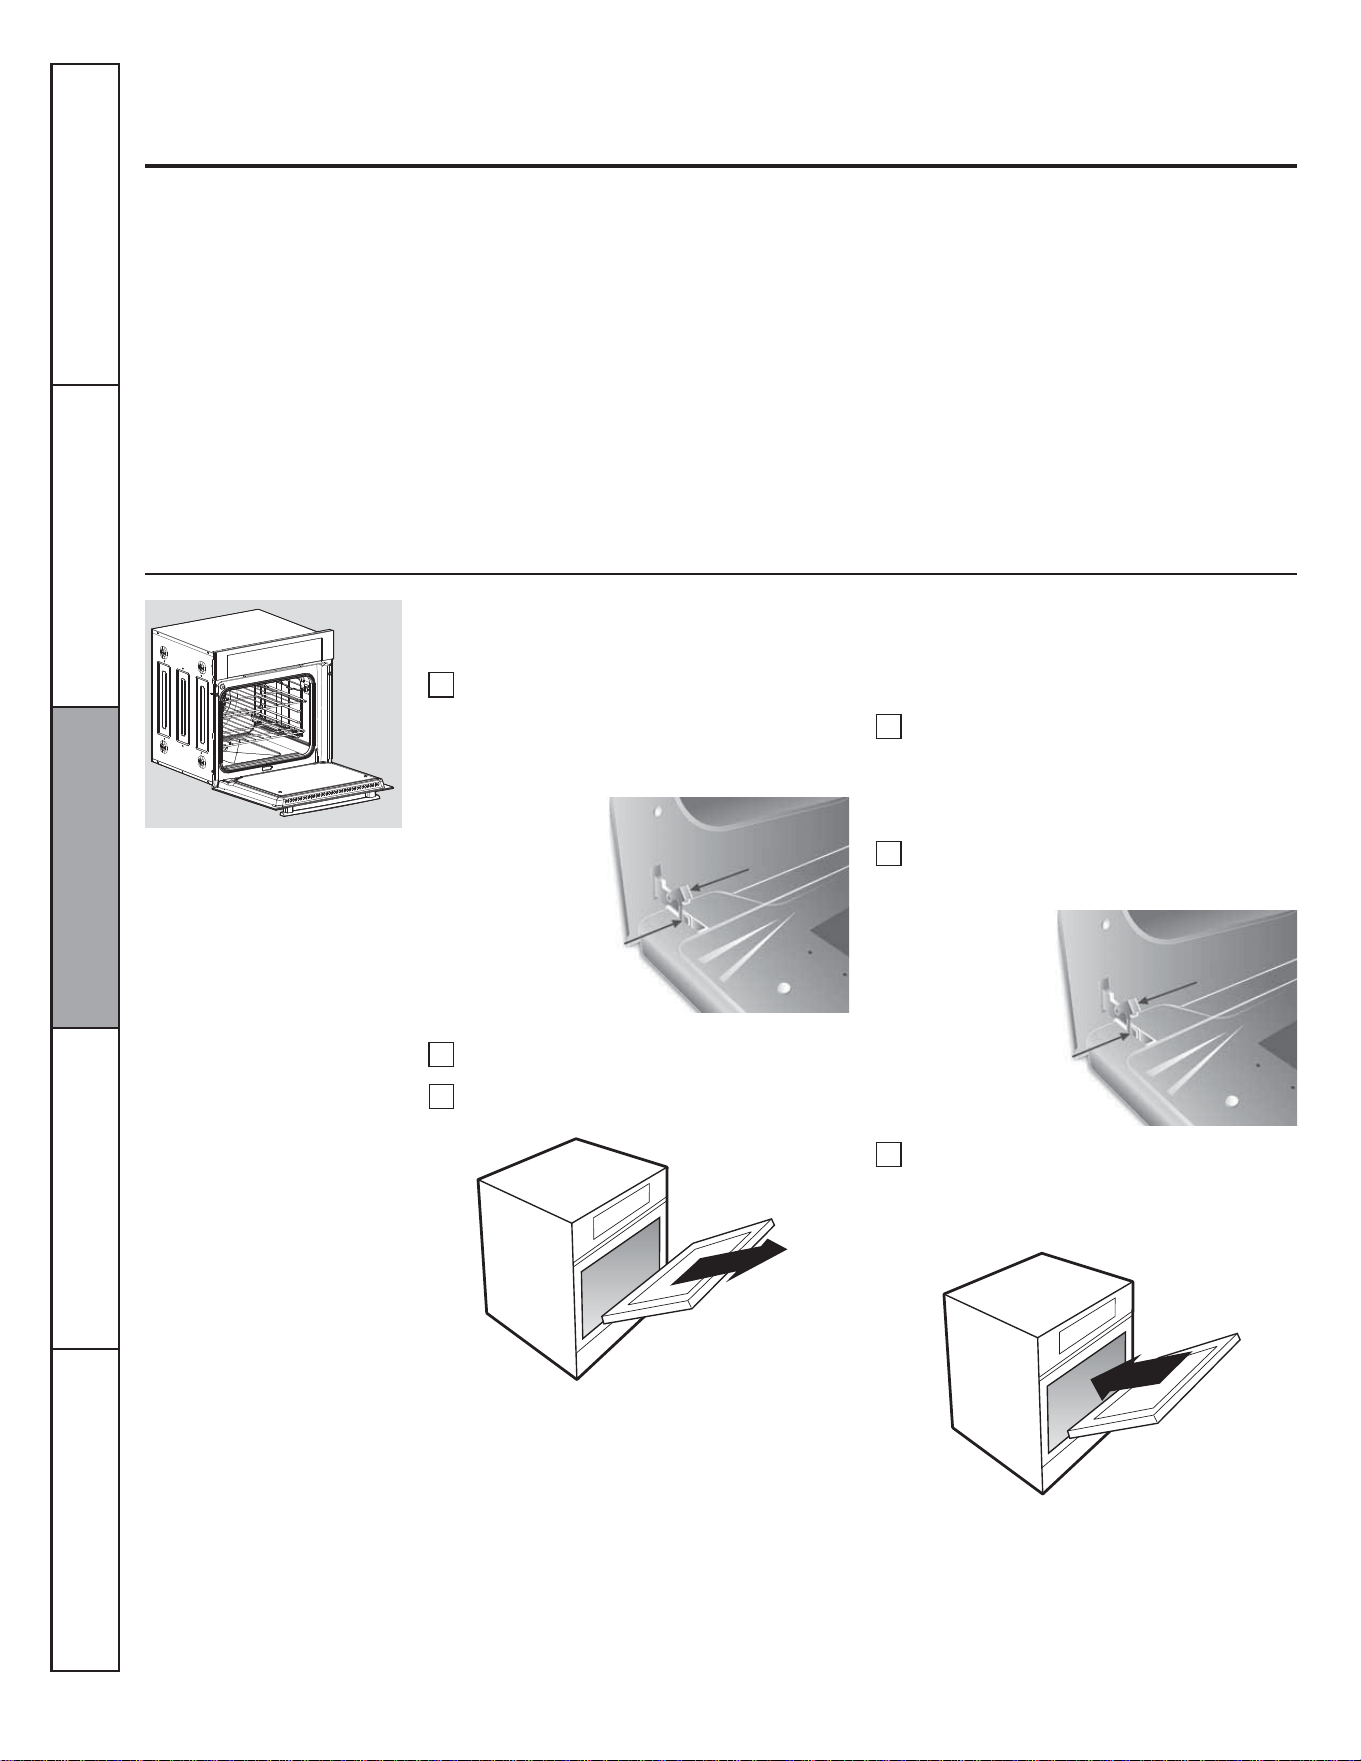
Using the oven controls.
Before you begin...
The racks have stop-locks, so that when
placed correctly on the supports, they will
stop before coming completely out, and will
not tilt. When placing and removing
cookware, pull the rack out to the bump on
the rack support.
The oven has 4 rack positions.
How to Set the Oven for Baking or Roasting
To avoid possible burns, place the racks in the desired position before you turn the oven on.
Touch the BAKE pad.
Touch the number pads to set the desired
temperature.
Touch the START pad.
Check food for doneness at minimum
time on recipe. Cook longer if necessary.
Touch the OFF pad when cooking is
complete.
To remove a rack, pull it toward you, tilt
the front end up and pull it out.
To replace, place the end of the rack
(stoplocks) on the support, tilt up the front
and push the rack in.
NOTE: A cooling fan may automatically turn on
and off to cool internal parts. This is normal, and
the fan may continue to run even after the oven is
turned off.
Type of Food
1
2
3
4
5
Frozen pies (on cookie sheet)
Angel food cake
Bundt or pound cakes
Biscuits, muffins, brownies,
cookies, cupcakes, layer
cakes, pies
Casseroles
Ye kr u t
Rack Position
D
A
B or C
C or D
C or D
A
Preheating and Pan Placement
Preheat the oven if the recipe calls for it. To
preheat, set the oven at the correct
temperature. Preheating is necessary for
good results when baking cakes, cookies,
pastry and breads.
Baking results will be better if baking pans
are centered in the oven as much as possible.
Pans should not touch each other or the
walls of the oven. If you need to use two
racks, stagger the pans so one is not directly
above the other, and leave approximately
1½" between pans, from the front, back and
sides of the wall.
WARNING!
Aluminum Foil
Never entirely cover a rack with aluminum
foil. This will disturb the heat circulation
and result in poor baking.
A smaller sheet of foil may be used to catch
a spillover by placing it on a lower rack
several inches below the food.
Do not use aluminum foil on the bottom of the
oven.
Consumer Support Troubleshooting Tips Care and Cleaning Operating Instructions Safety Instructions
D
C
B
A
D
C
B
A
7
How to Set the Oven for Broiling
Place the meat or fish on a broiler grid in
a broiler pan designed for broiling.
Close the oven door.
Touch the BROIL pad once for HI Broil.
To change to LO Broil, touch the
BROIL pad again.
If your oven is connected to 208 volts, rare steaks
may be broiled by preheating the broiler and
positioning the oven rack one position higher.
1
2
4
Touch the START pad.
When broiling is finished, touch the
CLEAR/OFF pad.
5
Consumer SupportTroubleshooting TipsCare and CleaningOperating InstructionsSafety Instructions
3
Leave the door closed in broil function
to better cooking results.
8
Using the clock and timer.
To Set the Clock
To Cancel the Timer
Touch the TIMER pad twice.
To Set the Timer
Touch the CLOCK pad.
Touch the number pads.
Touch the START pad.
The clock must be set to the correct time of
day for the automatic oven timing functions
to work properly. The time of day cannot be
changed during a timed baking or cleaning
cycle.
Make sure the clock is set to the correct
time of day.
1
2
3
The Timer is a minute timer only.
The Timer does not control oven
operations. The maximum setting on
the Timer is 9 hours and 59 minutes.
Touch the TIMER pad.
Touch the number pads until the amount
of time you want shows in the display.
For example, to set 2 hours and 45
minutes, touch 2, 4 and 5 in that order. If
you make a mistake, touch the TIMER
pad and begin again.
Touch the START pad.
The 6-second tone can be canceled by following
the steps in the Special features of your oven
control section under Tones at the End of a Timed
Cycle.
When the Timer reaches :00, the control
will beep 3 times followed by one beep
every 6 seconds until the TIMER pad is
touched.
After touching the START pad, SET disappears;
this tells you the time is counting down, although
the display does not change until one minute has
passed. Seconds will not be shown in the display
until the last minute is counting down.
1
2
3
4
Consumer Support Troubleshooting Tips Care and Cleaning Operating Instructions Safety Instructions

9
NOTE: Foods that spoil easily -such as milk, eggs, fish, stuffings, poultry and pork- should not be allowed to sit for more than 1 hour
before or after cooking. Room temperature promotes the growth of harmful bacteria. 8e sure that the oven light is off because heat from
the bulb will speed harmful bacteria growth.
Using the timed baking and roasting features.
How to Set an Immediate Start and Automatic Stop
The oven will turn on immediately and cook for a
selected length of time. At the end of the cooking
time the oven will turn off automatically.
Touch the BAKE pad.
Touch the number pads to set the desired
oven temperature.
Touch the COOKING TIME pad.
Touch the OFF pad to clear the display if
necessary. Remove the food from the
oven. Remember, even though the oven
turns off automatically, food left in the
oven will continue cooking after the
oven turns off.
NOTE: An attention tone will sound if you are
using timed baking and do not touch the START
pad.
The oven will turn ON, and the display will show
the cooking time countdown and the changing
temperature starting at 37.8 °C (100 °F). (The
temperature display will start to change once the
oven temperature reaches 37.8 °C [100 °F]).
When the oven reaches the temperature you set,
3 beeps will sound. The oven will continue to
cook for the set amount of time, then turn off
automatically.
Touch the number pads to set the desired
length of cooking time. The minimum
cooking time you can set is 1 minute.
The oven temperature that you set and
the cooking time that you entered will be
in the display.
Touch the START pad.
NOTE: If your recipe requires preheating, you
may need to add additional time to the lenght of
the cooking time.
1
2
3
4
5
6
NOTE: An attention tone will sound if you are
using timed baking and do not touch the START
pad.
When the oven turns ON at the time of day you
set, the display will show the cooking time
countdown and the changing temperature
starting at 37.8 °C (100 °F). (The temperature
display will start to change once the oven
temperature reaches 37.8 °C [100°F]). When the
oven reaches the temperature you set, 3 beeps
will sound. The oven will continue to cook for the
set amount of time, then it turns off automatically.
How to Set a Delayed Start and Automatic Stop
The oven will turn on at the time of day you set,
cook for a specific lenght of time an then turn off
automatically.
Make sure the clock shows the correct time of
day.
Touch the BAKE pad.
Touch the number pads to set the desired
oven temperature.
Touch the COOKING TIME pad.
NOTE: If your receipe requires preheating, you
may need to add additional time to the length of
the cooking time.
Touch the number pads to set the desired
length of cooking time. The minimum
cooking time you can set is 1 minute.
The oven temperature that you set and
the cooking time that you entered will be
in the display.
Touch the START TIME pad.
Touch the OFF pad to clear the display if
necessary. Remove the food from the
oven. Remember, even though the oven
turns off automatically, food left in the
oven will continue cooking after the
oven turns off.
1
2
3
4
5
6
Consumer SupportTroubleshooting TipsCare and CleaningOperating InstructionsSafety Instructions
10
12-Hour Shutdown
Special features of your oven control.
Your new touch pad control has additional features that you may choose to use. The following are the features and how you may
activate them.
The special feature modes can only be activated while the display is showing the time of day. They remain in the control's memory until
the steps are repeated.
When the display shows your choice, touch the START pad. The special features will remain in memory after a power failure, except for
the Sabbath feature, which will have to be reset.
Fahrenheit or Celsius Temperature Selection
With this feature, should you forget and leave the
oven on, the control will automatically turn off the
oven after 12 hours during baking functions of
after 3 hours during a broil function.
If you wish to turn OFF this feature, follow
the steps below.
Touch the START TIME pad until no
shdn (no shut-off) appears in the display.
Touch the START pad to activate the no
shut-off and leave the control set in this
special features mode.
Touch the BROIL and BAKE pads at the
same time for 3 seconds until the display
shows SF.
1
2
3
Touch the BROIL and BAKE pads at the
same time for 3 seconds until the display
shows SF.
Touch the BROIL and COOKING TIME
pads. The display will show F
(Fahrenheit).
Your oven control is set to use the Fahrenheit
temperature selections but you may change this
to use the Celsius selections.
Touch the BROIL and COOKING TIME
pads again. The display will show C
(Celsius).
Touch the START pad.
1
2
3
4
Tones at the End of a Timed Cycle
1
2
3
1
2
Touch the BROIL and BAKE pads at the
same time for 3 seconds until the display
shows SF.
To cancel the 6-second beep:
At the end of a timed cycle, 3 short beeps will
sound followed by one beep every 6 seconds
until the OFF pad is touched. This continual 6
second beep may be canceled.
Touch the TIMER pad. The display
shows CON BEEP (continuous beep).
Touch the TIMER pad again. The display
shows BEEP. (This cancels the one beep
every 6 seconds.)
Touch the START pad.
Control Lockout
To unlock the control, touch the 9 and 0
pads at the same time for 3 seconds until
the control beeps twice and LOC is
removed from the display.
NOTE: All cooking and timing functions will be
cancelled when locking out the control.
Touch the 9 and 0 pads at the same time
for 3 seconds until the control beeps
twice. The display will show LOC
continuously and the time of day, if not
blacked out.
To activate this feature:
Your control will allow you to lock out the touch
pads so they cannot be activated when touched.
Consumer Support Troubleshooting Tips Care and Cleaning Operating Instructions Safety Instructions

11
12-Hour, 24-Hour or Clock Blackout
Your control is set to use a 12-hour clock.
If you would prefer to have a 24-hour
military time clock or black out the clock
display, follow the steps below.
Touch the BROIL and BAKE pads at the
same time for 3 seconds until the display
shows SF.
Touch the CLOCK pad once. The display
will show 12 hr. If this is the choice you
want, touch the START pad.
NOTE: If the clock is in the black-out mode you
will not be able to use the Start Time function.
Touch the CLOCK pad again to change
to the 24 hour military time clock. The
display will show 24 hr. If this is the
choice you want, touch the START pad.
Touch the CLOCK pad again to black
out the clock display. The display will
show OFF. If this is the choice you want,
touch the START pad.
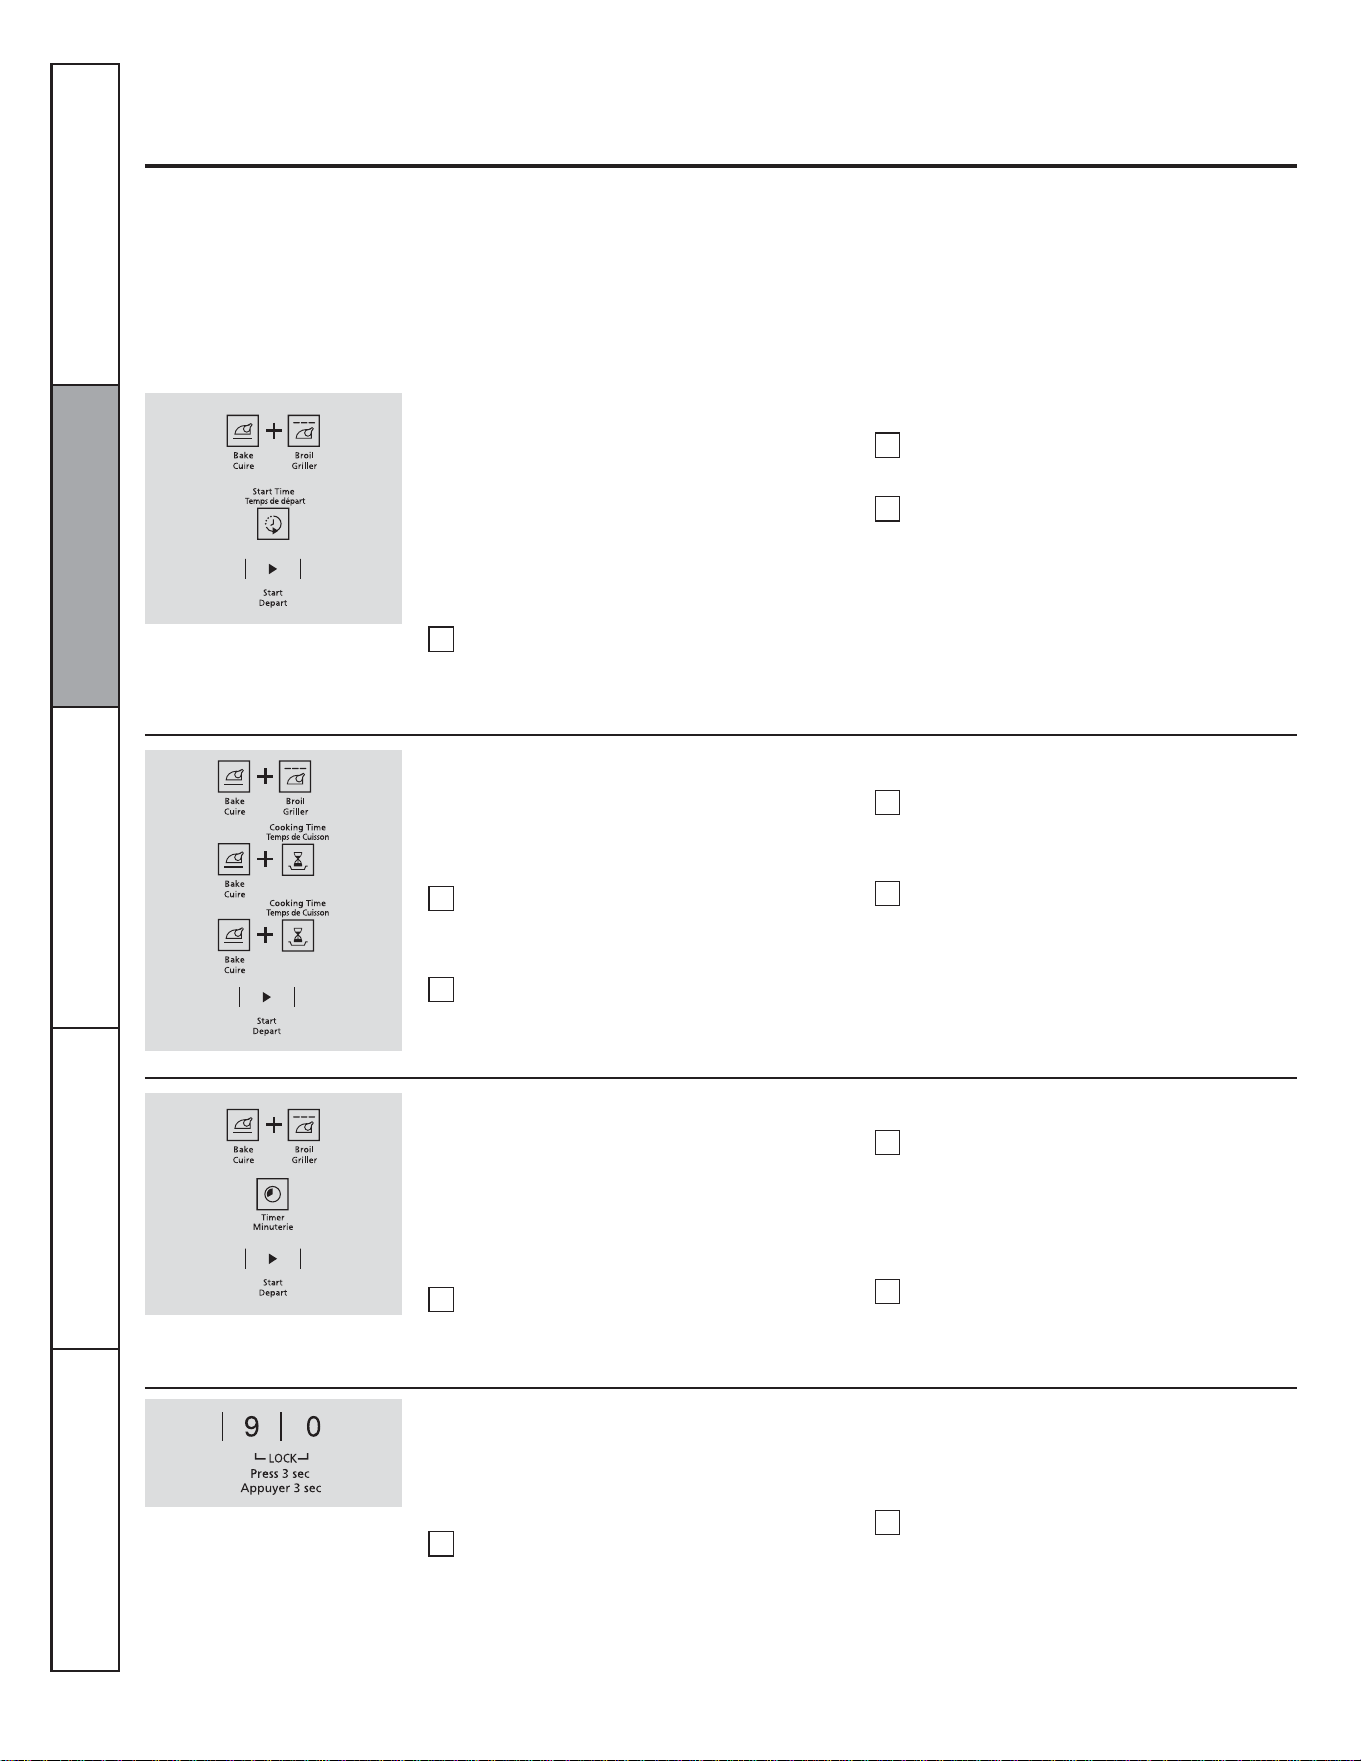
Auto Recipe™ Conversion
To reactivate the feature, repeat steps 1-3
above but touch the START pad when CON
ON is in the display.
To deactivate the feature:
Touch the oven BAKE and BROIL pads
at the same time until the display shows
SF.
Touch the CONVECTION BAKE pad.
The display will show CON ON. Touch
the CONVECTION BAKE pad again.
The display will show CON OFF.
Touch the START pad.
When using convection bake, the Auto Recipe™
Conversion feature will automatically convert
entered regular baking temperatures to
convection baking temperatures.
This feature is activated so that the display will
show the actual converted (reduced)
temperature. For example, if you enter a regular
recipe temperature of 176.7 °C (350 °F) and
touch the START pad, the display will show CON
and the converted temperature of 162.8 °C
(325 °F).
1
2
3
Consumer SupportTroubleshooting TipsCare and CleaningOperating InstructionsSafety Instructions
1
2
3
4

12
How to Set for Regular Baking/Roasting
Using the Sabbath feature.
(Designed for use on the Jewish Sabbath and Holidays)
The Sabbath feature can be used for baking/roasting only. It cannot be used for convection, broiling or Delay Start cooking.
NOTE: The oven light comes on automatically when the door is opened and goes off when the door is closed. The bulb may be
removed. See the Oven Light Replacement section. On models with a light switch on the control panel, the oven light may be turned on
and left on.
When the display shows the
oven is set in Sabbath. When the
display shows the oven is
baking/roasting.
To adjust the oven temperature, touch the
BAKE pad, enter the new temperature using
the number pads and touch the START pad.
NOTE: The OFF and COOKING TIME
pads are active during the Sabbath feature.
Touch and hold both the BROIL and
BAKE pads, at the same time, until the
display shows SF.
NOTE: If bake or broil appears in the
display, the BROIL and BAKE pads
were not touched at the same time.
Touch the OFF pad and begin again.
Touch the START TIME pad until SAb
bAtH appears in the display.
Touch the START pad and will
appear in the display.
Touch the BAKE pad. No signal will be
given.
Using the number pads, enter the desired
temperature between 77 °C (170 °F) and
288 °C (550 °F). No signal or
temperature will be given.
Make sure the clock shows the correct time of
day and the oven is off.
Touch the START pad.
After a random delay period of
approximately 30 seconds to 1 minute,
****** will appear in the display
indicating that the oven is baking/
roasting. If ****** doesn't appear in the
display, start again at Step 4.
1
2
3
4
5
6
7
Consumer Support Troubleshooting Tips Care and Cleaning Operating Instructions Safety Instructions

13
How to Set for Timed Baking/Roasting-Immediate Start and Automatic Stop
When the display shows ****** the oven
is set in Sabbath. When the display
shows ************ the oven is baking/
roasting.
To adjust the oven temperature, touch the
BAKE pad, enter the new temperature using
the number pads and touch the START pad.
When cooking is finished, the display will
change from ****** to *** and 0:00 will
appear, indicating that the oven has turned
OFF but is still set in Sabbath. Remove the
cooked food.
Touch and hold both the BROIL and
BAKE pads at the same time, until the
displayshows SF.
NOTE: If bake or broil appears in the display,
the BROIL and BAKE pads were not touched
at the same time. Touch the OFF pad and
begin again.
Tap the START TIME pad until
SAbbAtH appears in the display.
Touch the START pad and *** will
appear in the display.
Touch the COOKING TIME pad.
Touch the number pads to set the desired
length of cooking time between 1 minute
and 9 hours and 99 minutes. The cooking
time that you entered will be displayed.
Touch the START pad.
Touch the BAKE pad. No signal will be
given.
Make sure the clock shows the correct time of day and the oven is off.
Using the number pads, enter the desired
temperature. No signal or temperature
will be given.
Touch the START pad.
After a random delay period of
approximately 30 seconds to 1 minute,
****** will appear in the display
indicating that the oven is baking/
roasting. If ****** doesn't appear in the
display, start again at Step 7.
1
2
3
4
5
6
7
8
9
10
How to exit the Sabbath feature
Touch the OFF pad.
If the oven is cooking, wait for a random
delay period ofapproximately 30 seconds
to 1 minute, until only **** is in the
display.
Touch and hold both the BROIL and
BAKE pads at the same time, until the
display shows SF.
Tap the START TIME pad until 12shdn
or no shdn appears in the display.
NOTE: If a power outage ocurred while the oven
was in Sabbath, the oven will automatically turn
off and stay off even when the power returns. The
oven control must be reset.
Choose 12 shdn, indicating that the oven
will automatically turn after 12 hours or
no shdn, indicating that the oven will not
automatically turn after 12 hours.
Press START when the option that you
want is in the display (12 shdn or no
shdn).
1
2
3
4
5
6
Consumer SupportTroubleshooting TipsCare and CleaningOperating InstructionsSafety Instructions
14
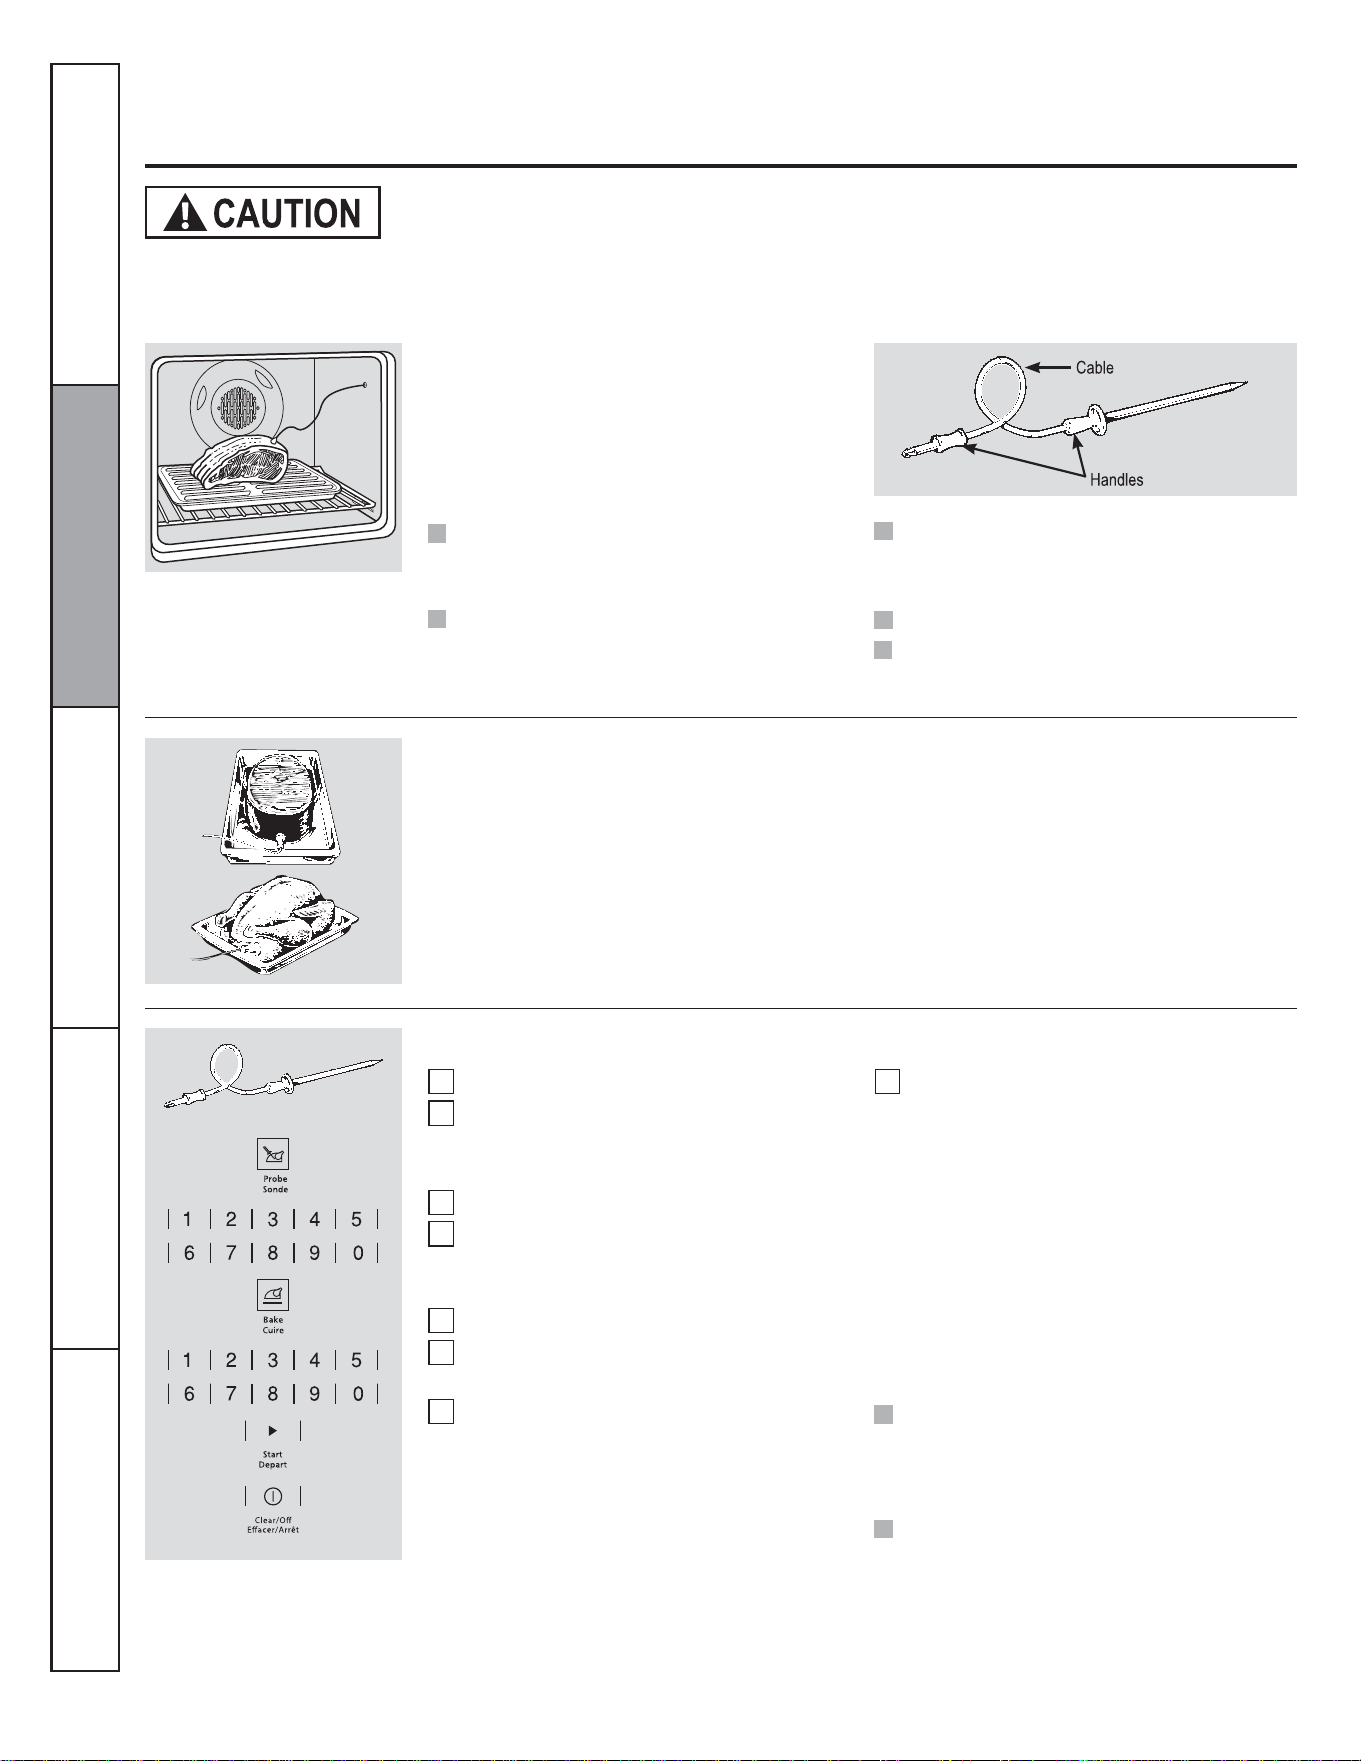
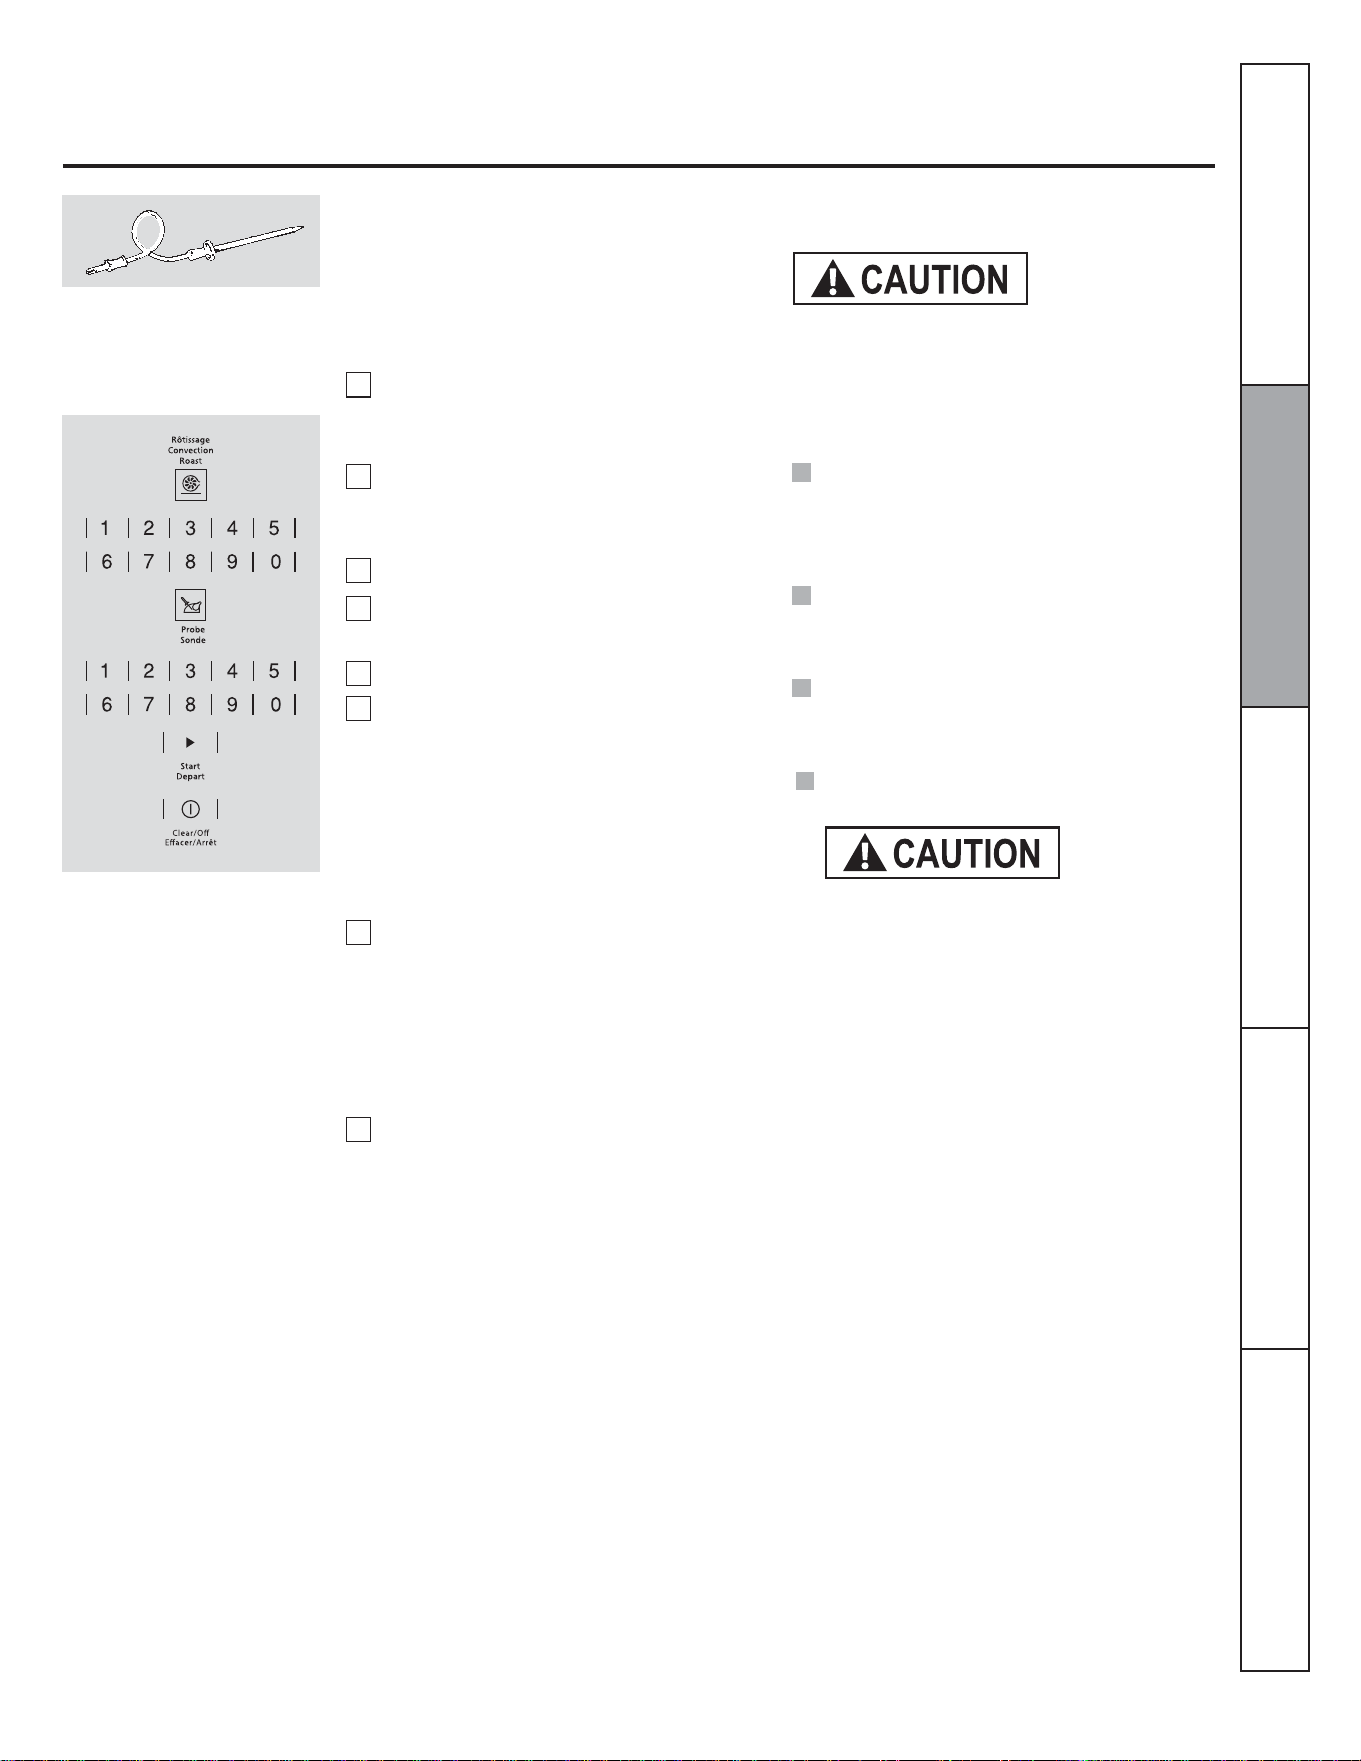
Using the probe.
For many foods, especially roasts and poultry, internal food temperature is the best test for doneness. The temperature
probe takes the guesswork out of cooking foods to the exact doneness you want.
Use of probes other than the one provided
with this product may result in damage to
the probe.
Use the handles of the probe and plug when
inserting and removing them from the food
and outlet.
To avoid damaging your probe, do not
use tongs to pull on the cable when
removing it.
To avoid breaking the probe, make sure
food is completely defrosted before
inserting .
After preparing the meat and placing it on a
trivet or on a broiler pan grid, follow these
directions for proper probe placement.
Insert the probe completely into the meat. It
should not touch the bone, fat or gristle.
For roasts with no bone, insert the probe into
the meatiest part of the roast. For bone-in
ham or lamb, insert the probe into the center
of the lowest large muscle.
The temperature probe has a skewer-
like probe at one end and a plug at the
other end that goes into the outlet in
the oven.
To prevent burns, do not unplug the probe from the oven outlet until the oven has cooled. Do not store the
probe in the oven.
Insert the probe into the center of dishes
such as meat loaf or casseroles.
Insert the probe into the meatiest part of the
inner thigh from below and parallel to the
leg of a whole turkey.
To prevent possible burns, do not unplug
the probe from the outlet until the oven
has cooled.
Do not store the probe in the oven.
To change the oven temperature during
probe cooking, touch the Bake pad and then
the number pads to set the new temperature.
How to Set the Oven For Cooking When Using the Probe
Consumer Support Troubleshooting Tips Care and Cleaning Operating Instructions Safety Instructions
Insert the probe into the food.
Plug the probe into the outlet in the
oven. Make sure it's pushed all the way
in. Close the oven door.
Touch the Probe pad.
Touch the number pads to set the desired
internal food or meat temperature
between 100°F and 200°F.
Touch the Bake pad.
Touch the number pads to set the desired
oven temperature.
Touch the Start pad.
1
2
3
4
5
6
7
7
The display will flash LO if the probe is
inserted into the outlet and you have not set
a probe temperature and touched the Start
pad.
The display will show LO until the internal
temperature of the food reaches 100°F; then
the changing internal temperature will be
shown .
When the internal temperature of the
food reaches the number you have set,
the probe and the oven turn off and the
oven control signals. To stop the signal,
touchthe
Clear/Off
pad. Use hot pads to
remove the probe from the food. Do not
use tongs to pull on it-they might
damage it.
If the probe is removed from the food before
the final
temperature is reached, a tone will
sound and the display will flash until the probe
is removed from the oven.
You can use the timer even though you cannot
use timed oven operations while using the
probe.
Never leave your probe inside the oven
during broil cycle.
NOTE: Broil settings will no work if the
temperature probe is plugged in.
15
Using the convection oven.
In a convection oven, a fan circulates
hot air over, under and around the
food. This circulating hot air is evenly
distributed throughout the oven cavity.
As a result, foods are evenly cooked
and browned-often in less time than
with regular heat.
Convection Roast
Convection Bake
To help you understand the difference
between convection bake and roast and
traditional bake and roast, here are some
general guidelines.
The convection oven fan shuts off when the oven door is opened. DO NOT leave the door open for long periods of time while using
convection cooking.
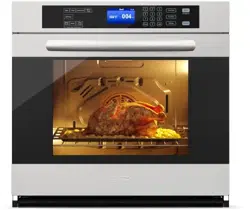
Place the rack in rack position (A).
Roasts or poultry should be cooked on rack
position (A).
When you are convection roasting, it is
important that you use a broiler pan and grid
for best convection roasting results. The pan
is used to catch grease spills and the grid is
used to prevent grease spatters.
The convection fan circulates the heated air
evenly over and around the food. Meat and
poultry are browned on all sides as if they
were cooked on a rotisserie. Heated air will
be circulated over, under and around the
food being roasted. The heated air seals in
juices quickly for a moist and tender product
while, at the same time, creating a rich
golden brown exterior.
Good for large tender cuts of meat, uncovered.
Preheat the oven.
Ideal for foods cooked on multiple racks.
Good for large quantities of baked foods.
Good results with cookies, biscuits,
brownies, cupcakes, cream puffs, sweet
rolls, angel food cake and bread.
The convection fan circulates the heated air
evenly over and around the food.
Consumer SupportTroubleshooting TipsCare and CleaningOperating InstructionsSafety Instructions
D
C
B
A
16
Consumer Support Troubleshooting Tips Care and Cleaning Operating Instructions Safety Instructions
Using the convection oven.
Cookware for Convection Cooking
Metal and Glass
Any type of cookware will work in your
convection oven. However, metal pans heat
the fastest and are recommended for
convection baking.
Paper and Plastic
Heat-resistant paper and plastic containers
that are recommended for use in regular
ovens can be used in convection ovens.
Plastic cookware that is heat-resistant to
temperatures of 400°F can also be used,
when oven is below 400°F.
When baking cookies, you will get the best
results if you use a flat cookie sheet instead
of a pan with low sides.
For recipes like oven-baked chicken, use a
pan with low sides. Hot air cannot circulate
well around food in a pan with high sides.
Darkened or matte-finished pans will bake
faster than shiny pans.
Glass or ceramic pans cook more slowly.
Before using your convection oven, check to
see if your cookware leaves room for air
circulation in the oven. If you are baking
with several pans, leave space between
them. Also, be sure the pans do not touch
each other or the walls of the oven.
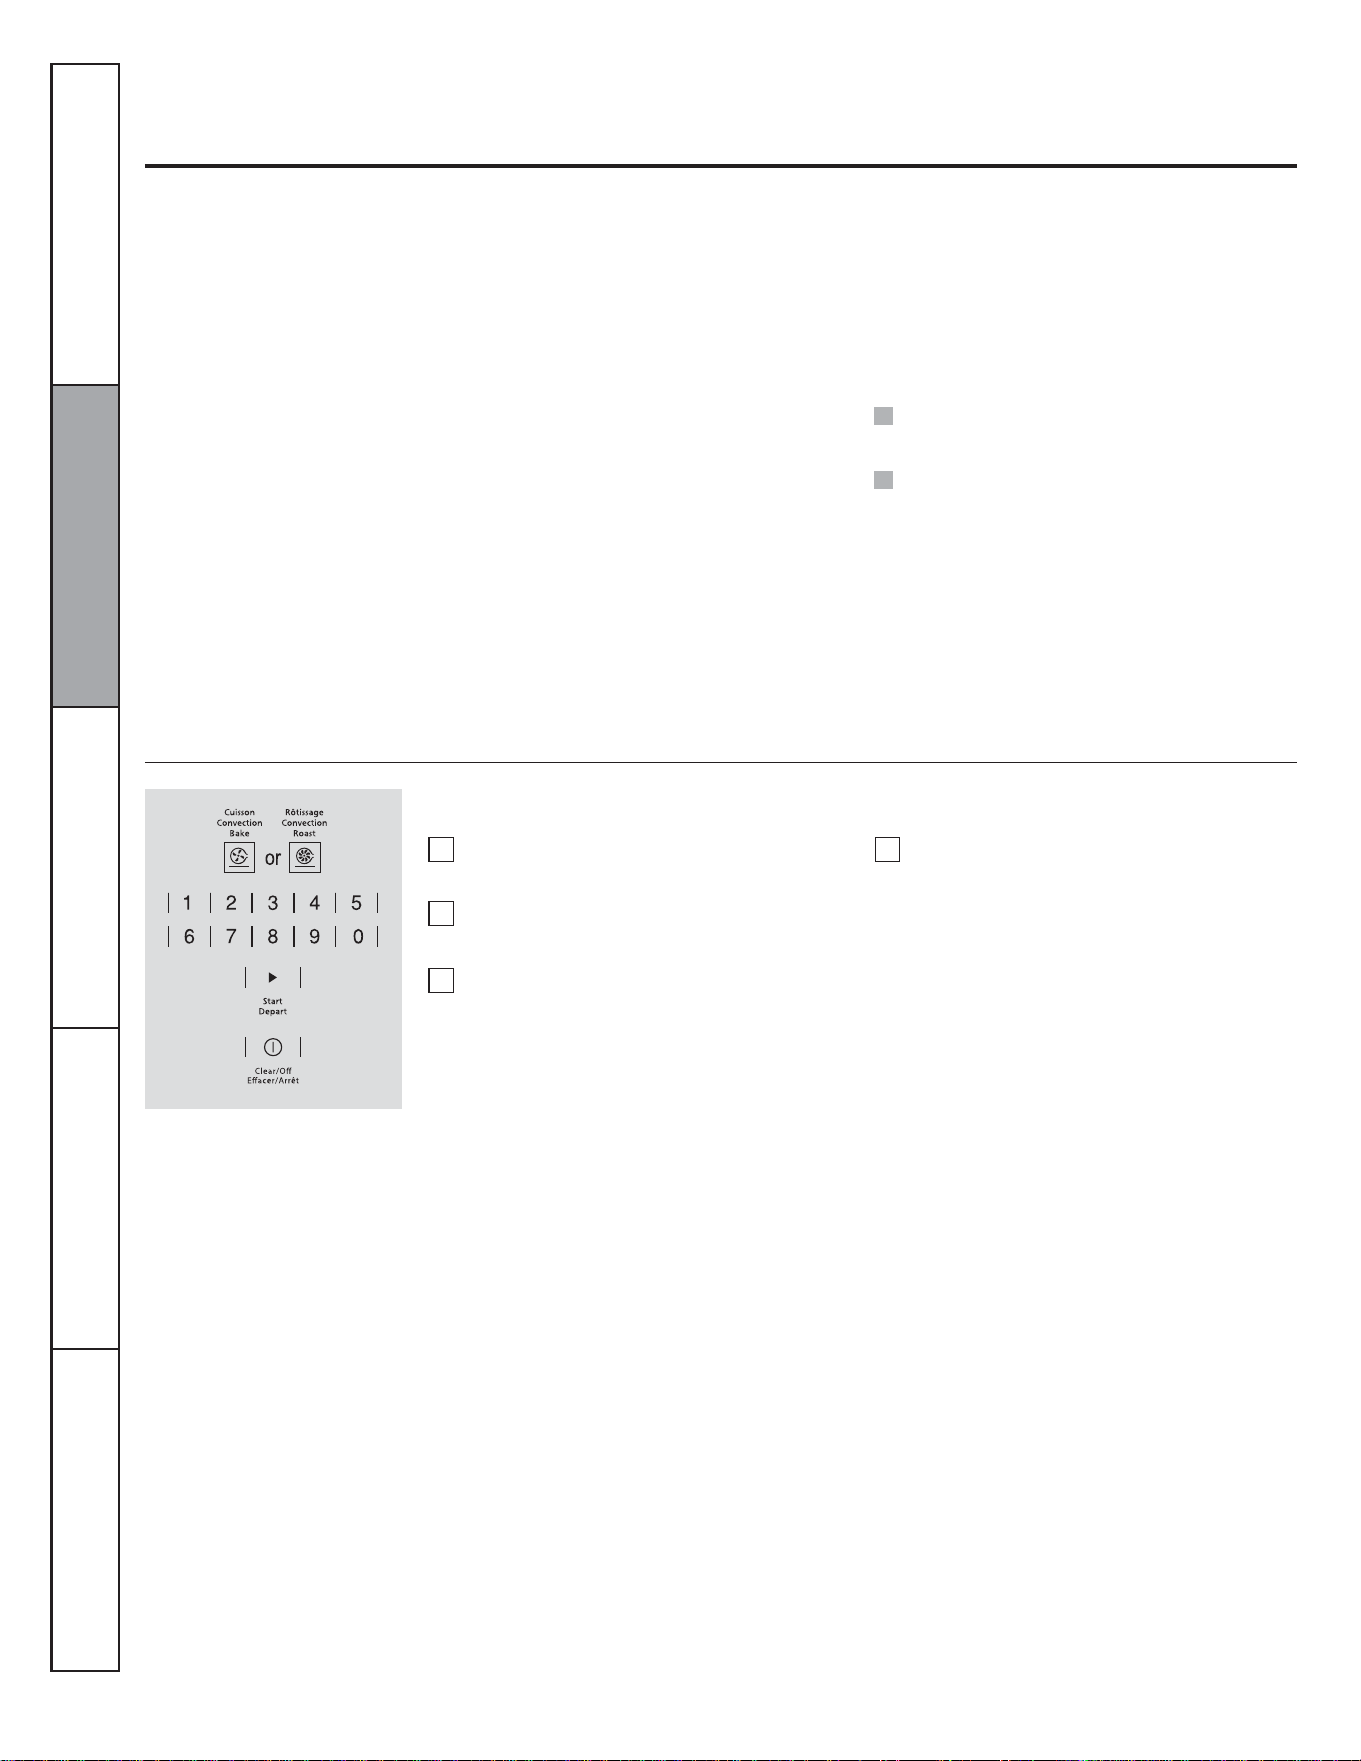
How to Set the Oven for Convection Baking or Roasting
Touch the Convection Bake or
Convection Roast pad.
Touch the number pads to set the desired
oven temperature.
Touch the Start pad.
NOTE: You will hear a fan while cooking with
convection. The fan will stop when the door is
opened, but the heat will not turn off.
The fan will not start until the preheat
temperature is reached.
Touch the Clear/Off pad when finished.
To change the oven temperature, touch the
Convection Bake or Convection Roast pad
and then the number pads to set the new
temperature.
When the oven starts to heat, the changing
temperature, starting at 100°F, will be
displayed. When the oven reaches the
temperature you set, 3 beeps will sound.
1
2
3
4
17
How to Setthe Oven for Convection Roasting When Using the Probe
The display will flash PROBE and the oven
control will signal if the probe is inserted
into the outlet, and you have not set a probe
temperature and touched the Start pad.
To prevent burns, do not unplug the probe from
the oven outlet until the oven has cooled. Do not
store the probe in the oven.
For best results when roasting large
turkeys and roasts, we recommend
using the probe included in the
convection oven.
When the internal temperature of the
food reaches the number you have set,
the probe and the oven turn off and the
oven control signals. To stop the signal,
touch the Clear/Off pad. Use hot pads to
remove the probe from the food. Do not
use tongs to pull on it-they might
damage it.
When the oven starts to heat, the word LO
will be in the display.
After the internal temperature of the food
reaches 100°F, the changing internal
temperature will be shown in the display.
1
2
3
4
5
6
7
8
Touch the Start pad.
To change the oven temperature during the
Convection Roast cycle, touch the
Convection Roast pad and then touch the
number pads to set the new desired
temperature.
Place the rack in the rack position (A).
Insert the probe completely into the
food.
Plug the probe into the outlet in the
oven. Make sure it is pushed all the way
in. Close the oven door.
Touch the Convection Roast pad.
Touch the number pads to set the desired
oven temperature.
Touch the Probe pad.
Touch the number pads to set the desired
internal food temperature.
NOTE
:
If the probe is removed from the food before
the finel temperature is reached, a tone will
sound and the display will flash until the
probe is removed from the oven.
You will hear a fan while cooking with this
feature. The fan will stop when the door is
opened but the heat will not turn off.
You can use the timer even though you
cannot use timed oven operations while
using the probe.
Consumer Support Troubleshooting Tips Care and Cleaning Operating Instructions Safety Instructions
Probe is not for use in Broil functions.
Do not use probe when cooking in rack level D.
18
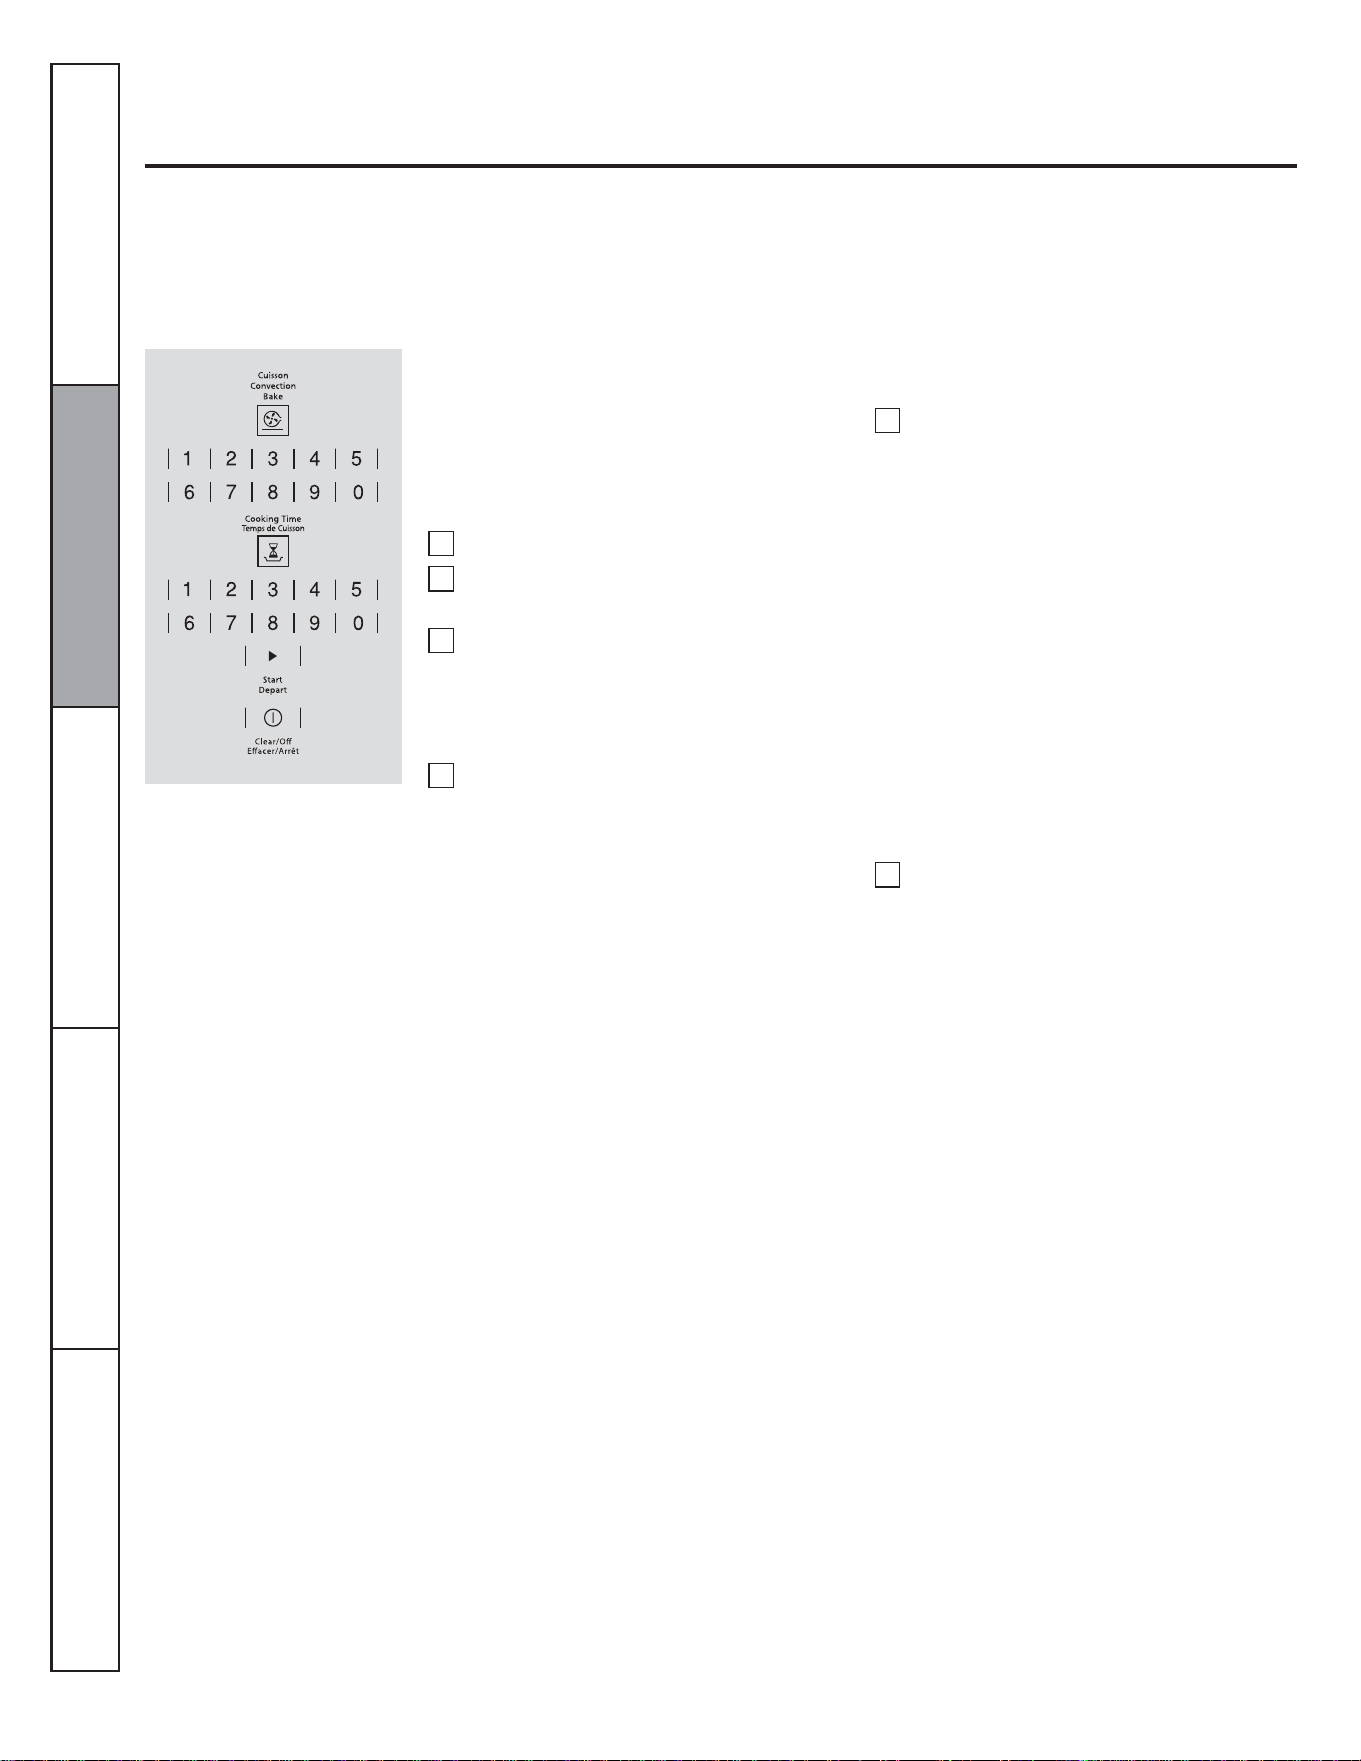
Using the oven timed convection baking features.
You will hear a fan while cooking with this feature. The fan will stop when the door is opened but the heat will not turn off.
NOTE: Foods that spoil easily-such as milk, eggs, fish, stuffings, poultry and pork-should not be allowed to sit for more than 1 hour
before or after cooking. Room temperature promotes the growth of harmful bacteria. Be sure that the oven light is off because heat from
the bulb will speed harmful bacteria growth.
How to Set an Immediate Start and Automatic Stop
The oven will turn on immediately and cook
for a selected length of time. At the end of
the cooking time, the oven will turn off
automatically.
Touch the Clear/Off pad to clear the
display if necessary. Remove the food
from the oven. Remember, even though
the oven turns off automatically, food
left in the oven will continue cooking
after the oven turns off.
The oven will turn ON, and the display will
show the cooking time countdown and the
changing temperature starting at 100°F. (The
temperature display will start to change once
the oven temperature reaches 100°F.) When
the oven reaches the temperature you set, 3
beeps will sound.
The oven will continue to cook for the set
amount of time, then turn off automatically,
unless the Cook and Hold feature was set.
See the Special features of your oven control
section.
After the oven turns off, the end-of-cycle
tone will sound.
Touch the Start pad.
1
2
3
4
5
6
Touch the number pads to set the desired
length of cooking time. The minimum
cooking time you can set is 1 minute.
The oven temperature that you set and
the cooking time that you entered will be
in the display.
NOTE: If your recipe requires preheating, you
may need to add additional time to the length of
the cooking time.
Touch the Convection Bake pad.
Touch the number pads to set the desired
oven temperature.
Touch the Cooking Time pad.
Consumer Support Troubleshooting Tips Care and Cleaning Operating Instructions Safety Instructions
19
The oven will turn on at the time of day you
set, cook for a specific length of time and
then turn off automatically.
Make sure the clock shows the correct time
of day.
Using the oven timed convection baking features.
How to Set a Delayed Start and Automatic Stop
Touch the Clear/Off pad to clear the
display if necessary. Remove the food
from the oven. Remember, even though
the oven turns off automatically, food
left in the oven will continue cooking
after the oven turns off.
NOTE: If you would like to check the times you
have set, touch the Start Time pad to check the
start time you have set or touch the Cooking
Time pad to check the length of cooking time you
have set.
When the oven turns ON at the time of day you
set, the display will show the cooking time
countdown and the changing temperature starting
at 100°F. (The temperature display will start to
change once the oven temperature reaches
100 °F. When the oven reaches the temperature
you set, 3 beeps will sound.
The oven will continue to cook for the set amount
of time, then turn off automatically, unless the
Cook and Hold feature was set. See the Special
features of your oven control section.
After the oven turns off, the end-of-cycle tone will
sound.
Touch the number pads to set the desired
length of cooking time. The minimum
cooking time you can set is 1 minute.
The oven temperature that you set and
the cooking time that you entered will be
in the display.
Touch the Start Time pad.
Touch the number pads to set the time of
day you want the oven to turn on and
start cooking.
Touch the Start pad.
NOTE: If your recipe requires preheating, you
may need to odd additional time to the length of
the cooking time.
Touch the Convection Bake pad.
Touch the number pads to set the desired
oven temperature.
Touch the Cooking Time pad.
1
2
3
4
5
6
8
7
Consumer SupportTroubleshooting TipsCare and CleaningOperating InstructionsSafety Instructions
20
Adjust the oven thermostat - Do it yourself
You may find that your new oven cooks differently than the one it replaced. Use your new oven for a few weeks to become more familiar
with it. If you still think your new oven is too hot or too cold, you can adjust the thermostat yourself.
Do not use thermometers, such as those found in grocery stores, to check the temperature setting of your oven. These thermometers
may vary 6-11 degrees Celsius (20-40 degrees Fahrenheit).
NOTE: This adjustment will only affect baking and roasting temperatures; it will not affect broiling temperatures. The adjustment will be
retained in memory after a power failure.
To Adjust the Thermostat
Touch the BAKE and BROIL pads at the
same time for 3 seconds until the display
shows SF.
Touch the BAKE pad.
Touch BAKE again to alternate between
increasing and decreasing the oven
temperature.
Press the number pads to set an user offset.
Press BAKE pad to switch between
positive or negative offset values.
The oven temperature can be adjusted up to
(+) 19 °C (35 °F) hotter or (-) 19 °C (35
°F) cooler. Touch the number pads the
same way you read them. For example, to
change the oven temperature 12 °C (15 °F),
touch 1 and 5.
When you have made the adjustment, touch
the START pad to go back to the time of
day display. Use your oven as you would
normally.
1
2
3
4
5
6
The type of margarine will affect baking performance.
Most recipes for baking have been developed using high fat products such as butter or margarine (80% fat). If you decrease the fat, the
recipe may not give the same results as with a higher fat product.
Recipe failure can result if cakes, pies, pastries, cookies or candies are made with low fat spreads. The lower the fat content of a spread
product, the more noticeable these differences become.
Federal standards require products labeled "margarine" to contain at least 80% fat by weight. Low fat spreads, on the other hand,
contain less fat and more water. The high moisture content of these spreads affects the texture and flavor of baked goods. For best
results with your old favorite recipes, use margarine, butter or stick spreads containing at least 70% vegetable oil.
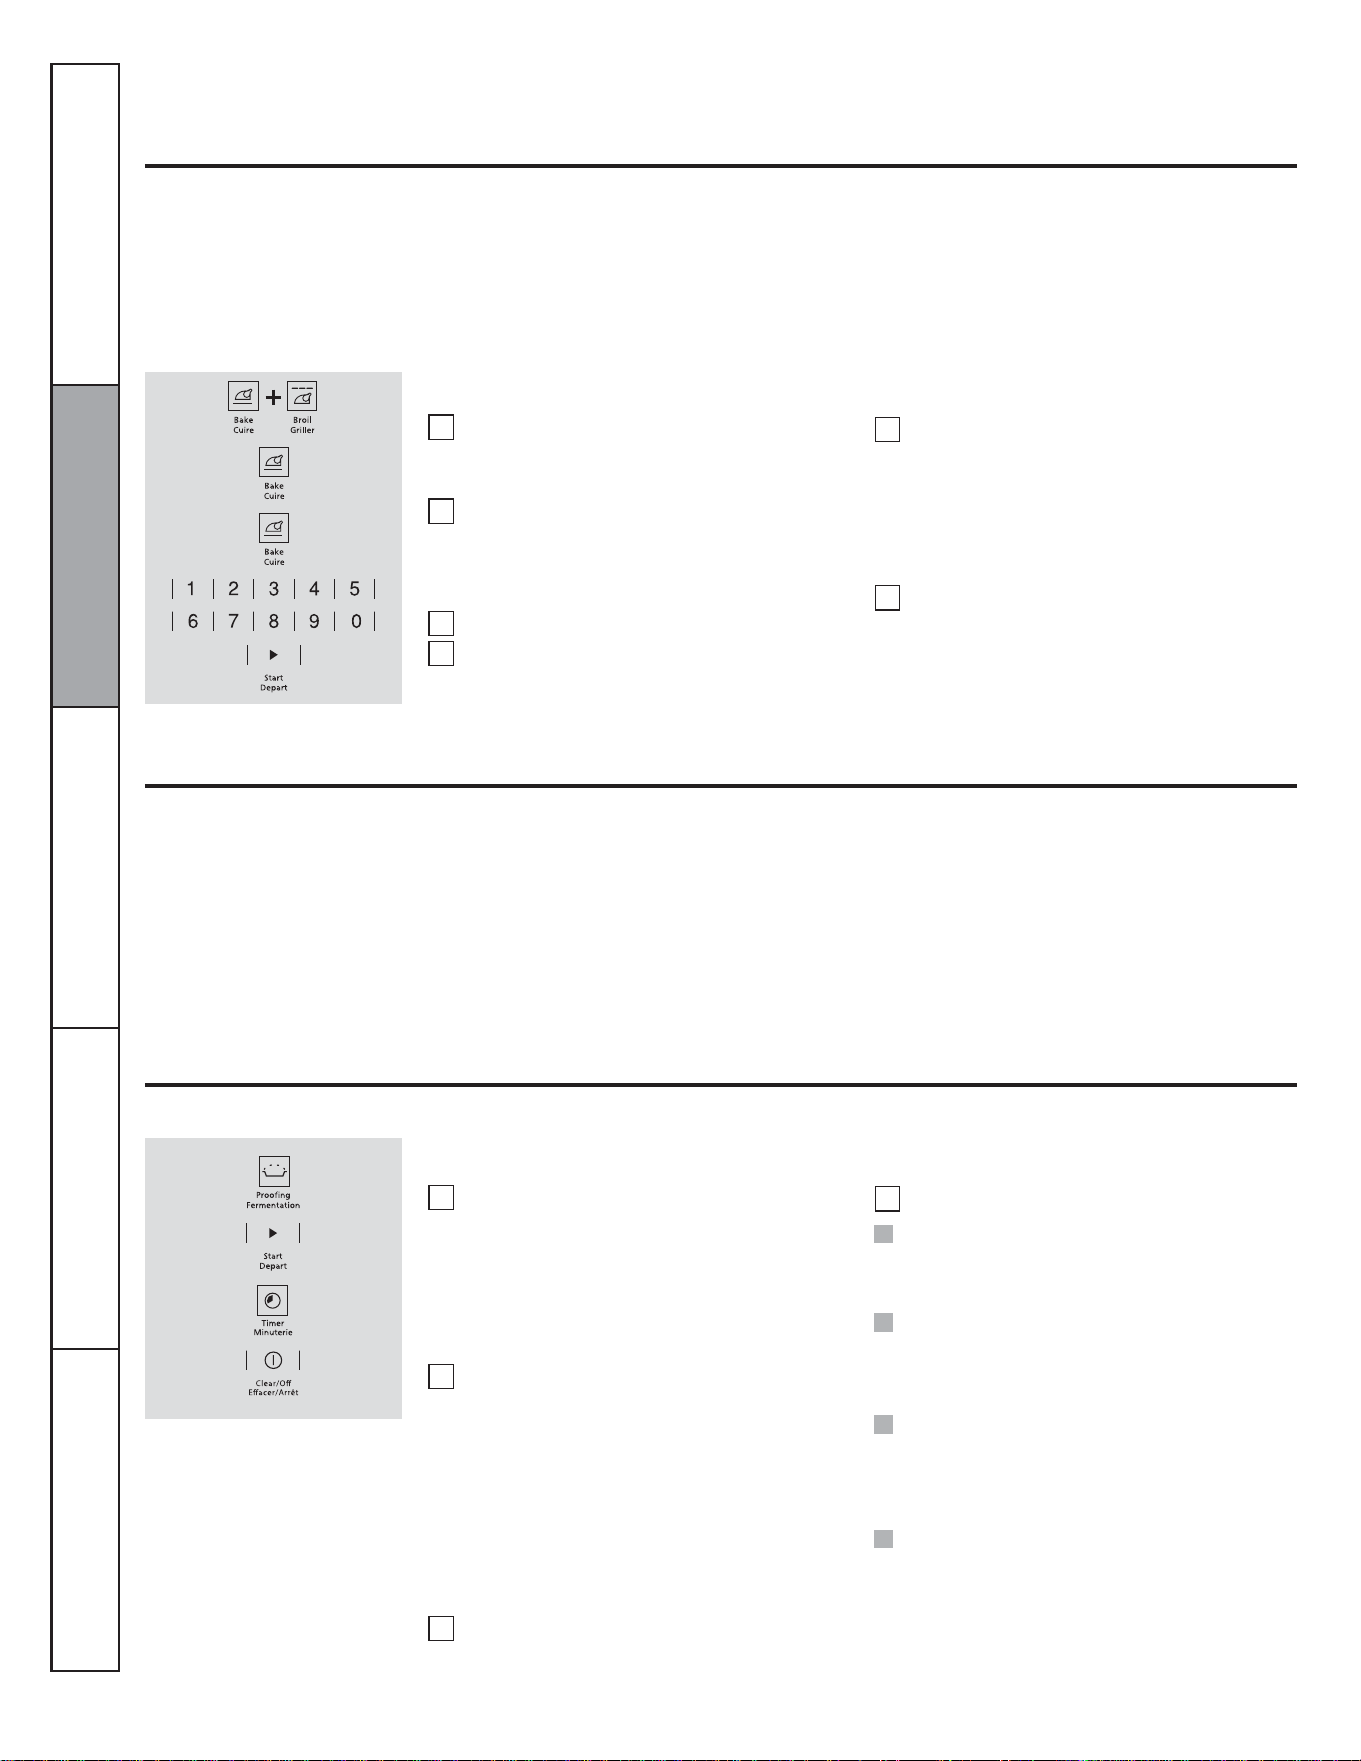
Touch the PROOF pad and then the
START pad.
The display will show PrF (proof).
The oven interior light turns on and
remains on during proofing.
The proofing feature automatically
provides the optimum temperature for the
proofing process, and therefore does not
have a temperature adjustment.
Set the TIMER for the minimum proof
time.
Using the proofing feature.
The proofing feature maintains a warm environment useful for rising yeast-leavened products.
1
2
3
4
How to Set the Oven For Proofing
Place the covered dough in a dish in the
oven on rack B or C.
NOTE: For best results, cover the dough with a
cloth or with greased plastic wrap (the plastic
may need to be anchored underneath the
container so the oven fan will not blow it off).
When proofing is finished, touch the OFF pad.
NOTE:
Do not use the proofing mode for warming
food or keeping food hot. The proofing oven
temperature is not hot enough to hold foods at
safe temperatures.
Proofing will not operate when oven is above
65 °C (150 °F). "HOT" will show in the display.
To avoid lowering the oven temperature and
lengthening proofing time, do not open the
oven door unnecessarily.
Check bread products early to avoid *****
over-proofing.
Consumer Support Troubleshooting Tips Care and Cleaning Operating Instructions Safety Instructions
NOTE:
Use as an optional feature the proofing
mode to defrost food placed in a baking
dish. Periodically monitor the
unfreezing of food grade and remove
from oven as soon as it has thawed.
Defrost cycle is a slow process required
for optimal results.

21
During the steam clean cycle, the
oven bottom becomes hot
enough to cause burns. Wait
until the cycle is over (30 minutes) before wiping the inside
surfaces of the oven. Failure to do so may result in burns.
The Steam Clean cycle makes it easier to clean light soiling
off the porcelain oven interior.
Using Steam Clean
CAUTION
The wall oven should be at room temperature before
beginning the Steam Clean cycle. If the oven is too hot,
"hot" will appear on the display and the cycle will not
activate until the oven cools down.
The Steam Clean cycle performs best on new spills or soils.
Burned-on food is more difficult to remove.
To Begin Steam Clean Cycle:
Remove racks and accessories from the
oven cavity. Do not place cookware or
other items in the oven during the Steam
Clean cycle.
Pour 200 ml (7 oz.) room-temperature
water onto the recessed area of the oven
bottom. Do not add cleaning solutions or
chemicals of any kind to the water.
Close the door.
Activate the Steam Clean function by
pressing the Steam Clean pad, then press
start.
A 30-minute cycle will begin to count
down on the display.
When the Steam Clean cycle is
complete, the oven control will beep.
Press Off pad and Open the door.
The oven bottom and remaining water
will still be warm at the end of the cycle.
This is normal.
Remove soils using a scrub brush or
nylon scouring pad. A soap-filled steel
wool pad may be used only on the
porcelain oven interior. The use of
abrasive pads will scratch the door glass.
Do not wipe soil or water onto the door
gasket.
Remove any remaining water with a dry
cloth or sponge.
Leave the door open to air dry.
1
2
3
4
5
6
7
NOTE: Minimal temperature 120 °F is allowed for
enable steam clean.
8
9
10
Pour 7 ounces of water onto the oven
floor.
IMPORTANT NOTES:
NOTE: Water will remain and will be still warm
(this is normal) this will need to be wiped up at
end of cycle.
If a steam clean cycle is initiated without
water, press the off pad to end the cycle. Wait
for the wall oven to cool to room temperature
before pouring water into the recessed area
and initiating another steam cycle.
Press Off pad at any time to end the cycle.
If mineral deposits remain in the oven bottom
after cleaning, use a cloth or sponge soaked
in vinegar to remove them.
Some water may drip from the bottom of the
oven door. If this happens, wipe it up at the
end of the cycle.
The door gasket may be wet when the Steam
Clean cycle finishes. This is normal. Do not
clean the gasket.
Consumer SupportTroubleshooting TipsCare and CleaningOperating InstructionsSafety Instructions
22
Lift the safe bracket in each hinge.
Care and cleaning of the oven.
Be sure electrical power is off before cleaning any part of the oven.
How to Remove Protective Shipping Film and Packaging Tape
Carefully grasp a corner of the protective
shipping film with your fingers and slowly
peel it from the appliance surface. Do not
use any sharp items to remove the film.
Remove all of the film before using the
appliance for the first time.
To assure no damage is done to the finish of
the product, the safest way to remove the
adhesive from packaging tape on new
appliances is an application of a household
liquid dishwashing detergent. Apply with a
soft cloth and allow to soak.
NOTE: The adhesive must be removed from all
parts. It cannot be removed if it is baked on.
Lift-Off Oven Door
The oven door is removable for easy access to oven cavity. Follow the instructions:
When the door is out, for any reason insurance
safe bracket, because the main arm suddenly
shut.
WARNING!
Completely close the door, until you hear
a slight click, this indicates that the door
has been mounted correctly.
1
2
3
1
2
3
Open the door fully and return safe
bracket in off position in both hinges.
Place the door at an angle of
approximately 45° and insert the snap
hinge compartment located on front
frame.
Mounting Oven Door
Full open the door and with the help of
this manual, locate the following parts:
• Hinge arm.
• Safe Bracket.
Move the door about 45° and pull it out.
Consumer Support Troubleshooting Tips Care and Cleaning Operating Instructions Safety Instructions
Hinge Arm
Safe
Hinge Arm
Safe
23
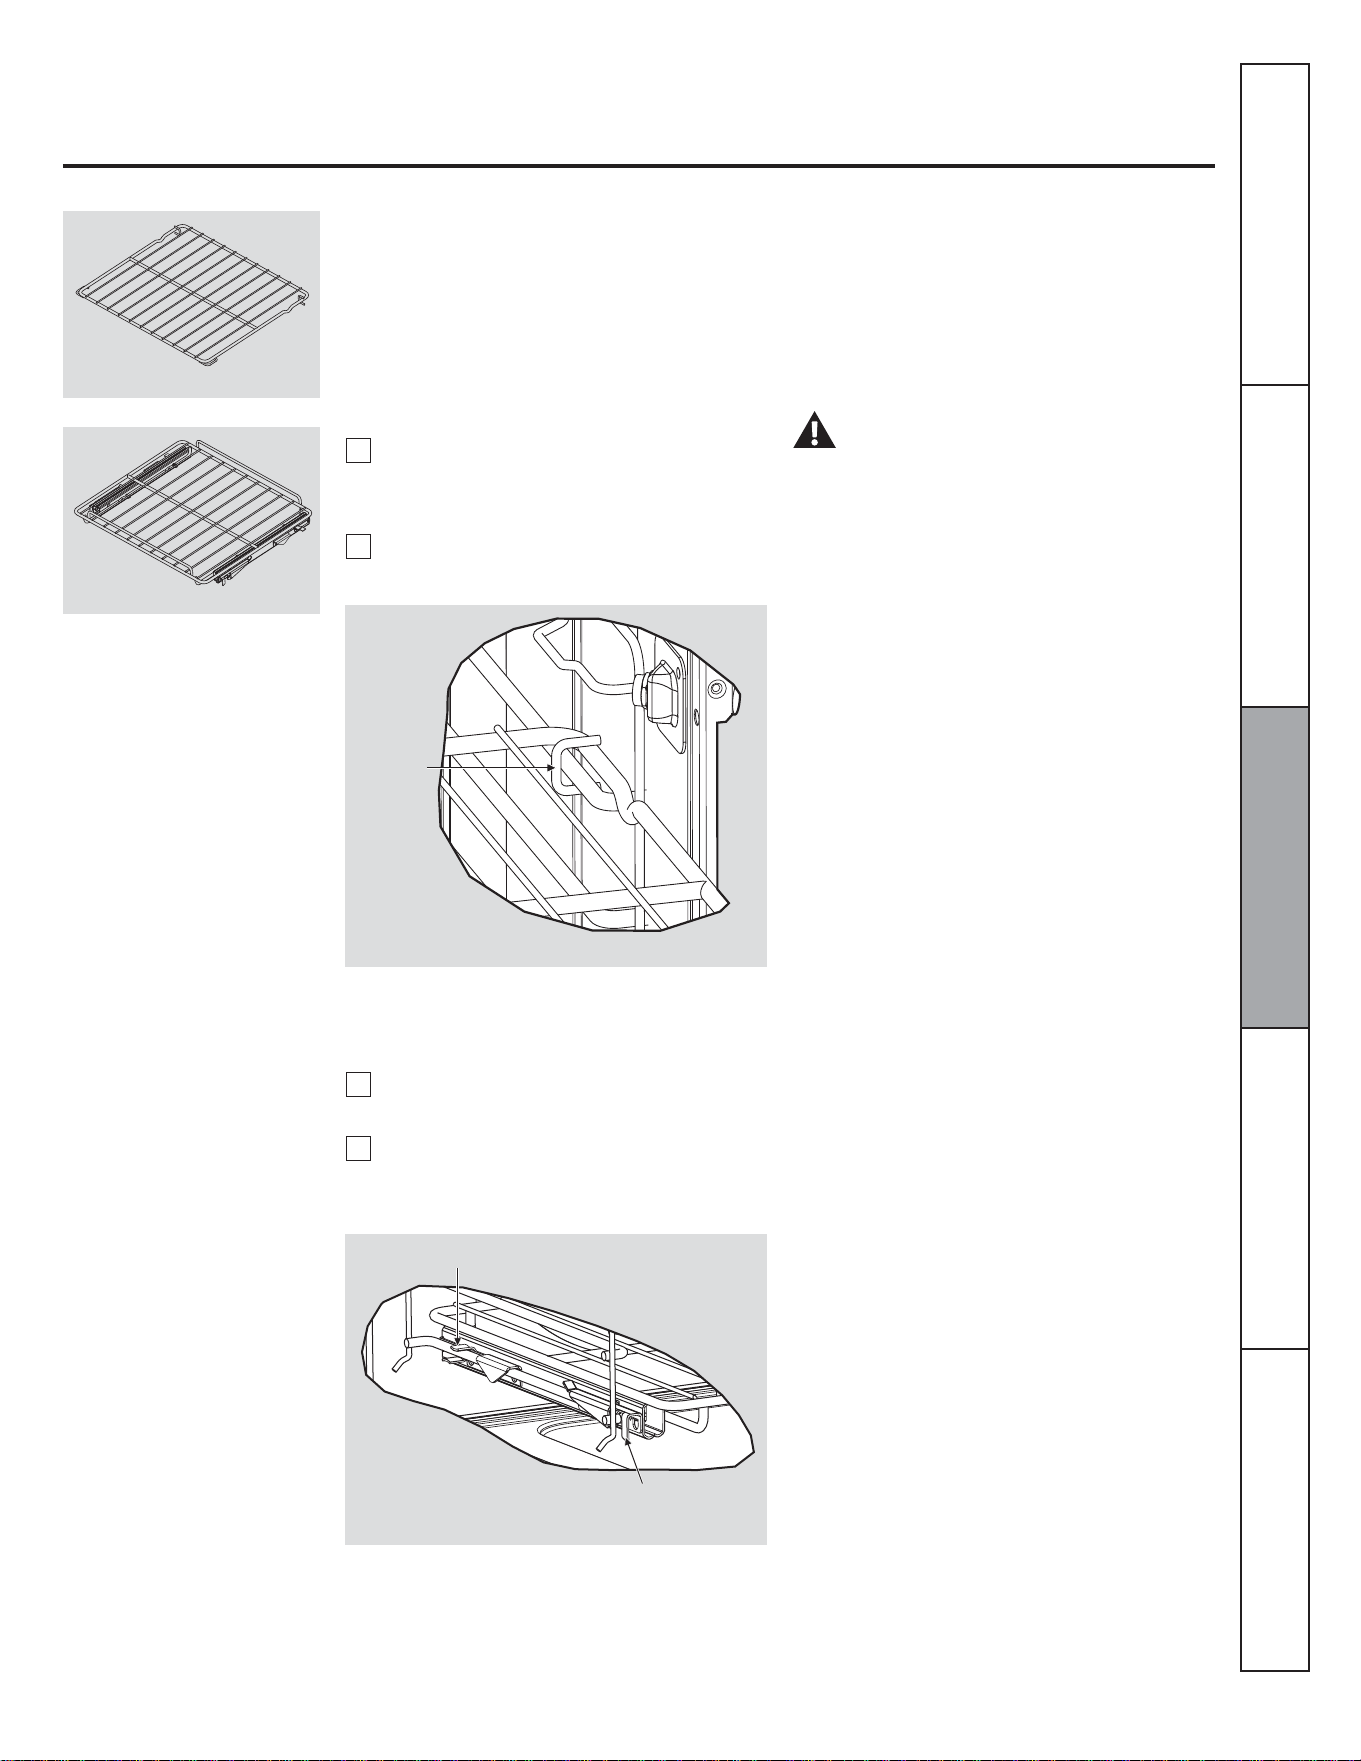
Removing and Installing Oven Racks
Oven Racks
The flat conventional rack (fig. 1) and the
full-extension rack (fig. 2) can be installed at
any level position into cavity.
WARNING!
Always place the broiler pan on the oven rack.
Locate broiler pan
The wall oven has a broiler pan for purposes
of put food on the role of "roasting".
Installing full extension racks
1
2
Slide the rack. Be sure the wire stop is in
the cut of the slides. The rails must be
fixed.
Insert guide of sliders on wires of oven
rack supports. (Fig. 4).
Consumer SupportTroubleshooting TipsCare and CleaningOperating InstructionsSafety Instructions
Oven Rack and Accessories.
Installing conventional rack
1
2
Insert guides "C" in sides support, that
guides are located in the rear of the flat
rack. See (fig. 3).
Pull flat rack into oven cavity.
Fig. 3
Guide "C"
Fig. 4
Slider Guides
Wire stop into cut of the slices
Fig. 2
Fig. 1

24
Care and cleaning of the oven.
Be sure electrical power is off and all surfaces are cool into cavity before cleaning any part of the oven.
Oven Racks
Stainless Steel Surfaces
Glass Surfaces
Painted Surfaces
Control Panel
Oven Heating Elements
Do not use a steel wool pad, it will scratch the
surface.
To clean the stainless steel surface, use
warm sudsy water or a stainless steel cleaner
or polish. Always wipe the surface in the
direction of the grain. Follow the cleaner
instructions for cleaning the stainless steel
surface.
To clean the outside glass finish, use a glass
cleaner. Rinse and polish with a dry cloth.
Do not allow the water or cleaner to run
down inside the oven door while cleaning.
Clean with soap and water or a vinegar and
water solution.
Do not use commercial oven cleaners
cleansing powders, steel wool or harsh
abrasives on any painted surface.
It is a good idea to wipe the control panel
after each use. Clean with mild soap and
water or vinegar and water, rinse with clean
water and polish dry with a soft cloth.
Do not use abrasive cleansers, strong liquid
cleansers, plastic scouring pads or oven
cleansers on the control panel-they will
damage the finish. A 50/50 solution of
vinegar and hot water works well.
Do not clean the broil element. Any soil will burn
off when the elements are heated.
Clean the oven racks with an abrasive
cleanser or steel wool. After cleaning, rinse
the racks with clean water and dry with a
clean cloth.
To make the racks slide more easily; apply a
small amount of vegetable oil or cooking oil
to a paper towel and wipe the edges of the
oven racks with the paper towel.
Consumer Support Troubleshooting Tips Care and Cleaning Operating Instructions Safety Instructions

25
Non-Self-Clean Oven Interior
Do not spray oven cleaner on the electrical
controls and switches because it could cause
a short circuit and result in sparking or fire.
Do not allow a film from the cleaner to build up
on the temperature sensor-it could cause the
oven to heat improperly. (The sensor is
located at the top of the oven.) Carefully wipe
the sensor clean after each oven cleaning,
being careful not to move the sensor as a
change in its position could affect how the
oven bakes.
Do not spray any oven cleaner on the oven
door, handles or any exterior surface of the
oven, cabinets or painted surfaces. The
cleaner can damage these surfaces.
With proper care, the porcelain enamel
finish on the inside of the oven—top,
bottom, sides, back and inside of the
doorwill stay new—looking for years.
Let the oven cool before cleaning. We
recommend that you wear rubber gloves
when cleaning the oven.
Soap and water will normally do the job.
Heavy spattering or spillovers may require
cleaning with a mild abrasive cleaner. Soap-
filled scouring pads may also be used.
Do not allow food spills with a high sugar or acid
content (such as tomatoes, sauerkraut, fruit
juices or pie filling) to remain on the surface.
They may cause a dull spot even after cleaning.
Household ammonia may make the cleaning
job easier. Place 1/2 cup in a shallow glass
or pottery container in a cold oven
overnight.
The ammonia fumes will help loosen the
burned-on grease and food.
If necessary, you may use an oven cleaner.
Follow the package directions.
NOTE: The glass cover (on some models) should
be removed only when cold. Wearing latex gloves
may offer a better grip.
Before replacing the bulb, disconnect
electrical power to the oven at the main fuse
or circuit breaker panel. Let the bulb cool
completely before removing it. For your
safety, do not touch a hot bulb with a damp
cloth. If you do, the bulb will break.
To remove:
Turn the glass cover counterclockwise 1/4
turn until the tabs of the glass cover clear the
grooves of the socket. Remove the bulb.
Oven Light Bulb
CAUTION:
Before replacing your oven light bulb, disconnect
the electrical power to the oven at the main fuse
or circuit breaker panel.
Be sure to let the light cover and bulb cool
completely.
NOTE:
A 50-watt appliance bulb is smaller than a
standard 50-watt household bulb.
Install and tighten the cover clockwise.
Reconnect electrical power to the oven.
For improved lighting inside the oven, clean
the glass cover frequently using a wet cloth.
This should be done when the oven is
completely cool.
To replace:
Put in a new 50 watt appliance bulb. Place
the tabs of the glass cover into the grooves
of the socket. Turn the glass cover clockwise
1/4 turn.
Consumer SupportTroubleshooting TipsCare and CleaningOperating InstructionsSafety Instructions

26
Before you call for service...
Troubleshooting Tips
Save time and money! Review the charts on the following
pages first and you may not need to call for service.
Control signals after
entering cooking time
or delay start.
You forgot to enter a bale
temperature or cleaning time.
• Touch the BAKE pad and desired temperature.
Food does not bake or
roast properly.
Oven controls improperly set. • See the Using the oven section.
Rack position is incorrect or the
rack is not level.
• See the Using the oven section.
Incorrect cookware or cookware of
improper size being used.
• See the Using the oven section.
Oven thermostat needs adjustment. • See the Adjust the oven thermostat—Do it yourself!
section.
Food does not broil
properly
Door not open to the broil stop
position as recommended.
• See the Using the oven section.
Oven controls improperly set. • Make sure you touch the BROIL pad.
Food being cooked in a hot pan. • For best results, use a pan designed for broiling.
Make sure it is cool.
Cookware not suited for broiling.
• For best results, use a pan designed for broiling.
In some areas the power (voltage)
may be low.
• Preheat the broil element for 10 minutes.
Problem Posible Causes What To Do
Clock and timer do
not work.
A fuse in your home may be blown
or the circuit breaker tripped.
• Replace the fuse or reset the circuit breaker.
Oven controls improperly set. • Set the Using the clock and timer section.
Oven light does not
work.
Lightbulb is loose or defective. • Tighten or replace the bulb.
Pad operating light is broken. • Call for service.
Consumer Support Troubleshooting Tips Care and Cleaning Operating Instructions Safety Instructions
"Burning or oily" odor
emitting from the vent
This is normal in a new oven and will
disappear in time.
• To speed the process, set bake mode for a minimum
of 3 hours.
27
Problem Posible Causes What To Do
Oven temperature too
hot or too cold
Oven thermostat needs adjustment. • See the Adjust the oven thermostat section—Do it
yourself!.
Oven will not work A fuse in your home may be blown
or the circuit breaker tripped.
• Replace the fuse or reset the circuit breaker.
Oven controls improperly set. • See the Using the oven section.
"Cracking" or
"popping" sound
This is the sound of the metal
heating and cooling during both,
the cooking and cleaning functions.
• This is normal.
Excessive smoking
during clean cycle
Excessive soil. • Touch the CLEAR/OFF pad. Open the windows to
rid the room of smoke. Wait until the LOCKED light
goes off. Wipe up the excess soil and reset the clean
cycle.
Oven door will not
open after a clean
cycle
Oven too hot. • Allow the oven to cool below locking temperature.
LOCKED light is on
when you want to
cook
The oven door is locked because the
temperature inside the oven has not
dropped below the locking
temperature.
• Touch the CLEAR/OFF pad. Allow the oven to cool.
Consumer SupportTroubleshooting TipsCare and CleaningOperating InstructionsSafety Instructions
28
Problem Posible Causes What To Do
"F- and a number or
letter" flash in the
display
You have a function error code. • Touch the CLEAR/OFF pad. Allow the oven to cool
for one hour. Put the oven back into operation.
If the function code repeats. • Disconnect all power to the oven for at least 30
seconds and then reconnect power. If the function
error code repeats, call for service.
Display goes blank A fuse in your home may be blown
or the circuit breaker tripped.
• Replace the fuse or reset the circuit breaker.
The clock is in the black-out mode. • See the Special features of your oven control section.
Display flashes
Power failure. • Reset the clock.
Unable to get the
display to show "SF"
Oven control pads were not pressed
properly.
• The BAKE and BROIL pads must be touched at the
same time and held for 3 seconds.
Power outage, clock
flashes
Power outage or surge. • Reset the clock. If the oven was in use, you must
reset it by touching the CLEAR/OFF pad, setting the
clock and resetting any cooking function.
Strong odor An odor from the insulation around
the inside of the oven is normal for
the first few times the oven is used.
• This is temporary.
Fan noise A cooling fan may automatically
turn on.
• This is normal. The cooling fan will turn on to cool
internal parts. It may run for up to 30 minutes after
the oven is turned off.
Consumer Support Troubleshooting Tips Care and Cleaning Operating Instructions Safety Instructions
29
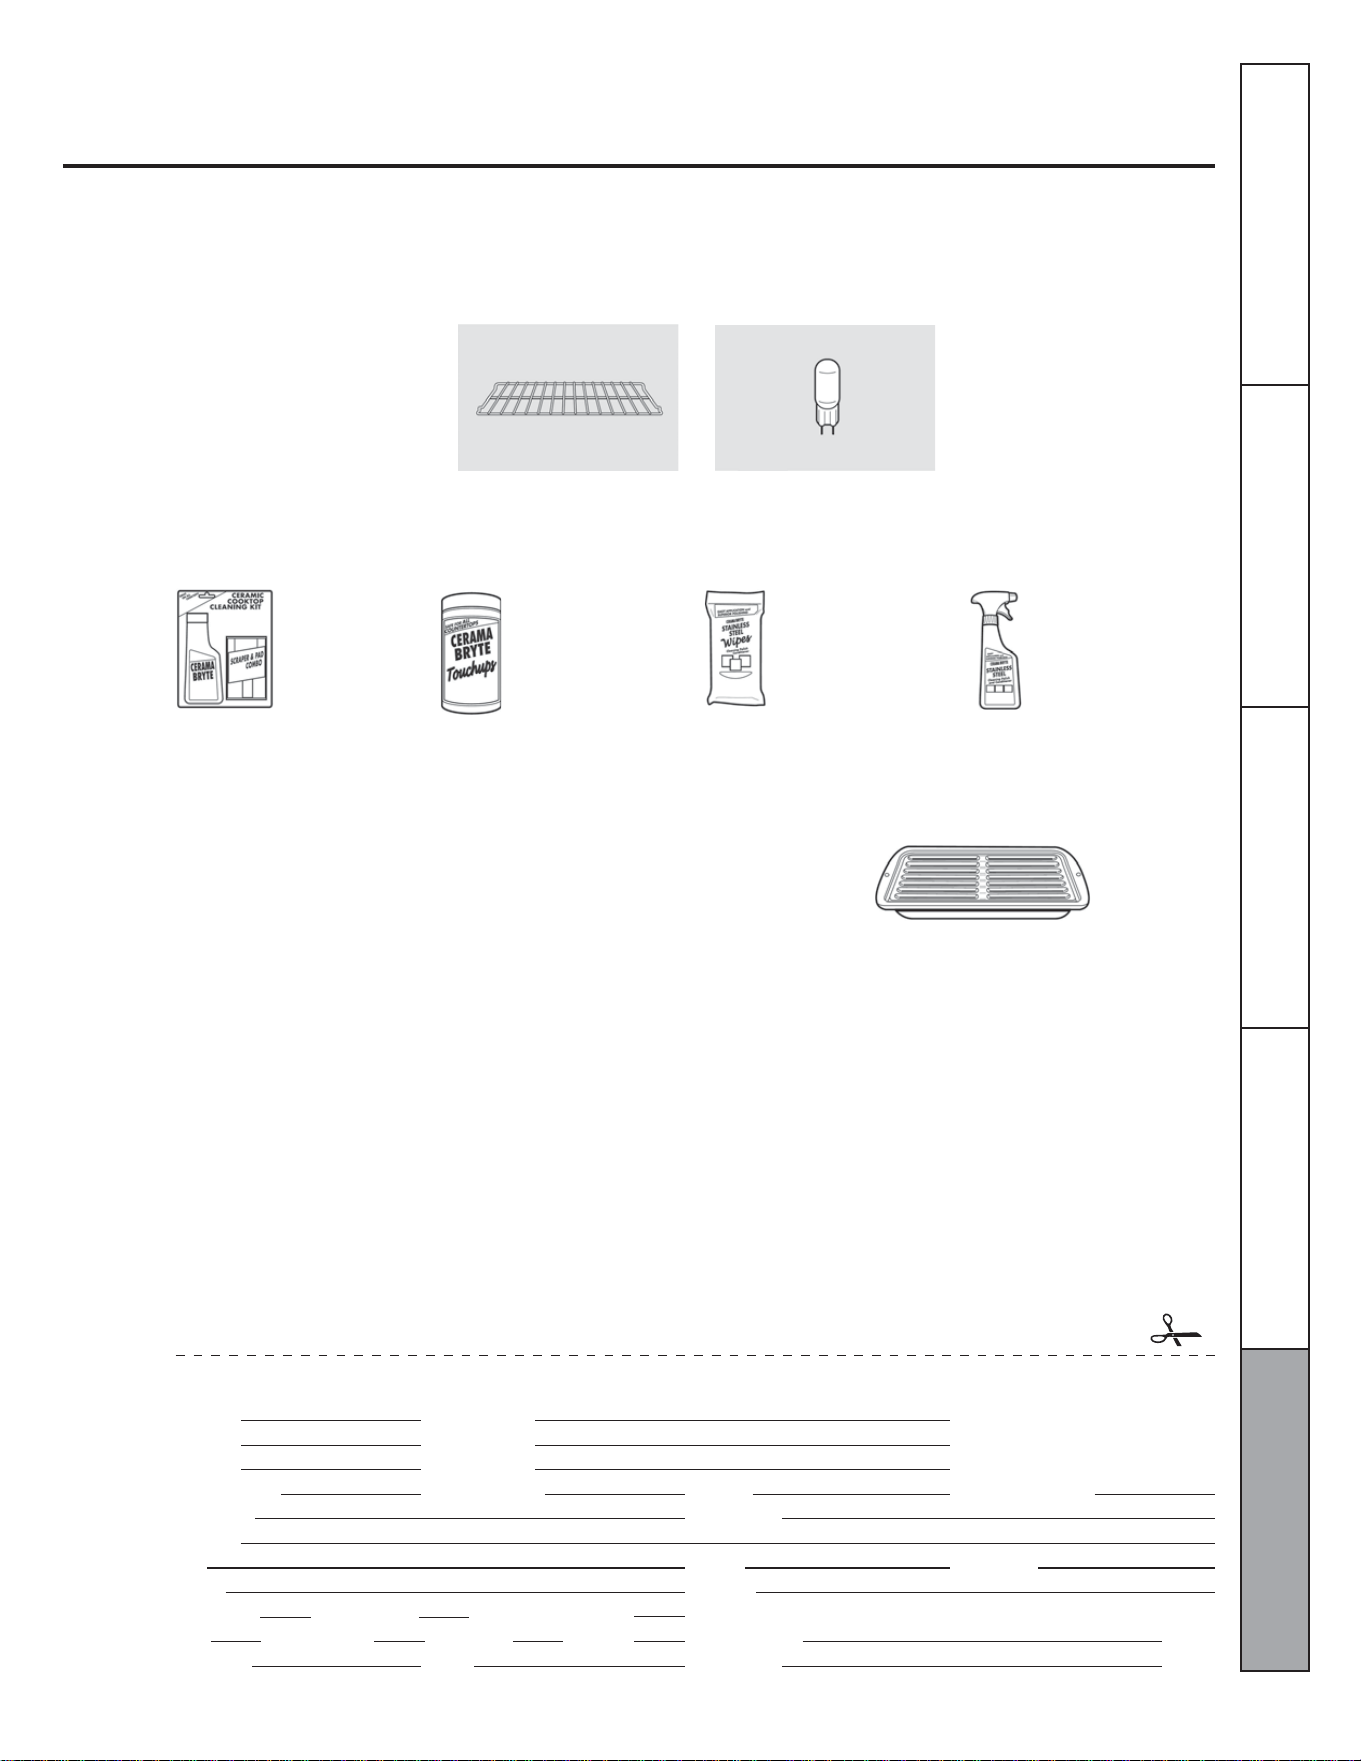
Accessories
Looking for something more?
You can find these accessories and many more at GEAppliances.com (US) or
www.GEAppliances.ca (Canada), or call 800.626.2002 (U.S.) or 800.661.1616 (Canada)
(during normal business hours.) Have your model number ready.
Oven racks
Experience these other great products to keep your kitchen looking great!
Light Bulbs
Ceramic Cooktop
Cleaning Kit: Includes
cleaner, scraper and
pad
Stainless Steel
Appliance Cleaner
Stainless Steel
Appliance Polish
Wipes
Ceramic Cooktop
Cleaning Wipes
WXIOX117GCS WXIOX305 WX10X100001 PMI0X311
Get the most out of your Broiler Pan! (Not for use with Broiler Drawer models.)
Use your pan and grid cover to broil hamburgers, seafood, steaks, vegetables,
bacon, chops and so much more! The pan below catches the excess fats and oils.
• Genuine GE Part
• Easy To Clean
• One-Year Warranty
Limited Time Offer! Free Shipping!
When you order your broiler pan within 30 days of purchasing your cooking product.
U.S. Part #
Canada Part #
Dimensions
Price
†
PIus applicable state sales tax (PST/HST and GST)
Small
WB48X10055
222D2097G001
8-3/4" W x 1-1/4" H x 13-1/2" D
US$10.50
†
To place your order, call 800.626.2002 (U.S.), 800.661.1616 (Canada) or mail this form to:
In the U.S.: GE Parts, P.O. Box 221027, Memphis, TN 38122-1027. In Canada: GE Parts, 1 Factory Lane, Moncton, N.B. E1C 9M3
Broiler Pan Order Form
Quantity
Model Number
First Name
Address
City
Phone
Credit Card
Visa
Exp. Date:
Part Number
Serial Number Brand
Last name
State
E-mail
Date of Purchase
Zip Code
Check Money Order
Master Card Discover AmEx Credit Card #
Signature:Year
Consumer SupportTroubleshooting TipsCare and CleaningOperating InstructionsSafety Instructions

30
Consumer Support Troubleshooting Tips Care and Cleaning Operating Instructions Safety Instructions
Notes

31
Notes
Consumer SupportTroubleshooting TipsCare and CleaningOperating InstructionsSafety Instructions

32
Notes
Consumer Support Troubleshooting Tips Care and Cleaning Operating Instructions Safety Instructions

33
Please place in envelope and mail to:
Veuillez mettre dans une enveloppe et envoyez à:
OWNERSHIP REGISTRATION
P.O. BOX 1780
MISSISSAUGA, ONTARIO
L4Y 4G1
(FOR CANADIAN CONSUMERS ONLY -
POUR RÉSIDENTS CANADIENS SEULEMENT)
34
I do not wish to receive any promotional offers regarding this product.
Je ne désire pas recevoir d’offres promotionnelles concernant ce produit.
For Canadian
Customers
Pour les
Consommateurs
Canadiens
CUT ALONG THIS LINE AND RETURN CARD - THANKS
DÉCOUPEZ ICI ET ENVOYEZ LA FICHE - MERCI
OWNERSHIP REGISTRATION CERTIFICATE – FICHE D’INSCRIPTION DU PROPRIÉTAIRE
Please register your product to enable us to contact you in the
remote event a safety notice is issued for this product and to allow
for efficient communication under the terms of your warranty, should
the need arise.
Veuillez enregistrer votre produit afin de nous permettre de
communiquer avec vous si jamais un avis de sécurité concernant ce
produit était émis et de communiquer facilement avec vous en vertu
de votre garantie, si le besoin s’en fait sentir.
REGISTER ON-LINE: www.geappliances.ca
ENREGISTREMENT SUR INTERNET À : www.electromenagersge.ca
MAIL TO:
POSTEZ À :
P.O. BOX 1780, MISSISSAUGA
ONTARIO, L4Y 4G1
MR. / M
MISS/MLLE.
MRS. / MME.
MS.
FIRST NAME / PRÉNOM LAST NAME / NOM
STREET NO / Nº RUE STREET NAME / RUE APT.NO/APP./RR#
CITY / VILLE PROVINCE POSTAL CODE/POSTAL
AREA CODE/IND. RÉG. E-MAILTELEPHONE
DID YOU PURCHASE A SERVICE CONTRACT FOR THIS APPLIANCE?
AVEZ-VOUS ACHETÉ UN CONTRAT DE SERVICE POUR CET APPAREIL?
YES/OUI
NO/NON
IF YES/SI OUI : EXPIRATION
Y/A M D/J
MODEL / MODÈLE
SERIAL / SÉRIE
NAME OF SELLING DEALER / NOM DU MARCHAND
INSTALLATION DATE / DATE D’INSTALLATION
CORRESPONDENCE
CORRESPONDANCE
ENGLISH
FRANÇAIS
Y/A M D/J
35
This warranty is extended to the original purchaser and any succeeding owner for products purchased for home use within Canada.
In-home warranty service will be provided in areas where it is available and deemed reasonable by Mabe to provide.
Some provinces do not allow the exclusion or limitation of incidental or consequential damages, so the above exclusion may not apply
to you.
This warranty gives you specific legal rights, and you may also have other rights which vary from province to province. To know what
your legal rights are in your province, consult your local or provincial consumer affairs office.
GE Built-In Electric Oven Warranty.
All warranty service provided by our Factory Service Centers, or an
authorized Customer Care® technician. To schedule service 24 hours a
day, call 1.800.361.3400. Please have serial number and model
number available when calling for service.
Staple your receipt here.
Proof of the original purchase date is
needed to obtain service under the
warranty.
For The Period Of..
One Year
From the date of the
original purchase
GE Will Replace...
Any part of the oven which fails due to a defect in materials or workmanship.
During this limited one year warranty, Mabe will also provide, free of charge, all labor
and in-home service to replace the defective part.
For The Period Of..
Service trips to your home to teach you how to use
the product.
Improper installation, delivery or maintenance.
Failure of the product if it is abused, missused, or
used for other than the intended purpose or used
commercialy.
Replacement of house fuses or resetting of circuit
breakers.
Damage to the product caused by accident, fire,
floods or acts of God.
Incidental or consequential damaged caused by
possible defects with this appliance.
Damage caused after delivery.
Product not accesible to provide required service.
EXCLUSION OF IMPLIED WARRANTIES - Your sole and exclusive remedy is product repair as provided in this Limited
Warranty. Any implied warranties, including the implied warranties of merchantability or fitness for a particular
purpose, are limited to one year or the shortest period allowed by law.
Warrantor: Mabe Canada Inc. Burlington, Ontario
Consumer SupportTroubleshooting TipsCare and CleaningOperating InstructionsSafety Instructions

36
Consumer Support
If you are not satisfied with the service you receive, contact us on our Website with all the
details including your phone number, or write to:
This book is printed on recycled paper.
Printed in Mexico
Schedule Service
Expert repair service is only one step away from your door. Call 1-800-361-3400, 24 hours
a day, 7 days a week.
Parts and Accessories
To inquire about purchasing a part or an accessory for your appliance, call our National
Parts Center at 1-800-661-1616.
Contact Us
www.moffatappliances.ca
Mabe Canada, Inc.
1 Factory Lane Moncton,
New Brunswick
EIC 9M3
Warrantor: Mabe Canada Inc. Burlington, Ontario
Consumer Support Troubleshooting Tips Care and Cleaning Operating Instructions Safety Instructions

Inscrivez les numéros de modèle
et de série ici :
Nº de modèle ________________
Nº de série __________________
Manuel de l'utilisateur
Vous trouverez ces numéros sur une
étiquette située à l'avant du four,
derrière la porte.
MCRS20SFSS
Nº de publication : 29-5929
222D9114P001
Sécurité ................................................38 à 40
Utilisation
Commandes du four ......................41 à 55
Convection .....................................................51
Convection minutée ..........................54, 55
Cuisson et rôtissage minutés ...............45
Horloge et minuterie .................................44
Fonctions spéciales ...........................46, 47
Mode sabbat .................................................48
Nettoyage à la vapeur .............................57
Thermostat ....................................................56
Utilisation de la sonde ..............................50
Entretien et nettoyage
Élément chauffant .....................................60
Grilles ...............................................................59
Intérieur du four ..........................................61
Lampe ..............................................................61
Porte de four amovible ............................58
Surfaces en acier inoxydable ...............60
Surfaces en verre .......................................60
Surfaces peintes .........................................60
Tableau de commande ...........................60
Dépannage ........................................62 à 64
Service à la clientèle
Accessoires ...................................................65
Enregistrement du produit ......................69
Garantie ..........................................................71
Service à la clientèle
..................................Dernière de couverture
Four encastré
électrique
38
CONSIGNES DE SÉCURITÉ IMPORTANTES.
LISEZ TOUTES LES INSTRUCTIONS AVANT D’UTILISER VOTRE APPAREIL.
AVERTISSEMENT!
Pour votre sécurité et pour réduire les risques d’incendie, d'explosion, de choc électrique, de dommages
matériels, de blessures ou même d'accident mortel, vous devez vous conformer aux instructions contenues
dans ce manuel.
MESURES DE SÉCURITÉ
Lors de l'utilisation d'appareils électriques, suivez les mesures de sécurité de base :
Ne laissez personne grimper, se tenir ou
s'accrocher à la porte. Ceci pourrait endommager
le four ou causer de graves blessures.
Assurez-vous que le four est installé dans une
DUPRLUHTXLHVWVROLGHPHQW¿[pHjODVWUXFWXUHGH
l'habitation. Ne permettez jamais à personne de
grimper ou de se tenir debout sur la porte du four,
ni même de s'y accrocher.
Ne laissez jamais la porte du four ouverte lorsque
vous ne surveillez pas le four.
Éloignez toujours de votre four les revêtements
muraux, rideaux et draperies.
Éloignez toujours de votre four les torchons,
chiffons, poignées et autres tissus.
Éloignez toujours de votre four les ustensiles en
bois et en plastique, ainsi que les aliments en
boîtes de conserve.
Apprenez à vos enfants à ne pas jouer avec les
boutons ou tout autre élément du four.
Les longues rayures et larges impacts peuvent
amener le verre à se casser ou fêler.
&HWDSSDUHLOGRLWXQLTXHPHQWrWUHXWLOLVpDX[¿QV
prévues et décrites dans ce manuel.
Assurez-vous que votre appareil est correctement
LQVWDOOpHWPLVjODWHUUHSDUXQWHFKQLFLHQTXDOL¿p
conformément aux instructions d'installation
fournies.
Ne tentez pas de réparer ou de remplacer une
SLqFHGXIRXUVDXIVLFHODHVWVSpFL¿TXHPHQW
recommandé dans ce manuel. Toutes les autres
UpSDUDWLRQVGRLYHQWrWUHFRQ¿pHVjXQWHFKQLFLHQ
TXDOL¿p
Demandez au technicien de vous montrer
l'emplacement du disjoncteur ou du fusible.
,GHQWL¿H]OHHQOHPDUTXDQWSRXUOHUHWURXYHU
facilement.
Avant d'effectuer toute réparation, coupez
l'alimentation électrique du four au niveau du
tableau de distribution de votre domicile (fusible
ou disjoncteur).
Ne laissez pas les enfants seuls – les enfants
ne devraient pas être laissés seuls ou sans
surveillance à proximité d'un appareil
électroménager en cours d'utilisation. Ils ne
devraient jamais être autorisés à s'asseoir ou se
tenir debout sur quelque partie de l'appareil que
ce soit.
Service à la clientèle Dépannage Entretien et nettoyage Utilisation Sécurité
39
AVERTISSEMENT!
MESURES DE SÉCURITÉ
Éloignez-vous du four lorsque vous en ouvrez la
porte. De l'air chaud ou de la vapeur s'échappant
du four pourrait brûler vos mains, votre visage et/
ou vos yeux.
Ne faites pas chauffer de récipient fermé. La
pression accumulée risquerait de faire éclater le
récipient et de causer des blessures.
Assurez-vous que l'évent de four n'est pas
obstrué.
Assurez-vous qu'aucune graisse ne s'accumule
dans le four.
Placez la grille de four à l'emplacement désiré
lorsque le four est froid. Si vous devez manipuler
une grille lorsqu'elle est chaude, veillez à ce que
la poignée utilisée n'entre pas en contact avec les
éléments chauffants.
Lorsque vous mettez des sachets de cuisson ou
de rôtissage dans le four, suivez les instructions
de leur fabricant.
Ne touchez pas les éléments chauffants ou la
surface intérieure du four. Ces surfaces, bien que
GHFRXOHXUIRQFpHSHXYHQWrWUHVXI¿VDPPHQW
chaudes pour causer des brûlures. Pendant
et après l'utilisation, ne touchez pas l'intérieur
du four et ne laissez aucun tissu ou matériau
LQÀDPPDEOHHQWUHUHQFRQWDFWDYHFFHOXLFL
Laissez d'abord le four refroidir.
Les surfaces potentiellement chaudes
comprennent les ouvertures des évents, les
surfaces autour de ces ouvertures, les interstices
autour de la porte de four, les rebords du hublot
et les pièces de bordure métallique au-dessus de
la porte.
N'OUBLIEZ PAS : L'intérieur du four peut être
chaud lorsque la porte est ouverte.
1HQWUHSRVH]SDVGHPDWpULDX[LQÀDPPDEOHV
dans le four.
ATTENTION : Les articles pouvant
susciter l'intérêt des enfants ne devraient pas
être rangés dans les armoires situées au-dessus
du four. Les enfants s'exposeraient à de graves
blessures s'ils grimpaient sur le four pour les
atteindre.
Ne portez jamais de vêtements amples ou qui
pendent lorsque vous utilisez cet appareil. Faites
attention lorsque vous attrapez des articles qui
sont rangés dans les armoires au-dessus du four.
/HVPDWpULDX[LQÀDPPDEOHVSRXUUDLHQWSUHQGUH
feu et causer de graves brûlures s'ils entraient en
contact avec une surface chaude ou un élément
chauffant.
Utilisez uniquement des poignées isolantes
sèches – la vapeur émise par des poignées
humides en contact avec une surface chaude
pourrait vous brûler. Ne laissez pas les poignées
entrer en contact avec les éléments chauffants.
N'utilisez pas de torchon ou d'autre tissu épais.
Pour votre sécurité, n'utilisez jamais votre appareil
pour chauffer ou réchauffer la pièce.
Ne laissez pas de graisse de cuisson ou d'autres
PDWLqUHVLQÀDPPDEOHVVDFFXPXOHUjOLQWpULHXURX
près du four.
Ne versez pas d’eau sur un feu de friture.
N'essayez jamais de soulever un ustensile de
cuisson en feu. Arrêtez l'appareil.
9RXVSRXYH]FRPSOqWHPHQWpWRXIIHUGHVÀDPPHV
provenant du four en fermant la porte et en
arrêtant le four ou en utilisant un extincteur
chimique ou à mousse, à usages multiples.
Ne laissez jamais de pots ou de conserves
contenant des matières grasses de cuisson dans
ou près de votre four.
Ne rangez pas et n'utilisez pas d'essence ou
GDXWUHVYDSHXUVHWOLTXLGHVLQÀDPPDEOHVj
proximité de cet appareil ou de tout autre appareil
électroménager.
Service à la clientèleDépannageEntretien et nettoyageUtilisationSécurité
40
CONSIGNES DE SÉCURITÉ IMPORTANTES.
LISEZ TOUTES LES INSTRUCTIONS AVANT D’UTILISER VOTRE APPAREIL.
AVERTISSEMENT!
MESURES DE SÉCURITÉ
Tirer la grille jusqu'au cran d'arrêt permet de
soulever plus facilement les plats les plus lourds.
&HODIDLWpJDOHPHQWRI¿FHGHSURWHFWLRQFRQWUHOHV
brûlures causées par le contact avec les surfaces
chaudes de la porte ou des parois du four.
N'utilisez pas le four pour sécher des journaux. S'ils
sont trop chauffés, ils pourraient prendre feu.
Ne rangez rien à l'intérieur du four. Les articles
entreposés dans le four pourraient prendre feu.
Ne laissez pas d'article en papier, d'ustensile de
cuisine ou d'aliments dans le four lorsque celui-ci
n'est pas utilisé.
Après avoir utilisé le gril, retirez toujours la
lèchefrite du four pour la laver. La graisse
accumulée dans la lèchefrite pourrait prendre feu
la prochaine fois que vous utiliserez celle-ci.
Ne nettoyez que les pièces listées dans le présent
manuel.
N'utilisez pas de papier d'aluminium pour recouvrir
le fond du four. Une installation incorrecte du
papier d'aluminium pourrait engendrer un risque
de choc électrique ou d'incendie.
FAITES BIEN CUIRE LA VIANDE ET LA VOLAILLE…
Faites bien cuire la viande et la volaille. La température INTERNE de la viande doit atteindre au moins 160 °F
(71 °C) et celle de la volaille au moins 180 °F (82 °C). La cuisson à ces températures permet généralement de se
protéger contre les intoxications alimentaires.
LISEZ ET SUIVEZ ATTENTIVEMENT CES CONSIGNES DE SÉCURITÉ.
CONSERVEZ CES INSTRUCTIONS
Service à la clientèle Dépannage Entretien et nettoyage Utilisation Sécurité
41
Utilisation des commandes du four
Les caractéristiques et l'apparence de l'appareil montré dans ce manuel peuvent varier selon le modèle.
CUIRE
Appuyez sur cette touche pour sélectionner la
fonction de cuisson au four.
LAMPE
Appuyez sur cette touche pour allumer ou éteindre
la lampe du four.
Caractéristiques et réglage des commandes, de l'horloge et
de la minuterie du four
1
2
3
4
5
6
NETTOYAGE VAPEUR
Appuyez sur cette touche pour sélectionner la
fonction de nettoyage à la vapeur. Reportez-vous à
la section Utilisation du nettoyage à la vapeur.
Af¿cheur
$I¿FKHOKHXUHODWHPSpUDWXUHGXIRXUOHPRGH
utilisé (cuisson au four, gril ou nettoyage à la vapeur)
et le décompte de la minuterie ou des durées des
fonctions automatiques du four.
SONDE
Appuyez sur cette touche pour sélectionner la
température de cuisson du capteur.
MINUTERIE
Appuyez sur cette touche pour sélectionner la minuterie.
Touches numériques
Utilisez ces touches pour programmer les diverses
fonctions nécessitant l'utilisation de chiffres comme
l'horloge, la minuterie, la température du four, la
température interne des aliments, l'heure de mise en
marche différée et la durée de fonctionnement pour
la cuisson minutée.
HORLOGE
Appuyez sur cette touche avant de régler l'horloge.
EFFACER/ARRÊT
Appuyez sur cette touche pour annuler TOUTES les
fonctions du four, sauf l'horloge et la minuterie.
DÉPART
Vous devez appuyer sur cette touche pour lancer
une fonction de cuisson ou de nettoyage.
RÔTISSAGE CONVECTION
Appuyez sur cette touche pour sélectionner la
fonction de rôtissage à convection.
CUISSON CONVECTION
Appuyez sur cette touche pour sélectionner la
fonction de cuisson à convection.
GRILLER
Appuyez sur cette touche pour sélectionner la
fonction de gril.
Si « F– » suivi d'un chiffre ou d'une lettre apparaît sur
ODI¿FKDJHHWTXHOHWDEOHDXGHFRPPDQGHGXIRXUpPHW
un signal sonore, cela indique un code d'erreur de fonction.
Appuyez sur la touche ARRÊT. Laissez le four refroidir
pendant une heure. Rallumez le four. Si le code d'erreur
de fonction réapparaît, coupez l'alimentation du four et
contactez un service de dépannage. Si votre four était
programmé pour une utilisation minutée et qu'une coupure
de courant s'est produite, l'horloge et toutes les fonctions
réglées doivent être reprogrammées. L'heure clignote sur
ODI¿FKHXUORUVTXXQHFRXSXUHGHFRXUDQWHVWVXUYHQXH
8
9
10
11
12
13
14
15
16
TEMPS DE DÉPART
Utilisez cette touche avec la touche TEMPS DE
CUISSON pour programmer le départ et l'arrêt
automatiques du four à votre gré.
FERMENTATION
Appuyez sur cette touche pour sélectionner la
fonction de fermentation et créer un environnement
chaud pour faire monter les produits à base de
levure.
Service à la clientèleDépannageEntretien et nettoyageUtilisationSécurité
Conversion des températures
° Fahrenheit
140
° Celsius
60
150
65
170
75
200
95
250
120
275
135
300
150
325
160
350
175
375
190
400
205
425
220
450
230
475
245
500
260
525
275
550
290
7
TEMPS DE CUISSON
Appuyez sur cette touche, puis sur les touches
numériques pour régler la durée de cuisson de vos
aliments. Le four s'arrête une fois la durée de cuisson
écoulée.
42
Utilisation des commandes du four
Avant de commencer...
Les grilles possèdent des crans d'arrêt. Ainsi,
si elles sont placées correctement, elles
s'arrêtent avant de complètement sortir du
four et ne basculent pas. Lorsque vous mettez
des ustensiles de cuisson dans le four ou les
en retirez, tirez les grilles jusqu'à la butée du
support de grille.
Le four possède 4 positions de
grille.
Pour programmer la cuisson traditionnelle ou le rôtissage
Pour éviter les brûlures, placez la ou les grilles à l'emplacement désiré avant d'allumer le four.
Appuyez sur la touche CUIRE.
Réglez la température désirée à l'aide des
touches numériques.
Appuyez sur la touche DÉPART.
9pUL¿H]VLOHVDOLPHQWVVRQWFXLWVDSUqVOD
durée minimale de cuisson indiquée sur
la recette. Laissez cuire plus longtemps si
nécessaire.
Appuyez sur la touche ARRÊTjOD¿QGHOD
cuisson.
Pour retirer une grille, tirez-la vers vous,
soulevez-en l'avant et sortez-la.
Pour remettre une grille en place, placez
son extrémité (crans d'arrêt) sur le support,
soulevez-en l'avant et poussez-la à l'intérieur.
REMARQUE : Le ventilateur peut se mettre en
marche et s'arrêter automatiquement pour
refroidir les pièces internes. Cela est normal. Le
ventilateur peut même continuer à fonctionner
une fois le four arrêté.
1
2
3
4
5
Types d'aliments
Tartes surgelées (sur une plaque à biscuits)
Gâteau des anges
Gâteau Bundt ou quatre-quarts
Biscuits, muf¿ns, broZnies, gâteaux secs,
petits gâteaux, gâteaux à étages, tartes
Plats en cocotte
Yekrut
Position
de grille
D
A
B ou C
C ou D
C ou D
A
Préchauffage et position de la casserole
Préchauffez le four si la recette vous le
demande. Pour préchauffer le four, réglez-le
à la température désirée. Le préchauffage
est nécessaire à de bons résultats de cuisson
lorsque vous préparez des gâteaux, des
biscuits, des pâtisseries ou du pain.
Les résultats de cuisson seront meilleurs si les
ustensiles sont aussi centrés que possible dans
le four. Les ustensiles ne doivent pas se toucher
et ne pas entrer en contact avec les parois du
four. Si vous devez utiliser deux grilles, décalez
les ustensiles de manière à ce qu'ils ne soient
pas directement l'un au-dessus de l'autre
et laissez environ 1½ po (3,8 cm) entre les
ustensiles et les parois du four.
AVERTISSEMENT!
Papier d'aluminium
Ne recouvrez jamais entièrement une grille de
papier d'aluminium. Cela gênerait la circulation
de l'air chaud et affecterait les résultats de
cuisson.
Une plus petite feuille d'aluminium, placée
sur une grille à plusieurs pouces (dizaine de
centimètres) en dessous des aliments, peut
être utilisée pour retenir les éclaboussures et
débordements.
Ne mettez pas de papier d'aluminium sur la sole
du four.
Service à la clientèle Dépannage Entretien et nettoyage Utilisation Sécurité
D
C
B
A
D
C
B
A
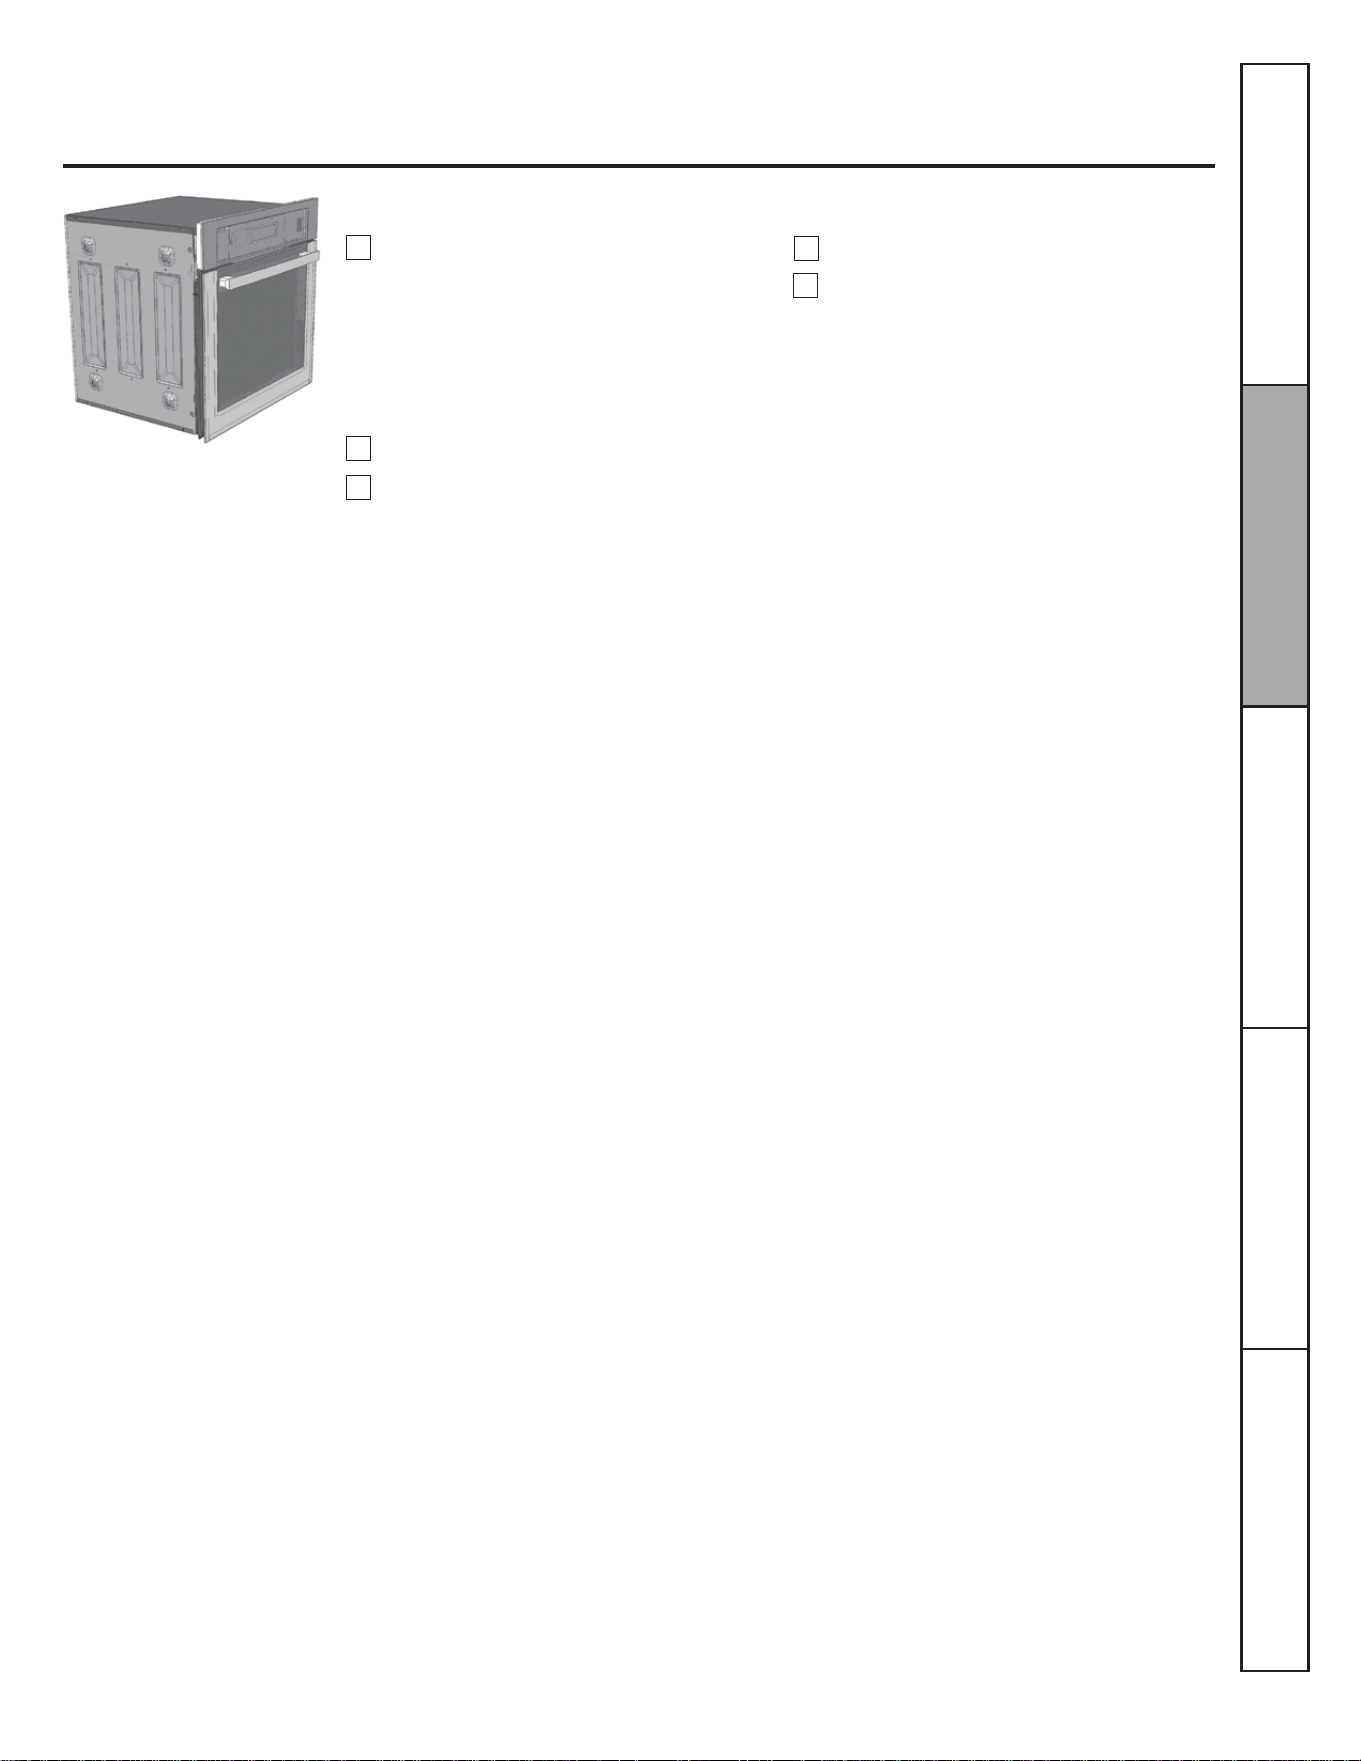
43
Pour programmer le gril
Placez la viande ou le poisson sur la grille
d'une lèchefrite conçue pour la cuisson au
gril.
Fermez la porte du four.
Appuyez une fois sur la touche GRILLER
pour une cuisson au gril à la température
maximale. Pour une cuisson au gril à
la température minimale, appuyez une
nouvelle fois sur GRILLER.
Si votre four est connecté sur du 208 volts,
vous pouvez cuire les biftecks crus au gril en
préchauffant le gril et en positionnant la grille
un cran plus haut.
1
2
Appuyez sur la touche DÉPART.
OD¿QGHODFXLVVRQDXJULODSSX\H]VXUOD
touche EFFACER/ARRÊT.
5
Service à la clientèleDépannageEntretien et nettoyageUtilisationSécurité
3
Laissez la porte fermée lorsque
vous utilisez le gril pour obtenir de
meilleurs résultats de cuisson.
4

44
Utilisation de l'horloge et de la minuterie
Pour régler l'horloge
Pour annuler la minuterie
Appuyez deux fois sur la touche MINUTERIE.
Pour régler la minuterie
Appuyez sur la touche HORLOGE.
Appuyez sur les touches numériques.
Appuyez sur la touche DÉPART.
L'horloge doit être réglée à l'heure exacte
pour que les fonctions minutées fonctionnent
correctement. L'heure ne peut être changée
lors d'un programme minuté de cuisson ou de
nettoyage.
Assurez-vous que l'horloge af¿che
l'heure exacte.
1
2
3
La minuterie ne décompte que les
minutes.
La minuterie ne commande pas le
fonctionnement du four. Le réglage
maximum de la minuterie est de
9 heures et 59 minutes.
Appuyez sur la touche MINUTERIE.
Appuyez sur les touches numériques
MXVTXjFHTXHODGXUpHGpVLUpHVDI¿FKH
Par exemple, pour régler 2 heures
45 minutes, appuyez sur 2, 4 et 5 dans cet
ordre. Si vous faites une erreur, appuyez
une nouvelle fois sur MINUTERIE et
recommencez.
Appuyez sur la touche DÉPART.
Le bip émis toutes les 6 secondes peut être
désactivé en suivant les étapes indiquées dans
la section « Fonctions spéciales des commandes
de votre four ª, sous « Signaux sonores de ¿n
de programme minuté ».
Lorsque la minuterie atteint « :00 », le
tableau de commande émet 3 bips, suivis
d'un bip toutes les 6 secondes, jusqu'à
ce que vous appuyiez sur la touche
MINUTERIE.
Après avoir appuyé sur la touche DÉPART,
« SET » (régler) disparavt de l'af¿cheur. Cela
indique que le décompte a commencé, même
si l'af¿chage ne change pas tant qu'une minute
n'est pas passée. Les secondes ne sont pas
af¿chées avant la dernière minute du décompte.
1
2
3
4
Service à la clientèle Dépannage Entretien et nettoyage Utilisation Sécurité
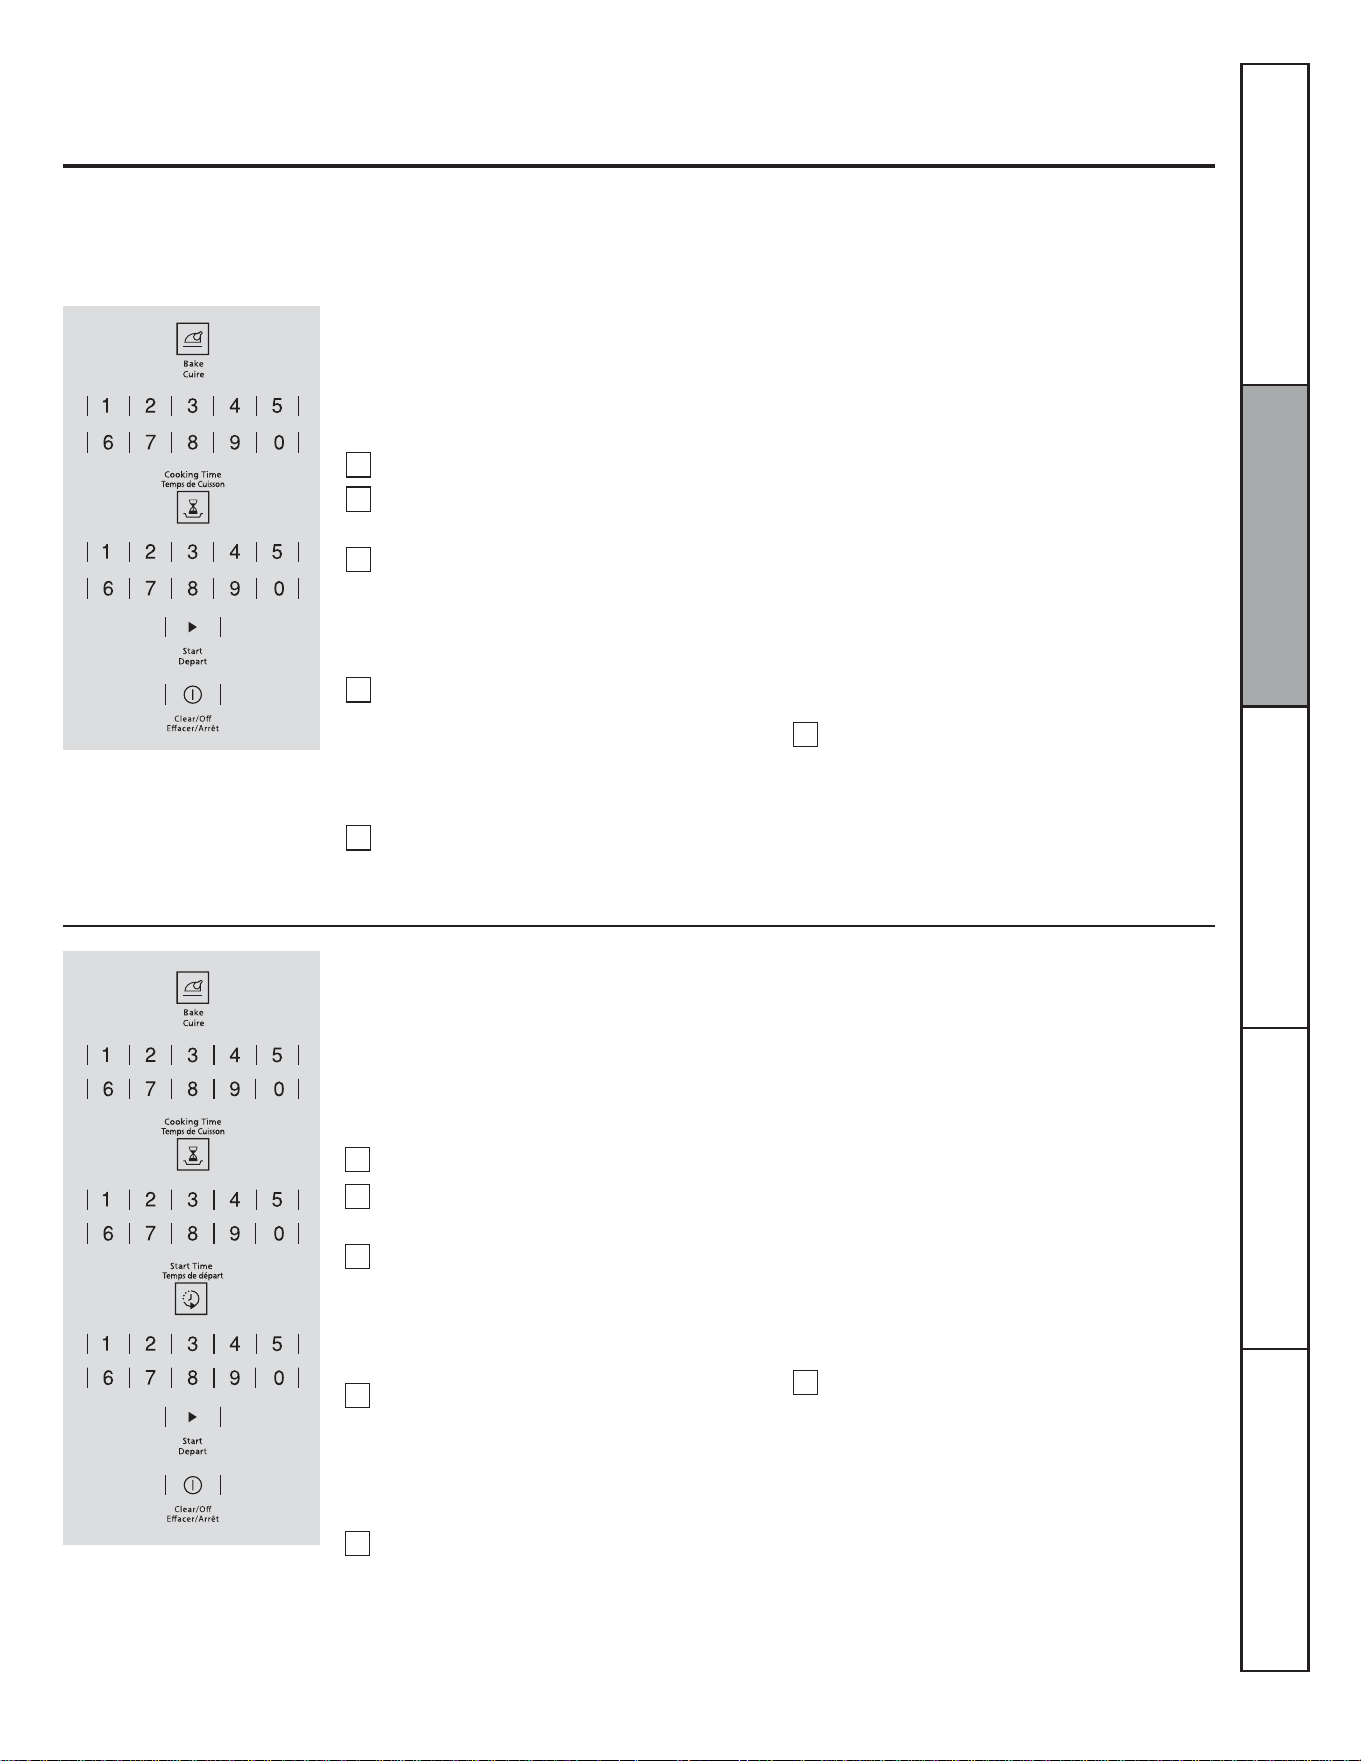
45
REMARQUE : Les aliments rapidement périssables – comme le lait, les œufs, le poisson, la farce, la volaille ou le porc – ne doivent
pas être laissés à température ambiante pendant plus d’une heure avant ou après la cuisson. Les bactéries nocives prolifèrent
rapidement à la température ambiante. Assurez-vous que la lampe du four est éteinte : la chaleur provenant de l'ampoule accélère
la prolifération des bactéries nocives.
Utilisation des fonctions minutées : cuisson et rôtissage
Programmer un départ immédiat et un arrêt automatique
Le four se met en marche immédiatement et
fonctionne pendant une durée déterminée.
la ¿n de la cuisson, le four s'arrête
automatiquement.
Appuyez sur la touche CUIRE.
Réglez la température désirée à l'aide des
touches numériques.
Appuyez sur la touche TEMPS DE CUISSON.
Au besoin, appuyez sur la touche ARRÊT
SRXUHIIDFHUFHTXLHVWDI¿FKp5HWLUH]OHV
aliments du four. N'oubliez pas que, même
si le four s'arrête automatiquement, les
aliments laissés dans le four continuent à
cuire.
REMARQUE : Un bip d'avertissement se fait
entendre si vous utilisez la cuisson minutée et
que vous n'appuyez pas sur la touche DÉPART
après avoir entré la durée de cuisson.
Le four se met en marche. La durée de cuisson
et le changement de température à partir
de 100 °F (38 °C) s'af¿chent. (La température
af¿chée commence à changer une fois que
la température du four atteint 100 °F [38 °C].)
Lorsque la température du four atteint la
température programmée, 3 bips se font
entendre. La cuisson continue pendant la
durée programmée, puis le four s'arrête
automatiquement.
Programmez la durée de cuisson désirée à
l'aide des touches numériques. La durée de
cuisson minimale réglable est de 1 minute.
La température et la durée de cuisson que
YRXVDYH]HQWUpHVVDI¿FKHQW
Appuyez sur la touche DÉPART.
REMARQUE : Si votre recette nécessite un
préchauffage, il vous faut ajouter cette durée
supplémentaire à la durée de cuisson.
1
2
3
4
5
6
REMARQUE : Un bip d'avertissement se fait
entendre si vous utilisez la cuisson minutée et
que vous n'appuyez pas sur la touche DÉPART
après avoir entré la durée de cuisson.
Lorsque le four se met en marche à l'heure
réglée, le changement de température à
partir de 100 °F (38 °C) et la durée de cuisson
s'af¿chent. (La température af¿chée commence
à changer une fois que la température du four
atteint 100 °F [38 °C].) Lorsque la température
du four atteint la température programmée,
3 bips se font entendre. La cuisson continue
pendant la durée programmée, puis le four
s'arrête automatiquement.
Programmer un départ différé et un arrêt automatique
Le four se met en marche à l'heure qui a été
programmée, cuit pendant la durée spéci¿ée,
puis s'éteint automatiquement.
Assurez-vous que l'horloge du four af¿che
l'heure exacte.
Appuyez sur la touche CUIRE.
Réglez la température désirée à l'aide des
touches numériques.
Appuyez sur la touche TEMPS DE CUISSON.
REMARQUE : Si votre recette nécessite un
préchauffage, il vous faut ajouter cette durée
supplémentaire à la durée de cuisson.
Programmez la durée de cuisson désirée à
l'aide des touches numériques. La durée de
cuisson minimale réglable est de 1 minute.
La température et la durée de cuisson que
YRXVDYH]HQWUpHVVDI¿FKHQW
Appuyez sur la touche TEMPS DE CUISSON.
Au besoin, appuyez sur la touche ARRÊT
SRXUHIIDFHUFHTXLHVWDI¿FKp5HWLUH]OHV
aliments du four. N'oubliez pas que, même
si le four s'arrête automatiquement, les
aliments laissés dans le four continuent à
cuire, même après son arrêt.
1
2
3
4
5
6
Service à la clientèleDépannageEntretien et nettoyageUtilisationSécurité
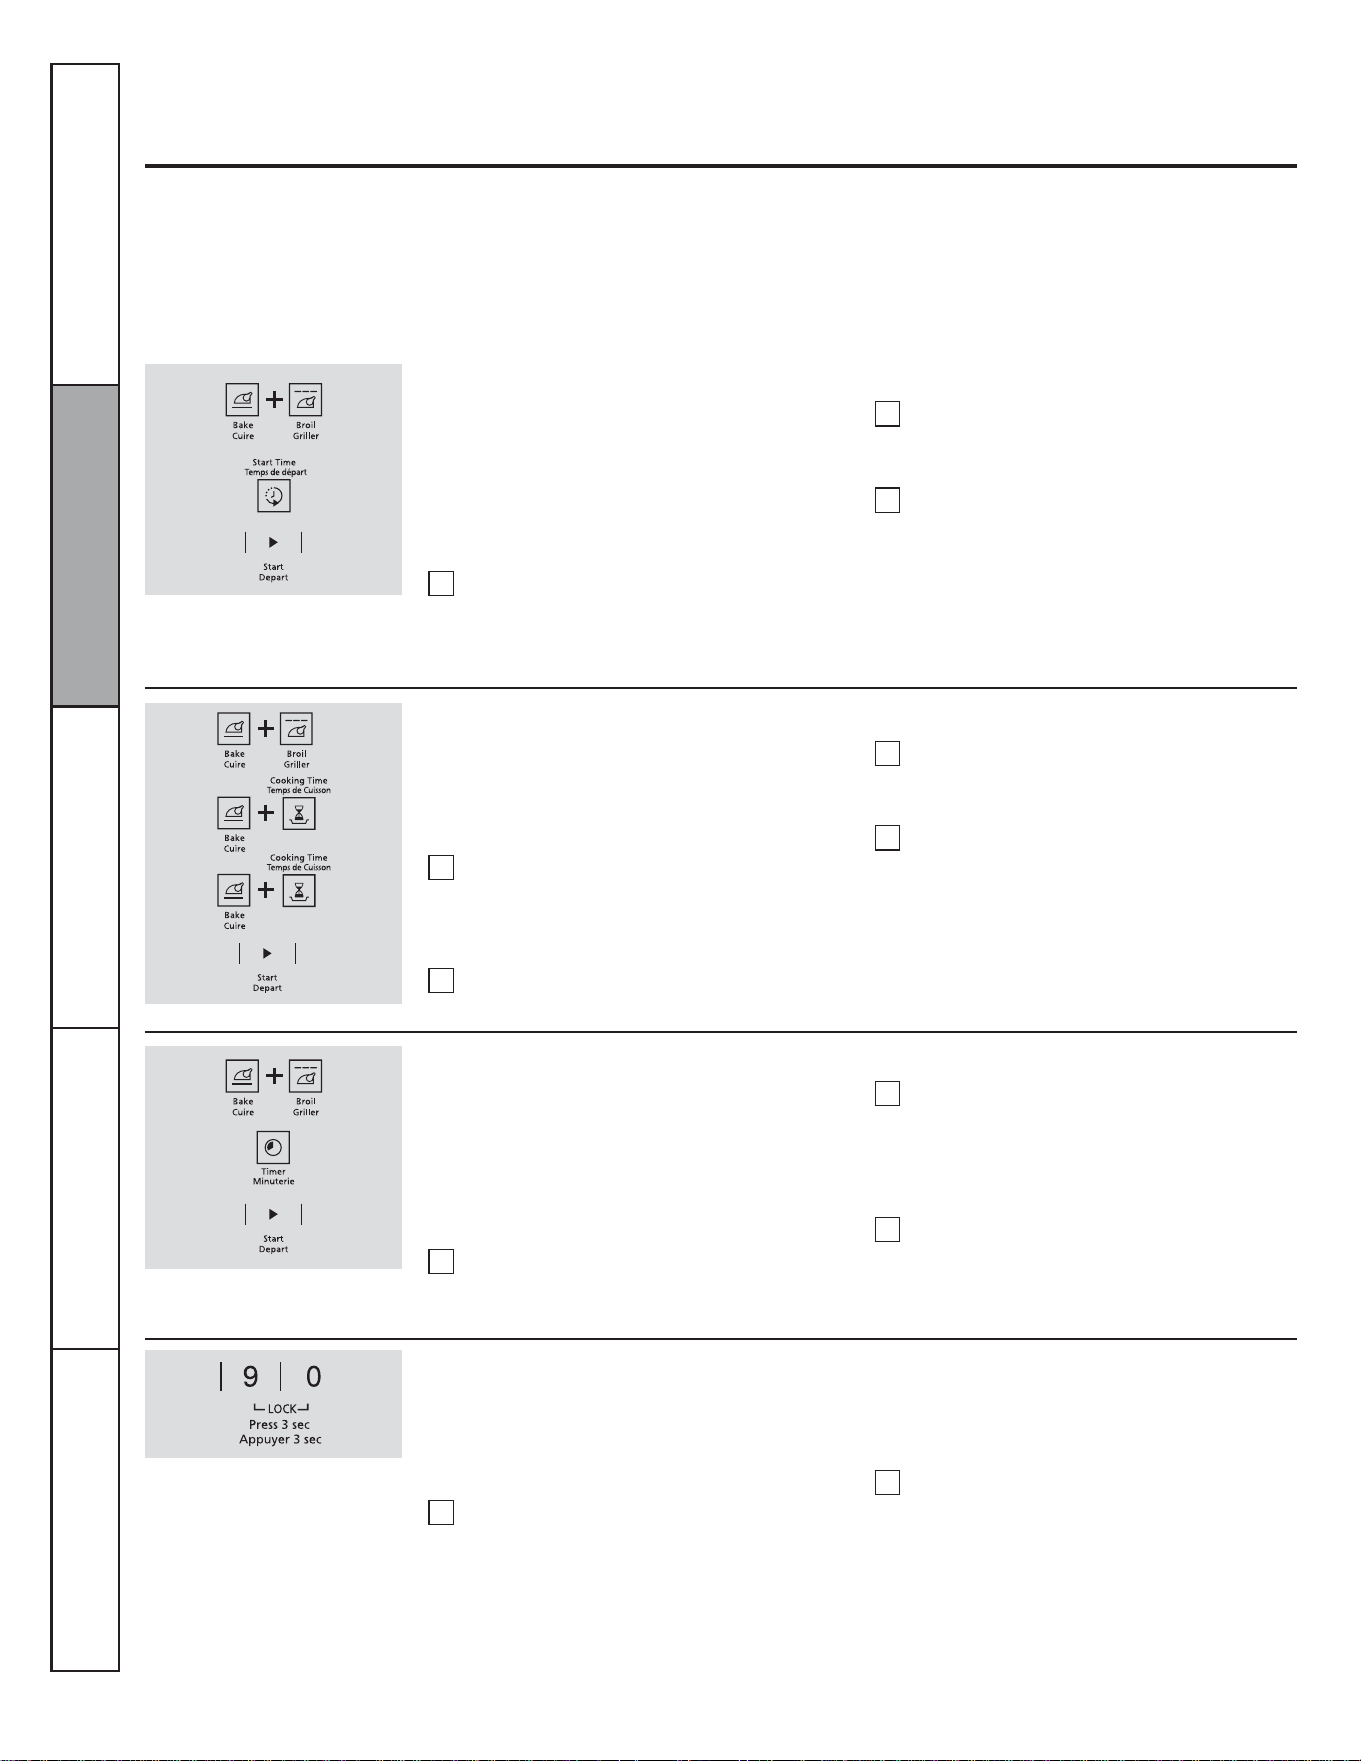
46
Arrêt automatique après 12 heures
Fonctions spéciales des commandes de votre four
Votre nouveau tableau de commande tactile possède des fonctions supplémentaires que vous pouvez décider d'utiliser. Vous
trouverez ci-dessous une liste de ces fonctions avec une explication de leur mode d'activation.
Les fonctions spéciales ne peuvent être activées que lorsque l'heure du jour est indiquée sur l'af¿cheur. Elles restent en mémoire
jusqu'à ce que les étapes soient répétées.
Lorsque l'af¿chage indique votre choix, appuyez sur la touche DÉPART. Les fonctions spéciales resteront en mémoire après une
coupure de courant, excepté le mode sabbat qui devra être reprogrammé.
$I¿FKDJHGHVWHPSpUDWXUHVHQGHJUpV)DKUHQKHLWRX&HOVLXV
Grâce à cette fonction, si vous oubliez le four alors
qu'il est allumé, il s'arrêtera automatiquement
après 12 heures pour les fonctions de cuisson ou
après 3 heures pour les fonctions de gril.
Si vous souhaitez arrêter cette fonction, suivez
les instructions ci-dessous.
Appuyez sur la touche TEMPS DE DÉPART
jusqu'à ce que « no shdn » (absence
GDUUrWDXWRPDWLTXHVDI¿FKH
Appuyez sur la touche DÉPART pour activer
l'absence d'arrêt automatique et laisser
cette fonction spéciale programmée.
Appuyez simultanément sur les touches
GRILLER et CUIRE pendant 3 secondes
jusqu'à ce que « SF » (arrêt automatique)
VDI¿FKH
1
2
3
Appuyez simultanément sur les touches
GRILLER et CUIRE pendant 3 secondes
jusqu'à ce que « SF » (arrêt automatique)
VDI¿FKH
Appuyez sur les touches GRILLER et TEMPS DE
CUISSON. « F »GHJUpV)DKUHQKHLWVDI¿FKH
Le tableau de commande de votre four est
programmé pour utiliser des températures en
degrés Fahrenheit, mais il vous est possible
d'utiliser les degrés Celsius.
Appuyez une nouvelle fois sur les touches
GRILLER et TEMPS DE CUISSON. « C »
GHJUpV&HOVLXVVDI¿FKH
Appuyez sur la touche DÉPART.
1
2
3
4
6LJQDX[VRQRUHVGH¿QGHSURJUDPPHPLQXWp
1
2
3
1
2
Appuyez simultanément sur les touches
GRILLER et CUIRE pendant 3 secondes jusqu'à
ce que « SF »DUUrWDXWRPDWLTXHVDI¿FKH
Pour désactiver le bip émis toutes les 6 secondes :
la ¿n d'un programme minuté, 3 brefs bips
sonores se font entendre, suivis d'un bip toutes
les 6 secondes jusqu'à ce que vous appuyiez sur
la touche ARRÊT. Ce bip continu, émis toutes les
6 secondes, peut être désactivé.
Appuyez sur la touche MINUTERIE. « CON
BEEP »ELSFRQWLQXVDI¿FKH$SSX\H]
de nouveau sur la touche MINUTERIE.
« BEEP »ELSVDI¿FKH&HODGpVDFWLYHOH
bip émis toutes les 6 secondes.)
Appuyez sur la touche DÉPART.
Verrouillage des commandes
Pour déverrouiller les commandes, appuyez
simultanément sur les touches 9 et 0
pendant 3 secondes jusqu'à ce que le
tableau de commande émette deux bips
et que « LOC » (commandes verrouillées)
GLVSDUDLVVHGHODI¿FKDJH
REMARQUE : Toutes les fonctions minutées et
de cuisson sont annulées lorsque le tableau de
commande est verrouillé.
Appuyez simultanément sur les touches
9 et 0 pendant 3 secondes jusqu'à ce que
le tableau de commande émette deux
bips. « LOC » (commandes verrouillées)
HWOKHXUHUHVWHQWDI¿FKpVHQFRQWLQXVL
l'horloge n'est pas éteinte.
Pour activer cette fonction :
Le tableau de commande vous permet de
verrouiller les touches pour qu'elles ne s'activent
pas lorsque vous appuyez dessus.
Service à la clientèle Dépannage Entretien et nettoyage Utilisation Sécurité
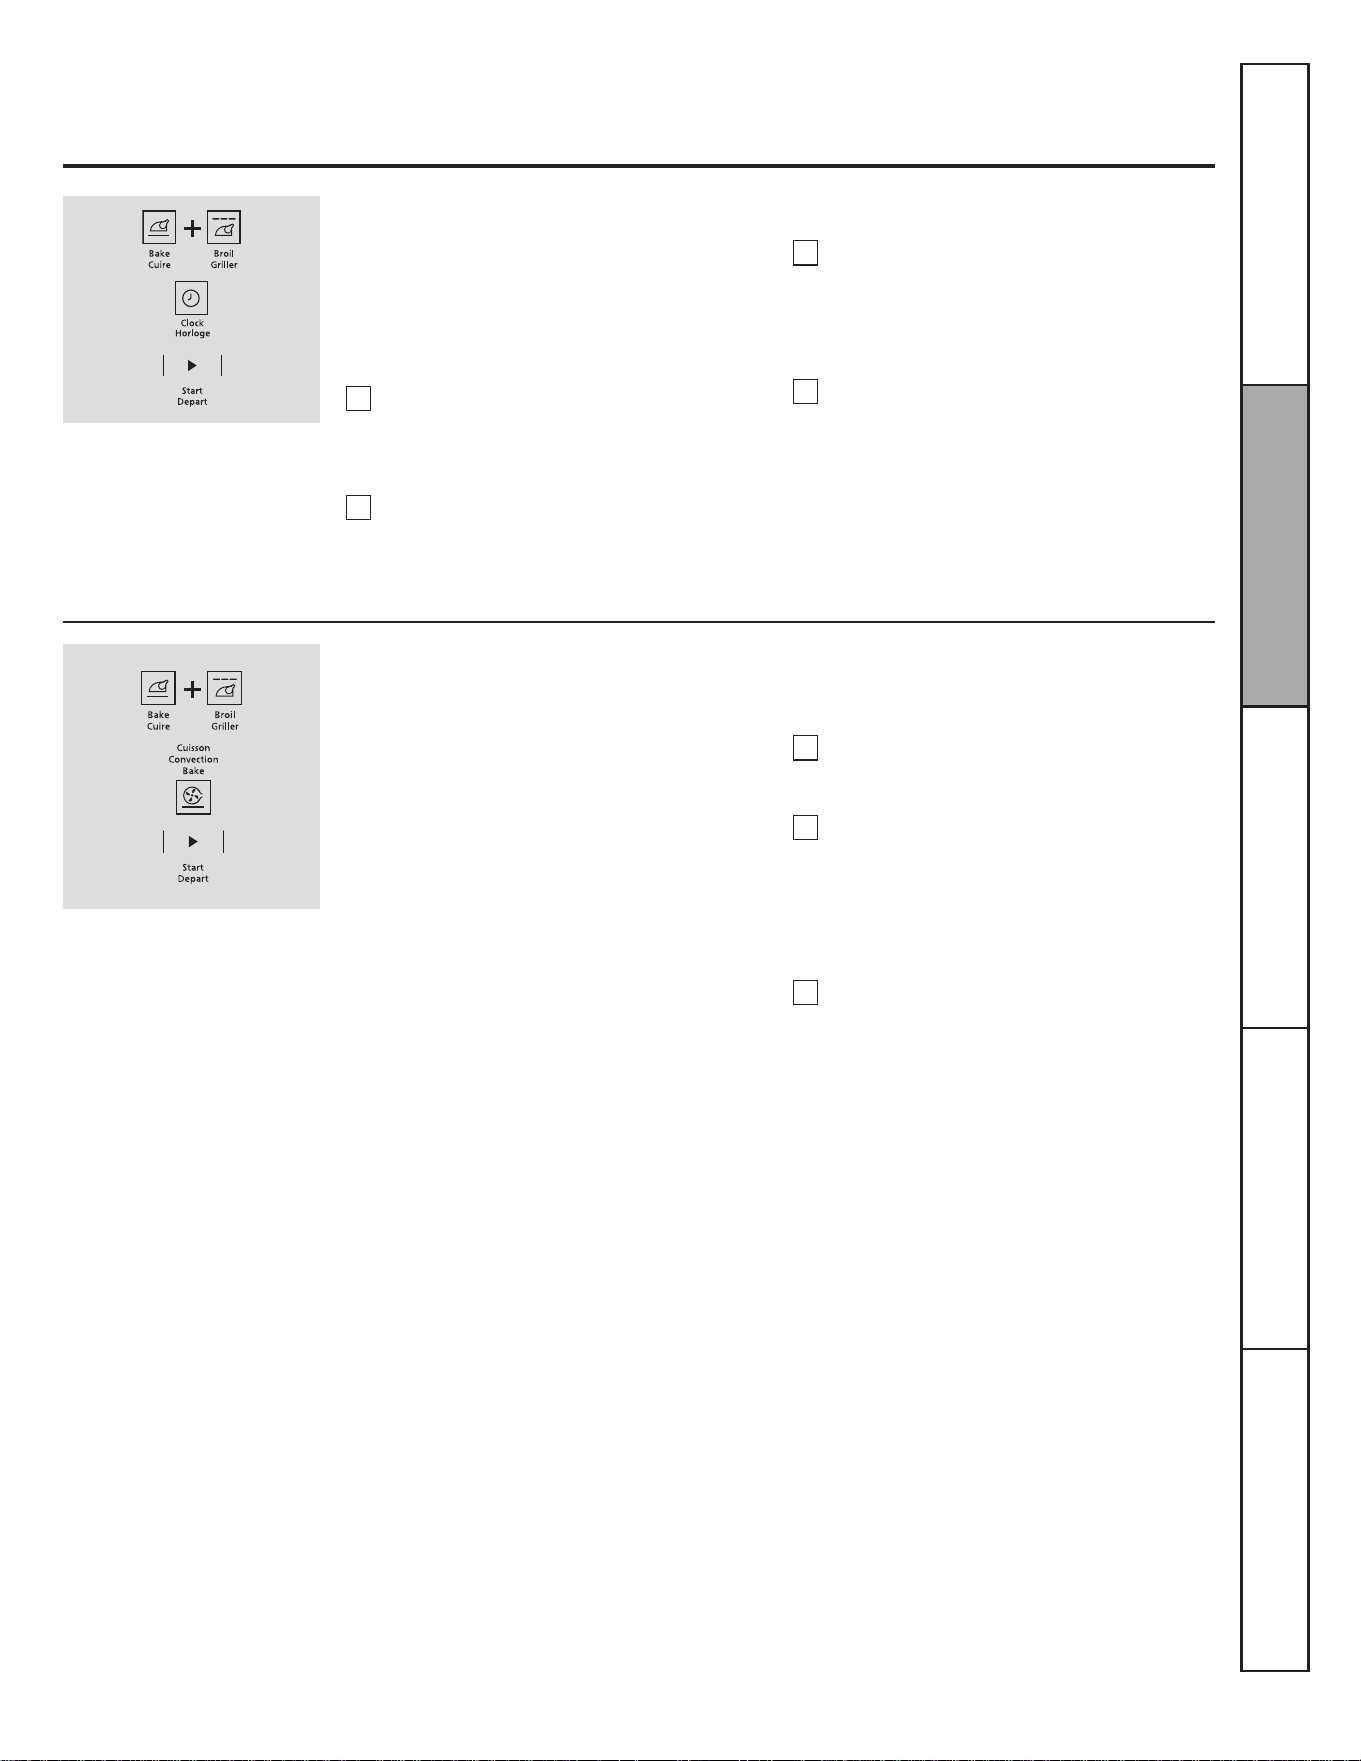
47
Horloge en mode 12 heures, 24 heures ou éteinte
Votre tableau de commande est réglé pour
af¿cher une horloge en mode 12 heures.
6LYRXVSUpIpUH]DI¿FKHUXQHKRUORJHHQ
mode 24 heures de type militaire ou éteindre
l'horloge, suivez les étapes ci-dessous.
Appuyez simultanément sur les touches
GRILLER et CUIRE pendant 3 secondes
jusqu'à ce que « SF » (arrêt automatique)
VDI¿FKH
Appuyez une fois sur la touche HORLOGE.
« 12 hr »KHXUHVVDI¿FKH6LFHFKRL[
vous convient, appuyez sur la touche
DÉPART.
REMARQUE : Si l'horloge est éteinte, vous ne
pouvez pas utiliser la fonction Temps de départ.
Appuyez de nouveau sur la touche
HORLOGESRXUSDVVHUjXQDI¿FKDJH
de l'heure en mode 24 heures. « 24 hr »
KHXUHVVDI¿FKH6LFHFKRL[YRXV
convient, appuyez sur la touche DÉPART.
Appuyez de nouveau sur la touche
HORLOGE pour éteindre l'horloge. « OFF »
DUUrWVDI¿FKH6LFHFKRL[YRXVFRQYLHQW
appuyez sur la touche DÉPART.
Conversion automatique Auto Recipe
MC
Pour réactiver cette fonction, répétez les étapes
1 à 3, mais appuyez sur la touche DÉPART
lorsque « CON ON » (convection marche) est
DI¿FKp
Pour désactiver cette fonction :
Appuyez simultanément sur les touches
du four CUIRE et GRILLER jusqu'à ce que
« SF »DUUrWDXWRPDWLTXHVDI¿FKH
Appuyez sur la touche CUISSON
CONVECTION/DI¿FKDJHLQGLTXHUD« CON
ON » (convection marche). Appuyez
de nouveau sur la touche CUISSON
CONVECTION/DI¿FKDJHLQGLTXHUD« CON
OFF » (convection arrêt).
Appuyez sur la touche DÉPART.
Lorsque vous utilisez la cuisson à convection,
la fonction de conversion automatique
Auto Recipe
MC
convertit automatiquement les
températures de cuisson normale entrées en
températures de cuisson à convection.
Lorsque cette fonction est activée, la
température réelle convertie (réduite) est
af¿chée. Par exemple, si vous entrez une
température normale de 350 °F (177 °C) et
appuyez sur la touche DÉPART, « CON »
(convection) et la température convertie de
325 °F (163 °C) s'af¿chent.
1
2
3
Service à la clientèleDépannageEntretien et nettoyageUtilisationSécurité
1
2
3
4

48
Programmer la cuisson au four ou le rôtissage conventionnels
Utilisation du mode sabbat
(Conçu pour être utilisé lors du sabbat et des fêtes juives)
Le mode sabbat ne peut être utilisé que pour la cuisson au four traditionnelle ou le rôtissage. Il ne peut pas être utilisé pour la
cuisson à convection, le gril ou la cuisson différée.
REMARQUE : La lampe du four s'allume et s'éteint automatiquement lorsque vous ouvrez et fermez la porte. L'ampoule peut être
retirée. Reportez-vous à la section sur le remplacement de l'ampoule du four. Sur les modèles dotés d'un commutateur pour la
lumière, il est possible d'allumer la lampe et de la laisser allumée.
Le four est en mode sabbat
lorsque « » est af¿ché. Le four
est en mode de cuisson/rôtissage
lorsque «
» est af¿ché.
3RXUPRGL¿HUODWHPSpUDWXUHGXIRXUDSSX\H]
sur la touche CUIRE, entrez la nouvelle
température à l'aide des touches numériques,
puis appuyez sur la touche DÉPART.
REMARQUE : Les touches ARRÊT et TEMPS DE
CUISSON sont actives en mode sabbat.
Appuyez simultanément sur les touches
GRILLER et CUIRE, et maintenez-les
enfoncées jusqu'à ce que « SF » (arrêt
DXWRPDWLTXHVDI¿FKH
REMARQUE : Si « Bake » (cuire) ou « Broil »
JULOOHUVDI¿FKHQWFHODVLJQL¿HTXHYRXV
n'avez pas appuyé sur les touches GRILLER
et CUIRE en même temps. Appuyez sur la
touche ARRÊT et recommencez.
Appuyez sur la touche TEMPS DE DÉPART
jusqu'à ce que « SAb bAtH » (sabbat)
VDI¿FKH
Appuyez sur la touche DÉPART et «
»
VDI¿FKHUD
Appuyez sur la touche CUIRE. Aucun signal
sonore ne sera émis.
Entrez la température désirée entre 170 °F
(77 °C) et 550 °F (288 °C), à l'aide des
touches numériques. Aucun signal sonore
n'est émis et aucune température ne
VDI¿FKH
Assurez-vous que l'horloge af¿che l'heure
exacte et que le four est arrêté.
Appuyez sur la touche DÉPART.
Après une durée aléatoire allant de
30 secondes à 1 minute, «
»VDI¿FKH
pour indiquer que le four est en mode de
cuisson/rôtissage. Si « »QHVDI¿FKH
pas, recommencez à partir de l'étape 4.
1
2
3
4
5
6
7
Service à la clientèle Dépannage Entretien et nettoyage Utilisation Sécurité
49
Programmer la cuisson ou le rôtissage minutés – Départ immédiat et
arrêt automatique
Le four est en mode sabbat
lorsque«
» est af¿ché. Le four
est en mode de cuisson/rôtissage
lorsque « » est af¿ché.
3RXUPRGL¿HUODWHPSpUDWXUHGXIRXUDSSX\H]
sur la touche CUIRE, entrez la nouvelle
température à l'aide des touches numériques,
puis appuyez sur la touche DÉPART.
/RUVTXHODFXLVVRQHVWWHUPLQpHODI¿FKDJH
passe de «
» à « » et « 0:00 »
VDI¿FKHSRXULQGLTXHUTXHOHIRXUVHVW$55Ç7e
mais est toujours en mode sabbat. Retirez les
aliments cuits.
Appuyez simultanément sur les touches
GRILLER et CUIRE, et maintenez-les
enfoncées jusqu'à ce que « SF » (arrêt
DXWRPDWLTXHVDI¿FKH
REMARQUE : Si « Bake » (cuire) ou « Broil »
(griller) s'af¿chent, cela signi¿e que vous
n'avez pas appuyé sur les touches GRILLER
et CUIRE en même temps. Appuyez sur la
touche ARRÊT et recommencez.
Appuyez sur la touche TEMPS DE DÉPART
jusqu'à ce que « SAbbAtH » (sabbat)
VDI¿FKH
Appuyez sur la touche DÉPART et «
»
VDI¿FKHUD
Appuyez sur la touche TEMPS DE CUISSON.
Appuyez sur les touches numériques pour
régler la durée de cuisson désirée entre
1 minute et 9 heures 99 minutes. La durée
GHFXLVVRQHQWUpHVDI¿FKH
Appuyez sur la touche DÉPART.
Appuyez sur la touche CUIRE. Aucun signal
sonore ne sera émis.
Assurez-vous que l'horloge af¿che l'heure exacte et que le four est arrêté.
Entrez la température désirée à l'aide des
touches numériques. Aucun signal sonore
n'est émis et aucune température ne
VDI¿FKH
Appuyez sur la touche DÉPART.
Après une durée aléatoire allant de
30 secondes à 1 minute, «
»VDI¿FKH
pour indiquer que le four est en mode de
cuisson/rôtissage. Si « »QHVDI¿FKH
pas, recommencez à partir de l'étape 7.
1
2
3
4
5
6
7
8
9
10
Comment désactiver le mode sabbat
Appuyez sur la touche ARRÊT.
Si le four est en cours d'utilisation, attendez
pendant une durée aléatoire d'environ
30 secondes à 1 minute, jusqu'à ce que
«
»VRLWDI¿FKp
Appuyez simultanément sur les touches
GRILLER et CUIRE, et maintenez-les
enfoncées jusqu'à ce que « SF » (arrêt
DXWRPDWLTXHVDI¿FKH
Appuyez sur la touche TEMPS DE
DÉPART jusqu'à ce que « 12 shdn »
(arrêt automatique après 12 heures) ou
« no shdn » (absence d'arrêt automatique)
VDI¿FKH
REMARQUE : Si une panne de courant survient
lorsque le four est en mode sabbat, le four
s'arrête automatiquement et reste éteint même
lorsque le courant est rétabli. Le four doit être
reprogrammé.
Choisissez 12 shdn pour que le four
s'arrête automatiquement après 12 heures
ou no shdn pour qu'il ne s'arrête pas
automatiquement.
Appuyez sur DÉPART lorsque votre choix
VDI¿FKH12 shdn ou no shdn).
1
2
3
4
5
6
Service à la clientèleDépannageEntretien et nettoyageUtilisationSécurité
50
Utlisation de la sondei
Pour plusieurs types d'aliments, plus particulièrement les rôtis et la volaille, la température interne constitue la meilleure indication
de cuisson. La sonde de température vous facilite la vie en cuisant les aliments au degré exact de cuisson désiré.
Une sonde autre que celle fournie avec ce
produit peut être endommagée si elle est
utilisée.
Utilisez les poignêes de la sonde et de la fiche
lorsque vous les insérez dans les aliments et la
prise ou les en retir
ez.
Ne retirez pas la sonde de l'aliment ou
de la prise en tirant sur son câble au
moyen d'une pince. Vous risqueriez de
l'endommager.
Pour ne pas casser la sonde, assurez-vous
que les aliments dans lesquels vous allez
l'insérer sont complètement décongelés.
Après avoir préparé la viande et l'avoir placée
sur un trépied ou sur une grille de la lèchefrite,
suivez ces instructions pour placer la sonde
correctement.
Introduisez complètement la sonde dans la
viande. Elle ne doit toucher ni os, ni gras, ni
cartilage.
La sonde thermique est munie
d'une sonde de type broche d'un
côté et d'une fiche de l'autre côté,
qui se branche dans la prise du
four.
Câble
Poignées
Pour éviter les brûlures, ne débranchez pas la sonde de la prise avant que le four n'ait refroidi. Ne
rangez pas la sonde dans le four.
Pour les rôtis sans os, insérez la sonde dans
leur partie la plus charnue. Pour un jambon ou
de l'agneau avec os, insérez la sonde au centre
du grand muscle le plus bas.
Insérez la sonde au centre des mets comme le
pain de viande ou les plats en cocotte.
Pour une dinde entière, insérez la sonde par
en dessous, dans la partie la plus charnue de
l'intérieur de la cuisse, parallèlement à cette
dernière.
Pour éviter les brûlures, ne débranchez pas
la sonde de la prise avant que le four n'ait
refroidi.
Ne rangez pas la sonde dans le four.
ATTENTION
cuisson avec sonde, appuyez sur la touche
CUIRE, puis sur les touches numériques pour
entrer la nouvelle température.
Pour programmer le rôtissage par sonde
Service à la clientèle Dépannage Entretien et nettoyage Utilisation Sécurité
Introduisez la sonde dans l'aliment.
Assurez-vous qu'elle est complètement
enfoncée. Fermez la porte du four.
Appuyez sur la touche SONDE.
Réglez la température interne désirée (entre
100 °F [38 °C] et 200 °F [93 °C] pour les plats
ou la viande) à l'aide des touches numériques.
Appuyez sur la touche CUIRE.
Réglez la température désirée à l'aide des
touches numériques.
Appuyez sur la touche DÉPART.
1
2
3
4
5
6
7
8
« LO »
est branchée dans la prise du four alors que
vous n'avez pas programmé de température
pour la sonde et que vous avez appuyé sur la
touche DÉPART.
« LO »
température interne des aliments atteigne
100 °F (38 °C). Ensuite, le changement de
température interne est indiqué.
Lorsque la température interne atteint celle
que vous avez programmée, la sonde et le
four s'arrêtent et le tableau de commande
émet un signal sonore. Pour arrêter ce
signal sonore, appuyez sur la touche
EFFACER/ARRÊT. Utilisez des poignées
isolantes pour retirer la sonde de l'aliment.
N'utilisez pas de pinces pour la sortir. Elles
pourraient endommager la sonde.
Si vous sortez la sonde des aliments avant
que la sonde soit retirée du four.
Vous pouvez utiliser la minuterie, même si
vous ne pouvez pas vous servir des fonctions
minutées lors de la cuisson par sonde.
Ne laissez jamais la sonde à l intérieur du
for pendant la coisson au gril.
REMARQUE: Le gril ne fonctionnet pas si la
sonde de temérature est branchée.
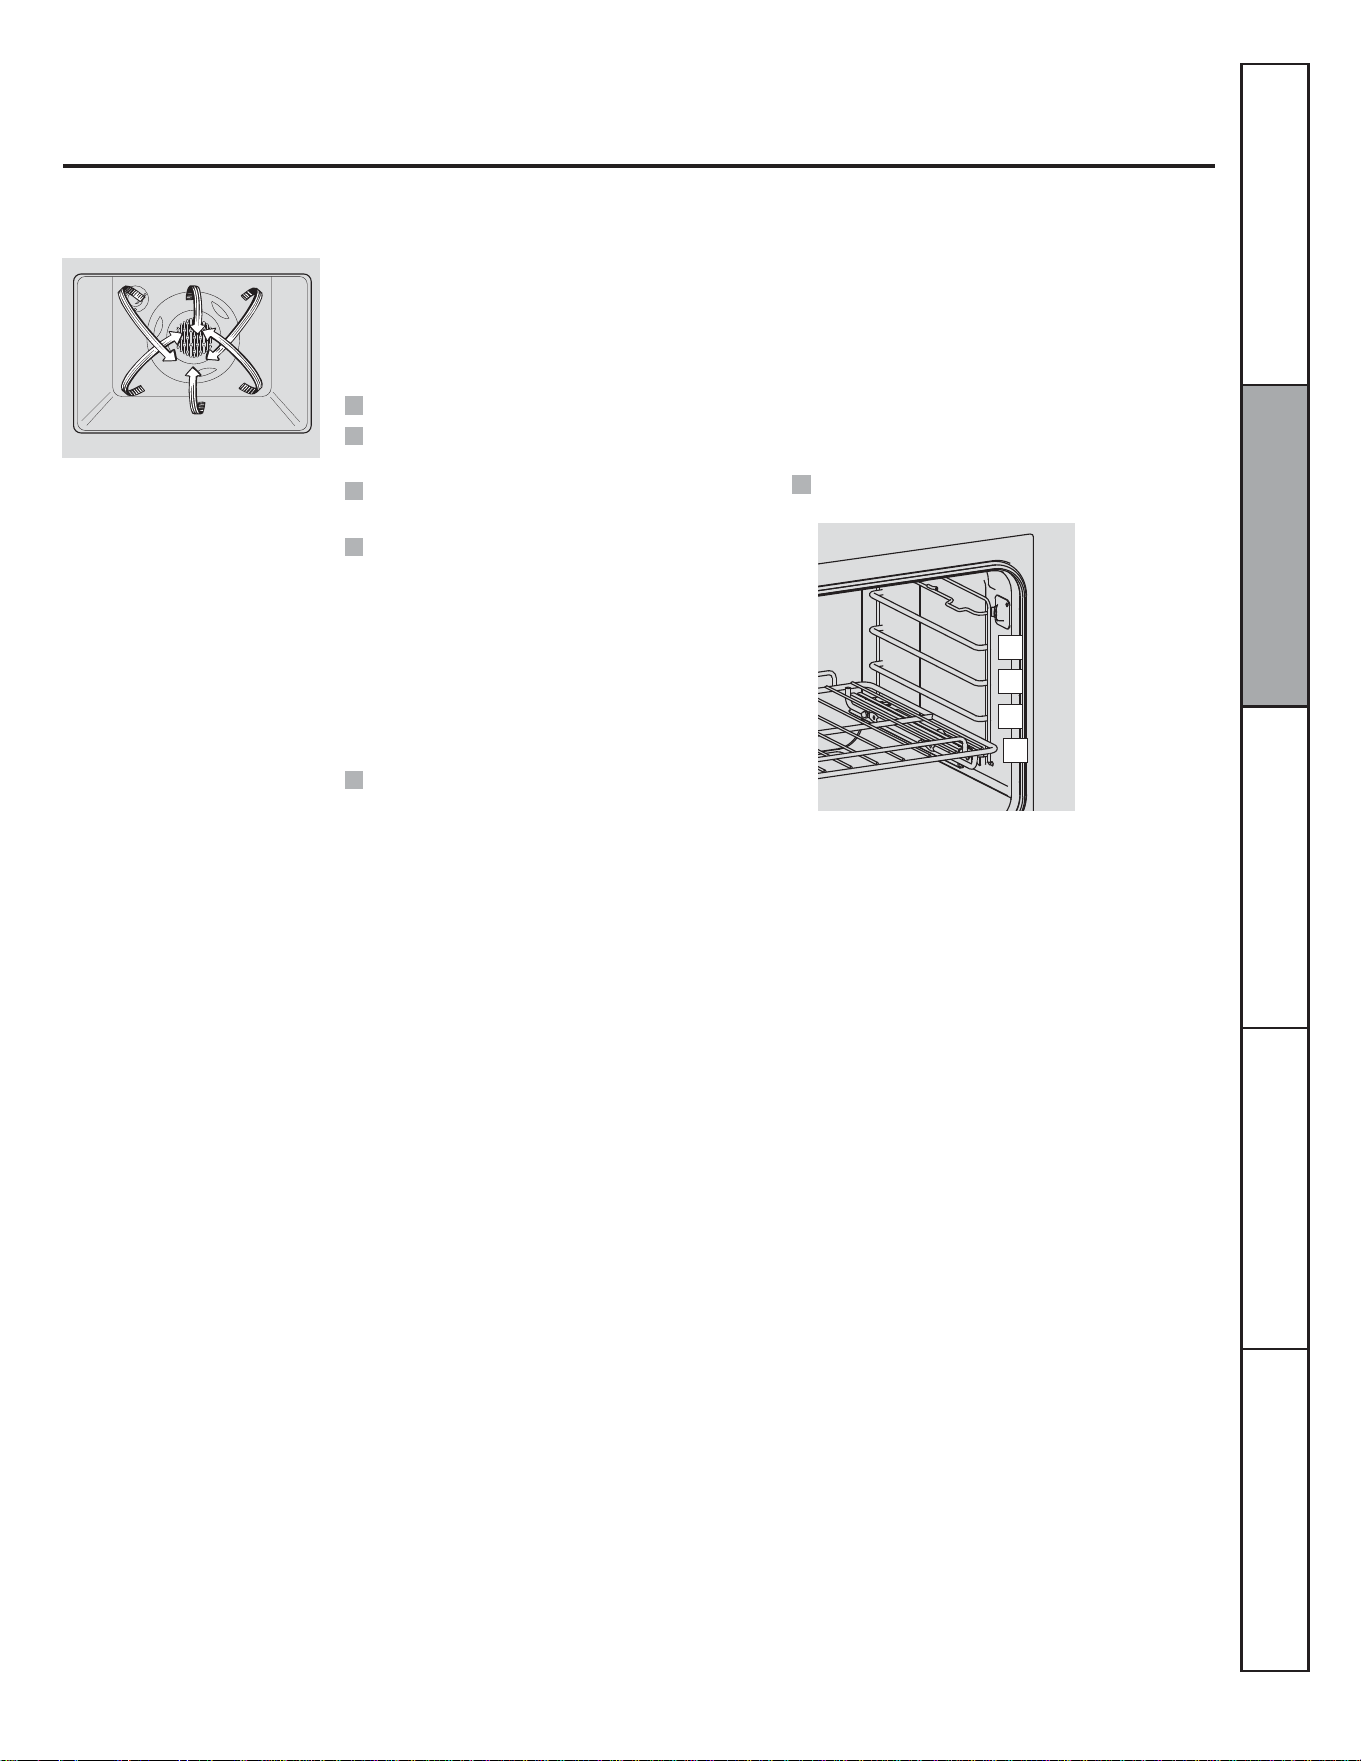
51
Utilisation du four à convection
Dans un four à convection, un
ventilateur fait circuler l'air chaud
au-dessus, en dessous et autour
de l'aliment. Cet air chaud est
diffusé uniformément dans la
cavité du four. Les aliments sont
donc cuits et dorés uniformément,
et souvent plus rapidement que la
cuisson au four traditionnelle.
Rôtissage à convection
Cuisson à convection
Pour vous aider à comprendre la différence
entre la cuisson et le rôtissage traditionnels et
à convection, voici quelques instructions :
Le ventilateur de convection s'arrête lorsque la porte du four est ouverte. NE LAISSEZ PAS la porte ouverte longtemps pendant la
cuisson à convection.
Placez la grille à la position (A).
Les rôtis et la volaille doivent être cuits sur une
grille à la position (A).
Pour le rôtissage à convection, il est important
que vous vous serviez d'une lèchefrite et d'une
JULOOHD¿QGREWHQLUOHVPHLOOHXUVUpVXOWDWV
de cuisson possibles. La lèchefrite retient la
graisse renversée et la grille de lèchefrite
empêche les projections de graisse.
Le ventilateur de convection diffuse l'air
chaud uniformément au-dessus et autour des
aliments. La viande et la volaille sont dorées
uniformément comme s'ils avaient été cuits
dans une rôtisserie. L'air chaud est diffusé au-
dessus, en dessous et autour des aliments à
rôtir. L'air chaud permet d'obtenir des aliments
tendres et juteux à l'intérieur tout en étant
dorés et croustillants à l'extérieur.
Parfait pour les grosses pièces de viande
tendre non couvertes.
Préchauffez le four.
Idéale pour les cuissons avec plusieurs
grilles.
Pratique pour les grandes quantités
d'aliments à cuire au four.
Donne de bons résultats avec les biscuits,
brownies, petits gâteaux, choux à la crème,
brioches, gâteaux des anges et pains.
Le ventilateur de convection diffuse l'air
chaud uniformément au-dessus et autour des
aliments.
Service à la clientèleDépannageEntretien et nettoyageUtilisationSécurité
D
C
B
A
52
Service à la clientèle Dépannage Entretien et nettoyage Utilisation Sécurité
Utilisation du four à convection
Ustensiles pour la cuisson à convection
Métal et verre
Ce type d'ustensile de cuisson est compatible
avec votre four à convection. Néanmoins,
les ustensiles métalliques chauffent plus
vite et sont recommandés pour la cuisson à
convection.
Papier et plastique
Les récipients en papier et en plastique
résistants à la chaleur et recommandés pour
l'utilisation au four traditionnel peuvent être
utilisés dans un four à convection. Vous pouvez
également utiliser les ustensiles en plastique
qui résistent à des températures allant jusqu'à
400 °F (204 °C).
Vous obtiendrez de meilleurs résultats pour la
cuisson des biscuits si vous utilisez une plaque
à biscuits plutôt qu'un ustensile peu profond.
Pour les recettes comme celle du poulet rôti,
utilisez un ustensile peu profond. L'air chaud
circule mal autour des aliments si l'ustensile est
très profond.
Les ustensiles noircis ou mats cuiront les
aliments plus vite que les ustensiles brillants.
Les ustensiles en verre ou en céramique
cuisent les aliments plus lentement.
d'espace pour que l'air circule dans le four.
Si vous cuisinez avec plusieurs ustensiles,
laissez de l'espace entre eux. Assurez-vous
également que les ustensiles ne se touchent
pas et n'entrent pas en contact avec les parois
du four.
Pour programmer la cuisson ou le rôtissage à convection
Appuyez sur la touche CUISSON
CONVECTION ou RÔTISSAGE CONVECTION.
Réglez la température désirée à l'aide des
touches numériques.
Appuyez sur la touche DÉPART.
REMARQUE : Vous pouvez entendre le
ventilateur pendant la cuisson à convection. Le
ventilateur s'arrête lorsque vous ouvrez la porte,
mais pas la chaleur.
Le ventilateur ne se met en marche qu'une fois
la température de préchauffage atteinte.
Appuyez sur la touche EFFACER/ARRÊT
lorsque la cuisson est terminée.
sur la touche CUISSON CONVECTION ou sur la
touche RÔTISSAGE CONVECTION, puis sur les
touches numériques pour entrer la nouvelle
température.
Lorsque le four commence à chauffer, le
de 100 °F/38 °C). Lorsque la température du
four atteint la température programmée, 3 bips
se font entendre.
1
2
3
4
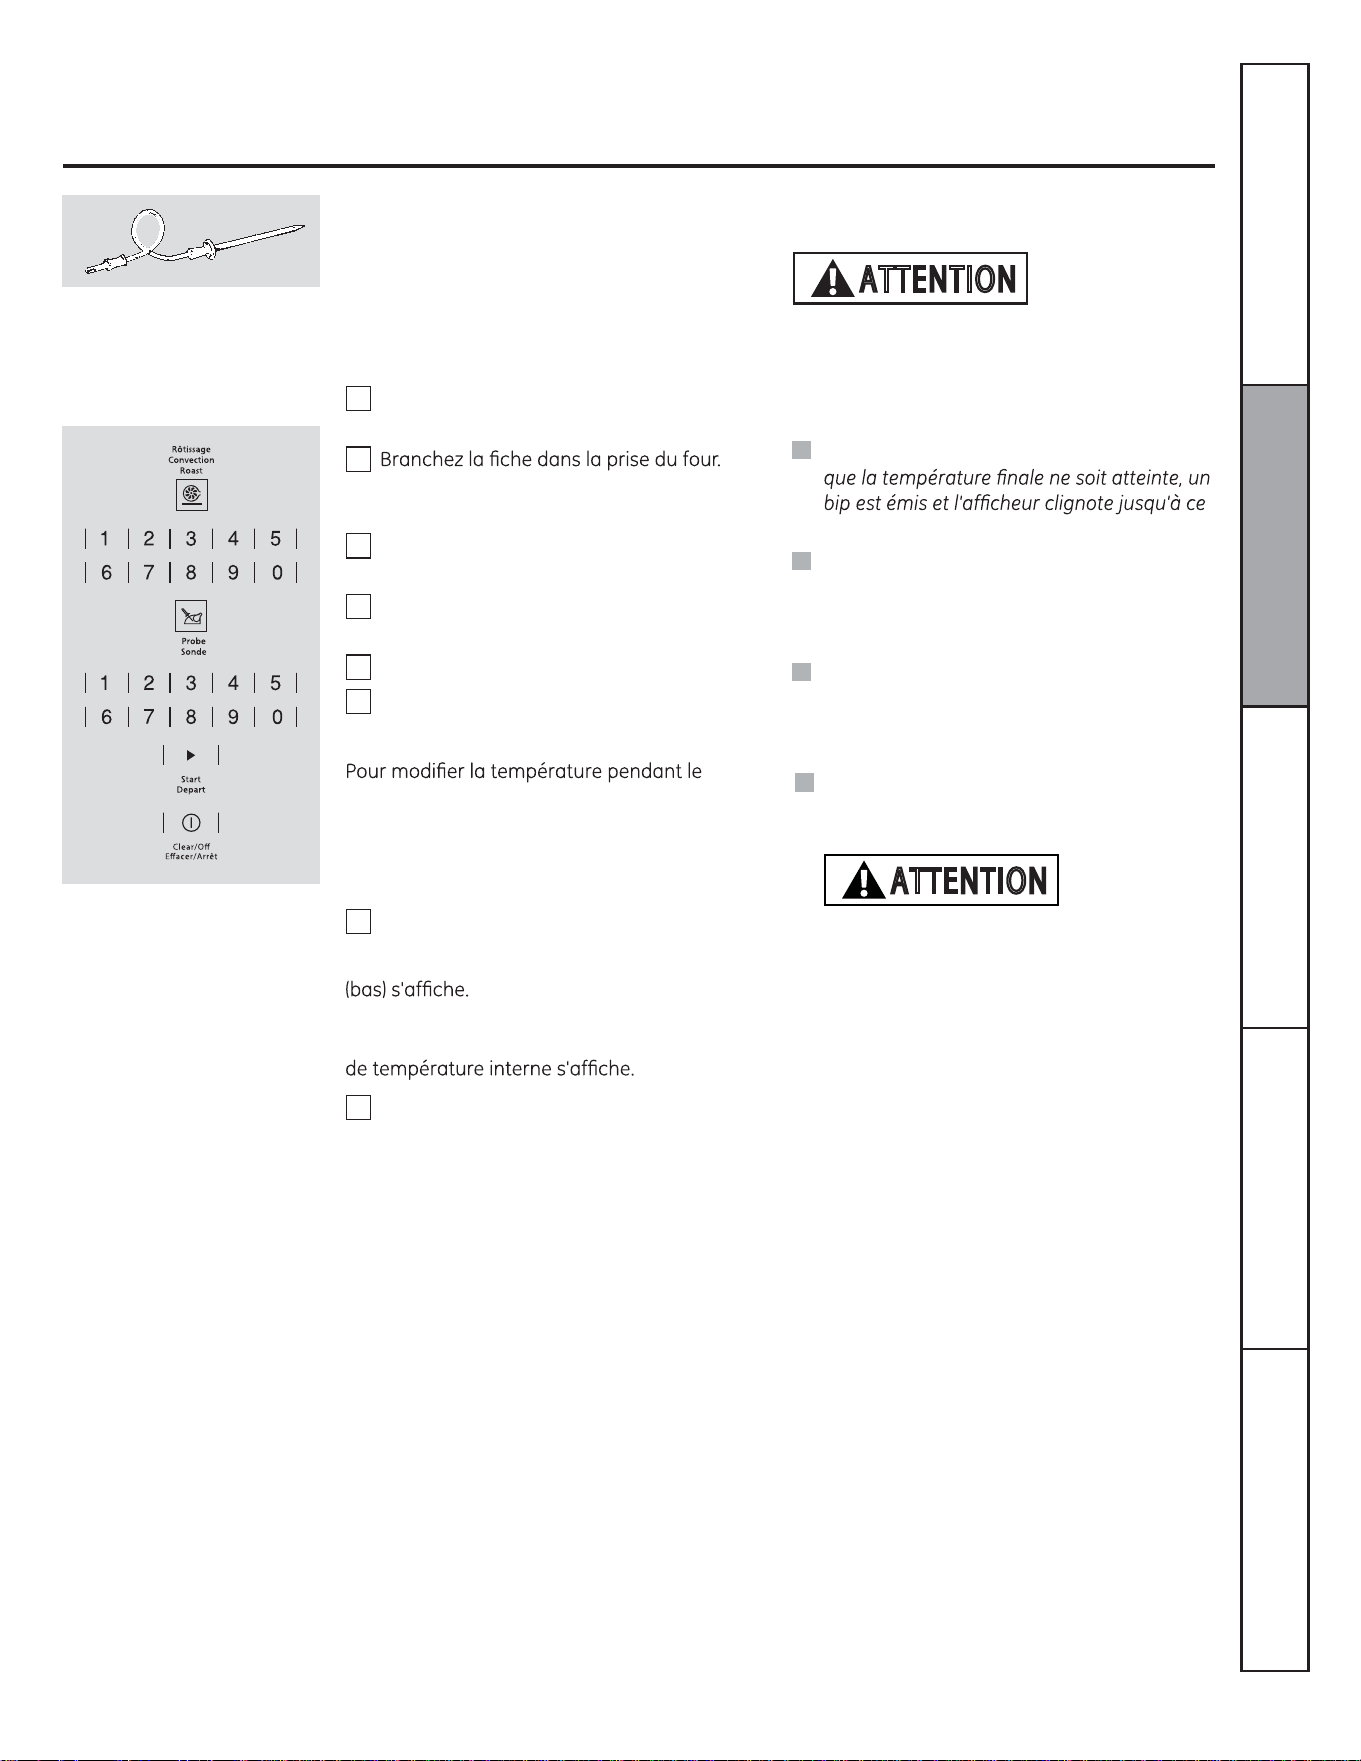
53
Pour programmer le rôtissage à convection avec sonde
« PROBE » (sonde) clignote et le tableau
de commande émet un signal sonore si la
sonde est branchée dans la prise, mais que
vous n'avez ni programmé de température, ni
appuyé sur la touche DÉPART.
Pour éviter les brûlures, ne débranchez pas la
sonde de la prise avant que le four n'ait refroidi.
Ne rangez pas la sonde dans le four.
Pour de meilleurs résultats
lorsque vous cuisez de grosses
dindes ou des rôtis, nous vous
recommandons d'utiliser la sonde
fournie avec ce four à convection.
Lorsque la température interne atteint celle
que vous avez programmée, la sonde et le
four s'arrêtent et le tableau de commande
émet un signal sonore. Pour arrêter ce
signal sonore, appuyez sur la touche
EFFACER/ARRÊT. Utilisez des poignées
isolantes pour retirer la sonde de l'aliment.
N'utilisez pas de pinces pour la sortir. Elles
pourraient endommager la sonde.
Lorsque le four commence à chauffer, « LO »
Une fois que la température interne des
aliments a atteint 100 °F (38 °C), le changement
1
2
3
4
5
6
7
8
Appuyez sur la touche DÉPART.
rôtissage à convection, appuyez sur la
touche RÔTISSAGE CONVECTION, puis sur les
touches numériques pour entrer la nouvelle
température.
Placez la grille à la position (A). Introduisez
complètement la sonde dans l'aliment.
Assurez-vous qu'elle est complètement
enfoncée. Fermez la porte du four.
Appuyez sur la touche RÔTISSAGE
CONVECTION.
Réglez la température désirée à l'aide des
touches numériques.
Appuyez sur la touche SONDE.
Réglez la température interne désirée à
l'aide des touches numériques.
REMARQUE :
Si vous sortez la sonde des aliments avant
que la sonde soit retirée du four.
Vous pouvez entendre le ventilateur lors de
l'utilisation de la cuisson à convection. Le
ventilateur s'arrête lorsque vous ouvrez la
porte, mais pas le brûleur.
Vous pouvez utiliser la minuterie, même
si vous ne pouvez pas vous servir des
fonctions minutées lors de la cuisson par
sonde.
ATTENTION
Service à la clientèleDépannageEntretien et nettoyageUtilisationSécurité
La sonde n’est pas destinée à être utilisée
avec les fonctions de gril.
Ne pas utiliser la sonde de cuisson lorsque
le niveau D est utilisé
ATTENTION
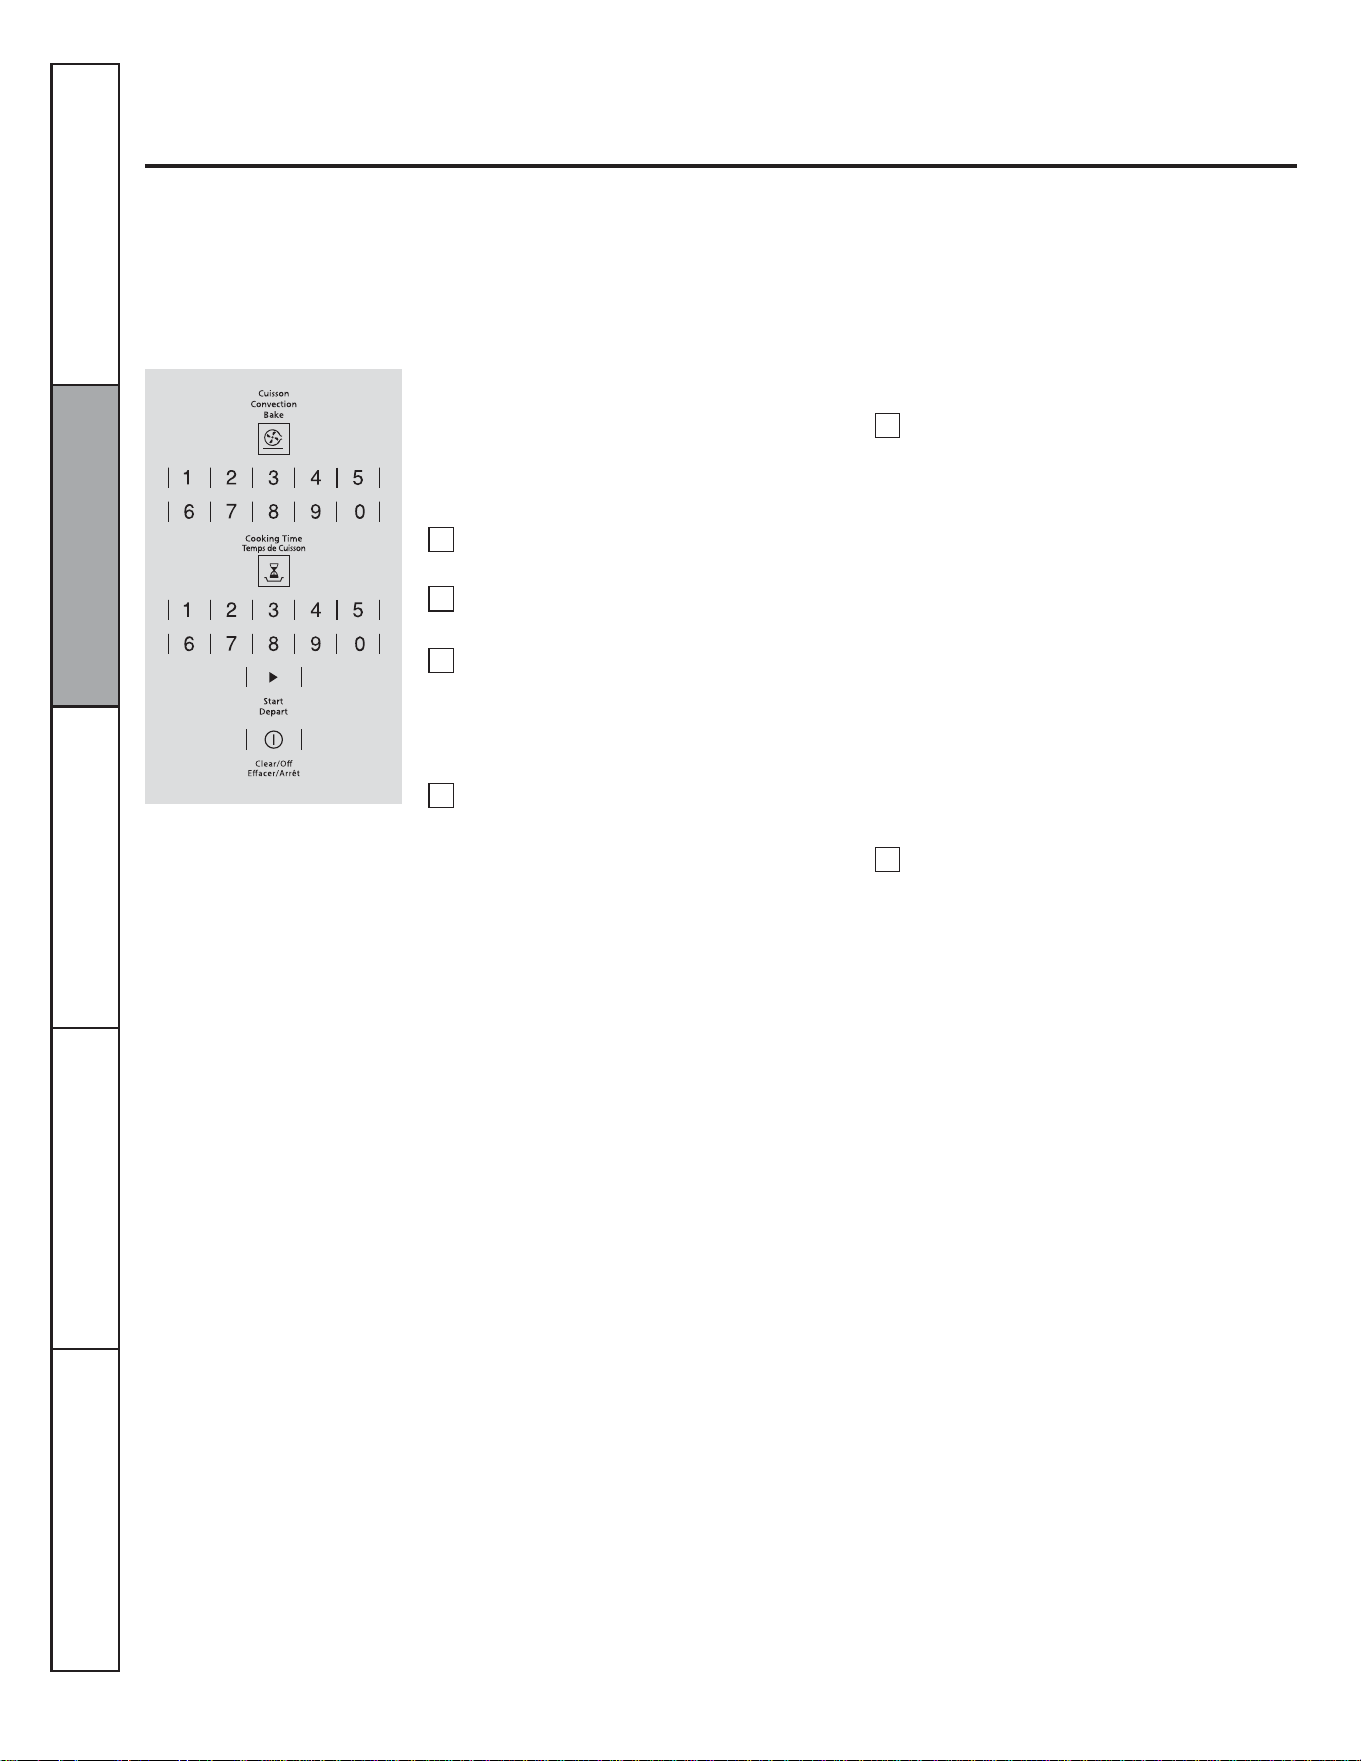
54
Utilisation des fonctions minutées de cuisson à convection
Vous pouvez entendre le ventilateur lors de l'utilisation de la cuisson à convection. Le ventilateur s'arrête lorsque vous ouvrez la
porte, mais pas le brûleur.
REMARQUE : Les aliments rapidement périssables – comme le lait, les œufs, le poisson, la farce, la volaille ou le porc – ne doivent
pas être laissés à température ambiante pendant plus d’une heure avant ou après la cuisson. Les bactéries nocives prolifèrent
rapidement à la température ambiante. Assurez-vous que la lampe du four est éteinte : la chaleur provenant de l'ampoule accélère
la prolifération des bactéries nocives.
Programmer un départ immédiat et un arrêt automatique
Le four se met en marche immédiatement et
fonctionne pendant une durée déterminée.
OD¿QGHODFXLVVRQOHIRXUVDUUrWH
automatiquement.
Au besoin, appuyez sur la touche
EFFACER/ARRÊT pour effacer ce qui
HVWDI¿FKp5HWLUH]OHVDOLPHQWVGXIRXU
N'oubliez pas que, même si le four s'arrête
automatiquement, les aliments laissés
dans le four continuent à cuire.
Le four se met en MARCHE. Le décompte
de la durée de cuisson et le changement
de température (à partir de 100 °F [38 °C])
VDI¿FKHQWDORUV/DWHPSpUDWXUHDI¿FKpH
commence à changer une fois qu'elle atteint
100 °F [38 °C].) Lorsque le four atteint la
température désirée, 3 bips se font entendre.
Le four continue à fonctionner pendant la durée
programmée, puis s'arrête automatiquement
(sauf si la fonction de cuisson et maintien au
chaud a été programmée). Reportez-vous à la
section « Fonctions spéciales des commandes
de votre four ».
8QHIRLVOHIRXUDUUrWpOHELSGH¿QGH
programme se fait entendre.
Appuyez sur la touche DÉPART.
1
2
3
4
5
6
Programmez la durée de cuisson désirée à
l'aide des touches numériques. La durée de
cuisson minimale réglable est de 1 minute.
La température et la durée de cuisson que
YRXVDYH]HQWUpHVVDI¿FKHQW
REMARQUE : Si votre recette nécessite un
préchauffage, il vous faut ajouter cette durée
supplémentaire à la durée de cuisson.
Appuyez sur la touche CUISSON
CONVECTION.
Réglez la température désirée à l'aide des
touches numériques.
Appuyez sur la touche TEMPS DE CUISSON.
Service à la clientèle Dépannage Entretien et nettoyage Utilisation Sécurité

55
Le four se met en marche à l'heure qui a été
SURJUDPPpHFXLWSHQGDQWODGXUpHVSpFL¿pH
puis s'éteint automatiquement.
$VVXUH]YRXVTXHOKRUORJHGXIRXUDI¿FKH
l'heure exacte.
Utilisation des fonctions minutées de cuisson à convection
Programmer un départ différé et un arrêt automatique
Au besoin, appuyez sur la touche
EFFACER/ARRÊT pour effacer ce qui
HVWDI¿FKp5HWLUH]OHVDOLPHQWVGXIRXU
N'oubliez pas que, même si le four s'arrête
automatiquement, les aliments laissés
dans le four continuent à cuire.
REMARQUE : Si vous voulez véri¿er les heures
programmées, appuyez sur la touche TEMPS
DE DÉPART pour véri¿er l'heure de mise
en marche que vous avez programmée ou
appuyez sur la touche TEMPS DE CUISSON
pour véri¿er la durée de cuisson.
Lorsque le four se met en MARCHE à l'heure
que vous avez programmée, le décompte
de la durée de cuisson et le changement
de température (à partir de 100 °F [38 °C])
s'af¿chent. (La température af¿chée commence
à changer une fois qu'elle atteint 100 °F [38 °C].)
Lorsque le four atteint la température désirée,
3 bips se font entendre.
Le four continue à fonctionner pendant la durée
programmée, puis s'arrête automatiquement
(sauf si la fonction de cuisson et maintien au
chaud a été programmée). Reportez-vous à la
section « Fonctions spéciales des commandes
de votre four ».
Une fois le four arrêté, le bip de ¿n de
programme se fait entendre.
Programmez la durée de cuisson désirée à
l'aide des touches numériques. La durée de
cuisson minimale réglable est de 1 minute.
La température et la durée de cuisson que
YRXVDYH]HQWUpHVVDI¿FKHQW
Appuyez sur la touche TEMPS DE DÉPART.
À l'aide des touches numériques, entrez
l'heure à laquelle vous voulez que le four se
mette en marche et commence la cuisson.
Appuyez sur la touche DÉPART.
REMARQUE : Si votre recette nécessite un
préchauffage, il vous faut ajouter cette durée
supplémentaire à la durée de cuisson.
Appuyez sur la touche CUISSON
CONVECTION.
Réglez la température désirée à l'aide des
touches numériques.
Appuyez sur la touche TEMPS DE CUISSON.
1
2
3
4
5
6
8
7
Service à la clientèleDépannageEntretien et nettoyageUtilisationSécurité
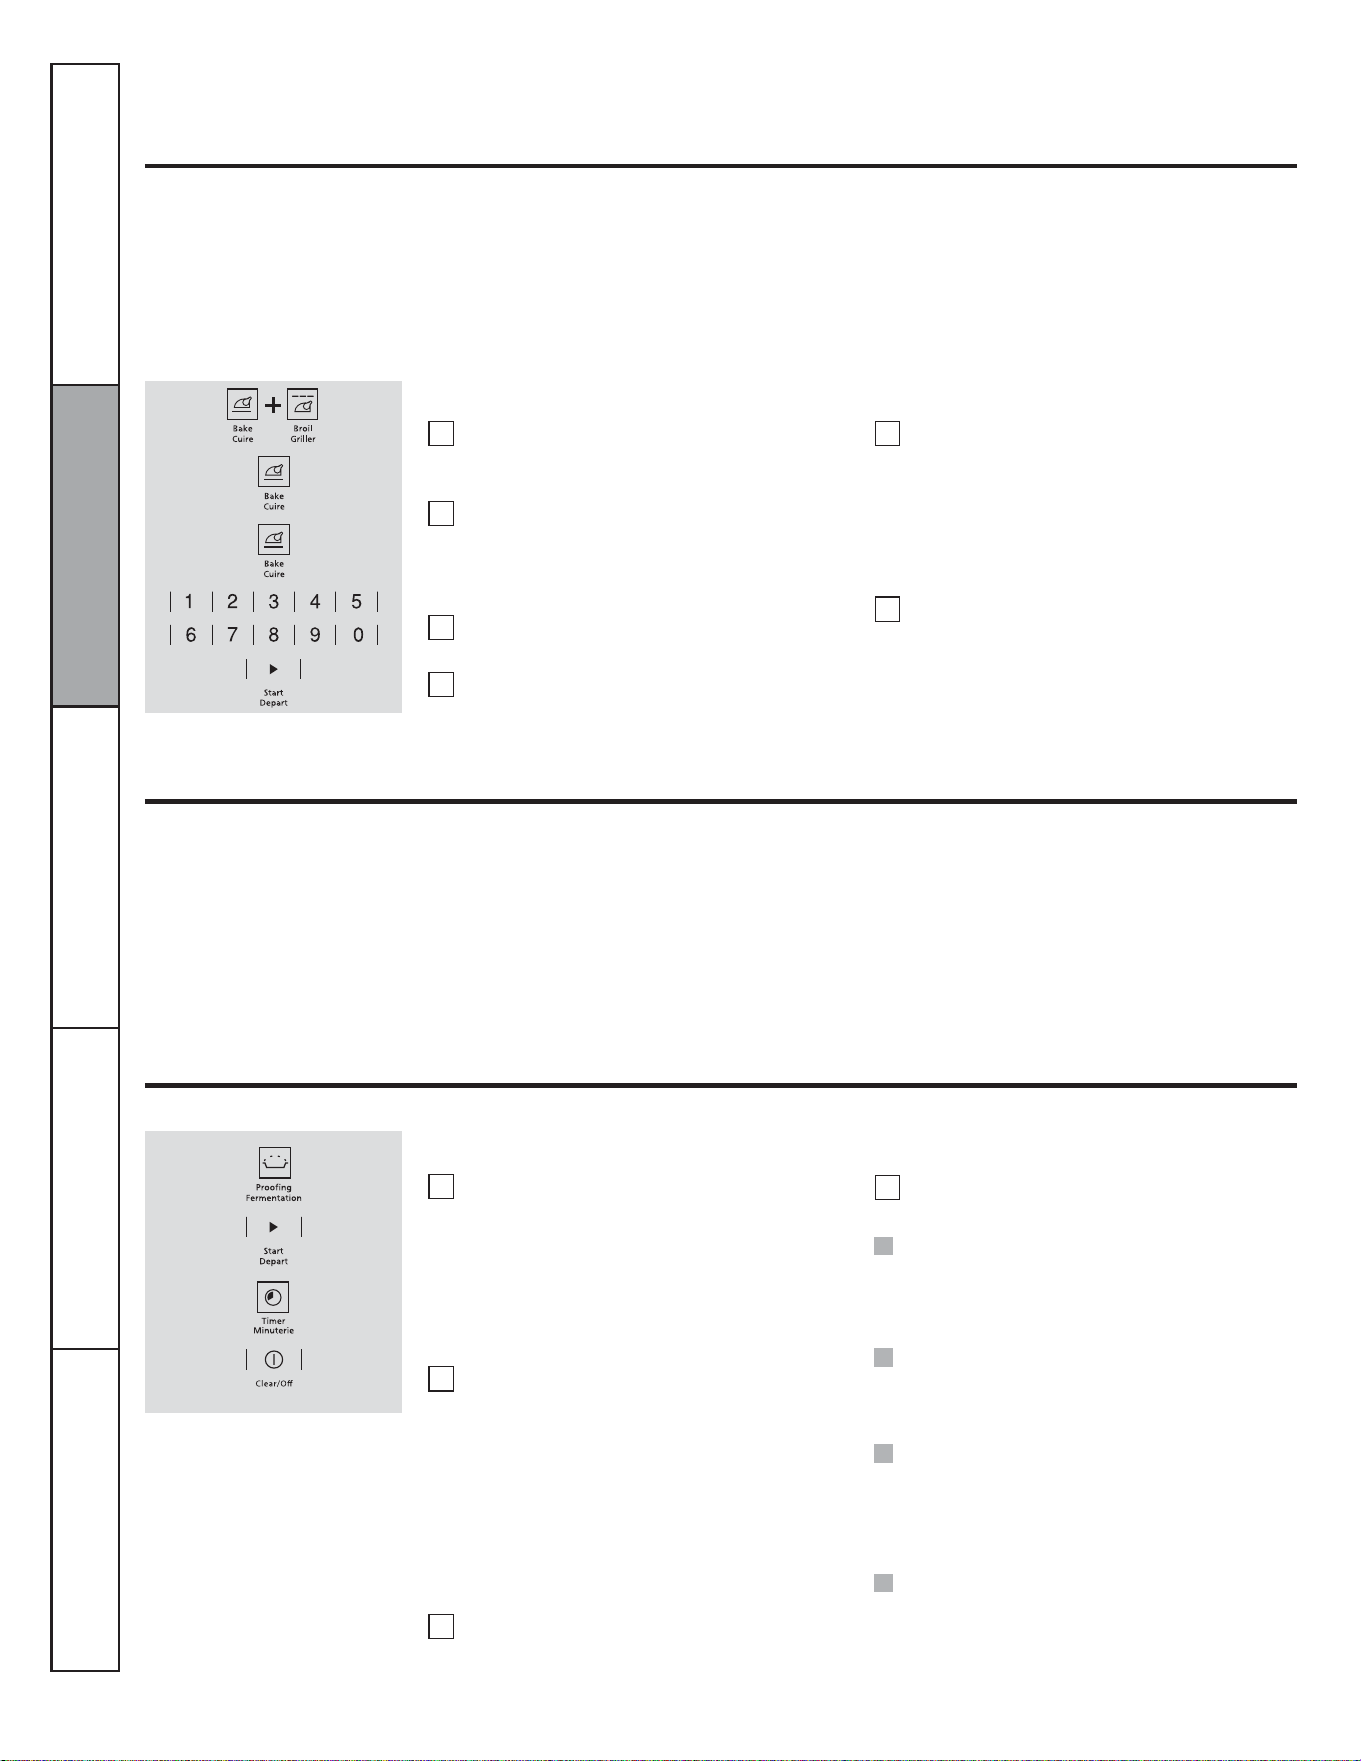
56
Réglage du thermostat du four – Faites-le vous-même!
Il se peut que vous trouviez que votre nouveau four cuit différemment que votre ancien four. Utilisez votre nouveau four pendant
quelques semaines pour vous y familiariser. Si vous pensez toujours que votre four chauffe trop ou ne chauffe pas assez, vous
pouvez régler le thermostat vous-même.
N'utilisez pas de thermomètre, comme ceux que l'on trouve dans les épiceries, pour véri¿er le réglage de température de votre four.
Ce type de thermomètre peut varier de 20 à 40 °F (6 à 11 °C).
REMARQUE : Ce réglage n'affecte que les températures de cuisson et de rôtissage traditionnels. Il ne s'applique pas aux
températures de gril, de convection ou d'autonettoyage. Ce réglage reste en mémoire après une coupure de courant.
Pour régler le thermostat
Appuyez simultanément sur les touches CUIRE
et GRILLER pendant 3 secondes jusqu'à ce
que « SF »DUUrWDXWRPDWLTXHVDI¿FKH
Appuyez sur la touche CUIRE.
Appuyez de nouveau sur CUIRE pour
augmenter ou diminuer la température du
four.
Appuyez sur les touches numériques pour
régler un décalage.
Appuyez sur la touche CUIRE pour passer
des valeurs de décalage positives aux
valeurs négatives, et vice versa.
La température du four peut être
augmentée (+) ou diminuée (-) de 35 °F
(19 °C) maximum. Appuyez sur les touches
numériques dans le sens de lecture du
QRPEUHjHQWUHU([HPSOHSRXUPRGL¿HUOD
température de 15 °F (12 °C), appuyez sur
1 et 5.
Lorsque vous avez effectué le réglage,
appuyez sur la touche DÉPART pour que
OKHXUHVRLWjQRXYHDXDI¿FKpH8WLOLVH]YRWUH
four comme vous le faites normalement.
1
2
3
4
5
6
/HW\SHGHPDUJDULQHTXHYRXVXWLOLVH]LQÀXHVXUOHVUpVXOWDWVGHFXLVVRQ
La plupart des recettes sont élaborées avec des produits riches en matières grasses, comme le beurre ou la margarine (80 % de
matières grasses). Si vous diminuez l'apport de matières grasses, la recette peut donner des résultats différents.
Une recette de gâteau, tarte, pâtisserie, biscuit ou bonbon peut être manquée si vous utilisez une tartinade à faible teneur en
matières grasses. Moins la tartinade contient de matières grasses, plus la différence est Àagrante.
Les normes fédérales stipulent que les matières grasses doivent constituer au moins 80 % du poids de tout produit appelé « margarine ».
Les tartinades à faible teneur en matières grasses, quant à elles, contiennent moins de matières grasses et plus d'eau. La forte teneur en
eau de ces tartinades affecte la texture et le goût des préparations cuites. Pour obtenir de meilleurs résultats avec vos recettes favorites,
utilisez de la margarine, du beurre ou des tartinades en plaquette qui contiennent au moins 70 % d'huile végétale.
Appuyez sur la touche FERMENTATION,
puis sur la touche DÉPART.
« PrF »IHUPHQWDWLRQVDI¿FKH
La lampe du four s'allume et reste allumée
pendant la fermentation.
La fonction de fermentation procure
automatiquement une température
idéale au processus de fermentation et ne
nécessite donc aucun ajustement.
Réglez la MINUTERIE sur le temps de
fermentation minimum.
Utilisation de la fonction de fermentation
La fonction de fermentation maintient un environnement chaud favorable à la levée des produits à la levure.
1
2
3
4
Pour programmer la fermentation
Placez la pâte dans un plat couvert à l'intérieur
du four sur une grille en position B ou C.
REMARQUE : Pour de meilleurs résultats, couvrez
la pâte avec un chiffon ou une pellicule plastique
huilée (il vous faudra peut-être rabattre le ¿lm
plastique sous le récipient pour que le ventilateur
du four ne le fasse pas s'envoler).
OD¿QGHODIHUPHQWDWLRQDSSX\H]VXUOD
touche ARRÊT.
REMARQUE :
N'utilisez pas le mode de fermentation
pour réchauffer des aliments ou les garder
chauds. La température de fermentation du
four n'est pas assez élevée pour maintenir
des aliments à des températures sûres.
La fonction de fermentation ne peut être
utilisée lorsque la température du four
dépasse 150 °F (65 °C). « HOT » (chaud)
s'af¿che à l'écran.
Pour éviter une baisse de la température
du four et une augmentation de la durée de
fermentation, n'ouvrez pas inutilement la
porte du four.
Véri¿ez les préparations pour pain à l'avance
pour éviter une fermentation excessive.
Service à la clientèle Dépannage Entretien et nettoyage Utilisation Sécurité
REMARQUE :
Utilisez le mode de fermentation
comme fonction optionnelle pour
décongeler des aliments disposés
dans un plat allant au four. Véri¿ez
régulièrement la décongélation
des aliments et retirez-les du
four dès qu'ils sont décongelés.
Le cycle de décongélation est un
processus lent requis pour obtenir
les meilleurs résultats.
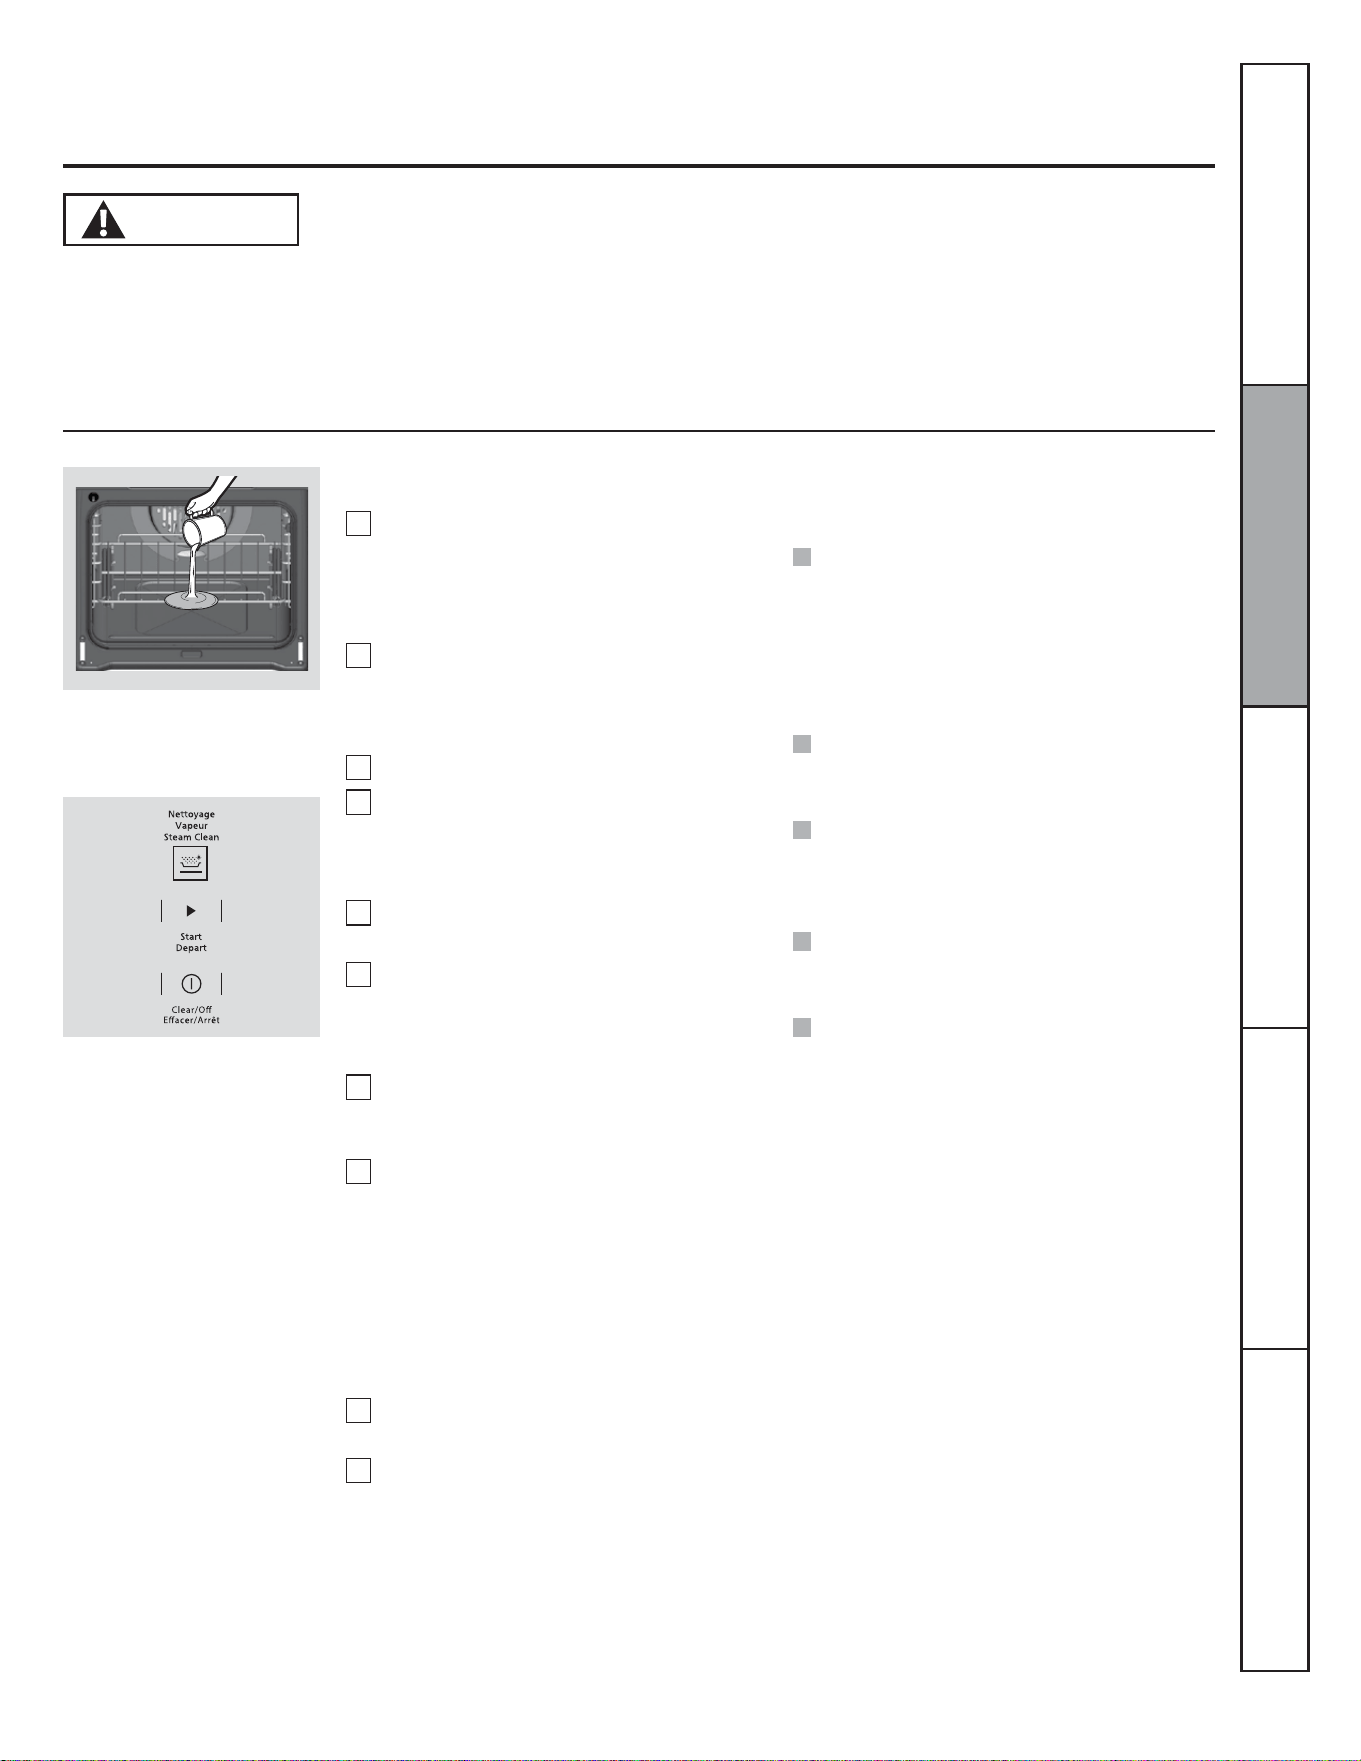
57
Lors du cycle de nettoyage à la
vapeur, le fond du four devient
assez chaud pour causer des
EUOXUHV9HXLOOH]DWWHQGUHOD¿QGXF\FOHPLQXWHVDYDQW
d'essuyer les parois intérieures du four. Sinon, vous pourriez
vous brûler.
Le cycle de nettoyage à la vapeur facilite le nettoyage des
parois intérieures du four en porcelaine.
Utilisation du nettoyage à la vapeur
ATTENTION
Le four encastré doit être à la température de la pièce avant
d'entamer le cycle de nettoyage à la vapeur. Si le four est
trop chaud, « hot »FKDXGVDI¿FKHHWOHF\FOHQHGpEXWHSDV
tant que le four n'a pas refroidi.
Le cycle de nettoyage à la vapeur offre un rendement optimal
lorsque les débordements ou les saletés sont récents. Les
DOLPHQWV©FXLWVªVRQWSOXVGLI¿FLOHVjpOLPLQHU
Commencer un cycle de nettoyage à la vapeur :
Enlevez les grilles et les accessoires qui
sont à l'intérieur du four. Ne placez aucun
ustensile de cuisson ou tout autre article
dans le four pendant le cycle de nettoyage
à la vapeur.
Versez 7 oz (200 mL) d'eau à température
de la pièce dans la zone creuse située
au fond du four. N'ajoutez aucun produit
nettoyant ou chimique dans l'eau.
Fermez la porte.
Activez la fonction de nettoyage à
la vapeur en appuyant sur la touche
NETTOYAGE VAPEUR, puis appuyez sur
DÉPART.
Le compte à rebours du cycle de
PLQXWHVVDI¿FKHUDHWGpEXWHUD
Une fois le cycle de nettoyage à la vapeur
complété, la commande du four émettra
un bip. Appuyez sur la touche ARRÊT et
ouvrez la porte.
Le fond du four et l'excédent d'eau seront
HQFRUHWUqVFKDXGVjOD¿QGXF\FOH&HOD
est normal.
Enlevez la saleté à l'aide d'une brosse
à récurage ou d'un tampon à récurer
en nylon. Vous pouvez utiliser une laine
d'acier savonneuse uniquement sur les
parois intérieures du four en porcelaine.
L'utilisation d'un tampon abrasif sur la
porte en verre l'égratignera. Évitez de
mettre de l'eau sale ou propre sur le joint
de la porte.
Enlevez tout excédent d'eau à l'aide d'un
linge sec ou d'une éponge.
Laissez la porte ouverte pour faire sécher le
four à l'air.
1
2
3
4
5
6
7
REMARQUE : Une température minimale
de 120 °F (49 °C) est permise pour activer le
nettoyage à la vapeur.
8
9
10
Versez 7 oz (200 mL) d'eau dans le
fond du four.
REMARQUES IMPORTANTES :
REMARQUE : De l'eau restera et elle sera tiède
(cela est normal). Il faudra l'essuyer à la ¿n du
cycle.
Si vous entamez le cycle de nettoyage à la
vapeur sans avoir ajouté de l'eau, appuyez
sur la touche ARRÊT pour mettre ¿n au
cycle. Attendez que le four ait refroidi à la
température de la pièce avant de verser
de l'eau dans la zone creuse et de lancer à
nouveau le cycle de nettoyage à la vapeur.
Vous pouvez mettre ¿n au cycle de
nettoyage à tout moment en appuyant sur
la touche ARRÊT.
Si un dépôt de minéraux se forme au fond
du four après le nettoyage, utilisez un linge
ou une éponge imbibée de vinaigre pour
l'éliminer.
Il se peut que de l'eau coule au bas de la
porte du four. Le cas échéant, essuyez-la à
la ¿n du cycle.
Il se peut que le joint du four soit humide à la
¿n du cycle de nettoyage à la vapeur. Cela
est normal. Ne nettoyez pas le joint.
Service à la clientèleDépannageEntretien et nettoyageUtilisationSécurité
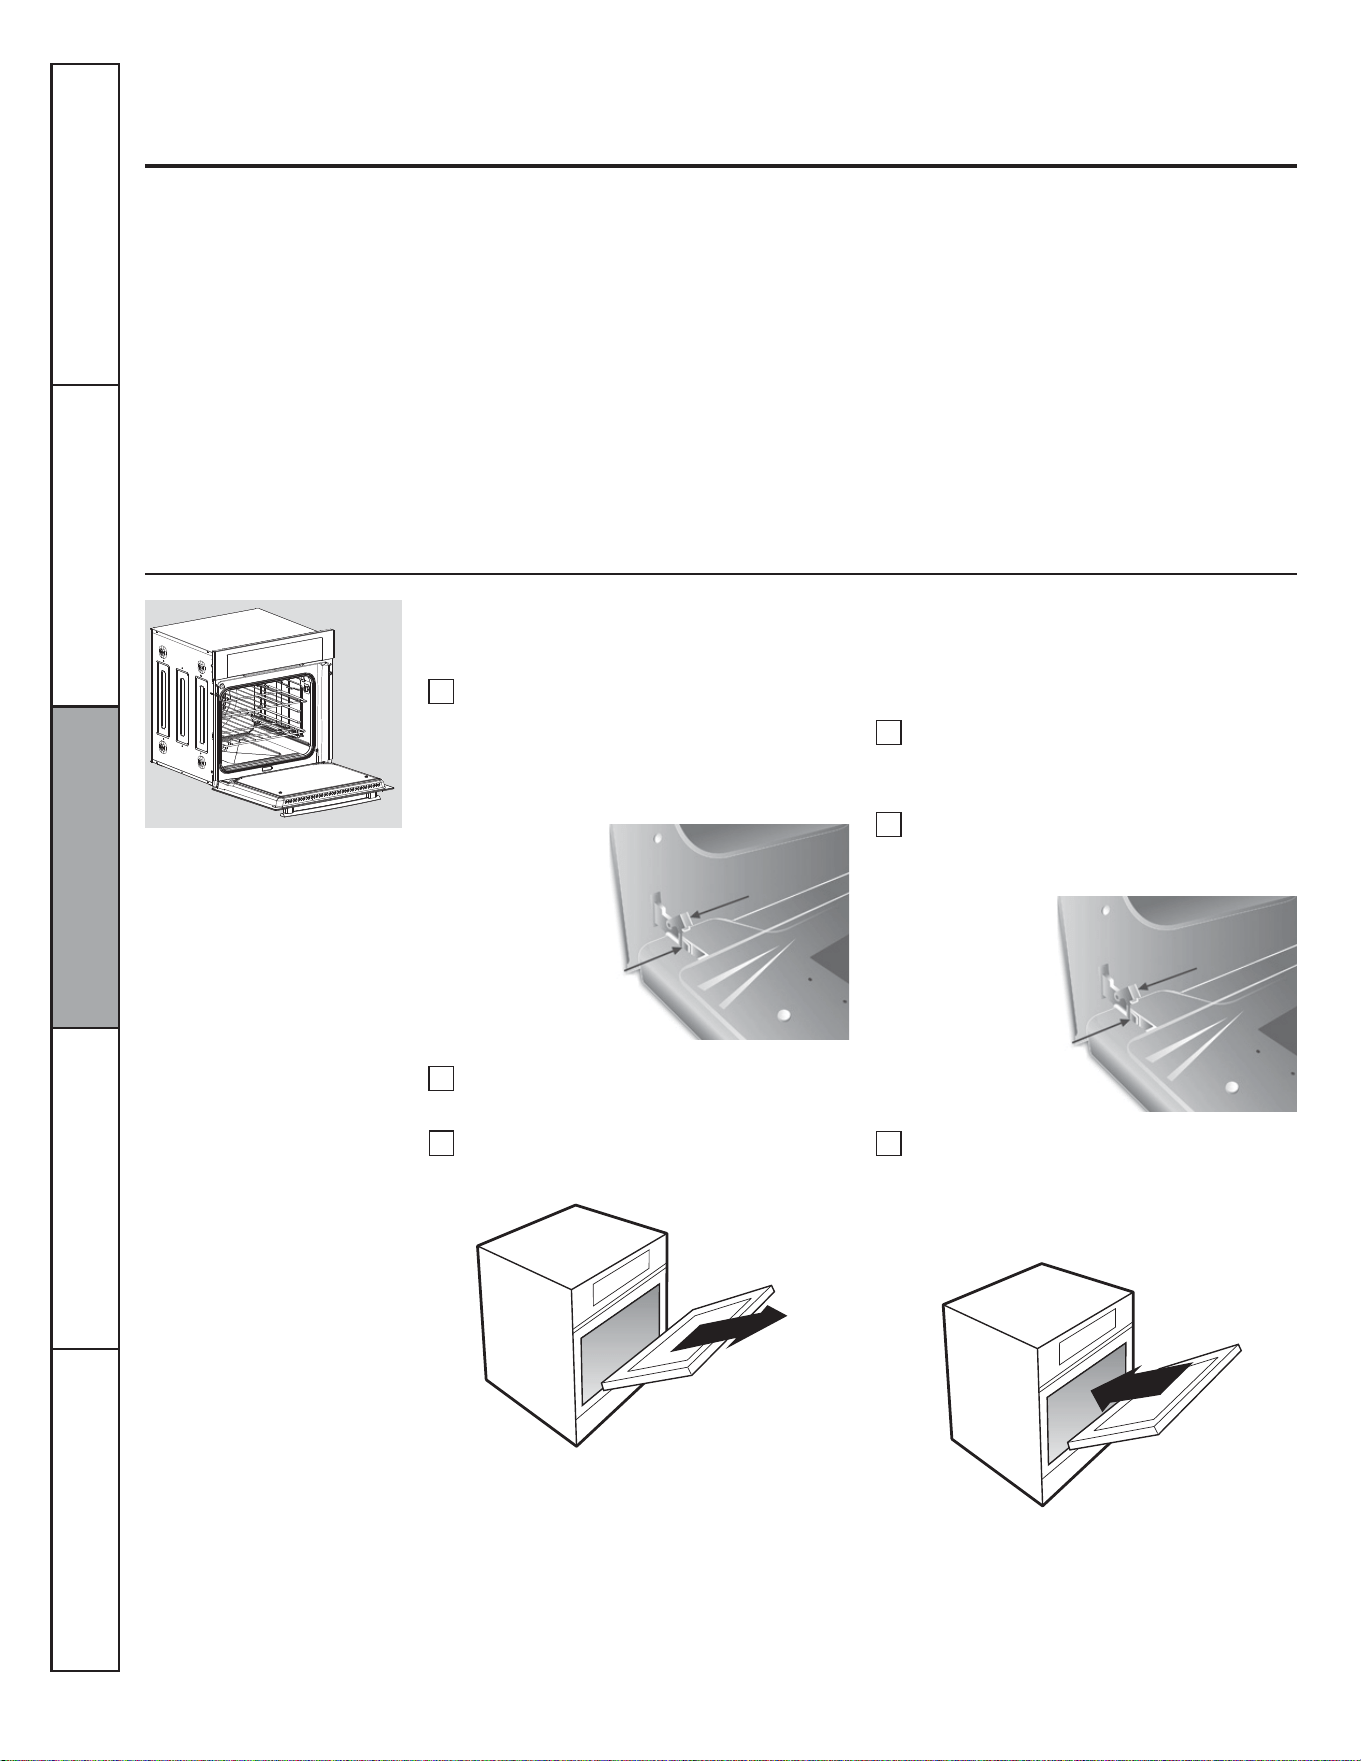
58
Soulevez le dispositif de sécurité sur
chacune des charnières.
Entretien et nettoyage du four
Assurez-vous que l'alimentation électrique du four est coupée avant de le nettoyer.
Pour retirer la pellicule protectrice et le ruban adhésif d'emballage
Attrapez soigneusement un des coins de
la pellicule protectrice avec vos doigts et
décollez-la doucement de la surface de
l'appareil. N'utilisez aucun objet coupant pour
enlever la pellicule. Retirez toute la pellicule
avant d'utiliser l'appareil pour la première fois.
3RXUYRXVDVVXUHUTXHOH¿QLGHODSSDUHLOQH
soit pas endommagé lorsque vous enlevez la
colle laissée par le ruban adhésif d'emballage,
la méthode la plus sûre consiste à utiliser un
détergent à vaisselle. Appliquez le produit choisi
avec un chiffon doux et laissez-le pénétrer.
REMARQUE : Vous devez enlever la colle
résiduelle de toutes les pièces. Vous ne pourrez
plus l'enlever après cuisson.
Porte de four amovible
La porte du four est amovible pour permettre un accès facile à la cavité du four. Veuillez suivre ces
instructions :
Fermez complètement la porte, jusqu'à
ce que vous entendiez un léger cliquetis.
Cela indique que la porte a été montée
correctement.
1
2
3
1
2
3
Ouvrez pleinement la porte et remettez le
support de sécurité en position d'arrêt sur
les deux charnières.
Placez la porte à un angle d'environ 45° et
insérez le compartiment à charnière situé
sur le cadre avant.
Montage de la porte du four
Ouvrez complètement la porte et, avec
l'aide de ce manuel, repérez les pièces
suivantes :
%UDVGHFKDUQLqUH
6XSSRUWGHVpFXULWp
Mettez la porte à un angle d'environ 45° et
retirez-la.
Service à la clientèle Dépannage Entretien et nettoyage Utilisation Sécurité
Bras de charnière
Dispositif
de sécurité
Bras de charnière
Dispositif
de sécurité

59
Retrait et installation des grilles du four
Grilles de four
/DJULOOHSODWHWUDGLWLRQQHOOH¿JHWODJULOOH
SOHLQHORQJXHXU¿JSHXYHQWrWUHLQVWDOOpHVj
tout niveau de la cavité.
AVERTISSEMENT!
Placez toujours la lèchefrite sur la grille du four.
Repérez la lèchefrite
Le four est doté d'une lèchefrite à utiliser en
cas de rôtissage d'aliments.
Installation des grilles pleine longueur
1
2
)DLWHVFRXOLVVHUODJULOOH9pUL¿H]TXHOD
butée se situe dans l'encoche des glissières.
/HVUDLOVGRLYHQWrWUH¿[HV
Insérez les guides des glissières sur les
bords des supports de grille. (Fig. 4)
Service à la clientèleDépannageEntretien et nettoyageUtilisationSécurité
Grilles et accessoires de four
Installation de la grille traditionnelle
1
2
Insérez les guides en forme de C dans les
supports latéraux de manière à ce que les
guides soient à l'arrière de la grille plate.
5HSRUWH]YRXVjOD¿JXUH
Tirez la grille plate dans la cavité du four.
Fig. 3
Guide en
forme
de C
Fig. 4
Guides des glissières
Butée dans l'encoche des glissières
Fig. 2
Fig. 1
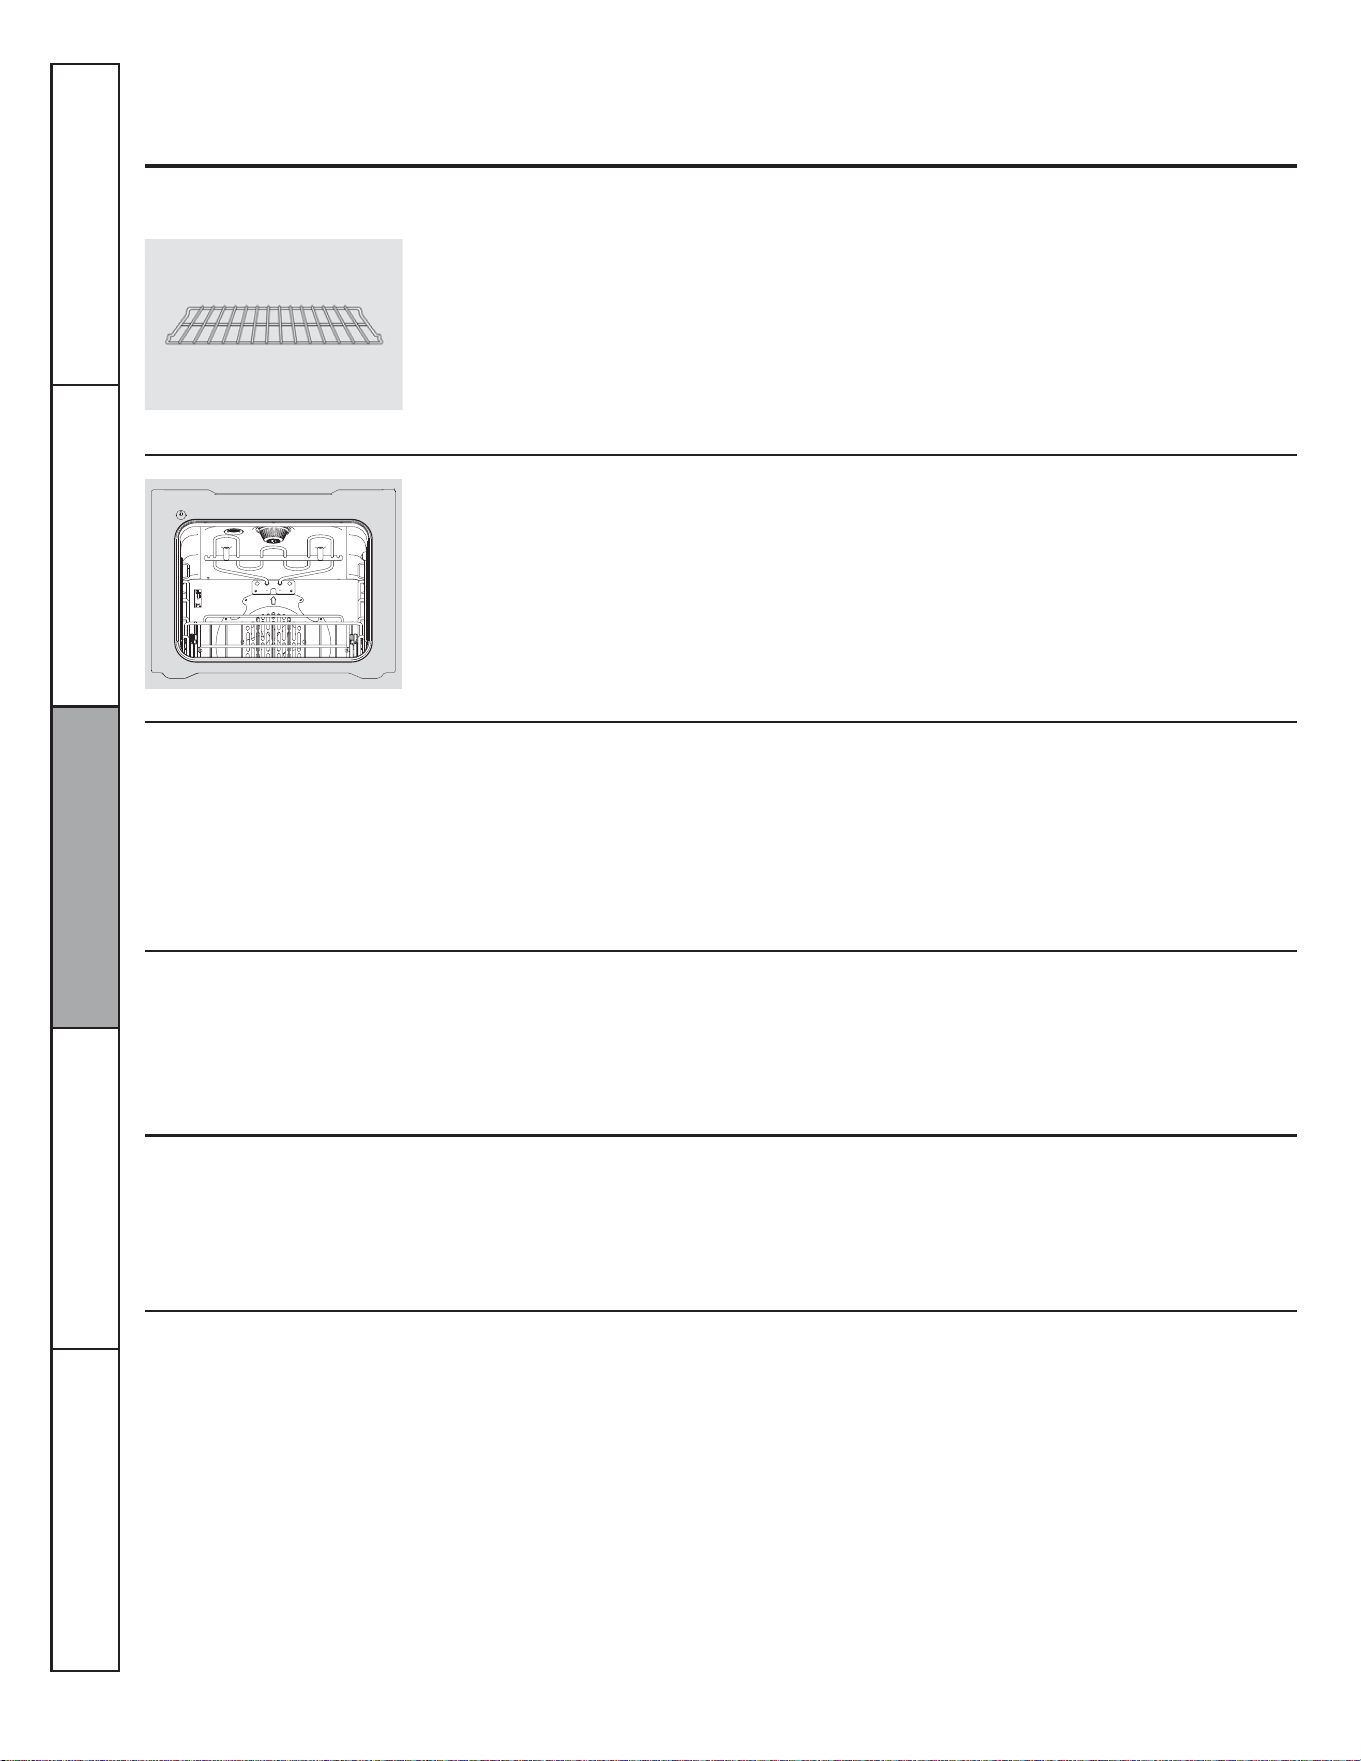
60
Entretien et nettoyage du four
Assurez-vous que l'alimentation électrique est coupée et que toutes les surfaces sont froides dans la cavité avant de nettoyer l'une
ou l'autre des parties du four.
Grilles de four
Surfaces en acier inoxydable
Surfaces en verre
Surfaces peintes
Tableau de commande
Éléments chauffants du four
N'utilisez pas de tampon en laine d'acier, il
rayerait la surface.
Pour nettoyer la surface en acier inoxydable,
utilisez de l'eau tiède savonneuse ou un produit
de nettoyage ou à polir pour acier inoxydable.
Essuyez toujours la surface dans le sens du
grain. Suivez les instructions du nettoyant pour
surface en acier inoxydable.
Pour nettoyer le verre extérieur, utilisez un
nettoyant pour verre. Rincez et polissez à l'aide
d'un chiffon sec.
Ne laissez pas de l'eau ou du nettoyant
couler à l'intérieur de la porte du four lors du
nettoyage.
Nettoyez avec de l'eau et du savon ou avec
une solution d'eau et de vinaigre.
N'utilisez pas de nettoyant commercial pour
four, de poudre nettoyante, de laine d'acier ou
d'abrasif fort sur les surfaces peintes.
Il est judicieux de nettoyer le tableau de
commande après chaque utilisation. Nettoyez-
le avec du savon doux et de l'eau ou un
mélange de vinaigre et d'eau, rincez-le à l'eau
claire et séchez-le avec un chiffon doux pour
le polir.
N'utilisez pas de nettoyant abrasif, de
nettoyant liquide fort, de tampon à récurer
en plastique ou de nettoyant pour four sur le
tableau de commande. Ils endommageraient
son revêtement. Une solution à parts égales de
vinaigre et d'eau chaude fonctionne bien.
Ne nettoyez pas l'élément de gril. Toutes les
saletés qui pourraient s'y trouver brûleront
lorsque les éléments chaufferont.
Nettoyez les grilles du four à l'aide d'un
nettoyant abrasif ou d'une laine d'acier. Après
le nettoyage, rincez les grilles à l'eau claire et
séchez-les avec un chiffon propre.
Pour que les grilles glissent plus facilement,
appliquez une petite quantité d'huile végétale
ou de cuisson sur un essuie-tout et essuyez les
rebords des grilles.
Service à la clientèle Dépannage Entretien et nettoyage Utilisation Sécurité
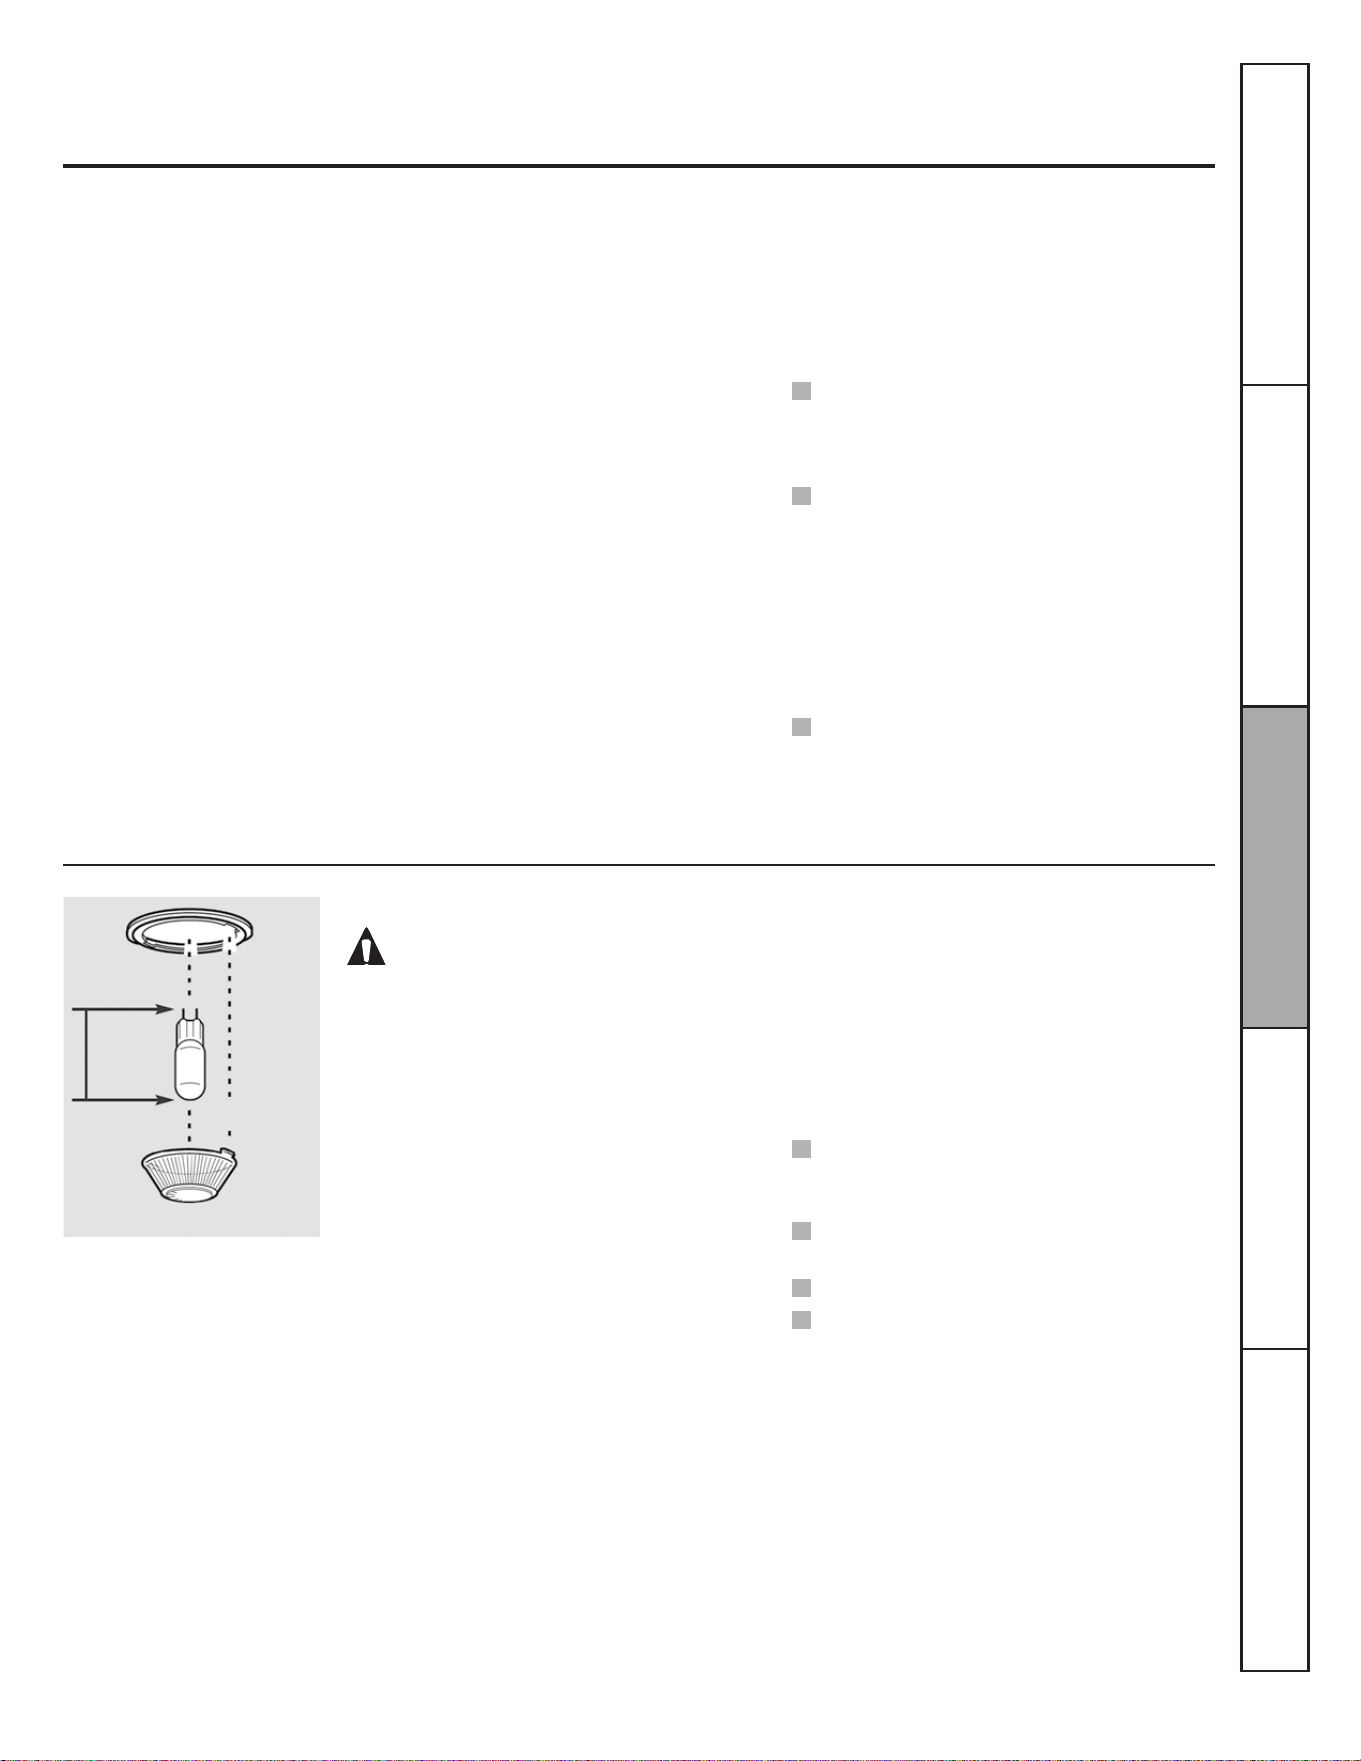
61
Intérieur de four sans autonettoyage
Ne vaporisez pas le nettoyant pour four sur les
commandes et interrupteurs électriques, cela
pourrait entraîner un court-circuit et provoquer
la formation d’étincelles ou un incendie.
Ne laissez pas le nettoyant former un ¿lm
sur le détecteur de température, le four
pourrait fonctionner incorrectement. (Le
capteur se situe dans la partie supérieure du
four.) Essuyez soigneusement le détecteur
avec un chiffon après chaque nettoyage, en
prenant soin de ne pas déplacer le détecteur
(changer son emplacement pourrait affecter
la façon de cuire du four).
Ne vaporisez pas de nettoyants pour four
sur la porte, les poignées ou toute autre
surface extérieure du four, les armoires
ou les surfaces peintes. Le nettoyant peut
abîmer ces surfaces.
(QOHQWUHWHQDQWFRUUHFWHPHQWOH¿QLHQpPDLO
YLWUL¿pjO·LQWpULHXUGXIRXUKDXWEDVF{WpV
arrière du four et intérieur de la porte) gardera
son aspect neuf pendant de nombreuses années.
Laissez le four refroidir avant de le nettoyer.
Nous vous recommandons de porter des gants
en caoutchouc lorsque vous nettoyez le four.
(QJpQpUDOGHO·HDXHWGXVDYRQVXI¿VHQW/HV
éclaboussures ou projections importantes
peuvent nécessiter un lavage avec un nettoyant
légèrement abrasif. Vous pouvez également
utiliser un tampon à récurer imbibé de savon.
Ne laissez pas des projections d'aliments acides
ou contenant un fort taux de sucre (comme
les tomates, la choucroute, les jus de fruit
ou les garnitures de tarte) sur la surface. Ces
projections pourraient créer des taches opaques
même après le nettoyage.
L’utilisation d'ammoniaque domestique peut
faciliter le nettoyage. Versez 1/2 t. (120 mL)
d'ammoniaque dans un verre ou un contenant
en porcelaine peu profond et placez celui-ci
dans le four froid pendant une nuit entière.
Les vapeurs d’ammoniaque aideront à
désincruster les aliments et les graisses brûlés.
Vous pouvez vous servir d’un nettoyant pour
four, si nécessaire. Suivez les instructions sur
l’emballage.
REMARQUE : Le couvre-ampoule (certains
modèles) ne doit être enlevé que lorsqu'il est
froid. Le port de gants en latex permet de saisir
plus facilement le couvre-ampoule.
Avant de remplacer l'ampoule du four, coupez
l'alimentation de la cuisinière au niveau
du tableau de distribution (disjoncteurs
ou fusibles). Laissez l'ampoule refroidir
entièrement avant de la retirer. Pour votre
sécurité, ne touchez pas l'ampoule chaude
avec un chiffon humide. Le cas échéant,
l'ampoule pourrait se briser.
Retrait :
Tournez le couvre-ampoule en verre d'un quart
de tour vers la gauche, jusqu'à ce que les
languettes sortent des rainures du réceptacle.
Retirez l'ampoule.
Ampoule du four
ATTENTION :
Avant de remplacer l'ampoule, coupez
l'alimentation du four au niveau du tableau de
distribution (disjoncteurs ou fusibles).
Assurez-vous de laisser le couvre-ampoule et
l'ampoule refroidir complètement.
REMARQUE :
Une ampoule pour appareil électroménager
de 50 Zatts est plus petite qu'une ampoule
de 50 Zatts standard.
Installez le couvre-ampoule et vissez-le dans
le sens horaire.
Rétablissez l'alimentation électrique du four.
Pour un meilleur éclairage de l'intérieur
du four, nettoyez le couvre-ampoule
fréquemment à l'aide d'un chiffon humide.
Cela doit être fait lorsque le four est
complètement froid.
Remise en place :
Vissez une ampoule pour appareil
électroménager de 50 watts. Placez les
languettes du couvre-ampoule en verre dans
les rainures du réceptacle. Tournez le couvre-
ampoule d'un quart de tour vers la droite.
Service à la clientèleDépannageEntretien et nettoyageUtilisationSécurité
Receptacle
Ampoule
Languette
Couvre-ampoule en verre
3-1/2 po
(8,9 cm)
(longueur
maximale)
62
Avant de contacter le service de dépannage...
Dépannage
Économisez du temps et de l’argent! Reportez-vous au
tableau suivant pour éviter tout appel de service qui ne
serait pas nécessaire.
Un signal sonore est émis
après la programmation
de la durée de cuisson ou
l'heure de départ
Vous avez oublié d'entrer la température de
cuisson ou la durée de nettoyage.
$SSX\H]VXUODWRXFKHCUIRE et entrez la température désirée.
Les aliments ne cuisent
ou ne rôtissent pas
correctement
Les commandes du four sont mal réglées. &RQVXOWH]ODVHFWLRQVXUOXWLOLVDWLRQGXIRXU
La grille est sur la mauvaise position ou n'est
pas de niveau.
&RQVXOWH]ODVHFWLRQVXUOXWLOLVDWLRQGXIRXU
Ustensile de cuisson inapproprié ou de
dimensions inadéquates.
&RQVXOWH]ODVHFWLRQVXUOXWLOLVDWLRQGXIRXU
Le thermostat du four doit être réglé. &RQVXOWH]ODVHFWLRQ©5pJODJHGXWKHUPRVWDWGXIRXU²)DLWHVOH
vous-même! ».
Les aliments ne grillent pas
correctement
La porte n'est pas ouverte à la position d'arrêt
du gril conformément aux recommandations.
&RQVXOWH]ODVHFWLRQVXUOXWLOLVDWLRQGXIRXU
Les commandes du four sont mal réglées. $VVXUH]YRXVGDSSX\HUVXUODWRXFKHGRILLER.
Les aliments sont cuits dans un ustensile
chaud.
3RXUGHPHLOOHXUVUpVXOWDWVXWLOLVH]XQXVWHQVLOHFRQoXSRXUOHJULO
9pUL¿H]VLOGHPHXUHIURLG
Un ustensile de cuisson inapproprié pour le
gril est utilisé.
3RXUGHPHLOOHXUVUpVXOWDWVXWLOLVH]XQXVWHQVLOHFRQoXSRXUOHJULO
Dans certaines régions, la tension électrique
peut être basse.
3UpFKDXIIH]OpOpPHQWGHJULOSHQGDQWPLQXWHV
Problème Causes possibles Solutions
L'horloge et la minuterie
ne fonctionnent pas
Un fusible de votre domicile peut être grillé ou
le disjoncteur s’est déclenché.
5HPSODFH]OHIXVLEOHRXUpHQFOHQFKH]OHGLVMRQFWHXU
Les commandes du four sont mal réglées. &RQVXOWH]ODVHFWLRQ©8WLOLVDWLRQGHOKRUORJHHWGHODPLQXWHULHª
La lampe du four ne
fonctionne pas
L'ampoule est mal serrée, ou elle est grillée. 5HVVHUUH]RXUHPSODFH]ODPSRXOH
La touche du tableau de commande contrôlant
l'ampoule est défectueuse.
&RQWDFWH]XQVHUYLFHGHGpSDQQDJH
Service à la clientèle Dépannage Entretien et nettoyage Utilisation Sécurité
Odeur de brûlé ou d'huile
provenant de l'évent
Cela est normal pour un nouveau four et
disparaît avec le temps.
3RXUDFFpOpUHUFHSURFHVVXVUpJOH]OHPRGHGHFXLVVRQVXU
3 heures minimum.
63
Problème Causes possibles Solutions
Température du four trop
chaude ou trop froide
Le thermostat du four doit être réglé. &RQVXOWH]ODVHFWLRQ©5pJODJHGXWKHUPRVWDWGXIRXU²)DLWHVOH
vous-même! ».
Le four ne fonctionne pas Un fusible de votre domicile peut être grillé ou
le disjoncteur s’est déclenché.
5HPSODFH]OHIXVLEOHRXUpHQFOHQFKH]OHGLVMRQFWHXU
Les commandes du four sont mal réglées. &RQVXOWH]ODVHFWLRQVXUOXWLOLVDWLRQGXIRXU
Bruits de crépitement ou
de craquement
Ces sons proviennent du métal qui chauffe et
refroidit pendant les fonctions de cuisson et
d'autonettoyage.
&HFLHVWQRUPDO
Fumée excessive pendant
l'autonettoyage
Il y a trop de saleté. $SSX\H]VXUODWRXFKHEFFACER/ARRÊT. Ouvrez les fenêtres pour
évacuer la fumée de la pièce. Attendez que le voyant « LOCKED »
(verrouillé) s'éteigne. Nettoyez l'excès de saleté et reprogrammez
l'autonettoyage.
La porte du four ne s'ouvre
pas après l'autonettoyage
Four trop chaud. /DLVVH]ODWHPSpUDWXUHGXIRXUUHGHVFHQGUHHQGHVVRXVGHOD
température de verrouillage.
« LOCKED » (verrouillé)
VDI¿FKHORUVTXHYRXV
voulez utiliser le four
La porte du four est verrouillée, car la
température à l'intérieur du four n'est pas
redescendue en dessous de la température de
verrouillage.
$SSX\H]VXUODWRXFKHEFFACER/ARRÊT. Laissez le four refroidir.
Service à la clientèleDépannageEntretien et nettoyageUtilisationSécurité

64
Problème Causes possibles Solutions
La lettre « F– » et un
chiffre ou une lettre
FOLJQRWHQWVXUODI¿FKHXU
Il s'agit d'un code d'erreur de fonction. $SSX\H]VXUODWRXFKHEFFACER/ARRÊT. Laissez le four refroidir
pendant une heure. Rallumez le four.
Si le code de fonction réapparaît. &RXSH]ODOLPHQWDWLRQGXIRXUSHQGDQWDXPRLQVVHFRQGHVSXLV
rétablissez-la. Si le code d'erreur de fonction réapparaît, contactez
un service de réparation.
/DI¿FKHXUHVWYLGH Un fusible de votre domicile peut être grillé ou
le disjoncteur s’est déclenché.
5HPSODFH]OHIXVLEOHRXUpHQFOHQFKH]OHGLVMRQFWHXU
L'horloge est éteinte. 5HSRUWH]YRXVjODVHFWLRQFonctions spéciales des commandes de
votre four.
/DI¿FKDJHFOLJQRWH Coupure de courant. 5HPHWWH]OKRUORJHjOKHXUH
Impossible de faire
VDI¿FKHU©6)ªDUUrW
automatique)
Vous n'avez pas appuyé correctement sur les
touches de commande du four.
9RXVGHYH]DSSX\HUVLPXOWDQpPHQWVXUOHVWRXFKHVCUIRE et
GRILLER pendant 3 secondes.
Coupure de courant,
l'heure clignote
Coupure de courant ou surtension. 5HPHWWH]OKRUORJHjOKHXUH6LOHIRXUpWDLWHQFRXUVGXWLOLVDWLRQ
vous devez le reprogrammer en appuyant sur la touche EFFACER/
ARRÊT, en remettant l'horloge à l'heure et en reprogrammant la
fonction de cuisson choisie.
Forte odeur Il est normal qu'une odeur se dégage de
l'isolant de l'intérieur du four pendant les
premières utilisations du four.
&HFLHVWWHPSRUDLUH
Bruit de ventilateur Un ventilateur de refroidissement peut
automatiquement se mettre en marche.
&HFLHVWQRUPDO/HYHQWLODWHXUGHUHIURLGLVVHPHQWVHPHWWUDHQ
marche pour refroidir les composants internes. Il peut fonctionner
jusqu'à 30 minutes après l'arrêt du four.
Service à la clientèle Dépannage Entretien et nettoyage Utilisation Sécurité
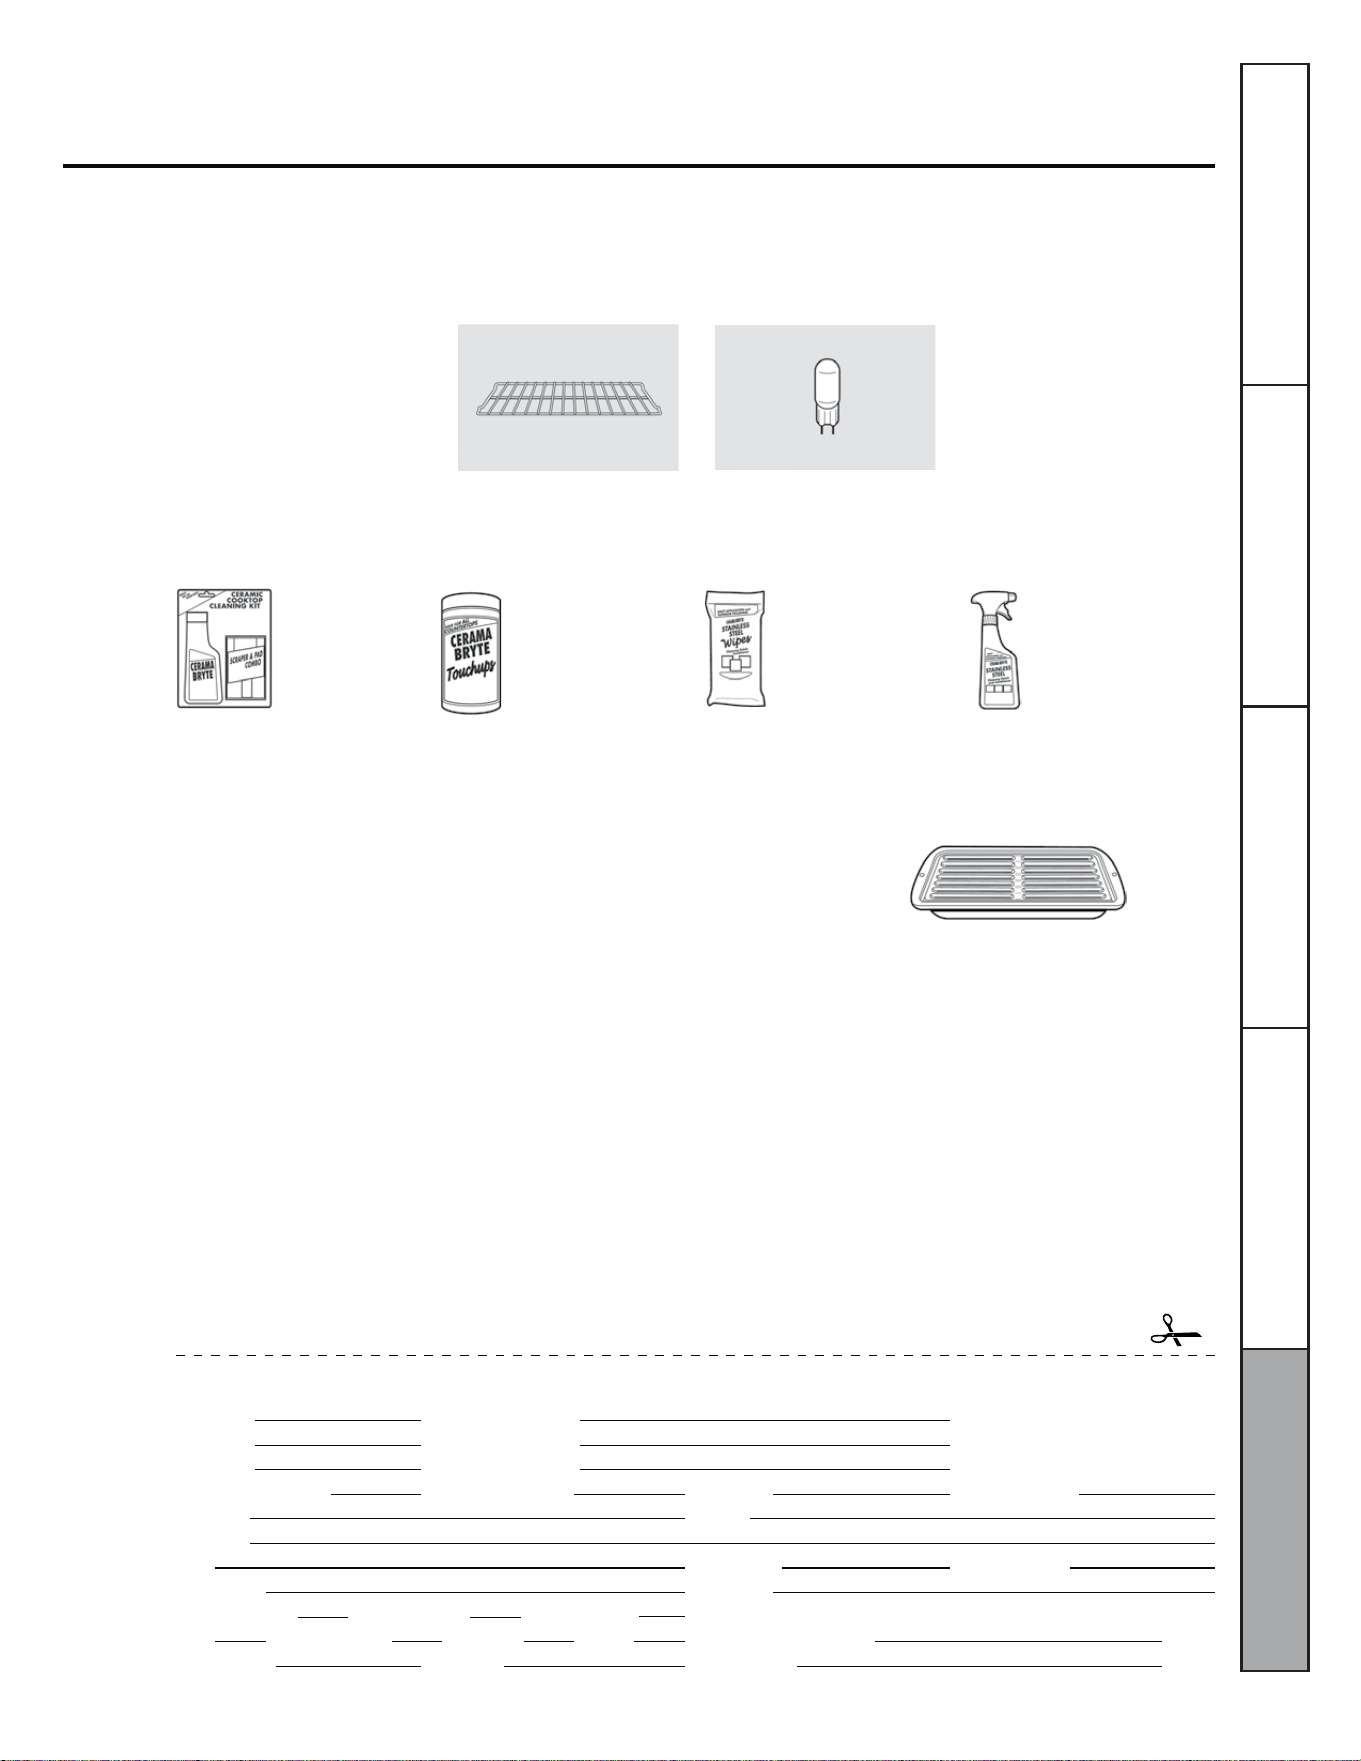
65
Accessoires
Vous manquez de quelque chose?
Vous pouvez trouver ces accessoires et bien d'autres encore sur GEAppliances.com (É.-U.) ou
www.electromenagersge.ca (Canada), ou en appelant le 1-800-626-2002 (É.-U.) ou le 1-800-661-1616 (Canada)
(pendant les heures normales de bureau). Ayez le numéro de modèle de votre appareil à portée de main.
Grilles de four
(VVD\H]FHVDXWUHVUHPDUTXDEOHVSURGXLWVSRXUTXHYRWUHFXLVLQHJDUGH¿qUHDOOXUH
Ampoules
Ensemble de nettoyage
pour surface de cuisson
en vitrocéramique :
Comprend un nettoyant,
un grattoir et un
tampon.
Nettoyant pour
appareil en acier
inoxydable
Lingettes pour polir
les appareils en
acier inoxydable
Lingettes pour nettoyer
les surfaces de cuisson en
vitrocéramique
WXIOX117GCS WXIOX305 WX10X100001 PMI0X311
Obtenez le meilleur de votre lèchefrite! (À ne pas utiliser avec les modèles à compartiment gril.)
Utilisez votre lèchefrite et sa grille pour faire griller des galettes de bœuf haché,
des fruits de mer, des steaks, des légumes, du bacon, des côtelettes et bien plus
encore! La casserole du dessous récupère l'excès de graisse et d'huile.
3LqFHGRULJLQH*(
)DFLOHjQHWWR\HU
*DUDQWLHGXQDQ
Offre à durée limitée! Envoi gratuit!
Lorsque vous commandez votre lèchefrite dans les 30 jours suivant l'achat de votre produit de cuisson.
Nº de pièce (É.-U.)
Nº de pièce (Canada)
Dimensions
Prix
†
Plus toute taxe de vente applicable (TVP/TVH et TPS)
Petite
WB48X10055
222D2097G001
L 8-3/4 po x H 1-1/4 po x P 13-1/2 po
(32,4 cm x 3,2 cm x 41,9 cm)
10,50 $ US
†
Pour passer une commande, téléphonez au 1-800-626-2002 (É.-U.), au 1-800-661-1616 (Canada) ou envoyez ce formulaire par la poste :
Aux É.-U. : GE Parts, P.O. Box 221027, Memphis, TN 38122-1027. Au Canada : GE Parts, 1 Factory Lane, Moncton, N.-B. E1C 9M3
Formulaire de commande de lèchefrite
Quantité
Numéro de modèle
Prénom
Adresse
Ville
Téléphone
Carte de crédit
Visa
Date d'exp. :
Numéro de pièce
Numéro de série Marque
Nom
Province
Courriel
Date d'achat
Code postal
Chèque Mandat
Master Card Discover AmEx Nº de carte de crédit
Signature :Année
Service à la clientèleDépannageEntretien etnettoyageUtilisationSécurité

66
Service à la clientèle Dépannage Entretien et nettoyage Utilisation Sécurité
Remarques

67
Remarques
Service à la clientèleDépannageEntretien et nettoyageUtilisationSécurité

68
Remarques
Service à la clientèle Dépannage Entretien et nettoyage Utilisation Sécurité

69
OWNERSHIP REGISTRATION
P.O. BOX 1780
MISSISSAUGA, ONTARIO
L4Y 4G1
(FOR CANADIAN CONSUMERS ONLY -
POUR RÉSIDENTS CANADIENS SEULEMENT)
Please place in envelope and mail to:
Veuillez mettre dans une enveloppe et envoyez à :
70
CUT ALONG THIS LINE AND RETURN CARD – THANKS
DÉCOUPEZ ICI ET ENVOYEZ LA FICHE – MERCI
For Canadian
Customers
Pour les
consommateurs
canadiens
OWNERSHIP REGISTRATION CERTIFICATE – FICHE D’INSCRIPTION DU PROPRIÉTAIRE
Please register your product to enable us to contact you in
the remote event a safety notice is issued for this product
and to allow for efficient communication under the terms of
our warranty, should the need arise.
REGISTER ON-LINE:
www.geappliances.ca
ENREGISTREMENT SUR INTERNET À :
www.electromenagersge.ca
MAIL TO:
P.O. BOX 1780, MISSISSAUGA
POSTEZ À :
ONTARIO, L4Y 4G1
MR. / M.
MRS. / MME
MISS/MLLE
MS.
FIRST NAME / PRÉNOM
LAST NAME / NOM
STREET NO / N
O
RUE STREET NAME / RUE
APT.NO/APP./RR#
CITY / VILLE
PROVINCE
AREA CODE/
IND. RÉG.
TELEPHONE/TÉLÉPHONE E-MAIL/COURRIEL
DID YOU PURCHASE A SERVICE CONTRACT FOR THIS APPLIANCE?
AVEZ-VOUS ACHETÉ UN CONTRAT DE SERVICE POUR CET APPAREIL ?
YES/OUI
NO/NON
IF YES/SI OUI
: EXPIRATION
Y/A M
D/J
NAME OF SELLING DEALER / NOM DU MARCHAND
INSTALLATION DATE / DATE D’INSTALLATION
Y/A M D/J
CORRESPONDENCE
ENGLISH
CORRESPONDANCE
FRANÇAIS
I do not wish to receive any promotional offers regarding this product.
Je ne désire pas recevoir d’offres promotionnelles concernant ce produit
.
MODEL / MODÈLE
SERIAL / SÉRIE
Veuillez enregistrer votre produit afin de nous permettre de
communiquer avec vous si jamais un avis de sécurité concernant
ce produit était émis et de communiquer facilement avec vous en
vertu de votre garantie, si le besoin s’en fait sentir.
POSTAL CODE/CODE POSTAL

71
Cette garantie est offerte à l’acheteur initial, ainsi qu’à tout propriétaire subséquent d’un produit acheté en vue d’une utilisation
domestique au Canada.
Le service à domicile couvert par la garantie sera fourni dans les régions où il est disponible et où Mabe estime raisonnable de
l'offrir.
Dans certaines provinces, il est interdit d’exclure ou de limiter les dommages indirects ou accessoires. Il est alors possible que les
limitations ou exclusions ci-dessus ne s’appliquent pas dans votre cas.
La présente garantie vous confère des droits juridiques spéci¿ques. Vous pouvez béné¿cier d'autres droits, qui varient d'une
province à l'autre. Pour connaître les droits dont vous béné¿ciez dans votre province, contactez le bureau des Relations avec les
consommateurs de votre région ou de votre province.
Garantie du four électrique encastré GE
Toutes les réparations sous garantie sont effectuées par nos Centres de
réparation ou par nos réparateurs agréés Customer Care®. Pour
faire la demande d'une réparation, 24 heures sur 24, téléphonez au
1-800-361-3400. Veuillez avoir les numéros de série et de modèle de votre
appareil à portée de main lorsque vous appelez pour obtenir un service.
Agrafez votre facture ici.
Une preuve de la date d’achat
d’origine est requise pour
obtenir des services sous
garantie.
Pendant la période de...
Un an
À compter de la date
d’achat d’origine
GE remplacera...
Toute pièce du four qui se révèle défectueuse en raison d’un vice de matériau ou de fabrication.
Au cours de cette garantie limitée d’un an, Mabe fournira également, sans frais, toute la main-d’œuvre
pour la réparation ou le remplacement à domicile de la pièce défectueuse.
Pendant la période de...
Toute visite à votre domicile pour vous expliquer le
fonctionnement de l’appareil.
Une installation, une livraison ou un entretien
inadéquats.
Toute défectuosité du produit lorsqu’il a été utilisé de
façon abusive ou inadéquate, ou employé à toute autre
¿QTXHFHOOHSRXUODTXHOOHLODpWpFRQoXRXXWLOLVpjGHV
¿QVFRPPHUFLDOHV
Le remplacement des fusibles ou le réenclenchement des
disjoncteurs de votre domicile.
Tout dommage au produit attribuable à un accident, un
incendie, une inondation ou une catastrophe naturelle.
Tout dommage accessoire ou indirect, causé par des
défaillances possibles de l'appareil.
Dommage causé après la livraison.
Tout produit auquel il n’est pas possible d'accéder pour
effectuer les réparations nécessaires.
EXCLUSION DES GARANTIES IMPLICITES : Votre seul et unique recours est de faire réparer le produit dans le cadre de
cette garantie limitée. Toute garantie implicite, incluant la garantie de qualité marchande ou d'adaptabilité du produit
à un usage particulier, est limitée à un an ou à la période la plus courte autorisée par la loi.
Garant : Mabe Canada Inc. Burlington, Ontario
Service à la clientèleDépannageEntretien et nettoyageUtilisationSécurité
72
Service à la clientèle
Si vous n’êtes pas satisfait du service après-vente de Mabe, communiquez avec nous sur notre site Web en
fournissant tous les détails et votre numéro de téléphone ou écrivez à :
Ce document est imprimé sur du papier recyclé.
Imprimé au Mexique
Demande de réparation
Le service de réparation expert n'est qu'à un pas de chez vous. Appelez le 1-800-361-3400, 24 heures sur 24,
7 jours sur 7.
Pièces et accessoires
Pour toute question concernant l'achat d'une pièce ou d'un accessoire pour votre appareil, appelez notre Centre
national des pièces au 1-800-661-1616.
Communiquer avec nous
ZZZ.electromenagersmoffat.ca
Mabe Canada, Inc.
1 Factory Lane, Moncton,
Nouveau-Brunswick
EIC 9M3
Garant : Mabe Canada Inc. Burlington, Ontario
Service à la clientèle Dépannage Entretien et nettoyage Utilisation Sécurité