Loading ...
Loading ...
Loading ...
6
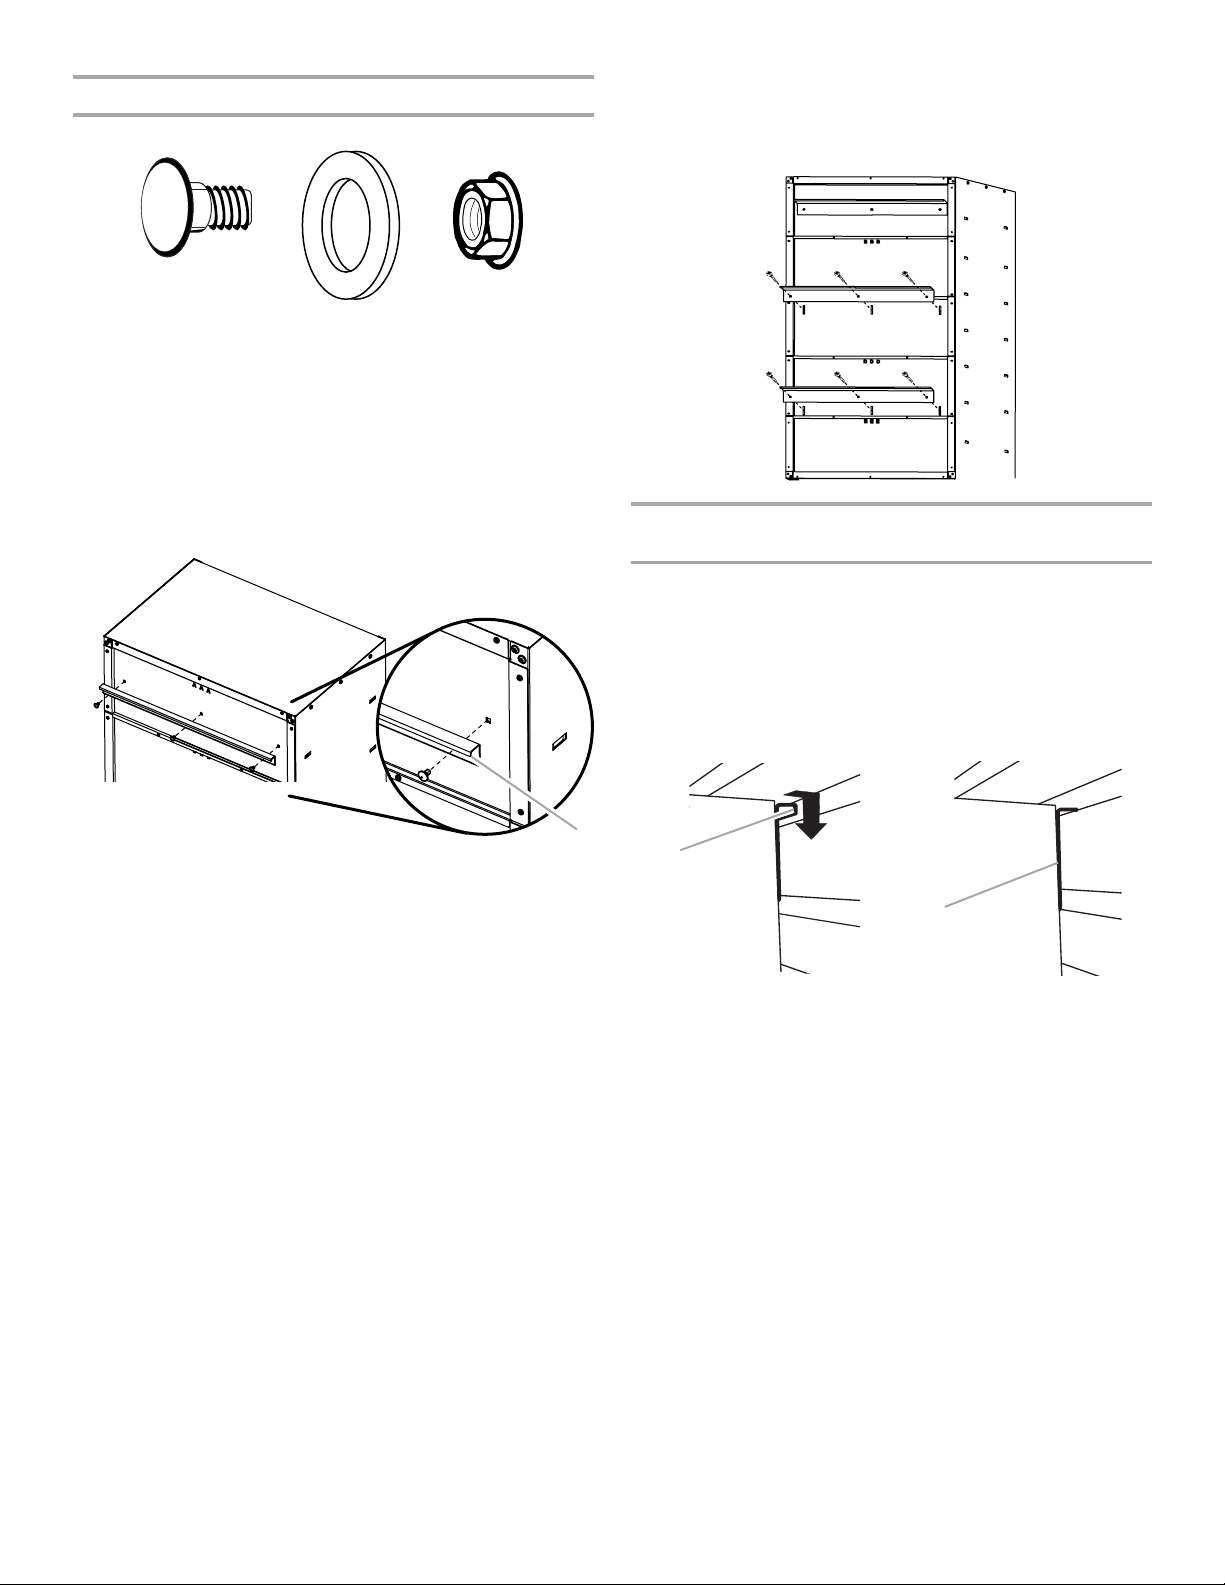
Attach Mounting Brackets
IMPORTANT: There are slots in back panels (AAA, CCC, and DDD) to
attach the mounting brackets (P8).
1. With the mounting bracket rim pointing down, align the three
bracket holes with the slots in back panel (AAA), as shown.
2. Working from the back, insert carriage bolts (F7) through the
bracket and into top back panel (AAA).
3. Working from the cabinet interior, fasten each bolt with a
washer (F8) and a flange nut (F2). Fully tighten the bolts.
4. Repeat steps 1 and 2 to attach the center and bottom mounting
brackets (P8) to the back of the cabinet.
NOTE: Hand tighten the nuts attaching the center and bottom
brackets. These brackets will need to be adjusted to mount the
cabinet on the wall.
Mount the Cabinet to GearWall
®
Panels or
GearTrack
®
Channel
NOTE: The three nuts on the center and bottom mounting brackets
must be loose enough to allow the brackets to move in the slots.
1. Close the cabinet doors.
2. Determine cabinet mounting location on GearWall
®
panels or
GearTrack
®
channel.
3. Using two or more people, engage the top bracket (P8) into the
slots by lifting up, pushing toward the wall and lowering the
bracket rims into the slots as shown.
4. Make sure the top bracket is fully engaged in the slots as shown.
5. Open the cabinet doors.
6. From inside the cabinet, grasp the bolts in the center bracket and
adjust the bracket until it aligns with the slot in the GearWall
®
panels or GearTrack
®
channels.
7. Push the cabinet toward the wall and lower the center mounting
bracket into the slots.
8. Make sure the center bracket (P8) is fully engaged in the slot as
shown.
9. Repeat for the bottom bracket (P8).
10. Using a ¹⁄₂" wrench, fully tighten the nuts attaching the center and
bottom brackets.
F7 F8 F2
F7 Carriage-head bolt (9)
F8 Washer (9)
F2
⁵⁄₁₆
" Flange nut (9)
A. Bracket rims pointing down
AAA
BBB
P1
P8
P8
A
P2
P1
AAA
A. Bracket rim B. Mounting bracket
fully engaged
A
B
Loading ...
Loading ...
Loading ...