Loading ...
Loading ...
Loading ...
8
Setting the time-setting options
The ó main oven has various time-setting options. You can use
the
0 button to access the menu and switch between the
individual options. All the time symbols are lit during the time
when you can make settings. The [ ] brackets show you which
time-setting function you have currently selected. A time-setting
option which has already been set can be changed directly
using the
@ or A button, when its time symbol is in brackets.
Timer
You can use the timer as a kitchen timer. It runs independently
of the oven. The timer has its own signal. In this way, you can
tell whether it is the timer or a cooking time which has elapsed.
1. Press the 0 button once.
The time symbols light up in the display and the brackets are
around
U.
2. Use the @ or A button to set the timer duration.
Default value for
@button = 10 minutes
Default value for
Abutton = 5 minutes
After a few seconds, the time setting is adopted. The timer
starts. The [
U] symbol lights up in the display and the timer
duration counts down. The other time symbols go out.
The timer duration has elapsed
A signal sounds. 00:00 is shown in the display. Use the
0
button to switch off the timer.
Changing the timer duration
Use the
@ or A button to change the timer duration. After a few
seconds, the change is adopted.
Cancelling the timer duration
Use the
A button to reset the timer duration to 00:00. The
change will be adopted after a few seconds. The timer is
switched off.
Checking the time settings
If several time-setting options are set, the relevant symbols are
illuminated on the display. The symbol for the time-setting
option that is visible in the display is shown in brackets.
To call up the
U timer, r cooking time, p end time or 0
clock, press the
0 button repeatedly until the brackets are
around the relevant symbol. The display shows the value for a
few seconds.
Cooking time
You can set a cooking time for your dish in the ó main oven.
When the cooking time has elapsed, the main oven switches
itself off automatically. This means that you do not have to
interrupt other work to switch off the main oven. The cooking
time cannot be accidentally exceeded.
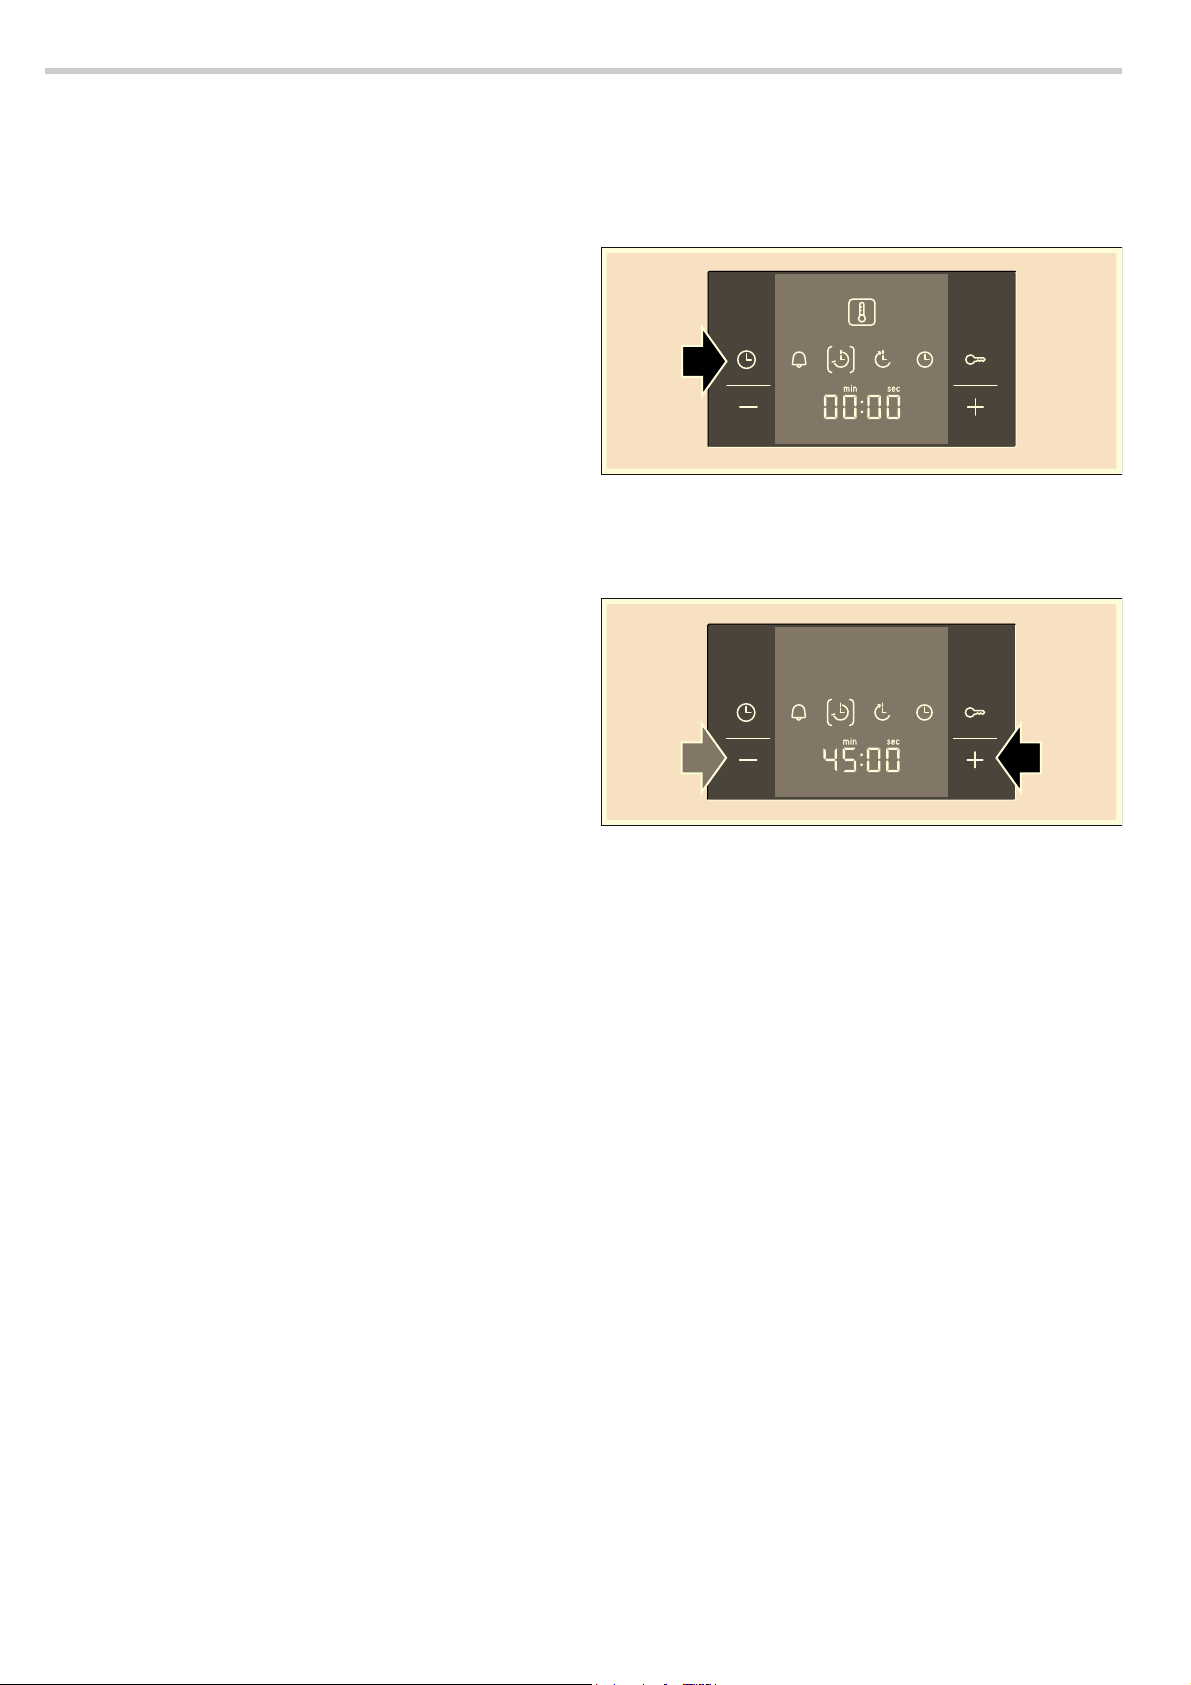
Example shown below: Cooking time of 45 minutes.
1. Turn the function and temperature selector to set the heating
type and temperature for the main oven.
2. Press the 0 button twice. The display shows 00:00. The time
symbols light up, the brackets are around
r.
3. Use the @ or A button to set the cooking time.
■ Default value for the @ button = 30 minutes
■ Default value for theA button = 10 minutes
The main oven will start up after a few seconds. The cooking
time counts down in the display and the [
r] symbol lights
up. The other time symbols go out.
The cooking time has elapsed
A signal sounds. The main oven stops heating. 00:00 is shown
in the display. Press the
0 button. The @ or A buttons can be
used to set a new cooking time. Or press the
0 button twice
and turn the function and temperature selector to the off
position. The main oven is switched off.
Changing the cooking time
Use the
@ or A button to change the cooking time. After a few
seconds, the change is adopted. If the timer has been set,
press the
0 button beforehand.
Cancelling the cooking time
Use the
A button to reset the cooking time to 00:00. After a few
seconds, the change is adopted. The cooking time is
cancelled. If the timer has been set, press the
0 button
beforehand.
Checking the time settings
If several time-setting options are set, the relevant symbols are
illuminated on the display. The symbol for the time-setting
option that is visible in the display is shown in brackets.
To call up the
U timer, r cooking time, p end time or 0
clock, press the
0 button repeatedly until the brackets are
around the relevant symbol. The display shows the value for a
few seconds.
Loading ...
Loading ...
Loading ...