Loading ...
Loading ...
Loading ...
5
INSTALLATION
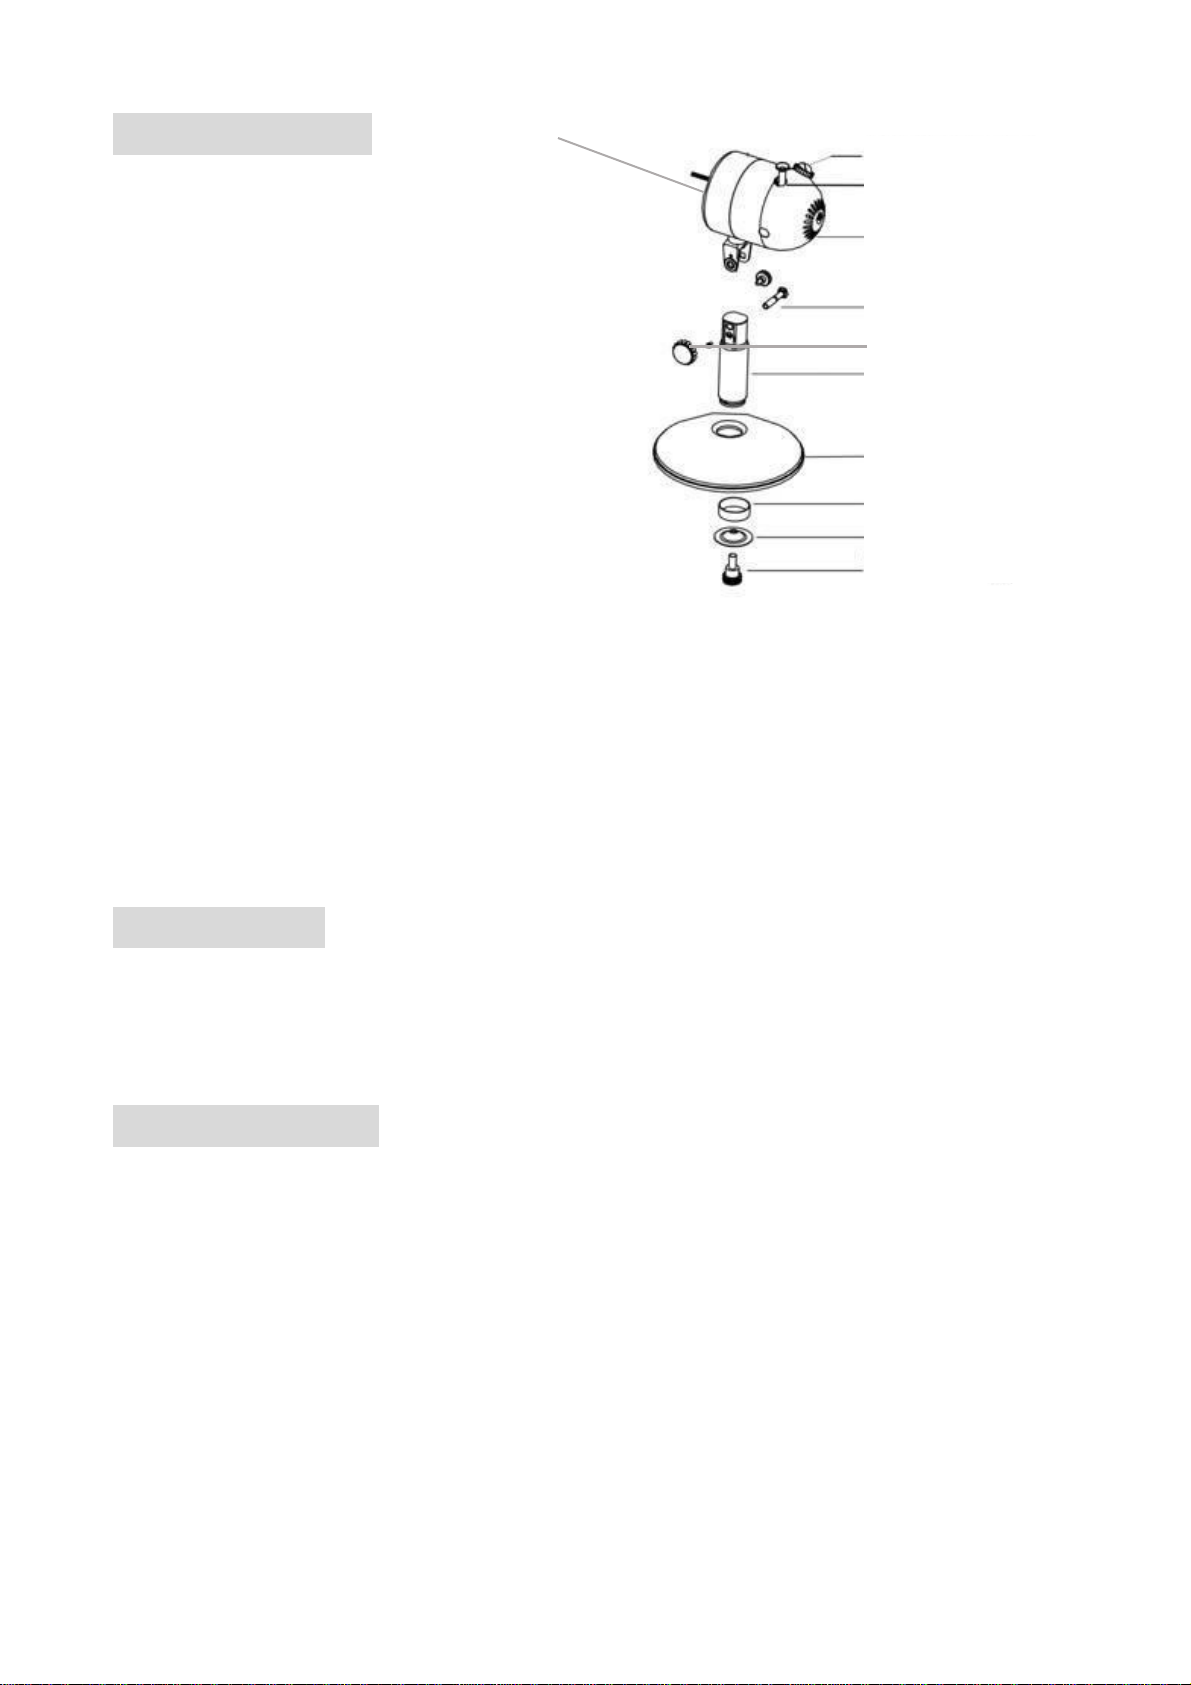
BODY ASSEMBLY
1. Unscrew the BASE LOCKING SCREW
from the PIPE and remove the RING.
2. Insert the PIPE through the hole in the
center of the BASE and twist into position.
3. Secure the PIPE to the BASE with the
FASTENER, RING and BASE LOCKING
SCREW, in that order (see picture)
4. Unscrew the LOCKING NUT from the FAN
HEAD.
5. Put the FAN HEAD into the PIPE, then use
the SCREW to tighten THE FAN HEAD
onto the PIPE.
FAN GRILL ASSEMBLY
1. Align the REAR GRILL on the FAN HEAD, then secure in place using the 4 x REAR
GRILL SCREWS.
2. Install the BLADE onto the MOTOR SHAFT by tightening the BLADE SCREW.
3. Centre the FRONT GRILL by aligning the central logo so that it is horizontal and parallel
to the floor. The FRONT and REAR GRILLS should be fastened completely by snapping
the 5 x GRILL CLIPS into place.
4. Tighten the GRILL LOCKING SCREW at the bottom of the REAR GRILL.
OPERATION
1. Twist the SWITCH CONTROL to select the desired speed.
2. Push down the OSCILLATION KNOB to start oscillation. Pull it up to stop oscillation.
3. Loosen the LOCKING NUT slightly to adjust the tilt angle of the fan head, then re-tighten.
MAINTENANCE
ATTENTION: Please shut off the unit and unplug from the mains before
cleaning or performing any maintenance.
CLEANING THE SURFACE
Clean the grills with a duster or a soft wet cloth.
Do not use chemical solvents (such as benzene, alcohol or gasoline) as they may cause
irreversible damage. Make sure no water enters the control panel or fan motor
Do not run the unit until completely dry.
Place the fan in its original box or cover the fan to protect it from dust.
Store it in a cool dry place.
Oscillation Knob
Motor
Screw
Pipe
Base
Fastener
Ring
Base Locking Screw
Switch Control
Locking Nut
Fan Head
Loading ...
Loading ...