Loading ...
Loading ...
Loading ...
14
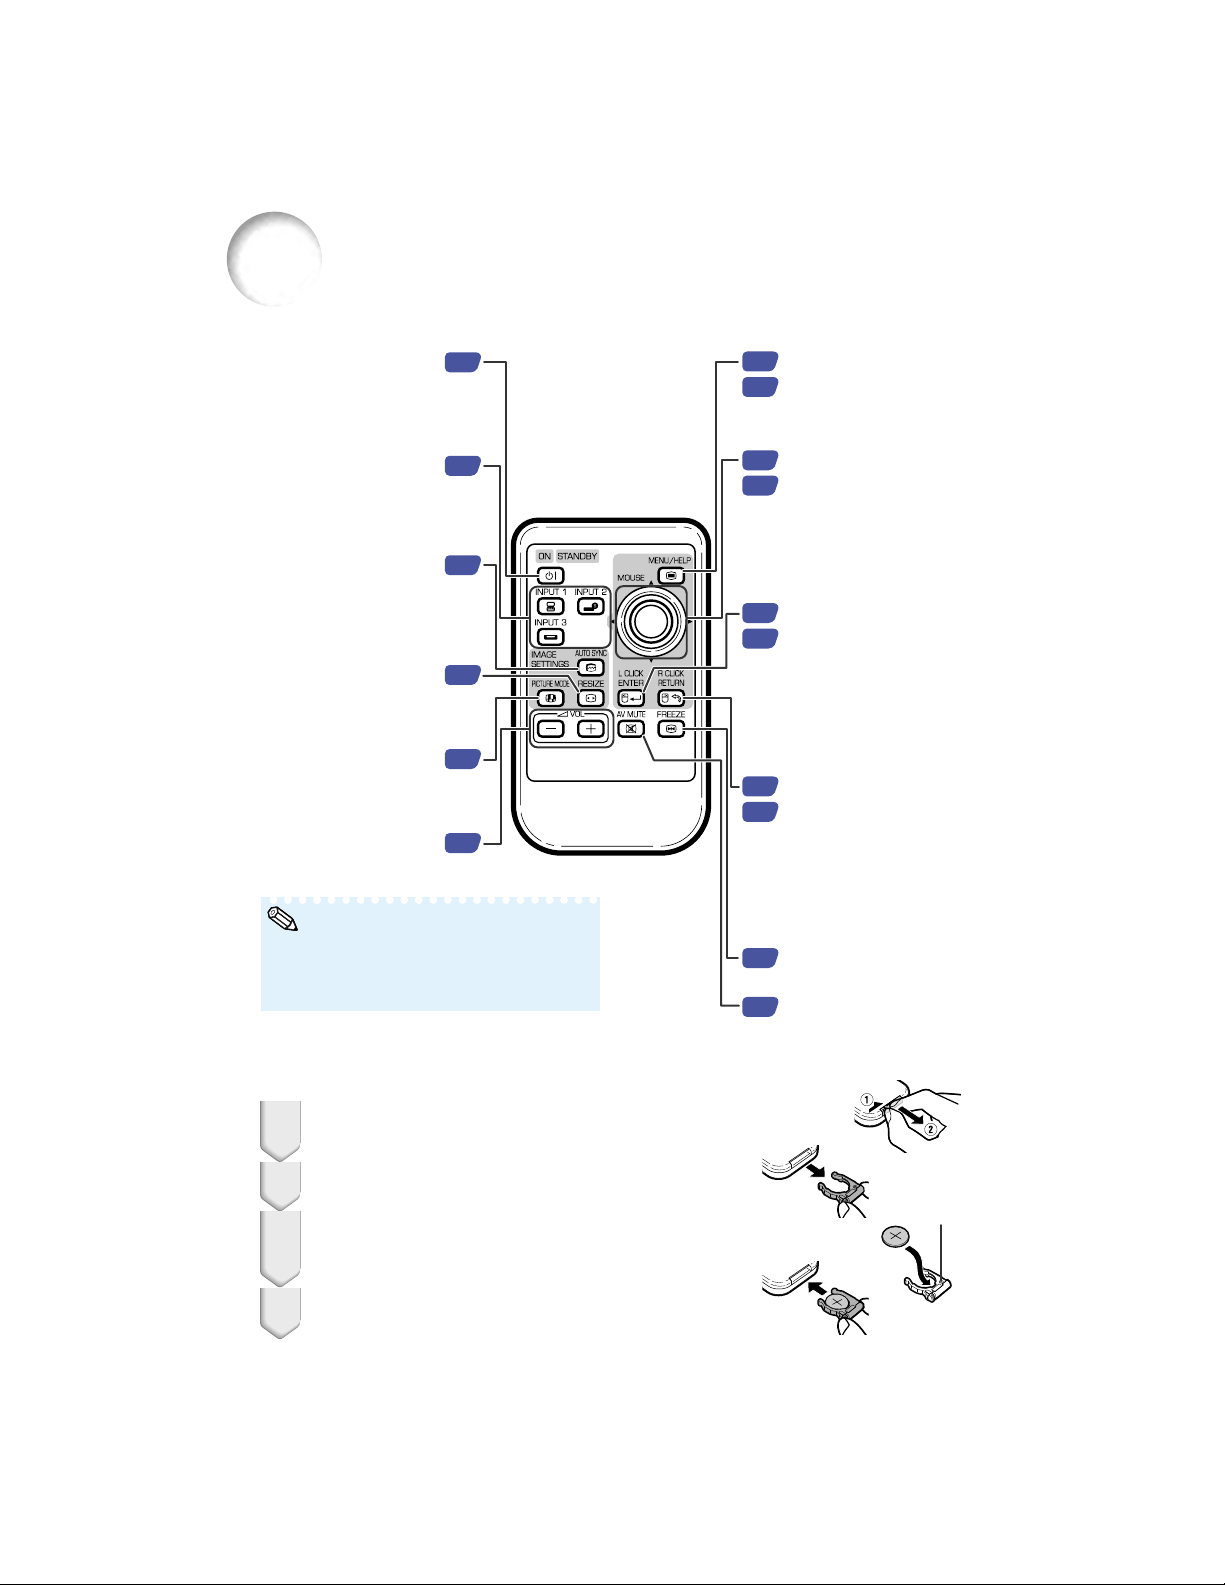
Inserting the Lithium Battery
Insert the battery holder into the remote control.
Insert the supplied lithium battery (CR2025).
• Insert the lithium battery with the + side of the battery facing the
+ mark of the battery holder.
Pull the battery holder.
While pressing the tab (1), pull the battery holder
(2).
1
2
3
29
32
30
32
29
33
29
26
36
33
33
51
36
36
36
32
Part Names and Functions (Continued)
MOUSE/Adjustment
buttons (P/R/O/Q)
• For moving the computer
cursor when connecting
the projector USB terminal
to the computer with RGB/
USB cable.
• For selecting menu items.
L CLICK/ENTER button
• For the Left click when
connecting the projector
USB terminal to the
computer with RGB/USB
cable.
• For setting items selected
or adjusted on the menu.
AV MUTE button
For temporarily display-
ing the black screen and
turning off the sound.
RESIZE button
For switching the
screen size (NORMAL,
BORDER, etc.).
FREEZE button
For freezing images.
INPUT 1, 2, and 3
buttons
For switching to the
respective input
modes.
Volume buttons
For adjusting the
speaker sound level.
AUTO SYNC button
For automatically
adjusting images when
connected to a com-
puter.
R CLICK/RETURN button
• For the Right click when
connecting the projector
USB terminal to the
computer with RGB/USB
cable.
• For undoing an operation
or returning to the previous
display.
MENU/HELP button
For displaying adjustment
and setting screens, and
help screen.
ON/STANDBY button
For turning the power
on and putting the
projector into standby
mode.
Numbers in Z refer to the main pages in this operation manual where the topic is explained.
PICTURE MODE
buttons
For switching the
picture mode.
• All the buttons on the remote control, except
the MOUSE/Adjustment button, are made of
luminous rubber, that is visible in the dark. (The
luminous light weakens over time.)
Note
4
+ mark
Loading ...
Loading ...
Loading ...