
Loading ...
Loading ...
Loading ...
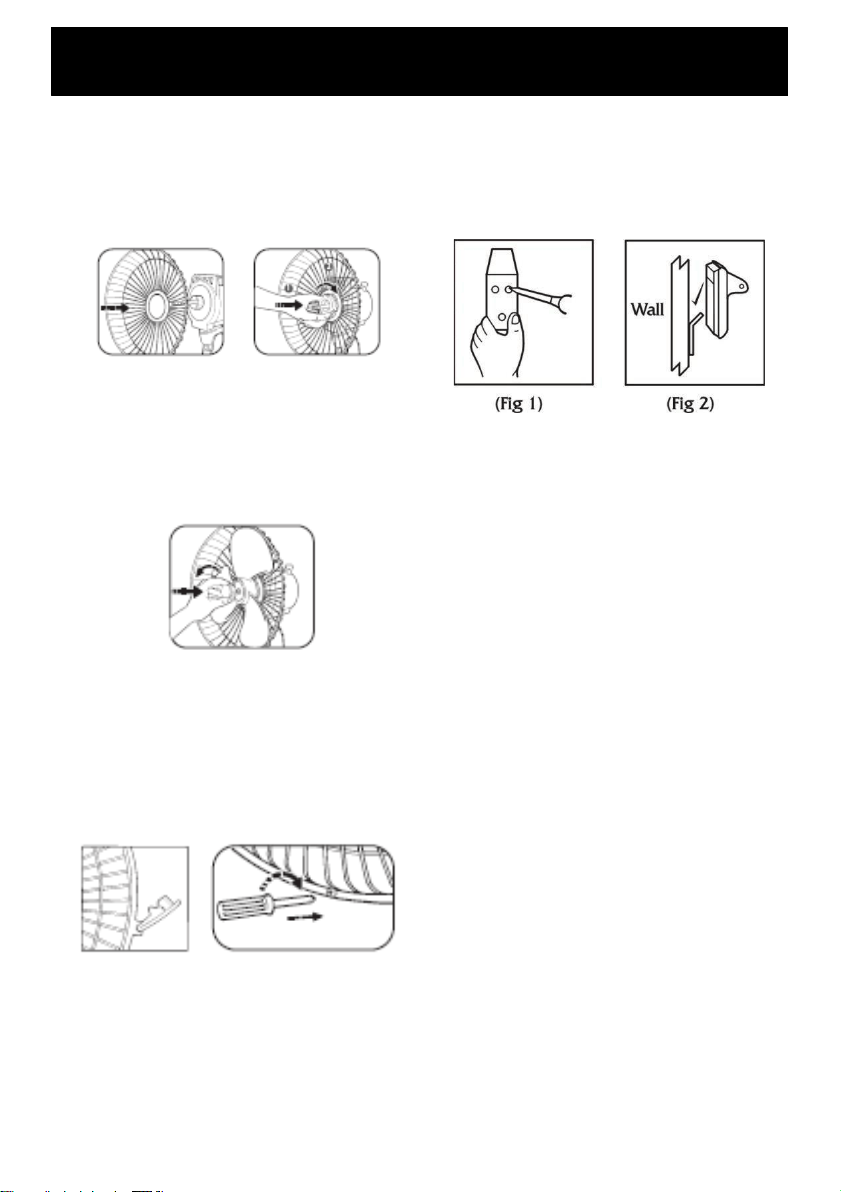
Wall Mounting
Select an appropriate location and fix the
mounting bracket onto a strong wall (or locate
a stud behind plaster boards) with three wall
plugs and screws supplied.
Note: Consider a location within a distance of
0.8m radius from a wall power outlet to make
sure you can plug the unit into the power
point easily.
Mount the wall fan on the mounting hook and
plug in the unit.
If the power cord is hanging loosely between
the fan and the power outlet, make sure it will
not touch or obstruct fan blade rotation or fan
oscillation in any way.
Assembly
Assembly
Remove the rear grill locking nut from the motor
shaft. Fit the rear grill by positioning it on the
location pins. Secure the rear grill to the motor
body with the rear grill locking nut.
Push the fan blade onto the motor shaft until the
fan blade is appropriately fitted. Secure the blade
with the fan blade securing nut by turning it anti-
clockwise.
Check that the fan blade rotates freely by turning
it with your hand.
Open securing clips around the front grill and
loosen the screw at the bottom of the front grill.
Position the top clip on the uppermost part of
the rear grill. Push the top clip down and press
rim of the front grill onto the rear grill. Close all
clips around and tighten the grill screw.
You can adjust the tilt of the fan head by
slightly loosening the tilt screw and moving the
fan head until it reaches the desired angle.
Secure by re-tightening the tilt screw.
Caution: The fan should be switched off when
making these adjustments.
Loading ...
Loading ...
Loading ...