Loading ...
Loading ...
Loading ...
49-7772
INSTALLATION INSTRUCTIONS
Installation Instructions
3ODQIRUSURSHUHOHFWULFDOVXSSO\GUDLQVDQG
ductwork locations.
,QVWDOOZDOOSOHQXP
,QVWDOOWKHJULOOH
%XLOGDQGLQVWDOOSODWIRUP
,QVWDOOGUDLQSDQ
3ODFHXQLWRQWKHSODWIRUPDQGVOLGHWKHH[WHULRUVLGH
of the unit into the plenum until it is fully seated.
INSTALLATION SEQUENCE
7. Connect unit to the ductwork.
8. Connect the thermostat.
&RQQHFWWKHHOHFWULFDOSRZHU
,QVWDOODLUUHWXUQJULOOHRUDFFHVVFRYHU
5HYLHZWKHLQVWDOODWLRQFKHFNOLVW
&KHFNRSHUDWLRQRIWKHXQLW
Condensate Disposal System
7KH&RQGHQVDWH'LVSRVDO6\VWHPLQFUHDVHVHQHUJ\HIILFLHQF\XWLOL]LQJDIDFWRU\LQVWDOOHGIDQWKDWVOLQJVWKH
condensate onto the hot outdoor coil.
:KHQKLJKRXWGRRUKXPLGLW\SUHYHQWVWKHVOLQJHUIURPGLVSRVLQJRIDOOFRQGHQVDWHWKHH[FHVVFRQGHQVDWH
RYHUIORZVLQWRWKHFRQGHQVDWHGUDLQSDQDQGRXWRIWKH´LQWHUQDOGUDLQFRQQHFWLRQV
NOTE: If the Condensate Disposal System fails to remove all of the condensate from the unit, any
excess condensate will overflow from a spillway in the rear of the unit directly into the wall plenum,
and drain outside the building. This is your indication that the chassis or drain requires servicing.
Install the Wall Plenum
,QVWDOOWKHZDOOSOHQXP5HIHUWRLQVWUXFWLRQVLQFOXGHG
LQWKHZDOOSOHQXPNLW5$9:3RU5$9:37IRU
proper installation procedures.
Install the Grille
,QVWDOOWKHJULOOH5HIHUWRLQVWUXFWLRQVLQFOXGHG
in the grille kit RAVAL2 for proper installation
procedures.
INSTALLATION INSTRUCTIONS
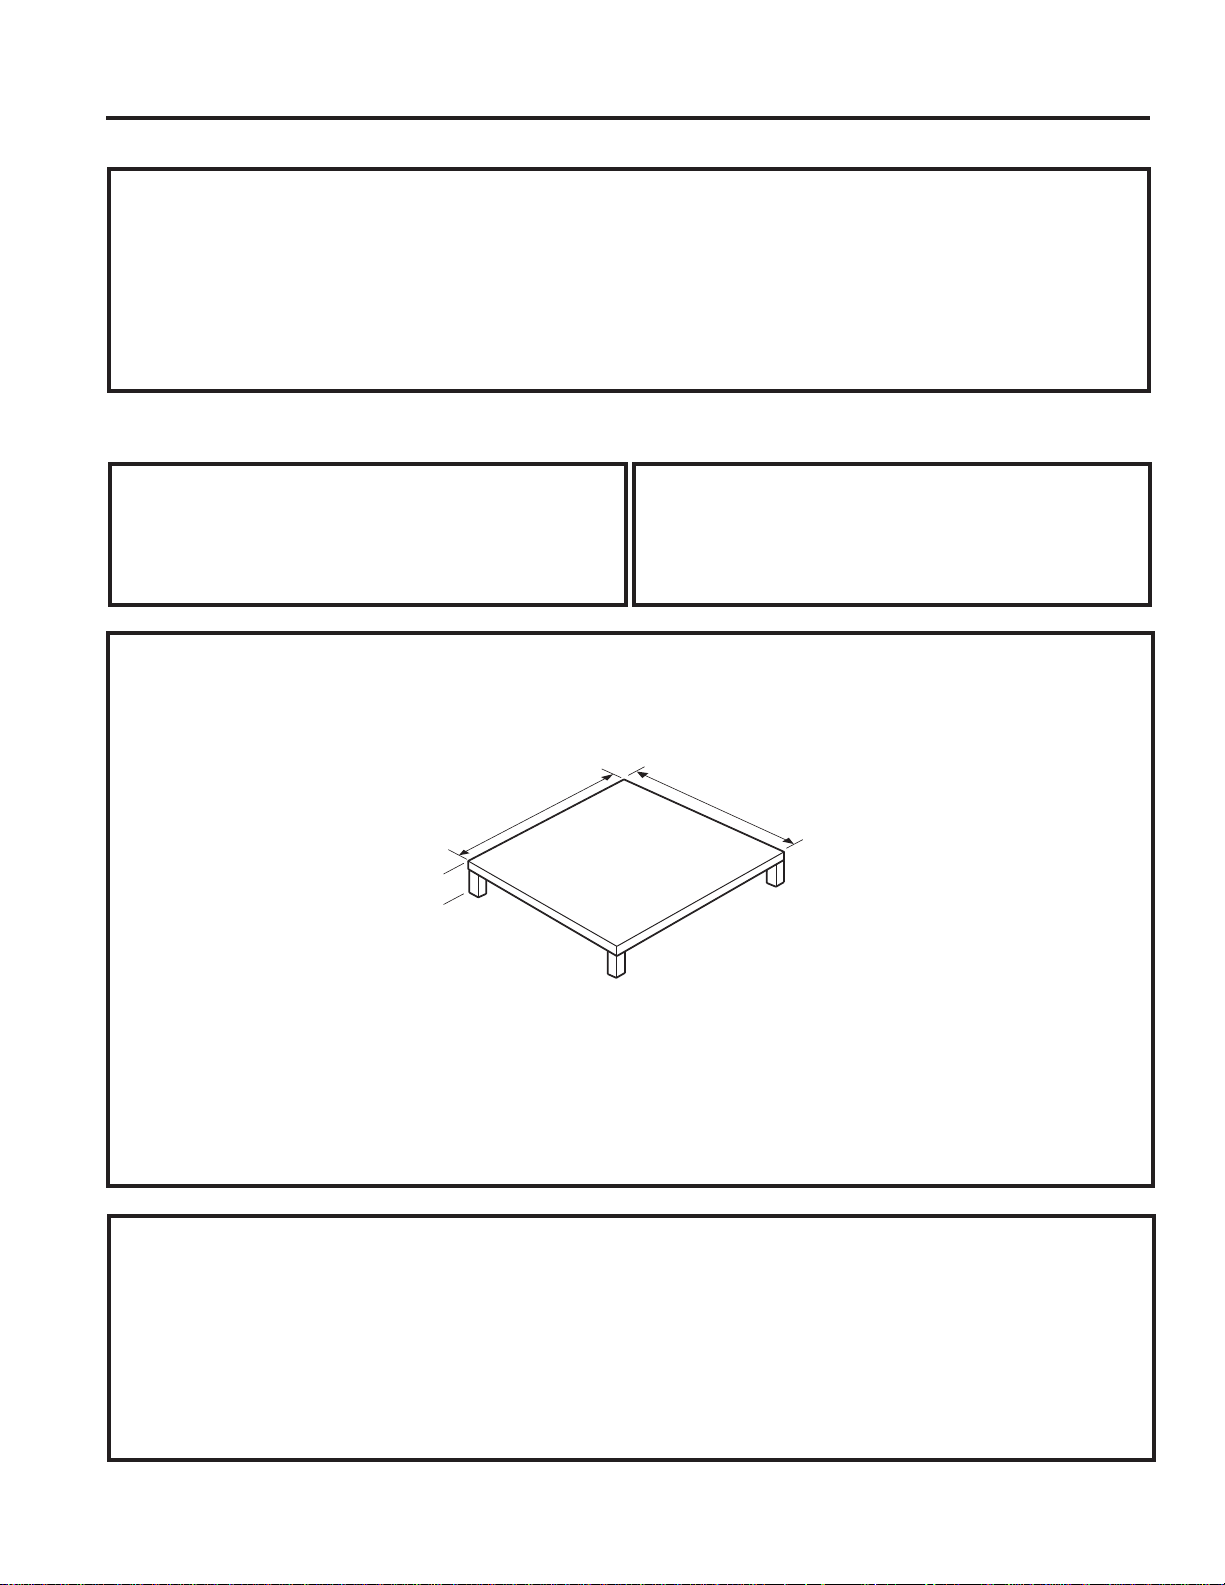
Build and Install the Zoneline Base Platform
1. Construct a 23-
»´PLQ[
»´PLQVTXDUHSODWIRUPZLWKOHJVWRUDLVHWKHSODWIRUP
127(7KHSODWIRUPPXVWKDYHDORDGEHDULQJFDSDFLW\RIOEVPLQLPXP
2. Place the platform in the utility closet with the following clearance between it and the interior surface of the
walls/door/panel:
´PLQIURPIURQWRIWKHXQLW±8QLWWREHLQVWDOOHGWKURXJK)5217RIFDVH
´PLQIURPWZRVLGHVRIWKHXQLW
3. Align the platform with the opening of the wall plenum and secure to the floor using appropriate brackets
and bolts.
23-
»´ min.
Recommended platform height:
´PLQIRUGUDLQDFFHVV3ODWIRUP
VXUIDFHVKRXOGEH´EHORZZDOO
plenum opening. See Plenum
,QVWDOODWLRQ,QVWUXFWLRQVIRUGHWDLOV
127(6SHFLILFFXWRXWVL]HIRUGUDLQ
connections (if required) needs to be
determined by the installer for the given
installation situation.
23-
»´ min.
127()RUODUJHFKDVVLVXQLWV'UDLQ.LW
5$9'3LVUHTXLUHGWRGUDLQFRQGHQVDWH
ZDWHUWRWKHEXLOGLQJ':9V\VWHP
Loading ...
Loading ...
Loading ...