Loading ...
Loading ...
Loading ...
6
up to create one large cooking surface.
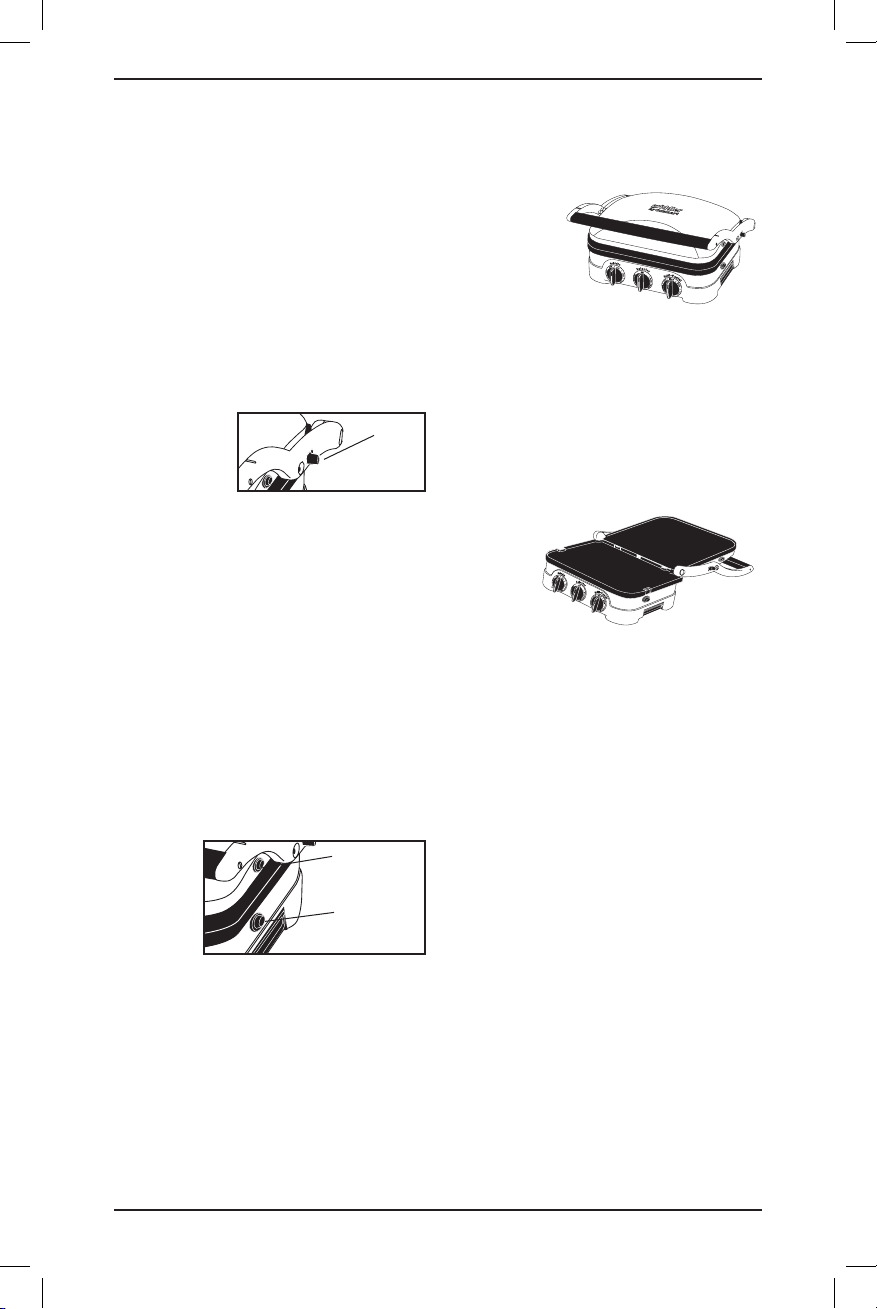
The Griddler
®
is in this position when it is
used as a Full Grill, Full Griddle, or Half
Grill/Half Griddle.
To adjust the Griddler
®
to this position,
locate the hinge release lever on the
right arm.
With your left hand on the handle, use
your right hand to slide the lever toward
you. Push the handle back until the cover
rests flat on the counter. The unit will stay
in this position until you lift the handle and
cover to return it to the closed position.
If the Griddler
®
is already in the open
position and you
wish to adjust it
to the flat
position, pull the
handle slightly
toward you and then lift the hinge release
lever. Push the handle back until the cover
rests in the flat position. Pulling the
handle forward slightly before lifting the
hinge release lever will take some of the
pressure off of the hinge and you will be
able to adjust the Griddler
®
more easily.
To insert cooking plates
Adjust the Griddler
®
to the flat position
(see page 5) with the controls directly in
front of you. Insert one plate at a time.
Each plate is designed to fit in either the
upper housing or the lower housing of the
Griddler
®
.
If you are facing the Griddler
®
, the drip
spout
should be
at the
rear of the
plate.
Locate the
metal
brackets at the center of the housing. Tilt
the back end of the plate and line up the
cutouts at the back of the plate with the
metal brackets. Slide the plate underneath
the brackets and push down the front end
of the plate. It will snap into place. Turn
the Griddler
®
around and insert the
second plate on either its grill or griddle
side into the upper housing as you did
with the first plate.
To remove cooking plates
Once the Griddler
®
is cooled, adjust to
flat position (see page 5). Locate the plate
release button
on one side of
the unit. Press
firmly on
button and the
plate will pop
up slightly
from the base.
Grasp the plate with two hands, slide it
out from under the metal brackets, and lift
it out of the base. Press on the other plate
release button to remove the other
cooking plate in the same manner.
To position drip tray
One side of the base has a slot provided
for the drip
tray. Slide
the drip
tray into
the base
according
to the
instruction
on the tray.
Grease from the food will run off the
plates through the grease spout and into
the drip tray. Grease should be safely
disposed of after the Griddler
®
has cooled
down completely. The drip tray can be
cleaned in the dishwasher.
OPERATING
INSTRUCTIONS
Once the Griddler
®
is assembled properly
and you are ready to begin cooking, turn
the Selector Dial to the left to choose the
Griddle function or to the right to choose
the Grill/Panini function, depending on
what you intend to cook. When the knob
is turned to either function, a red indicator
light will illuminate to indicate that the
power is on.
If you intend to use the Griddler
®
as a
Contact Grill, Panini Press or Full Grill,
turn the Grill/Panini control to the desired
temperature for cooking. Settings range
from Warm to Sear.
Hinge
release
lever
Lower plate
release button
Upper plate
release button
10ce114709_gr4n_ib.indd 6 5/25/10 2:26:08 PM
Loading ...
Loading ...
Loading ...