Loading ...
Loading ...
Loading ...
6
Installation - continued
5. Connect and secure the ducting (use duct tape if required).
6. Remove the protective plastic covering from all parts including the filters. Fit the canopy hood on the
fixing bracket. Mark and drill the two holes required for the safety screws. Secure the canopy in place
with the safety screws provided. The safety screws stop the canopy from accidently being knocked off
the fixing plate.
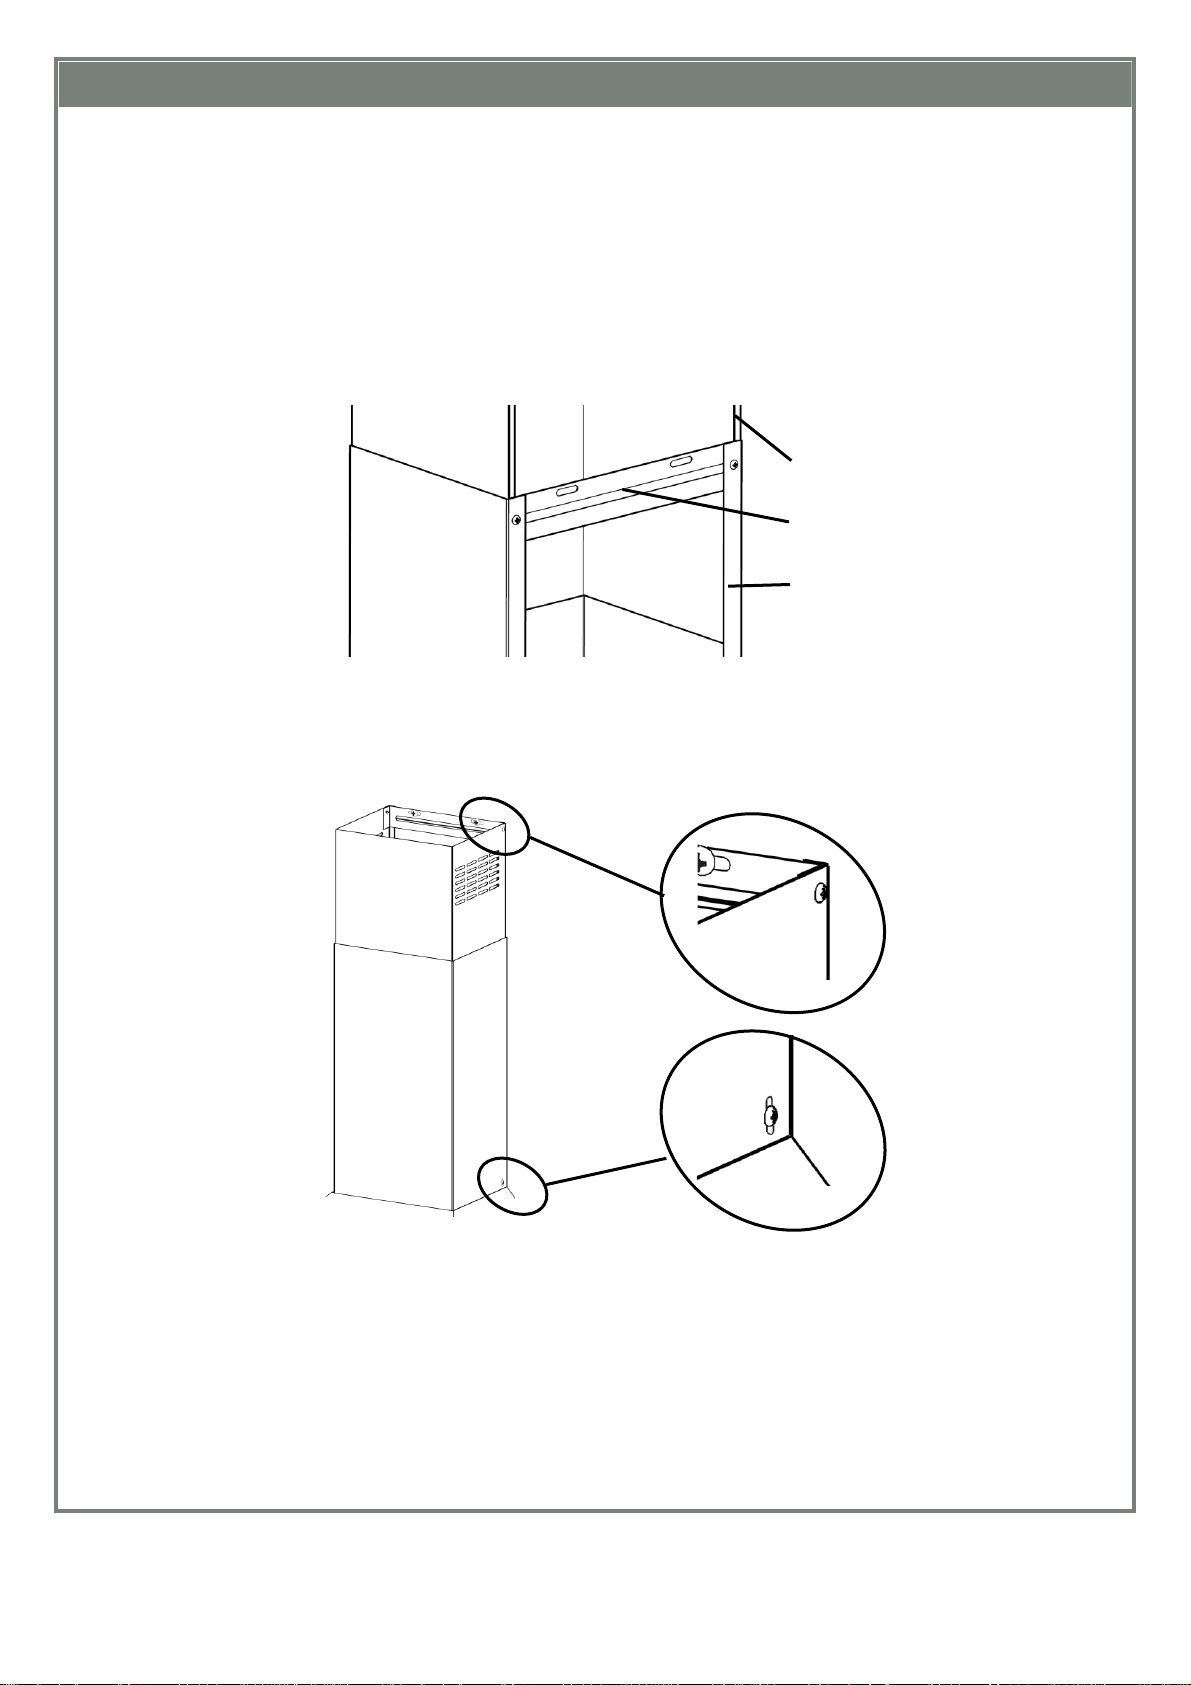
7. Insert the upper chimney piece into the lower chimney piece. Assemble the lower chimney bracket onto
the lower chimney using screws provided and ensure the bracket holds both chimney pieces. Do not fully
tighten the screws as some adjustment is required in step 9.
8. Connect to the power supply and switch on the power to the canopy hood. Check the function of the
canopy hood. Connect and secure the ducting (use duct tape if required).
9. Place the two chimney pieces onto the canopy top and secure the lower part to the canopy sides. Extend
the upper chimney to the ceiling and secure in place with two screws supplied.
Recirculation mode
1. This unit can be installed to operate in recirculation mode where ducting is not a chosen/desired or practical
option. There are recirculation grilles fitted on each side of the upper chimney which allow the cleansed air
to return to the kitchen. Ensure that the side outlet grilles are not obstructed. Even a partial obstruction
will restrict the efficiency of the rangehood.
2. Replace aluminium filters with charcoal filters (see pg 7 for part numbers).
Upper chimney
Lower chimney bracket
Lower chimney
Loading ...
Loading ...
Loading ...