Loading ...
Loading ...
Loading ...

Warranty restrictions
The shaving heads (cutters and guards) are not
covered by the terms of the international warranty
because they are subject to wear.
Troubleshooting
This chapter summarizes the most common
problems you could encounter with the appliance.
If you are unable to solve the problem with the
information below, visit www.philips.com/support
for a list of frequently asked questions or contact
the Consumer Care Center in your country.
Problem Possible
cause
Solution
I cannot
connect
the shaver.
You have not
downloaded
the app.
Download the
SmartShaver app.
Make sure the shaver
is switched on.
Try restarting your
smartphone and try
again.
Make sure you open
the app.
The
smartphone
cannot nd
the shaver.
Make sure your
smartphone has
Bluetooth® 4.1 or
higher.
Make sure Bluetooth®
is enabled on the
shaver and the
smartphone.
Make sure the shaver
is charged.
I want to
use the
shaver
without
the app.
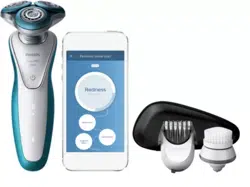
You can use the shaver
without the app. Via
the app you can
create your personal
shave plan, track your
technique and adjust
your sensitive shave
settings.
I cannot
change
the
Sensitive
shave
settings on
the shaver.
You can only change
your sensitive shave
settings via the app,
so make sure to
download it.
Make sure there is
a good connection
between the shaver
and your smartphone.
The shaver
does not
shave as
well as it
used to.
The shaving
heads are
damaged or
worn.
Replace the
shaving heads (see
'Replacement').
Ordering accessories
To buy accessories or spare parts, visit
www.shop.philips.com/service or go to your
Philips dealer. You can also contact the Philips
Consumer Care Center in your country (see the
international warranty leaet for contact details).
The following accessories and spare parts are
available:
- SH70 Philips shaving heads
- HQ110 Philips shaving head cleaning spray
- RQ111 Philips beard styler attachment
- SH575 Philips cleansing brush attachment
- SH560 Philips cleansing brush attachment head
- HQ8505 supply unit
Note: The availability of the accessories may dier
by country.
Recycling
- This symbol means that this product shall not
be disposed of with normal household waste
(2012/19/EU) (Fig. 42).
- This symbol means that this product contains a
built-in rechargeable battery which shall not be
disposed of with normal household waste (Fig. 43)
(2006/66/EC). We strongly advise you to take your
product to an ocial collection point or a Philips
service center to have a professional remove the
rechargeable battery.
- Follow your country’s rules for the separate
collection of electrical and electronic products
and rechargeable batteries. Correct disposal
helps prevent negative consequences for the
environment and human health.
Removing the rechargeable battery
Only remove the rechargeable battery when
you discard the shaver. Before you remove
the battery, make sure that the shaver is
disconnected from the wall socket and that
the battery is completely empty
Take any necessary safety precautions when
you handle tools to open the shaver and when
you dispose of the rechargeable battery.
1 Check if there are screws in the back of the
shaver or in the hair chamber. If so, remove
them.
2 Remove the outer panels of the shaver with
a screwdriver or other tool. If necessary, also
remove additional screws and/or parts until
you see the printed circuit board with the
rechargeable battery.
3 Remove the rechargeable battery.
Warranty and support
If you need information or support, please
visit www.philips.com/support or read the
international warranty leaet.
6 For optimal performance, lubricate the teeth of
the attachment with a drop of sewing machine
oil every six months.
Cleaning the cleansing brush attachment
Clean the cleansing brush attachment every time
you have used it.
1 Make sure the appliance is switched o.
2 Detach the brush head from the attachment
base (Fig. 35).
3 Clean both parts thoroughly with warm water
and mild soap.
4 Dry the cleansing brush attachment with a towel.
Reattach the brush head to the brush base.
Storage
Note: We advise you to let the appliance and its
attachments dry before you put the protection cap
on the attachment and store the shaver in the pouch.
- Store the shaver in the pouch supplied.
- Put the protection cap on the cleansing brush
attachment to protect it from dirt accumulation.
Replacement
Replacing the shaving heads
For maximum shaving performance, we advise
you to replace the shaving heads every two years.
Always replace the shaving heads with original
Philips shaving heads (see ‚Ordering accessories‘).
1 Switch o the appliance.
2 Pull the shaving head holder o the bottom part
of the shaving unit.
3 Turn the retaining rings anticlockwise and remove
them (Fig. 36). Place them aside in a safe place.
4 Remove the shaving heads from the shaving
head holder and throw them away (Fig. 37).
5 Place new shaving heads in the holder (Fig. 38).
Note: Make sure the notches on both sides
of the shaving heads t exactly onto the
projections in the shaving head holder.
6 Place the retaining rings back onto the shaving
heads and turn them clockwise (Fig. 39).
- Each retaining ring has two recesses that t
exactly into the projections of the shaving head
holder. Turn the ring clockwise until your hear a
click to indicate that the ring is xed (Fig. 40).
Note: Hold the shaving head holder in your
hand when you reinsert the shaving heads and
reattach the retaining rings. Do not place the
shaving head holder on a surface, as this may
cause damage to the shaving heads.
7 Attach the shaving head holder to the bottom
part of the shaving unit (‘click’) (Fig. 34).
Replacing the cleansing brush head
The brush head should be replaced every 3
months or earlier if the brush hairs are bent or
damaged (see ‚Ordering accessories‘).
8 After approx. 20 seconds you can move
the attachment to your forehead and start
cleansing this part of your face. Gently move
the brush head from left to right (Fig. 31).
Note: We advise you to not overdo the
cleansing and to not cleanse any zone longer
than 20 seconds.
9 After the treatment, rinse and dry your face.
Your face is now ready for the next step of your
daily skincare routine.
10 Clean the attachment after use (see ‚Cleaning
and maintenance‘).
Cleaning and maintenance
Cleaning the shaver under the tap
Clean the shaver after every shave for optimal
performance. As an extra reminder, the notication
symbol on the shaver lights up once every 6
shaves to tell you to clean the shaver.
Warning: Be careful with hot water. Always
check if the water is not too hot, to prevent
your hands from getting burnt.
Never dry the shaving unit with a towel or tissue,
as this may damage the shaving heads.
1 Switch on the shaver.
2 Rinse the shaving unit under a warm tap (Fig. 19).
Note: You can also clean the shaving unit with
the cleaning brush supplied (Fig. 32)
3 Switch o the shaver.
4 Pull the shaving head holder o the bottom part
of the shaving unit and rinse or brush the hair
chamber to remove any excess hairs (Fig. 33).
Let it dry.
5 Rinse the shaving head holder under a warm tap.
Note: You can also clean the shaving head
holder with the cleaning brush supplied.
6 Carefully shake o excess water and let the
shaving head holder air dry.
7 Reattach the shaving head holder to the bottom
part of the shaving unit (‚click‘) (Fig. 34).
Cleaning the click-on attachments
Caution: Never dry the beard styler attachment
with a towel or tissue, as this may damage the
trimming teeth.
Cleaning the beard styler attachment
Clean the beard styler after each use.
1 Pull the comb o the beard styler.
Note: Grab the comb in the center to pull it o
the beard styler. Do not pull at the sides of the
comb (Fig. 25).
2 Switch on the appliance.
3 Rinse the beard styler attachment and the comb
separately under a warm tap for some time.
4 After cleaning, switch o the appliance.
5 Carefully shake o excess water and let the
beard styler and comb air dry.
Loading ...
Loading ...
Loading ...