Loading ...
Loading ...
Loading ...

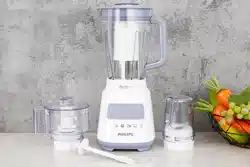
General description (fig. 1)
Blender
A Stopper
B Lid
C Opening in the lid
D Spout
E Blender jar
F Level indications
G Rubber sealing ring
H Blade unit
I Motor unit
J M = pulse position (‘Moment’) / Quick
Clean button
K Speed buttons
3 = high speed
2 = normal speed
1 = low speed
0 = off
L Cord storage facility
Mill (only type HR 1737)
M Beaker
N Rubber sealing ring
O Mill blade unit
P Lid with reclosable sprinkling hole
Filter
Q Filter
Cord storage
You can store excess mains cord by winding it
around the base of the appliance (fig. 2).
Built-in safety lock
The appliance has been equipped with a built-in
safety lock that prevents it from functioning if the
accessories have been assembled incorrectly or
have not been assembled at all.
Note: never use the accessories to turn the
appliance on and off!
Blender
Preparing the blender for use
- Wash all detachable parts (see section
‘Cleaning’).
- Put the rubber sealing ring on the inner edge of
the blade unit (fig. 3).
- Mount the blender jar onto the blade unit and
turn it in the direction of the arrow until it is
fixed (fig. 4).
- Mount the jar with blade unit onto the motor
unit and turn in the direction of the arrow until it
is fixed (fig. 5).
- After putting the ingredients in the jar, fix the lid
onto the jar by pressing it down (fig. 6).
- Insert the stopper into the opening in the lid
(fig. 7).
To disassemble the blender, proceed in reverse
order and opposite direction.
Speed selection
- Make sure that the appliance is plugged in and
the blender jar has been properly attached
before you switch the appliance on.
- Select the speed that is most suitable for the
ingredients you want to process (fig. 8):
1 light processing of mainly liquid ingredients,
e.g. chocolate milk.
2 heavier processing of e.g. a combination of
liquid and solid ingredients.
3 heavy processing of mainly solid ingredients.
• If you are not sure which speed to select, you
can always use the highest speed (speed 3).
• To let the appliance run for only a few
moments at a time, press the M button and
release it straightaway (fig. 9).
- To switch the motor off, press the O button
(fig. 10).
Tips
• Put the stopper upside down in the lid to use it
as a dosing device (fig. 11).
• The opening in the lid can be used for adding
ingredients while the motor is running (fig. 12).
• Do not let the appliance run for longer than 3
minutes at a time. If you have not finished
processing after 3 minutes, switch the
appliance off for one minute before you let it
run again.
• Precut meat and other solid ingredients into
smaller pieces before putting them into the
blender jar.
• For optimal blending of solid ingredients, feed a
series of small amounts into the jar rather than
processing a large quantity at once.
• If you are not satisfied with the performance of
the appliance, switch it off and
- let it run briefly a number of times by means
of pulse position M, or
- stir the ingredients with a spatula (not while
the blender is running!), or
- reduce the contents of the jar and process
smaller amounts at a time.
5
Loading ...
Loading ...
Loading ...
