Loading ...
Loading ...
Loading ...
en Installation instructions
24
17.3 Scope of delivery
After unpacking all parts, check for any damage in
transit and completeness of the delivery.
17.4 Fitted units
Here, you can find notes on safe installation.
ATTENTION!
Any shavings may impair the function of electrical com-
ponents.
▶
Carry out cut-out work on the units before installing
the appliance.
▶
Remove the shavings.
¡ The minimum installation height is 850mm.
¡ The installation cabinet must not have a back panel
behind the appliance.
¡ The ventilation slots and intake openings must not
be covered.
¡ Fitted units must be heat-resistant up to 90°C, and
adjacent unit fronts up to 65°C.
17.5 Installation dimensions in the upper
cabinet
Observe the installation dimensions and the safety
clearances in an upper cabinet.
17.6 Preparing the upper cabinet
1.
Determine the wall thickness of the unit.
An x-value is assigned to the wall thickness.
2.
Note:The x-value corresponds to the distance
between the lower edge of the connection plate and
the bottom of the fitted unit.
Screw the connection plate tightly into the upper
unit.
When doing so, observe the x-value that was de-
termined.
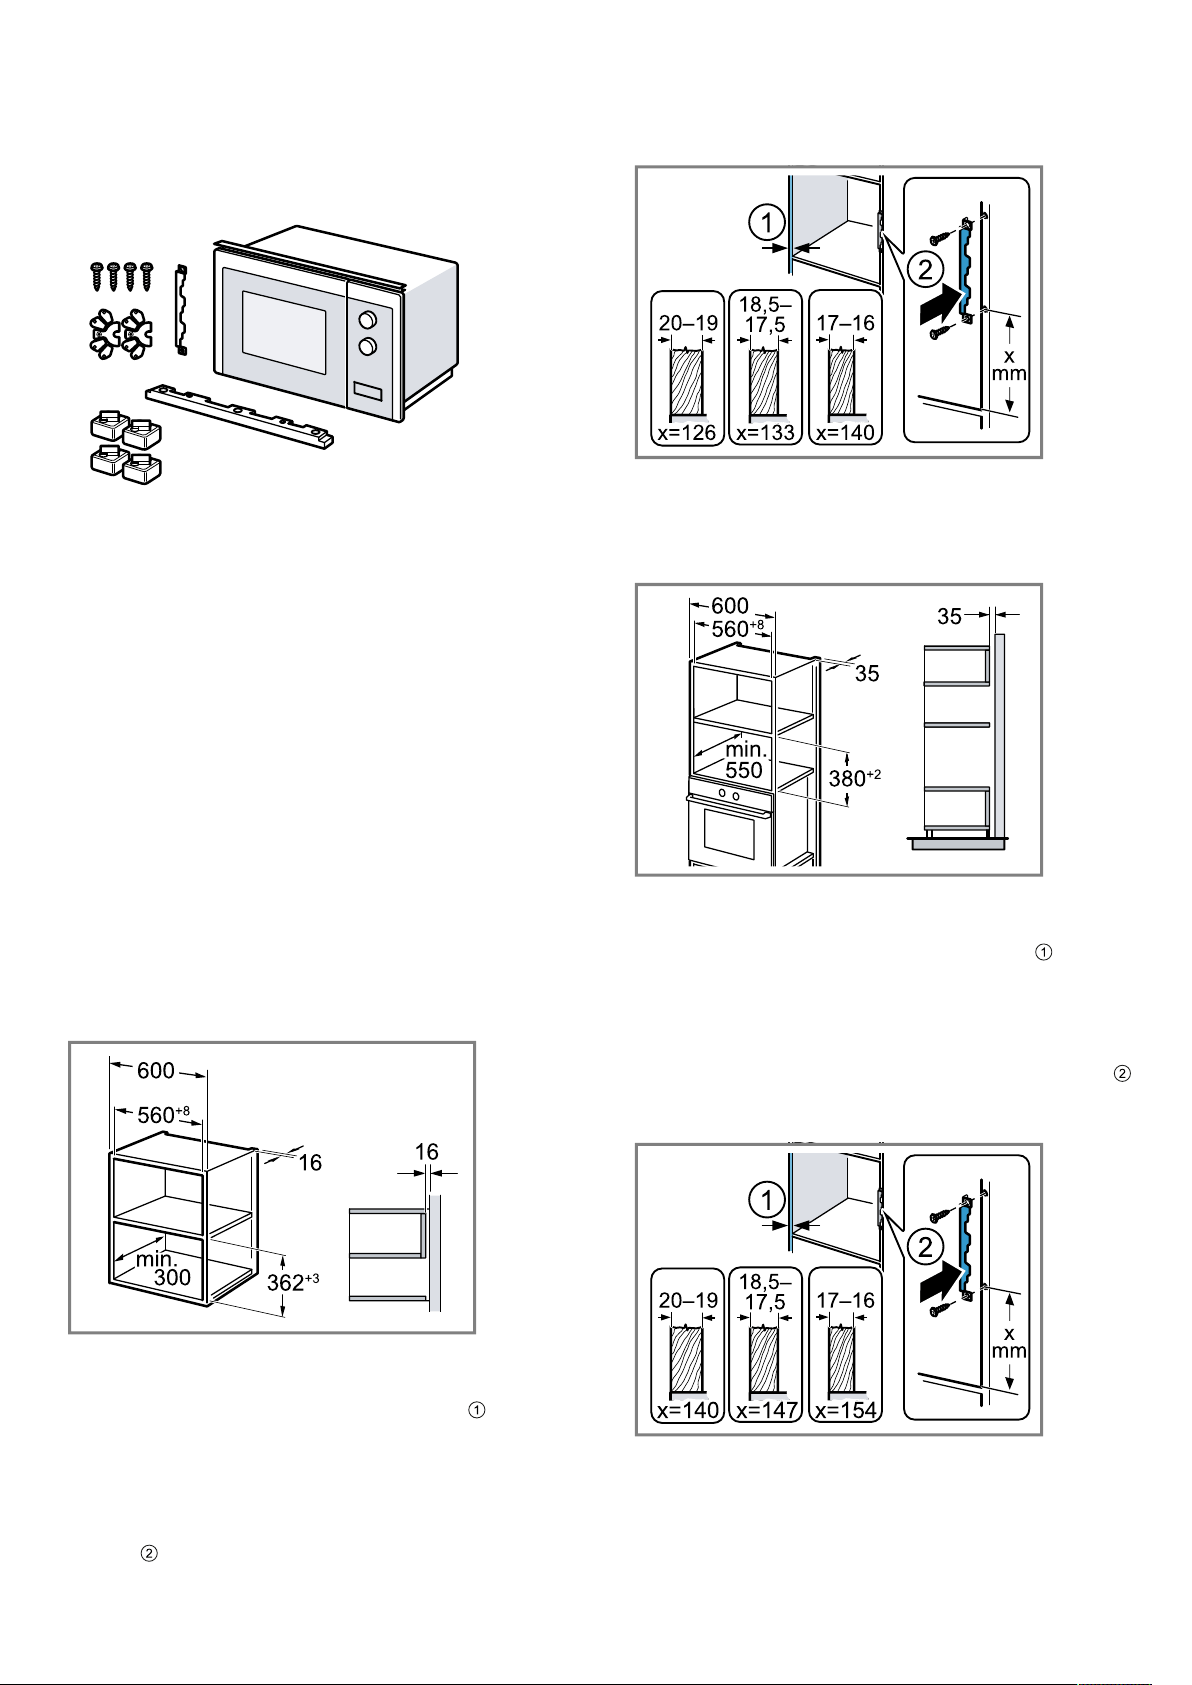
17.7 Installation dimensions in the tall unit
Observe the installation dimensions and the safety
clearances in a tall unit.
17.8 Preparing the tall unit
1.
Determine the wall thickness of the unit.
An x-value is assigned to the wall thickness.
2.
Note:The x-value corresponds to the distance
between the lower edge of the connection plate and
the bottom of the fitted unit.
Screw the connection plate tightly to the tall unit.
When doing so, observe the x-value that was de-
termined.
Loading ...
Loading ...
Loading ...